
Do you have memorable gaming moments captured on a video? Instead of just letting them be forgotten in your folder, how about you make money from it? Through social media, it is clear that NFTs are being sold from left to right. It’s no doubt that NFTs have overwhelmingly become part of day-to-day conversations as sales.
While there are plenty of forms of NFT art getting auctioned off, NFTs in video forms are increasing in popularity. With that said, this would create a good opportunity for you if you have an interesting video lying around.
So, the question is, how do you create a video NFT? In this article, we’ll explain how you can use Eklipse to create a video NFT from your gaming highlights.
How to Create an NFT Video with Eklipse?
Eklipse is a powerful AI tool that is able to capture your highlights in game. If you are a streamer who rarely has time to edit your own videos, you can simply use Eklipse to create your montage videos.
In addition, Eklipse has also introduced a revolutionary NFT feature to aid game streamers who would like to make a profit off their highlights. At a click of a button, streamers can harness the power of A.I and clip their best moments from their streaming sessions to share them in the marketplace.
Here’s how you can create a video NFT using Eklipse easily.
1. Set Up a Metamask Account
Before anything else, it’s important for you to set up your Metamask account. In addition, you will also need to be registered to Eklipse as well.
So, take your time in reading this in-depth guide on how to set up your Metamask account and connect it with your Eklipse account!
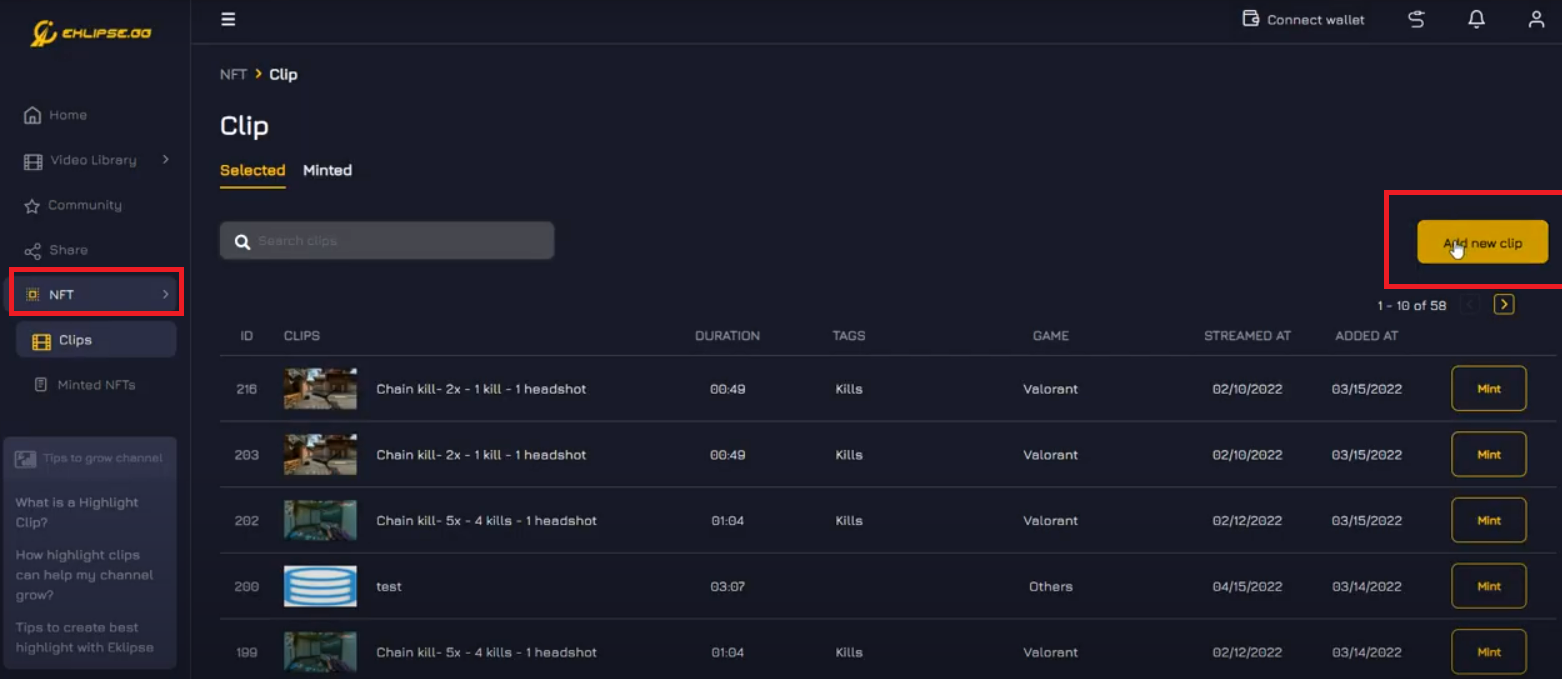
2. Add a Clip
Once you’ve got your accounts set up, now it’s time to add a clip. To do so, simply follow these steps below!
- Click on the NFT tab on the left side, then select “Add New Clip” on the top right.
2. Click “Select from Eklipse” if your video has already been added to Eklipse’s gallery.
3. Select your video and click “Add Clips”.
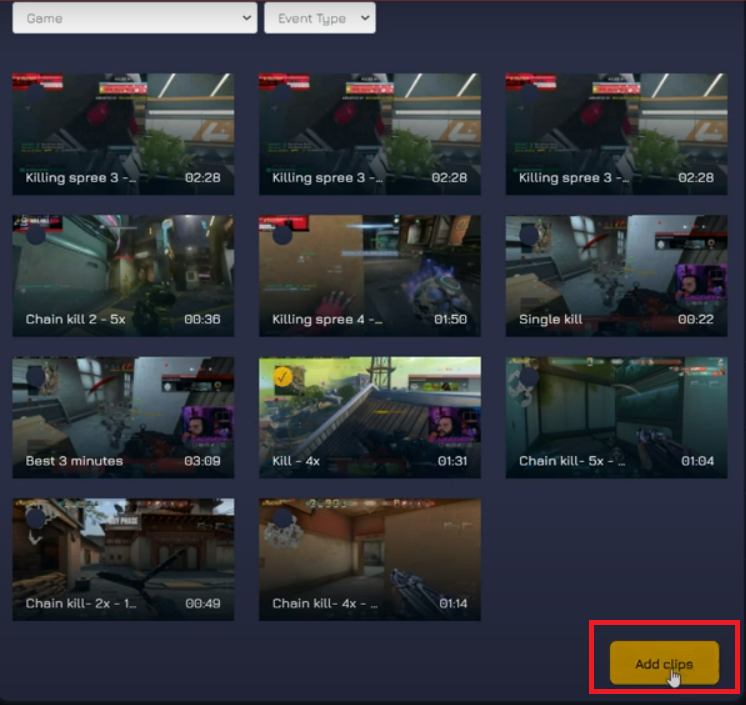
4. If your video hasn’t been added, select “Upload from Local files” and choose your video.
5. Afterwards, complete the information of the video
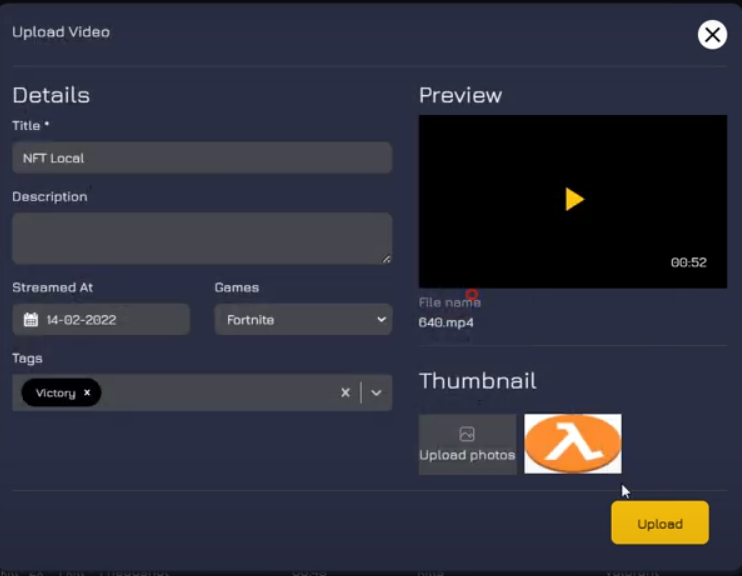
6. Click “Upload” and wait for the process to finish.
3. Mint Your Video
After you’ve uploaded your clip, you need to mint them before you can transfer them to OpenSea. Here’s how to do it.
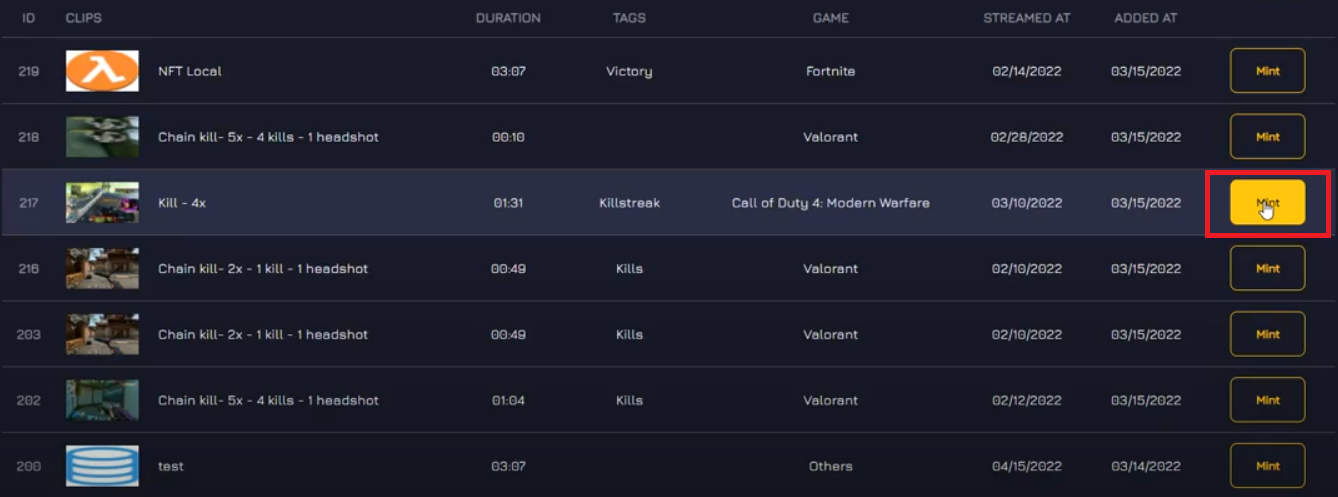
- Before minting your video, click on the “Connect Wallet” icon at the top and enter your wallet credentials if necessary.

2. Then, hover to the right side o f your clip and select “Mint”.
3. Fill in the details of your video NFT.
4. Click “Upload” once you are done.
5. Afterwards, you should receive a notification from Metamask. Click “Confirm”.
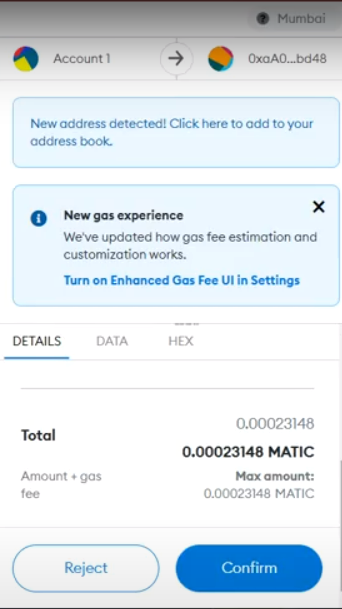
6. Wait for the minting process to finish.
7. After a few minutes, your video should show up under “Minted” tab. Click on it to continue the process.
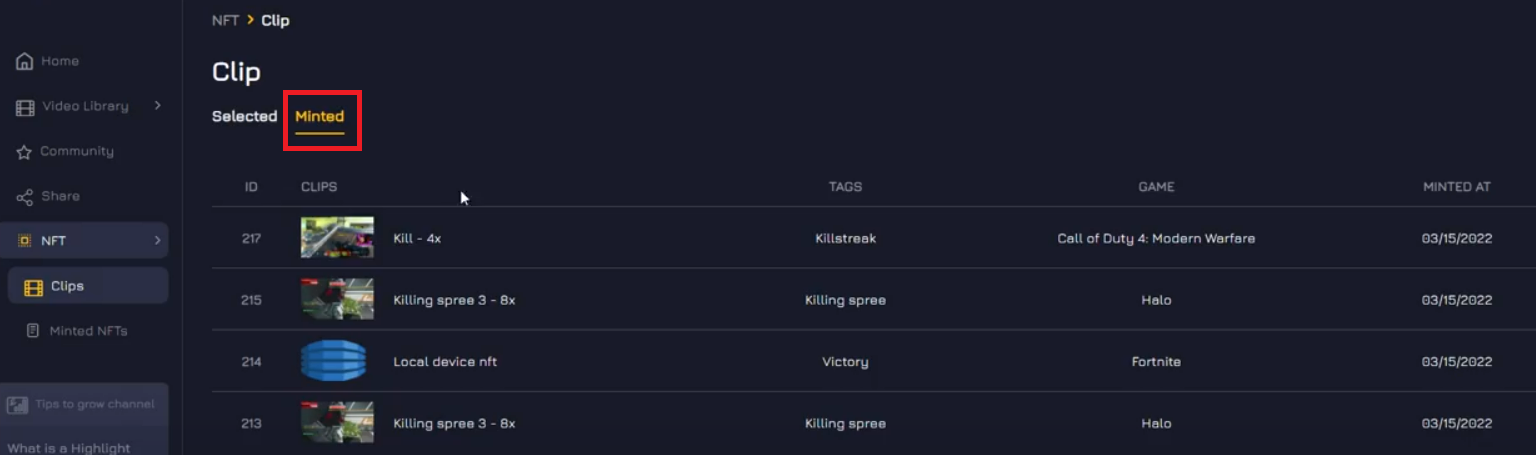
- Select “Go to Minted NFT”.
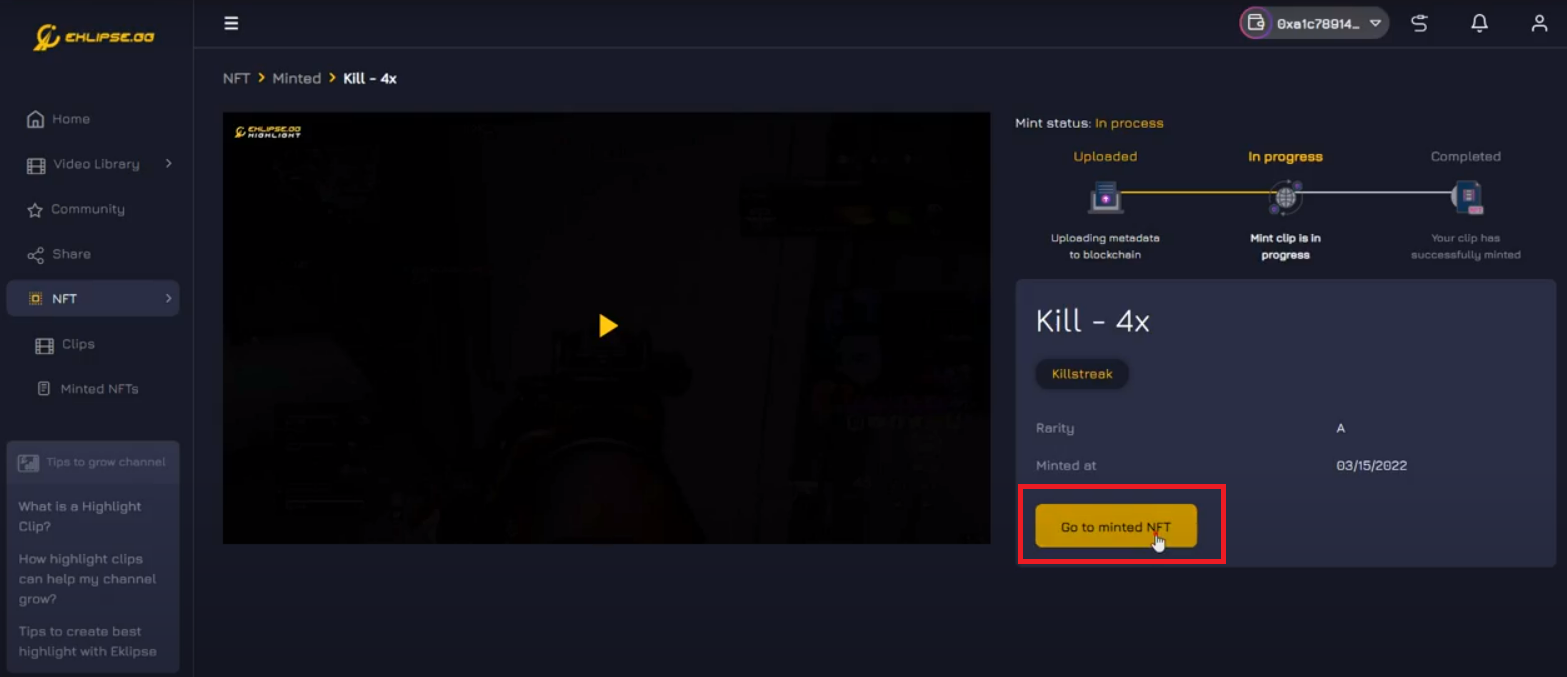
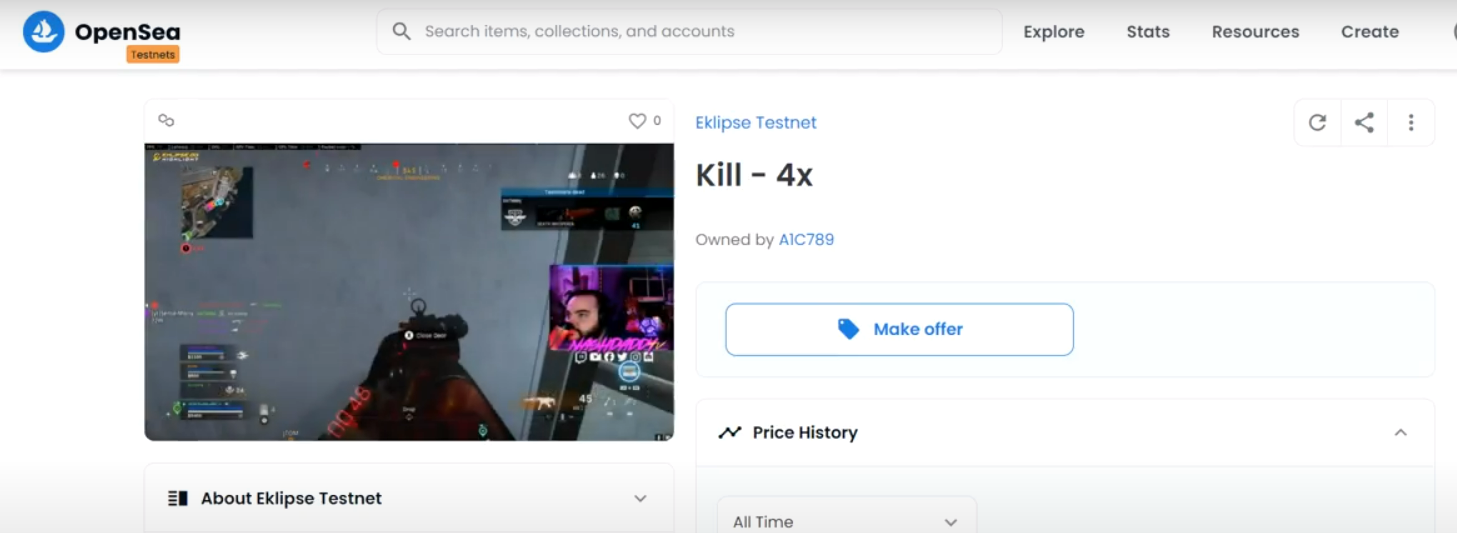
8. Select your minted video and click “View NFT in OpenSea”.

9. You can successfully view your video NFT in OpenSea. It should look like this.
4. Transfer
If for some reason, you would like to change the ownership of the NFT in OpenSea, you could also use the “Transfer” feature in Eklipse. Simply follow the steps below.
- Select the video you’d like to transfer and click the “Transfer NFT” button.
![]()
2. Copy and paste your wallet address, then click “Transfer”.
![]()
3. Wait for the transfer process to complete.
4. You should receive a notification from Metamask regarding your transfer. Click “Confirm”.
![]()
5. All done. The ownership status should change now.
Conclusion
So, that’s about how to create an NFT video with Eklipse. You will need to set up your Metamask account, followed by adding a clip, minting your video, and transferring your video if needed.
Stay tuned to Eklipse for more tips and tricks, as well as new features!

A competitive online game enthusiast who has potato aim and grandma reflexes, but still enjoy writing about various games.