
Share your YouTube videos on Instagram is one of the ways to expand your channel awareness to broader audiences. Whether it’s your stream or the clip of your best gameplay, you can share it easily – especially if you are using the right tool.
If you are a YouTube streamer and need a tool to help grow your channel, you gotta read on today’s Eklipse blog post on how to share YouTube videos on Instagram with these easy, time-saving tools.
Step 1: Resize your YouTube Videos for Instagram Reels Format
To share your YouTube video on Instagram, the first thing you need to do is resize your video to Instagram format. Since YouTube’s standard video aspect ratio is 16:9, you need to convert it to vertical 9:16 format, especially if you want to post it as Instagram Reels.
You can follow these simple steps to quickly edit and resize your YouTube videos for Instagram Reels format:
- Go to Eklipse.gg on your browser, register your account.
You can sign-up using Facebook or Twitch or you can create an account manually using email, all for FREE.
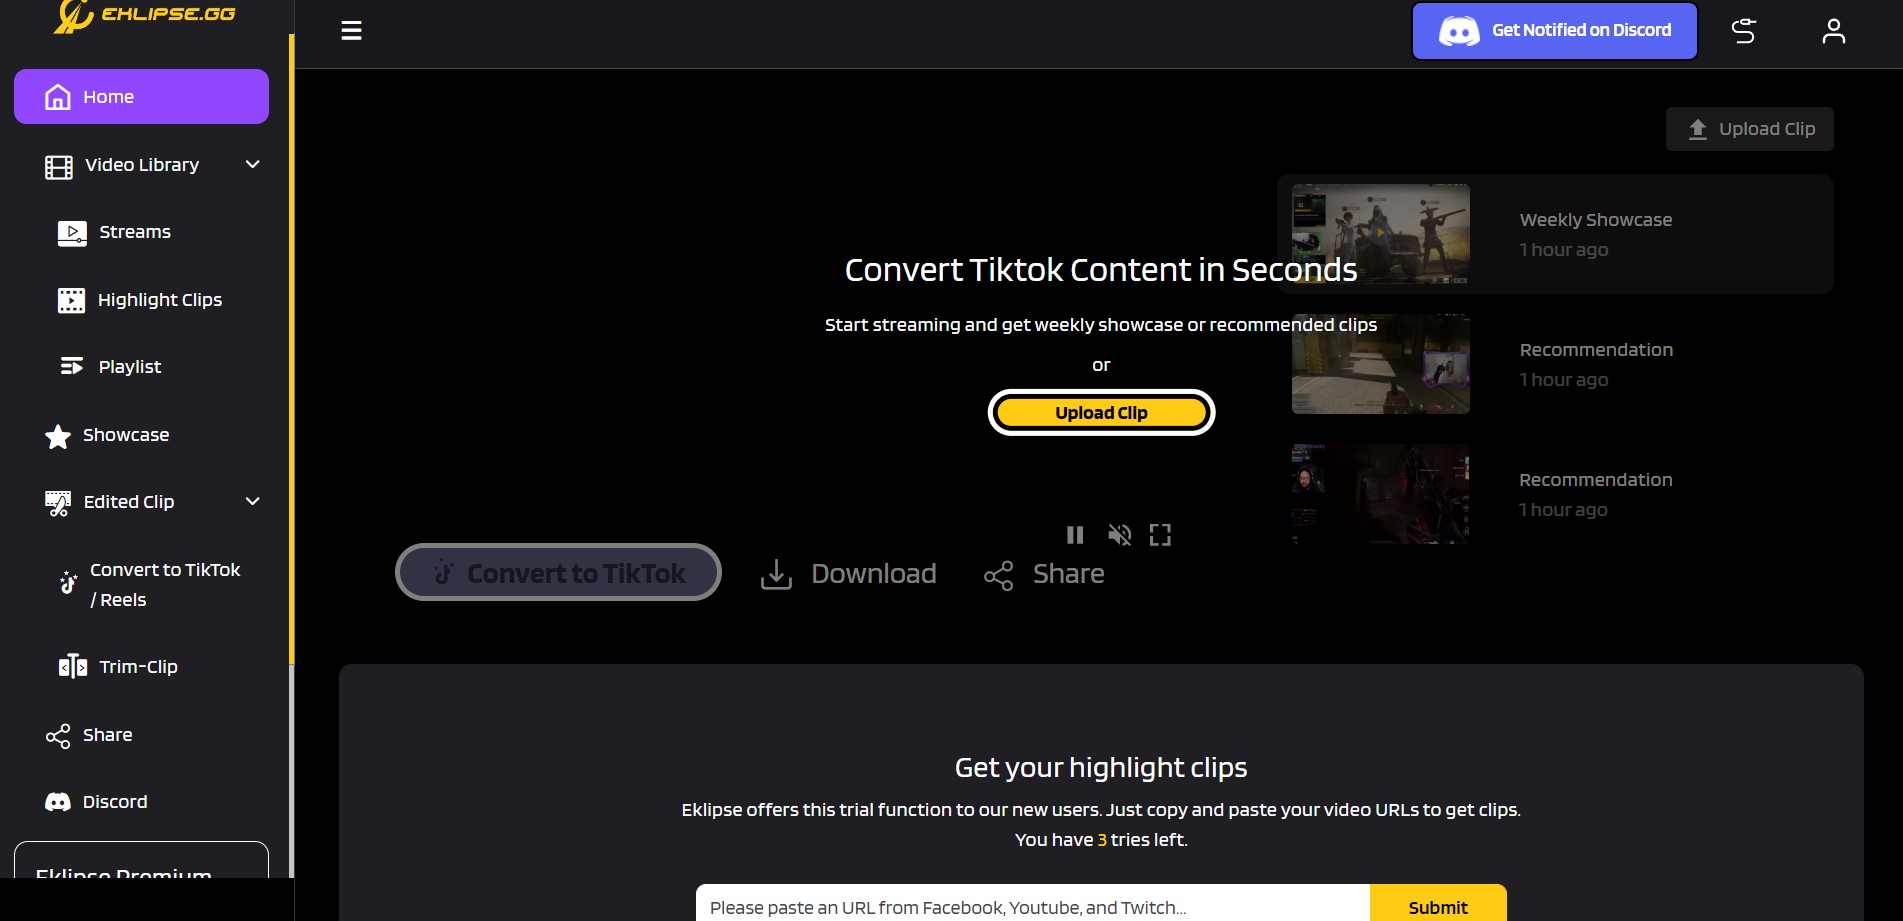
- Click Upload Clip menu at the center of homepage.
By clicking Upload Clip menu, you will be brought to the Eklipse Studio tools.
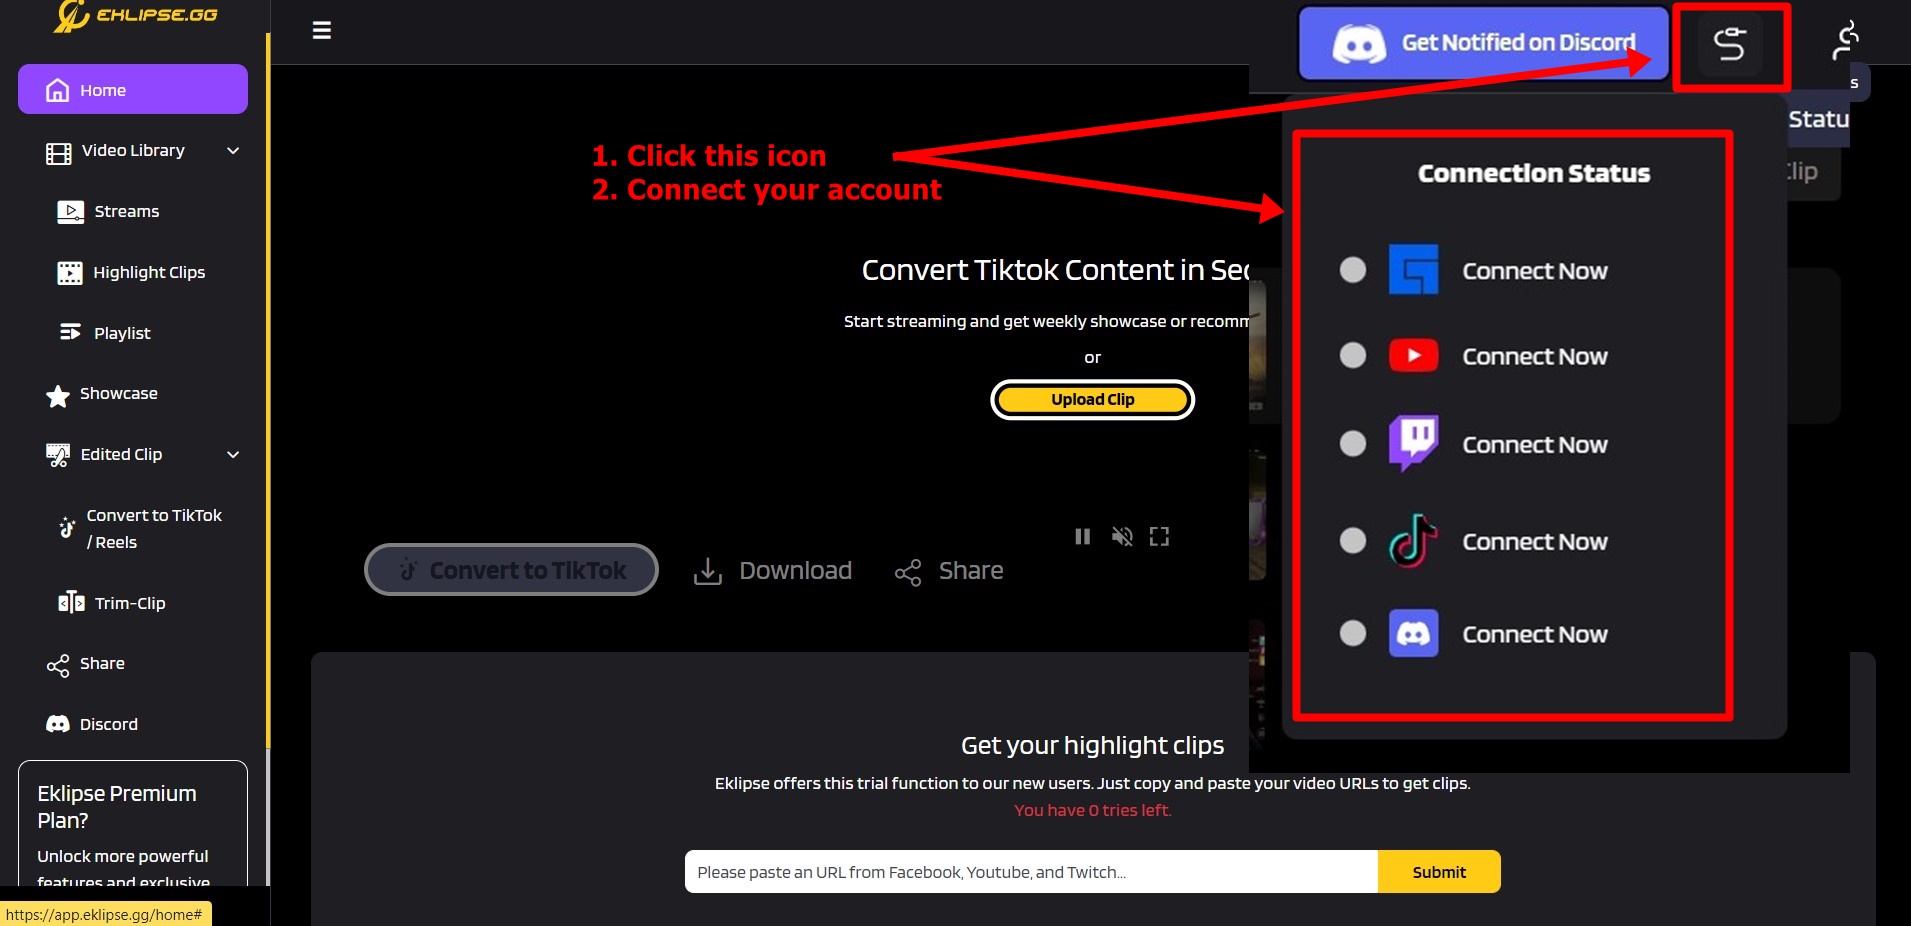
- Or else you can connect your YouTube account to Eklipse.
Eklipse will capture your YouTube video, so you can convert it to TikTok video.
- Insert your clip into the app.
You can just put Clip URL into Eklipse, click Get Clip, or upload it from your local storage.
If you insert a YouTube video URL, make sure the video duration is under 2 minutes long.
For manual clip upload, your video needs to be maximum 100MB in size and 5 minutes in duration.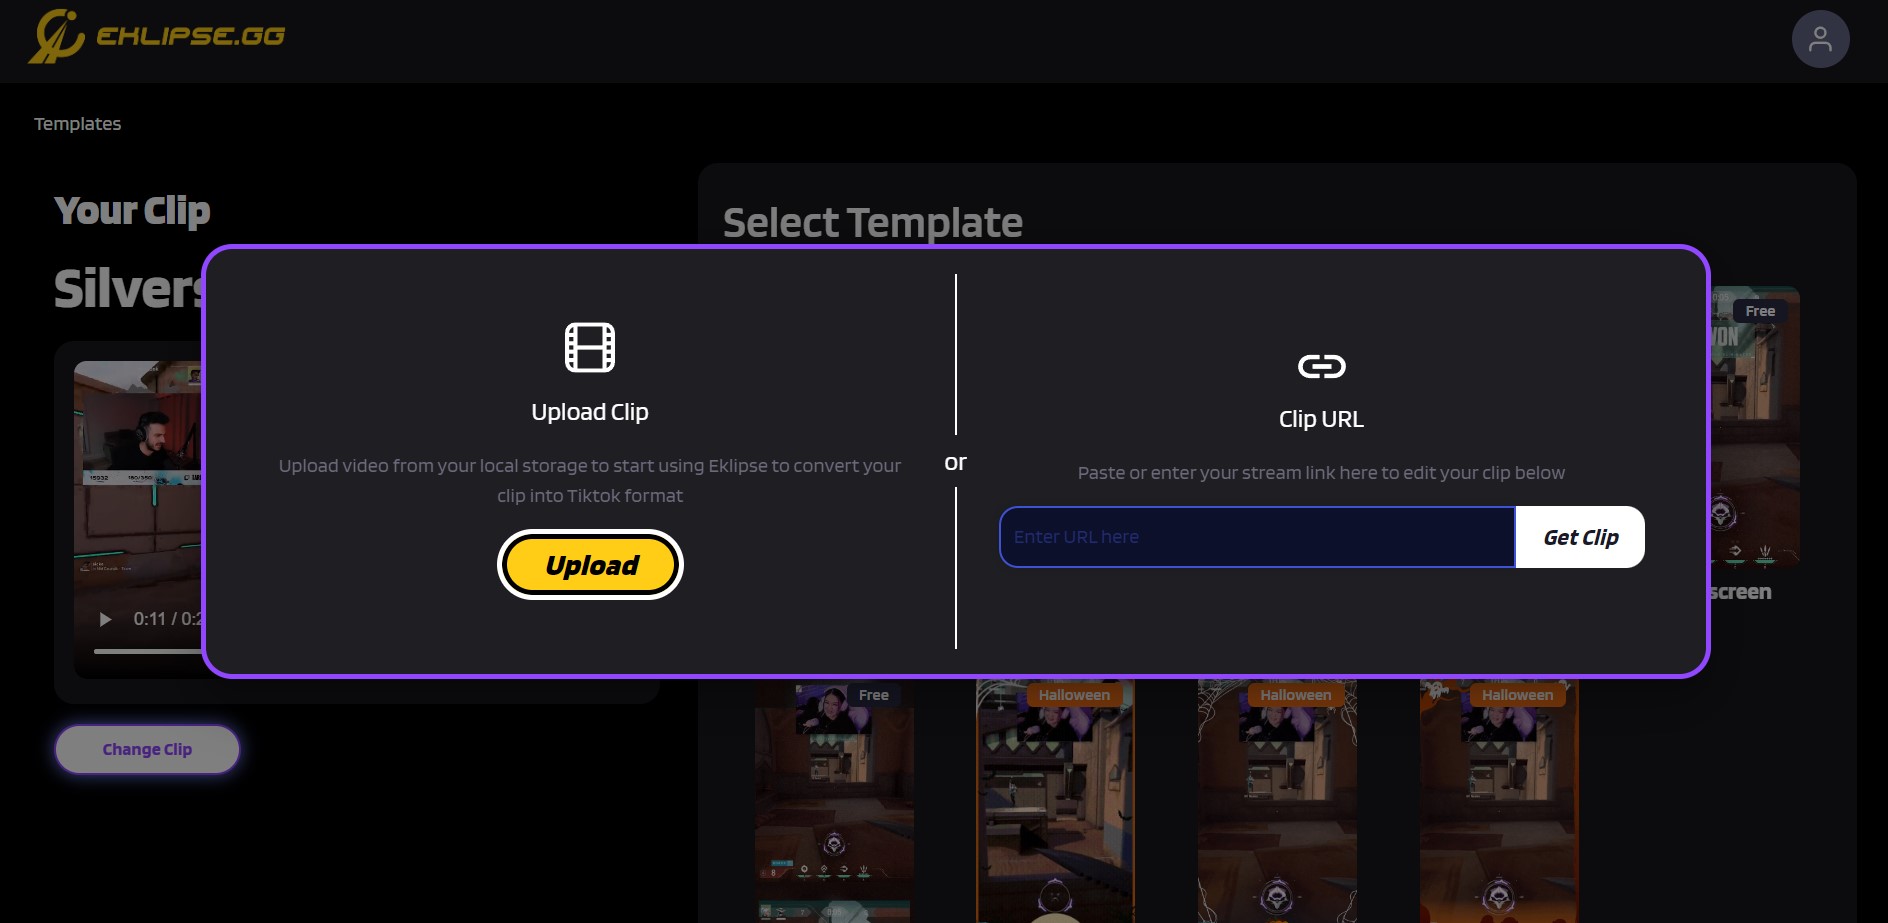
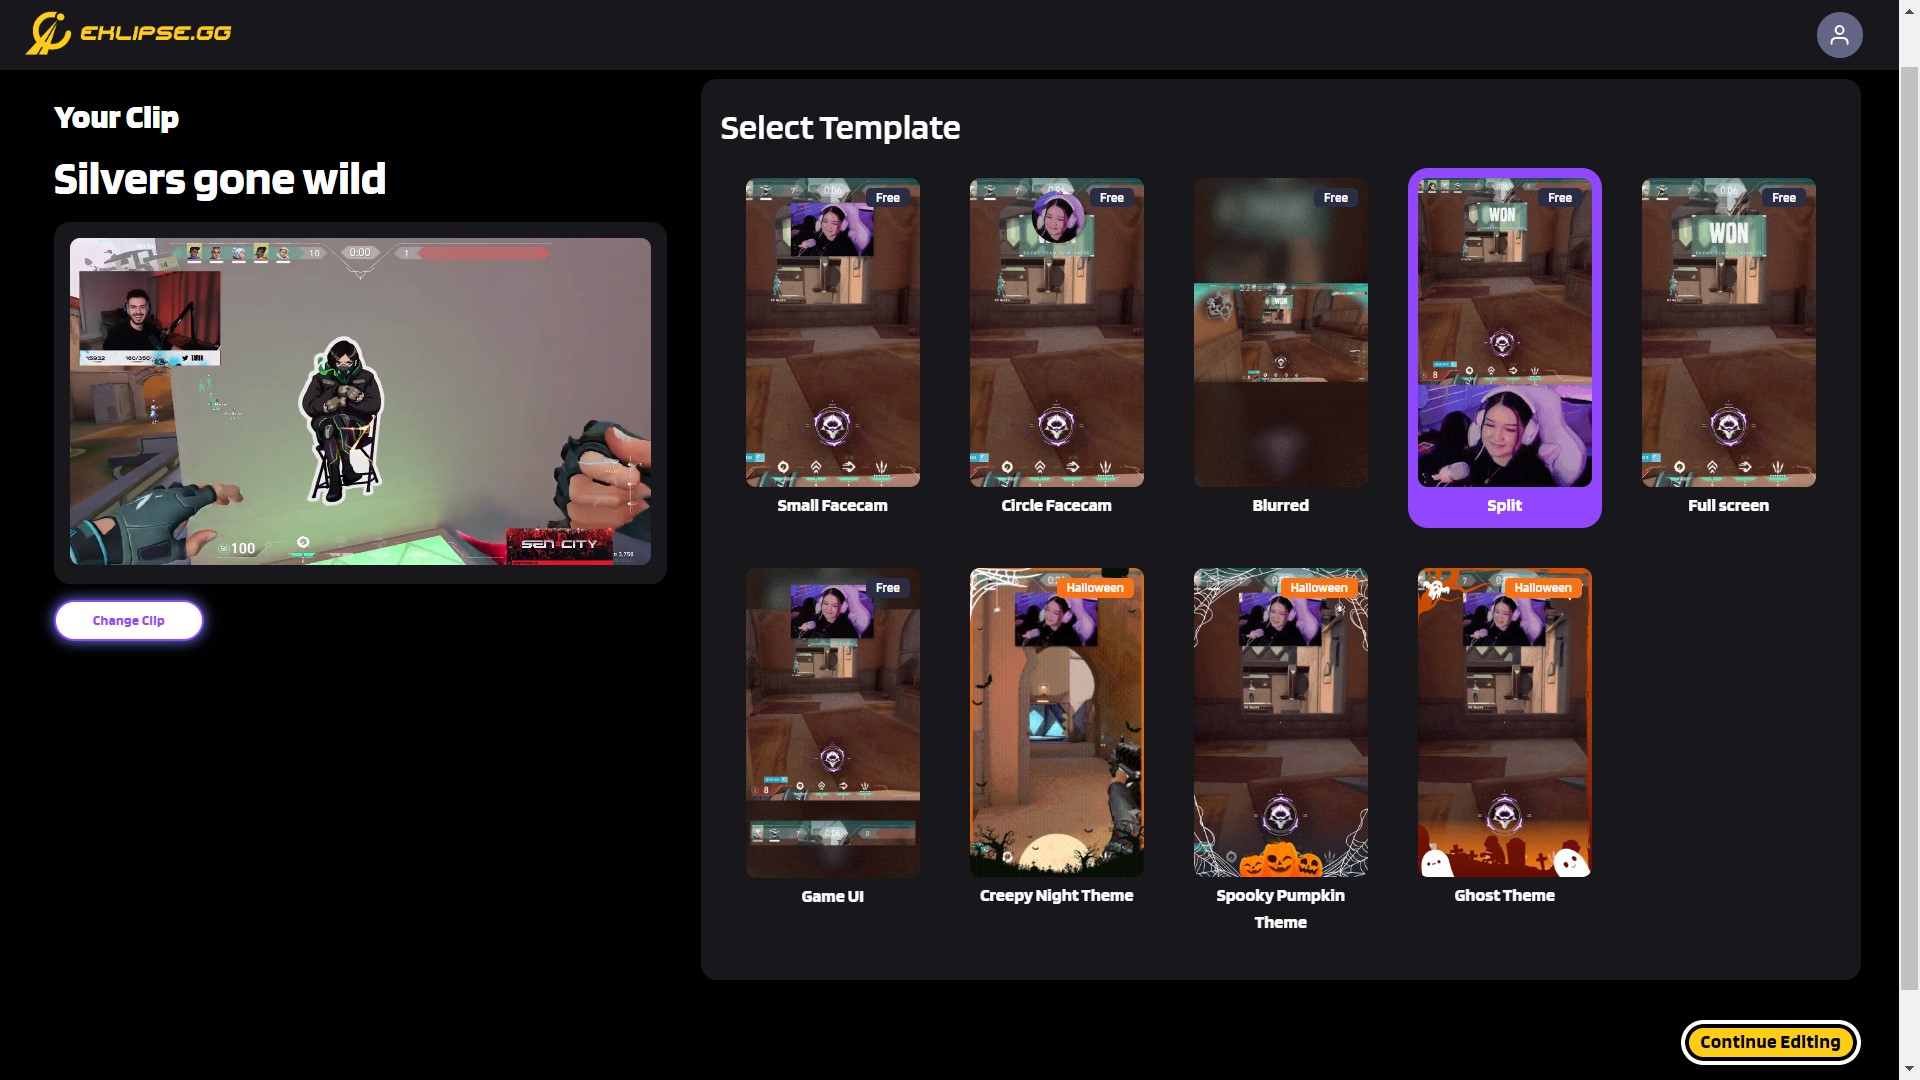
- Choose the Instagram Reels template you want to use.
Eklipse has 9 TikTok video templates that you can choose to use. After done choosing, click Continue Editing button.
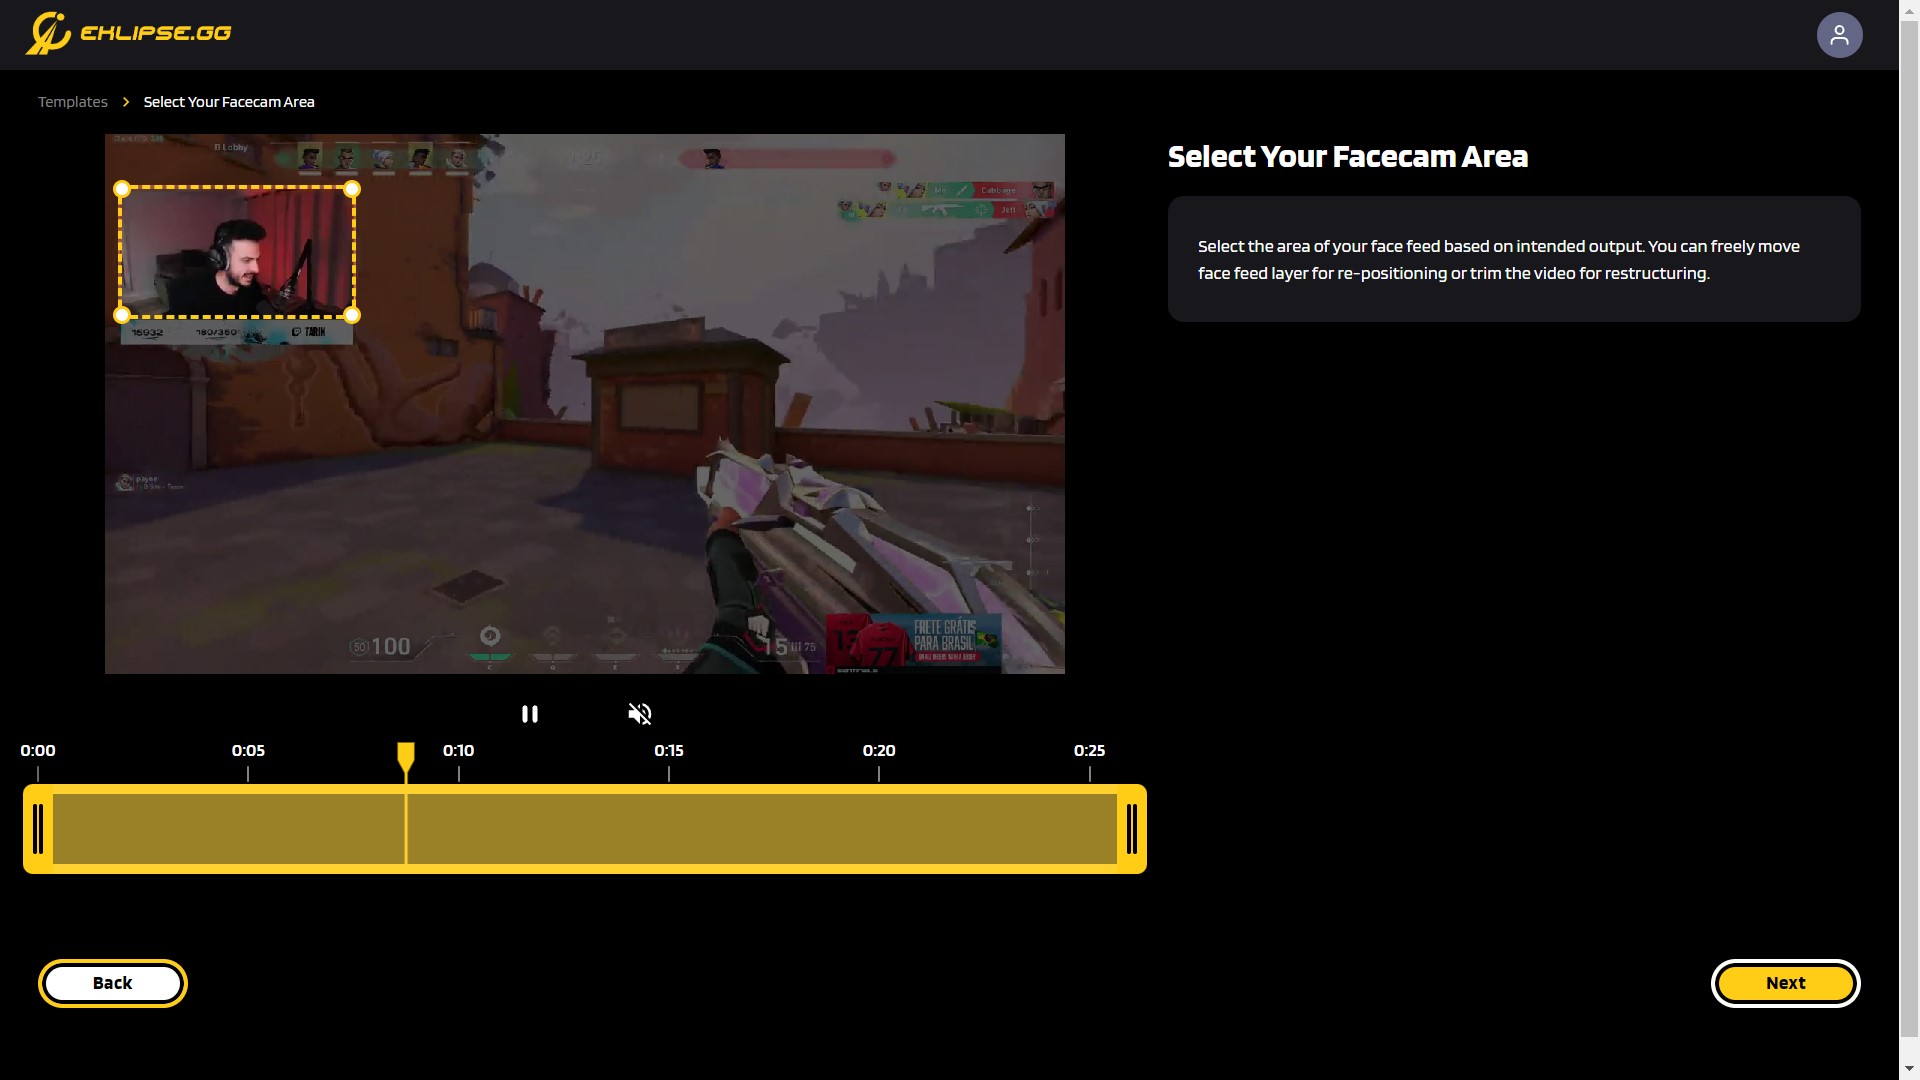
- Select your facecam and game feed area.
Make sure your facecam and game feed area are in the right place since it will affect your video output. You can also trim your video here to select the best moment from your gameplay montage.
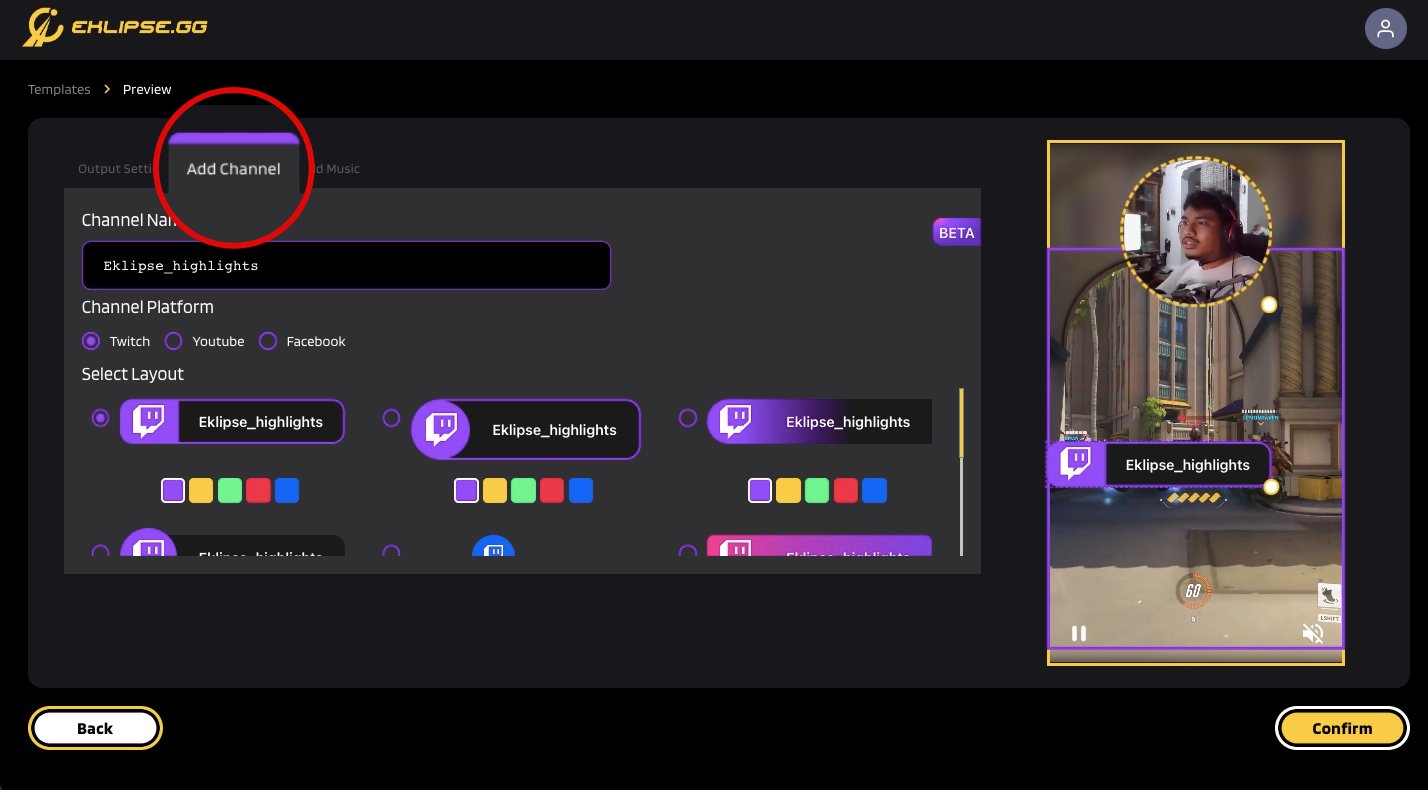
- Customize the video all you want
You can change your output settings, add music, or try our latest feature, add channel name sticker!
- Click Confirm to go back to the Eklipse app home page.

- Go to Edited Clip > Convert to TikTok/ Reels on the left sidebar menu.
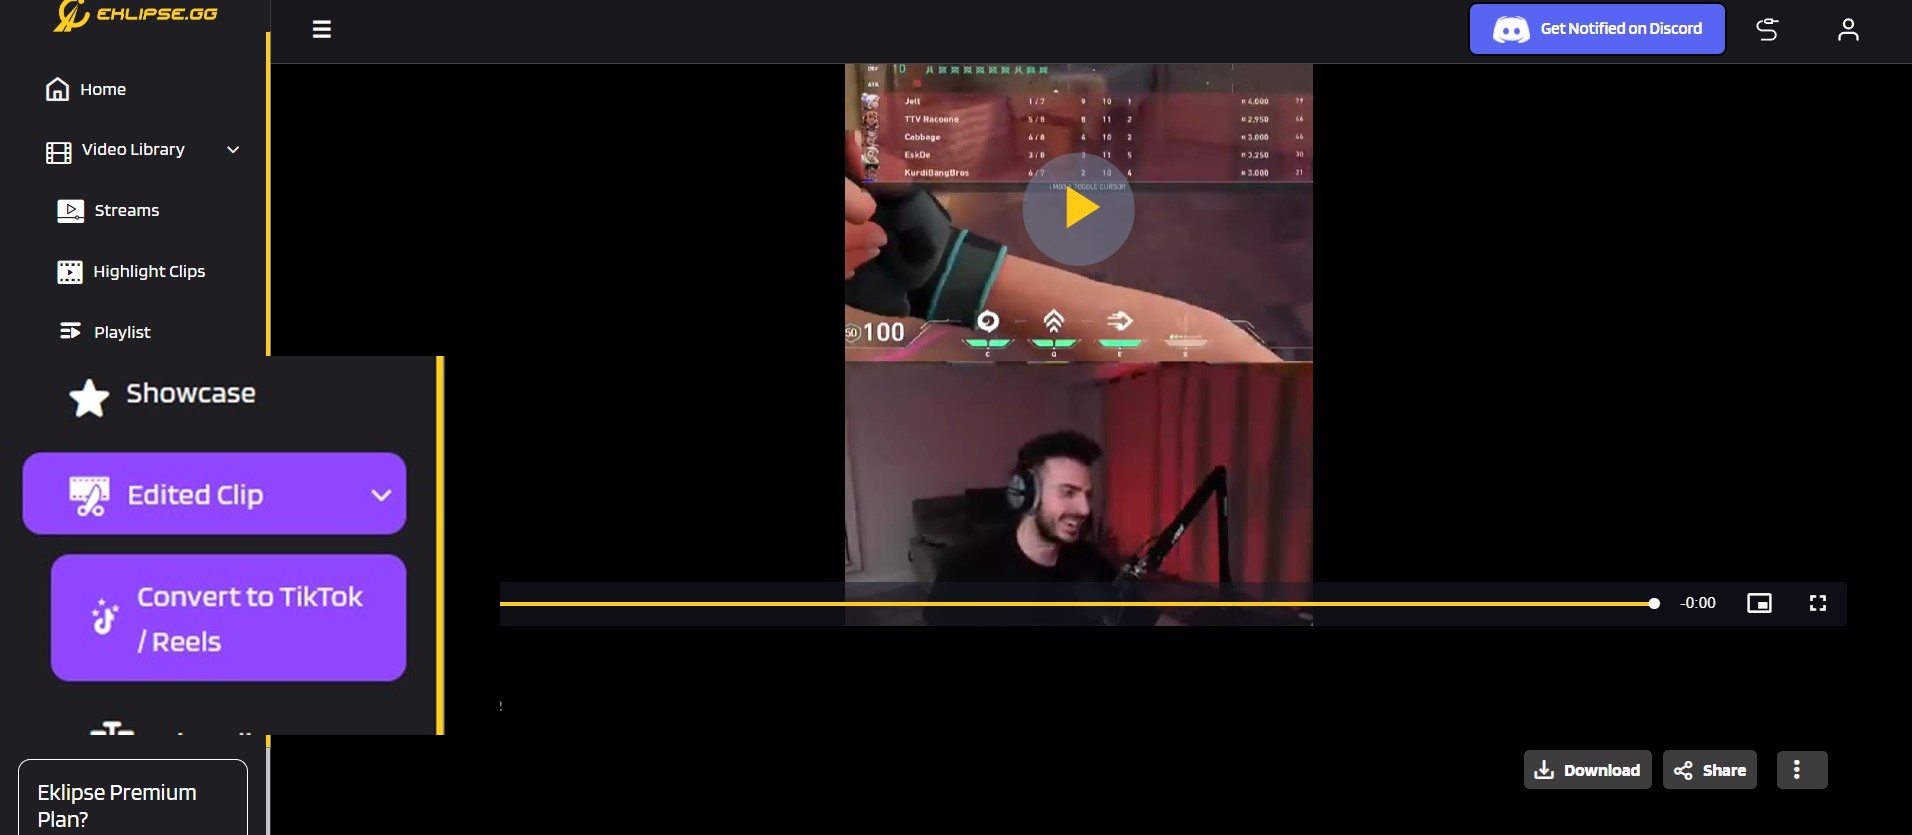
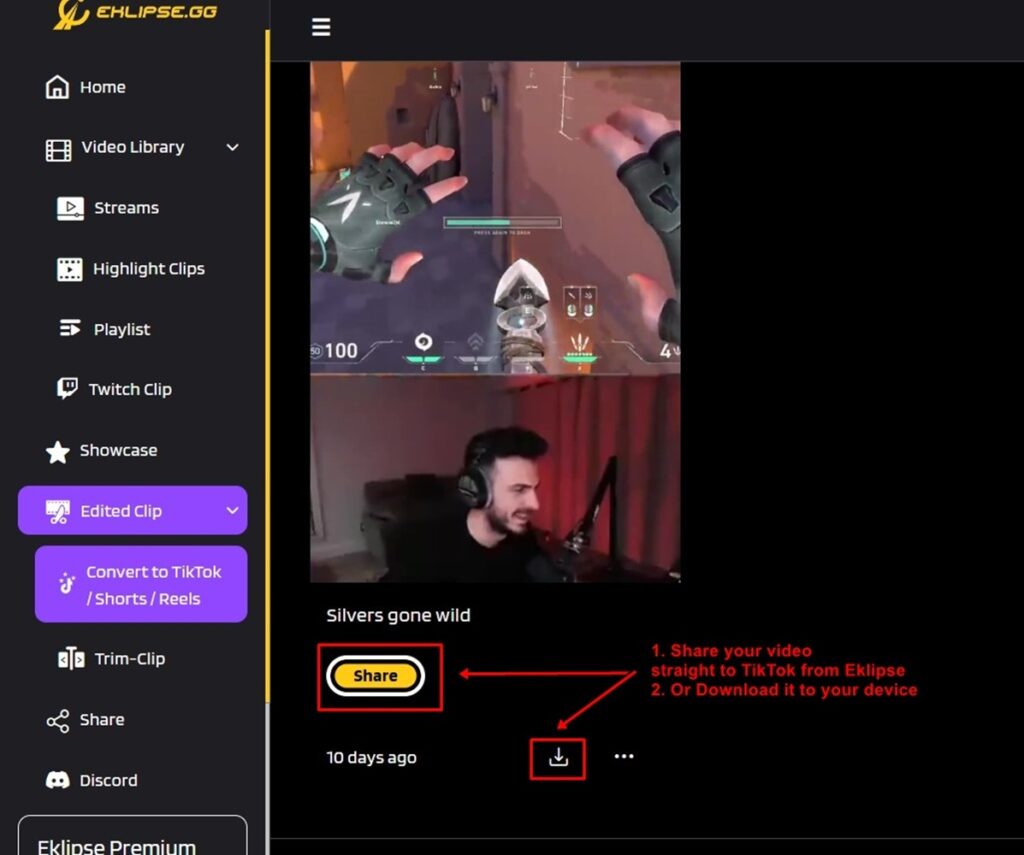
- Click Download or Share straight to your social media account.
You can download your clip to share it as Instagram Reels, or you can share it to Facebook, directly from Eklipse.

Step 2. Post your YouTube Videos on Instagram
Once you finished converting your YouTube video to Instagram Reels format, all you need is posting your video on Instagram to boost audience’s awareness of your contents.
If you already use Eklipse to resize your YouTube videos for Instagram Reels format, you can follow this steps to easily post your videos:
- Download your clip from Eklipse.
- You can also do this from the latest Eklipse Android app for easier posting flow to Instagram app.
- Open your Instagram app, tap (+) button on the top-right.
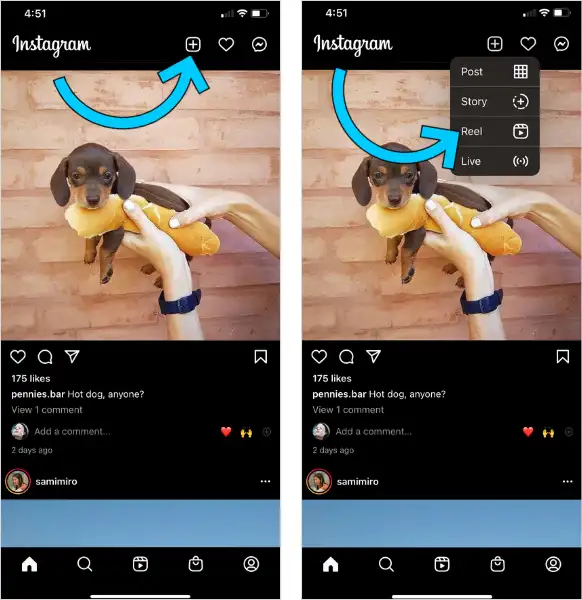
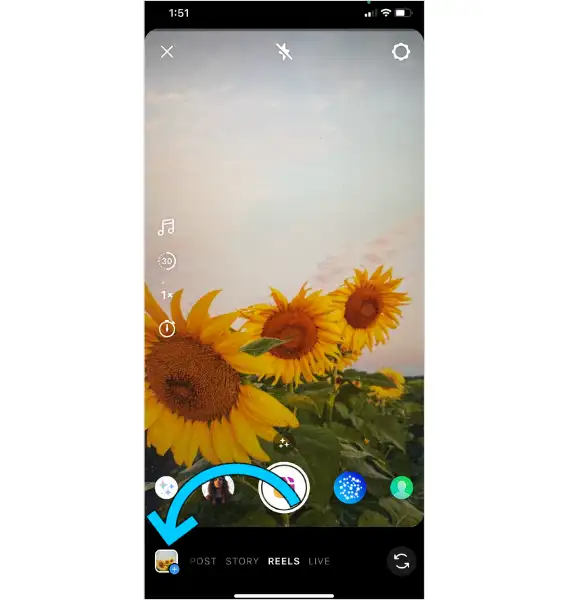
- Swipe the bottom dial to Reels, tap (+) button on the left to upload video from your Camera Rolls.
- Once you have done uploading, you can customize your clip here. Trim your clip, adding sticker, text, or audio.
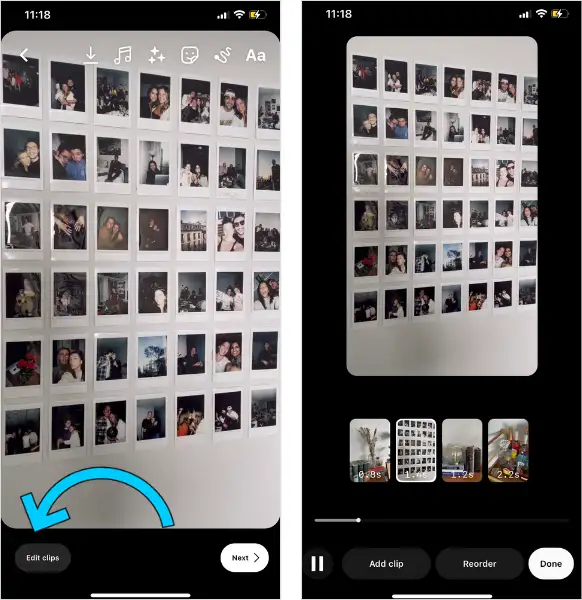
- After done customizing, tap Next to post your YouTube Videos on Instagram.
You can add caption, tag people, and add location in this part.

- Tap Share, then you are done!
Step 3: Learn How to Clip your Best Gaming Moments from Your YouTube Automatically
Suppose you are a YouTube streamer and want to be as famous as IShowSpeed or PewDiePie. In that case, you need to constantly share your best or funny moments on Instagram to attract new audiences.
From the statement above, you might already imagine it as a tedious process to do. Clip your best gaming moments from YouTube manually means you need to re-download your YouTube stream, edit and cut your video manually using heavy applications like Final Cut Pro or Adobe Premiere, then finally post it on Instagram.
While that process is as exhausting as it be, you can save your time and energy by doing it automatically! How? You can try using Eklipse stream auto-processing feature, so all you need is focus on stream while our AI engine will clip every best moments of your stream.
You can follow this guide to enable stream auto-processing feature!
- Go to Account Settings.
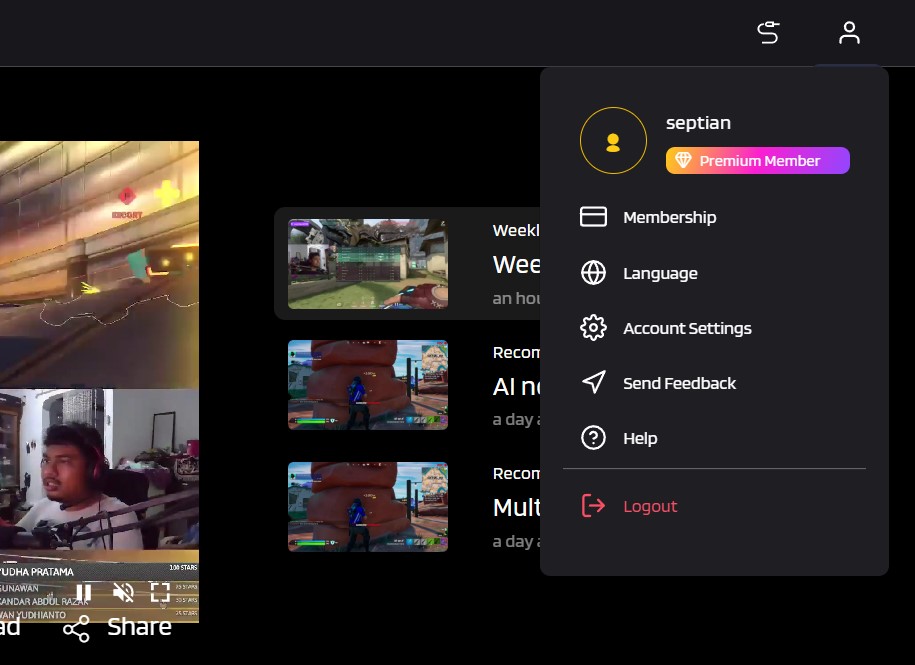
- Choose Preferences tab.
- Turn on the Stream auto-processing toggle switch.
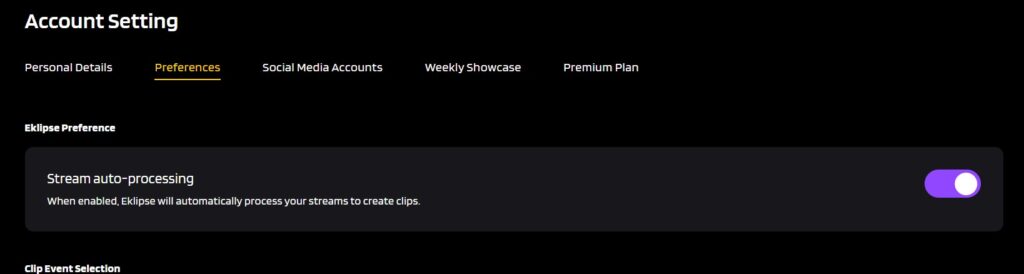
- Continue your stream and see how Eklipse make the magic happen.
Conclusions
Sharing your YouTube videos to Instagram is as important as doing the stream. While the process seems sweaty, but you can try on Eklipse any time to save your time and cut-off all the tedious clip-making process.
All that features are available for FREE, so make sure to try out Eklipse by clicking the link below!
Your friendly-neighborhood gamers that love playing MOBA and strolling on Twitch in his free time. Akbar has been playing games since Sega Genesis era, and started being a game writer in his late college day.