
Becoming a popular streamer is a long and tough journey. Not only do you need to be creative in order to produce great content, but you need to promote your content as well to other platforms, such as Instagram. Therefore, it’s advisable to learn how to post Twitch clips on Instagram.
However, the first thing you should do is capture the best moment of your stream videos to be a nice short clip. Thankfully, Eklipse can assist you to cover it in a wink. Once you’ve got the clips, you can start to post them on your Instagram account. Let’s take a look at the step-by-step.
How to Create Twitch Clips Using Eklipse
Eklipse is an AI highlight tool that is able to automatically capture your highlights and compile them into a TikTok video or Instagram reel. Here’s how to create the clips.
Step 1. Register and Log in
Go to the Eklipse website or click the following button. Then, do a free registration using email, Twitch or Facebook account. Once it’s done, log in with your new account.
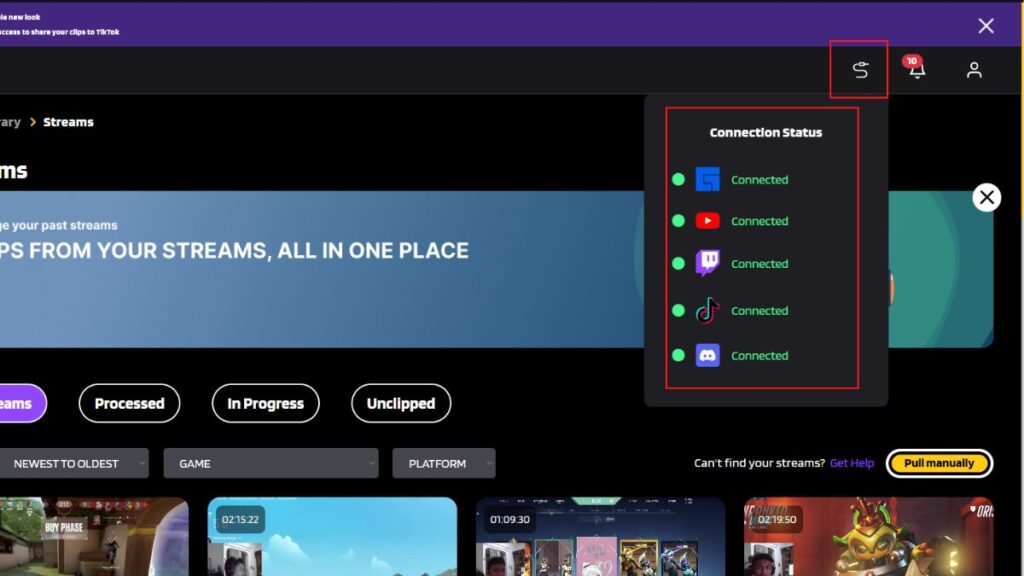
Step 2. Connect Twitch to Eklipse
To link your Twitch account with Eklipse, you can hit the cable icon at the top-right corner of the screen. After that, click the Twitch option.
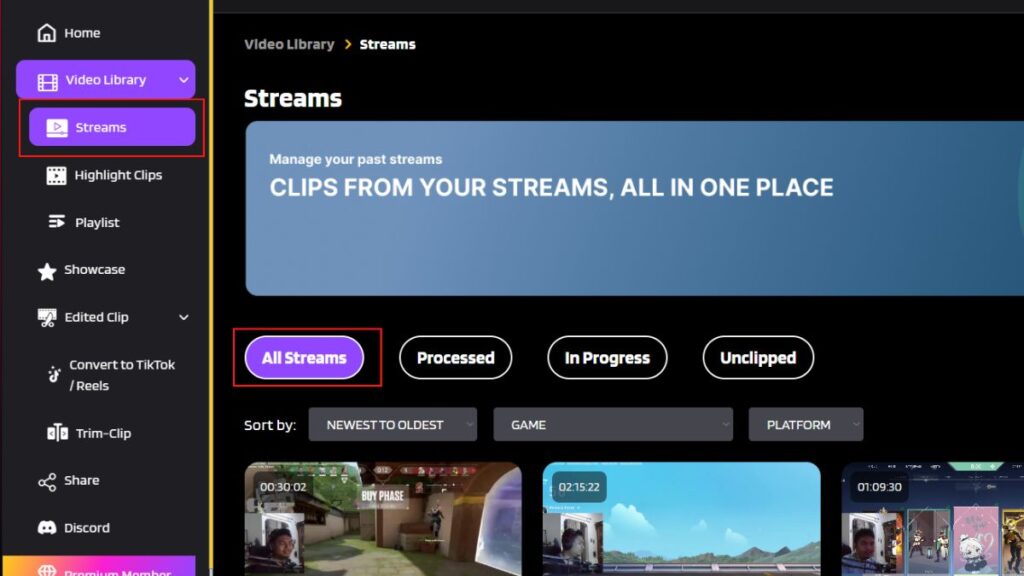
Step 3. Find the Stream Video to Clip
Head to the Streams tab at the left-side menu and click on the All Streams option. Find any video you would like to clip. Then, let the AI do its job for you.
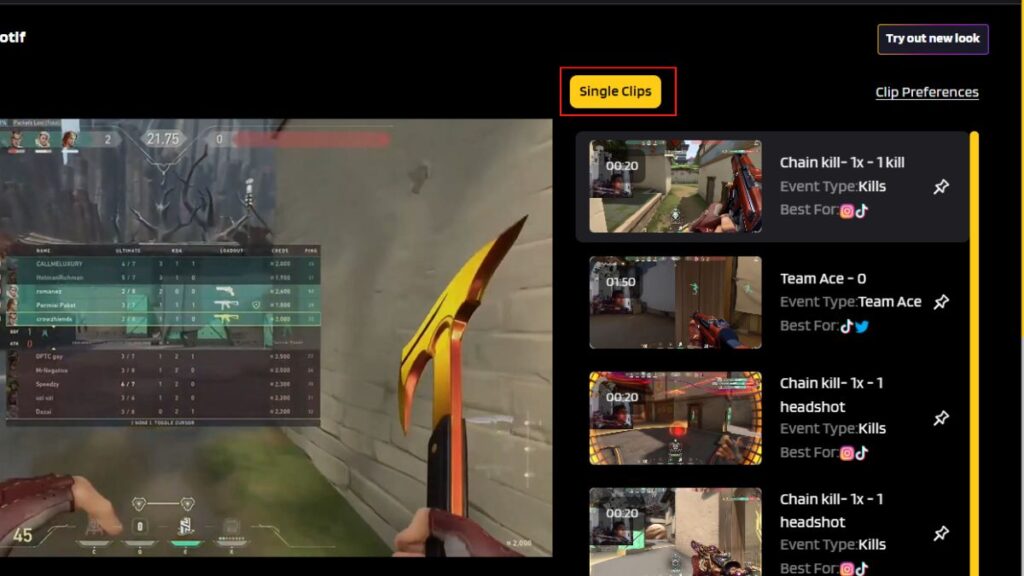
Step 4. Choose the Best Compilation or Short Clips
The AI will process your clip automatically, and will see Short clips button. Choose whichever you might like.
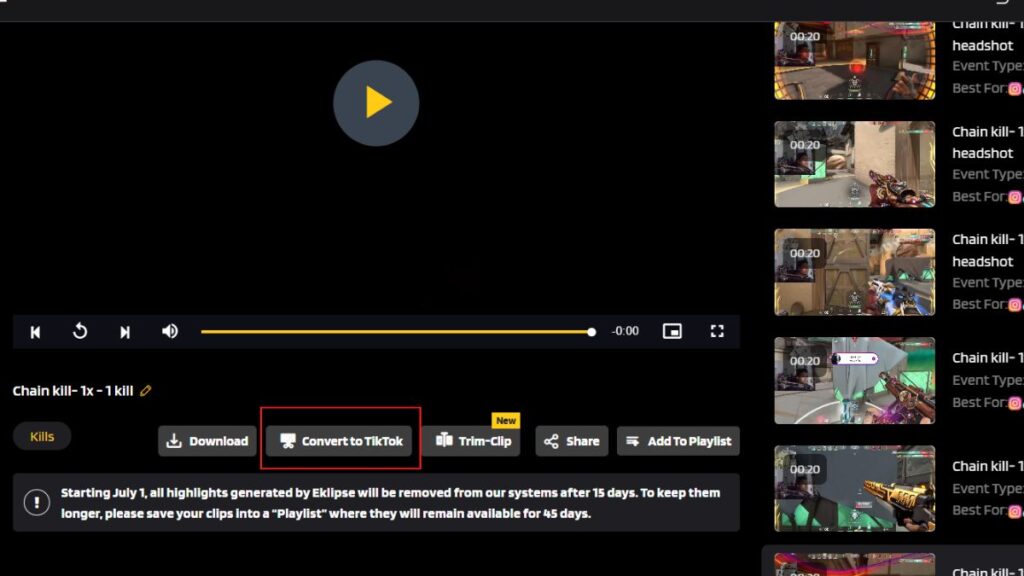
Step 5. Convert to TikTok or Instagram Reel
After choosing the best part of your videos, now convert them to TikTok or Reel by clicking the Convert to TikTok/Reel button under the video preview.
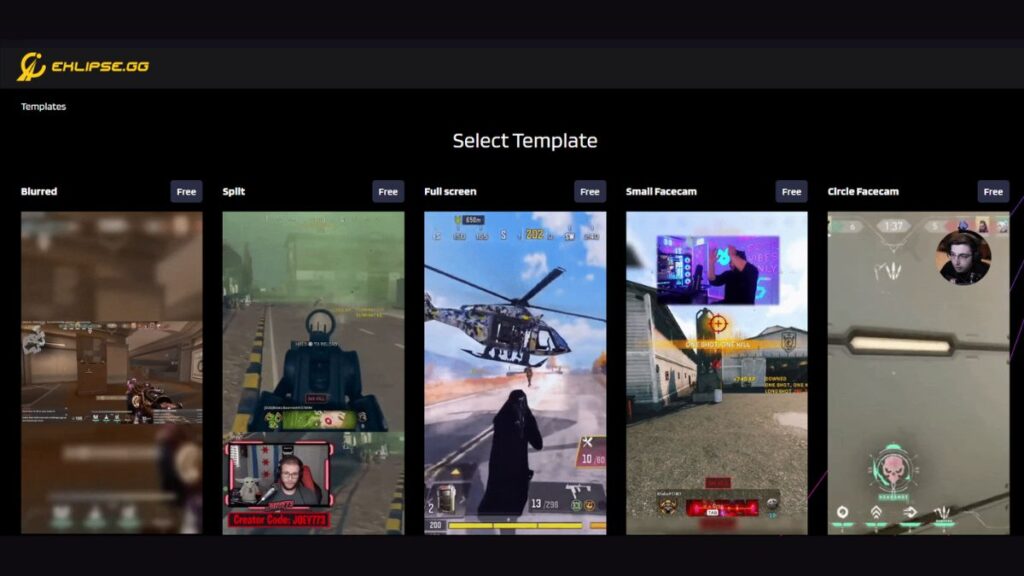
Step 6. Choose the Template
Eklipse provides several templates to make your short clip cooler. Choose which you think is the best. Then, press the Select Template button.
Step 7. Adjust the video area
To highlight the best moment, adjust your video based on the template by moving it around.

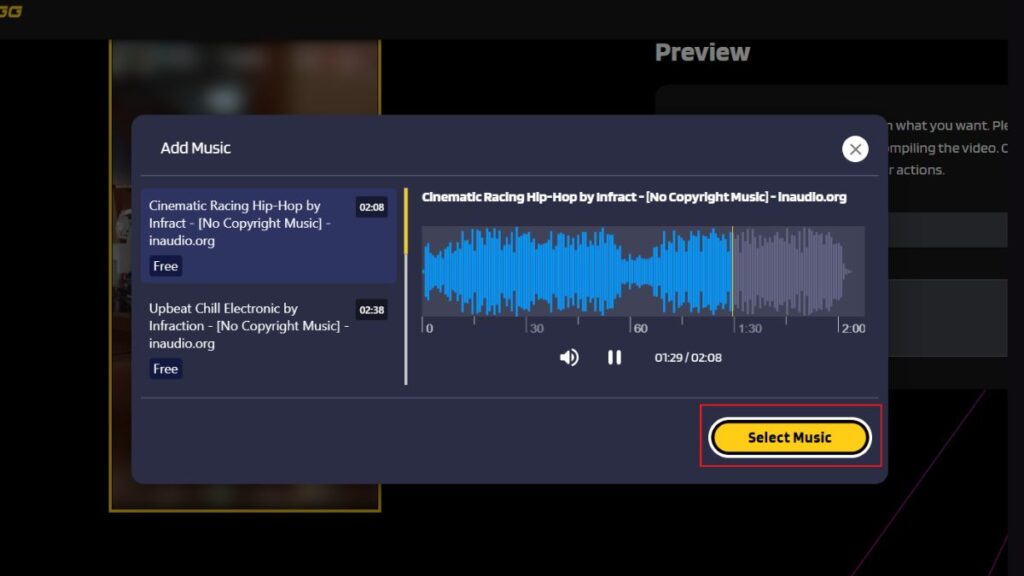
Step 8. Add Background Music
Head to Add Music option and select any copyright-free song you would like to apply to your video. For more details, you can learn how to add music to a video from our previous article. Finally, click Confirm to save the changes.
How to Download Twitch Clips on Eklipse
It usually takes a few moments to make your video ready. Once it’s ready, you can access it from the Edited Clips tab on the left-side menu. Then, hit the Convert to TikTok/Reel option to find the specific video.
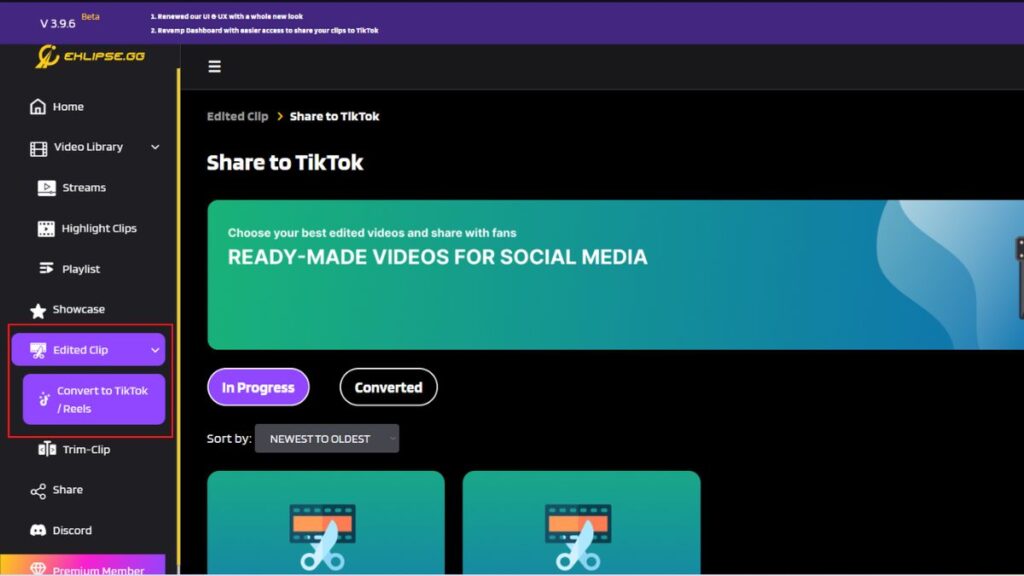
Click the chosen video and there will be two options under the video preview; Download and Share. Currently, Eklipse doesn’t enable you to share the clip directly to Instagram. So, if you want to post it there, you have to download the video first. Hit the Download button to save the video to your device.
How to Post Twitch Clips on Instagram
Instagram offers three different kinds of posts: Instagram Story, Reel, or Feed. Due to this, we’re going to guide you to do it.
Step 1. Log in to your Instagram Account
The first thing, log in to your Instagram account. If you don’t have an account, just create it first.
Step2. Choose the posting style
Once you’re on the Instagram homepage, click the plus button on the top right corner of the screen and choose which you want your video to be posted, as a reel, story, or in feed.
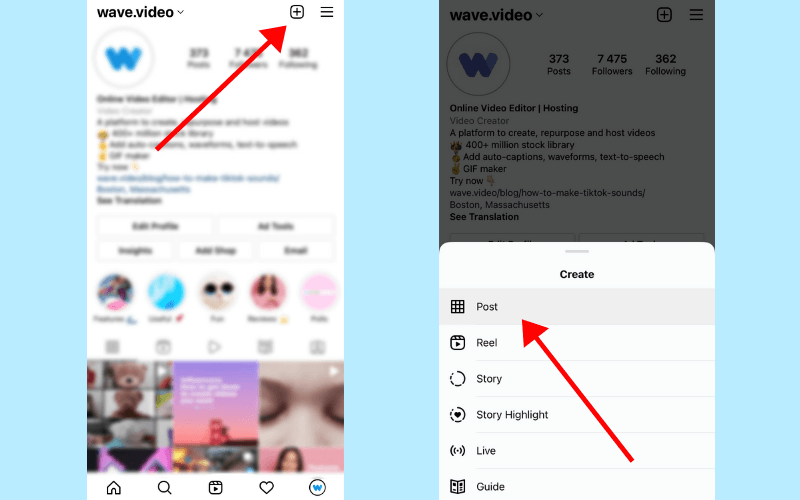
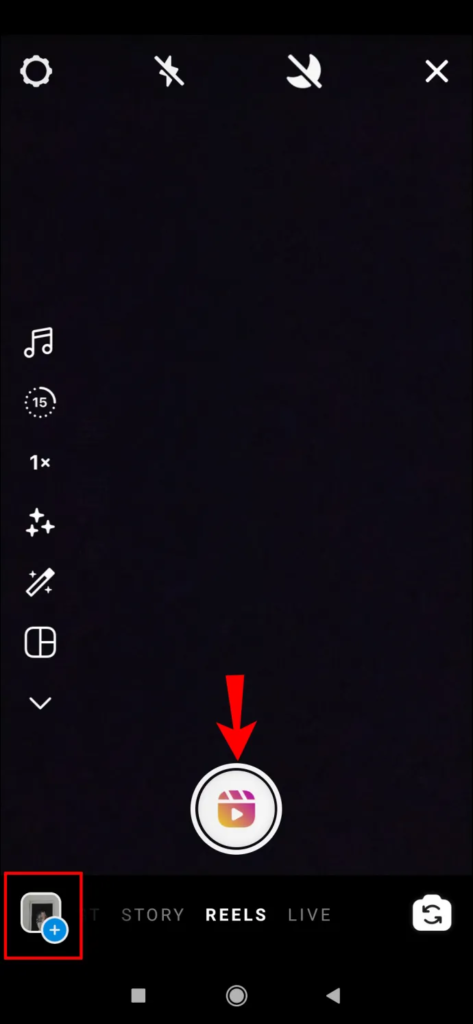
Step 3. Post as a Reel
To post a reel, click the gallery icon and find the clip you want to share. Tap Add after you have adjusted the length of your video. If you want to add more clips, follow the same steps. To customize your video, click the Preview button and add stickers, music, effects, or anything else you like. You can now proceed to the next step.
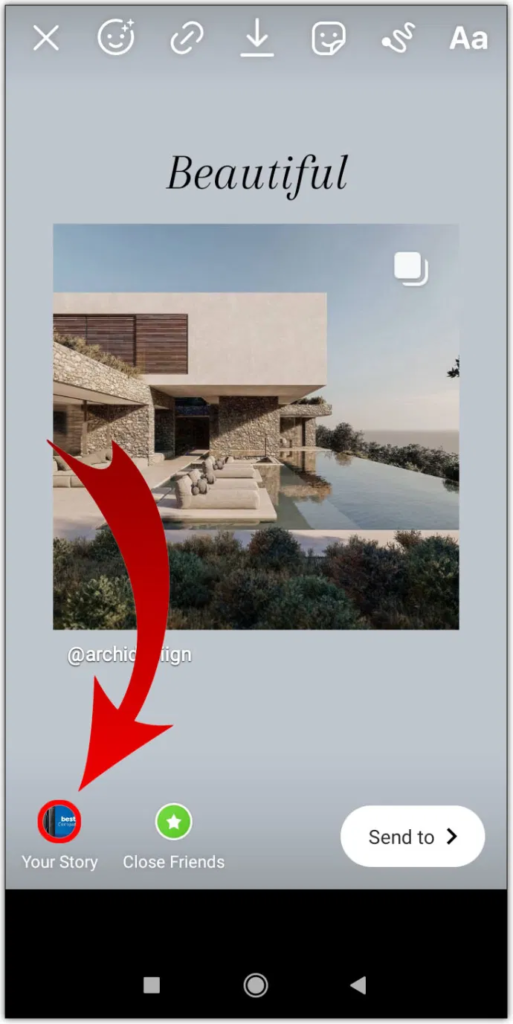
Step 4. Post as an IG Story
Alternatively, you can also post the clip as a story. Just swipe right to set it as a story, and do the same steps as above mentioned. If you have satisfied with your editing, tap Your Story to let everyone see your post, or Close Friend if you desire to show the clip to selected users.
Step 5. Post on the IG Feed
To post the clip on your feed, do the same step, but instead of choosing Reel/Story, choose Post. Then, select the video from the gallery. Edit your video as you want and follow the next steps.
Conclusion
There you have it. Now that you have learned how to post twitch clips on Instagram, you can start to promote your content there. Make sure to attach your Twitch link to attract new viewers to your streaming. Good luck!

Almira spends most of her time reading, writing, and playing games with her cats. She enjoys playing console games like GTA and Resident Evil. But among all those popular games, it’s always Cooking Mama that captures her heart.