
Twitch clips are a great way to capture and share your favorite gaming moments, but what do you do when you want to save them for offline viewing or use them in a video project? The answer is simple: convert your Twitch clip to MP4.
MP4 is a popular video format that is compatible with a wide range of devices and is perfect for sharing or archiving your Twitch clips. In this article, we’ll guide you through the process of how to convert your Twitch clip to MP4, so you can enjoy your gaming highlights anytime, anywhere.

How to Convert Twitch Clips to MP4 With Basic Method
To save a Twitch clip as an MP4 file, you need to use a third-party service or software. Here are the steps you can follow.
Step 1. Saving The Twitch Clips To Your Device
The first thing you should do before saving the clip in MP4 format, you should save the clip on your device. Don’t know where to begin? Follow the steps below.
- Open Twitch.tv, and log in with your account
- Secondly, go to Creator Dashboard in the Content section
- Select Clips
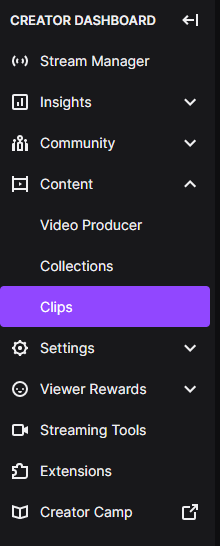
- Pick the clips you’d like to download
- Then, click the Share icon of an arrow pointing upward
- Hit the first option pop-ups with a downward pointing arrow icon and label as download
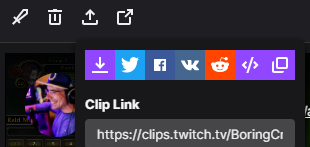
- Now, you have your clips on your PC
Step 2. Convert Twitch Clip to MP4 Format
So you’ve saved your fave Twitch clip on your device, and now it’s time to make it into an MP4. No worries, we got you covered. In this article, we’ll show you how to change the format using Clideo as your Twitch video downloader. Here’s the lowdown.
- To begin with, go to the Clideo website and log in or create a new account.
- Hit the Choose File button to attach a file from your gallery, or you can take it from Dropbox, or Google Drive.

- Then, select the downloaded clip from your device.
- Wait until the uploading process is finished.
- If you want to save the video without changes, you can drag the sliders to start, and the endpoint.
- While you want to edit, just move the sliders as you wish.

- After that, change the format to MP4.

- Click the Export button on the right bottom of the screen.
- Finally, hit Download to save it to your gallery.

Convert Twitch to MP4 Use Twitch Video Downloader
There are many online conversion services that allow you to download Twitch clips as MP4 files without hassle. All you need is to simply copy the URL of the Twitch clip, paste it into the conversion service, and hit the “Download” button. Additionally, we have provided some great tools you can use to save Twitch clips easily. Let’s get a closer look at the list below.
- Twitch Leecher
- StreamTransport
- Twitch Desktop App
- Twitch Rip
- TubeNinja
- 4K Video Downloader
These Twitch stream downloaders offer various features such as downloading entire streams, downloading stream clips, or saving videos to various file formats. Some are free while others offer both free and paid versions with varying levels of functionality. When choosing a Twitch stream downloader, it’s important to consider your specific needs and to compare the features and pricing of each tool.
In case you want to find more options for Twitch clip downloaders, you can head over to our article here: Top 6 Twitch Stream Downloader: Never Miss an Epic Moment!
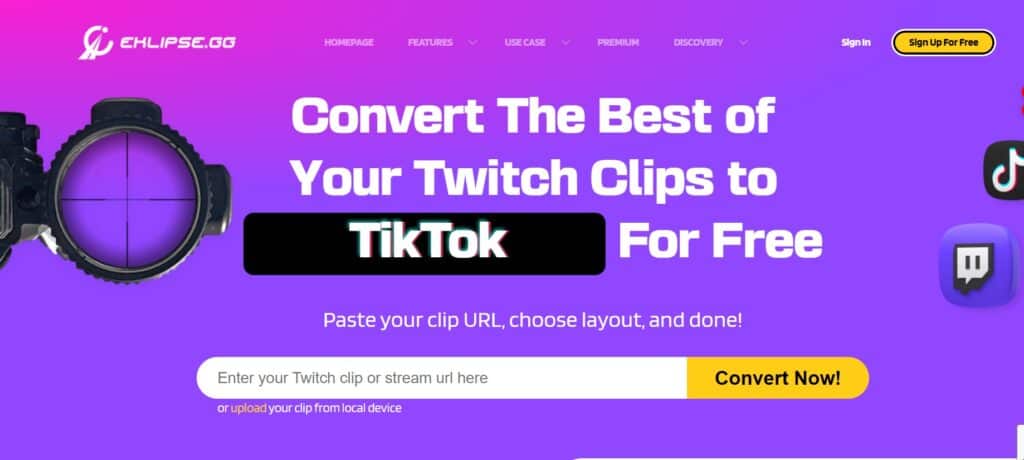
How To Convert Twitch Clips to MP4 Using Eklipse
If you regularly dip your toe in the greater lake of Twitch to stream, you must be familiar with Eklipse. Eklipse is basically an automated clip maker that is able to not only save your clip to MP4 but also capture any fantastic moment from the streams accurately. Plus, AI can get things done only in seconds! If you are interested in Eklipse, you can follow the guide below to know how it works.
- Starting off by going to Eklipse website.
- hen, log in to your account or make a new account.
- Copy the URL link of the Twitch stream you want to convert to MP4.
- Paste in Eklipse.
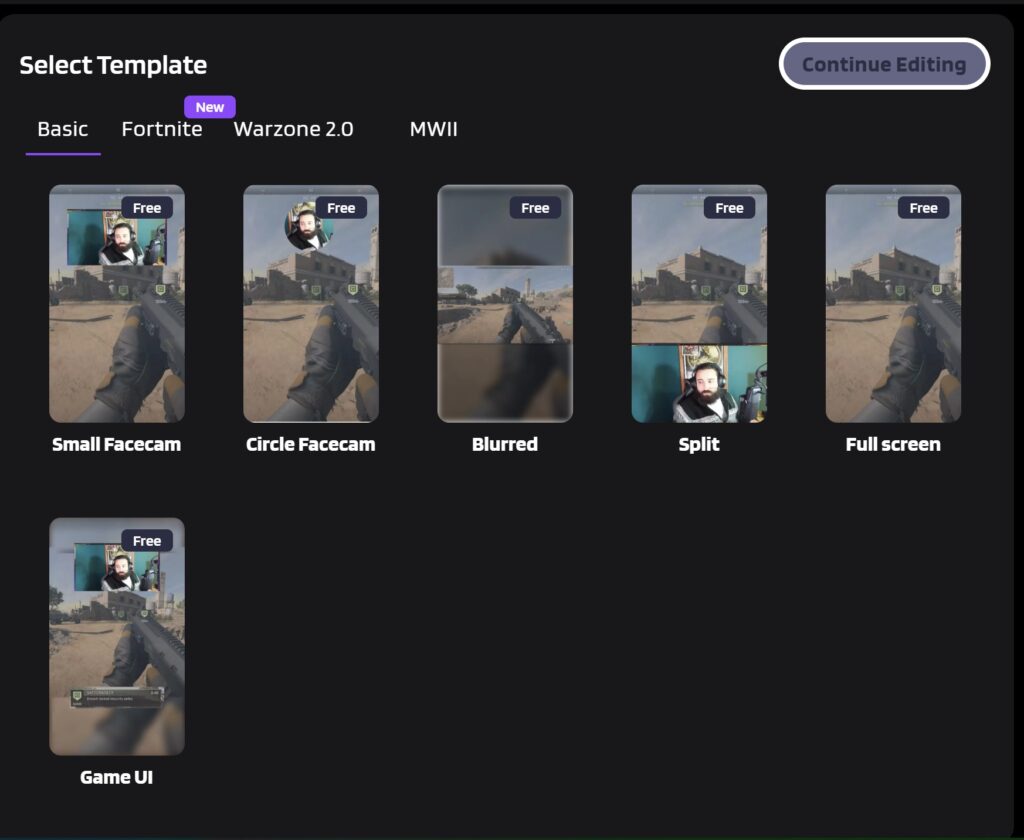
- After that, select your favorite TikTok template and hit Continue Editing.
- Adjust the facecam, the video length, and the gameplay area, and hit Next.
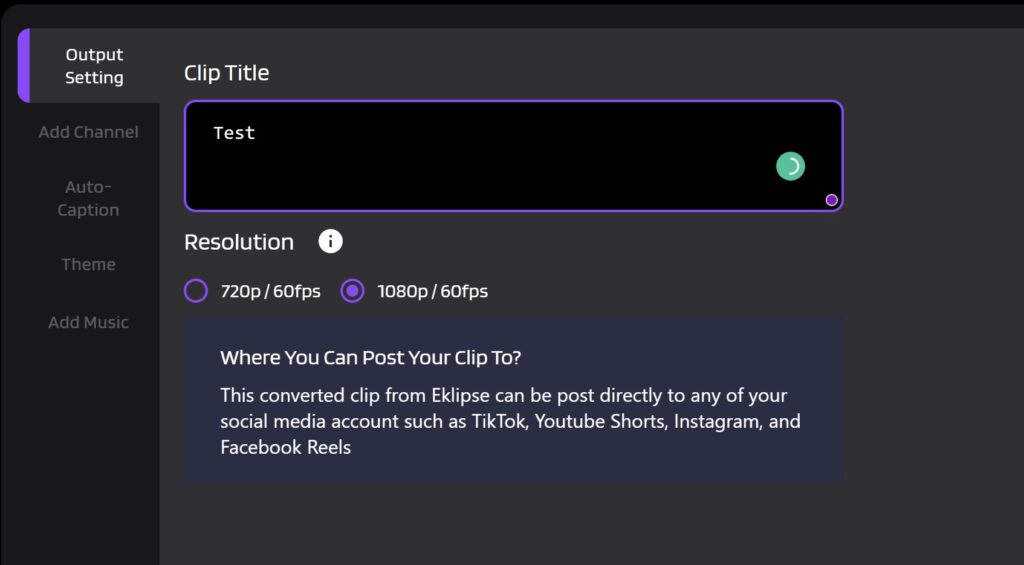
- Next up, write a title and choose the output resolution.
- Add channel name, auto-caption, and background music.
- Once done, click Confirm.
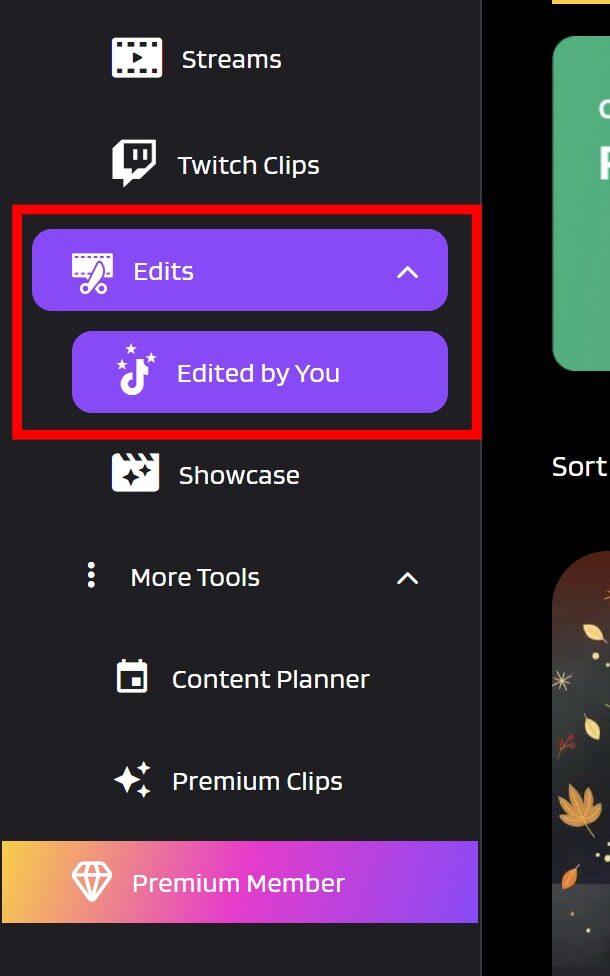
- Now go to the Edits tab and click Edited by You.
- Find your edited clip and hit the Download icon to directly save it on your device.
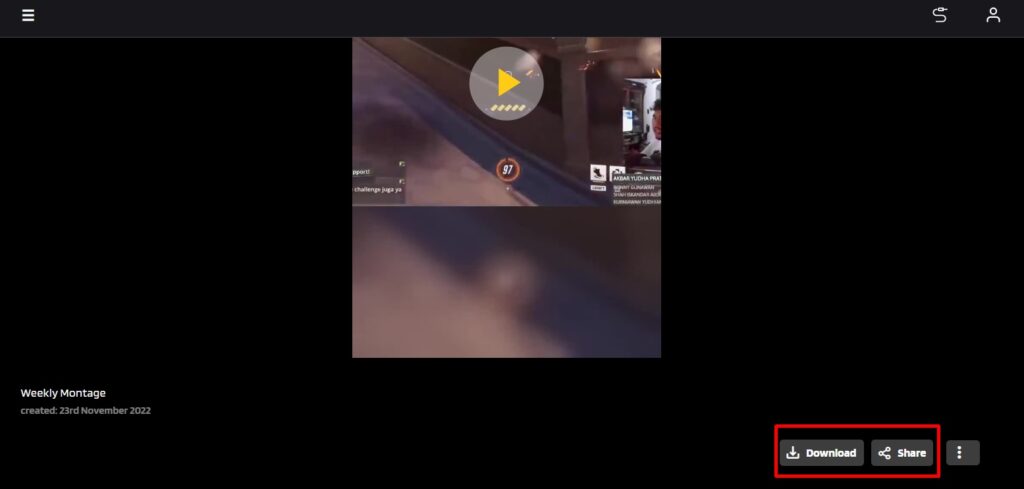
- Or, you can also share it directly to your social media by hitting the Sharing icon.
- That’s it.
Boost Your Streaming Presence in Social Media with AI Highlights
Eklipse help streamer improve their social media presence with AI highlights that clip your Twitch / Kick streams automatically & converts them to TikTok / Reels / Shorts
Conclusion
Converting Twitch clips to MP4 is a breeze! All you need is an online service, and it’s super simple. No more hopping on the Twitch website to watch your clips – now you can enjoy them whenever, wherever. How cool is that?
Tech writer, gaming, streaming, gadgets. A decade’s experience. Informative, engaging.
Featured in web publications. Reviews new products. Loves gaming, tinkering.