Level Up Your Marvel Rivals Gameplay
Capture your epic wins, clutch moments, and even hilarious fails with Eklipse. Easily create and share highlight reels with your friends—even if you're not streaming!
Learn MoreAs a Twitch streamer, you understand the importance of creating an inclusive and engaging environment for your viewers.
One effective way to achieve this is by adding captions to your Twitch stream. Captions not only make your content accessible to a wider audience but also enhance the overall viewing experience.
In this guide, we will walk you through the step-by-step process of adding captions to your Twitch stream. Let’s dive in and make your streams more inclusive!
Step 1: Choosing Your Twitch Captions Tools
Before we proceed, please ensure that you have a dependable captioning solution ready. Several tools are available to assist you in generating real-time captions or uploading pre-recorded caption files.
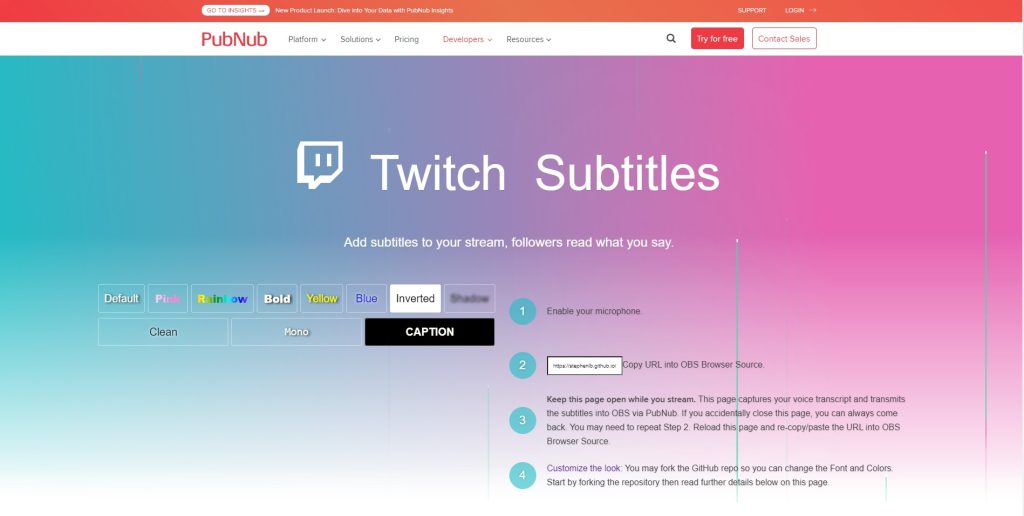
For your convenience, there is a community tool available that allows you to simply copy the URL and add it to your “Browser Source” in OBS.
Now, let’s move on to the next step.
Step 2: Integrating Captions into Your Twitch Stream

Once you have set up your captioning tool, it’s time to integrate the captions into your Twitch stream. Follow these steps to ensure a seamless integration:
- Visit this website.
- A prompt to activate your microphone will appear. Select “Allow.”
- Copy the following URL: stephenlb.github.io.
Now that you have completed this step, keep the web page open as we move on to the next step. Next step, it’s time to add this captions tools to your Twitch stream via broadcasting software like OBS or Streamlabs OBS.
Step 3: Adding The Caption Tools to Your OBS

Now that you have copied the URL, it’s time to integrate the Twitch captions tool into your overlay. The step-by-step process is as follows:
- Open OBS (or Streamlabs OBS).
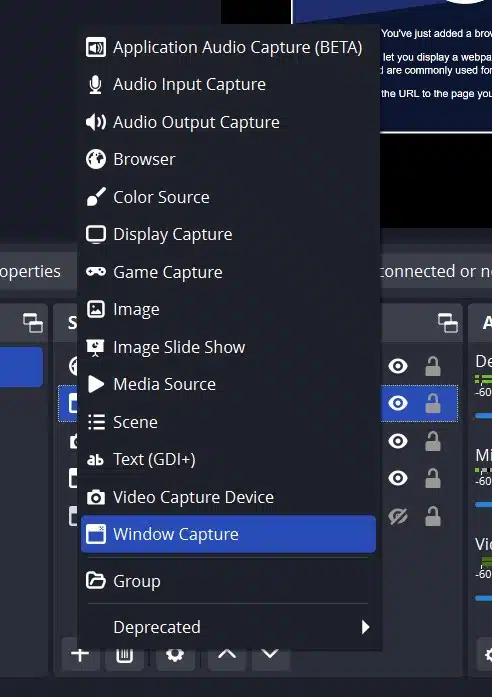
- Click the “+” button in the “Sources” section and select “Browser Source”.
- Paste the previously copied URL into the “URL” box.
- Click “OK”.
- Congratulations! You now have captions on your Twitch stream.
The final task is to position your captions so that they can be easily read without obstructing your webcam. Once you have finished arranging the layout, you can start broadcasting to Twitch and showcase captions for every word spoken during the stream.
Adding Caption to Twitch Stream with Eklipse

Another alternative to adding captions to a Twitch stream is using tools like Eklipse.
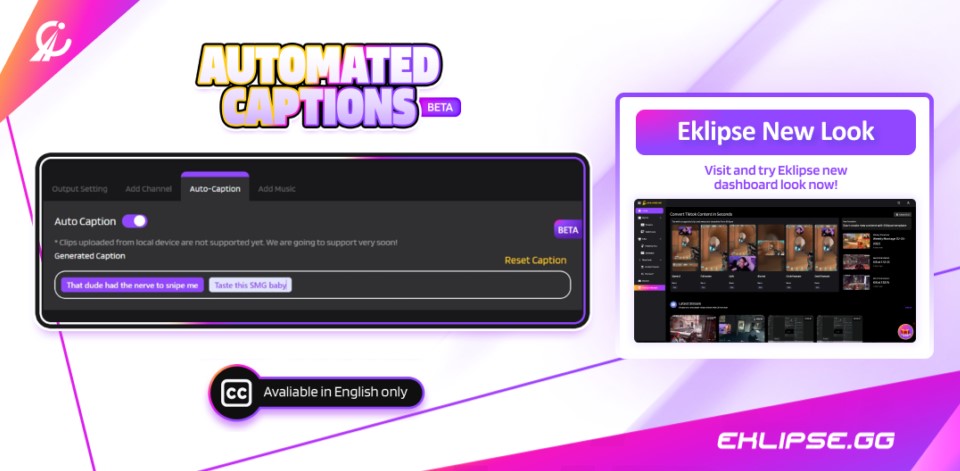
Eklipse can automatically clip your stream and convert it to TikTok’s vertical format using online video editing tools. The advantage of using Eklipse is that captions are added automatically by detecting and transcribing anything on the stream clip.
However, it’s important to note that Eklipse cannot directly add captions to your Twitch live stream. Instead, it can assist you in creating social media content from your stream.
Visit Eklipse.gg to learn more and sign up now to start growing your channel.
Maximize your Black Ops 6 rewards—Create highlights from your best gameplay with with Eklipse
Eklipse help streamer improve their social media presence with AI highlights that clip your Twitch / Kick streams automatically & converts them to TikTok / Reels / Shorts
Maximize your Black Ops 6 rewards—Create highlights from your best gameplay with with Eklipse
Eklipse help streamer improve their social media presence with AI highlights that clip your Twitch / Kick streams automatically & converts them to TikTok / Reels / Shorts
Conclusion
By following this guide, you can seamlessly add captions to your Twitch stream, creating a more inclusive and engaging experience for all viewers. Remember to choose a reliable captioning tool, integrate it into your streaming software, and refine the captions for optimal.
🎮 Play. Clip. Share.
You don’t need to be a streamer to create amazing gaming clips.
Let Eklipse AI auto-detect your best moments and turn them into epic highlights!
Limited free clips available. Don't miss out!
