
Level Up Your Marvel Rivals Gameplay
Capture your epic wins, clutch moments, and even hilarious fails with Eklipse. Easily create and share highlight reels with your friends—even if you're not streaming!
Learn More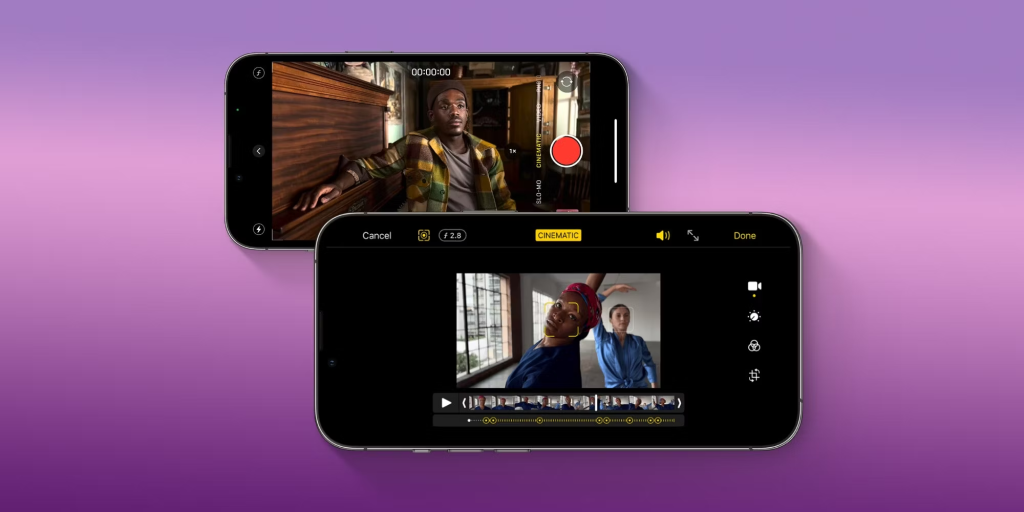
Editing videos on your iPhone for YouTube is a straightforward process, thanks to the powerful and user-friendly video editing apps available on iOS. With its advanced camera technology and intuitive user interface, the iPhone provides an ideal platform for creating high-quality videos on the go.
Whether you’re an experienced YouTuber or just starting, mastering iPhone video editing can significantly boost your content quality. With the right techniques and apps, you can turn raw footage into compelling content that grabs your audience’s attention.
In this guide, we’ll walk you through the essential steps of editing videos on your iPhone specifically for YouTube. Whether you’re a beginner or an experienced editor, these steps will guide you in creating high-quality videos directly from your iPhone.
Step 1: Choose the Right Video Editing App
iMovie
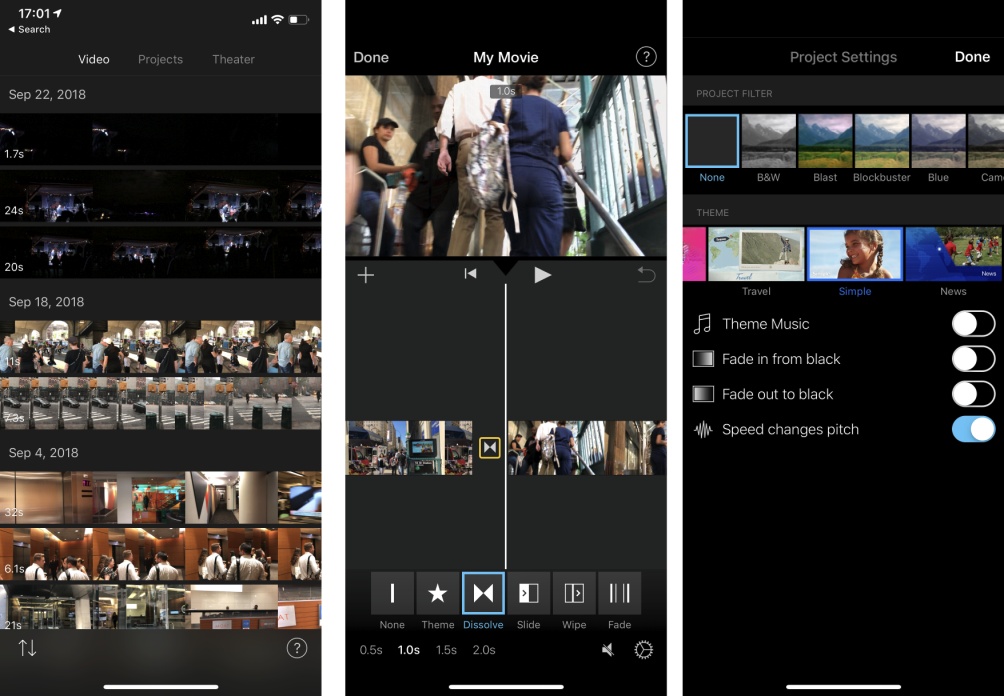
iMovie is an AI video editing app from Apple that offers a range of features perfect for creating YouTube content. With its intuitive interface, iMovie allows you to easily trim clips, add transitions, and incorporate music and text.
Key Features:
- Simplified timeline
- Built-in templates and themes
- 4K video support
- Seamless integration with other Apple devices
Eklipse Mobile App
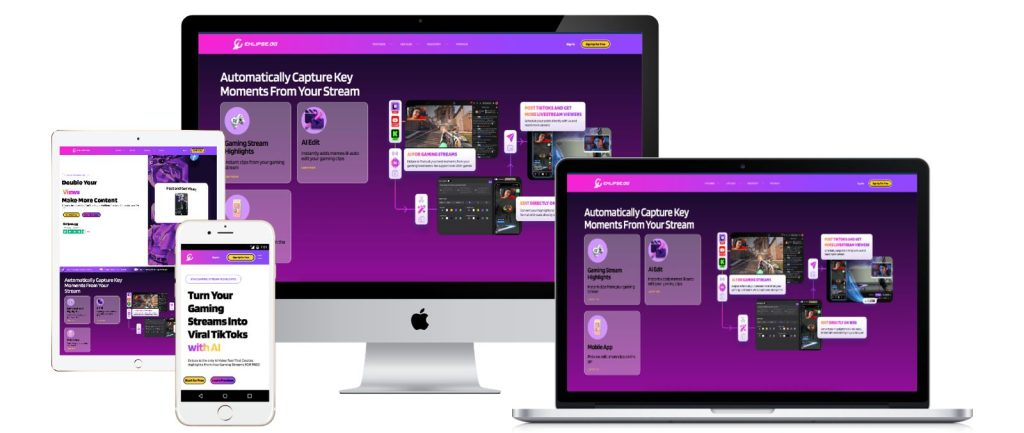
Eklipse’s mobile app offers AI-powered editing tools that automatically generate highlights and clips from your videos. This app is ideal for creators looking to streamline their editing process with minimal effort.
Key Features:
- AI-driven highlight detection
- Customizable templates
- Social media optimization
- Easy-to-use interface
Learn more about Eklipse’s mobile app here.
Other Notable Apps
- LumaFusion: A professional-grade video editor offering multi-track editing, advanced effects, and robust features for serious video creators.
- Adobe Premiere Rush: A cross-platform video editor with powerful features and easy integration with Adobe Creative Cloud.
Step 2: Import Your Footage
Once you have chosen your video editing app, import the footage you want to edit.
- Open Your App: Launch your chosen video editing app.
- Import Videos: Select the footage from your iPhone’s camera roll or directly from your cloud storage.
Step 3: Trim and Arrange Clips
Editing involves trimming and arranging your clips to create a coherent narrative or highlight the key moments.
- Trim Clips: Cut out unwanted sections of your video. Most apps, like iMovie and Eklipse, allow you to drag the edges of your clip to trim it.
- Arrange Clips: Drag and drop your clips on the timeline to arrange them in the desired order.
Step 4: Add Transitions and Effects
Enhance your video with transitions and effects to make it more engaging.
- Add Transitions: Apply transitions between clips to ensure a smooth flow. Apps like iMovie offer a variety of transition effects.
- Apply Effects: Use filters, overlays, and other effects to give your video a professional look.
Step 5: Incorporate Music and Sound Effects
Adding music and sound effects can significantly enhance the impact of your video.
- Select Music: Choose background music from your app’s library or import your own. Ensure the music complements the tone of your video.
- Adjust Audio Levels: Balance the audio levels between your video clips and background music to ensure clear sound.
Step 6: Add Titles and Text
Titles and text can provide context and information to your viewers.
- Insert Titles: Add titles at the beginning of your video or new sections.
- Overlay Text: Use text overlays to highlight important points or provide additional information.
Step 7: Review and Fine-Tune
Review your edited video to make sure everything looks and sounds perfect.
- Watch Your Video: Play back your video from start to finish to catch any mistakes or areas for improvement.
- Fine-Tune Edits: Make necessary adjustments to timing, transitions, and effects.
Step 8: Export and Upload to YouTube
Once you are satisfied with your edit, export the video in the highest quality possible and upload it to YouTube.
- Export Settings: Choose the appropriate export settings for YouTube. Most apps offer presets for YouTube to ensure optimal quality.
- Upload to YouTube: Open the YouTube app or website, log in to your account, and upload your video.
Conclusion
Editing videos on your iPhone for YouTube is a seamless process with the right tools and techniques. Whether you use iMovie, the Eklipse mobile app, or another video editing app, you can create professional-quality content from the convenience of your phone.
Ready to elevate your video editing game? Try Eklipse’s mobile app for AI-powered editing that simplifies your workflow and enhances your video content. Visit Eklipse to get started now!

🎮 Play. Clip. Share.
You don’t need to be a streamer to create amazing gaming clips.
Let Eklipse AI auto-detect your best moments and turn them into epic highlights!
Limited free clips available. Don't miss out!
