
Level Up Your Marvel Rivals Gameplay
Capture your epic wins, clutch moments, and even hilarious fails with Eklipse. Easily create and share highlight reels with your friends—even if you're not streaming!
Learn MoreTL;DR
Integrate Twitch chat into OBS Studio by using either the custom browser dock feature for an internal chat window or a browser source for an on-stream overlay. Both methods allow for real-time viewer interaction and can be customized for transparency and appearance.
For streamers, connecting with your audience is paramount, and the Twitch chat box serves as a dynamic hub for real-time interaction. Integrating this vital communication channel directly into your streaming setup can significantly enhance your engagement without distracting from your content. If you’re utilizing OBS Studio, the leading software for live broadcasting, you’ll be pleased to know that adding Twitch chat is a straightforward process that allows you to monitor discussions and respond to your community seamlessly.
This comprehensive guide will walk you through the essential steps to add Twitch chat to OBS Studio, ensuring your setup is optimized. We will cover both methods: setting up a docked chat window for personal monitoring and creating an on-stream overlay for viewer visibility. Additionally, we will show you how to achieve a transparent chat box for a polished, professional look. By following these instructions, you’ll be able to maintain focus on your stream while fostering a more interactive and engaging experience for your viewers.

How to Add Twitch Chat to OBS Studio
Integrating your live Twitch chat directly into your OBS Studio interface is a fundamental step for any streamer looking to enhance audience engagement. This method allows you to keep an eye on discussions without needing to switch between applications, ensuring you remain focused on your stream. The process is quite simple and remains largely consistent for 2025. Here’s a step-by-step guide:
- Access Twitch Chat: Begin by opening your web browser and navigating to Twitch.tv. Log in to your account.
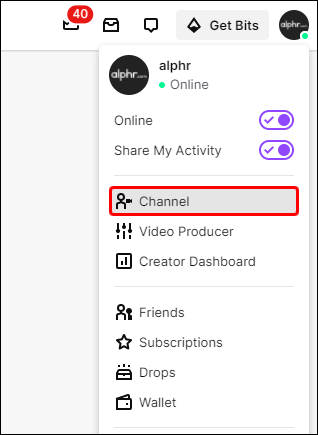
- Navigate to Your Channel: Click on your profile icon in the top-right corner, then select Creator Dashboard from the dropdown menu.
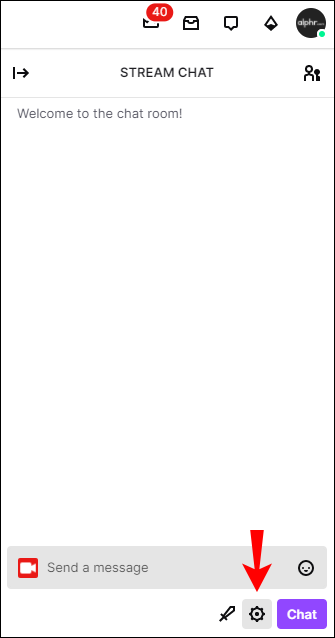
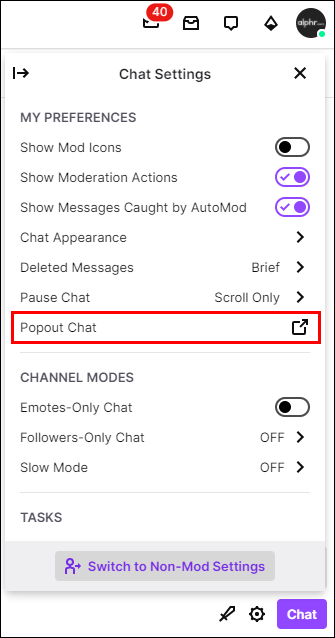
- Open Chat in Popout Window: In the Creator Dashboard, locate the Chat section. You should see an option to ‘Popout Chat’ or a similar icon (often a square with an arrow pointing out). Click this to open your chat in a new, separate browser window.
- Copy the Chat URL: Once the pop-out chat window appears, copy the URL from its address bar. This URL is unique to your chat and will be used in OBS.
- Launch OBS Studio: Open OBS Studio on your computer.
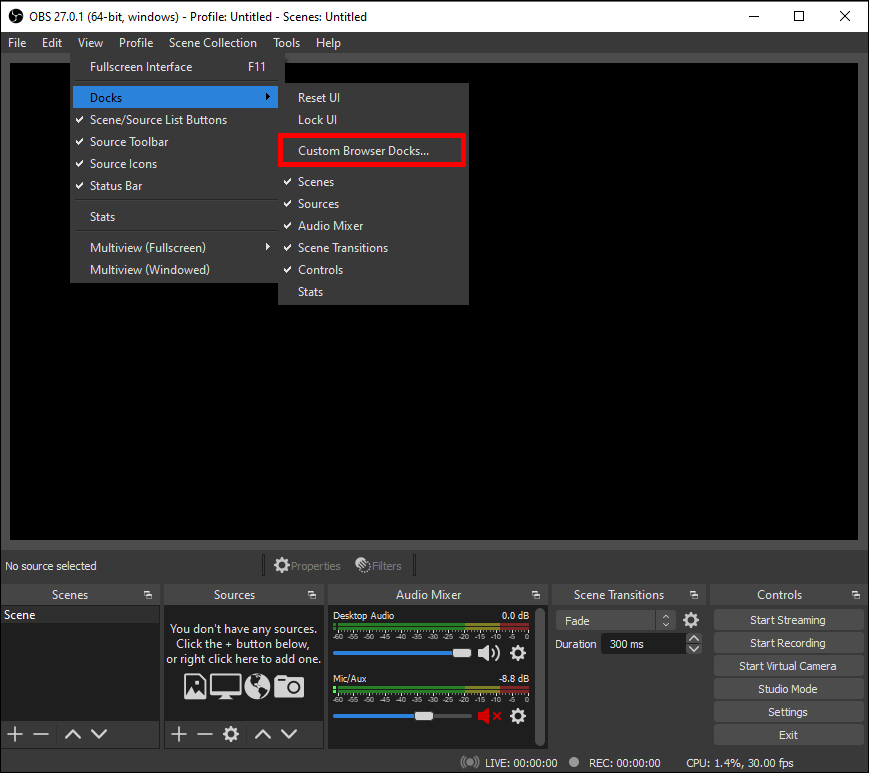
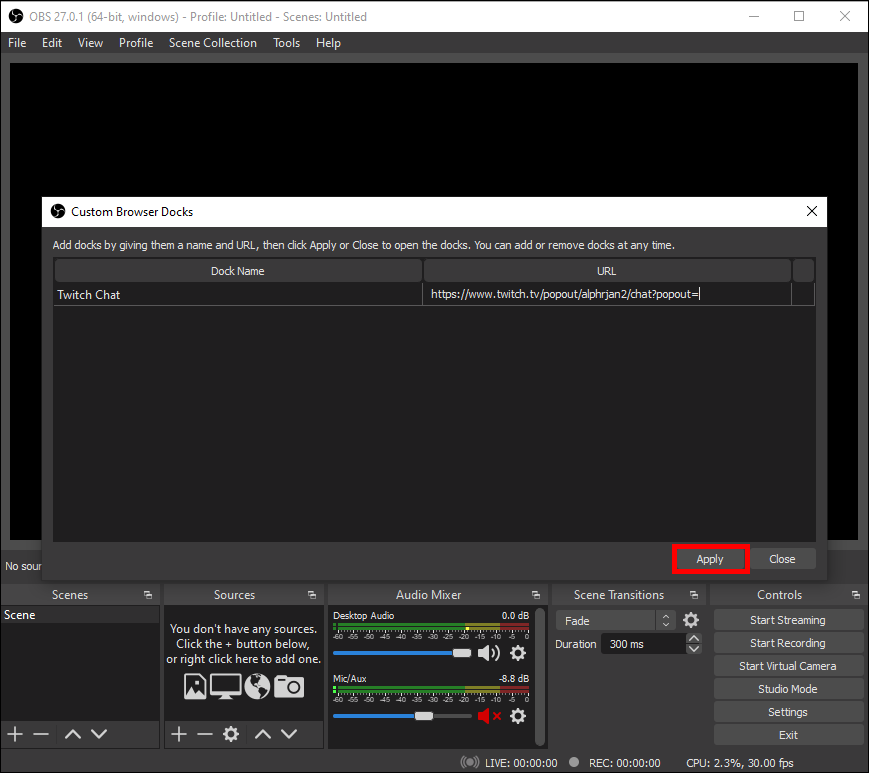
- Add a Custom Browser Dock: In OBS, go to View in the top menu bar, then hover over Docks, and select Custom Browser Docks…. A new window will appear.
- Configure the Dock: In the ‘Custom Browser Docks’ window:
- In the Dock Name field, enter a descriptive name like “Twitch Chat” or “My Stream Chat”.
- In the URL field, paste the Twitch chat URL you copied earlier.
- Apply and Arrange: Click Apply, then Close. Your Twitch chat will now appear as a dockable window within your OBS Studio interface. You can drag and drop this window to any preferred location within OBS, resize it, or even make it a floating window.
This method provides a convenient way to monitor your chat directly within OBS, allowing for seamless interaction with your viewers. Should you wish to remove the chat dock at any point, simply return to the ‘Custom Browser Docks’ menu and disable or delete the entry.
Read more: Top 7 OBS Plugins for Streaming You Need in 2025 to Boost Your Stream
How to Add Twitch Chat Overlay to OBS
Beyond a docked chat window, many streamers prefer to display their Twitch chat directly on their stream as an overlay. This allows your viewers to see the live conversation, making the stream feel more dynamic and interactive. The steps for adding a chat overlay are similar to docking the chat, with a few key differences:
- Obtain the Popout Chat URL: Follow steps 1-4 from the previous section (“How to Add Twitch Chat to OBS Studio”) to get the pop-out chat URL from Twitch.
- Launch OBS Studio: Open OBS Studio on your device.
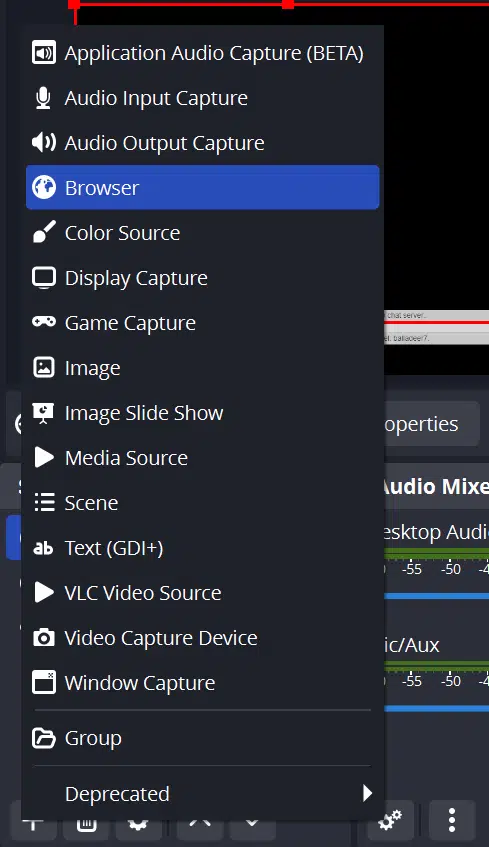
- Add a Browser Source: In the Sources section of OBS (usually at the bottom of the window), click the ‘+’ button to add a new source. Select Browser from the list.
- Create/Select Source: A pop-up window will appear. Choose Create new and give your chat overlay a descriptive name (e.g., “Twitch Chat Overlay”). Click OK.

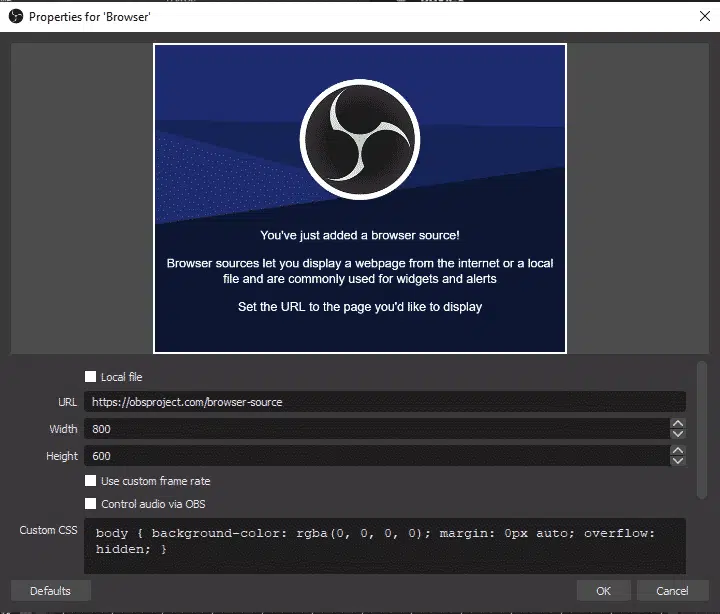
- Configure Browser Source: In the new properties window for your Browser Source:
- In the URL field, paste the Twitch chat URL you copied earlier.
- Set the Width and Height to your desired dimensions for the chat box on your stream. You can adjust these later directly on the canvas.
- Leave Custom CSS blank for now, unless you have specific styling in mind (we’ll cover transparency next).
- Ensure Shutdown source when not active and Refresh browser when scene becomes active are checked for optimal performance.
- Position and Resize: Click OK. Your chat overlay will now appear on your OBS canvas. You can drag it to your desired position and resize it using the red bounding box.
With the chat overlay active, your viewers can follow along with the conversation, creating a more immersive and connected streaming experience. Remember to test your overlay to ensure it appears correctly on your stream.
How to Add Transparent Twitch Chat to OBS
A transparent chat box can significantly enhance the visual appeal of your stream, allowing the chat to blend seamlessly with your game or content. Achieving this effect in OBS is straightforward and builds upon the previous method of adding a chat overlay. The key lies in applying a simple CSS modification:
- Follow Overlay Setup Steps: Begin by following all the steps outlined in the “How to Add Twitch Chat Overlay to OBS” section until you reach the Browser Source properties window (Step 5).
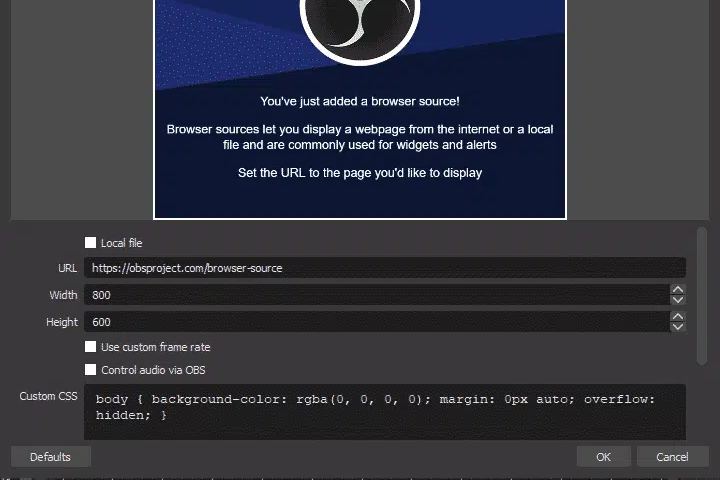
- Apply Custom CSS for Transparency: In the Browser Source properties window, locate the Custom CSS field. Paste the following CSS code into this box:
body { background-color: rgba(0, 0, 0, 0); margin: 0px auto; overflow: hidden; }This CSS code sets the background color of the chat box to fully transparent (rgba(0, 0, 0, 0)), while maintaining proper margins and overflow settings. - Finalize Settings: Click OK to apply the changes. Your Twitch chat overlay will now appear transparent on your OBS canvas, allowing your stream content to show through.
Experiment with the positioning and size of your transparent chat box to find what best suits your stream layout. This subtle customization can greatly improve the professional look and feel of your broadcast.
Conclusion
Integrating Twitch chat into your OBS Studio setup, whether as a docked window or a transparent overlay, is a crucial step in fostering a more interactive and engaging streaming environment. By following the methods outlined in this guide, updated for 2025, you can effortlessly monitor viewer conversations and display them on-screen, all while maintaining your focus on delivering quality content.
At Eklipse.gg, we understand the importance of seamless streaming and audience connection. Our tools and features are designed to help you grow your channel and streamline your workflow. Ready to take your stream to the next level? Explore how Eklipse Premium can further enhance your streaming experience with advanced editing tools, higher quality clips, and dedicated support. Happy streaming!
🎮 Play. Clip. Share.
You don’t need to be a streamer to create amazing gaming clips.
Let Eklipse AI auto-detect your best moments and turn them into epic highlights!
Limited free clips available. Don't miss out!
