How to add clips to Twitch from your phone
To add a clip to Twitch from your phone, open the Twitch mobile app, tap the stream you are watching, tap the clip icon (the small scissors or “Clip” button), drag the handles to set a 5 to 60 second window, then tap “Publish.” The clip is hosted on Twitch and gets a shareable link right away. That is the fast answer. The rest of this guide covers the parts Twitch does not explain: clipping your own VODs from mobile, why the app caps you at 60 seconds, and how to turn those raw clips into TikToks without ever opening a laptop.
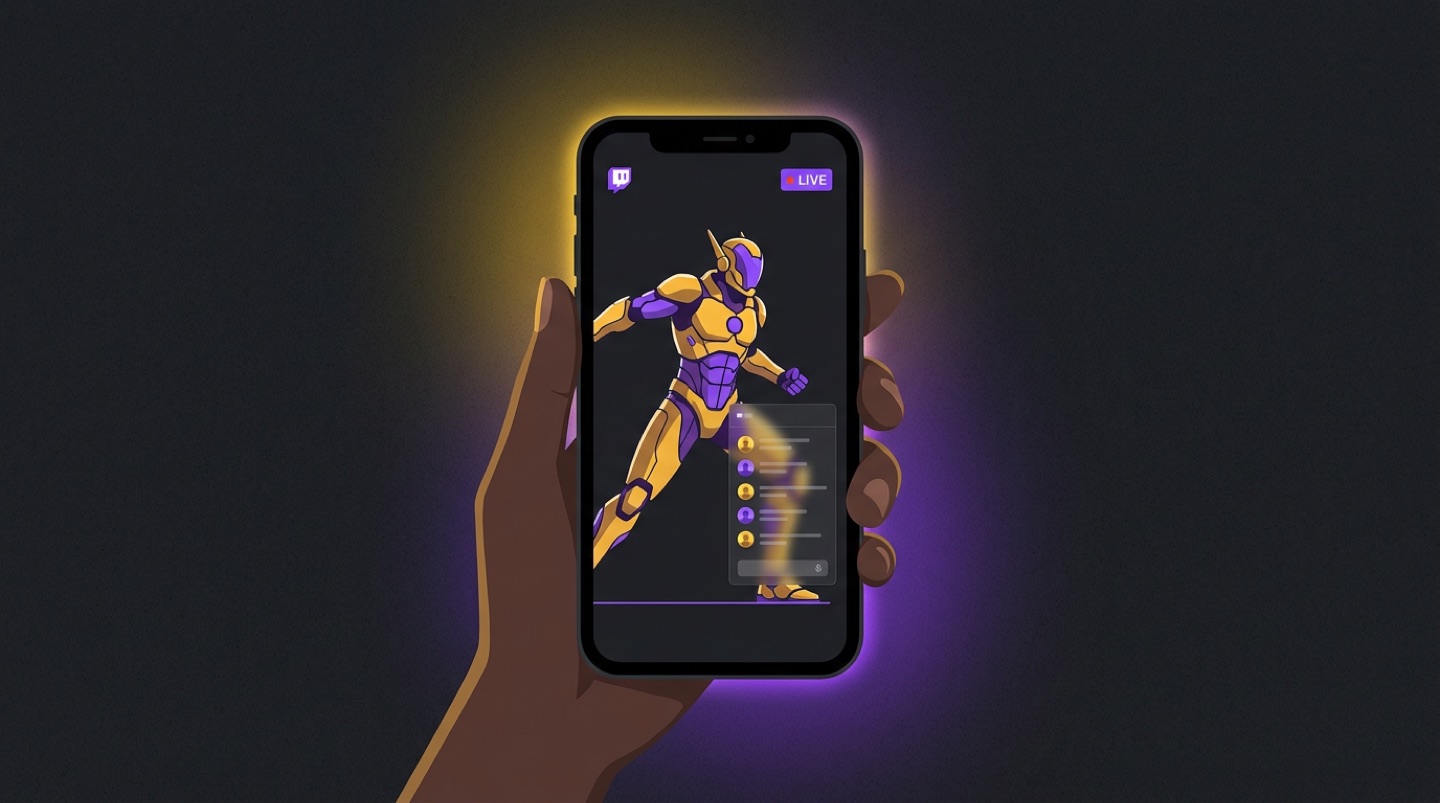
Most guides skip the next part. Twitch clips and the vertical clips that actually grow a channel are two different jobs. The Twitch app makes the first. It will not make the second. If you have ever clipped a clutch on your phone, opened TikTok, and realized the footage is sideways with a chat box covering half the kill, you already know the gap.
This guide closes it. You will learn the exact taps for clipping on Twitch mobile, how to clip from your own past broadcasts, and how to skip the manual grind entirely when you have a full VOD to work through.
> Key Takeaways
> – The Twitch mobile app clips live streams in 3 taps: tap the video, tap the clip icon, set the window, publish.
> – Twitch mobile clips are capped between 5 and 60 seconds and stay in landscape (16:9) format.
> – To clip your own VODs on a phone, use the Twitch Creator Dashboard in a mobile browser, not the app.
> – Twitch clips are not TikTok-ready, they are landscape and often show chat overlays, so they need reframing to 9:16.
> – Eklipse auto-detects highlights from a whole VOD and exports vertical clips, which replaces manual mobile clipping when you have hours of footage.
How to add clips to Twitch from phone (live streams)
Clipping a live Twitch stream from your phone takes three taps in the official Twitch mobile app. This works whether you are watching another streamer or your own live broadcast on a second device.
The exact process:
1. Open the Twitch app and tap into the live stream you want to clip.
2. Tap the video once so the playback controls appear over the stream.
3. Tap the clip icon, it looks like a small clapperboard or scissors, usually near the share button.
4. Drag the trim handles to set your clip window. Twitch allows anywhere from 5 to 60 seconds.
5. Add a title, then tap “Publish.”
Once you publish, Twitch generates a clip page with its own URL. You can copy that link straight from the app and drop it in Discord, X, or a group chat. The clip also appears under the streamer’s Clips tab.
One thing to know upfront: you can only clip content that is currently live or a VOD the channel has kept public. If a streamer has clips disabled, the clip icon will not appear. That is a channel setting, not a bug on your end.
💡 Pro tip: The clip captures the last several seconds before you tapped, not after. So if something wild happens, tap the clip button immediately, then trim it down. Waiting to “set up the shot” means you miss the moment.
When Marcus, a Warzone streamer with around 40 average viewers, switched to clipping on his phone during breaks, he stopped losing highlights to the “I’ll grab it later” trap. He would tap the clip button the second a squad wipe landed, then trim it between rounds. By the end of a session he had 6 or 7 Twitch clips ready, without touching his stream PC.
How to clip your own Twitch VODs from a phone
To clip your own past broadcasts from a phone, open the Twitch Creator Dashboard in your mobile browser, not the Twitch app. The app is built for viewing and live clipping; VOD clipping lives in the dashboard.
Follow these steps:
1. Open a mobile browser (Chrome, Safari) and go to `dashboard.twitch.tv`.
2. Tap the menu, then go to Content, then Video Producer.
3. Find the past broadcast you want to clip and tap to open it.
4. Scrub to the moment, then use the clip tool to set your 5 to 60 second window.
5. Publish the clip and copy the link.
This is the route for turning a 4-hour VOD into shareable moments after the fact. It works on a phone, but it is slow. Scrubbing through hours of footage on a small screen to find three good moments is exactly the post-stream grind that burns creators out.
Twitch VODs also expire. Standard broadcasts are stored for 14 days (60 days for Partners and Prime users). If you want to clip an old stream, you need to grab it before it disappears, which is a good reason not to leave clipping until “someday.”
Why Twitch caps clips at 60 seconds
Twitch limits mobile and web clips to 60 seconds because clips are designed as bite-sized shareables inside the Twitch ecosystem, not as standalone videos for other platforms. The cap is a product decision, not a technical one.
That matters for one reason: a 60-second landscape clip is not a finished TikTok. It is raw material. Which brings us to the real gap in every “how to clip on Twitch” guide.
The problem: Twitch clips are not TikTok-ready
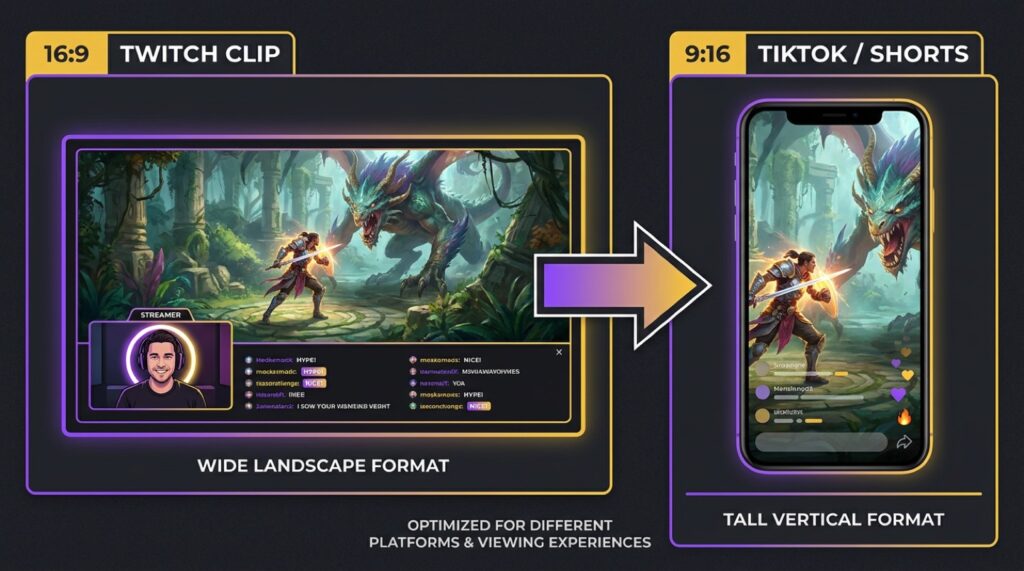
A clip made on the Twitch mobile app comes out in landscape (16:9) with the stream’s original layout, often including a chat box, alerts, or a facecam positioned for a widescreen viewer. TikTok, YouTube Shorts, and Reels want vertical (9:16). Post a raw Twitch clip to TikTok and it either sits in a tiny letterboxed strip or crops out the action.
So the honest workflow for most streamers is two steps, not one:
- Step 1: Clip the moment (Twitch app or dashboard).
- Step 2: Reframe it to vertical, move the facecam, and add captions before posting.
Step 2 is where phones usually fall apart. Manual vertical editing on a 6-inch screen, repositioning a facecam, keeping the kill feed in frame, syncing captions, is fiddly and slow. This is the exact friction that stops streamers from posting even when they have good clips sitting in their Twitch account.
Sarah, a Valorant streamer, described the loop clearly: she had 30-plus Twitch clips saved and posted maybe two of them, because “reframing each one on my phone took longer than the play itself.” The clips existed. The posts did not. That is the gap between clipping and growing.
Ready to skip the manual reframe? If you have a full VOD instead of a single moment, there is a faster path than clipping one highlight at a time.
The faster way: turn a VOD into vertical clips automatically
Instead of clipping moments one by one and reframing each on your phone, you can paste a VOD link and let AI find the highlights and format them vertically. This is what Eklipse is built for.
How the workflow changes:
- Manual mobile clipping: watch the VOD, find each moment, set the window, publish, then reframe each clip to 9:16 by hand. Repeat for every highlight.
- AI clip workflow: connect your Twitch account, and Eklipse scans the VOD, detects kills, clutches, and hype moments, and exports them already cut to vertical format with captions.
The AI reads a full stream and returns multiple timestamped clips, so a 5-hour VOD becomes a batch of ready-to-post shorts without you scrubbing the footage. Because Eklipse processes in the cloud, this runs the same whether you are on a phone or a PC, you can kick off a job from the Eklipse mobile app and grab the finished clips later.
A fair limitation to name: AI highlight detection is strongest on games with clear action events, FPS and battle royale titles like Valorant, Warzone, and Apex, where kills and wins are easy to detect. It is less precise on slow strategy games and Just Chatting streams, where “the best moment” is a judgment call the model cannot always make. For those, manual clipping still has a place.
When to clip manually vs use AI
Use the decision that matches your footage:
- Clip manually on the Twitch app when you want one specific live moment right now and you are going to share the Twitch link as-is (Discord, X, chat).
- Use AI clipping when you have a full VOD and want several vertical clips for TikTok, Shorts, and Reels without scrubbing hours of video on your phone.
Most streamers end up doing both: quick live clips for the community during the stream, and a VOD-to-vertical batch afterward for social platforms.
Sharing and posting your Twitch clips from mobile
Once you have a clip, sharing it from your phone depends on where it is going.
Sharing inside the Twitch ecosystem is simple. Copy the clip link from the app and paste it anywhere. Anyone who clicks it watches the clip on Twitch, no download needed.
Posting to TikTok, Shorts, or Reels needs a download and usually a reframe. From a Twitch clip page you can download the raw file, but it comes down in landscape. If you used Eklipse Studio or the AI highlights flow, the export is already vertical and captioned, so you can post it straight to TikTok from your phone.
Volume is what moves the needle here. The creators hitting TikTok Creativity Program payouts are posting several clips a day, not one a week. That pace is only realistic if the reframe step is automated, clipping and hand-editing every video on a phone does not scale to a daily posting schedule.
Does this work for Kick streams too?
Yes. If you stream on Kick instead of (or alongside) Twitch, the same two-step reality applies: clip the moment, then reframe for vertical. Kick’s mobile clipping is newer and more limited than Twitch’s, so the VOD-to-vertical route matters even more. Eklipse supports Kick VOD clipping the same way it handles Twitch, so a Kick streamer on a phone gets the same batch of vertical clips from a single VOD link.
Frequently asked questions
Can you make Twitch clips from your phone?
Yes. The Twitch mobile app lets you clip any live stream in three taps: tap the video, tap the clip icon, then set a 5 to 60 second window and publish. For your own past VODs, use the Twitch Creator Dashboard in a mobile browser instead of the app.
How do I clip my own stream on the Twitch mobile app?
You can clip your own stream live the same way you clip anyone else’s, tap the clip icon while watching your broadcast on the app. To clip a past broadcast, open `dashboard.twitch.tv` in a mobile browser, go to Content, then Video Producer, and use the clip tool on the VOD.
Why is my Twitch clip sideways on TikTok?
Twitch clips are recorded in landscape (16:9), and TikTok wants vertical (9:16). A raw Twitch clip posted to TikTok appears letterboxed or crops out the action. You need to reframe it to vertical first, which tools like Eklipse do automatically.
How long can a Twitch clip be from a phone?
Twitch clips are capped between 5 and 60 seconds on both mobile and web. The limit is a Twitch product decision, so you cannot extend a single clip past 60 seconds, you would need to make multiple clips.
Can I turn a whole Twitch VOD into clips on my phone?
Yes, but not efficiently by hand. Scrubbing a multi-hour VOD on a phone to find moments is slow. Pasting the VOD link into an AI clip tool like Eklipse detects the highlights and exports them as vertical clips, which runs in the cloud and works from mobile.
Do you need a paid tool to clip on Twitch from your phone?
No. Basic clipping in the Twitch mobile app is free and built in. A tool like Eklipse is for the next step, automatically finding highlights across a full VOD and formatting them vertically for TikTok and Shorts, which the Twitch app does not do.
Conclusion
Adding clips to Twitch from your phone is genuinely a three-tap process in the Twitch mobile app: tap the video, tap the clip icon, set your window, and publish. For your own past broadcasts, the Twitch Creator Dashboard in a mobile browser handles VOD clipping. Both are free and built into Twitch.
The catch is what comes after. Twitch clips are landscape, capped at 60 seconds, and not ready for TikTok or Shorts without a reframe, and reframing each clip by hand on a phone is the exact friction that leaves good highlights unposted. When you have a full VOD to work through, letting AI detect the moments and export them vertically turns hours of scrubbing into a batch of ready-to-post clips.
Clip the live moments as they happen, then let the VOD do the heavy lifting for social. Start clipping free with Eklipse and turn your next stream into a week of vertical clips.
🎮 Play. Clip. Share.
You don’t need to be a streamer to create amazing gaming clips.
Let Eklipse AI auto-detect your best moments and turn them into epic highlights!
Limited free clips available. Don't miss out!