
Level Up Your Marvel Rivals Gameplay
Capture your epic wins, clutch moments, and even hilarious fails with Eklipse. Easily create and share highlight reels with your friends—even if you're not streaming!
Learn MoreIf you’re considering delving into VTubing, Discord Reactive Images may become a requirement down the line. These reactive images enable you to manifest a dynamic digital PNG character or avatar during your Discord voice calls. As you engage or stream on Discord calls, this image moves in response to your voice or reactions.
The Discord reactive images PNG feature offers an excellent option for moments when you prefer not to appear on camera but still desire to interact with your audience. For beginners, the process of personalizing your 2D, 3D, or PNG model and integrating them into your Discord calls and collaborations might be unfamiliar.
Don’t worry, though, as this article presents a comprehensive guide on utilizing Discord reactive images. If embodying a fictional character is your goal, then ensuring you grasp this process is essential. Let’s dive right into it!

Necessary Prerequisites for Working with Discord Reactive Images
Being a PNGtuber also has some requirements. Worry not, since it’s pretty minimal. Here are some of the things you need to set up before working with Discord Reactive Images:
- At least one and no more than two PNG images to serve as your Discord reactive image.
- A microphone to record your voice with a noise reduction feature to eliminate background noise.
- An OBS to add a browser source for live streaming and video recording.
How to Add Discord Reactive Images with OBS StreamKit Overlay
Thanks to OBS StreamKit, adding PNG to your Discord is easy despite having some steps to go. Well, let’s follow the instructions below to start using the Discord reactive images OBS:
- To begin with, head to the Discord StreamKit site and select Install for OBS or Install for XSplit (depending on your streaming software).
- If you have signed up for Discord, it will display the Widgets page. Otherwise, it’ll prompt you to log in.
- After that, navigate to the Voice Widget option.
- Then, select your server name, as well as your voice channel from the drop-down menu.
- In case you want to hide your username while on Discord calls, enable the Hide Names option.

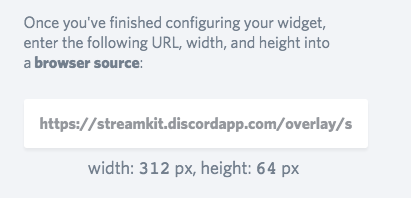
- Next up, copy the browser code from the bottom-right corner under the Voice Widget.
- Now open the OBS software and hit the plus ‘+’ button from the Sources menu to add the source.
- Select Browser and OK. Then, paste the copied browser code and hit OK again.
- Open the Discord app and create a private text channel to save your PNG images.
- In addition, open the CSS Generator link in a browser.
- Go back to Discord and right-click your username and hit Copy ID.
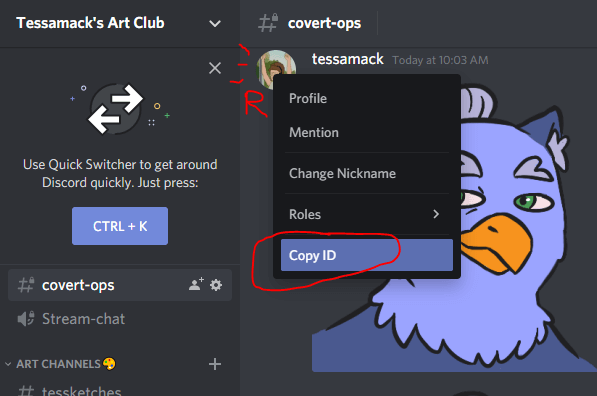
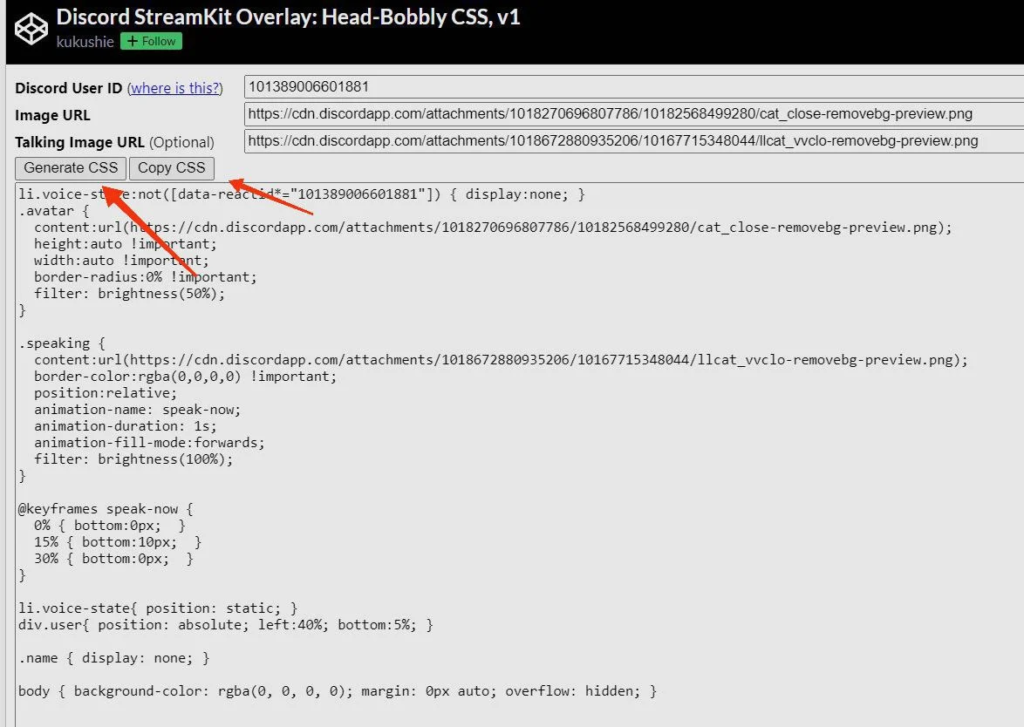
- Paste the ID next to the Discord User ID in the CSS generator link.
- Now open the Discord channel where your reactive images are stored and right-click on each image.
- Hit Copy ID and paste it next to the Image URL section in the CodePen window.
- Verify the image links and hit Generate CSS to generate your code. You can then modify the code.
- Once it’s done, hit the Copy CSS button.
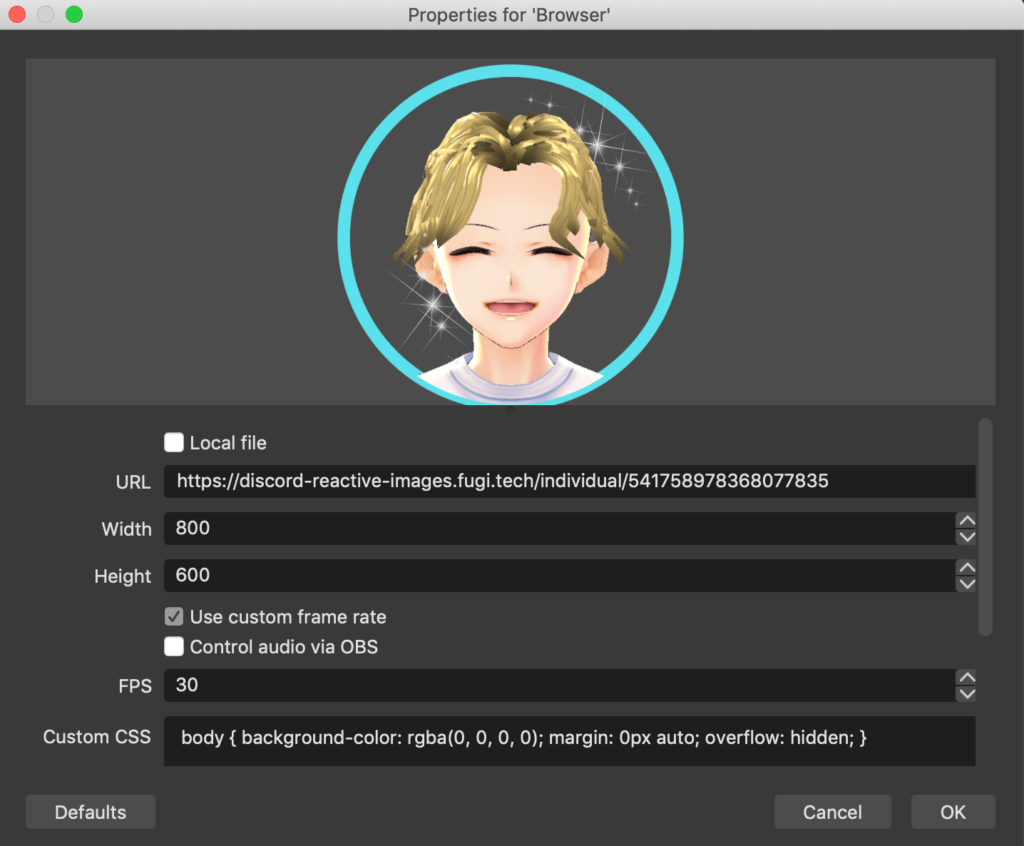
- Return to OBS and right-click on the browser source you made with StreamKit.
- Hit Properties, find Custom CSS, and paste the code you just copied.
- Finally, hit OK.
- Now that your reactive image is ready to customize, you can go to Controls in OBS and hit Start Virtual Camera to connect the Discord.
How to Add Discord Reactive Images Using Fugi Reactive Images
Looking for simpler steps to add the PNG Vtuber images? Try Fugi Reactive Images. It is claimed as the easiest and the most popular tool to add reactive images to your Discord call. Here’s how to use Discord reactive images for friends:
- Start off by downloading and installing Discord and OBS Studio on your device.
- Open Discord and hit the Settings icon next to your username.
- Then, scroll down and find the Advanced option, and toggle on Developer Mode under Advanced.
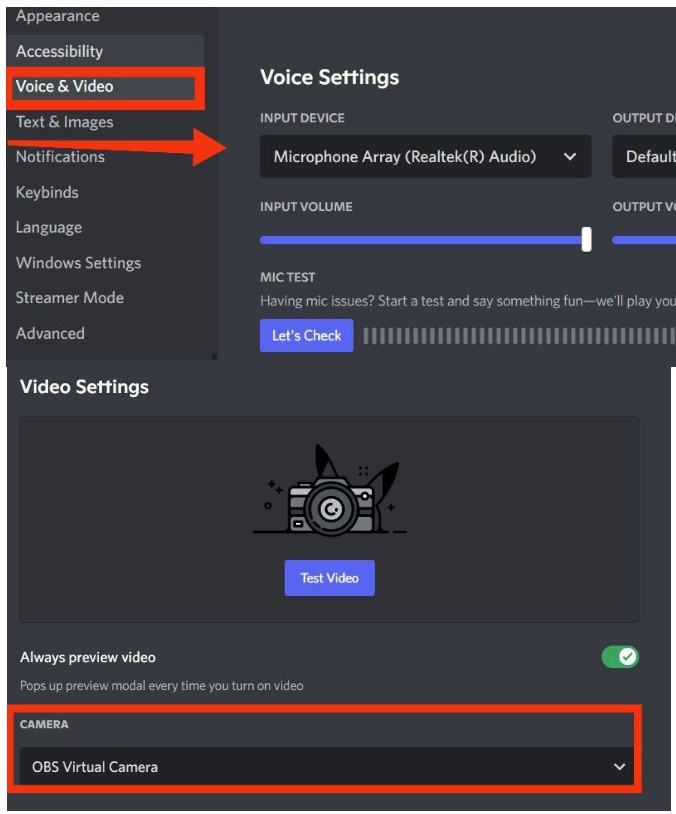
- Navigate to the Select Voice & Video option and select Voice settings.
- Afterward, choose your microphone and make sure it works properly.
- Next up, click on the Camera section on the Video Settings menu, and select OBS Virtual Camera.
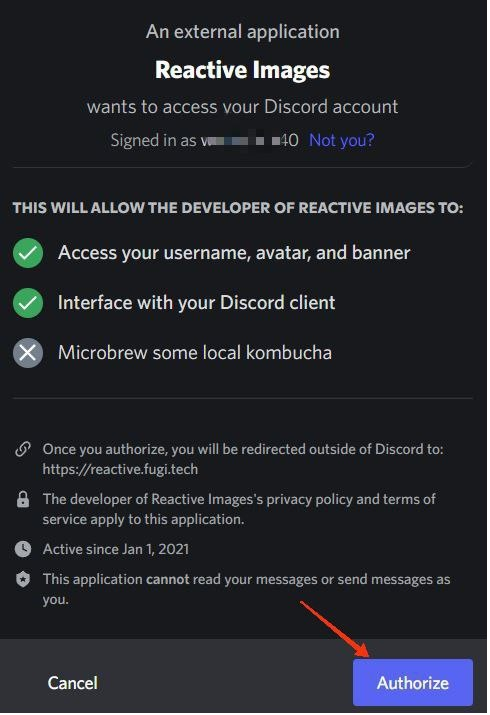
- Now, head over to Fugi’s Reactive site and log in, sign in to Discord again, and authorize the Discord reactive image maker app.
- Make sure you have two PNGs ready; one with a closed mouth and one with an open mouth.
- Once they are ready, navigate to Set Inactive Image and hit the camera icon.
- Select the closed mouth PNG and repeat the process under Set Speaking Image. When finished, hit Save.
- Make some changes to your PNGs and click Apply once you’ve done.
- Navigate to Links, and hit the Copy icon to copy the URL link.
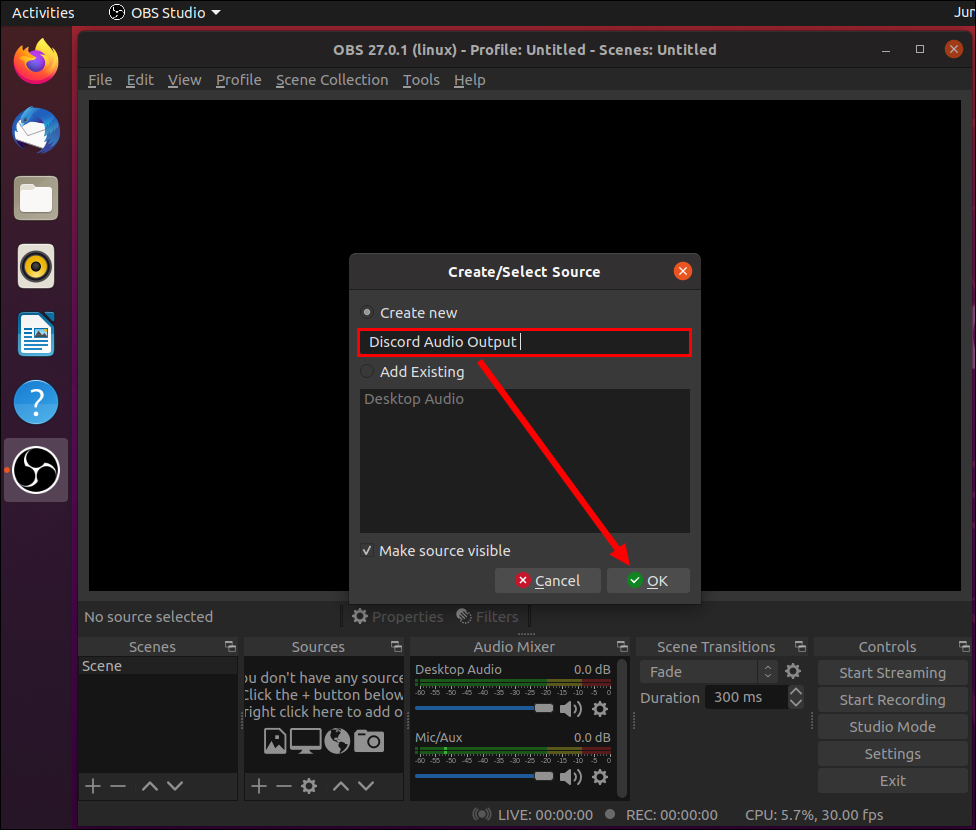
- Now, open the OBS app and click on the plus ‘+’ icon on the Sources tab.
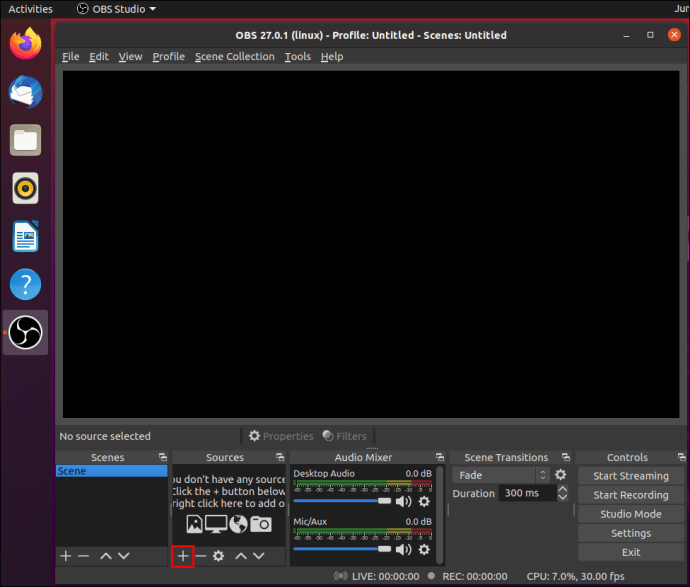
- Select Browser > Create New > name it > hit OK.
- Paste the copied link next to the URL box under the Properties window and hit OK.
- Adjust the width or the height of your reactive image.
- Finally, to start the Discord stream, hop on to the Controls option in OBS and hit Start Virtual Camera.
- Return to the Discord app > connect to a voice channel > hit Video > Turn On Camera.
Conclusion
There you have it, a guide to adding Discord Reactive Images. Although it takes you a little long road, using the Discord reactive images Streamlabs and OBS isn’t as hard as it looks. Now you can start VTubing with your hilarious 3D character. Even without showing off your real face, you can still make your viewers busy with your existence.
Additionally, you can engage with your viewers using Discord chat as well. In case you want to liven up the chat, using stickers is always a good idea. Learn about it here: How To Make Stickers on Discord and Use Them.
Elevate your streaming game with Eklipse, the ultimate AI video editing tool designed for streamers and content creators. Save a whopping 90% of your editing time and transform your streams into viral clips with just one click.
Still hesitating? Try Eklipse for free and experience the impressive power of AI editing. Don’t miss out—sign up now and watch your content go viral!
Maximize your Black Ops 6 rewards—Create highlights from your best gameplay with with Eklipse
Eklipse help streamer improve their social media presence with AI highlights that clip your Twitch / Kick streams automatically & converts them to TikTok / Reels / Shorts
🎮 Play. Clip. Share.
You don’t need to be a streamer to create amazing gaming clips.
Let Eklipse AI auto-detect your best moments and turn them into epic highlights!
Limited free clips available. Don't miss out!
