Level Up Your Marvel Rivals Gameplay
Capture your epic wins, clutch moments, and even hilarious fails with Eklipse. Easily create and share highlight reels with your friends—even if you're not streaming!
Learn MoreStreaming or going live from your computer to Twitch or YouTube is nothing new. Many people have already known about this method. But do you know how to stream computer to Instagram with OBS? Instagram doesn’t really feature content like Twitch or YouTube, so this will be new.
Instagram used to have IGTV long ago, but now they have discontinued the feature. Means that you can’t literally go live on Instagram as well as you can do on other streaming platforms.
However, this article will give you a tutorial on how you can send your desktop to Instagram using one of the best streaming software, OBS studio. Let’s just begin the article.
Preparation Stream To Instagram From PC With OBS
Before we talk about how you can do Instagram live from your PC, it would be better if you know the things you need to prepare. They are:
- A PC, either with Mac OS, or Windows
- The OBS software
- Instagram app
- Yellow duck Instagram as the software to connect your PC and the Instagram
- A webcam
- A mic
If you’re done preparing the stuff, now we can move to the tutorial. Get ready and let’s just dive in!
How To Stream Computer To Instagram From OBS

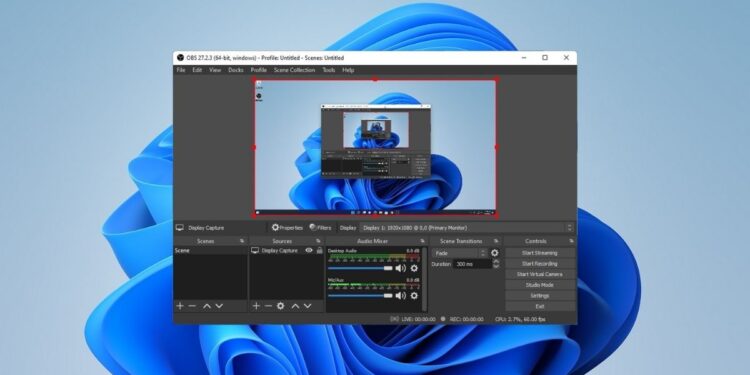
Before we start the step by step, make sure that you have launched the OBS software on your PC. Other than that, have the Instagram app on your hands as well. Don’t forget about the Yellow Duck software which is also needed to install on your PC. Now, we can start the tutorial.
- Open the OBS software and set it up from Instagram by heading to Profile > New
- Named it Instagram
- Then, go to Settings > click on the Video option on the settings menu
- Set the video to be full HD and change the aspect ratio to be 1080 x 1920
- Then, press OK
- Make this worksheet as the Scene Collection
- After that, click the ‘+’ button under the Scene box and choose Display Capture
- Give it a name as “Desktop” and click OK

- To connect the webcam, do the same thing but instead of clicking Display Capture, choose Video Capture Device
- Name it and select the device
- Connect with the audio source by doing the same step and choose Audio Input Capture
- Next, setting up the layout
Now, you’re done setting up the OBS before you use it to show your desktop capture to Instagram. But the tutorial won’t stop there, fellas. We’re now going to the next step.
Setting Up The Yellow Duck Instagram Software
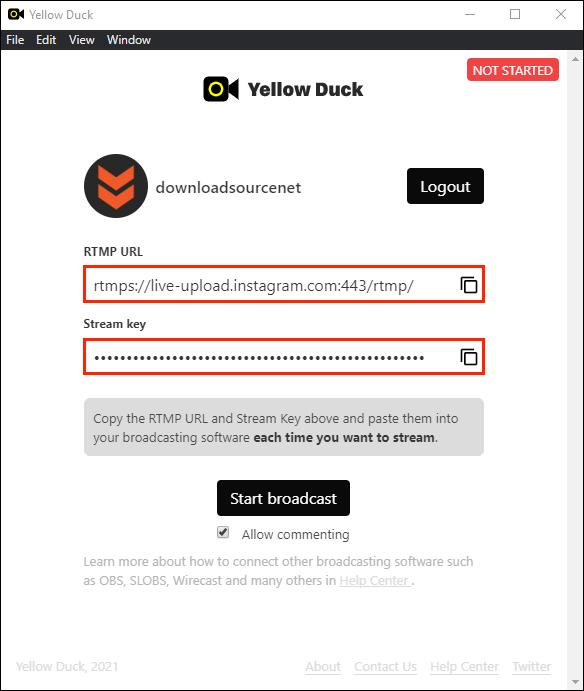
Make sure you have this software applied to your computer. If it’s done, log in to Instagram from the Yellow Duck. Then, follow the next directions below:
- Login with your Instagram account
- Check the Allow commenting and Save the video to the story box

- Once you logged in, you’ll be presented with the RTMP URL and the stream key

- After that, copy the RTMP URL
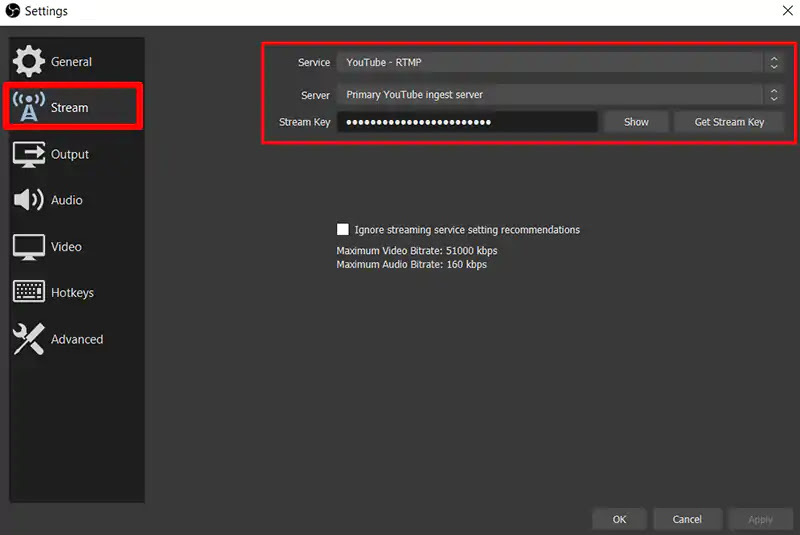
- Head back to OBS Studio and go to Settings
- Then, click Stream and change the Service to Custom
- Paste the RTMP URL on the server box under the service option
- Go back to Yellow Duck to get the stream key and paste it into the OBS stream key box

- Finally, press the Start Streaming button on OBS
After you have followed all the instructions above, now you can go to Instagram and check whether you have been going live or not. If you can find yourself streaming on your Instagram, meaning that you have success to run the tutorial very well.
Going to finish the streaming session? You can go to OBS Studio and click Stop Streaming. Then, go to the Yellow Duck and click Save & Finish.

Conclusion
It seems like you need to do dozens of steps to make you able to start streaming from desktop to Instagram. But it’s actually very easy and clear to do. Now, after you have known how to stream computer on Instagram with OBS, it’s your turn to do it.
🎮 Play. Clip. Share.
You don’t need to be a streamer to create amazing gaming clips.
Let Eklipse AI auto-detect your best moments and turn them into epic highlights!
Limited free clips available. Don't miss out!
