Ranked Play in Call of Duty: Black Ops 6 (BO6) launched this week, as part of the Season 1 update. This highly anticipated feature has generated excitement among competitive gamers.
Although some fans were disappointed by the delay, which pushed this feature back from its October 25, 2024 release date, Activision and Treyarch chose to prioritize a better experience.
In this article, we’ll explore what Ranked Play in BO6 has to offer, the reasons behind the delay, and how players can prepare for this new competitive mode.
Activision has announced that Black Ops 6 Ranked Play will go live at 12 p.m. EST on Thursday, November 21. Check the timing for your local time zone.
9 a.m. PST for the West Coast of North America
12 p.m. EST for the East Coast of North America
5 p.m. GMT for the U.K.
6 p.m. CET for west mainland Europe
2 a.m. JST on Nov. 15 in Japan
What Is Ranked Play in Black Ops 6?
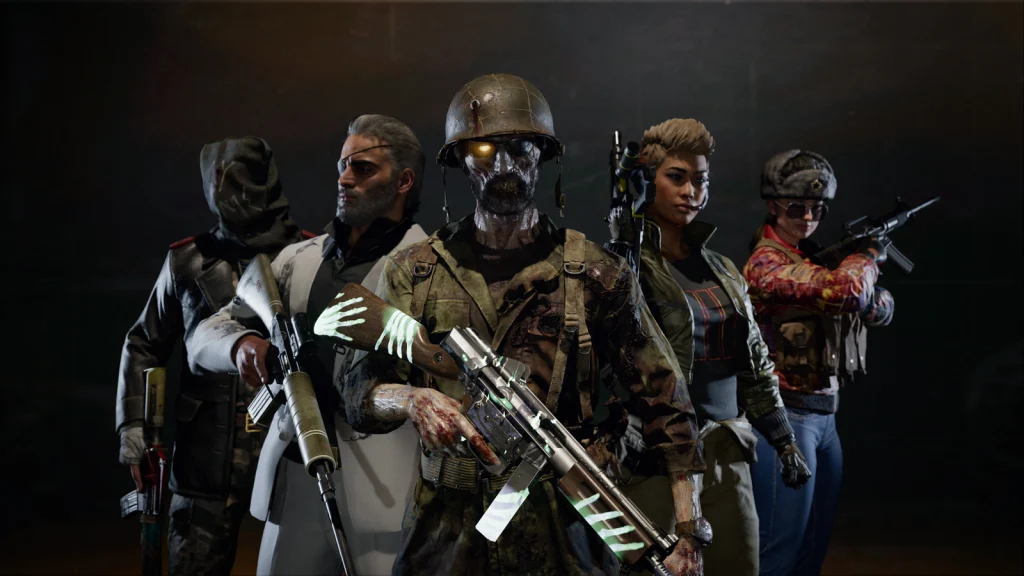
Ranked Play offers a structured and skill-based multiplayer mode where players compete to rise through eight competitive ranks:
Bronze
Silver
Gold
Platinum
Diamond
Crimson
Iridescent
Top 250
Skill Rating (SR) forms the backbone of Ranked Play, determining players’ ranks based on match performance. Wins increase SR, while losses lead to deductions. To keep the experience engaging, BO6 introduces loss forgiveness, which waives SR penalties for the first daily loss.
BO6’s Ranked Play follows Call of Duty League (CDL) rules and regulations, making it a competitive haven for both casual enthusiasts and professional players. This includes strict restrictions on weapon loadouts, maps, and modes to maintain balance.
What’s New in BO6 Ranked Play?
BO6 is shaking up the formula with several exciting features:
Map & Mode Veto System: Players gain control over the competition with this feature, allowing teams to veto one map and mode combination from a randomized pool. This strategic element empowers players to avoid unfavorable settings.
Team Forfeit Option: If a team unanimously agrees, they can forfeit a match without severe penalties. This is particularly useful in one-sided matches or when a team member disconnects.
Unified Loadouts: Ranked Play loadouts are now transferable across BO6 modes, including Multiplayer, Zombies, and Warzone. This provides players with consistent customization and flexibility.
Full-Party Matchmaking: Parties of up to four players can join Ranked Play together, regardless of individual ranks. Matchmaking will prioritize balance based on the highest-ranked player in the group.
Unlocking Ranked Play
To access Ranked Play, players must achieve 50 Multiplayer wins. Unlike previous Call of Duty titles, this replaces level-based requirements, ensuring participants have ample in-game experience before entering the competitive scene. Wins from public matches before Season 1’s launch also count towards this goal, which means players grinding since release might already qualify.
Rewards and Seasonal Progression
Treyarch has implemented a robust rewards system to incentivize Ranked Play participation:
Rank Rewards: Players earn exclusive skins, emblems, and weapon charms upon reaching new ranks.
Seasonal Challenges: Completing challenges tied to Ranked Play can unlock additional cosmetics, ensuring fresh incentives every season.
Top 250 Exclusive Rewards: Players achieving the prestigious Top 250 rank will receive unique skins unavailable to others.
This seasonal model encourages players to stay engaged throughout the year. Each season resets ranks, offering a fresh opportunity for all players to compete for glory.
Why Is Ranked Play Not Available at Launch?
Like many previous Call of Duty titles, Ranked Play in BO6 wasn’t released on the game’s launch day (October 25, 2024). Developers at Treyarch explained that this delay allows them to refine the competitive experience. The extra time helps them ensure proper balancing, align rules with the Call of Duty League, and avoid early technical hiccups
Final Thoughts
The countdown to November 21, 2024, has started. BO6 Ranked Play promises rewards and a chance to reach the Top 250. Now is the time to refine your skills, adjust your loadouts, and assemble your team. Competitive gaming in Call of Duty: Black Ops 6 is about to reach a whole new level!
The best quickscope class in BO6 is essential for players who want to dominate matches with precise and lightning-fast sniper shots. Quickscoping, a skillful technique requiring swift aim and firing, demands the right sniper rifle, attachments, and perks to maximize efficiency.
This guide will detail the best sniper rifles, loadouts, and strategies to master quickscoping in Call of Duty: Black Ops 6.
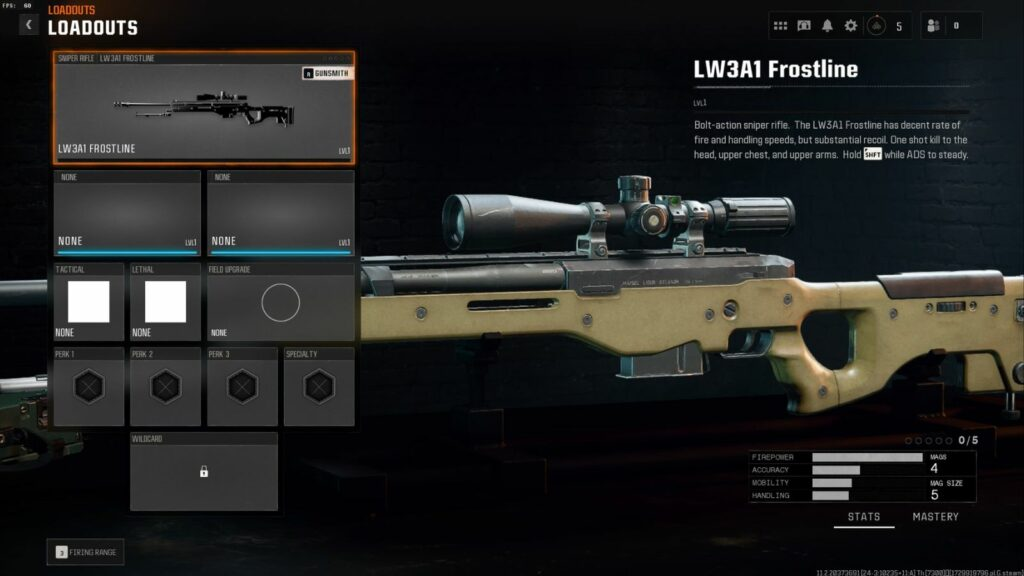
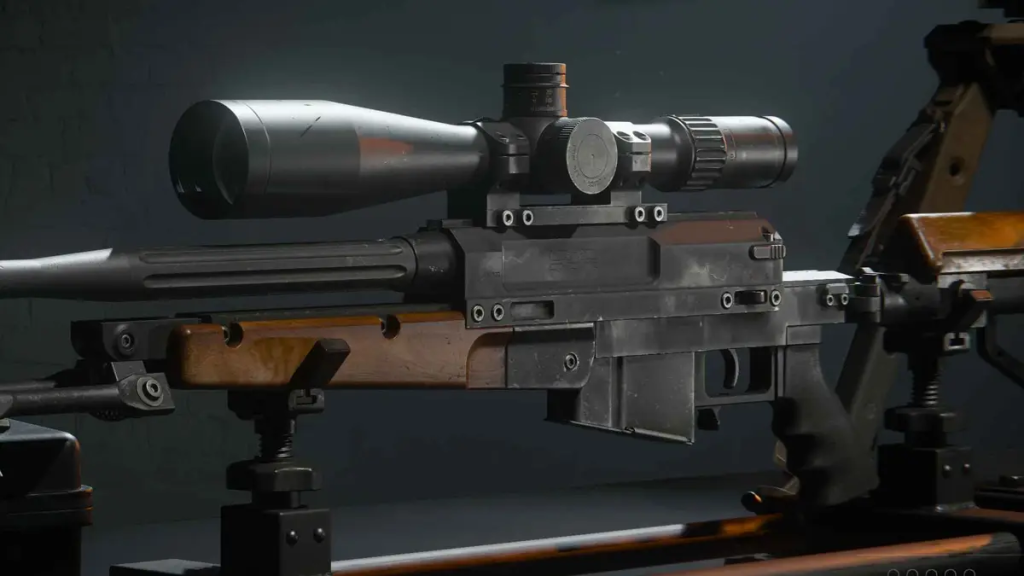
The LW3A1 Frostline is widely regarded as the go-to sniper rifle for quickscoping in BO6. Its bolt-action design ensures high damage output, delivering one-shot kills to the upper body with precision. What sets the LW3A1 apart is its exceptional ADS (aim down sight) speed, which is crucial for executing quickscopes effectively.
Players using this weapon will find it highly responsive in fast-paced scenarios, making it ideal for close-to-mid-range encounters. The lightweight design and manageable recoil allow for fluid gameplay, enabling snipers to quickly eliminate targets and reposition.
LR 7.62
Source: Eurogamer
The LR 7.62 offers immense stopping power, with consistent one-shot kills across a wider damage profile. However, its slower ADS speed and heavier handling make it less agile than the LW3A1. While not as favored for quickscoping, it’s a strong choice for players who prioritize damage over speed and can adjust to its deliberate pacing.
The LR 7.62 is particularly effective in maps with longer sightlines, where precision and power take precedence over rapid engagement.
Creating the best quickscope class in BO6 involves focusing on attachments that enhance ADS speed, accuracy, and control. Below are the recommended attachments and their benefits:
Recommended Attachments
Attachment Type
Recommended Attachment
Purpose
Muzzle
Muzzle Brake
Reduces recoil for better accuracy.
Barrel
Short Barrel or Reinforced Barrel
Enhances ADS speed and bullet velocity.
Stock
Heavy Stock
Provides flinch resistance under fire.
Comb
Quickdraw Riser
Drastically improves ADS speed.
Laser
Target Laser
Reduces aiming sway for precise shots.
Fire Mod
Rapid Fire
Speeds up rechambering for quicker follow-ups.
This setup maximizes your ability to react and engage targets swiftly, making it perfect for high-pressure situations. The Quickdraw Riser and Short Barrel are particularly critical for reducing ADS time, ensuring you can scope and fire faster than your opponents.
Perks
Pair your loadout with these perks for an edge in battle:
Perk 1: Ninja – Stay silent and move undetected by enemies.
Perk 2: Tracker – Follow enemy footprints to anticipate movements.
Perk 3: Cold-Blooded – Avoid detection from enemy scorestreaks.
Wildcard: Gunfighter – Equip more attachments for added versatility.
This combination supports a stealthy, fast-paced playstyle while providing situational awareness and enhanced survivability.
Mastering quickscoping in Call of Duty: Black Ops 6 requires more than just the right loadout—it’s about implementing the right strategies to outmaneuver opponents and land precise shots. Here are some essential tips to help you excel at quickscoping and dominate the battlefield.
Perfect Your Timing: Quickscoping is all about precision and speed. Practice firing immediately after scoping in to minimize the time between aiming and shooting.
Map Awareness: Learn the layouts of popular maps and position yourself strategically. Use high ground and chokepoints to your advantage.
Utilize Cover: Stay behind cover to reduce exposure and create opportunities for controlled engagements.
Play Aggressively: Quickscoping thrives on fast, calculated movements. Don’t hesitate to push objectives or disrupt enemy lines.
Final Thoughts
The best quickscope class in BO6 combines the LW3A1 Frostline with optimized attachments and perks to deliver unmatched speed and precision. By focusing on enhancing ADS time and mastering key strategies, players can dominate the battlefield with expert-level sniping.
Whether you’re a seasoned sniper or just starting, this loadout will elevate your gameplay and help you secure more satisfying victories in Call of Duty: Black Ops 6.
Maximize your Black Ops 6 rewards—Create highlights from your best gameplay with with Eklipse
Eklipse help streamer improve their social media presence with AI highlights that clip your Twitch / Kick streams automatically & converts them to TikTok / Reels / Shorts
In the competitive landscape of YouTube Shorts, capturing and maintaining a viewer’s attention can be the difference between success and obscurity. One of the most important metrics that directly impacts your Shorts’ performance is Average View Duration (AVD).
AVD measures how long viewers watch your video on average before they click away. In this article, see why AVD (Average View Duration) is Important for YouTube Shorts, how it affects your content strategy, and provide actionable tips to help you increase AVD and boost your channel’s growth.
Before we can optimize AVD, it’s essential to understand what this metric is and why it matters. AVD measures the average time viewers spend watching your video. This data is crucial because YouTube’s algorithm favors videos that keep users engaged for longer periods, pushing your content to a broader audience.
For YouTube Shorts, where the format is typically under 60 seconds, AVD becomes even more important. It directly correlates to video completion rates. The more people watch your Shorts in full, the more likely it is that YouTube will promote your content to other viewers. High AVD signals to the algorithm that your video is engaging and worth recommending to a wider audience.
In short, why AVD (Average View Duration) is Important for YouTube Shorts lies in its ability to drive higher visibility, increased engagement, and ultimately more views for your Shorts. If your AVD is high, it means viewers are sticking around to the end, showing the algorithm that your video is worth watching.
The Content Connection: How Your Creative Choices Impact AVD
Now that we understand why AVD is important for YouTube Shorts, let’s look at how your content choices influence this critical metric. From the first few seconds to the closing frame, every part of your video plays a role in keeping viewers engaged.
Hooking Viewers From the Start
The first few seconds of your YouTube Shorts are crucial. Viewers scroll quickly, and if you don’t grab their attention immediately, they’ll move on to the next video. Start with something that sparks curiosity or delivers instant value. Whether it’s a compelling visual, a dramatic question, or a surprising statement, a strong hook will ensure viewers stick around long enough to get to the next part of your video.
Real-World Tip: Think about trending topics or questions that resonate with your audience. A question like “Did you know you can double your views with this trick?” can immediately spark curiosity and encourage people to watch until the end.
Pacing and Structure
Maintaining a dynamic pace is another key factor in increasing AVD on YouTube Shorts. You only have a limited amount of time to keep viewers’ attention, so every second counts. Avoid slow starts or drawn-out introductions. Keep the energy high and the content moving. Effective pacing can make the difference between a viewer sticking around or scrolling away.
How to Do It: Use a mix of fast cuts, quick edits, and a clear structure to guide the viewer through your video. Think of it like a mini-story that unfolds quickly, with each moment building toward the next.
Storytelling and Narrative
Even in short-form content like YouTube Shorts, storytelling remains powerful. People are drawn to stories, and creating a mini-narrative in your Shorts will make your content more engaging. Whether you’re telling a joke, sharing a tip, or revealing a transformation, crafting a compelling beginning, middle, and end encourages viewers to stay until the last frame.
Example: A transformation video (like “watch me turn this $1 thrift store shirt into a fashion statement”) can keep viewers engaged as they anticipate the final result.
Visual Storytelling and Editing Techniques
Effective visual storytelling and editing techniques are crucial for keeping your audience hooked. Use dynamic visuals, engaging transitions, and text overlays to highlight key points and add visual interest. Quick cuts and seamless transitions can create a sense of motion that keeps the video feeling fresh and engaging.
Pro Tip: Experiment with different editing styles such as split screens or fast cuts to create a visually stimulating experience that holds viewer attention.
Audio Engagement: Music and Sound Effects
The right audio can significantly enhance engagement levels in your YouTube Shorts. Using trending audio or sound effects can capture the audience’s attention, making them feel more connected to your video. Additionally, clear narration and background music can help set the mood and keep viewers immersed in the content.
Tip: Use trending music or sound effects from popular YouTube Shorts to make your video stand out. YouTube often promotes Shorts with trending audio, increasing your chances of discovery.
Call to Actions and Interactive Elements
Don’t hesitate to ask for engagement! Incorporating interactive elements like questions or polls can encourage viewers to watch until the end and interact with your content. For example, asking “What do you think will happen next?” or “Which outfit is your favorite?” encourages viewer engagement.
Pro Tip: Ensure CTAs are integrated naturally into your content rather than just tacked on at the end. Encourage viewers to engage in ways that feel organic within the story.
Analyzing Your Shorts’ AVD
Once you’ve uploaded your YouTube Shorts, use YouTube Analytics to track performance metrics like AVD. Look for drop-off points on retention graphs; if viewers leave after just a few seconds or halfway through, it may indicate issues with hooks or pacing.
Actionable Tip: Track your AVD over time and compare successful videos with those that underperformed to identify patterns. If videos with higher pacing consistently perform better, apply those strategies in future content.
Content Planning for AVD Optimization
To optimize AVD effectively for YouTube Shorts, thorough content planning is essential before filming begins. Brainstorm engaging ideas and structure content accordingly using storyboarding or scripting techniques.
Planning Tips:
Focus on impactful stories within short timeframes.
Develop scripts with dynamic pacing including hooks and CTAs.
Continuously test different approaches based on analytics feedback.
Conclusion
Why AVD (Average View Duration) is important for YouTube Shorts cannot be overstated. It is essential for growing your channel successfully. By focusing on content that hooks viewers from start to finish while maintaining dynamic pacing through engaging visuals and audio elements, you can significantly increase AVD and improve overall performance on YouTube Shorts. Experiment with various strategies while tracking analytics regularly—this will enable you to refine content continually for enhanced engagement and visibility on YouTube.
How to go viral on Instagram is a common goal for users seeking widespread attention. To achieve this, your posts must be eye-catching and shareable. Focus on creating high-quality visuals, attention-grabbing captions, and timing your content well. Using relevant hashtags and staying consistent can also improve your chances of going viral.
In a fast-paced digital environment, viral success comes from posts that connect with a wide audience. Popular content often taps into trends, evokes strong emotions, or sparks engagement. Combining these elements with a targeted approach increases the likelihood of making your Instagram post go viral quickly.
Understanding your audience is crucial for a successful Instagram marketing strategy. Without this Instagram insight, your efforts and budget spent on content creation will be wasted.
To engage your audience effectively, create buyer personas that define their preferences and behaviors. Consider key details like age, gender, location, job, income, and education.
2. Keep an eye on trends
Stay ahead by embracing new trends swiftly. Platforms like Instagram Reels can amplify your engagement and increase your chances of going viral.
You don’t always have to create viral content from scratch. Instead, capitalize on trending topics that the algorithm promotes. As people increasingly search for trending content, this is a great way to boost your visibility.
To stay on top of trends, regularly visit Instagram’s Explore page. You can also use tools like Google Trends or BuzzSumo to discover what’s currently popular.
With Instagram’s rapid growth and increasing competition, over 200 million businesses are now marketing on the platform. To stand out and truly connect with your audience, it’s essential to develop a unique brand voice. This sets you apart and creates a memorable experience for your followers.
4. Audit your own posts
Conduct an Instagram audit to align your new strategy with existing posts. Enhance your aesthetic, voice, and content for future success.
5. Study the competition
Analyze competitors’ posts for viral content ideas. Examine their top-performing posts, voice, formats, engagement strategies, and posting times.
6. Engage with other accounts
Actively engage with your audience. Encourage interaction in your posts, ask questions, add calls-to-action, and respond to comments.
7. Use analytics to learn what worked before
Leverage Instagram analytics to track engagement and follower growth. Learn from past successes and failures to create data-driven viral content.
8. Recreate viral content
Put your twist on viral content in your niche. Adapt successful content from Instagram or other platforms to resonate with your audience.
9. Partner with an influencer
Collaborate with other influencers in your niche for exposure. Seek reposts, mentions, or co-create content. Choose influencers aligned with your values.
10. Determine the best time to post on Instagram
Identify peak activity hours using Instagram analytics. Post during these times to maximize engagement and visibility.
11. Post consistently to grow your followers
Build a strong presence by posting regularly. Consistency keeps your brand top of mind and attracts more followers.
Knowing how to go viral on Instagram involves a combination of strategy, creativity, and timing. To make your Instagram go viral, focus on crafting engaging and shareable posts that capture the attention of a wide audience.
Stay consistent with high-quality visuals, use relevant hashtags, and tap into trending topics. By posting at optimal times and encouraging interaction, you can increase the chances of your content gaining popularity fast.
Maximize your Black Ops 6 rewards—Create highlights from your best gameplay with with Eklipse
Eklipse help streamer improve their social media presence with AI highlights that clip your Twitch / Kick streams automatically & converts them to TikTok / Reels / Shorts
Looking for Lorenzo’s Children in the Seeds of Love mission in Far Cry 6? Don’t worry—you’re not alone! This quirky quest sends you across the vast El Este region of Yara to track down Lorenzo’s seven love children. Armed with nothing but a few cryptic photos and no map markers, it’s easy to feel lost.
But fear not! This guide has all the exact locations you need to save time and complete the mission like a pro. Let’s dive in and reunite Lorenzo with his scattered family!
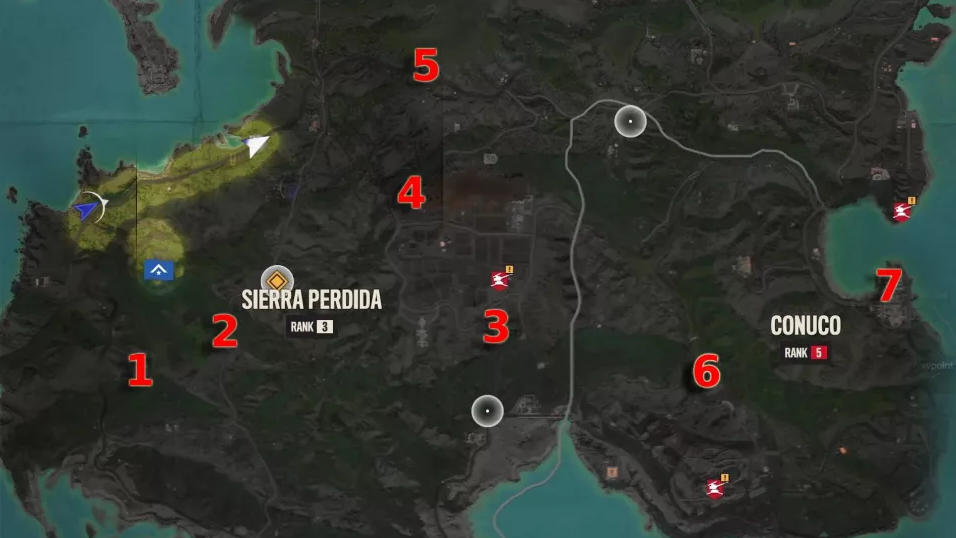
Voila! Here’s your first look at where to find these long lost children.
Source: Ubisoft
Thankfully, Lorenzo’s children are scattered around the southern part of the Far Cry 6 map. The above image is a rough look at where each location is. For those of you who are adventurous, this should be good enough. For the more time conscious players, read on for detailed locations!
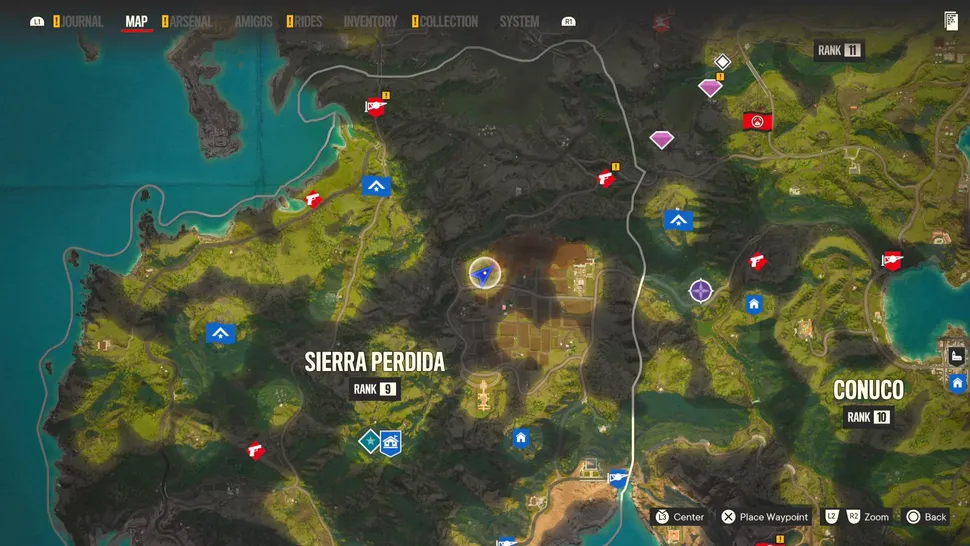
1. Alfaro farm
Source: Ubisoft
The first is found on a hill west of Verde Lake and North East of Verde River. The red building is easy to spot if flying. If you speak to the woman she’ll tell you her husband is dead and you can find him in the graveyard. Head to the marker that appears and when you reach the graveyard head uphill until you find the ‘ghost’ and hand them the letter.
2. Santo Domingo
Source: Ubisoft
Your point of interest is the orange and blue building. You’ll probably hear some shouting which is your cue. The person you want is locked on the top floor of the house. Open the door by climbing the building opposite and shoot the padlock through the window!
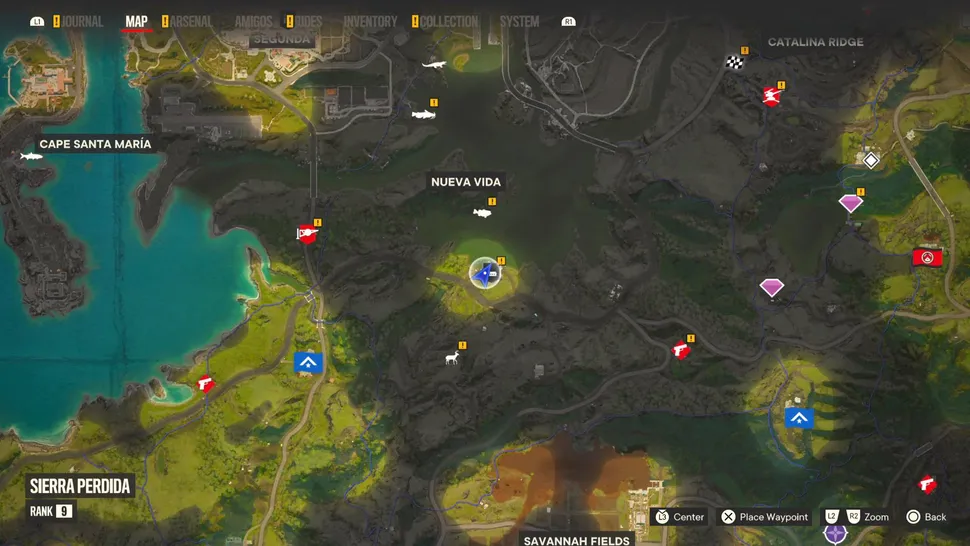
3. Oceguera Farm
Source: Ubisoft
Your target is present amongst the straw thatched buildings on the mountainside directly east of the Basilica De La Virgin. Once you arrive and explore, head to the workshop nearby. A Far Cry 5 Easter egg involving the hallucinogenic Bliss drug will lead you to one of Lorenzo’s children.
4. Perdomo Farm
Source: Ubisoft
A large signboard makes life easy! Arrive at the location and locate a key hidden under a hat in one of the thatched structures. Then, use the key to open the locked red door just behind the seated woman and speak to the man inside.
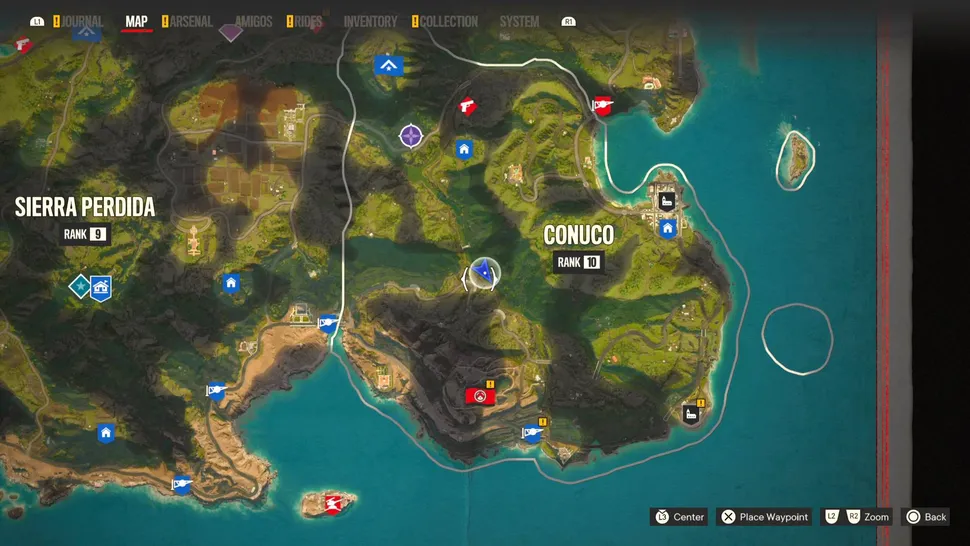
5. Barriga
Source: Ubisoft
Tick another love seed off the list! Get to the white house which will be surrounded by paintings on the waterfront. After clearing away some soldiers outside, speak to the man inside.
6. Flores Farm
Source: Ubisoft
When you find the statue by a river, head away from the water to a red building where you’ll find a dog. Once you pet the dog, follow it. No more from us, because – spoilers!
7. Corazon Ally, Concepcion
Source: Ubisoft
Once you find the painting in the provided picture, Dani will comment about the graffiti on the wall. This will help you find the person you need. The easy tip? Find someone who is currently painting the walls with a spray can!
Final Thoughts
By following this guide, you’ll uncover all the hidden locations of Lorenzo’s Children in the El Este region without the frustration of aimless wandering. Whether you’re tackling this mission for the story, the rewards, or just to explore more of Yara, this walkthrough ensures you’ll finish the Seeds of Love quest efficiently.
Now, get ready to reunite Lorenzo with his family and enjoy one of Far Cry 6’s most memorable adventures!
Want to grow your gaming channel’s audience? Look no further than Eklipse!
Experience the magic of our AI-powered tool, seamlessly transforming your game streaming moments into captivating TikTok/Short/Reels content with just a single click!
Sign up for free at Eklipse.gg and dive into the world of effortlessly creating gaming video clips like never before.
Maximize your Black Ops 6 rewards—Create highlights from your best gameplay with with Eklipse
Eklipse help streamer improve their social media presence with AI highlights that clip your Twitch / Kick streams automatically & converts them to TikTok / Reels / Shorts
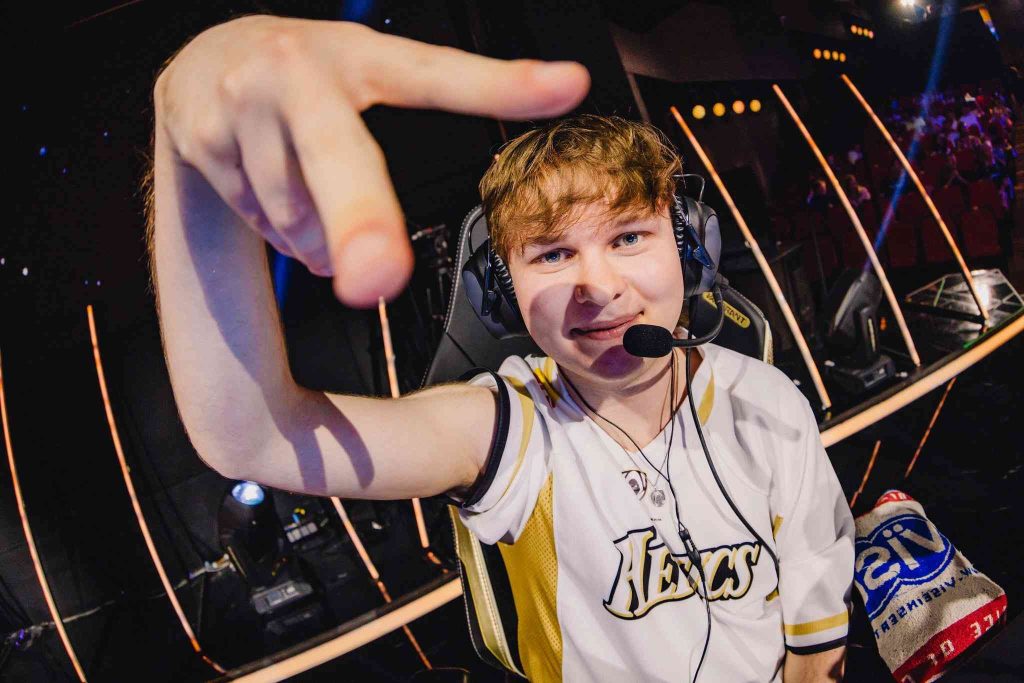
Benjyfishy, whose real name is Benjy David Fish, has made significant waves in the esports scene since his debut in Fortnite in 2019. As a prominent Twitch streamer and YouTuber, he has captured the attention of millions with his gaming skills and engaging content. This article delves into his financial success, competitive achievements, and overall profile to give you a comprehensive understanding of this young star.
With a net worth estimated between $800K to $1.5 million, Benjyfishy’s income streams are diverse. His earnings come from various sources including Twitch subscriptions, YouTube ad revenue, tournament winnings, sponsorships, and merchandise sales. Each aspect contributes to his status as one of the top players in the gaming community today.
This article will cover key elements such as his background, career highlights, financial breakdowns from streaming platforms, sponsorship deals, and more. By exploring these facets of Benjyfishy’s life and career, we aim to provide insights that highlight not only his accomplishments but also the potential for aspiring gamers looking to make their mark in the industry.
Total Prize Money Earned: Over $782K from 153 tournaments.
Major Earnings by Game:
Fortnite: Approximately $640K
VALORANT: Around $132K
Top Tournament Earnings: His highest single prize was $80K from VALORANT Champions 2024.
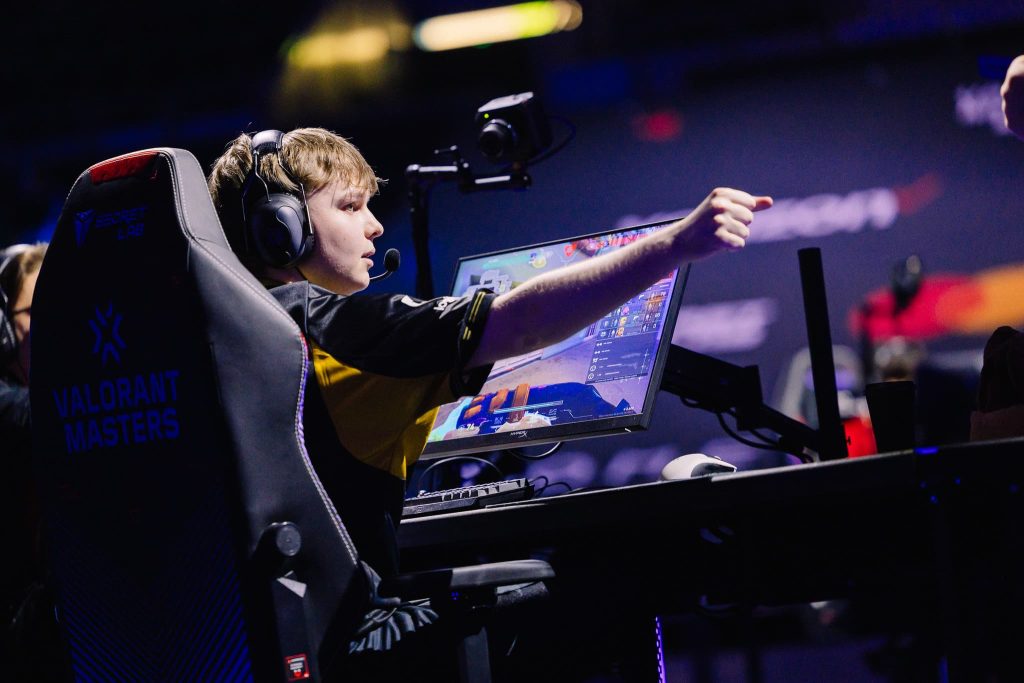
Benjyfishy quickly rose through the ranks after entering competitive gaming at an early age. He is known for being one of the youngest professional players on platforms like Fortnite and VALORANT. His dynamic playing style has earned him accolades across multiple tournaments while establishing him as a household name among gaming enthusiasts.
Financial Breakdown
Source: esports.gg
Benjyfishy’s net worth reflects his tournament successes and proficiency as a content creator on Twitch and YouTube. His various income sources combine to create an impressive financial portfolio that makes him one of the wealthiest young gamers today.
Twitch Earnings
Benjyfishy’s Twitch channel boasts an average subscriber count of about 2,300 members. Estimated earnings from subscriptions alone can reach around $8K monthly or approximately $96K annually based on Tier 1 subscription rates. At times when his subscriber count peaked at over 11K members, he potentially earned upwards of $41K per month solely from subscriptions.
Additionally:
Ad Revenue: Estimated at around $3K monthly.
Donations & Tips: Ranging between $2-$4K monthly.
YouTube Earnings
With about 1.71 million subscribers and averaging around 6.5 million views per month on YouTube:
Estimated Monthly Ad Revenue: Between $19.5k-$22k.
Annual Income Projection from Ads: Approximately $234k-$264k.
Combining both platforms gives Benjyfishy an approximate total earning range of:
Monthly Earnings: ~$34.5k
Annual Income Estimate: ~$414k before factoring in sponsorships or merchandise sales.
Sponsorship Deals
Sponsorship plays a pivotal role in enhancing Benjyfishy’s net worth further beyond what he earns directly through streaming or tournaments. He is signed with NRG Esports which helps him secure lucrative contracts with brands like Levi’s and Hot Pockets among others. These partnerships not only provide financial benefits but also enhance brand visibility within the gaming community.
Merchandise Sales
While exact figures for merchandise sales aren’t disclosed publicly, it is common for popular streamers like Benjyfishy to earn significant amounts through branded apparel and other merchandise sold via online stores or during live events.
Competitive Achievements
Benjyfishy gained worldwide recognition following impressive performances during major tournaments:
Fortnite World Cup Finals (2019): Placed 14th in Duo; received a prize money split totaling $50k.
FNCS Invitational Week (2020): Secured first place yielding another prize payout of $50k.
Most recently finished second at VALORANT Champions (2024), walking away with another substantial sum adding up to nearly half of what he had earned previously throughout most competitions combined.
Conclusion
Benjyfishy’s story is one of remarkable achievement and ongoing growth. At only 20 years old, he has already accomplished what many seasoned professionals strive for, establishing himself as a force to be reckoned with in both Fortnite and VALORANT.
With a substantial net worth, a dedicated fanbase, and a promising future ahead, Benjyfishy is undoubtedly a name to watch in the ever-evolving world of esports. His journey highlights the dynamic nature of the industry and the exciting opportunities that await those who embrace the challenges and rewards of competitive gaming.
Call of Duty: Black Ops 6 teams up with Little Caesars in an epic promotion that combines exclusive in-game rewards with delicious pizza. From October 21, 2024, to December 31, 2024, players can unlock unique DLC items just by enjoying their favorite meals from Little Caesars. It’s the perfect mix of gaming and indulgence, offering fans a chance to level up their Black Ops 6 experience while satisfying their cravings.
In this guide, we’ll cover all the details on the rewards available and how to claim them with qualifying purchases. Whether you’re a seasoned Call of Duty player or new to the game, this promotion is your chance to snag exclusive loot and enhance your gameplay. Let’s dive in!
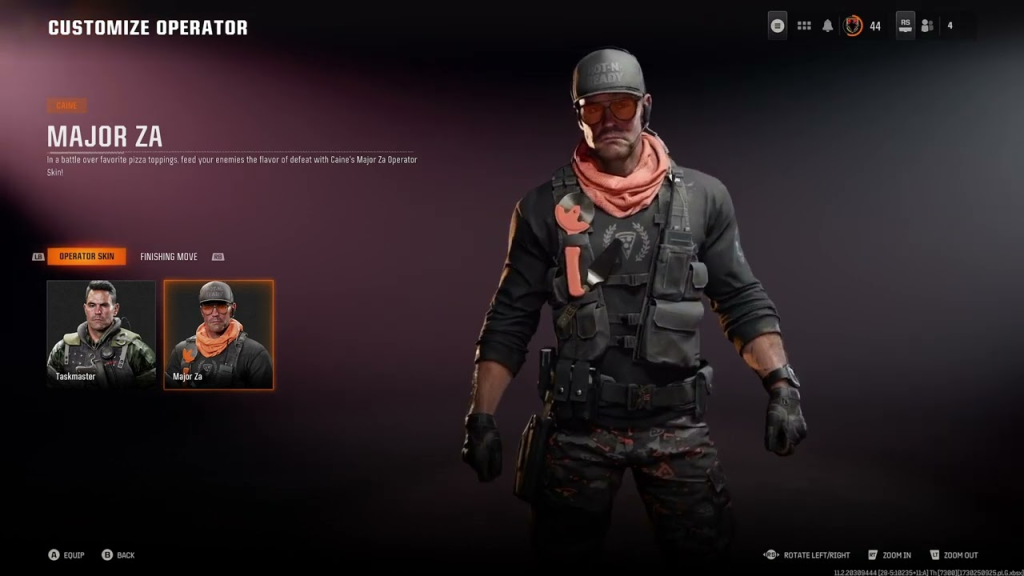
The Major Za Operator Skin is one of the standout rewards available through the Little Caesars promotion. This skin allows players to customize their character with a fun and thematic look inspired by the iconic pizza chain. It adds a unique flair to gameplay while showcasing your engagement with the event.
Theme: Pizza-themed design.
Customization: Enhances character aesthetics.
Exclusivity: Available only through this promotion.
Adding depth to weapon customization, the Battle Heart Weapon Charm brings personality to your arsenal. Attach it to your weapons as a representation of your achievements within this promotional campaign.
Visual Appeal: Eye-catching charm for weapons.
Symbolic Representation: Showcases participation in promo.
Customization Option: Personalizes your loadout further.
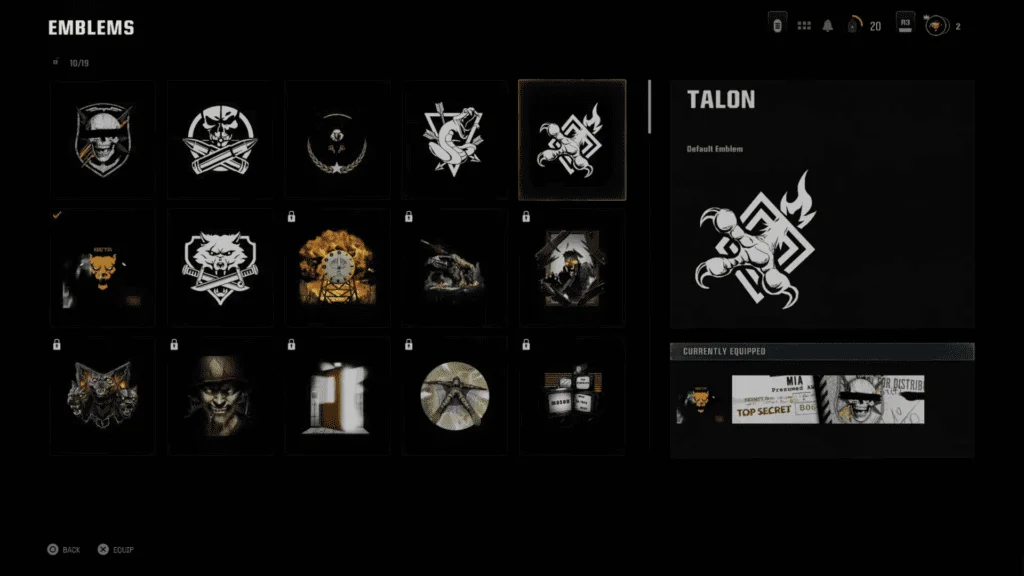
Crest of Combat Emblem
The Crest of Combat Emblem serves as a badge of honor for players who partake in this promotional event. Displaying this emblem signifies not just participation but also showcases dedication towards collecting exclusive content from Little Caesars.
Unique Design: Distinctive visual representation.
Achievement Recognition: Highlights commitment within CoD community.
Dynamic Use: Can be prominently displayed on player profiles.
Go Crazy Calling Card
With its vibrant design, the Go Crazy Calling Card allows players to express themselves creatively within their profiles. It’s another way to celebrate your involvement with both Black Ops 6 and Little Caesars during this limited-time event.
Creative Expression: Reflects personality within game profiles.
Promotional Tie-In: Directly linked with Little Caesars campaign.
Exclusive Content: Not available outside of this promo period.
To enhance gameplay further, participants have access to Dual 2XP bonuses that allow for accelerated leveling up during matches. This feature significantly boosts progress within the game and adds excitement as you strive for higher ranks faster than ever before.
Experience Boost: Double XP for quicker progression.
Limited Time Offer: Only accessible through promo participation.
Increased Engagement: Encourages more playtime among users.
How To Redeem Your Rewards
To claim these exciting DLC items, follow these simple steps:
Purchase qualifying food or beverage items at participating Little Caesars locations (minimum spend $3).
Keep your receipt; each purchase provides a unique code for redemption.
Visit callofduty.littlecaesars.com and enter your receipt code or upload an image of your receipt.
After validation, receive random rewards tied directly into your Activision account within 48 hours!
By following these straightforward steps, you can easily unlock all that Black Ops 6 has partnered with Little Caesars to offer!
Final Thoughts
The collaboration between Call of Duty: Black Ops 6 and Little Caesars opens up an array of exciting opportunities for gamers looking to enhance their experience with unique digital rewards in 2024! From themed skins like Major Za’s Operator Skin to useful bonuses such as Dual 2XP options — there’s something valuable waiting for every participant willing to engage with both brands during this promotional period.
By understanding how each item works and following our guide on redeeming codes efficiently, you’ll be well-equipped to make the most out of this thrilling partnership! Don’t miss out; dive into delicious deals while enjoying exceptional gaming additions today!
Maximize your Black Ops 6 rewards—Create highlights from your best gameplay with with Eklipse
Eklipse help streamer improve their social media presence with AI highlights that clip your Twitch / Kick streams automatically & converts them to TikTok / Reels / Shorts
Live stream giveaways have become an effective way for streamers to connect with their audience and expand their communities. By offering enticing rewards, streamers can engage loyal viewers and attract new ones, fostering an interactive environment during broadcasts. In this article, we’ll highlight ten creative and affordable live stream giveaway ideas that can easily be incorporated into your streaming sessions.
From digital gift cards to exclusive experiences, these ideas are tailored to captivate your audience without breaking the budget. Whether you’re an experienced streamer or new to the scene, these giveaways will boost viewer participation and create a stronger sense of community.
Gift cards are classic giveaways that never go out of style. They offer flexibility and allow winners to choose what they want, making them appealing for various audiences. Consider options like Steam or Amazon gift cards; they are particularly popular among gamers.
Details:
Value: Typically range from $10-$25.
Appeal: Universally liked as they cater to individual preferences.
Ease of Distribution: Can be sent electronically or physically.
Strengths: High perceived value; encourages interaction. Weaknesses: Might attract viewers solely interested in winning without ongoing engagement.
2. In-Game Currency
For gaming streams, offering in-game currency can be incredibly enticing. Fans of games like Fortnite or GTA V often crave extra resources to enhance their gameplay experience.
Details:
Specificity: Tailored to particular games.
High Demand: Many players seek ways to improve their gaming experience.
Strengths: Directly relevant; fosters loyalty among gaming communities. Weaknesses: Limited appeal if viewers play different games.
3. Merchandise Giveaways
Branded merchandise such as t-shirts, mugs, or stickers can create lasting connections between you and your audience while promoting your channel.
Details:
Brand Promotion: Enhances visibility through fans wearing or using products.
Personal Touch: Customized items can reflect the streamer’s style or catchphrases.
Strengths: Builds brand loyalty; makes viewers feel part of a community. Weaknesses: Initial costs for production may be higher than digital giveaways.
4. Art Commissions
Offering custom art commissions can add a personal touch that resonates well with your viewers—especially if they’re part of niche communities where creativity is valued.
Details:
Unique Offerings: Custom artwork related to inside jokes or themes from your streams.
Support Local Artists: Opportunities for collaboration with artists from platforms like Etsy.
Strengths: Highly personalized; engages creative communities deeply invested in content culture. Weaknesses: Could take time for completion; requires sourcing skilled artists.
5. Subscription Services
Consider gifting subscriptions such as Discord Nitro or Twitch Subs! This not only rewards a viewer but also enhances their experience on platforms they already use regularly.
Details:
Value Additions: Enhanced features on platforms users already frequent.
Community Building Tools: Encourages more interaction within chat environments.
Strengths: Strengthens community ties; promotes regular engagement on your platform. Weaknesses: May draw in participants focused only on free perks rather than genuine interest in content creation.
6. Play with the Streamer
Offering a chance for fans to game alongside you creates an intimate connection that many followers appreciate deeply—a once-in-a-lifetime experience!
Details:
Engagement Opportunity: Participants feel special being chosen as guests.
Community Bonding Experience
Strengths: Builds strong bonds within the community; memorable interactions increase viewer retention rates over time. Weaknesses: Time-consuming; may require scheduling logistics depending on the number of entries received.
7. Mystery Boxes
Mystery boxes are inherently exciting! They create an element of surprise which keeps audiences intrigued about what they’ll receive when they win!
Details:
Variety & Surprise Factor
Customizable Content Levels
Strengths: Engaging due to unpredictability; draws curiosity from both active participants and passive observers alike! Weaknesses: Potential misalignment if contents don’t meet winner expectations leading potentially disappointed views (could affect future engagement).
8. Humble Bundle Keys
Humble Bundle offers affordable bundles comprising multiple games that can be thrilling giveaways—especially suitable for gamer-centric streams where variety matters!
Details:
Cost-effective Options
Wide Variety Available
**Strengths: Affordable yet valuable prizes encouraging consistent viewer participation across diverse genres simultaneously! Weaknesses: Requires some knowledge about current offerings available via Humble Bundles at any given time (to ensure suitability).
9. Discount Coupons
Collaborating with local businesses allows you not only provide discounts but also supports smaller enterprises while creating goodwill towards supporting local economies together!
Details:
Community Engagement
Encourage Local Support
**Strengths: Strengthens ties within communities outside streaming cultures fostering positive relationships locally too!. Weaknesses: May require extensive networking initially before sustainable partnerships arise long-term!.
10. Exclusive Access To Events
Offering tickets (either physical/virtual) for online events such as conventions could excite audiences who might not otherwise get opportunities otherwise!.
Details:
Provide access opportunities unavailable elsewhere!
Build anticipation leading up continuous viewership growth around event dates!.*Strengths : High value perceived by attendees generating buzz leading up towards actual occasions!. Weakness : Organizing logistics might prove challenging especially if multiple issues arise unexpectedly!
Final Thoughts
Integrating live stream giveaways into your broadcasts offers several advantages. Not only do they enhance viewer engagement, but they also express gratitude to loyal followers. Each giveaway idea caters to specific audience interests, strengthening community ties and fostering lasting connections.
Over time, these rewarding moments will help grow your channel organically. By sharing these experiences, you build deeper bonds with your audience while creating memorable, shared journeys.
Prestiging in Call of Duty: Black Ops 6 (BO6) is a significant milestone for players looking to showcase their dedication and skill. This classic feature makes a return, allowing players to reset their progress after reaching the maximum level, which currently stands at level 55. In this guide, we’ll break down everything you need to know about the process, what resets upon Prestiging, and the rewards you can earn.
Understanding how to Prestige not only enhances your gaming experience but also provides insights into maximizing your character’s potential. Whether you’re a seasoned player or new to the franchise, this article will guide you through the steps necessary for Prestiging and highlight its benefits. Let’s dive into the specifics!
Reach Level 55: Play until you hit the maximum level in BO6.
Look for Prompt: After reaching level 55, a pop-up will appear asking if you want to Prestige.
Choose Your Timing: You can either Prestige immediately or opt to do it later through the Barracks menu.
Access Barracks Menu: Go to Multiplayer lobby and select “Barracks.”
Select Progression: Click on “Progression” within the Barracks menu.
Click on Prestige Card: Find and click on the ‘Prestige’ card available.
Confirm Action: Hold “Y” (or Triangle on PlayStation) to confirm your decision.
Once you’ve completed these steps, congratulations! You’ve successfully Prestiged in BO6.
What Resets When You Prestige?
When you decide to prestige, here’s what gets reset:
Player Level returns to 1
All level unlocks are cleared (except base operators and permanent unlock items)
Your loadouts will be reset
Despite these resets, many aspects of your game remain intact:
Items That Remain Intact:
Weapon progression including camos and reticles
Custom weapon builds can still be used once unlocked again
Challenge progress is preserved
Store purchases and Battle Pass content remain available
Operator and emote unlocks stay with your account
Any owned weapon blueprints or skins are retained
This balance ensures that while you start fresh as a lower-level player, much of your hard work isn’t lost.
Rewards for Prestiging
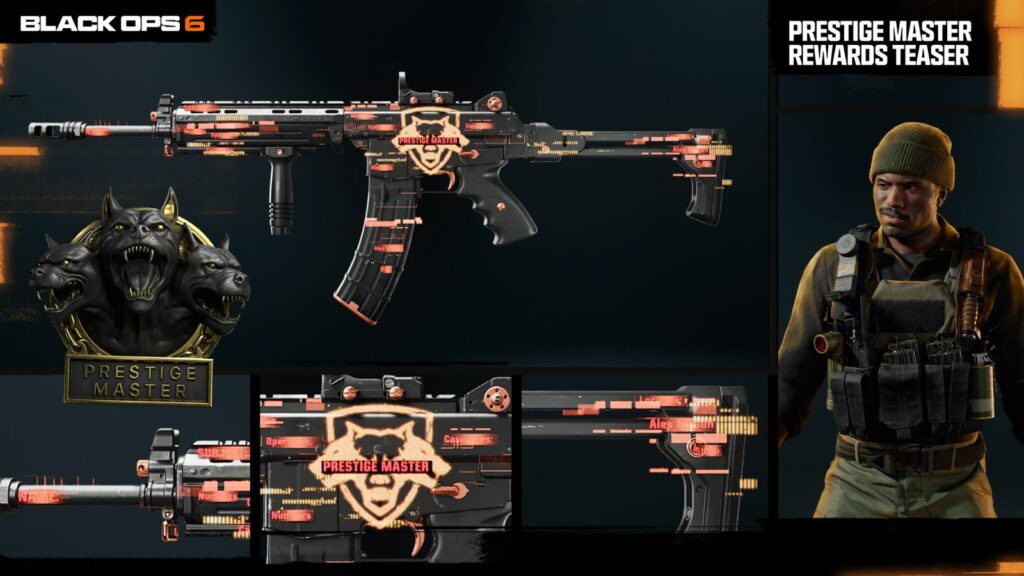
Image: ONE Esports
With each time you choose to prestige, there are exciting rewards waiting for you:
Permanent Unlock Token: Each prestige grants one token that allows you to keep an item permanently regardless of levels reached in future runs.
Double XP Tokens: You receive an hour-long Double XP token with every prestige attempt—up to ten tokens if you fully complete all prestiges.
These incentives not only enrich gameplay but also motivate players by providing tangible benefits for their commitment.
Final Thoughts
In conclusion, understanding how to prestige in Call of Duty: Black Ops 6 is essential for any serious player looking to enhance their gaming profile and enjoy rewarding gameplay mechanics. By following the simple steps above, you can successfully prestige while retaining much of your progress.
The system encourages continual engagement with rewards like permanent unlock tokens and Double XP boosts further enticing players into this exhilarating cycle of growth. Ultimately, whether you’re aiming for cosmetic upgrades or simply enjoy leveling up repeatedly, prestiging adds depth and excitement that makes each match worthwhile.
As you prepare for another round of combat in BO6, remember these tips so that you’re ready when it’s time to take that leap into prestige!
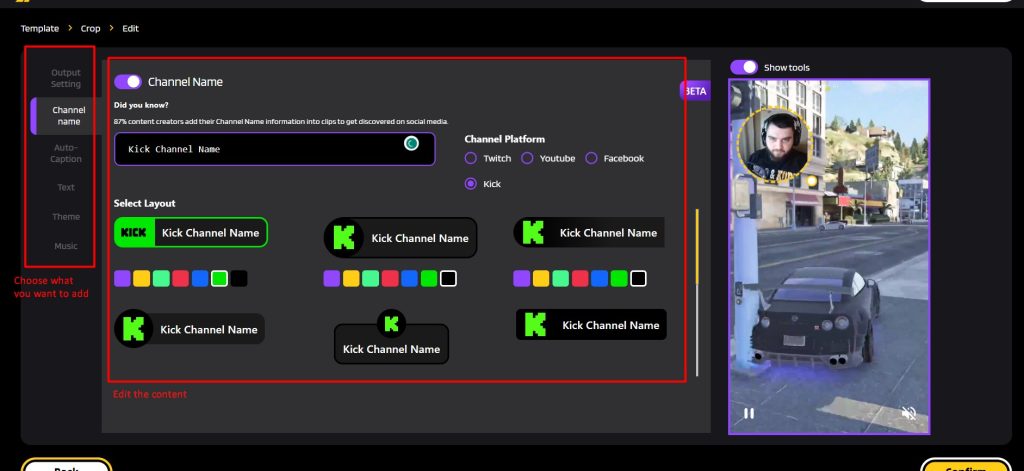
Editing TikTok videos involves more than just trimming clips. It’s about crafting a compelling narrative, infusing your personal style, and utilizing the right tools to make your content stand out. In this article, we’ll explore 20 expert tips on how to edit TikTok videos effectively. From shooting and editing footage to adding engaging captions, music, sound effects, and more.
By using these strategies, you’ll craft TikTok videos that engage your audience and increase your chances of going viral. Whether you’re a casual user, creator, or business, mastering how to edit TikTok videos can boost your views, likes, comments, and followers. Now, let’s dive in and unlock your creative potential!
How to Edit TikTok Videos to Get More Views and Engagement
how to edit tiktok videos caption
While knowing tips for creating viral TikTok videos is valuable, it’s essential to understand the basics of editing. You can edit videos directly within the TikTok app or use third-party editing tools for more advanced features.
Editing TikTok videos in TikTok is easy and fun. You can use the native editing tools in the app to add text, stickers, effects, filters, and music to your videos. You can also trim, split, and adjust the speed of your clips. Here are the basic steps to edit TikTok videos in TikTok:
Open the TikTok app and tap on the plus icon at the bottom of the screen.
Record a video with TikTok or upload an existing video from your camera roll.
Tap on the checkmark icon to go to the editing screen.
Use the icons on the right side of the screen to add text, stickers, effects, and filters to your video.
Use the icons on the bottom of the screen to trim, split, adjust the speed, and add music to your video.
Tap on the Next button to go to the posting screen.
Write a catchy caption, add hashtags, and choose who can view your video.
Tap on the Post button to share your video with the world.
You can also use third-party apps like Capcut to edit your videos and then upload them to TikTok. Some of these apps offer more advanced editing features, such as transitions, overlays, and animations. However, they may also require you to pay for premium tools or remove watermarks.
One of the best TikTok video editors you can try is Eklipse. What is it? Here’s the full guide:
The right music and sound effects can enhance your TikTok videos. Here’s how to add audio:
1. Use trending music and sounds
Jump on the bandwagon and use trending sounds to make your videos more engaging and favorited by the algorithm.
2. Match your videos to the beat
Sync your clips with the audio to create engaging videos. Use TikTok’s Sound Sync feature for easy synchronization.
3. Create Original Audio with viral potential
Consider creating your own catchy beats or voiceovers. Start a challenge to encourage others to use your Original Audio.
4, Record a voiceover
Use the Voiceover feature to narrate your videos and add an extra layer of storytelling.
5. Play around with voice effects
Add voice effects to make your voiceover or original sound more engaging. Experiment with different effects like Chipmunk or Megaphone.
6. Enable text-to-speech
Use the built-in text-to-speech feature to have TikTok narrate your text captions. This helps make your videos more accessible or when you don’t have time for a voiceover.
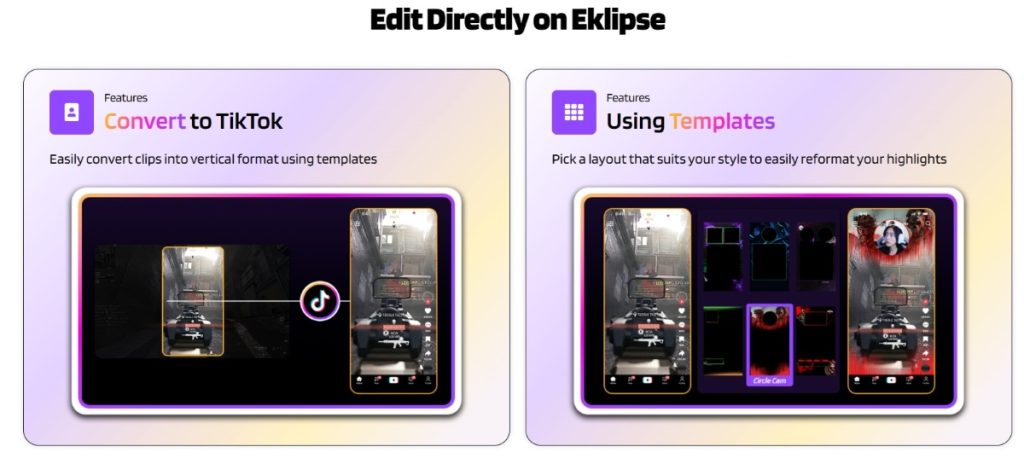
If you’re looking to save time on editing TikTok videos, Eklipse is a great option. This advanced AI tool automatically creates highlights from your Kick, Twitch, YouTube, and Facebook streams and videos, streamlining the process.
It captures a wide range of content, from exciting gaming moments to hilarious in-game experiences, which can be easily transformed into TikTok / Reels / YouTube shorts.
With Eklipse, you can create TikTok videos in minutes by following these simple steps:
Excited to announce our next big update for the Eklipse Mobile App! Now get (almost) all the benefits of Eklipse desktop but now on your phone 📱! Download our app today and see how you can create clips on the go 🚶! What’s ✨new✨? 1. Select which streams you’d like our AI to process 2. Review and select your favorite best highlights 🎞️ 3. Customize your clips with templates, webcam customization, channel stickers, text and auto-captions 4. Easily post to socials all on your phone Find our app by searching “Eklipse” in your app store!
Eklipse also provides premium features like 1080p high-resolution clips, voice command AI, faster processing, and a watermark-free experience. For just $149.99 annually, you can upgrade and access the full range of Eklipse’s capabilities.
Eklipse has helped tens of thousands of streamers save time and achieve viral success with their TikTok videos. Don’t miss this opportunity and register for Eklipse today!
TikTok is primarily a visual platform, so your videos take center stage. Here are some tips for shooting and editing your TikTok videos:
1. Set a timer to record hands-free
Use the timer feature to film yourself without needing someone to hold the phone. You can also set the timer to automatically stop recording after a certain time.
2. Record clips and adjust them
Film your video in clips to have more flexibility in editing. You can move clips around, trim their duration, add effects, captions, and more.
3. Adjust the recording speed
Play around with the speed of your video using the Speed feature. You can slow it down or speed it up for different effects.
4. Use filters to enhance your video
TikTok has various filters to improve the aesthetic appeal of your videos. Experiment with color filters, beautify tools, and enhance settings.
5. Get creative with video effects
TikTok offers a library of interactive and AR visual effects. Try out different effects to make your videos stand out and follow current trends.
6. Add stickers to your video
Use stickers to interact with your audience or make your videos more eye-catching. You can add various stickers from the search bar.
7. Create transitions between clips
Add transitions to make your videos look more cinematic. Choose from different transition effects to smoothen the flow between clips.
8. Upload clips from your camera roll
You can upload high-quality videos from your camera roll to TikTok. This allows you to edit your videos using professional software before uploading them.
Final Thoughts
Mastering how to edit TikTok videos is key to standing out. Use these creative editing tips in your TikTok marketing strategy to capture attention, boost engagement, and expand your audience.
Maximize your Black Ops 6 rewards—Create highlights from your best gameplay with with Eklipse
Eklipse help streamer improve their social media presence with AI highlights that clip your Twitch / Kick streams automatically & converts them to TikTok / Reels / Shorts


")