Level Up Your Marvel Rivals Gameplay
Capture your epic wins, clutch moments, and even hilarious fails with Eklipse. Easily create and share highlight reels with your friends—even if you're not streaming!
Learn More
Want to share those epic wins and funny moments from your Twitch streams? Twitch Clips lets you grab the best moments and show them off to your viewers. Picking a part of your stream, trimming it down, and saving it as a clip is that easy!
But what if you want to make your clips even more exciting? That’s where Eklipse comes in! Eklipse is a smart tool that uses AI to find the best moments in your streams and automatically turns them into short, attention-grabbing clips, all without you needing to be a skilled video editor. Plus, it only takes a few seconds!
Eklipse lets you add more to your clips too. You can choose a cool template, add your channel name, and even throw in some background music. Sound exciting? Keep reading to find out how Eklipse can take your Twitch clips to the next level!
A Guide to Clip on Twitch Using Eklipse Studio
Compact and quick—that’s what Eklipse offers you. With just a few clicks, you’ll be all set. Let’s take a closer look at the steps below.
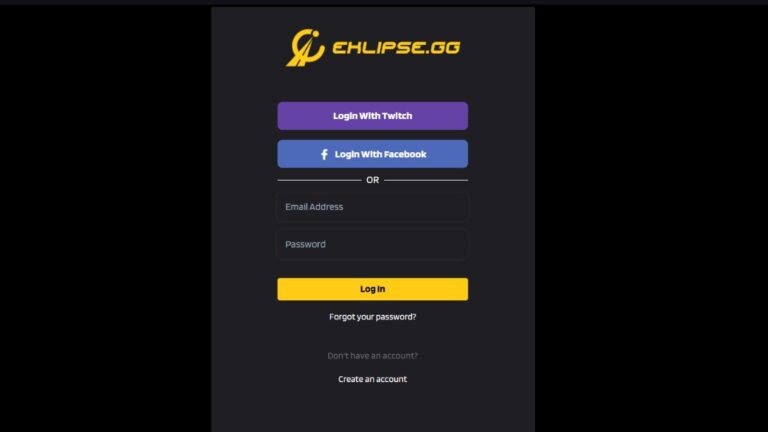
- Head over to the Eklipse website and sign in to your account.
- You can log in using Facebook, Twitch, or email. Register if you haven’t yet.
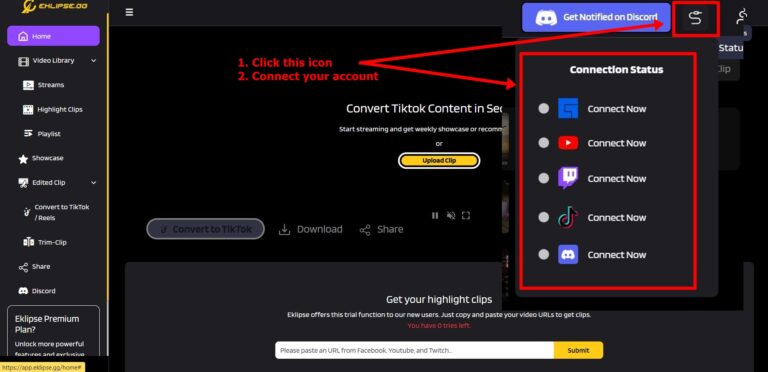
- Hit the cable icon to connect Eklipse with your social platforms.
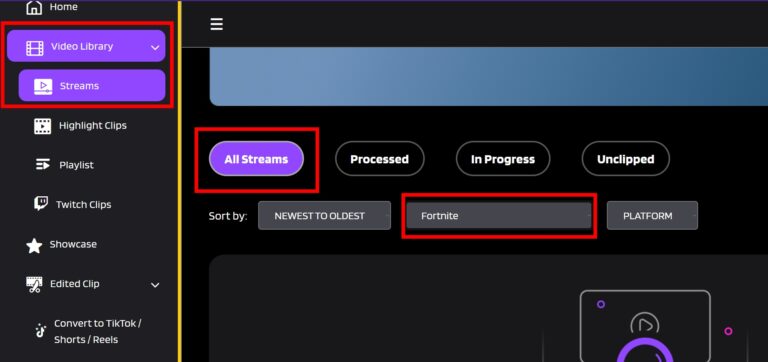
- Go to the Streams tab under the Video Library and find your streams there.
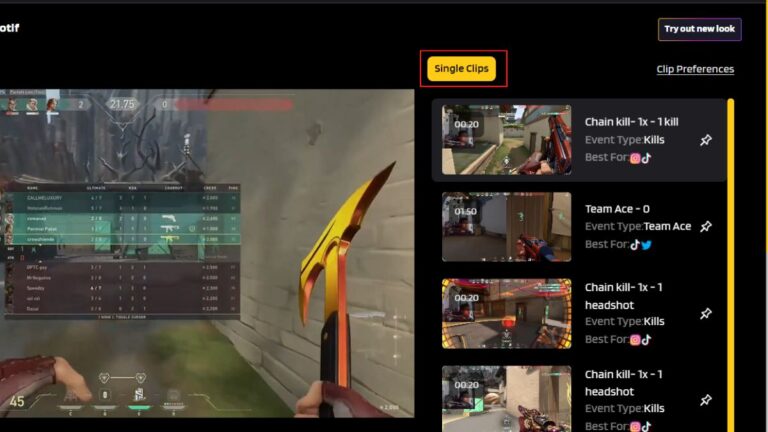
- Click on the stream you’d like to clip, and Eklipse will automatically offer some short clips.
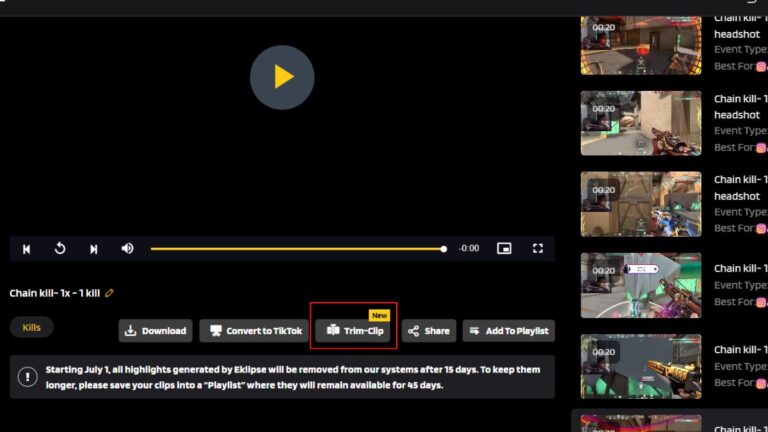
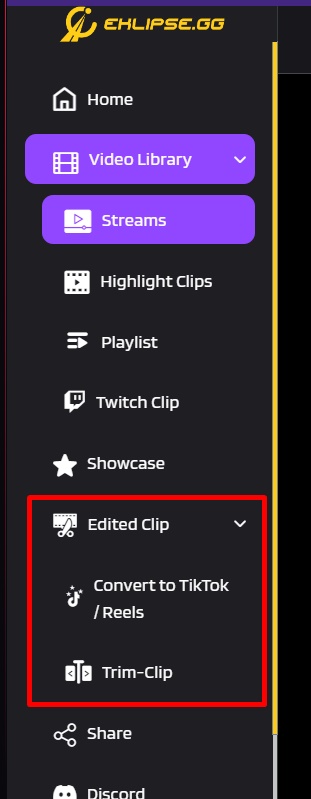
- To trim the length of your video, hit the Trim-clip option under the preview.
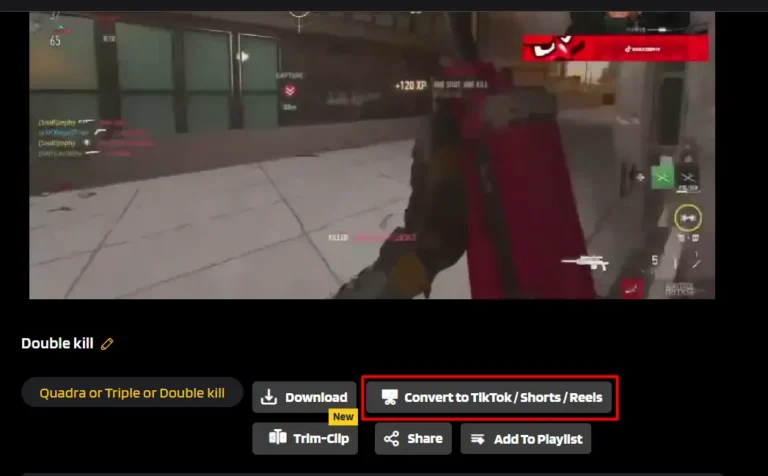
- Alternatively, hit the Convert to TikTok/Shorts/Reels button to convert it into a bite-sized video.
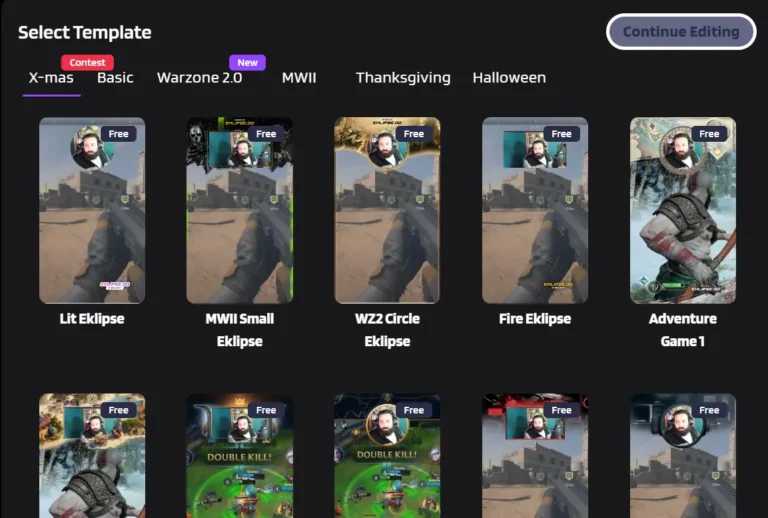
- Choose your preferred template and hit Continue Editing.
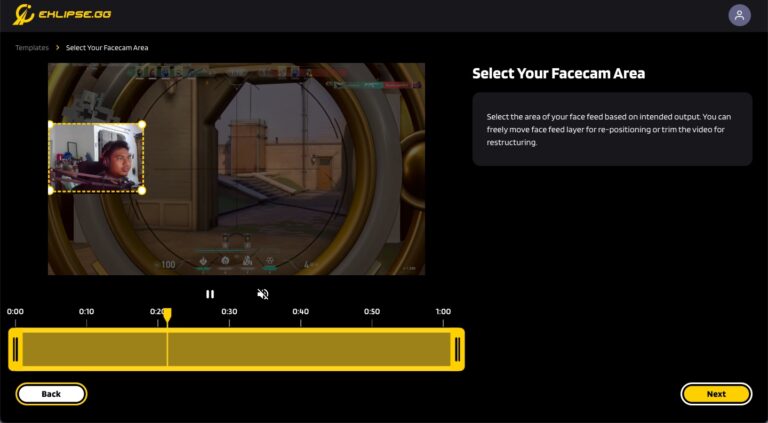
- Customize your game feed and facecam area, as well as the clip length. Hit Next.
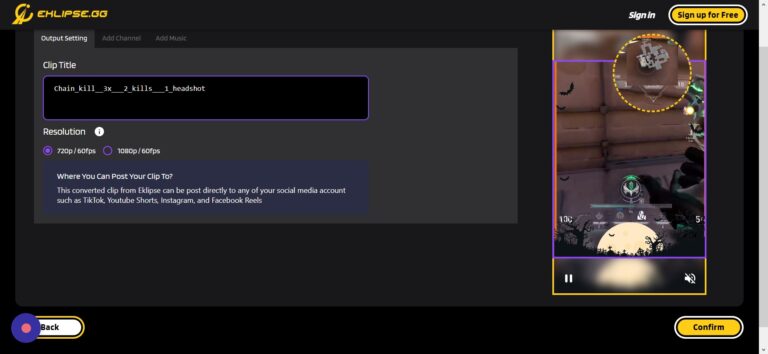
- Set the resolution, add channel names, and a catchy soundtrack before you click on the Confirm button.
- Wait for a few seconds and boom! Your Twitch clip is now ready!
How to Find Your Edited Clips on Eklipse
Now that you have edited your clip, you can access and instantly share it on your social networks. Here’s how to do it:
- Go to the Edited Clips option and select the Convert to TikTok/Reels section.
- Find your edited clip and click on it.
- Hit the Share option (or Download if you want to save it).
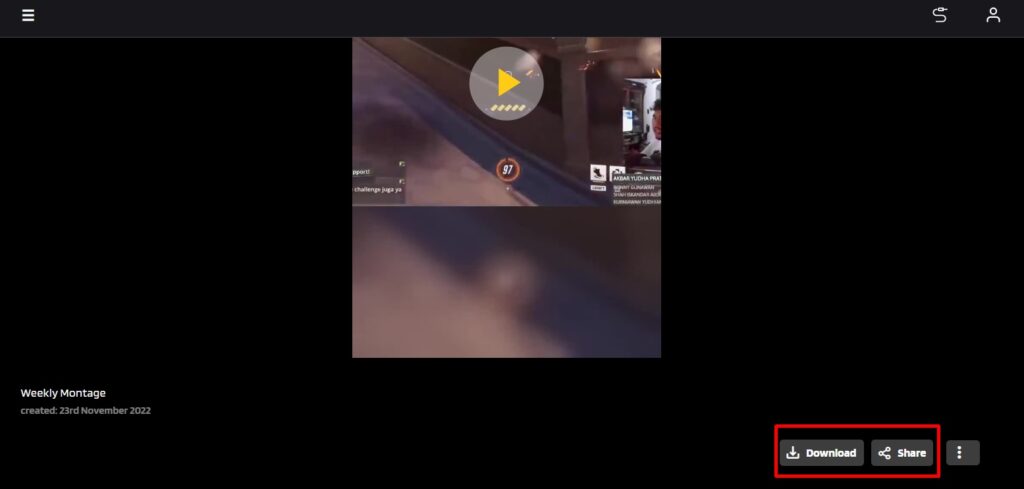
- Select any social media you want your video to be posted on.
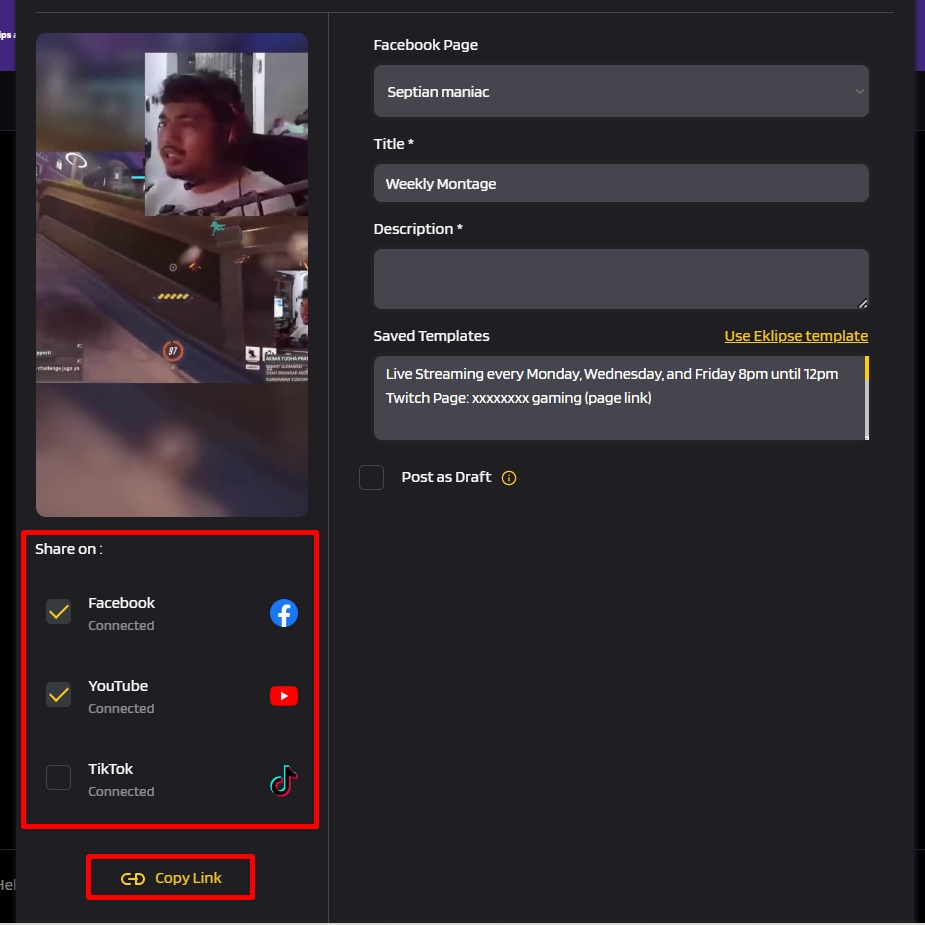
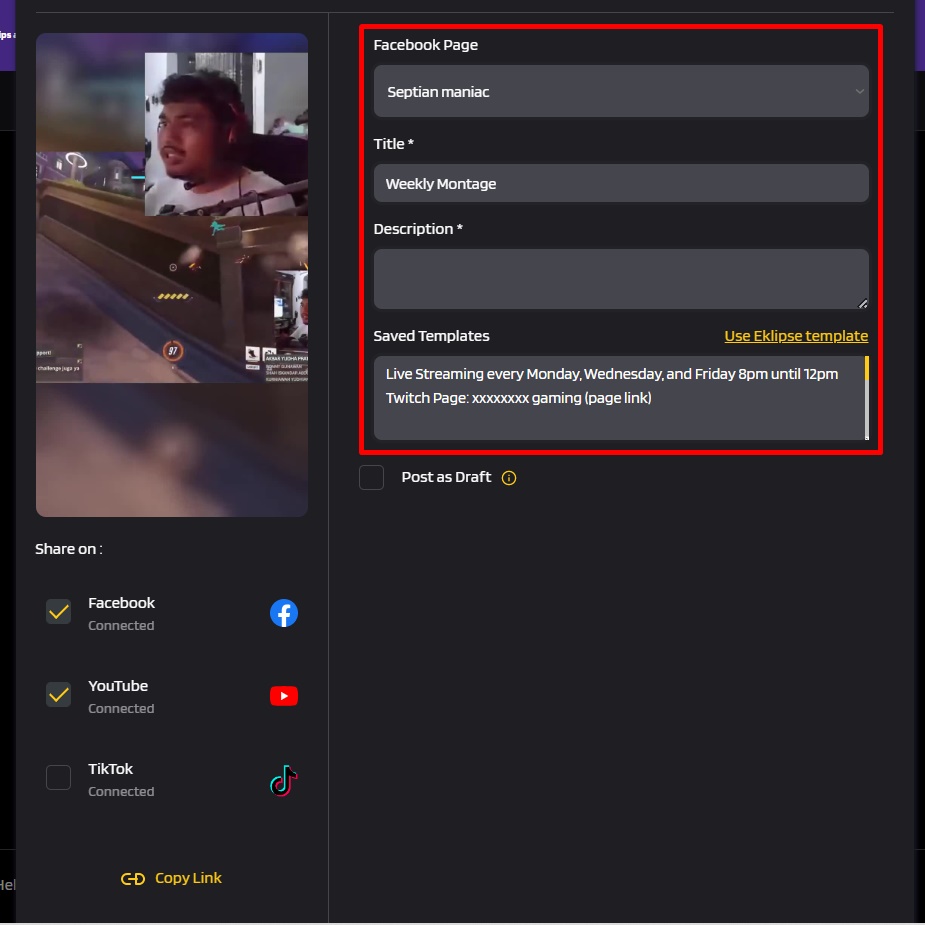
- Write a title and description.
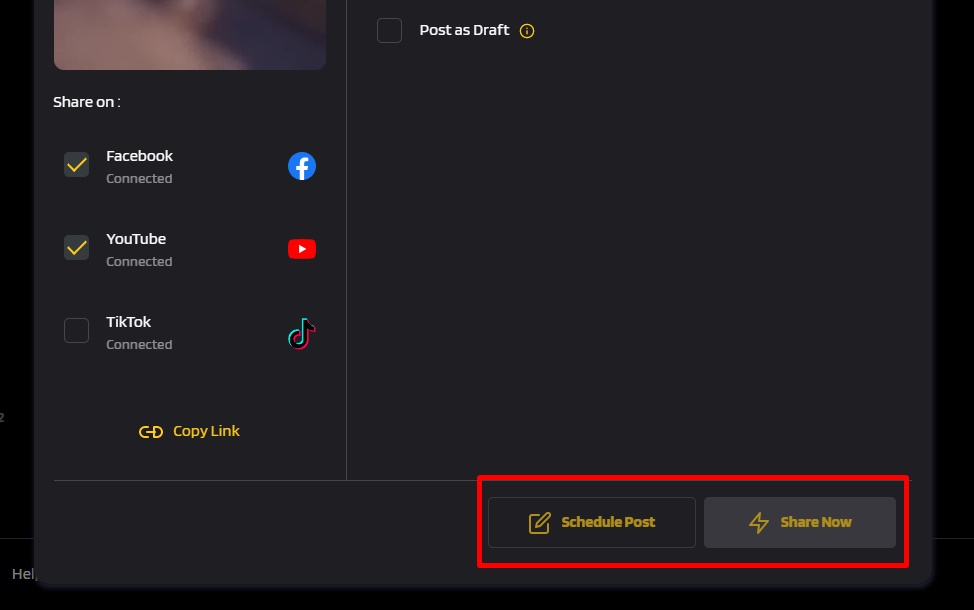
- Once done, click on the Share Now button to immediately share it.
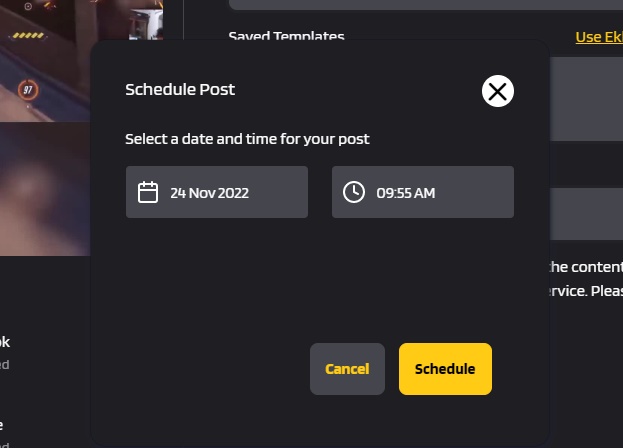
- In addition, you can schedule your post by clicking on the Schedule Post button.
- Set the date and time and you’re all set.
Conclusion
Ready to enhance your Twitch clips and engage your viewers? Eklipse is a powerful tool designed to help you effortlessly create captivating clips from your streams. Using artificial intelligence, Eklipse identifies the best moments and transforms them into short, shareable videos.
Skip the editing hassle and let Eklipse do the work! With Eklipse, you can quickly produce professional-looking highlights without needing advanced editing skills. Sign up for free at Eklipse.gg and discover an easy way to elevate your content. Watch your channel and audience grow with minimal effort!
Maximize your Black Ops 6 rewards—Create highlights from your best gameplay with with Eklipse
Eklipse help streamer improve their social media presence with AI highlights that clip your Twitch / Kick streams automatically & converts them to TikTok / Reels / Shorts
🎮 Play. Clip. Share.
You don’t need to be a streamer to create amazing gaming clips.
Let Eklipse AI auto-detect your best moments and turn them into epic highlights!
Limited free clips available. Don't miss out!
