
Level Up Your Marvel Rivals Gameplay
Capture your epic wins, clutch moments, and even hilarious fails with Eklipse. Easily create and share highlight reels with your friends—even if you're not streaming!
Learn MoreHave you ever wanted to relive your favorite Twitch moments or share them with a wider audience? Learning how to save streams on Twitch can help you preserve those special memories beyond the live broadcast. Twitch offers a built-in feature to archive streams temporarily, but without the right settings, your broadcasts may vanish forever.
Now, this guide covers everything you need to know, from enabling Twitch’s automatic VOD storage to using third-party tools for more permanent solutions. Stick around to discover easy steps that will keep your Twitch content safe!
How to Save Streams on Twitch Using Eklipse
Streamers often face the challenge of saving their streams and identifying the best moments. Eklipse offers a solution that eliminates the editing hassle. It’s not a streaming platform itself, but a powerful tool that analyzes your existing streams and automatically finds the most exciting clips using AI.
Simply connect Eklipse to your Twitch account, and let the software work its magic. Eklipse intelligently extracts highlights, compiling them into short, engaging videos. Choose auto-processing for a hands-off approach, or manually select clips for personalized control.
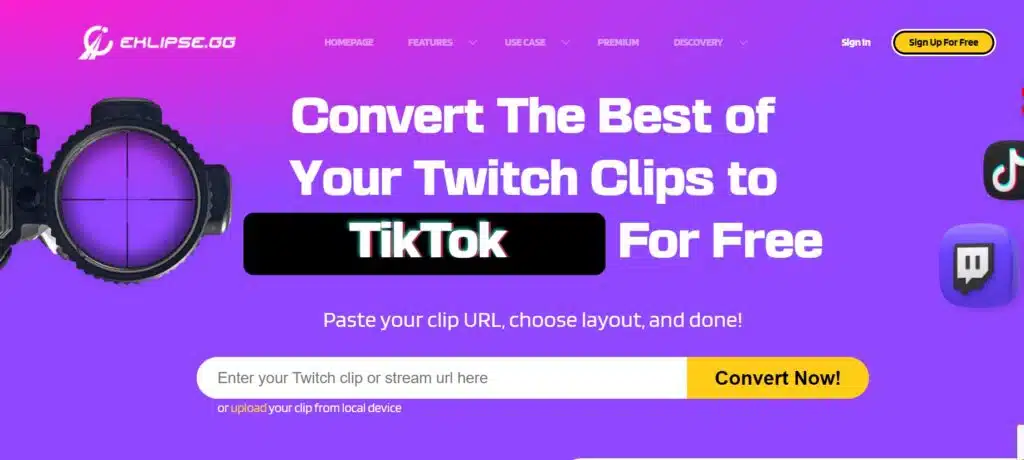
Plus, Eklipse now boasts a fantastic upgrade: a TikTok converter! Convert your Twitch highlights into captivating TikTok videos, Reels, or YouTube Shorts in just a few clicks. They even offer copyright-free soundtracks and five unique templates to enhance your creations. If you are interested in giving it a shot, visit our blog for more details and tutorials about this tool.
How To Download Twitch Videos
Twitch Leecher enables you to save streams on Twitch easily. You can learn how to use it by following these steps.
Step 1. First, install the Twitch Leecher and then open it up on your computer or other devices.
Step 2. After installing the program, open the tool and copy your desired video’s URL into URLs.
:max_bytes(150000):strip_icc():format(webp)/011-download-twitch-videos-4151697-e839865053f640d69cf62c69893d5986.jpg)
Source: Lifewire
Step 3. Click on the Search button.
:max_bytes(150000):strip_icc():format(webp)/012-download-twitch-videos-4151697-773b10ff26314a6bbbb6f231ef380a66.jpg)
Source: Lifewire
Step 4. Once you’ve set up everything, just hit the Download button.
:max_bytes(150000):strip_icc():format(webp)/013-download-twitch-videos-4151697-7af4edf586064f3189a323e21160a49c.jpg)
Source: Doc. Lifewire
Step 5. After that, the program will allow users some other options like resolution size as well as file name start/endpoints. Once you’ve set all of that, hit the Download button, and you’re all set.
:max_bytes(150000):strip_icc():format(webp)/014-download-twitch-videos-4151697-26d0b9735631404d8c25fa421e6ca69e.jpg)
Source: Doc. Lifewire
How to Save Streams on Twitch as a Streamer
If you want to save a video from your stream, this is possible at any time (in the given time frame). Just learn how to save streams on Twitch, of course, the video must also be recorded by Twitch. Here’s how to download your streams.
Step 1. First of all, go to Twitch and sign in to your account.
Step 2. Then, hit the profile icon at the top-right corner of the screen, and navigate to Creator Dashboard.

Source: pcstrike
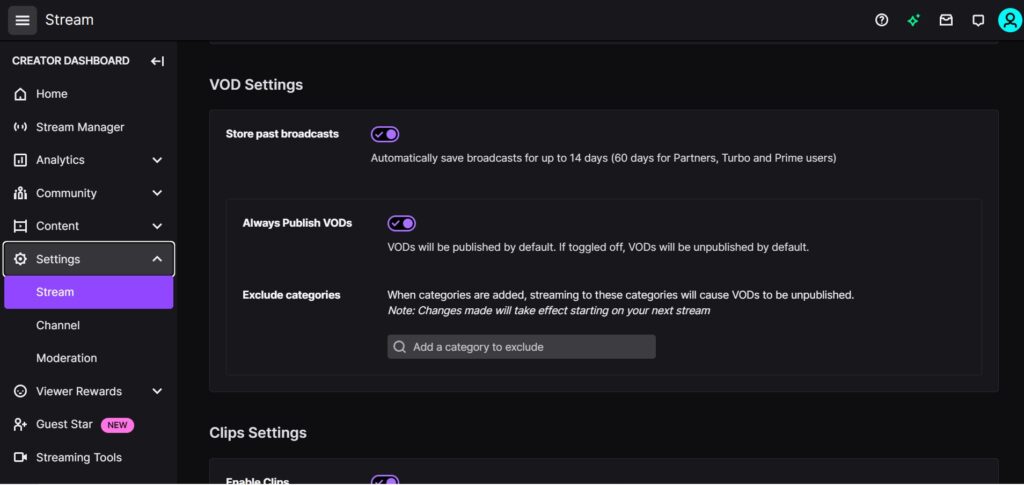
Step 3. Head to Settings > Stream.

Source: pcstrike
Step 4. Activate the automatic saving of live broadcasts with “Store Past Broadcasts.” All future videos will then have an automatically saved copy for playback when needed.

Source: doc. pcstrike
On Twitch there is always stored video for every live stream and all future broadcasts will be added automatically too so no need to worry about missing out on any action-packed moments because they’re saved right away. Just select Settings > Channel to set this option once then rest assured knowing everything gets synced up between videos/live sermons automatically.
You can now download all your future broadcasts with the click of a button. Simply go to Dashboard > Video Manager and find an option for Download Video Below Preview Image on each recording that is highlighted in green. This is how to save your streams on Twitch.
More on Eklipse Blog >> How to Download Twitch VOD: 5 Options You Can Try
Save and Share Your Broadcasts
To save your Twitch broadcasts, follow these steps:
- Access Video Producer: Click on your profile picture in the top right corner and select “Creator Dashboard” from the dropdown menu. Then, navigate to the “Content” section and choose “Video Producer.”
- Select a Broadcast: Browse through your past broadcasts and pick the one you want to save.
- Export Options: Clicking on a broadcast will automatically display its options at the top of the screen. Here, you’ll find the export button.
- Control Sharing: You can choose to export the video as shareable (public) or unlisted (private). This determines who can view your broadcast.
Publication Status: Once a broadcast is published, its visibility cannot be changed directly. You’d need to delete the published version and re-upload it with the desired privacy settings.
Downloading Your Streams on Twitch
Before you can download your Twitch streams, you need to enable VOD (Video On Demand) storage. Here’s how:
- Access Creator Dashboard: Click on your profile picture in the top right corner and select “Creator Dashboard” from the dropdown menu.
- Enable VOD Storage: Locate the “Settings” section and find the option related to VOD storage. This might be called “Store Past Broadcasts” or “Enable VOD Recording.” Make sure this option is checked.
Downloading Saved Broadcasts
Once VOD storage is enabled, your past broadcasts will be automatically saved. Here’s how to download them:
- Access Video Producer: From the Creator Dashboard, navigate to the “Content” section and choose “Video Producer.”
- Select a Broadcast: You’ll see a list of your saved broadcasts. Choose the one you want to download.
- Download Options: Each broadcast will have a download button or option. Clicking on it will initiate the download process.
FAQs
There are a couple of reasons why your Twitch streams might not be saving:
1. Disabled VOD Storage: Ensure you’ve enabled VOD (Video On Demand) storage in your Creator Dashboard settings. (See “How do I enable VOD storage on Twitch?”)
2. Weak Internet Connection: A strong and stable Internet connection is crucial for successful stream saving. Check your internet speed and stability before streaming.
No, Twitch streams don’t automatically save as videos unless you enable VOD storage. Once enabled, your broadcasts are automatically saved, but you’ll need to download them manually from the Video Producer page.
1. Click on your profile picture in the top right corner and select “Creator Dashboard” from the dropdown menu.
2. Locate the “Settings” section and find the option related to VOD storage (e.g., “Store Past Broadcasts” or “Enable VOD Recording”).
3. Make sure the VOD storage option is checked.
Unfortunately, you cannot directly save your Twitch streams on Xbox. VOD storage and download functionalities are currently only available through the Creator Dashboard on PC or mobile.
There’s no official way to directly download entire Twitch streams on iPhone. However, you can save specific Twitch clips using Siri Shortcuts. Here’s how (general steps, some details may vary):
1. Download the Shortcuts app from the App Store (if you haven’t already).
2. Search for “Save Twitch Clips” shortcuts or create your own using the “Get Content from URL” action.
3. Set the URL to the specific Twitch clip you want to save.
4. Run the shortcut to download the clip to your iPhone.
The storage duration for your Twitch VODs depends on your Twitch affiliation:
– Partners, Turbo, and Prime Users: Past broadcasts are stored for 60 days.
– Affiliates: Past broadcasts are stored for 14 days.
– Other Broadcasters: Past broadcasts are stored for 7 days.
Unfortunately, Twitch doesn’t offer built-in video editing tools for VODs. However, you can download your VODs and edit them using external video editing software before uploading them elsewhere. Remember to check Twitch’s Community Guidelines before editing and uploading content.
Final Thoughts
There are several answers regarding how to save streams on Twitch. You can enable the VOD (Video On Demand) storage feature in your Creator Dashboard, and then manually download them from the Video Producer page. Keep in mind that these saved streams have a limited storage duration, so make sure to download them before they expire.
You can also use Eklipse for downloading and editing your Twitch VODs to gain more views and engagement. With its intuitive tools, you can polish your streams effortlessly and create content that truly shines. Don’t let your content go to waste—Join Eklipse for free today!

🎮 Play. Clip. Share.
You don’t need to be a streamer to create amazing gaming clips.
Let Eklipse AI auto-detect your best moments and turn them into epic highlights!
Limited free clips available. Don't miss out!
