Level Up Your Marvel Rivals Gameplay
Capture your epic wins, clutch moments, and even hilarious fails with Eklipse. Easily create and share highlight reels with your friends—even if you're not streaming!
Learn MorePosting and going live on YouTube at the right time is necessary if you want your content to reach the right target. Unfortunately, many creators, especially newbies, still have no idea how to schedule a livestream on YouTube.
Sometimes, you might have a lot on your plate and miss your scheduled live stream. That’s why you need to schedule your activities in order to avoid repeating the mistakes.
Thankfully, YouTube enables you to schedule your posts or livestream directly from the native platform. Just see the guide from this article.
Why Schedule a YouTube Livestream?
YouTube live streaming is an excellent way to connect with your audience in real-time. Among the many features that YouTube offers, if you’re planning on live streaming sometime later in the future, the platform allows you to schedule a Livestream on YouTube in advance.
The benefit of doing so is that it would appear in your subscribers’ feed as an upcoming live event. And they can then click Set Reminder to get notified when the live event begins. Meanwhile, your scheduled stream will gain exposure through your subscribers. This would help ensure that you have a strong and engaged audience when you go live. Otherwise, you might have to wait some time for your audience to gather up in decent numbers.
Plus, you also risk disappointing your loyal fans if they miss any of your unannounced live streams. In fact, even if you make an announcement for your followers, it may just slip from their minds in the hustle and bustle of their day-to-day lives. But when they set a reminder, they get push notifications even before you go live. So this way they too have the time to settle down and enjoy the event.
Requirements to Go Live on YouTube
To live stream on YouTube mobile app, you need to meet some requirements, which are:
- At least 1,000 subscribers. Once you get 1,000 subscribers, you may have to wait to get access to mobile live streaming.
- No live streaming restrictions within the last 90 days on your channel.
- To verify your channel.
- An Android 5.0+ device or iOS 8+ device.
If you meet all the requirements, then you can start to go live both on your PC or mobile phone.
How to Schedule a Livestream on YouTube Through a PC?
Creating a YouTube Live on pc is different from creating it on mobile. Both, in terms of the available features, and the minimum eligibility requirements for going live. Starting with a guide for desktop users, here’s how to schedule a Livestream on YouTube:
- First, open YouTube and sign in.
- Hop on to the profile icon and hit YouTube Studio option.

- In Studio, click on the Create button (webcam icon) at the top right corner of the screen and select the Go Live option.

- Then, hit the Stream option in YouTube Studio and write a title, description, audience, and thumbnai.

- Afterward, click on the Schedule for Later option and set the exact time you wish to go live later.
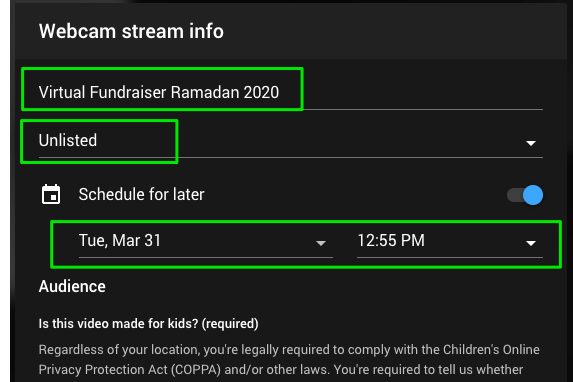
- If you have set all the streaming info, you can hit Done.
- That’s it. Once you’ve tuned into your desired settings, you can sit back and relax.
How to Schedule a Livestream on YouTube Mobile
Do you want to set your live streaming through your YouTube app? We got you. Luckily, the steps are basically same as you do it on a PC. But to make it clear, do these following instructions.
- Open the YouTube app, sign in to your account
- After that, tap on the ‘+’ button at the bottom of the screen.
- Select Go Live.
- Now, enter your stream details such as title, description, and audience.

- Then, tap on More Options.
- Next, you’ll have a drop-down list with additional options. Enable Schedule for Later from that list.
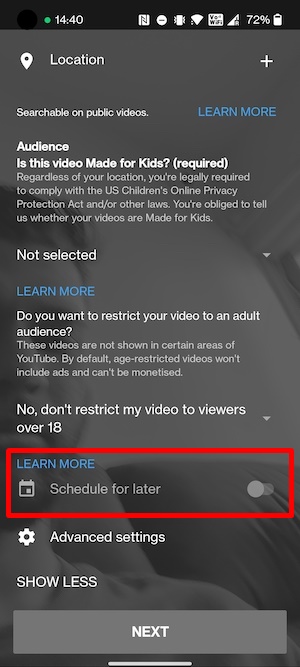
- Set the Date and Time, and move on to the thumbnail selection screen. Then, press Go Live.
- Bingo! You’re all set now.
Schedule Posts on Social Media Using Eklipse
If have recorded your livestream and feel like sharing it to other social media such as TikTok, and Instagram, or else, you can give it a shot to Eklipse. Eklipse is originally an AI-clip maker that will help you capture the best moment of your stream video, even transform it into bite-size format automatically.
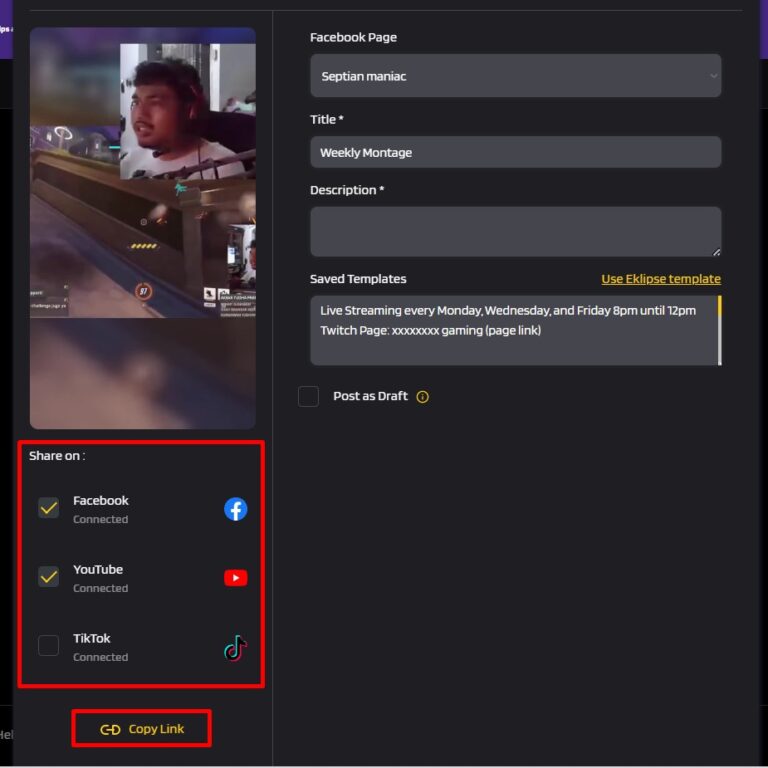
What’s even interesting is that Eklipse allows you to share the clip on your social media even without downloading it first. Not in the right time to post your content? Don’t sweat it. Just schedule your post away, and let it publish automatically even when you’re away. To do so, just follow the steps below.
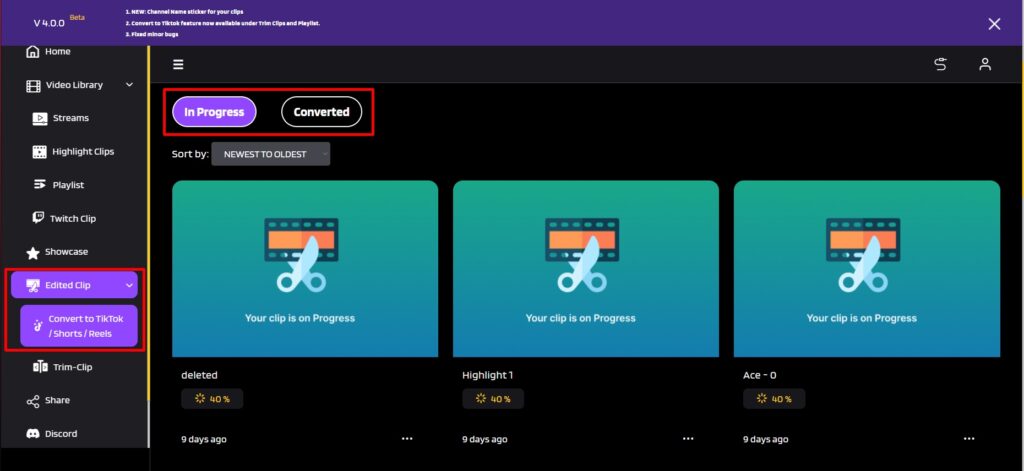
- First of all, go to Eklipse site and make sure that you have edited your clip.
- Then, find your edited clip under the Edited Clips option.
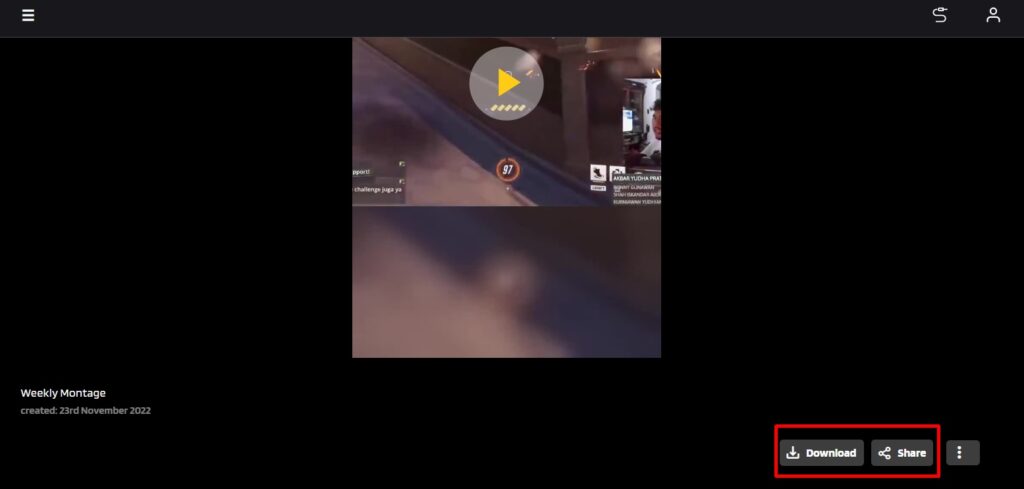
- Click on the specific clip you want to share.
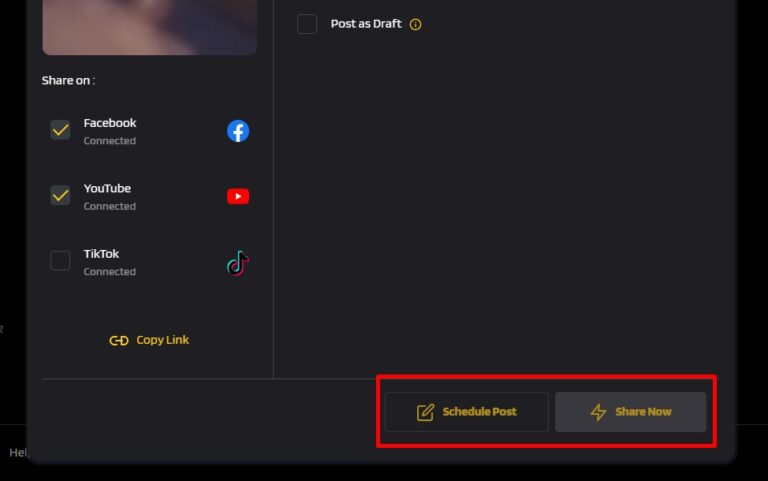
- Under the video preview, click the Share option.
- Click on the platform option where you will publish your clip later.
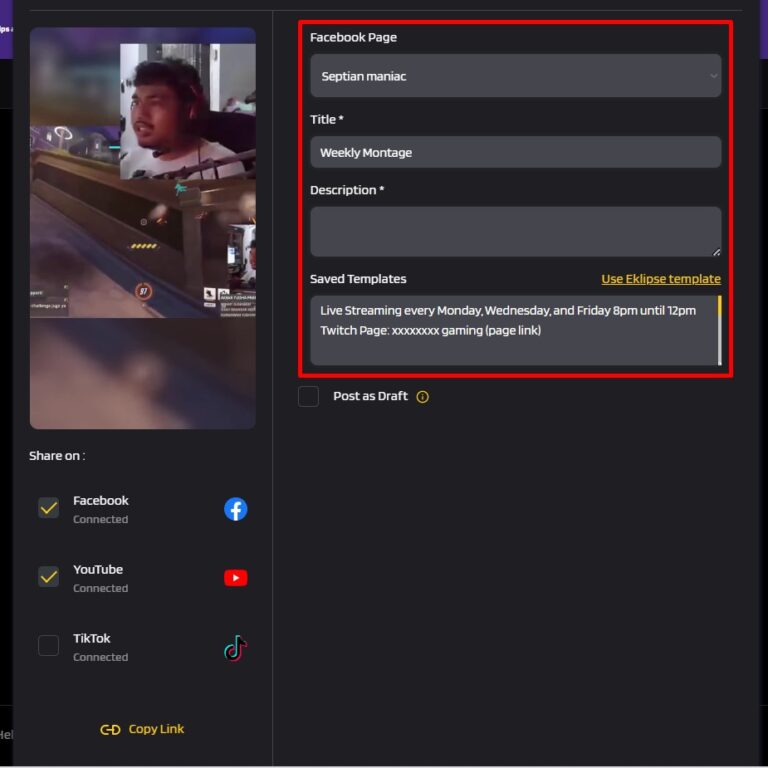
- Afterward, give it a title, description, and more.
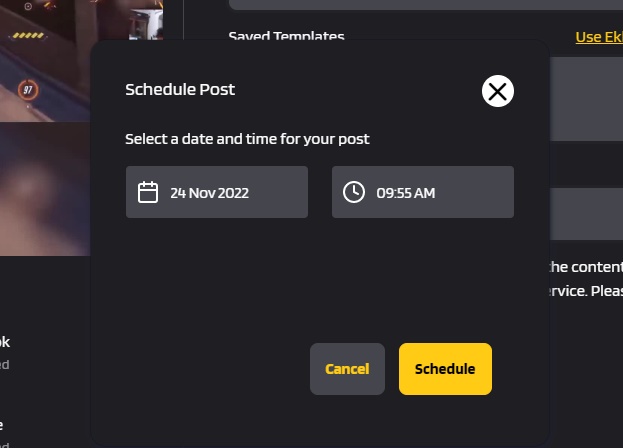
- Finally, hit the Schedule Post button at the bottom of the screen.
- Set the exact time when you’ll post your clip on social media and hit Schedule.
Final Thoughts
Now that you know how to schedule a live stream on YouTube through a PC or mobile phone, you can start to set your content airing at the best time so that it can reach your audience when they’re on their online time.
For many streamers, it’s always a good idea to schedule live streams just to be on the safer side. However, you must remember that you can only schedule a live stream if you plan to go live at least 12 hours from when you begin to schedule it. So, if you want to go live sooner, you’ll just have to do it spontaneously. Having said that, we hope the blog helped, and wish you the best of luck for your next live stream.
By the bye, YouTube live stream is not just about scheduling. You may need to record your live stream for various purposes. If you don’t know how, let us help you through this article: How To Record Live Streaming Video on YouTube for Multiple Devices.
🎮 Play. Clip. Share.
You don’t need to be a streamer to create amazing gaming clips.
Let Eklipse AI auto-detect your best moments and turn them into epic highlights!
Limited free clips available. Don't miss out!
