Level Up Your Marvel Rivals Gameplay
Capture your epic wins, clutch moments, and even hilarious fails with Eklipse. Easily create and share highlight reels with your friends—even if you're not streaming!
Learn MoreHow to record screen on Windows 10 without Xbox? Actually, you can try many ways to be able to record screens without Xbox. There are other software that might have more comprehensive and convenient features.
Basically, Xbox Game Bar is a free screen recorder you can use in Windows 10. It provides you with basic service that is convenient for you. However, it’s indeed not the perfect choice when it comes to screen recording.
In this article, we’re going to give you a guide to recording your screen using other tools. Let’s jump right into it.
How to Record Screen on Windows 10 Without Xbox
Here are the tools you can try to capture your screen on a PC. Additionally, we’ll also give you a comprehensive tutorial about how to record screen on Windows 10 desktop using the following tools.
Capture the Screen Using OBS Studio
OBS Studio is one of the best streaming software everyone love to use. It not only lets you record the screen, but you can also do live streaming using this tool. In addition to that, OBS featured excellent tools, supports various platforms, and produces high-quality videos. Here’s how to operate it.
- To begin with, launch the OBS Studio on your device.
- Then, open the app and see the Sources box at the bottom left of the screen and hit the ‘+’ button.

- After that, select Display Capture.
- Give your project a name in a small pop-up window and hit OK.

- Next, navigate to the Device option, and hit the small downward arrow to access a drop-down menu.
- Pick the display you’d love to capture and hit OK.
- Click on the Settings button in the bottom-right corner of the screen.

- In another pop-up window, hit Output from the left menu.
- Under the Recording path, choose the destination to save your project file later.

- Now click on the Start Recording button to start capturing your screen.

How to Record Screen on Windows 10 With Audio using Nvidia Graphic Card

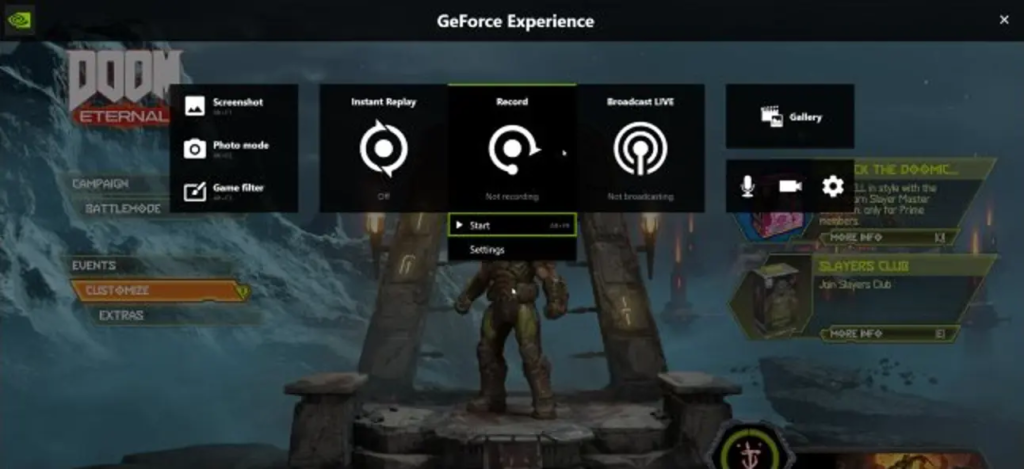
Another alternative to clipping the screen on a PC is using this tool. Nvidia Graphic card allows you to record the screen with a high-quality result. However, it might not be really friendly for beginners since it requires several steps to do. Here’s how.
- First, press the Alt + Z button to get permission from GeForce Experience Overlay.
- Second, click on the Instant Replace option to turn off the pop-ups on the new window.
- Go to Settings.
- Then, set the length of the video you want to capture.
- Adjust the quality of the clips according to the hardware configuration on your PC.
- After that, set the resolution, bitrate, and frame rate too, then click the Save button.
- Click the gear icon to open the general setting menu.
- Navigate to the Recordings and open the file.
- Next up, back to the main menu and then click the Keyboard shortcuts option.
- Hit the Record heading and set the keyboard key you want to use as a shortcut.
- Now you can use the shortcut key to clip the best moment.
Step by step to Record Screen Windows 10 With EaseUS RecExperts
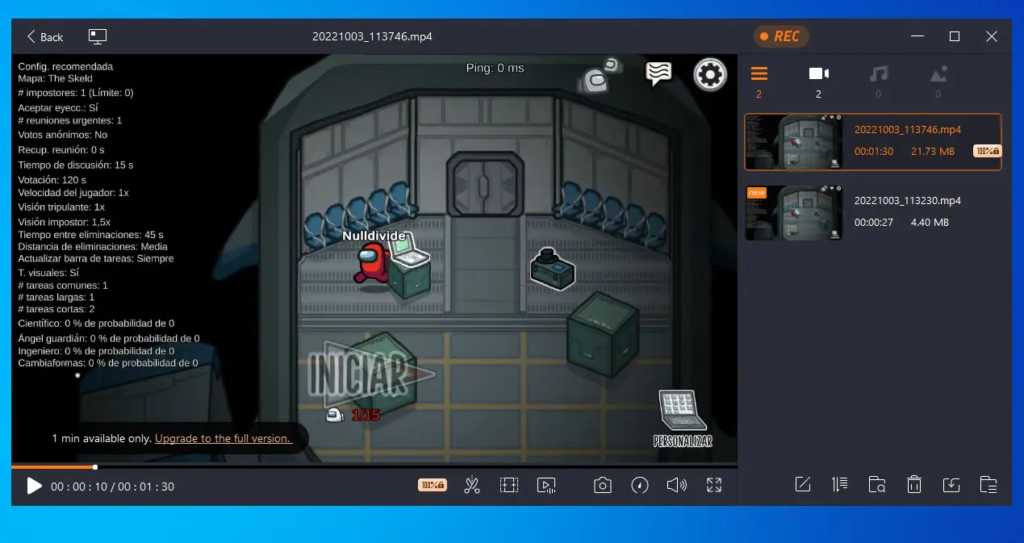
Do you need a tool that allows you to record the screen as well as edit the recorded? Then EaseUS RecExperts might be good for you. Aside from its friendly interface, EaseUS also comes with many cool features, including the editing studio. Here’s how you can use this tool.
- Start by launching EaseUS on your device.
- After that, choose between a Full-Screen option to help you record the whole screen, and Region if you want to customize the recording area.

- Then, tap on a button at the bottom left corner of the page.
- You can choose any option regarding the recording process.
- Additionally, you can record your audio from your microphone.

- Hit the Options button to adjust the volume and microphone device.
- Next, if you are ready to record the screen, you can hit the REC button.

- To pause or stop the recording process, you can see the button on the floating toolbar.
- Other than that, you can use the camera icon to take screenshots, and the timer icon if you want to record the screen and stop it automatically.
- Once you’ve ended the recording process, there will be a media player that appears along with the set of editing tools.
- Here, you can make some changes to your recording video.

- Finally, your video will be saved to your computer.
Conclusions
There you have it. Now you have known how to record a screen on Windows 10 without Xbox. There are still many alternative screen recorders you can try that are not mentioned above. If you want to find the right recording software for windows, our article has got you covered: 10 Best Screen Recorder For Windows 10 & 11.
So, which one is the route you would take as an alternative to Xbox? Let us know through the comment box below.
🎮 Play. Clip. Share.
You don’t need to be a streamer to create amazing gaming clips.
Let Eklipse AI auto-detect your best moments and turn them into epic highlights!
Limited free clips available. Don't miss out!
