Level Up Your Marvel Rivals Gameplay
Capture your epic wins, clutch moments, and even hilarious fails with Eklipse. Easily create and share highlight reels with your friends—even if you're not streaming!
Learn MoreReaching a broad audience is crucial for streamers and content creators. However, many viewers watch videos with the sound off, rendering audio cues ineffective. This presents a challenge – how can you ensure your message is understood by everyone?
Auto Captions have become a game-changer, offering a solution to this accessibility hurdle. Their importance has only grown since TikTok integrated the feature directly into their video editor. Auto Captions allow viewers to follow along regardless of their audio settings, significantly increasing your video’s reach.
While TikTok’s built-in auto-captions are convenient, alternative tools offer even greater control and customization. In the next section, we’ll explore a step-by-step guide on how to leverage auto-captions effectively for your TikTok creations, helping you reach a wider audience and ensure your content resonates with everyone.
Step by Step Guide to Using Auto Caption for TikTok

Tired of manually transcribing your streams for TikTok? Eklipse steps in as your one-stop shop for generating captivating TikTok content from your streams. This AI-powered platform streamlines the process, allowing you to focus on creating awesome content while Eklipse handles the technical aspects.
Eklipse: Your Auto Captioning Ally for TikTok
Eklipse elevates your TikTok workflow beyond basic video editing software. Here’s how it empowers you:
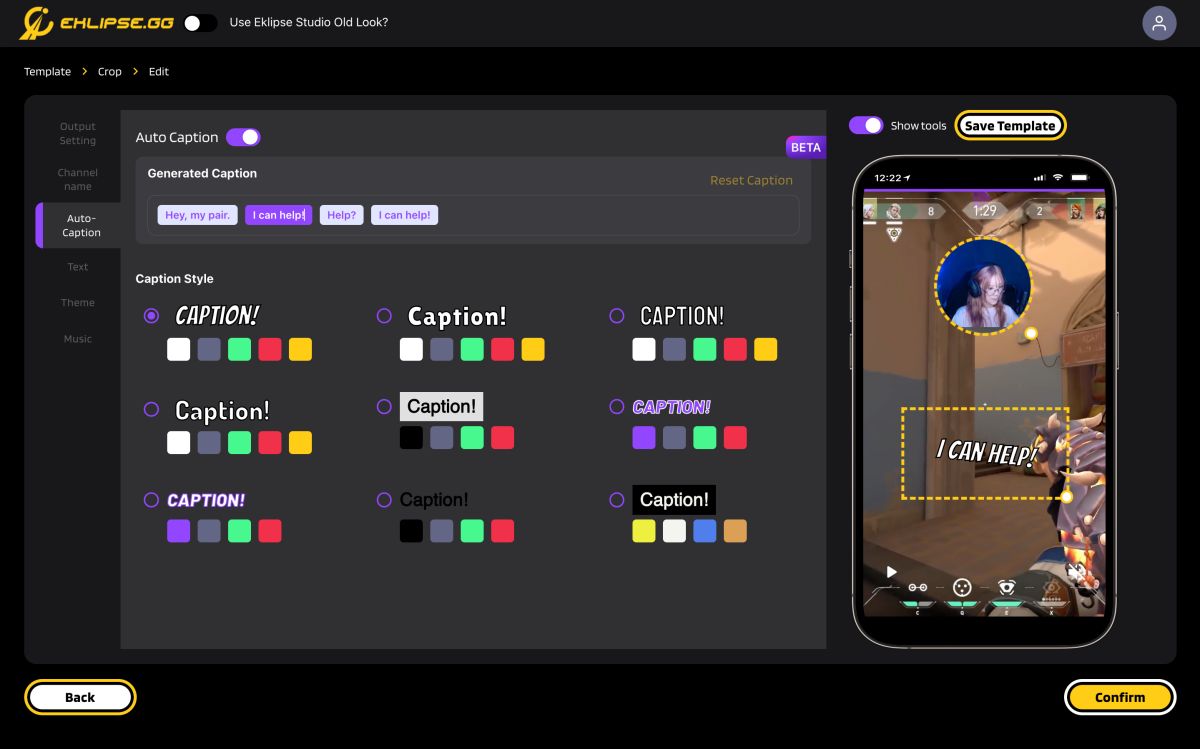
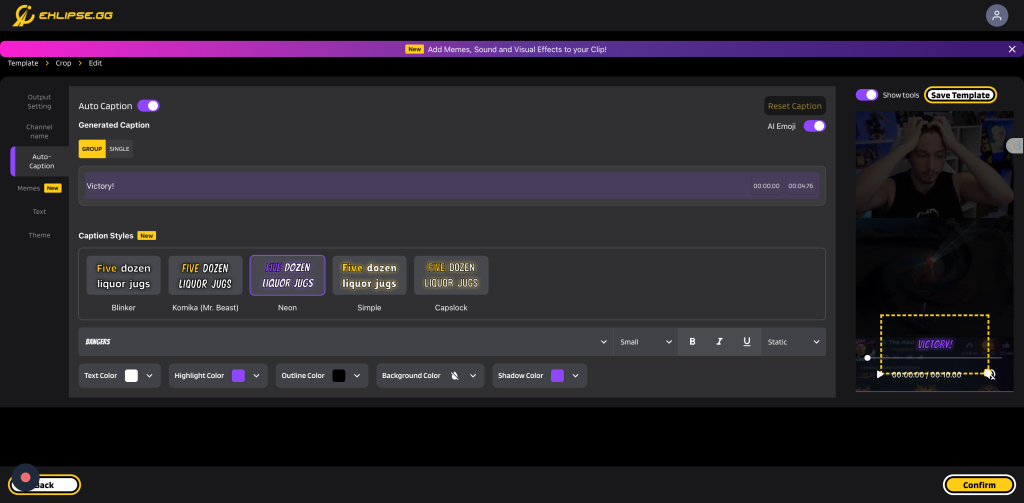
- Effortless Auto Captions: Let Eklipse analyze your video and generate high-accuracy captions. Customize them further with various fonts and colors to match your video’s style.
- Streamlined Workflow: Eklipse offers multiple import options. Upload your local video files or directly import clips from Twitch or Kick. No need to juggle different platforms!
- Seamless Editing: Choose from a variety of pre-made templates to personalize the layout of your TikTok video.
- AI-powered Highlights: While the focus is on auto-captions, you can mention this as an additional benefit. Eklipse uses AI to identify your stream’s most exciting moments, saving you time from manual searching.
Pros:
- Generate engaging TikTok content from your streams in a flash.
- Ensure viewers can understand your content, even with the sound off.
- Save time and effort with Eklipse’s user-friendly and versatile platform.
- Express yourself through customizable fonts and colors for your captions.
- Share your finished TikTok video directly to the platform without additional downloads.
Cons:
- The free plan has limited features and video storage.
- Advanced editing features require a paid subscription.
- Not ideal for creating long-form videos.
Pricing:
Eklipse offers a free plan to get you started, but it has limitations on features and video storage. Here’s a breakdown of their subscription options:
- Free Plan: This plan allows you to create a limited number of videos with basic editing tools and a watermark on the final product. You’ll also have limited storage space.
- Monthly Plan ($19.99/month): This plan removes the watermark and grants access to more editing features, including custom branding and a higher video storage limit.
Availability: Web-based platform, mobile apps (Android & IOs)
Maximize your Black Ops 6 rewards—Create highlights from your best gameplay with with Eklipse
Eklipse help streamer improve their social media presence with AI highlights that clip your Twitch / Kick streams automatically & converts them to TikTok / Reels / Shorts
Getting Started with Auto Captions in Eklipse for TikTok
Now that you’re convinced about Eklipse’s power, let’s dive into the simple steps for adding auto-captions to your TikTok video:
- Visit Eklipse.gg and Sign Up: Head over to the Eklipse website and create a free account.
- Start Converting: Once logged in, navigate to your dashboard and click “Start Converting” in the top right corner.
- Import Your Video: Choose your preferred import method:
- Upload Your Video: Select your video file from your computer (ensure it’s in .mp4 format and under 250 MB).
- Import from Twitch or Kick Clip: Copy the clip URL from your chosen platform and paste it into Eklipse.
- Select Your Template and Customize: Pick a template that suits your video and personalize the video layer according to your style.
- Add Auto Captions: Click the “Auto Captions” option and choose your desired font style and color for the captions.
- Confirm and Complete: Once happy with your edits, click “Confirm” to generate your TikTok video with auto captions. You can now directly share it on TikTok!

Why You Should Use Auto Captions on TikTok
There are several compelling reasons why utilizing auto-captions on TikTok can significantly benefit your content:
- Enhanced Accessibility: Auto captions make your videos more inclusive, allowing viewers who are deaf or hard of hearing to fully understand your message.
- Perfect for Short-Form Content: TikTok’s short-form format thrives on quick engagement. Auto captions ensure viewers can grasp the essence of your video, even without audio.
- Catering to Silent Viewers: Many users watch TikTok videos on mute. Subtitles from auto-captions provide crucial context and maintain viewer engagement, even without sound.
More on Eklipse Blog >> 5 Essential TikTok SEO Tips for 2023 – Creators Must-Know
Final Thoughts
In conclusion, adding auto-captions to your TikTok videos is a simple yet powerful way to make your content inclusive and engaging for a wider audience. But why spend hours manually transcribing?
Eklipse empowers you to automate the process with ease. Its high-accuracy auto-captions and user-friendly interface make creating captivating TikTok content with subtitles a breeze.
Embrace the power of Eklipse and unlock the full potential of your video content, ensuring it resonates with everyone, regardless of their audio settings. Start your free trial today and see the difference Eklipse can make!
🎮 Play. Clip. Share.
You don’t need to be a streamer to create amazing gaming clips.
Let Eklipse AI auto-detect your best moments and turn them into epic highlights!
Limited free clips available. Don't miss out!
