
Level Up Your Marvel Rivals Gameplay
Capture your epic wins, clutch moments, and even hilarious fails with Eklipse. Easily create and share highlight reels with your friends—even if you're not streaming!
Learn MoreHow to add closed captions to a YouTube video? What is actually a closed caption on YouTube? Well, YouTube CC is actually a feature that lets creators add captions to their videos to help viewers understand the audio. It includes subtitles and captions for viewers who are deaf or hard of hearing.
Adding YouTube automatic caption is a little bit technical, but doesn’t mean it’s difficult to get done. In this article, we’ll explain how to add closed-caption on YouTube in three different methods. Let’s begin.
How To Add Closed Captions To YouTube Video Using The Native Sub Tool
The easiest way to put subtitles to your YouTube video is by using the built-in feature. Yes, YouTube allows you to directly add a caption to every video conveniently. Here’s how to do it.
- To begin with, go to the YouTube website and log in to your account.
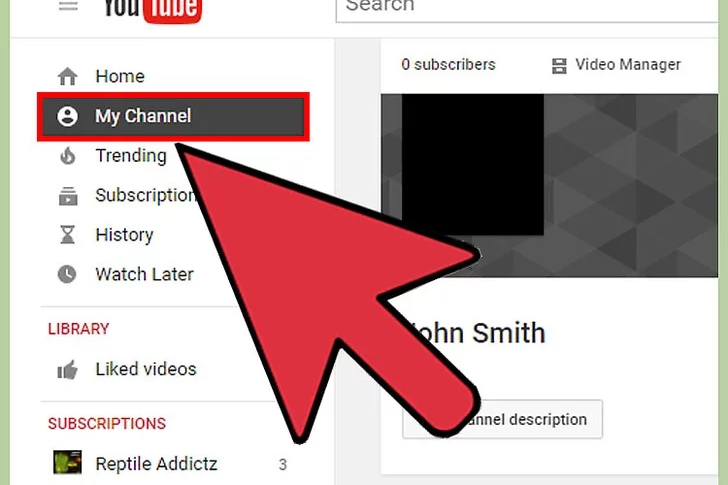
- Head over to your YouTube page by hitting the My Channel option in the left side menu.
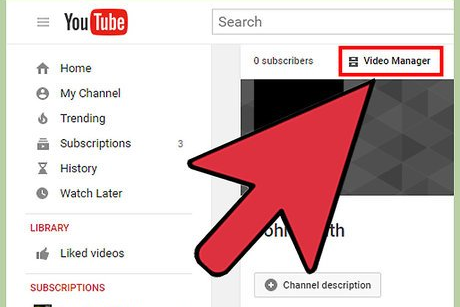
- Then, navigate to the Video Manager button.
- You’ll see the list of the uploaded video there.
- Alternatively, you can hit the profile icon > Creator Studio > Studio Manager.
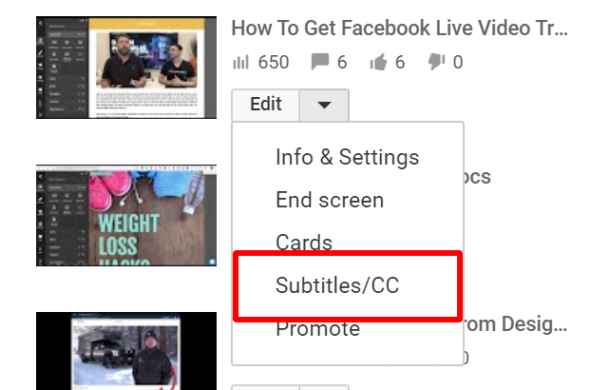
- After that, find the video you want to add the CC.
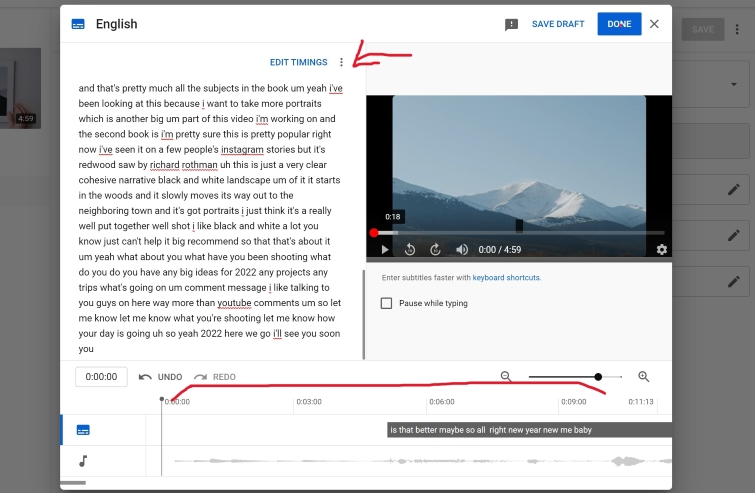
- Hit the Edit drop-down arrow button next to the video > Subtitles & CC.
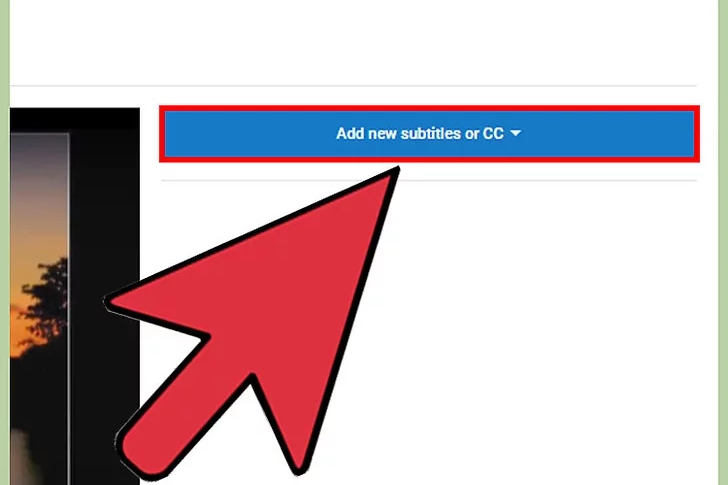
- Now click on “Add New Subtitles” and select “Create new subtitles or closed captions”.
- Choose your preferred subtitle language.
- Next up, play and pause the video in the certain part of the video you want to add a caption.
- Write the subtitle text and hit the blue plus button to submit the caption.
- Adjust the length of the subtitle.
- Avoid putting too many words at once by splitting the subtitle.
- Once you’ve completed subtitling, hit the Publish button to upload it to the video.
How To Add Subtitle Using YouTube Automatic Transcript Sync
Another way to add subtitles or closed-caption is by using the automatic transcript sync feature. This method is pretty simpler than the previous one since you don’t need to set the timing manually. Follow these steps to get it done.
- Do the same steps as the previous method (points 1-7).
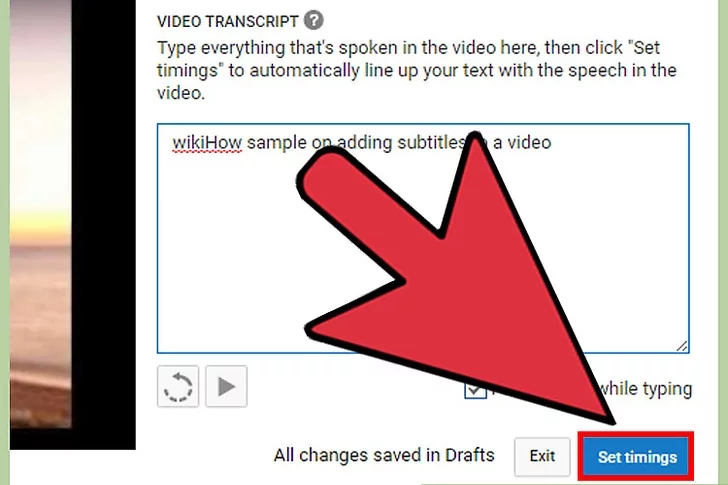
- Afterward, click Add New Subtitles and select “Transcribe and auto-sync”.
- Select the subtitle language.
- Next up, write away everything spoken on the video in the text area.
- Once done, hit the Set Timings button to automatically sync the written text to the timings in the video.
- Adjust the timing to synchronize the caption and the video.
- Finally, hit Publish after finishing putting the subtitle.
How to Add Closed Captions to YouTube Video From The Existing File
In case you want to create subtitles without using the YouTube feature, you can try using Notepad for Windows or TextEdit for Max, or any other text editor. Once it’s ready, simply add it to your video.
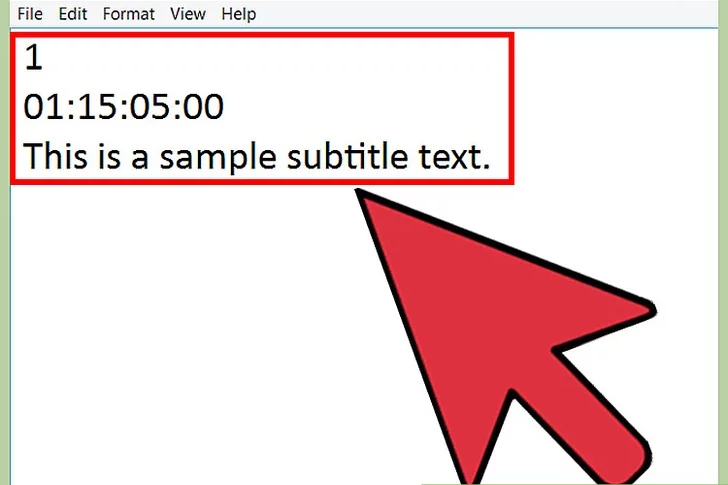
- First of all, create the subtitles using any text editor.
- Use the specific format (subtitle number, timestamp, and text).
- Keep in mind that the timestamps use the hour:minute:second:millisecond format.
- Once finished, navigate to the File tab and select the Save As option.

- Set the file into .srt format, or any common text format for subtitles.
- Set the Save As Type as All Files.
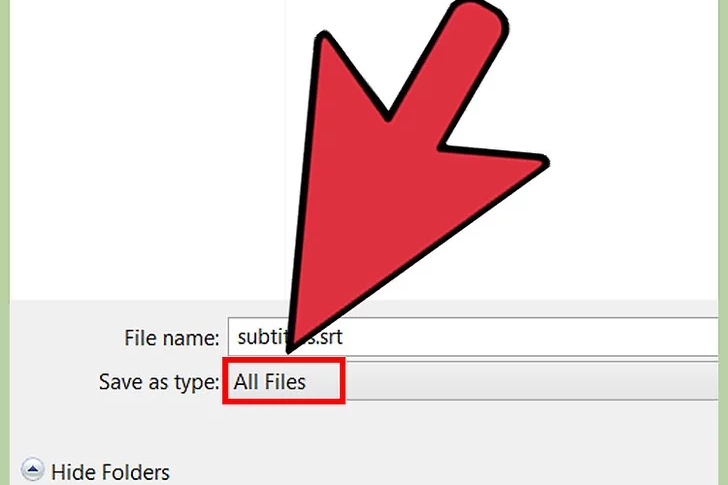
- Afterward, change the Encoding to UTF-8 to make sure the files work properly.
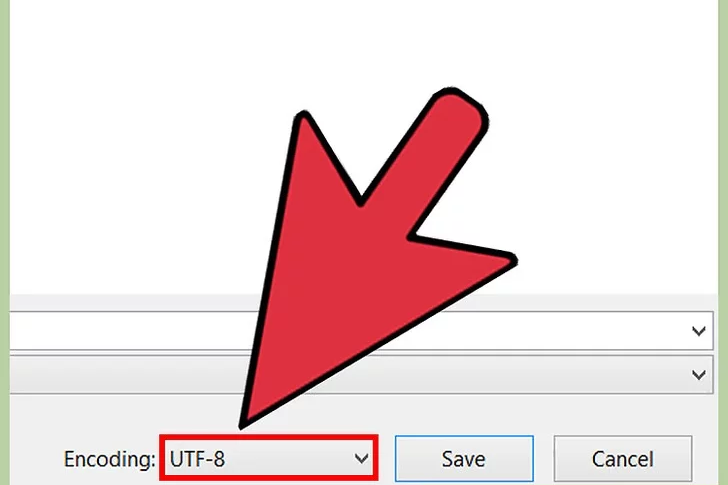
- Then, hit Save.
- Now, go to YouTube and do the same steps as the first method above (points 1-7).
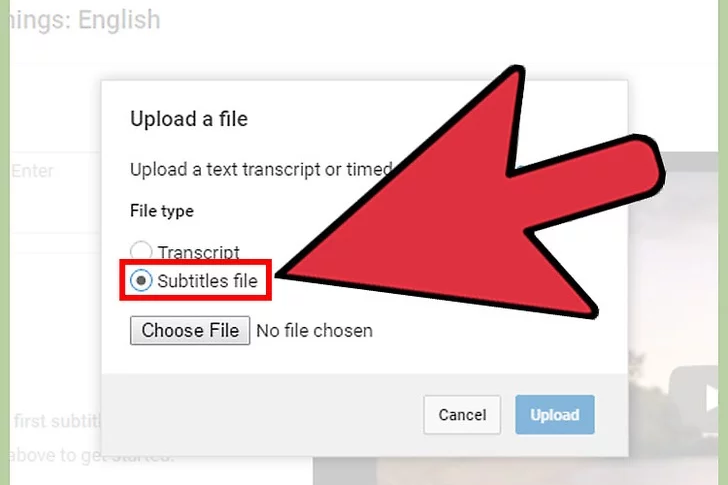
- Next up, hit the Add New Subtitles button, and select Upload a File.
- Choose the Subtitle File option from the popup menu.
- Browse the file, and hit Upload.
- Adjust the subtitles to make sure it matches well with the video.
- Lastly, click the Publish button to submit the subtitle to the video.
Conclusion
Now that you know how to add a closed caption to a YouTube video, you can improve the viewing experience of your audiences. Everyone can enjoy your content without any limits. Hopefully, this article could be useful to attract more views to your video. Good luck!
🎮 Play. Clip. Share.
You don’t need to be a streamer to create amazing gaming clips.
Let Eklipse AI auto-detect your best moments and turn them into epic highlights!
Limited free clips available. Don't miss out!
