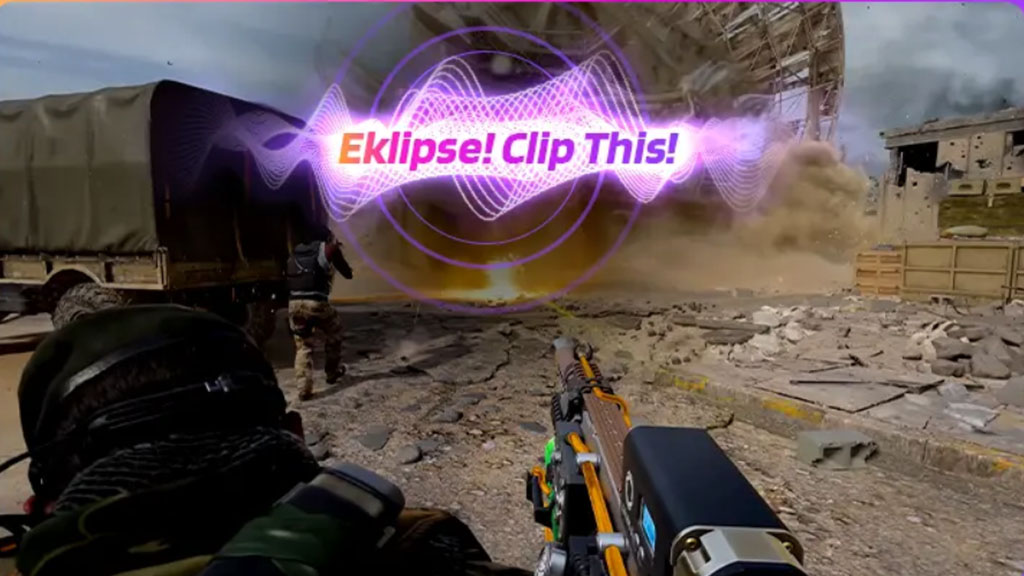
While everyone chases those “Only in Battlefield” epic plays, the franchise is equally famous for another kind of unforgettable moment: the absolute, laugh-out-loud fails. Since its launch on October 10, 2025, Battlefield 6 has proven to be a masterclass in chaotic physics and emergent comedy. These are the moments born from glitches, bad luck, and pure absurdity that often become more memorable than a perfect headshot. These are the best funny Battlefield 6 moments.
The beauty of Battlefield’s sandbox is that it’s an engine for unscripted comedy. Sometimes the game breaks in hilarious ways, and other times, players create their own slapstick humor. We’ve compiled some of the funniest clips we’ve seen so far, featuring some of the biggest names in gaming who prove that sometimes, the biggest win is having the best laugh.
4. A Medic Who Takes the Job a Little Too Seriously
This is peak “I got you bro!” energy 😂 Medics like this are the real MVPs… even when it goes hilariously wrong.
5. A Series of Unfortunate Events
Everything that could go wrong… did go wrong 😭 Total domino effect of disaster — 10/10 would laugh again.
6. The Classic “Fell Under the Map” Glitch
Some things never change 🤣 Falling through the map is basically a Battlefield rite of passage at this point.
Bro what did I just hear 😭💀 This sound glitch needs to be preserved forever — Battlefield comedy at its weirdest.
8. The Recon Drone of Doom
Imagine getting wrecked by a drone 💀 This is creative trolling at its finest — respect the chaos.
9. Tanks Hate This Simple Trick
Engineer mains are built different 🔧 One clever move and boom — tank goes bye-bye. Comedy meets genius.
10. The Pure Chaos Clip
This is Battlefield in a nutshell 💣 You have no clue what’s happening, but it’s beautiful, loud, and completely unhinged.
Don’t Let Your Funniest Moments Disappear
The best funny moments happen when you least expect them. A random physics glitch, a perfectly timed fail—you can’t plan for comedy. So how do you capture it without constantly smashing a record button? You let Eklipse do it for you.
Eklipse’s AI isn’t just trained to find your epic killstreaks; it’s designed to detect moments of intense, unusual action. That often includes the chaotic scrambles, sudden vehicle explosions, and bizarre encounters that make for the best funny clips. Just stream your game, and Eklipse will automatically clip the highlights—and the hilarious lowlights—for you. To get started, you can follow our simple guide on how to auto clip your Battlefield 6 moments.
Perfect Your Memes with Eklipse Premium
Ready to turn your funny fails into viral content? Eklipse Premium helps you polish your clips to perfection.
No Watermarks: Keep your memes and funny clips clean for maximum shareability.
AI Social Media Post Generator: Instantly create funny captions and hashtags to make your post go viral on TikTok, Reels, and Shorts.
Frequently Asked Questions (FAQ)
Can Eklipse actually clip funny moments and fails?
Yes! While our AI is trained to detect kills and epic plays, the sudden action, noise, and chaos associated with funny moments and fails often trigger our clipping algorithm. This means Eklipse frequently captures those unexpected funny moments right alongside your highlights.
Why are Battlefield games known for having so many glitches?
Battlefield games are incredibly complex, featuring large-scale maps, dozens of players, dynamic destruction, and a wide variety of vehicles. This complex interaction of systems (known as a “sandbox”) creates countless opportunities for unexpected and often hilarious bugs and physics glitches to occur.
Which type of content is better for growth: epic clips or funny clips?
Both are extremely valuable! Epic clips showcase your skill and impress viewers, while funny clips are highly relatable and shareable, which can massively boost your visibility and channel personality. A great content strategy includes a healthy mix of both.
Embrace the Chaos
Battlefield 6 continues the franchise’s proud tradition of being one of the most exciting and unintentionally hilarious games on the market. The moments in this showcase are a tribute to the beautiful, unpredictable chaos that keeps us all coming back for more.
So next time you log in, don’t just hunt for kills—keep an eye out for the comedy. And with Eklipse running in the background, you can be sure that when your funniest fail inevitably happens, it won’t be lost forever. Sign up today and start capturing every side of your Battlefield legacy.
Battlefield 6 has officially deployed! Launched on October 10, 2025, the newest chapter in the legendary franchise has already unleashed a new generation of “Only in Battlefield” moments across servers worldwide. As players dive in, the internet is already buzzing with clips of the unscripted, chaotic, and jaw-dropping events that define the series. We are already seeing some of the best Battlefield 6 epic moments.
To celebrate the launch, we’re highlighting 10 clips from top creators that perfectly capture the spectacular, vehicle-crunching, and squad-saving action that is the heart of Battlefield. These videos set the standard for the legendary clips we’ll all be creating and sharing from the new game. They are a masterclass in the kind of action that defines this incredible franchise.
This looks straight out of a movie trailer 🎬 Explosions, timing, lighting — perfection. Only in Battlefield moments, for real.
4. Westie: Skill and Mayhem Perfectly Blended
Westie doing Westie things 💪 Controlled chaos at its finest — every frame’s got something wild happening.
5. House Of FPS: Capturing the Magic of Battlefield
Pure nostalgia + chaos combo ❤️ This clip’s that “why we play Battlefield” energy. Just unpredictable, cinematic madness.
https://www.youtube.com/shorts/De89j3MwOvs
6. DooM49: Explosive Blockbuster Action
Bro turned the server into a Michael Bay film 💣 Everything’s blowing up every 3 seconds — absolutely insane.
7. StayBombastic: Flawless Execution Worthy of a Replay
Sometimes a play is so clean, so perfectly executed, makes you gotta replay it 👏 Every move hits perfect timing — feels scripted but it’s just pure skill.
Non-stop hype from start to finish 💀 The editing, the kills, the pacing — chef’s kiss for intensity.
10. ottr: An Adrenaline Ride of Mayhem
Peak Battlefield energy 🚁💥 Explosions, perfect timing, total mayhem — the kind of chaos we live for.
How to Capture Your Own Epic Battlefield Moments with Eklipse
Feeling inspired? When Battlefield 2025 drops, you’ll be creating your own legendary moments. But in the heat of battle, the last thing you want to do is take your hands off your controls to hit a clip button. You risk dying in-game and you might even miss the best part of the action. That’s where Eklipse comes in.
Eklipse is your personal AI clipping tool that works automatically in the background. Simply connect your Twitch, Kick, or YouTube account, stream your gameplay, and our AI will automatically detect, clip, and deliver your best moments—killstreaks, multi-kills, headshots, and more. No more sifting through hours of VODs. You play, and Eklipse handles the highlights, letting you turn your incredible gameplay into a steady stream of high-quality social media content effortlessly.
Create Professional-Quality Clips with Eklipse Premium
To do justice to a visually stunning game like the next Battlefield, you need the highest quality clips. Upgrading to Eklipse Premium gives you the tools to make your content truly stand out.
No Watermarks: Keep your content clean, professional, and ready for your brand.
Faster Processing: Get your clips quicker so you can post them while the moment is still trending.
Social Media Post Generator: Let AI create engaging captions and hashtags for your clips to maximize reach on TikTok, Reels, and Shorts.
Frequently Asked Questions (FAQ)
How can I automatically clip my own Battlefield 6 moments?
Capturing your best plays without interrupting your game is exactly what Eklipse is designed for. Our AI automatically detects and clips your highlights in the background, so you can focus on winning. For a complete walkthrough, check out our step-by-step guide on how to auto clip your Battlefield 6 moments.
How does Eklipse’s AI know what an “epic moment” is?
Our AI is trained on thousands of hours of gameplay across hundreds of titles. It recognizes key in-game events in FPS games, such as multi-kills, killstreaks, headshots, and other exciting action, to identify and capture your best highlights automatically.
Can I use Eklipse for free?
Absolutely! The Eklipse free tier is a great way to start. You can connect your stream and get AI-generated clips from your gameplay to see how it works. For higher quality, more features, and unlimited clipping, you can upgrade to Premium.
Start Capturing Your Battlefield 6 Legacy!
The “Only in Battlefield” legacy has entered its thrilling new era with the launch of Battlefield 6. The epic moments on this list are the foundation, and now it’s your turn to build upon it with the new maps, vehicles, and destruction. The only question is, are you ready to capture your own legendary plays as they happen?
Don’t let your best highlights get lost in the chaos of battle. Sign up for Eklipse today and start turning your incredible Battlefield 6 gameplay into amazing social media content. Capture every epic moment automatically and show the world what you can do on the new battlefield.
At Eklipse, our mission has always been clear: empower gaming streamers and content creators to turn their real gameplay into content that grows their audience, without the time, friction, or complexity of manual editing. To explain how our technology works, it’s important to first define what kind of AI we use. The simple answer is that Eklipse uses extractive AI, a safer and more authentic approach compared to the generative AI many people think of.
Many creators hear “AI video tool” and immediately think of generative AI, which fabricates entirely new content from prompts. But Eklipse belongs to a different, more creator-safe category. Understanding that difference helps explain why we built Eklipse the way we did — to enhance your creativity, not replace it.
AI in content creation generally falls into two core groups:
Generative AI: Creating from Scratch
Generative AI models are trained to produce brand-new content — text, images, video, and audio that did not previously exist. Systems like ChatGPT, Runway, and Synthesia fall into this category. They’re designed to generate ideas, scenes, and visuals based on learned data patterns. While powerful, generative AI often introduces risks for creators and brands: factual “hallucinations,” style inconsistency, licensing uncertainty, and perception issues such as “AI-slop” or synthetic-looking media.
Extractive AI: Enhancing What Already Exists
Extractive AI, on the other hand, works differently. Instead of generating new visuals or voices, it identifies and extracts meaningful segments from existing data. It repackages what’s already authentic — surfacing the best parts of your footage, conversations, or gameplay. This type of AI is used across search engines, recommendation systems, and highlight detection tools — including Eklipse.
In short: Generative AI creates. Extractive AI curates. At Eklipse, we believe curation is the future of authenticity-driven content creation.
How Eklipse Uses Extractive AI
Eklipse AI Video Generator
Eklipse is an extractive AI platform built for streamers and gaming creators. Our technology automatically scans your Twitch, Kick, YouTube, or Facebook VODs, detects hype moments, and turns them into short-form, social-ready videos optimized for TikTok, Reels, and YouTube Shorts.
We don’t generate fictional scenes, AI avatars, or synthetic voiceovers. We work entirely with your real gameplay footage because your authentic reactions, your clutch moments, and your energy are what your community connects with. Our AI system is trained on hundreds of popular game titles, recognizing contextual cues such as kills, wins, and assists. By analyzing both audio and visual triggers, Eklipse determines which moments carry the most emotional weight and extracts them automatically.
Why Eklipse Chose Extractive AI — and Why It Matters
How to Get Mobile Legends Highlight Automatically with Eklipse
We built Eklipse around extractive AI for three key reasons: authenticity, trust, and scalability.
Authenticity: Gaming content thrives on real reactions, not staged or generated ones. Our AI enhances what you already do naturally, ensuring your clips stay grounded in reality.
Trust: Platforms like TikTok and YouTube are increasingly strict about synthetic media. By using extractive AI, Eklipse ensures every clip you publish meets platform guidelines for originality. Your highlights remain fully yours — traceable and compliant.
Scalability: We designed Eklipse to remove bottlenecks in your workflow. Traditional editing takes hours. With Eklipse, you get highlight clips automatically, which you can review and publish from your desktop or on the go with our Mobile App.
What Eklipse Enables for Streamers and Gaming Creators
Our goal is simple: help creators produce, publish, and grow — faster and more sustainably. Here’s what Eklipse makes possible:
Fast, Automated Highlight Generation: Eklipse scans your streams and identifies engaging moments in minutes. You can even capture moments hands-free while streaming using our Voice Command feature.
Consistent Short-Form Output: Consistency drives algorithmic visibility. Automated clipping helps you maintain an active social presence, which is key to organic growth.
Authenticity and Creator Control: We never replace your content — we refine it. You can preview, adjust, or trim any clip before publishing. With powerful tools like Eklipse Studio and AI Edit, you have full creative control to ensure every post fits your brand.
Cross-Platform Growth: Eklipse automatically formats your clips for vertical platforms, helping you multiply your reach without re-editing for each channel.
Time and Cost Efficiency: For solo creators, editing can take 3–5 hours per stream. Eklipse drops that to a few minutes of review. That’s time you can reinvest into your community.
How Eklipse Compares to Generative Video AI Tools
Feature
Eklipse (Extractive AI)
Generative Video AI
Input Source
Your recorded gameplay or stream VODs
Text or visual prompts
Output Type
Real highlights from your footage
Synthetic video content
Authenticity
100% real, authentic moments
AI-generated imagery or animation
Editing Time
Minimal — automated extraction
High — prompt and refine cycles
Platform Compliance
Fully compliant
Variable; may trigger content flags
Risk of Hallucination
None
Moderate to high
Use Case
Streamers, creators, editors
Studios, concept designers, agencies
Value Proposition
Fast, authentic, safe growth
Creative experimentation
Frequently Asked Questions (FAQ)
What is extractive AI in simple terms?
Extractive AI is a technology that analyzes existing content (like your stream VOD) and “extracts” the most important or relevant parts. Think of it as an intelligent curator that finds the best moments for you automatically, rather than a creator that makes up new things from scratch.
Is extractive AI safer for my channel than generative AI?
Yes. Because extractive AI uses 100% of your own original gameplay and reactions, the output is authentically yours. This avoids issues with synthetic media policies on platforms like YouTube and TikTok, protects your brand’s authenticity, and ensures you always have clear ownership of your content.
Does Eklipse’s AI change my gameplay footage?
No, Eklipse does not alter or generate new gameplay. Our AI simply identifies and clips the most exciting moments that have already happened. You then have full control to edit these clips using tools like Eklipse Studio before you share them.
Our Call to Action: Measure Your Growth with Eklipse
Every product claim should be measurable. That’s why we encourage streamers and creators to quantify their gains with Eklipse. Don’t just take our word for it—see what other creators have achieved on our Use Cases page and then try it for yourself.
Connect your latest Twitch, Kick, or YouTube stream.
Let Eklipse auto-generate your highlights.
Track how many clips you create and how your short-form engagement changes.
Creators consistently report cutting editing time by over 80–90% and publishing 3–5x more content after using Eklipse. That’s not just convenience — that’s growth automation.
Conclusion: Authenticity Scales Faster
Eklipse isn’t here to generate artificial moments. We’re here to amplify your best moments — the real plays, real reactions, and real highlights that define your channel. By leveraging extractive AI, we help creators scale authenticity without compromise. You stay in control of your content, your brand voice, and your storytelling, while our AI takes care of the grunt work.
If you’re ready to grow your channel with real results, try Eklipse today. Upload your stream, extract your highlights, and see how fast authenticity scales when AI works for creators, not instead of them.
The next Battlefield is on the horizon for 2025, promising massive-scale warfare, stunning destruction, and unforgettable “Only in Battlefield” moments. As a streamer, you know these epic, unscripted events are content gold, but capturing them live is nearly impossible without interrupting your gameplay. This guide will show you how to auto clip Battlefield 6 moments using Eklipse, ensuring you never miss a single jaw-dropping highlight.
Eklipse acts as your personal AI editor, intelligently identifying and clipping your best plays in the background while you focus on winning the match. By automating the highlight creation process, you can save countless hours of VOD scrubbing and get high-quality, shareable clips almost instantly. It’s the ultimate tool for turning your live gameplay into a steady stream of engaging social media content.
Why Do You Need Automatic Clipping for Battlefield 6?
Battlefield isn’t just a game; it’s a chaotic sandbox of emergent gameplay. One minute you’re in a tense infantry firefight, the next you’re pulling off a wild stunt with a jet. Manually clipping these moments is a challenge. You either have to remember a timestamp or rely on a clumsy hotkey that takes you out of the action. This often means the best moments are lost forever.
Capture the Chaos: From multi-kills and long-range snipes to vehicle takedowns and clutch revives, the action is relentless. AI clipping ensures these fleeting moments are captured.
Save Massive Amounts of Time: Instead of spending hours reviewing VODs after a long stream, you get a curated list of your best plays ready to go.
Stay Focused on the Game: No more distractions. Keep your hands on your keyboard and mouse and let the AI handle the content creation. You play, Eklipse clips.
Step-by-Step: How to Auto Clip Battlefield 6 with Eklipse
Getting set up with Eklipse is incredibly simple. Our platform is designed to integrate seamlessly with your streaming workflow. Let’s walk through the process so you’re ready to capture amazing content from day one of the Battlefield 6 launch.
Create Your Eklipse Account: If you haven’t already, sign up for a free Eklipse.gg account. The free tier is a great way to start, allowing you to process your first few streams and see the magic for yourself.
Connect Your Streaming Platform: In your Eklipse dashboard, navigate to the “Connections” tab. Here, you can link your Twitch, Kick, or YouTube account. Just authorize the connection, and we’ll be ready to see your streams.
Start Streaming Battlefield 6: That’s it! There’s no software to install or hotkeys to configure. Just play your game as you normally would. Once your stream is live, Eklipse will automatically detect it and begin processing in the background.
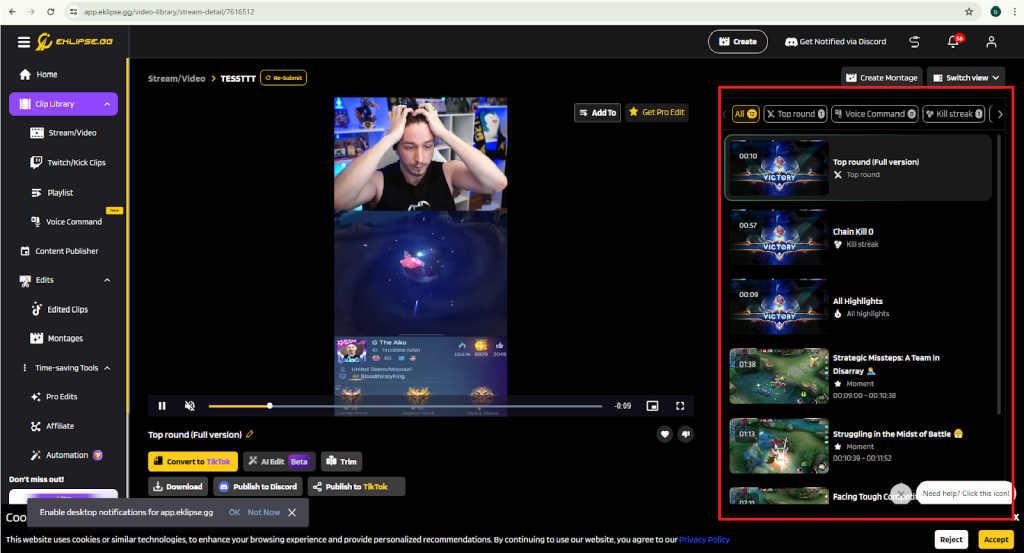
Review Your AI-Generated Clips: After your stream ends, Eklipse gets to work. Our AI analyzes your gameplay, identifying highlights based on in-game events recognized in shooters (like kills, killstreaks, and headshots). You’ll receive a notification when your clips are ready to be viewed in your dashboard.
Edit and Share: From your Eklipse dashboard, you can trim your clips, convert them to TikTok/Shorts/Reels format with our built-in editor, and share them directly to your social media platforms.
Pro Tip: Use the Eklipse Mobile App
Want to review and share your clips on the go? The Eklipse mobile app lets you manage your content from anywhere. You can get a head start on your social media posts during your commute or downtime, keeping your content flow consistent even when you’re away from your PC.
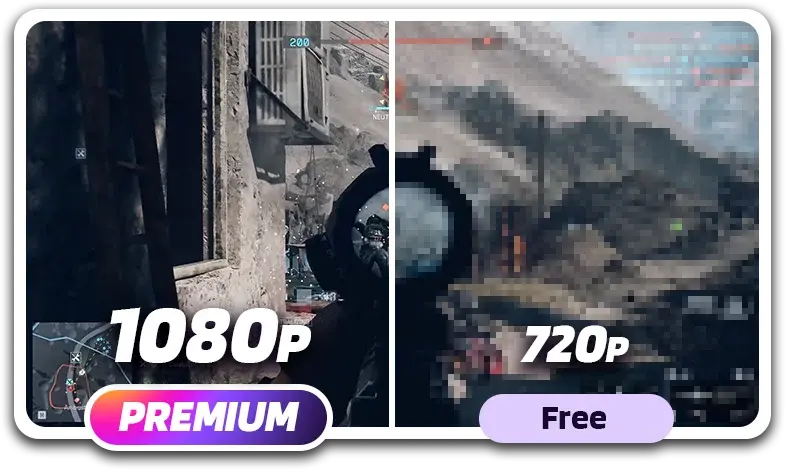
Elevate Your Battlefield Clips with Eklipse Premium
Ready to make your Battlefield 6 content stand out? While our free plan offers incredible value, Eklipse Premium is designed for streamers who are serious about growth. It provides the professional tools you need to create top-tier content that captures the insane visual fidelity of a game like Battlefield 6.
Premium Feature
Benefit for Battlefield 6 Streamers
1080p Clip Quality
Capture the stunning graphics and explosive action in crisp, high-definition detail. Your viewers won’t miss a single pixel.
No Watermarks
Maintain a professional look for your brand. Your content, your branding—no distractions.
Kick Platform Support
Expand your reach by automatically clipping your Kick streams alongside Twitch and YouTube.
AI Social Media Post Generator
Instantly generate engaging captions and relevant hashtags for your clips, optimizing them for platforms like TikTok, X (Twitter), and Instagram.
3x Faster Processing
Get your clips faster, allowing you to post timely content and capitalize on trending moments from your stream.
Key Eklipse Premium benefits for creating high-quality FPS content.
Frequently Asked Questions (FAQ)
Is Eklipse’s Auto Clipping Free to Use?
Yes! Eklipse offers a free tier that allows you to process 3 streams per month with 720p clip quality. It’s the perfect way to test the platform and see how it fits into your workflow. For more features and higher limits, you can upgrade to Eklipse Premium.
Will Eklipse Support Battlefield 6 on Launch Day?
Eklipse continuously updates its AI to support the latest and most popular games. While official support depends on the final game release, our AI is already highly proficient at recognizing key moments in FPS titles, ensuring you’ll be able to capture great clips from the start.
Can I Clip from Platforms Other Than Twitch?
Absolutely. Eklipse supports automatic clipping from Twitch, YouTube, and Facebook streams. With an Eklipse Premium subscription, you also get full support for the Kick streaming platform.
Get Ready to Dominate the Battlefield and Your Content
The next Battlefield is going to be a content machine, and with Eklipse, you’ll be perfectly positioned to take advantage of it. Stop worrying about missing highlights and start focusing on what you do best: playing the game. Let us handle the clipping so you can focus on creating unforgettable moments.
Sign up for Eklipse today and prepare to turn your best Battlefield 6 gameplay into a powerful engine for channel growth. When the game launches, you’ll be ready to share incredible, high-quality clips without lifting a finger. Ready to automate your success? Give Eklipse a try!
Eklipse is one of the best stream highlight tools for content creators in 2025. It delivers 10X faster processing, hands-free clipping with voice commands, built-in editing to style your videos, and direct publishing to TikTok, Reels, and Shorts. But while Eklipse shines in automation and social-ready output, it’s not the only option out there.
Depending on your workflow, you might prefer tools that focus on manual editing flexibility, browser-based simplicity, or budget-friendly pricing. In this article, we’ll compare the 10 best stream highlight tools of 2025, breaking down their key features, pros, cons, and pricing to help you choose the right fit.
Eklipse is an advanced AI tool that automatically generates highlights from your Twitch, YouTube, Facebook, and Kick streams and videos. It uses AI to identify exciting moments like kills, clutches, and funny reactions. These highlights can then be easily converted into vertical video formats like TikTok, Instagram Reels, and YouTube Shorts.
Key Features:
Automatic Gaming Highlights: Eklipse automatically generates highlights from Twitch, YouTube, and Facebook streams and videos.
Clip Conversion: Users can convert clips into vertical format using templates, pick a layout that suits their style, and create vibrant captions with animations and custom fonts.
Content Planning and Posting: Eklipse allows users to plan and post content, schedule posts with the Content Publisher, and enjoy a 3x faster processing speed.
Customization: Users can customize clips with TikTok templates, copyright-free background music, and a trimming feature.
Download and Share: Eklipse allows users to download Twitch and TikTok clips and easily export and share clips to social media platforms like TikTok, Instagram, Facebook, and YouTube.
Weekly Showcases and Montages: Eklipse provides weekly showcases and montages.
Support for Many Streams: Eklipse supports all types of streams, including Just Chatting, podcasts, sports broadcasts, and other unique broadcasts.
Some advanced editing options and higher-quality exports require a Premium subscription.
Editing customization is lighter compared to full professional software
Price:
Free with basic features
US$19.99 per month for Premium plan
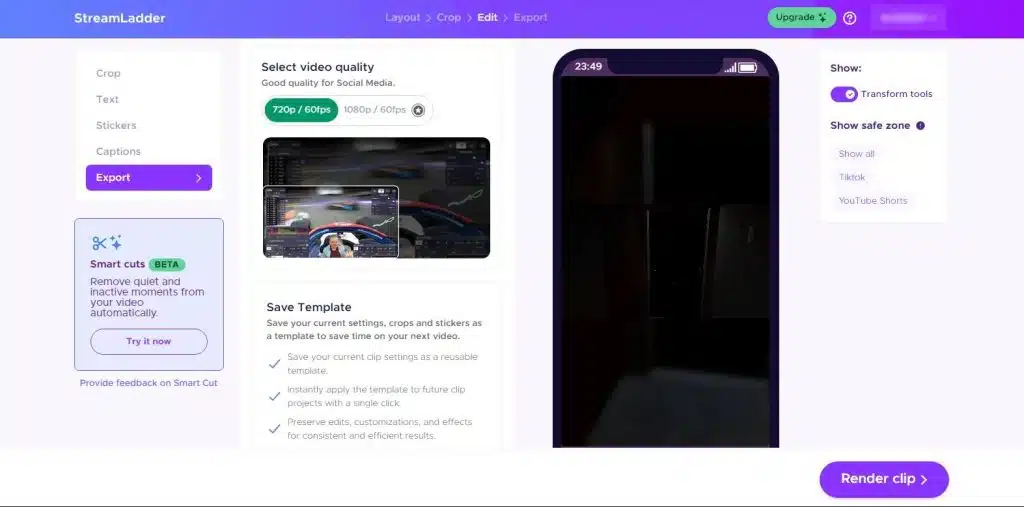
2. StreamLadder: Best Popular Highlight Tool
Source: Streamladder.com
Streamladder is a popular web app that lets you convert your Twitch clips into TikToks, YouTube Shorts, Instagram Reels, and more. It automatically crops, edits, and adds effects to your clips, making them ready for social media.
Key Features
Clip Slicing: Users can slice their videos and move/reposition their segments according to their preferences.
Decorations: Users can add stickers and custom text to YouTube and Twitch clips to make them look livelier and more engaging.
Auto-Captioning: StreamLadder automatically generates captions for TikTok posts, saving time and effort.
Immediate Posting to Socials: With StreamLadder Gold, users can schedule and post their videos to TikTok and YouTube Shorts ahead of time.
Track Video Status: Gold users can track the real-time status of their clips and monitor their progress seamlessly.
Multi-Account Sticker: StreamLadder offers a single, sleek sticker where users can add multiple social media accounts and let people know their names and where to find them.
EmoteMaker: StreamLadder provides a free EmoteMaker tool for creating unlimited animated emotes for Twitch chats.
Pros:
Upload and schedule videos for social media with no limits, even on the free plan.
StreamLadder’s SmartCut feature cuts out quiet and inactive parts of videos.
The free version doesn’t add watermarks to videos.
Users can track video status in real-time.
It offers unlimited animated emote creation with EmoteMaker.
Cons:
The free version exports videos at 720p HD resolution.
Video splitting is not available for free members.
The online portal offers fewer features compared to full desktop video editing software.
Nexus Clip is an AI-powered stream highlight tool built for creators who want fast, social-ready content. It automatically detects exciting gameplay moments and converts them into short clips optimized for TikTok, Reels, and YouTube Shorts. With its clean interface and simple templates, Nexus Clip is a good option for gamers looking for a quick turnaround without advanced editing knowledge.
Key Features:
AI Highlight Detection: Automatically identifies the most exciting moments in your gaming sessions.
Social Media Templates: Ready-made vertical formats optimized for TikTok, Reels, and Shorts.
One-Click Export: Instantly publish clips to multiple social platforms.
Pros:
Beginner-friendly interface with minimal setup
Ready-to-use templates for fast social sharing
Cons:
Free plan has watermarks and limited exports
Editing customization is basic compared to pro tools
Pricing: Free plan available; Premium starts at $12/month
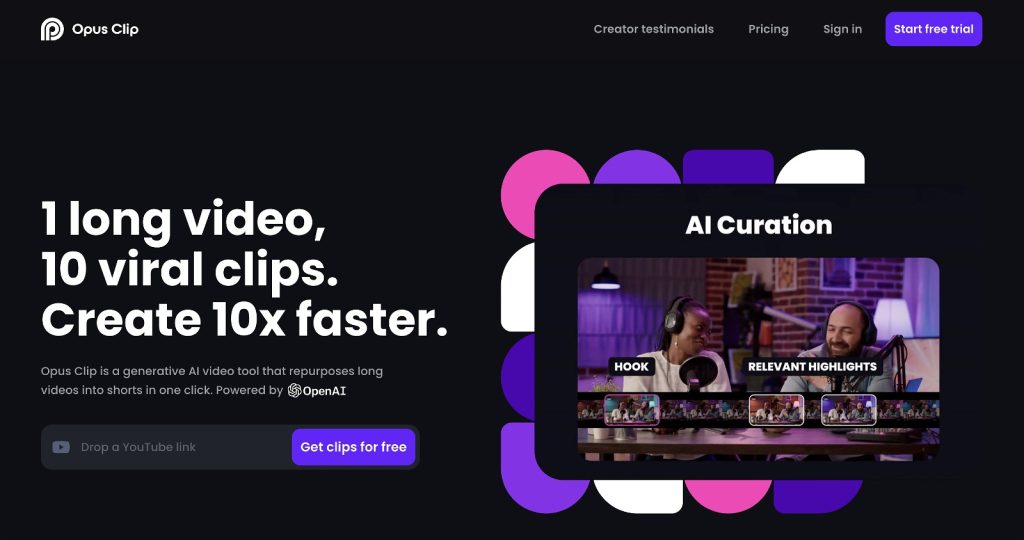
4. Opus.Pro: Best to Generate Professional-Looking Short Videos
Source: AI Art Kingdom
Opus Pro, also known as Opus Clip, is an AI video clipping tool designed to help content creators easily repurpose their long-form videos into professional-looking short-form clips perfect for platforms like YouTube Shorts, TikTok, and Instagram Reels.
Key features:
AI-driven content transformation: Opus Pro’s AI capabilities automatically identify compelling hooks and highlights within long-form videos, reorganizing them into cohesive, viral short videos Active speaker detection: This feature ensures the focus remains on the speakers throughout the video, enhancing viewer engagement and professionalism
AI Keyword Highlighter: Opus Pro’s AI analyzes video captions and effectively highlights keywords, boosting video watch time and searchability
Multi-Language Support: Opus Pro supports multiple languages, including English, German, Spanish, French, and Portuguese, catering to a diverse global audience
Custom Branding: Users can create up to 5 brand templates, maintaining brand consistency across all content
Caption Animation: Opus Pro offers various caption animations to increase viewer retention and engagement.
Auto Caption: The software provides auto-captioning with high accuracy, resulting in a 45% increase in watch time and making content more accessible to a broader audience
Pros
Identify the best and key moments easily
Streamlined social media integration
Integrates your brand elements like logos and colors
Easy-to-use web-based platform
Auto-captions feature and filler word removal
Cons:
Limited editing capabilities
Limited only on specific platforms (YouTube Shorts, TikTok, Instagram Reels)
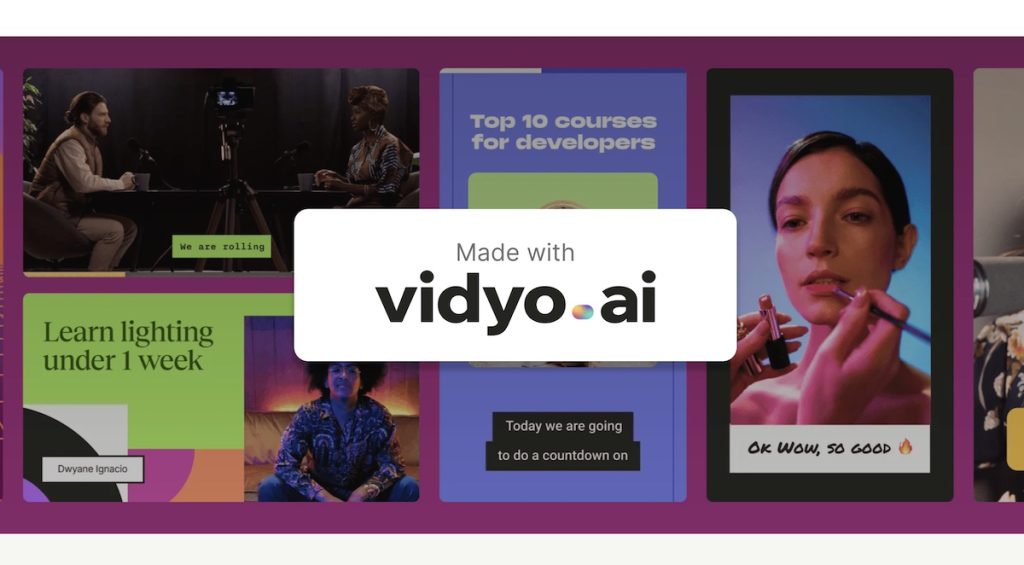
5. Vidyo.ai: Best Highlight Tool for Content Creators
Source: vidyo.ai
If you are a content creator, Vidyo.ai helps you create great clips. Vidyo.ai is an AI-powered video editing platform designed to help you transform long-form videos into short, engaging clips specifically optimized for social media.
Key Features
Advanced AI video clipping: Vidyo.ai automatically analyzes and generates short clips using advanced AI video clipping features
Progress bar for 1-minute clips: It offers a progress bar for 1-minute clips, allowing users to easily navigate through the video
Automatic transcriptions: The platform provides automatic transcriptions, making it easier to edit and repurpose content
Customizable fonts: Vidyo.ai offers customizable fonts for a consistent visual brand
Animated text overlays: It provides animated text overlays to enhance the visual appeal of the videos
Integrated B rolls library: The platform has an integrated B rolls library, which allows users to enhance their storytelling with royalty-free stock images, videos, and audio
Pros:
Automatically generating multiple engaging clips from long-form videos
Social media optimization
Auto-generated description with hashtags
Easy to use
Well-organized clip selection
Cons:
Limited editing capabilities
Limited on specific social media platforms
Doesn’t automatically cut out silences or fillers
Price:
Free for basic features
US$19 per month for Essential subscription
US$29 per month for Growth subscription
6. Vizard.ai: Best AI-Powered Highlight Tool
Source: Metaverse Post
Vizard is a browser-based platform that allows you to create social-ready videos with the magic of AI. You can take advantage of AI features to translate, transcribe, add subtitles, and even generate Twitch comments—all with a single click. Vizard also offers various editing tools, effects, and translations to make your videos more engaging.
Key Features
AI Clipper: Vizard’s AI clipper automatically detects engaging segments in video footage and generates short clips, eliminating the need for manual review
Video Editor: The tool provides a user-friendly video editor for comprehensive creative control, allowing users to edit videos by text, trim, and delete the corresponding transcription
Transcription: Vizard transcribes videos, which can be used for editing and creating captions
Translation: The platform supports caption translation into over 100 languages, helping users reach a global audience
Resize: Vizard allows users to resize videos to fit different social platform requirements
Timeline Editor: The tool offers a fine-tuned text-based edit by timeline down to seconds-level
Branding: Users can leverage templated designs or save their own to maintain brand consistency
Pros:
Automatically generating multiple engaging clips from long-form videos
Automatic transcriptions and subtitles
AI translation in multiple languages
User-friendly
Simple and efficient editing tools
Cons:
Limited editing capabilities, especially for the free version
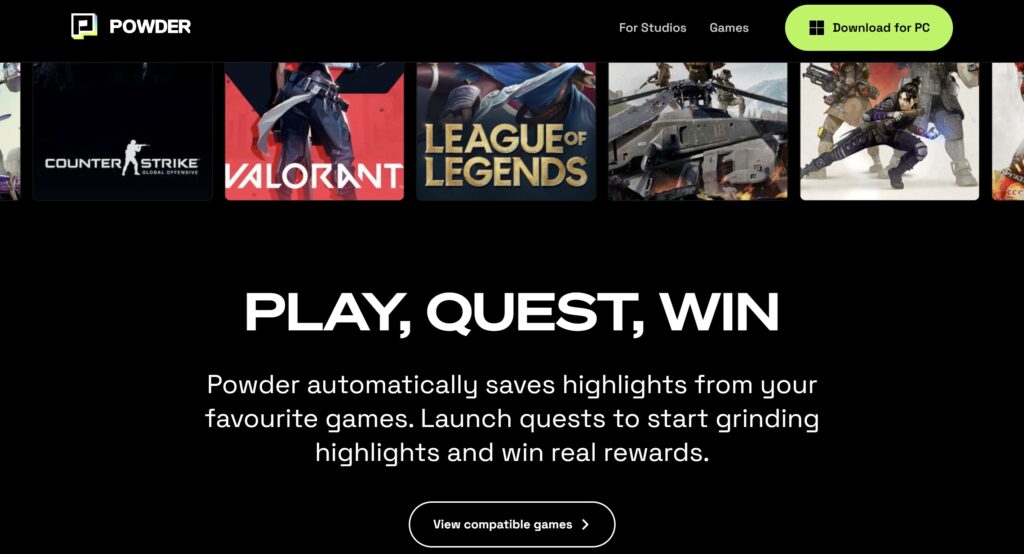
Powder.gg was a desktop app that captured, edited, and shared gaming highlights using machine learning. It was popular for quick clip sharing to Discord, TikTok, and more, but shut down in 2025. As the best Powder alternative, Eklipse offers 10X faster AI highlight detection, instant editing with captions and effects, and direct publishing to TikTok, Reels, and Shorts—plus a free version for budget creators.
Key Features
Instant Highlights: Import your Twitch video or local video file and watch as the AI identifies the best moments, creating highlights and montages in a few clicks.
Quick Customization: Swiftly modify your content with intuitive templates, saving you hours of editing time.
Streamlined Sharing: Easily distribute your clips and montages across social media platforms like TikTok, Twitter, Instagram, and YouTube.
Cost-Saving: An affordable solution compared to hiring a video editor or buying professional video editing software.
Pros:
Save time editing streams
High-quality clips
Easy to use
Integration with popular platforms (Twitch, YouTube, TikTok)
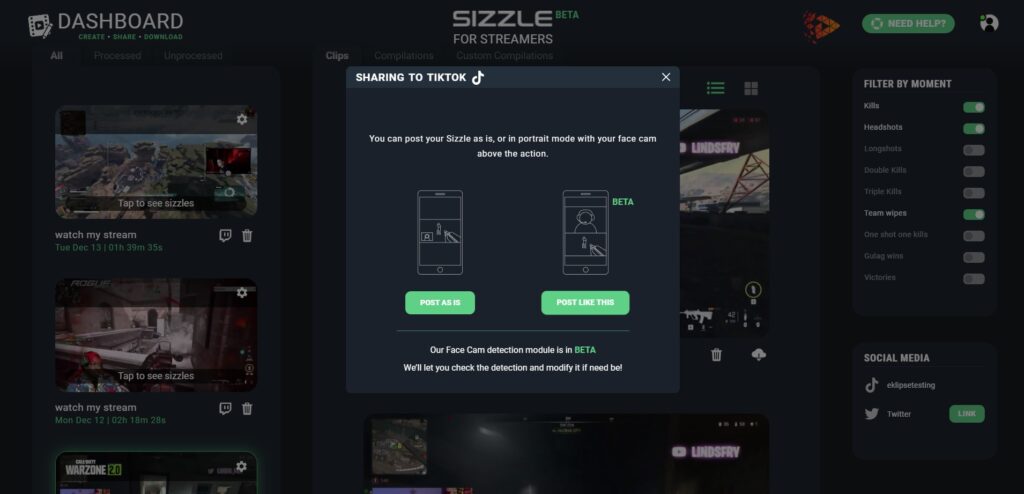
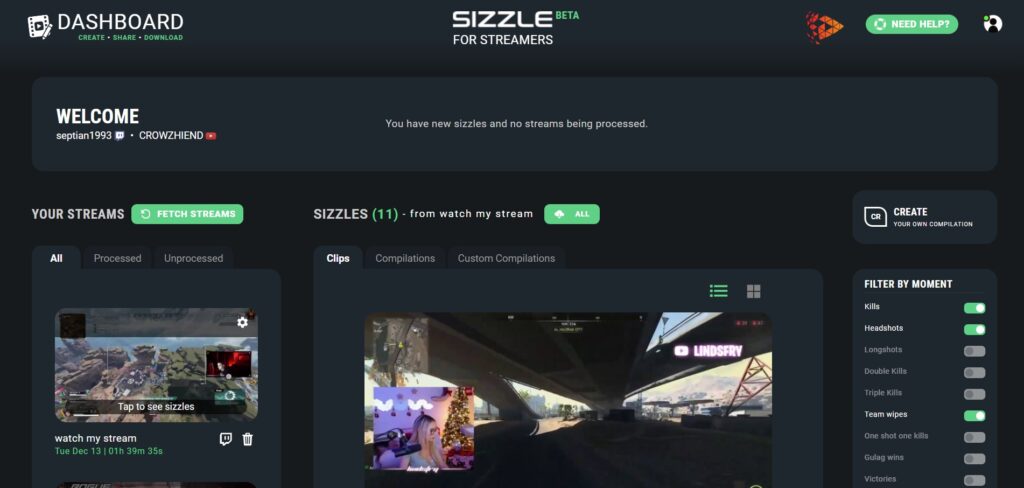
Sizzle.gg is a platform designed to help content creators transform long-form videos into bite-sized clips perfect for social media platforms like TikTok, YouTube Shorts, and Instagram Reels. The good news is that they are adding a new feature that allows you to download your video in a vertical format, making it easier to share on social media.
Key Features
Compatibility: Sizzle.gg is compatible with a wide range of popular streaming and esports games, such as League of Legends, VALORANT, Fortnite, Apex Legends, Call of Duty: Warzone 2.0, and Overwatch 2
AI Technology: Sizzle.gg uses innovative AI technology to analyze the most action-packed segments of a gaming stream and automatically create highlights
Personalizable Features: The platform allows users to create daily or weekly updates for fans, focusing on specific themes or entertaining moments
Easy Sharing: Sizzle.gg stream highlights are embedded directly from the original YouTube or Twitch stream, ensuring no loss of advertising revenue and preserving social shares
Immersive Experience: Viewers can search for and watch specific highlights, providing a deeply immersive and personalized experience
Pros:
Automatic short clip generation
Social media ready
Easy to use
“Vertical download” feature available
Ad-revenue preservation
Cons:
Limited editing capabilities
Limited compatibility with streaming and esports games
Price:
Free with basic features
US$4.99 per month for the Starter package (US$0.99 for the first month)
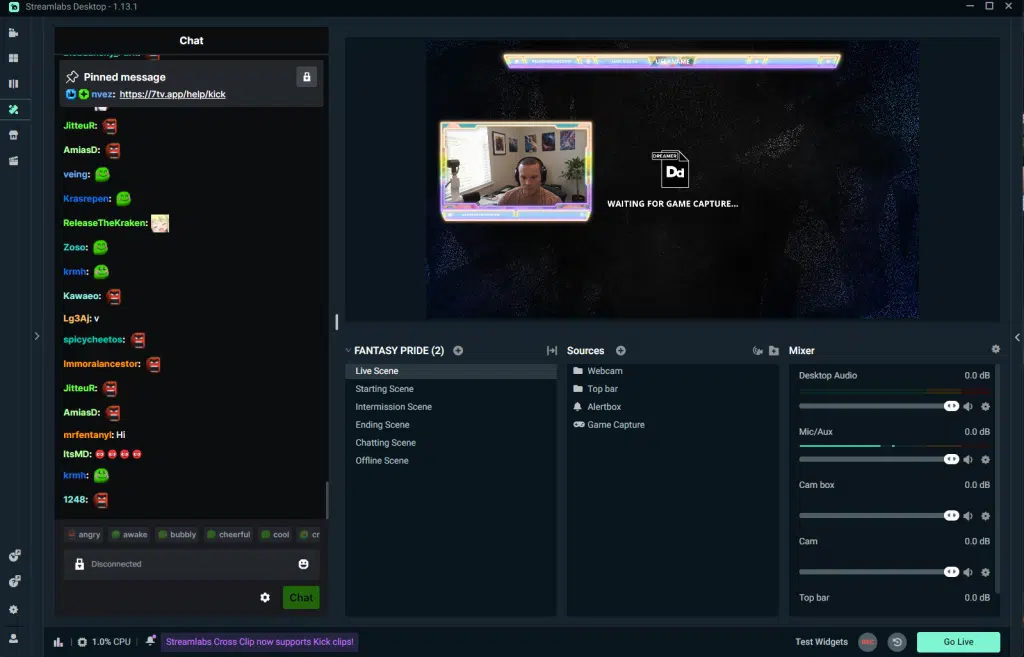
9. Streamlabs Cross Clip: Best Free Highlight Tool for Streamlabs Users
Streamlabs Cross Clip is a free and easy-to-use tool designed specifically for streamers to clip and edit their best gaming moments. It integrates seamlessly with the popular streaming platform Streamlabs OBS, making it a convenient solution for content creators on Twitch, YouTube, and other platforms.
Key Features:
Clip Editing: Streamlabs Cross Clip provides an editor to arrange content and camera boxes on videos, allowing for the creation of custom clips
Watermark Removal: Cross Clip Pro enables streamers to remove the Cross Clip watermark from their clips.
Export in High Quality: Cross Clip supports exporting clips in 1080p and 60 FPS, ensuring high-quality output.
Mobile Compatibility: Cross Clip is available on iOS, allowing for easy sharing of edited clips directly to TikTok, Instagram, or YouTube.
Kick Clip Integration: Streamlabs Cross Clip now supports Kick clips, making it easier to turn Kick moments into high-quality vertical videos for various platforms
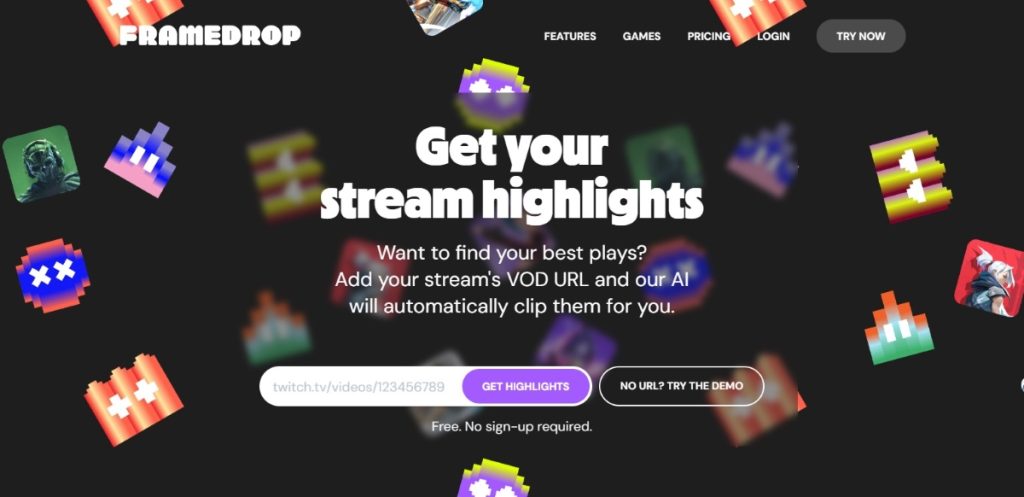
Framedrop.ai is a light, web-based AI-powered tool designed to help content creators repurpose their long-form YouTube and Twitch content into short, engaging clips specifically optimized for social media platforms like TikTok, YouTube Shorts, and Instagram Reels.
Key Features:
Highlight Detector: Framedrop uses advanced AI to analyze the stream and automatically identify the best moments, eliminating the need for manual searching through VODs.
Smart Edits: The AI not only finds clips but also offers smart editing tools to enhance the quality of the plays.
Clip Dashboard: Users can quickly access all their clips from the stream without the hassle of going through lengthy VODs.
Performance and Lightweight: As Framedrop is a web-based tool, there is no need for software installation, resulting in improved PC performance and storage space.
Quick Social Media Sharing: The tool enables easy and quick sharing of clips on various social media platforms.
Pros:
Automatically generate multiple engaging clips
Social media optimization
User friendly
Easy sharing to social media
No software download needed
Cons:
Limited editing capabilities
Upload limitations to 5 hours per month
No multi-video processing
Price:
US$15 per month
FAQs
1. How do I get stream highlights?
The easiest way is to use Eklipse, an AI tool that automatically detects and edits your best moments into short clips ready for TikTok, Reels, or Shorts. If you stream on Twitch, you can also use the built-in highlight maker. On YouTube, the highlight feature lets you trim streams directly. For other platforms, software such as OBS Studio, Streamlabs, or Nvidia Shadowplay can capture and save your highlights.
2. What is the best streaming tool for Twitch?
Different tools may suit different streamers’ needs, preferences, and budgets. Some of the most popular and recommended streaming tools for Twitch are OBS Studio, Streamlabs OBS, XSplit Broadcaster, and Twitch Studio.
3. What are the best tools for creating short stream clips?
Some of the most popular tools for creating short stream clips in 2025 include Eklipse, Streamladder, and OBS. Each has its own strengths, but Eklipse stands out with AI-powered highlight detection, instant editing, and direct publishing to TikTok, Reels, and Shorts.
4. What software do esports players use to edit their stream highlights?
Esports players often use tools like Eklipse, Premiere Pro, or DaVinci Resolve, depending on their workflow. For speed and efficiency, many prefer Eklipse because it delivers 10X faster AI clipping, hands-free voice command, and social-ready edits without complex timelines.
5. What software do gamers use to edit their stream highlights?
Gamers use a mix of software such as Eklipse, Spikes Studio, or Adobe Premiere Pro. However, Eklipse is the go-to choice for most because it combines auto highlight detection, free editing tools, and seamless publishing—all in one platform.
Final Thoughts
Choosing the right tool for creating stream highlights depends on your needs. Some platforms like Twitch and YouTube have built-in options, while software like OBS or Streamlabs gives you more manual control. But if you want a faster, easier, and more polished way to get highlights, Eklipse is the top choice with AI auto-detection, instant edits, and one-click publishing to TikTok, Reels, and Shorts.
Don’t waste time scrubbing through VODs. Sign up free on Eklipse and let AI create your stream highlights 10X faster.
TL;DR Eklipse is the best alternative and a significant upgrade. It offers more powerful AI for discovering highlights from full streams (not just user-submitted clips), a superior video editor with templates, and supports more platforms, including Kick.
If you’re searching for a direct comparison between Eklipse and Powder.gg in 2025, you’ve likely hit a wall. There’s a major reason for that: Powder.gg has officially shut down. The once-popular AI clipping tool has ceased operations, leaving many creators searching for a powerful and reliable replacement to keep their content flowing.
While this marks the end of an era for Powder users, it’s also the perfect opportunity to upgrade your workflow. The question is no longer “Which one is better?” but rather, “What is the best alternative now that Powder.gg is gone?” This article will serve as your definitive guide, comparing Eklipse not against a defunct tool, but against the other top contenders in the space to show why it stands as the superior choice for your new creative partner.
What Happened to Powder.gg and What Should You Look for in a Replacement?
In late 2024, Powder.gg announced it was closing its doors. The tool was known for its AI-powered clipping and its unique ability to connect directly to consoles like Xbox, although this feature was sometimes unreliable. Its shutdown has created a void for gamers who relied on its automated features to create social media content quickly.
When choosing a new “warrior” for your content creation, you need a tool that doesn’t just match Powder’s features but surpasses them. Key criteria include:
True AI Highlight Discovery: A tool that can analyze your entire multi-hour stream VOD and find the best moments for you, not just edit clips you already have.
Cloud-Based Workflow: No need to download and install an app that consumes your PC’s resources, a major hassle with the old Powder.gg desktop app.
Advanced Vertical Video Editor: A powerful, integrated editor specifically for TikTok, Reels, and Shorts with templates, text, and music.
Broad Platform Support: Must work with Twitch, YouTube, and critically, emerging platforms like Kick.
The New Battleground: Eklipse vs. Top Powder.gg Alternatives
With Powder.gg out of the picture, the main competitors in the AI clipping space are Eklipse, Streamladder, and Sizzle.gg. Let’s see how they stack up based on the features that matter most.
1. Auto-Clipping and Highlight Generation
Source: Eklipse
Powder.gg’s core promise was using AI to find your best moments. How do the modern alternatives compare?
Eklipse: This is where Eklipse truly shines and establishes itself as a direct upgrade. You connect your Twitch, Kick, YouTube, or Facebook account, and Eklipse’s AI analyzes your entire past broadcasts. It intelligently identifies exciting moments—multi-kills, squad wipes, clutch plays—and delivers a list of high-quality clips for you to review, edit, and share. It does the discovery for you.
Sizzle.gg: Sizzle.gg operates similarly to Eklipse, using AI to analyze streams and pull highlights. It’s a solid tool for pure clip generation but has fewer integrated editing and customization features.
Streamladder: Streamladder is primarily a clip *converter*, not a discovery tool. You must already have a clip (e.g., from Twitch) and provide the link. It does not use AI to watch your full stream and find new moments. This makes it far more manual than Eklipse.
Verdict: Eklipse offers the most powerful and comprehensive AI highlight discovery system, making it the best replacement for Powder.gg’s core functionality.
2. TikTok & Vertical Video Converter
Source: Eklipse
Turning horizontal gameplay into engaging vertical video is non-negotiable for growth. Powder.gg required a manual “Split” feature, which was clunky. Modern tools are far more advanced.
Eklipse: Eklipse features a robust, built-in video editor designed specifically for vertical content. With a single click, you can convert any clip to a 9:16 format and then use a huge library of pre-made templates (including layouts with your facecam), add text, stickers, subtitles, and background music. It’s an all-in-one editing suite.
Streamladder: This is Streamladder’s main feature. It excels at converting existing clips using a variety of templates. It’s very good at this specific task but lacks the all-in-one workflow of Eklipse, as you have to bring your clips to it.
Sizzle.gg: Sizzle’s editing tools are very basic. It’s more focused on generating the clip than helping you polish it for TikTok, often requiring you to download the clip and use another editor.
Verdict: For a seamless “find, edit, and post” workflow, Eklipse’s integrated pro editor is unmatched. Streamladder is a good single-purpose tool, but Eklipse provides the complete package.
3. Montage Maker Feature
Sometimes a single clip isn’t enough. You want to create a montage of your best plays. Powder.gg was never designed for this, focusing only on short clips.
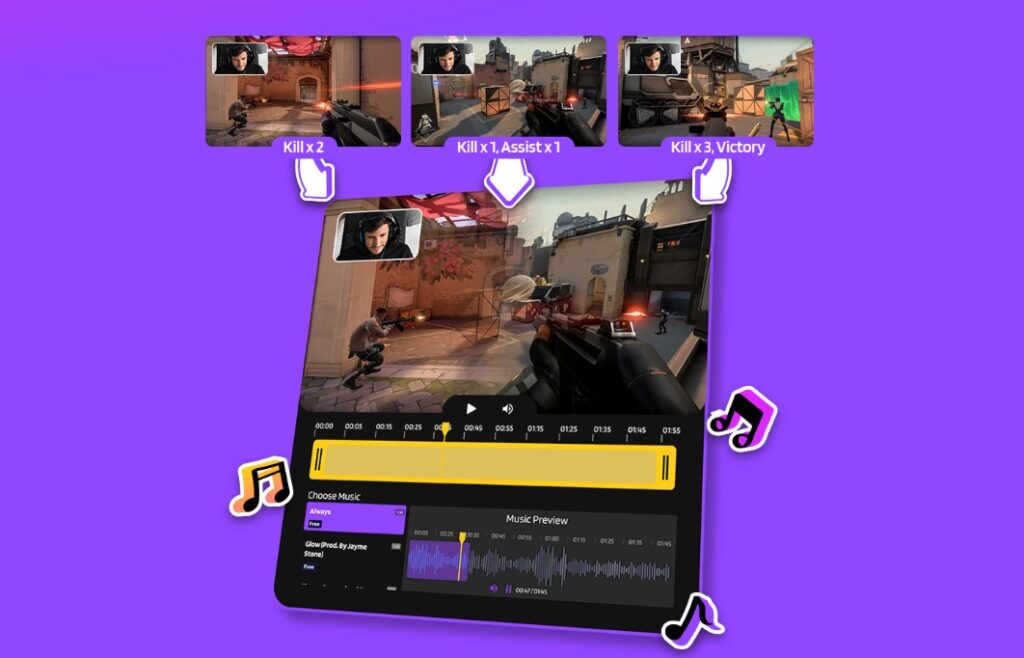
Eklipse: Eklipse includes an AI Montage Maker. With a few clicks, you can select your favorite clips from a stream, and Eklipse will automatically stitch them together into a professional-looking montage, complete with transitions and music. This is a feature none of its direct competitors offer in the same automated fashion.
Streamladder & Sizzle.gg: Neither of these platforms offers an automated montage creation tool. They are designed exclusively for creating individual short-form clips.
Verdict: Eklipse is the only tool in this category that goes beyond short clips to help you create longer-form YouTube content automatically, giving it a massive advantage.
Feature-by-Feature Showdown: Eklipse vs. The Alternatives
Feature
Eklipse
Streamladder
Sizzle.gg
AI Clips from Full Stream
✔️ Yes, analyzes full VODs
❌ No, requires user-provided clip
✔️ Yes
Platform Type
100% Cloud-Based (No Install)
100% Cloud-Based (No Install)
100% Cloud-Based (No Install)
Vertical Video Editor
✔️ Advanced editor with templates & music
✔️ Good, but is its only core feature
❌ Basic
AI Montage Maker
✔️ Yes
❌ No
❌ No
Kick Platform Support
✔️ Yes
❌ No
❌ No
Mobile App for Management
✔️ Yes (Android & iOS)
❌ No
❌ No
Final Thoughts: The Clear Successor to Powder.gg
While the shutdown of Powder.gg is an inconvenience, the evolution of AI content tools means a much better solution is waiting for you. When comparing Eklipse to the other available alternatives, it’s clear that it offers the most comprehensive, powerful, and user-friendly platform for any streamer serious about growth.
Eklipse is not just a replacement; it’s a total upgrade. It takes the original promise of Powder.gg—automated content creation—and perfects it with superior AI, a full editing suite, and forward-thinking features like Kick support and a montage maker. You get a faster workflow, higher-quality content, and more tools to build your brand, all without installing a single piece of software.
TL;DR The best Powder.gg alternatives are cloud-based, AI-powered tools. Eklipse is the top choice for its powerful AI highlights, direct social media integration, and robust free plan. Other great options include Streamladder, Sizzle.gg, Streamlabs Desktop, and Lightworks.
If you’ve landed here, you’ve probably heard the news: Powder.gg is shutting down. For many gamers and streamers, Powder was a go-to tool for effortlessly turning gameplay into shareable social media content. Its shutdown leaves a significant gap, forcing creators to search for the best Powder.gg alternatives to maintain their content pipeline. The good news is that the technology has evolved, and more powerful, intuitive, and feature-rich options are ready to take its place.
This guide will walk you through the top 5 replacements in 2025, with a focus on tools that don’t require any installation and can elevate your content beyond what was possible before.
In late 2024, Powder.gg announced it would be ceasing operations. The platform, known for its AI-driven game clipping and social sharing features, was a favorite for many creators who needed a quick way to generate content without complex editing software. The shutdown has left its user base in need of a new home for their clipping needs.
When looking for a replacement, it’s essential to find a tool that not only replicates Powder’s core functionality but also improves upon it. Key features to look for in an alternative include:
AI-Powered Clipping: Automatically identifies exciting moments like kills, goals, and big plays.
Cloud-Based Processing: No need to download bulky software that slows down your PC.
Direct Social Media Integration: Easily format and post clips to TikTok, Instagram, YouTube, and more.
Support for Multiple Platforms: Works with Twitch, Kick, YouTube, and Facebook Gaming.
Customization Tools: Ability to add text, memes, and unique layouts to make your content stand out.
1. Eklipse – The Proven Leader in AI Clipping
Source: eklipse.gg
For former Powder.gg users looking for a new home, the best choice isn’t a new platform, but a more powerful and established contemporary that has become the industry leader: Eklipse.
hile from the same generation of AI tools, Eklipse has spent years perfecting its technology, creating a robust, cloud-based platform that automatically analyzes your past streams from Twitch, Kick, YouTube, or Facebook to generate viral-ready highlights. It’s a proven system that eliminates the need for software installation and uses intelligent AI to find your best moments, delivering a workflow up to 10x faster than manual editing.
Think of Eklipse as your personal editing assistant, trusted by over 1 million gaming creators to grow their channels. For beginners, the free plan is incredibly generous, allowing you to process several streams and get high-quality 720p clips. For those ready to join the pros, Eklipse Premium unlocks 1080p quality, removes watermarks, offers 3x faster processing, and even includes an AI-powered social media caption and hashtag generator. It’s the complete package for creators focused on growth.
Key Features:
AI Highlights: Automatically detects and clips exciting moments from over 1000+ popular games.
Multi-Platform Support: Seamlessly connects to Twitch, Kick, YouTube, and Facebook.
Pro-Level Editing Tools: Edit clips with a built-in video editor, add text, stickers, and use pre-made templates for TikTok and Reels.
Direct Social Sharing: Post your clips directly to TikTok, YouTube Shorts, Instagram, and more without leaving the platform.
Discord Auto-Share Bot: A premium feature that automatically posts your best clips to your Discord community.
Pros:
Extremely easy to use with an intuitive interface.
Powerful AI saves countless hours with a workflow up to 10x faster than manual clipping.
Completely cloud-based—nothing to download.
Trusted by a massive community of over 1 million creators.
Supports Kick, a major advantage over many competitors.
Cons:
Highest quality features (1080p, no watermark) require a Premium subscription.
Pricing: Free plan available. Premium plans offer enhanced features and higher limits.
2. Streamlabs Desktop – The All-in-One Broadcasting Suite
Source: Streamlabs.com
Formerly known as Streamlabs OBS, Streamlabs Desktop is much more than just a clipping tool—it’s a full-fledged broadcasting software. However, it includes powerful features for creating highlights. Its “Replay Buffer” allows you to instantly save the last few seconds of your gameplay with a hotkey, ensuring you never miss an epic moment. You can also record your entire stream and edit it down later.
This is a great option if you want an all-in-one solution for both streaming and content creation. However, it requires a software installation and uses your PC’s resources. It’s not a cloud-based solution, making it fundamentally different from Powder.gg, but it’s a powerful tool for creators who prefer local control.
Key Features:
All-in-One Software: Combines streaming, recording, and basic editing.
Replay Buffer: Instantly capture highlights as they happen.
Highlight Cutter: A built-in tool to edit longer recordings into shorter clips.
Streamlabs Marketplace: Access to thousands of overlays, themes, and widgets.
Pros:
A comprehensive tool for streaming and recording.
Instant replay feature is excellent for capturing spontaneous moments.
Highly customizable.
Cons:
Requires software installation and is resource-intensive.
Not cloud-based; all processing is done on your PC.
Steeper learning curve compared to web-based clippers.
For creators who want to move beyond simple clips and delve into professional-grade video editing, Lightworks is an excellent choice. This is a non-linear editor (NLE) used in the film industry, but it offers a surprisingly accessible free version. With Lightworks, you can combine multiple clips, add professional transitions, perform color grading, and master your audio.
Lightworks is not an AI clipping tool; it’s a full editing suite. It’s the perfect Powder.gg alternative for someone who recorded their gameplay and now wants to create a high-quality YouTube montage or compilation. It’s overkill for quick TikToks but invaluable for more ambitious video projects.
Key Features:
Professional Editing Timeline: Advanced tools for trimming, cutting, and arranging clips.
Multicam Editing: Sync footage from multiple cameras (e.g., gameplay and facecam).
High-Resolution Export: The free version exports up to 720p, while the Pro version supports 4K.
Pros:
Extremely powerful editing capabilities.
The free version is very generous with its features.
Prepares you for industry-standard editing workflows.
Cons:
Significant learning curve for beginners.
Not an automated or AI-driven tool.
Requires a powerful PC to run smoothly.
Pricing: Free. “Create” and “Pro” subscriptions unlock higher resolutions and advanced features.
4. Sizzle. gg – Best Free Highlight Maker
Source: Sizzle.gg – Analyze and create clips with Sizzle.
Sizzle.gg is another AI-powered tool that focuses on automatically detecting and clipping your best gameplay moments from Twitch or YouTube streams. Its core strength lies in its ability to analyze footage and pull out highlights based on in-game events like kills, goals, or victories. You can then download these clips or share them directly.
Sizzle is a strong contender, but its feature set can feel limited compared to a more comprehensive platform. The free tier includes a watermark, and for features like faster processing and longer storage, a subscription is necessary. It’s a great tool for pure highlight generation but offers fewer creative editing tools in-platform.
Key Features:
Automatic Highlight Creation: AI analyzes gameplay and creates clips based on your preferences.
Personalized Filtering: Filter for specific moments like headshots, knockdowns, or wins.
Direct Sharing: Easy sharing to platforms like Twitter and TikTok.
Profile Page: The paid plan offers a profile page to showcase your best moments.
Pros:
AI automatically finds great moments from your streams.
Easy-to-use filtering system.
Good for creators who want a hands-off clipping process.
Cons:
Free highlights have a Sizzle.gg watermark.
Editing and customization options are basic.
Requires a subscription to remove limits and watermarks.
Pricing: Free tier available. Paid “Starter” plan for more features.
Streamladder positions itself as a direct alternative, offering a similar cloud-based experience for turning stream clips into social-friendly videos. You can paste a Twitch clip link or upload a video, and Streamladder helps you convert it into a vertical format using various templates. It’s a solid tool for quick edits and has a simple, easy-to-understand workflow.
While it’s effective for converting existing clips, its AI capabilities for *finding* those clips aren’t as robust as Eklipse’s. It’s more of a manual conversion tool than an automatic highlight generator. This makes it a good choice if you already know which moments you want to use but less ideal if you want an AI to do the discovery for you.
Key Features:
Clip Conversion: Easily converts horizontal clips to vertical formats.
Template Library: Offers a variety of templates to frame your gameplay.
Simple Editor: Add text and stickers to your clips.
Free to Use: Basic features are available for free with a watermark.
Pros:
Very simple and fast for converting single clips.
No software download required.
Good selection of free templates.
Cons:
Lacks automatic highlight detection from full streams.
The free version includes a prominent watermark.
Fewer advanced features compared to Eklipse.
Pricing: Free (with watermark). Pro plan available to remove watermarks and unlock more features.
Feature Comparison: Which Powder.gg Alternative is Right for You?
To help you decide, here’s a quick comparison of the top alternatives based on the features that matter most to former Powder.gg users.
Tool
Key Feature
Platform
AI Clipping
Best For
Eklipse
AI-powered highlights from full streams
Cloud-Based
✔️ Yes
Streamers wanting automated, high-quality social content.
Streamlabs Desktop
All-in-one streaming and recording suite
Desktop App
❌ No (Manual Replay)
Streamers wanting a single program for everything.
Lightworks
Professional non-linear video editing
Desktop App
❌ No
Creating polished YouTube montages and compilations.
Sizzle.gg
AI detection of specific in-game events
Cloud-Based
✔️ Yes
Creators who want a pure, automated highlight reel.
Streamladder
Quickly converting existing clips to vertical format
Cloud-Based
❌ No
Fast, simple edits of pre-selected clips.
Final Thoughts: The Best Path Forward After Powder.gg
Losing a familiar tool like Powder.gg can be disruptive, but the creator space is filled with innovation. The best path forward is to embrace a platform that not only fills the gap but also equips you with better tools for growth. For the vast majority of streamers and gamers, Eklipse is the clear successor to Powder.gg.
Eklipse’s powerful AI, cloud-based convenience, and direct integration with all major streaming and social platforms make it the most seamless and powerful alternative on the market. It takes the core idea of Powder.gg—easy content creation—and elevates it to a professional level, saving you time while helping you produce higher-quality content. Don’t let your content momentum stop.
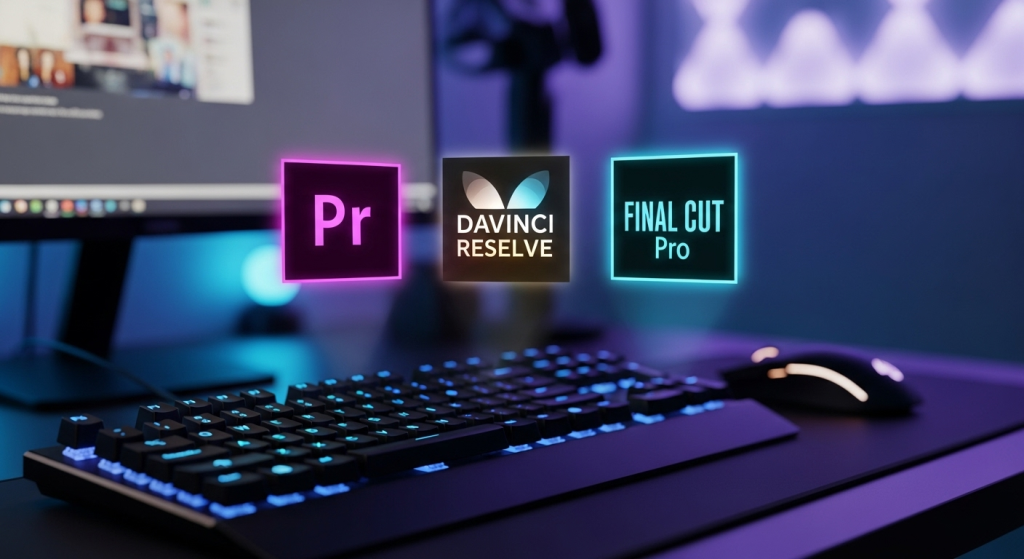
TL;DR Professionals primarily use three main software suites: Adobe Premiere Pro for its industry integration, DaVinci Resolve for its powerful free version and unparalleled color grading, and Final Cut Pro for its incredible performance on Apple hardware. The choice depends on their specific workflow, budget, and operating system.
When you see an insane gaming montage or a perfectly crafted stream highlight video, it’s easy to wonder what magic software the pros are using to make it happen. The truth is, most professional editors rely on a core group of powerful tools to get the job done. The answer to what software do professionals use for video editing primarily boils down to three titans: Adobe Premiere Pro, DaVinci Resolve, and Final Cut Pro.
As a gamer or streamer, your most valuable asset is time. While these professional programs offer endless creative control, the biggest challenge isn’t always the edit itself—it’s finding the hype moments from hours of gameplay in the first place. A truly professional workflow in 2025 isn’t just about the final editing software; it’s about using smart tools to streamline the entire process from start to finish, letting you get back to playing.
These programs are known as Non-Linear Editors (NLEs), and they are the command centers for professional video production. Think of them as the ultimate loadout for any editing challenge.
Adobe Premiere Pro: The Industry Standard
If video editing were a multiplayer game, Premiere Pro would be the most-picked character class. It’s available on both Windows and Mac and is part of the Adobe Creative Cloud subscription.
Why Gamers Use It: Its biggest strength is the seamless integration with other Adobe apps like After Effects for mind-blowing motion graphics and visual effects, and Photoshop for custom thumbnails. If you’re planning complex edits with lots of custom animations for your stream highlights, Premiere Pro is a beast.
The Downside: The subscription model can be a recurring cost that not everyone loves.
DaVinci Resolve: The Color Grading Powerhouse (and More)
Originally the go-to tool for Hollywood colorists, DaVinci Resolve has evolved into a full-fledged editing suite that is unbelievably powerful.
Why Gamers Use It: Two words: the free version. The free version of Resolve is more powerful than many paid programs, offering professional editing, color grading, audio mixing (Fairlight), and even visual effects (Fusion) in one app. For gamers who want to make their gameplay footage look incredibly cinematic without a monthly fee, there is no better starting point.
The Downside: It can be very demanding on your PC, so you’ll want a solid gaming rig with a good GPU to run it smoothly.
Final Cut Pro: The Apple Ecosystem Champion
For creators who live and breathe Apple, Final Cut Pro is the undisputed king of performance. It’s a one-time purchase, which is a huge plus for many.
Why Gamers Use It: It is optimized to an insane degree for Mac hardware. This means buttery-smooth playback and incredibly fast rendering times, even with 4K footage. For Mac-based streamers who want to edit and upload as quickly as possible, Final Cut Pro is built for speed.
The Downside: It’s Mac-only, which is a dealbreaker for the vast majority of PC gamers.
The Pro Gamer’s Workflow: Smart Tools First, Heavy Lifting Later
Here’s the secret the pros won’t always tell you: the software is just a tool. The real skill is in the workflow. No streamer has time to manually scrub through an 8-hour VOD to find 30 seconds of gold. A truly professional workflow means automating the boring parts.
This is where a tool like Eklipse becomes a non-negotiable part of your process. Instead of spending hours searching for clips, you can use the AI Highlights tool to automatically analyze your streams and pull out all your best kills, funny moments, and epic plays.
Think of Eklipse as your scout, automatically finding all the best loot from your stream. Then, you can either share those clips instantly or send them to your pro NLE for that final, cinematic polish. You can even make quick, high-impact edits for social media right in the Eklipse Studio or on the go with the Eklipse Mobile App, which is perfect for getting content out while the hype is still fresh.
Ready to make your workflow truly professional? With an Eklipse Premium subscription, you get your AI clips in crisp 1080p, process them 3x faster, and remove all watermarks. It’s the ultimate first step for any serious gaming creator.
What is the best FREE professional video editing software?
Without a doubt, the free version of DaVinci Resolve. It offers a complete, professional-grade suite for editing, color grading, audio, and VFX that is unmatched by any other free software.
Is Premiere Pro or DaVinci Resolve better for gaming videos?
It depends. If you’re on a budget and want amazing color in your videos, start with DaVinci Resolve. If you’re already in the Adobe ecosystem and plan on doing heavy motion graphics with After Effects, Premiere Pro is a fantastic choice.
Can I edit professional-looking videos on my phone?
Yes, especially for platforms like TikTok and Instagram Reels. Tools like the Eklipse Mobile App are designed specifically to help you create engaging, vertical gaming clips quickly and easily right from your phone.
What software do they use for Hollywood movies?
While all the “Big Three” have been used on major films, the long-standing Hollywood giant is Avid Media Composer, which is known for its powerful media management and collaborative features essential for large-scale productions.
TL;DR The best practices for editing video content are rooted in three core areas: establishing an organized workflow with backups, focusing on clear storytelling through intentional cuts and pacing, and ensuring technical polish with clean audio and consistent color.
Effective video editing is the crucial final step that transforms raw footage into a polished, engaging story that captivates your audience. The best practices for editing video content aren’t about having the most expensive software, but about mastering a solid workflow, understanding the art of storytelling, and delivering a clean technical presentation.
By focusing on organization, intentional pacing, and crystal-clear audio, you can turn your gaming clips, streams, and vlogs into content that stands out and keeps viewers coming back for more. Whether you’re a streamer trying to grow your channel or a content creator aiming for viral TikToks, these foundational principles are universal.
Let’s dive into the practices that will elevate your editing from basic cuts to professional-grade content, helping you save time and grow your audience.
The Foundation: Your Workflow Matters More Than Your Software
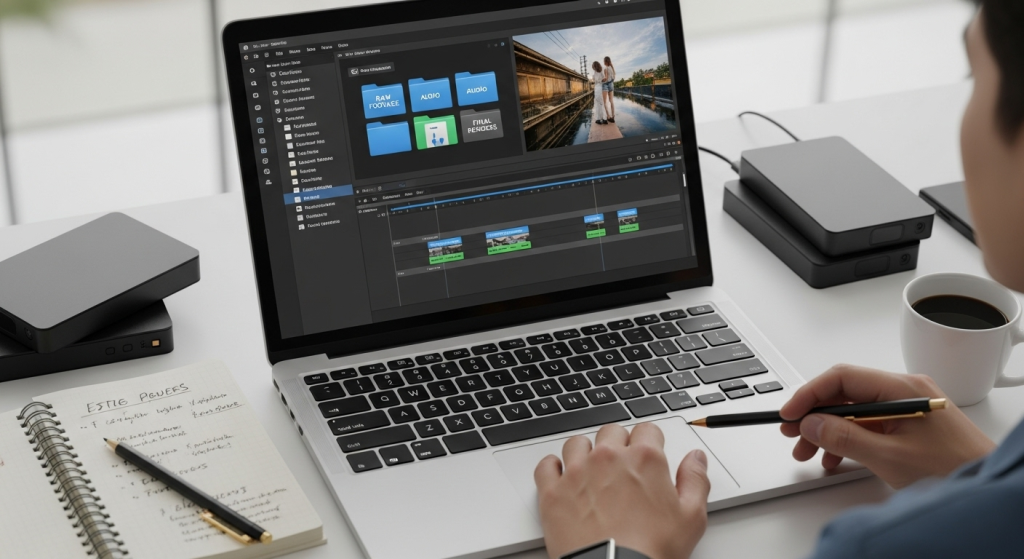
Before you even think about making your first cut, a solid workflow will save you from future headaches. Great editing is built on a foundation of great organization.
Organize Everything First: Create a clear folder structure for every project. At a minimum, have separate folders for Raw Footage, Audio, Graphics, Music, and Project Files. This simple step prevents you from wasting time searching for assets.
The 3-2-1 Backup Rule: Data loss is a creator’s worst nightmare. Follow the 3-2-1 rule: keep 3 copies of your files on 2 different types of media (e.g., an external hard drive and cloud storage), with 1 copy located off-site.
Plan Your Edit: Have a vision before you start. This could be a simple storyboard or a list of key moments you want to include. Knowing the story you want to tell will guide your decisions and make the editing process much faster.
The Heart of Editing: Mastering the Art of Storytelling
At its core, editing is storytelling. Every cut, transition, and effect should serve the narrative and the emotion you want to evoke. Think of yourself not just as an editor, but as the final storyteller.
Pacing is Everything
Pacing is the rhythm of your video, and it dictates how your audience feels. Fast cuts can build excitement and energy, perfect for a montage of gaming highlights. Slower pacing can create tension or give the viewer time to absorb information. A common mistake is keeping shots too long, which can bore the audience. Be ruthless in trimming the fluff; every second should have a purpose.
Make Every Cut Intentional
Don’t just cut for the sake of cutting. Each edit should be motivated. Are you cutting to a different angle to add visual interest? Are you using a J-cut or L-cut (where the audio from one clip overlaps the video of another) to create a smoother transition? Purposeful cuts guide the viewer’s attention and make the story flow seamlessly.
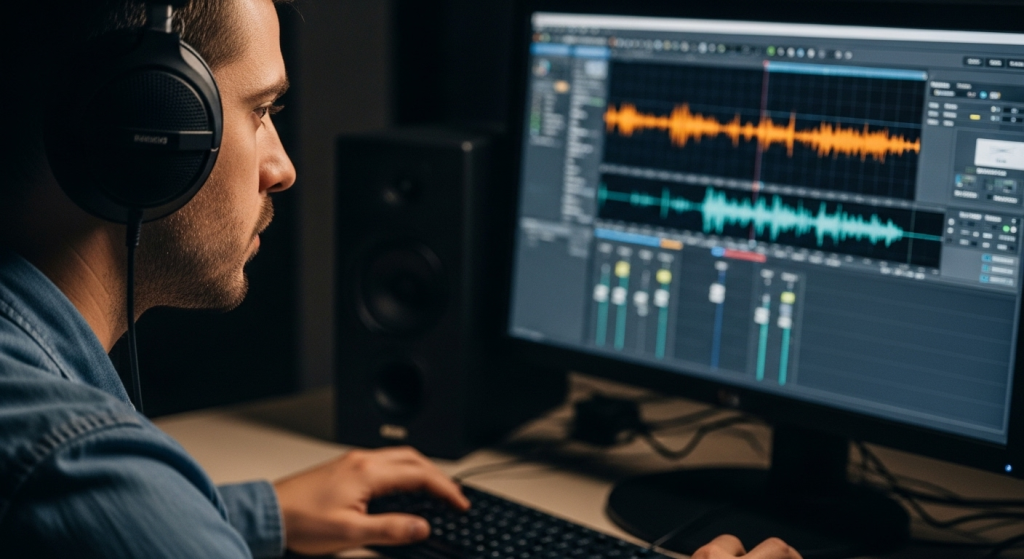
The Unsung Hero: Best Practices for Audio Editing
Here’s a hard truth: viewers will forgive mediocre video quality, but they will not tolerate bad audio. Clear, balanced sound is non-negotiable for professional content.
Level Your Audio: The volume of your dialogue, game audio, and music should be consistent. Dialogue should always be the priority and easy to hear. A common mistake is letting background music overpower the person speaking.
Reduce Background Noise: Even with a great microphone, you might pick up unwanted noise. Use your software’s noise reduction tools to clean up your tracks, but be careful not to overdo it, as it can make the audio sound unnatural.
Use Music and SFX Wisely: Music sets the mood, and sound effects can emphasize moments. Choose royalty-free music that matches the tone of your video. Use subtle sound effects to add punch to visuals or transitions.
Editing for 2025: Optimizing for Social Media & Short-Form
In 2025, attention spans are shorter than ever, especially on platforms like TikTok, YouTube Shorts, and Instagram Reels. Your editing style needs to adapt.
Hook Them in 3 Seconds: The first three seconds of your video are the most critical. Start with your most exciting clip, a controversial statement, or a question to grab the viewer immediately.
Embrace the Vertical Format: Edit in a 9:16 aspect ratio from the start. Don’t just crop your horizontal video; reframe the shots to ensure the main subject is always in view.
Add Captions: A huge percentage of social media videos are watched without sound. Adding on-screen captions makes your content more accessible and ensures your message gets across, even on mute.
Your Secret Weapon: How Eklipse Streamlines Your Editing Workflow
Following these best practices takes time, especially for streamers who have hours of footage to sift through. This is where having a smart partner can make all the difference. Think of Eklipse as your personal AI editing assistant, designed to handle the most time-consuming parts of your workflow.
Struggling to find the best moments from a 4-hour stream? Eklipse’s AI Highlights tool automatically analyzes your Twitch, YouTube, or Facebook streams and picks out the most exciting kills and funniest reactions. It delivers ready-to-share clips, which you can then perfect in the Eklipse Studio to add your personal touch, freeing you up to focus on the creative side of storytelling.
Ready to take your content to the next level? With an Eklipse Premium subscription, you can export your clips in crisp 1080p without watermarks, get 3x faster processing, and use the AI-powered social media caption and hashtag generator to optimize your posts. It’s the ultimate toolkit for creators who want to produce high-quality content efficiently.
What are the most common video editing mistakes to avoid?
The most common mistakes include inconsistent audio levels (music too loud, dialogue too quiet), poor pacing (shots held for too long), overusing flashy transitions and effects, and not backing up project files.
How do I improve my storytelling through editing?
Focus on creating a clear narrative arc with a beginning, middle, and end. Use pacing to control the emotional journey, and make sure every cut serves a purpose, whether it’s to advance the story, show a reaction, or provide new information.
What’s more important, video quality or audio quality?
Audio quality. While high-quality video is great, viewers are much more likely to abandon a video due to poor, hard-to-understand audio than they are for slightly low-resolution footage.
How can I edit videos faster?
To edit faster, start with a highly organized project and learn your software’s keyboard shortcuts. Additionally, using AI tools like Eklipse to generate your initial clips can cut your editing time down significantly.
TL;DR: The best app depends on your role. For streamers needing to find highlights in their own footage, Eklipse is the top choice for its AI automation. For viewers, the native clipping tools on Twitch and YouTube are best. For attendees, CapCut is ideal for mobile editing.
Gaming events are a whirlwind of hype, skill, and unforgettable moments. Whether you’re a streamer competing, a viewer watching from home, or an attendee on the floor, you want to capture and share the highlights. But when you search for an “app for gaming event clips,” you’ll find that the “best” tool isn’t one-size-fits-all. The right app depends entirely on your role and your goal.
A viewer needs a quick, instant clipper. An attendee needs a powerful mobile editor. But a streamer or content creator has the biggest challenge of all: mountains of footage and not enough time. To help you find the perfect tool for your needs, we’ve broken down the best apps for every role at a gaming event in 2025.
If you’re the one playing and streaming, your problem isn’t just clipping—it’s finding the moments to clip from hours of VODs. For this, you need more than a simple tool; you need an automated workflow.
1. Eklipse (Best for AI Automation and Efficiency)
Eklipse is the definitive solution for streamers and content creators because it solves the biggest problem: time. Instead of you manually searching for highlights, Eklipse’s AI does it for you. It’s an intelligent system designed to turn your long streams into a library of shareable content with minimal effort.
How it Works: You connect your Twitch, Kick, or YouTube account, and after your stream, Eklipse’s AI Highlights feature automatically scans your VOD and identifies your best plays, funny reactions, and other key moments. You can even use the Voice Command feature to mark moments hands-free while you’re live.
Why it’s Best: It automates the most tedious part of the process. You start with a curated list of your best moments instead of a blank timeline. From there, you can use the all-in-one Eklipse Studio to edit, add your facecam, and use AI Edit features to make your clips pop. The entire process is manageable on the go via the Eklipse Mobile App, and you can schedule your posts with the Content Planner. It’s a complete ecosystem, and you can explore all its features to see how it fits your workflow.
2. DaVinci Resolve / Adobe Premiere Pro (Best for Pro-Level Manual Control)
For creators who want to manually craft every second of their content and have a deep knowledge of video editing, professional software like DaVinci Resolve (which has a powerful free version) and Premiere Pro are the standard.
How they Work: These are traditional, timeline-based editors that give you complete creative control over every visual and audio element.
Why they’re an Option: If your goal is to create a highly-produced, cinematic montage of your event performance, these tools give you unlimited power. However, be prepared for a steep learning curve and a time-consuming process of manually finding, importing, and editing every single clip.
For Viewers Watching from Home: The Instant Clippers
Photo by Peter Stumpf on Unsplash
If you’re watching your favorite pro or streamer and want to capture a single, amazing moment as it happens, you don’t need complex software. The best tools are built right into the platform you’re using.
3. Twitch’s Native Clipper
The original and still one of the best for live moments. With a single click (or tap), the Twitch clip button instantly captures the last 60 seconds of a stream. You can then trim it down to the exact moment and share the link immediately. It’s fast, simple, and perfect for capturing live reactions.
4. YouTube’s Clipping Feature
Similar to Twitch’s tool, YouTube allows you to create short clips (5-60 seconds) from VODs and live streams. It’s ideal for sharing a specific highlight from a tournament VOD after the live event has ended.
For Attendees on the Event Floor: The On-the-Go Tools
If you’re physically at an event, your needs are all about speed, mobile-friendliness, and social media integration.
5. CapCut (Best for Quick Social Edits)
CapCut is a mobile editing powerhouse. You can film a bunch of short videos on the event floor, airdrop them into CapCut, and quickly stitch them together into a dynamic montage. With its massive library of trending sounds, effects, and auto-captioning, it’s the perfect tool for creating a high-energy “event vlog” for TikTok or Reels.
6. Instagram & TikTok (Best for Instant Sharing)
Sometimes the best app is the social media platform itself. Using Instagram Stories or the TikTok camera to capture short moments allows you to post them instantly. Their built-in filters, stickers, and text tools are more than enough for quick, on-the-ground updates that make your followers feel like they’re there with you. When you’re ready to post your more polished clips, Eklipse even supports direct publishing to TikTok.
Final Thoughts: Choose the Right Tool for the Job
There is no single “app for gaming event clips,” but there is a best app for your specific needs. If you are a content creator drowning in footage, an AI-powered tool like Eklipse isn’t just an option—it’s a necessity for staying consistent and avoiding burnout. For viewers and attendees, simpler, more direct tools will get the job done perfectly. Choose the right tool for your role, and you’ll spend less time working and more time sharing great content.
Frequently Asked Questions
What’s the main difference between Eklipse and a traditional editor like DaVinci Resolve? Eklipse’s primary function is to find the best moments for you using AI, automating the most time-consuming step. DaVinci Resolve is a tool you use after you’ve already found your clips manually, giving you deep creative control over the editing process.
Can I use Eklipse if I’m a beginner? Absolutely. It’s designed to be intuitive for creators at all levels. By automating the hardest part (finding the clips), it’s actually one of the easiest ways for a beginner streamer to start creating polished content.
Are the native clipping tools on Twitch and YouTube good enough? For viewers who want to capture one moment, yes, they are perfect. For creators who need to produce dozens of clips from their own multi-hour stream, they are far too slow and inefficient.