
Level Up Your Marvel Rivals Gameplay
Capture your epic wins, clutch moments, and even hilarious fails with Eklipse. Easily create and share highlight reels with your friends—even if you're not streaming!
Learn MoreIt’s important to save those sick plays highlights from your stream on Twitch if you want to grow your channel.
But if you don’t want your video to disappear after just two weeks on Twitch, you should consider uploading it to YouTube instead.
YouTube is the top platform for streaming and sharing videos, and your stuff won’t get taken down like it could on Twitch.
Plus, people can keep watching your videos on YouTube for as long as you don’t delete them.
Check out this tutorial to learn how to upload your Twitch streams to YouTube. Let’s get started!
How To Upload Twitch Streams To YouTube
Now you have got your stream highlights as one whole video. It’s time to export it into the YouTube channel. You can also learn how to connect Twitch to YouTube here.
To start exporting your highlights, look at the following steps below:
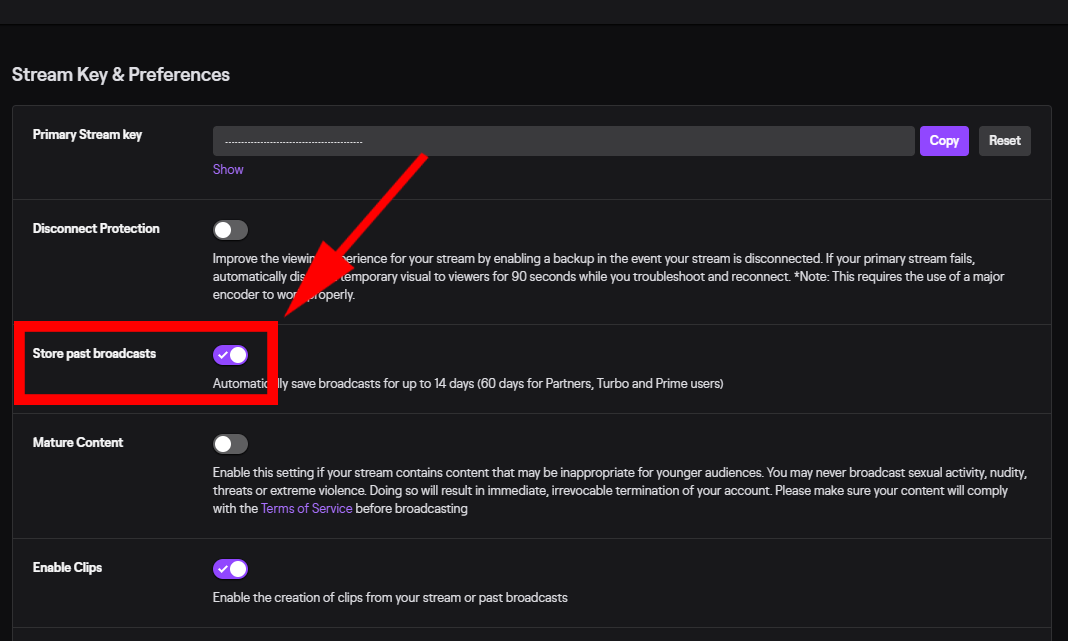
- Hit the Creator Dashboard menu > Settings > Stream
Turn on Store Past Broadcasts
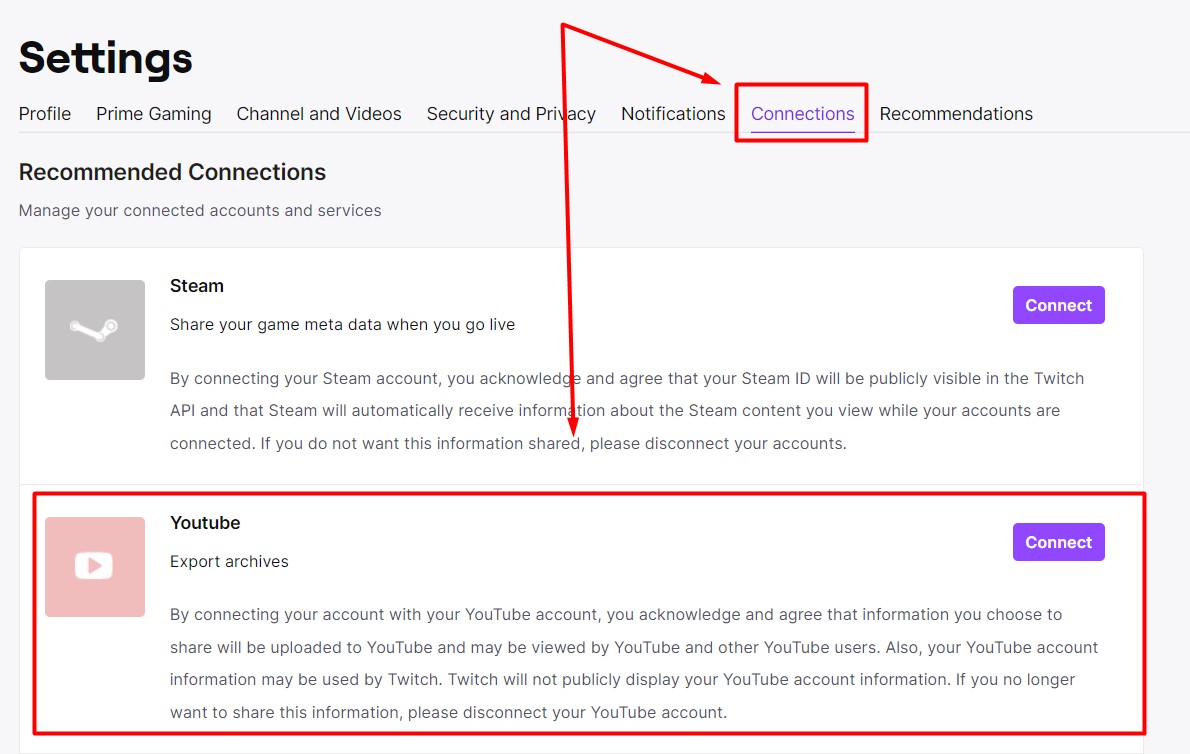
- Click the profile icon and hit Settings
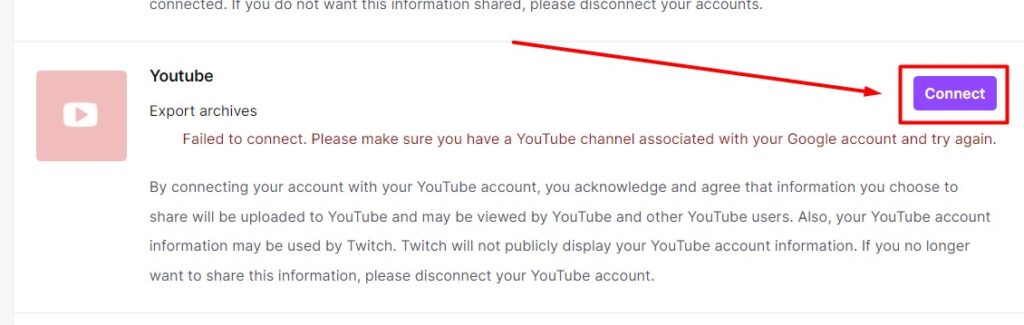
Go to the Connection tab, then click Connect on YouTube section
- Back to Creator Dashboard
Click Video Producer menu
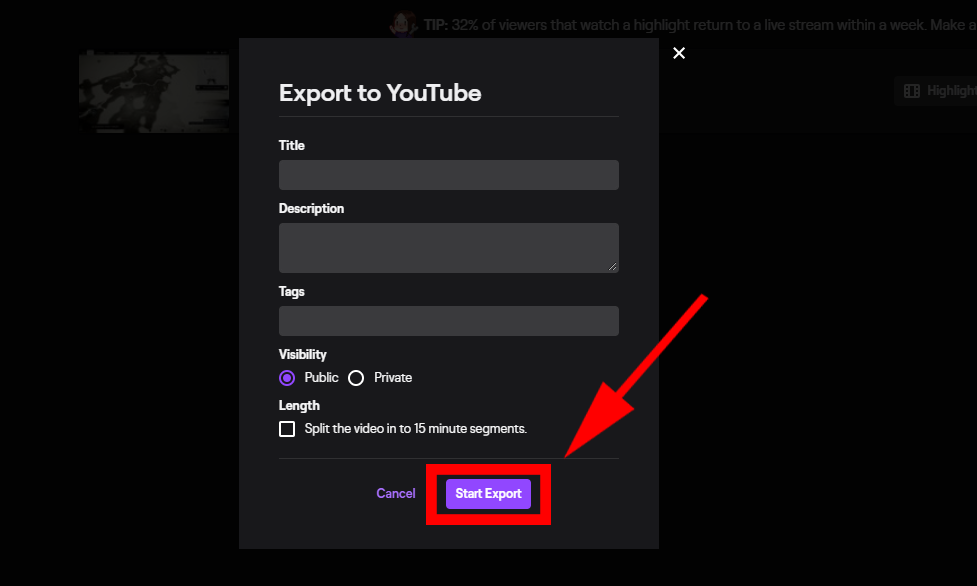
- Select the highlights you want to export
After that, click Export on your selected highlight and Start Export
How To Find Archived Stream on Twitch
Every time you finished streaming, your stream will automatically be archived in Twitch. It will last here for 14 days. And before it runs out the time and gone, you need to make highlights from it.
But before we jump there, here are the step to find where your stream saved in temporary time:
- Go to Twitch.tv and login with your account
- Click your profile picture account, then find Creator Dashboard
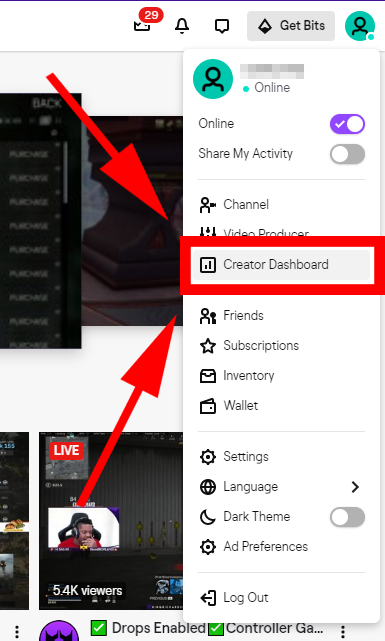
- Hit the Video Producer
- After that, click the Past Broadcast or All Videos button
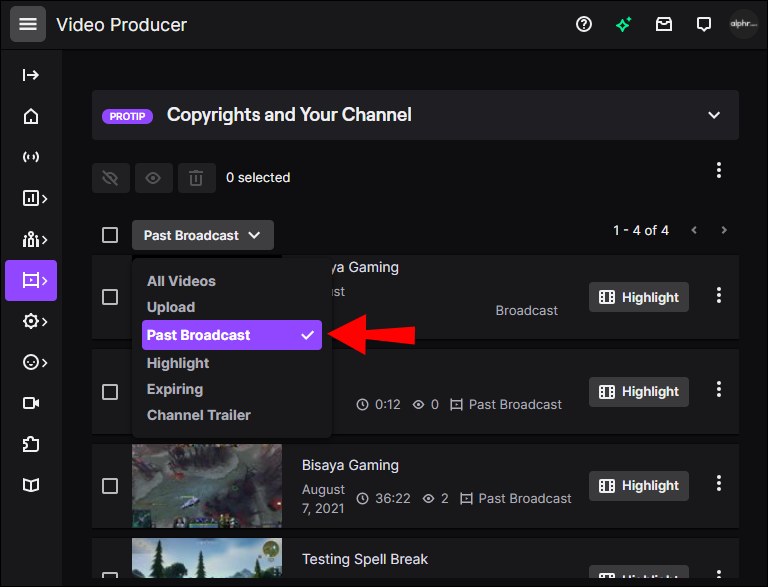
- Then, pick the stream you want to highlight
- Click on Highlight and you’ll find a timeline with an edit button on the bottom of the screen
- Now, you can start editing and highlighting your stream video whatever you want
- Do the same steps to make multiple highlights
- If you have satisfied with the result, click Publish Highlights
- The rendering process is starting
- After it has finished the process, hit Save and Next
- Your highlights are saved on Video Producer
How to Link Your YouTube Account to Your Twitch
To start linking your YouTube account to Twitch, you can continue from step 2 and then do as follows
Step 1: Click Connect
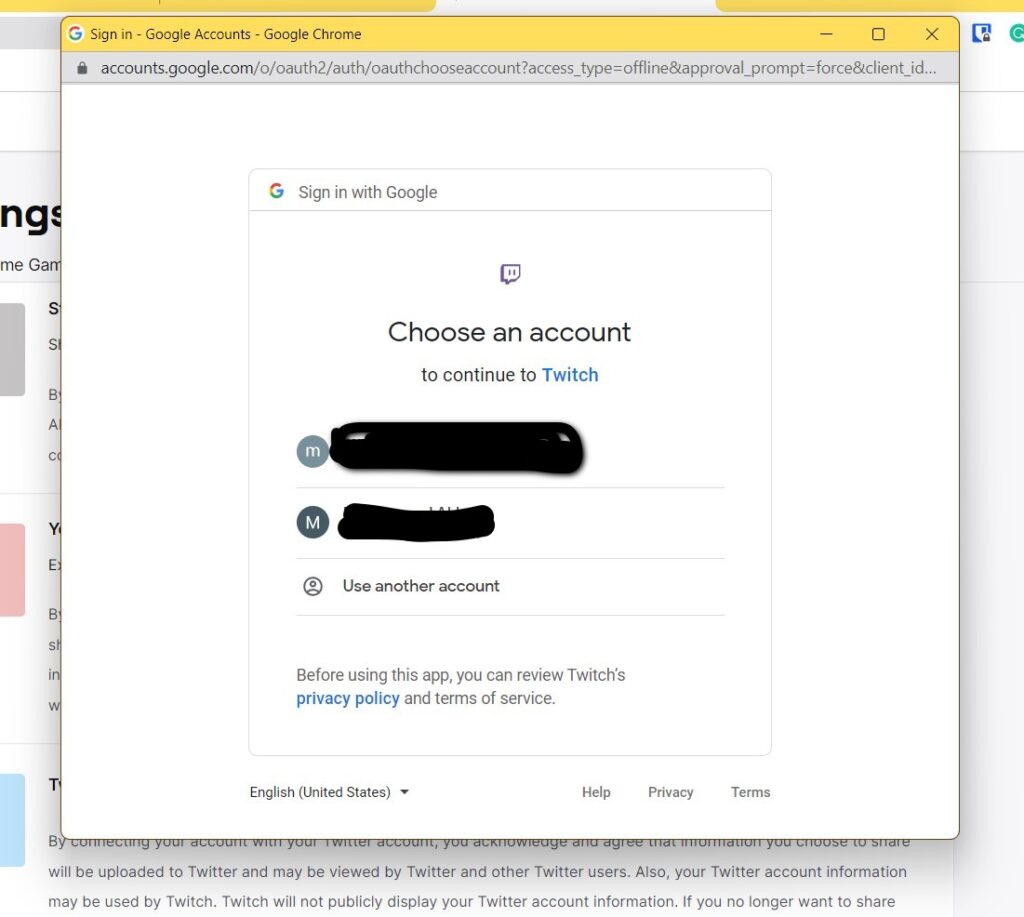
Step 2: Choose your YouTube account
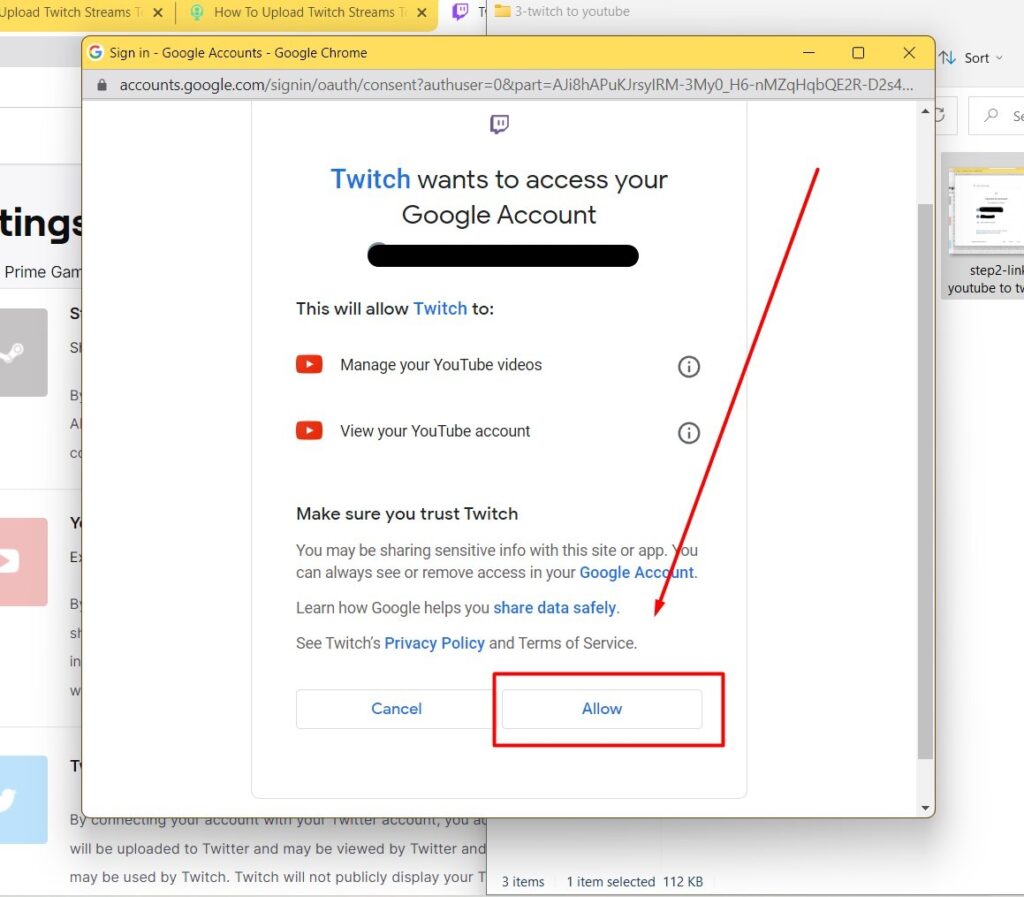
Step 3: Click Allow
Requirement To Upload Twitch Stream To YouTube
To upload the Twitch stream to the YouTube channel is quite simple. But you can’t actually do it instantly. There are several steps you have to do, including preparing the stream before you upload it.

It’s not like you upload a video on your Instagram, or even on YouTube itself. Twitch doesn’t provide you with a feature that allows you to save or download your full stream.
Therefore, all you have to do is make highlights multiple times from your stream. If you combine these highlights, you’ll get a full video of your streaming. And once you have done it, then you are ready to upload it to YouTube.
Apart from that, you also need to prepare some sort of things to highlight the stream. They are:
- Twitch account
- Access to PC
- Archived stream
- An optional editing tool
How to Publish The Twitch Highlight on YouTube
You can now move on to YouTube to finish the process of exporting your highlights from Twitch.
- Go to YouTube and login with your account
- Click your profile photo and hit YouTube Studio
- Then, click on Content in the left-side menu
- Select the video you uploaded from Twitch
- See the full detail of the video
- Add a proper title, description, etc
- Set the visibility to be Public if you’re ready
Now, your Twitch stream video is already shown from your YouTube account. Your viewers can enjoy your stream without having limited time on it.
Can You Make Highlights Using Another Tool?
Absolutely yes. If you are going to make highlights automatically, you can try Eklipse. This is one of the best online sources that allow you to clip the best moment on your stream. Generated with AI, you can easily produce several highlight clips without any difficulties. Here’s how:
- Go to eklipse.gg on your browser
- Do free sign up with your email, Facebook, or Twitch account

- Sync in your Eklipse account to Twitch
- Hit Connect Now
- Select Twitch as your selected social media, then hit Connect
- Move on to Video Library, and select Streams

- You can find your video streaming from Twitch
- After that, go to Unclipped tab and pick the streaming video you want to clip

- Click Submit > OK
- Eklipse has automatically made highlight clips to choose
- Then, click Single Clips to pick the best highlight clips
- Edit the highlight using the Edit Clips feature or Premium Edit if you desire a more simple way to edit
- If you have finished your editing, hit Share to share the clips to your YouTube or other social media
Conclusion
Learning how to upload Twitch streams to YouTube is necessary if you want to provide a convenient streaming experience to your viewers. In YouTube, you can make your streaming video more long-lasting and it will be available anytime as well. Good luck!
🎮 Play. Clip. Share.
You don’t need to be a streamer to create amazing gaming clips.
Let Eklipse AI auto-detect your best moments and turn them into epic highlights!
Limited free clips available. Don't miss out!
