
Level Up Your Marvel Rivals Gameplay
Capture your epic wins, clutch moments, and even hilarious fails with Eklipse. Easily create and share highlight reels with your friends—even if you're not streaming!
Learn MoreA laptop actually could be a choice for streaming on Twitch besides a PC. However, since a laptop has limited features compared to a PC, you’ll need to meet the minimum requirements to have a smooth and clear stream. That’s why learning how to stream on Twitch on a laptop is actually a necessity.
In this article, we’re going to walk you through the process of how to use a laptop to stream. Well, without any more ado, let’s just jump right into the tutorial.
Minimum Requirement for Twitch Streaming on a Laptop
To be able to produce a nice stream on Twitch, you have to follow Twitch’s official requirements. Those are:
- CPU: Intel Core i5-4670 or AMD equivalent
- Memory: 8GB DDR3 SDRAM
- OS: Windows 7 Home Premium
- GPU: DirectX 11 compatible
- OS: Windows 7
- ISP Upload Speed: 3-6Mbps
It’s worth highlighting that the CPU is the most essential thing you should pay attention to. The speed and the age of your CPU will significantly determine the quality of your output.
In addition, make sure you have a stable upload speed as well. The upload speed will also determine your video quality. The faster your internet will be, the bigger your bitrate and the clearer your stream will be.
Don’t forget about setting up the resolution, FPS, and other things related to streaming stuff to maximize your output.
How to Stream on Twitch on a Laptop
Now that you have fulfilled all the requirements above, you’re ready to go live on this popular platform. The first thing you’ll need to do is get the keystream. This is the key to stream using every software. Here’s how to get it.
- To begin with, head over to the Twitch website and log in to your account.
- After that, navigate to your avatar icon.
- Click on the Dashboard option under the drop-down menu.

- Then, hit the Settings section > Stream.
- Finally, copy the Stream Key to use later.

How to Stream With OBS on Laptop to Twitch
There is plenty of streaming software you can choose to go live on Twitch. But in this article, we recommend you use OBS Studio. It offers comprehensive tools yet is easy to use. Now, follow the steps below.
- First, make sure you installed OBS on your laptop.
- Hit the plus ‘+’ button in the Sources section.

- Then, select Window Capture to stream your desktop.
- In the popup message, click the Create New button.
- Write a name and hit OK.

- Now, select the window you want to stream from the drop-down menu > click OK.
- If you want to stream from your webcam, hit Video Capture Device and do the same steps as before.

- Next up, go to Settings.

- Select the Stream section and choose the platform source for Twitch.
- On the bar under the Source section, paste the copied Stream Key.
- Hit OK.

- Afterward, if you are ready to go live, hit Start Streaming.

- In addition, to record your stream, click the Start Recording button as well.
- Bingo! Now you are going live on Twitch!
In case you want to optimize your stream, even more, you’ll have to make sure that your OBS applied the recommended settings. You can read our previous article regarding the best OBS settings for streaming.
How to Clip Twitch Broadcast Using Eklipse
Done streaming and want to share the clip on your socials? No worries, we’ve got you covered. Eklipse is a special clip maker that is powered by AI. It can automatically capture the precious moment from your stream and turn it into TikTok/Reels/Shorts. You can follow the guide below.
- First, go to the Eklipse Studio website.
- Sign in with your Eklipse account, or create a new one.
- If you want to clip your stream videos, connect your Eklipse account to your socials first.
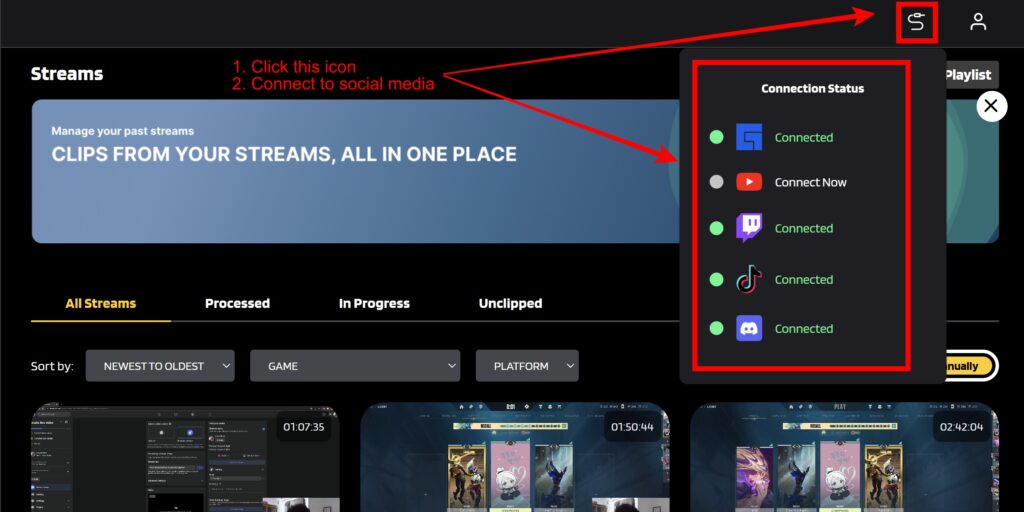
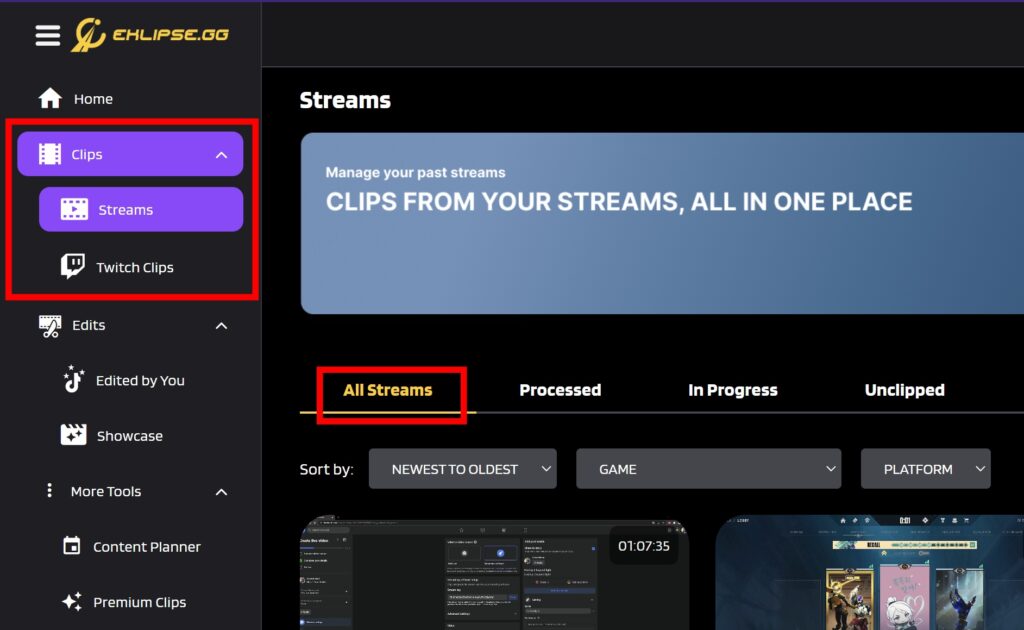
- Next up, navigate to the Clips option > Streams > All Streams to find the stream you want to clip.
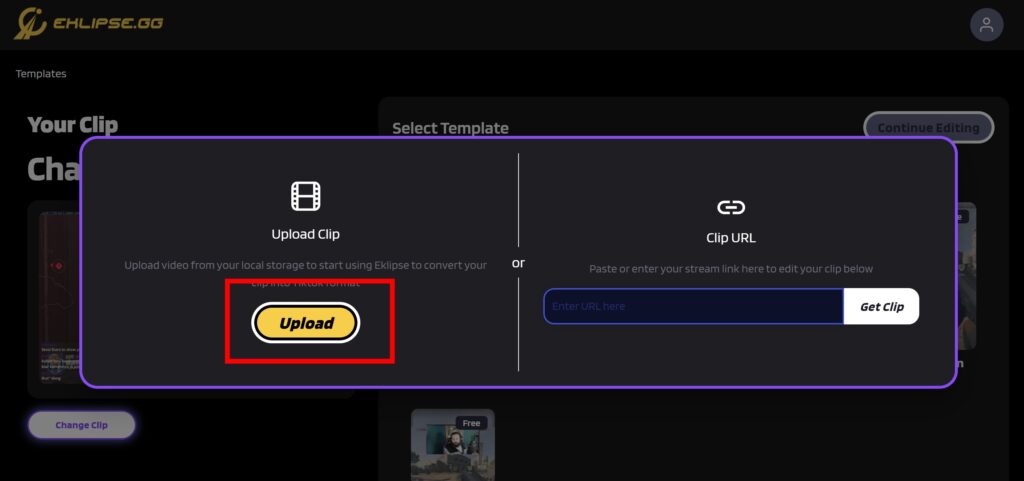
- Alternatively, you can click on the Upload button at the beginning to import your existing videos from the local device.
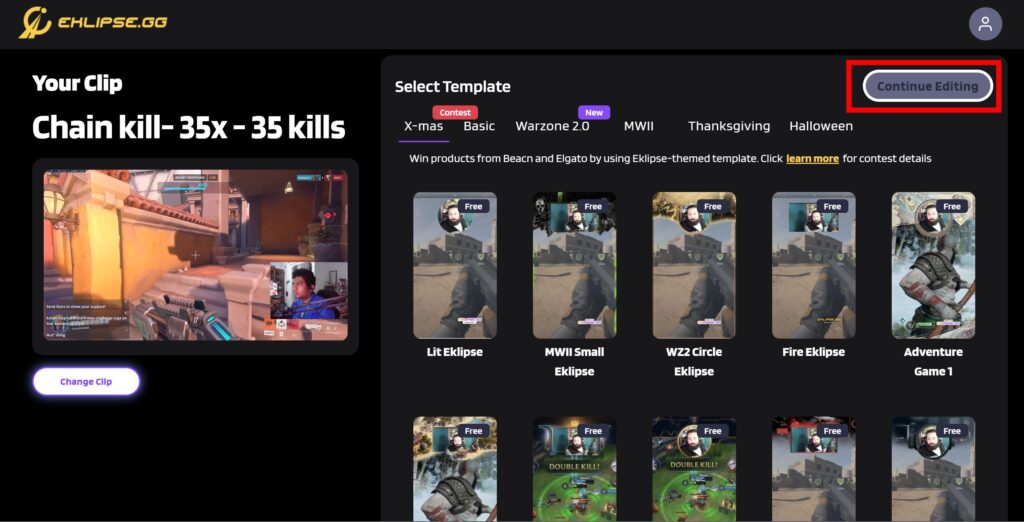
- Select your favorite template and hit Continue Editing.
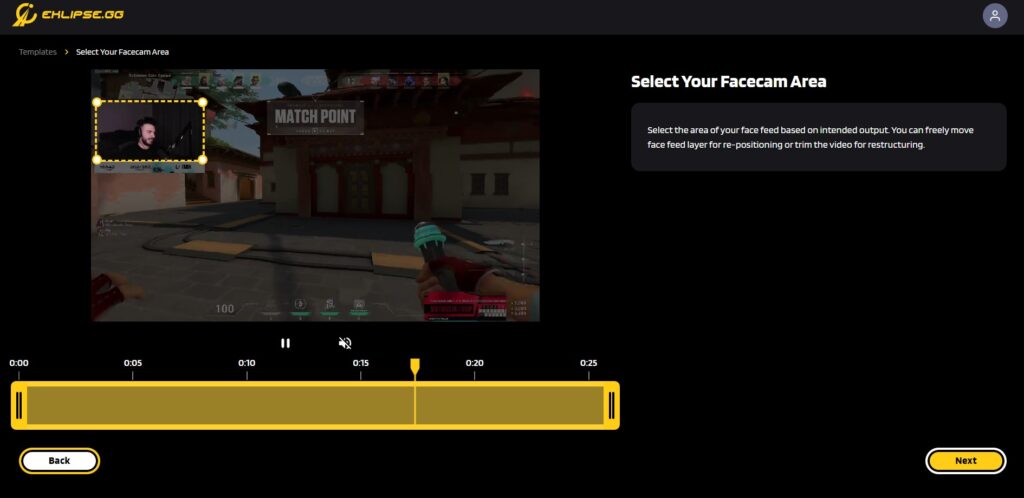
- Afterward, adjust the clip and the facecam area, as well as the duration > Next.
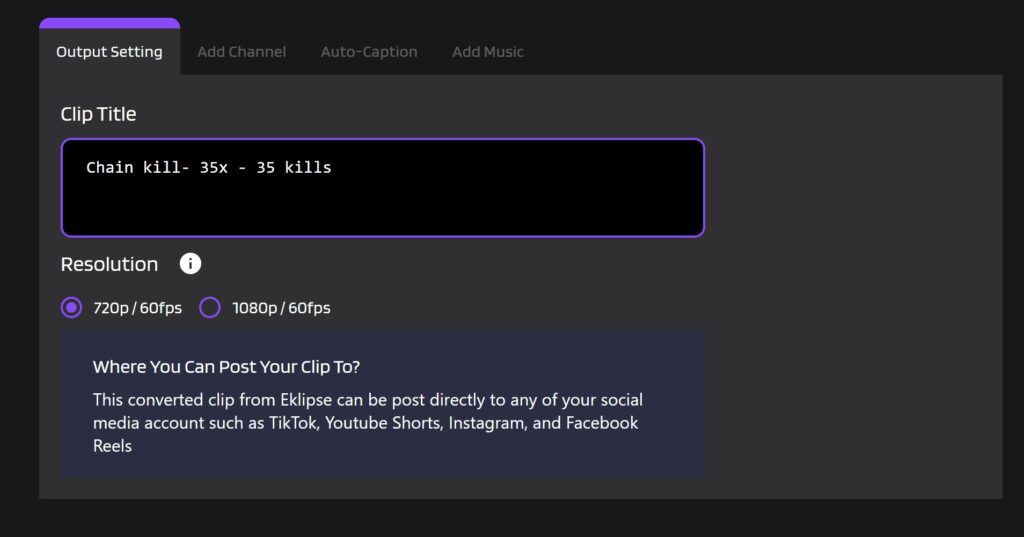
- Set the output by writing a title and selecting the output resolution.
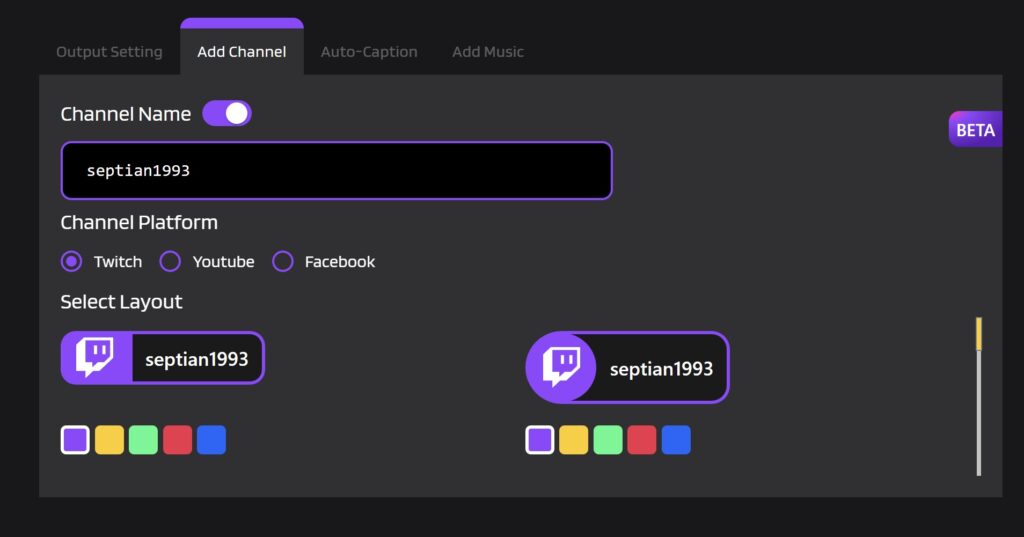
- Next up, add a channel name and auto-caption to make your clip cooler.
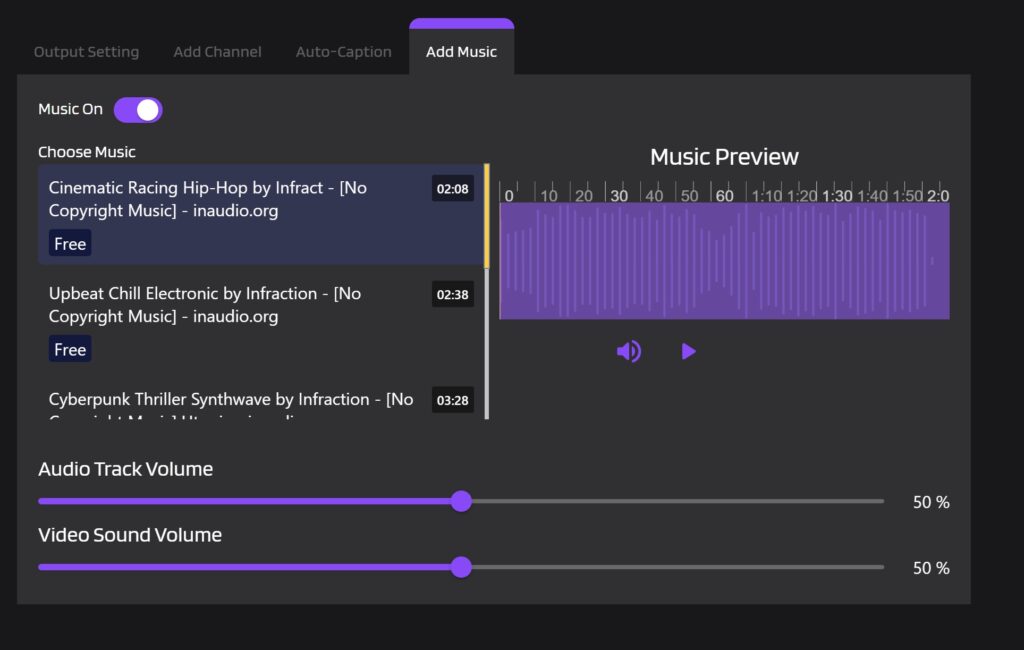
- Now, add a catchy soundtrack, adjust the volume, and hit Confirm once you’ve done.
- Now, find your edited clip by heading to the Edits tab > Edited by You.
- Sort by the Converted option and there your clips are.
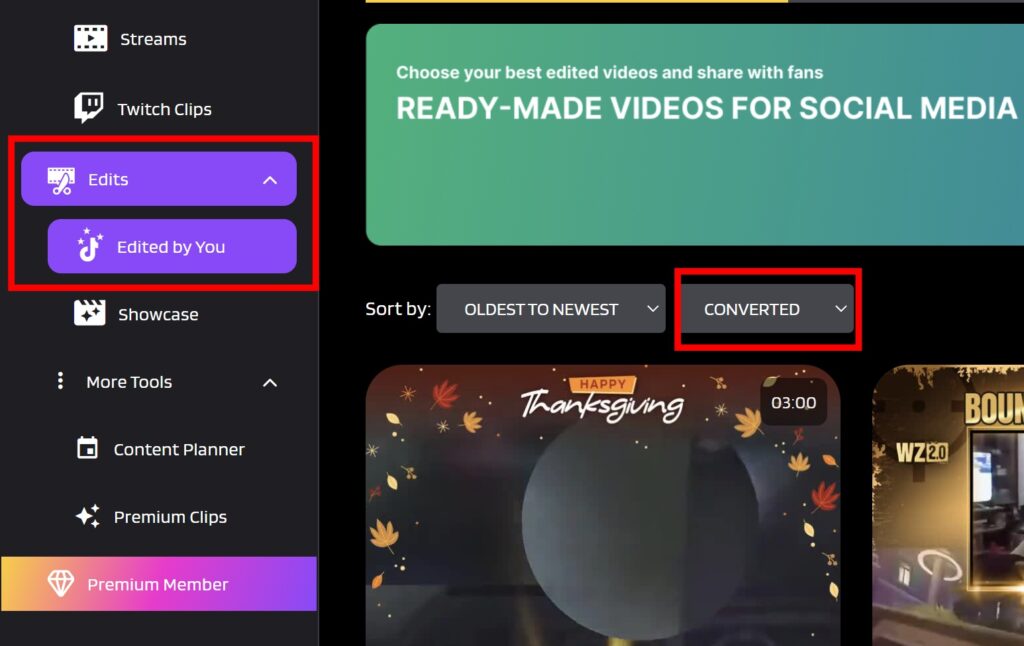
- Finally, you can download or share your highlight clips.
- If you want to share it, hit the Share button, write a description, and tick the small box next to the platform you want to share your clip on.
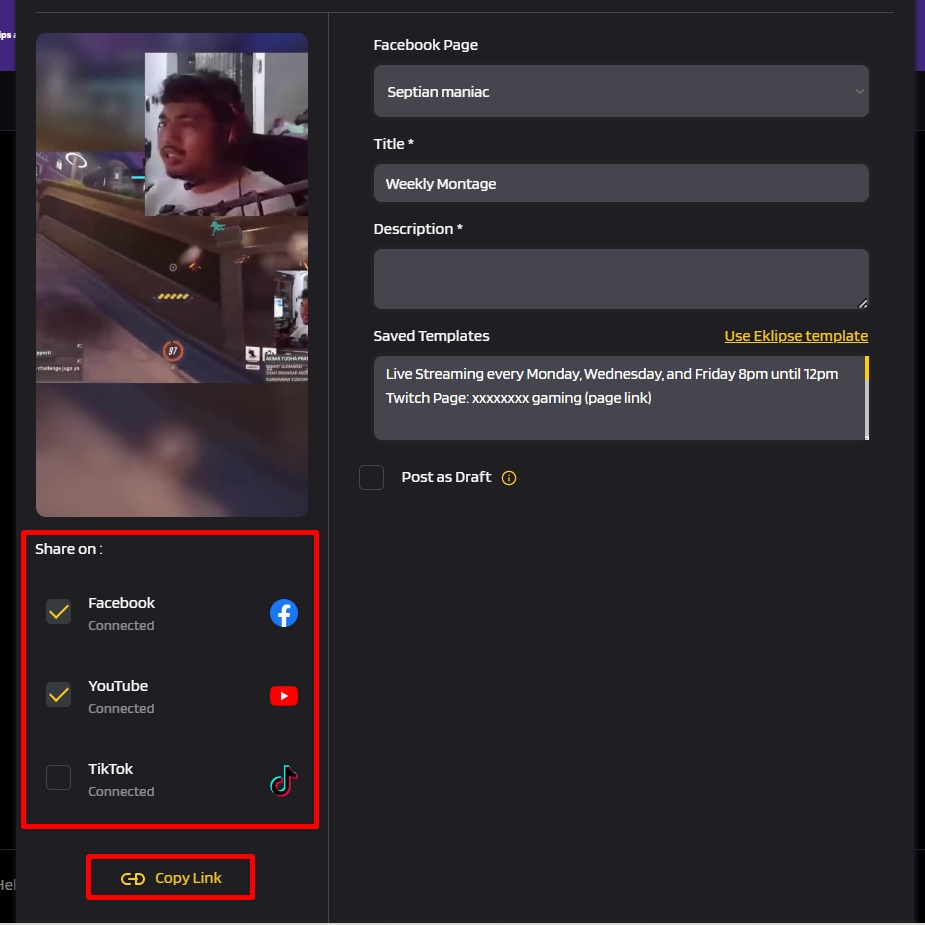
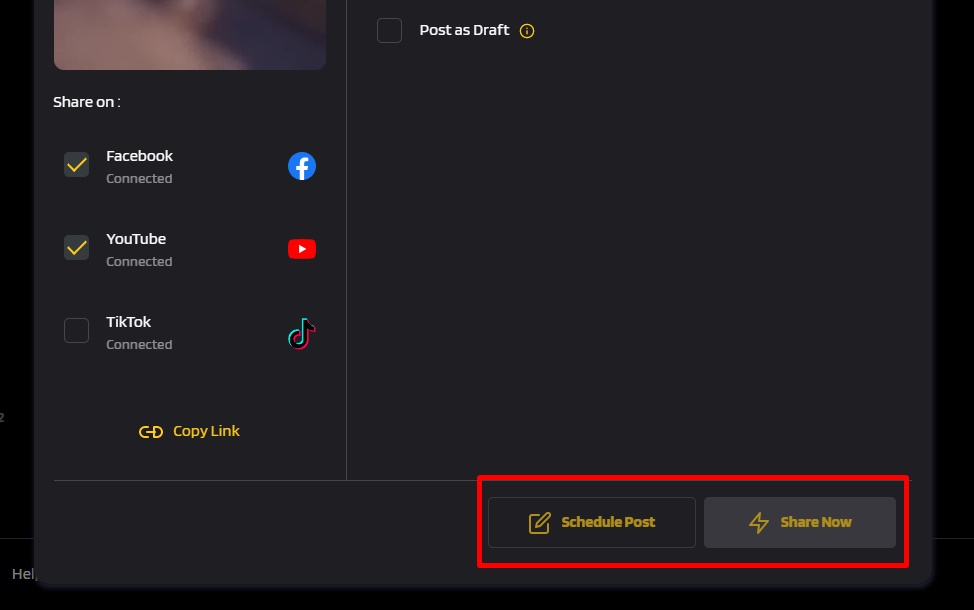
- Then, hit Share Now.
- Alternatively, click the Schedule Posts button to schedule your post.
Conclusion
That’s all about how to stream on Twitch on a laptop. It is easy and can be done with the right hardware, internet connection, and software like OBS Studio. Just follow the steps in this article to set up your stream and start sharing your gameplay or creative content with a large audience.
Anyway, there is something you should keep in mind about playing music while streaming on Twitch. You need to be careful that the song you play during the broadcast is a copyright-free one. Otherwise, you may get banned due to the Community Guidelines violations. To know what song you can safely play during the stream, you can go to our article that talks about this topic. Happy streaming!
Maximize your Black Ops 6 rewards—Create highlights from your best gameplay with with Eklipse
Eklipse help streamer improve their social media presence with AI highlights that clip your Twitch / Kick streams automatically & converts them to TikTok / Reels / Shorts
🎮 Play. Clip. Share.
You don’t need to be a streamer to create amazing gaming clips.
Let Eklipse AI auto-detect your best moments and turn them into epic highlights!
Limited free clips available. Don't miss out!
