
Level Up Your Marvel Rivals Gameplay
Capture your epic wins, clutch moments, and even hilarious fails with Eklipse. Easily create and share highlight reels with your friends—even if you're not streaming!
Learn MoreIt’s a necessity to learn how to make highlight videos. The highlight video actually sums up the significant moments of an event into a short yet packed snippet, giving you a comprehensive overview in just a few minutes.
In addition, due to its characteristic form, a highlight clip is quite flexible to share on social media, including bite-sized platforms like TikTok, Reel, and Shorts. It’s actually a great idea to reach a wider audience and grow your channel.
However, when it comes to creating highlight clips, many people think the process of creating highlights may be a little overwhelming for the beginner. It requires a long process and a lot of time to get done, at least that is what other clipping software offers you.
But don’t worry. Eklipse is the answer for those who wish to create a highlight clip without even taking a single drop of sweat. Just keep reading for more details about Eklipse.
Get a Closer Look at Eklipse
Eklipse is basically an AI-based software that extracts the best moment of your video or stream automatically. By using this tool, you no longer need to roll your sleeve and do manual editing for a stunning clip.
All you need is to create an account in Eklipse and connect it to your social media account, including Twitch, YouTube, Facebook, TikTok, and Discord. Then, the AI will load your stream and capture the highlight. For a more convenient step, you can simply import any existing video from your local device and Eklipse will do its job for you.
Not stopping there, you are also able to convert your clip into TikTok/reels/Shorts format in a snap. There is a wide scoop of templates and copyright-free songs you can choose from to spice up your clip. Most importantly, it’s all FREE!
Additionally, Eklipse also concerns with those who have so much on the table but still need to create a highlight for social media content. That’s why we create Eklipse Mobile App. Just like the web-based version, our auto video editor Android serves the exact same ease but this time, you can do it all on the go. Yes, I know it’s exciting.
If you are eager to know about this auto-editing video tool, then let’s move on to the next section.
How to Make Highlight Videos for free Using Eklipse
Now, it’s time to prove how fantastic this Eklipse will be. Follow the steps below and grab your highlights in no time!
- First, go to the Eklipse Studio website.
- Sign in with your Eklipse account, or create a new one.
- If you want to clip your stream videos, connect your Eklipse account to your socials first.
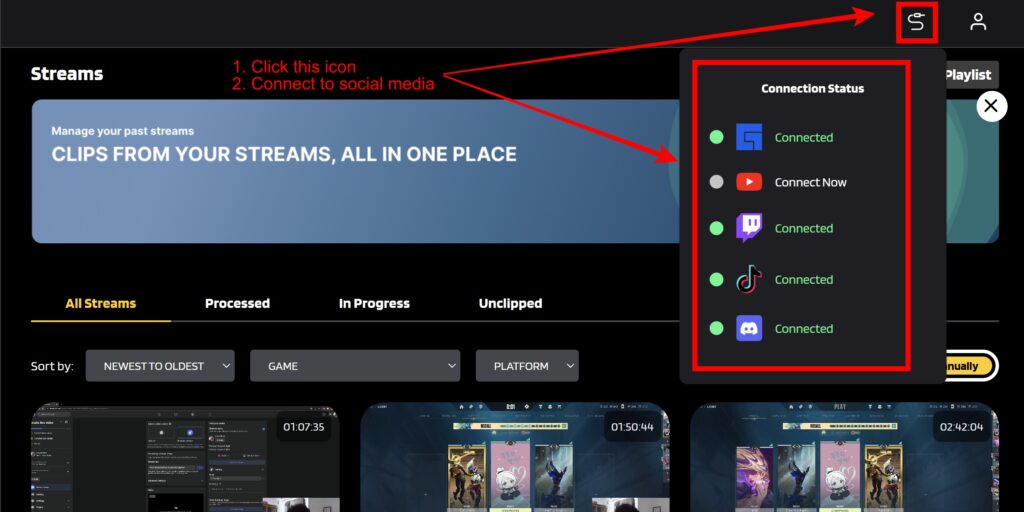
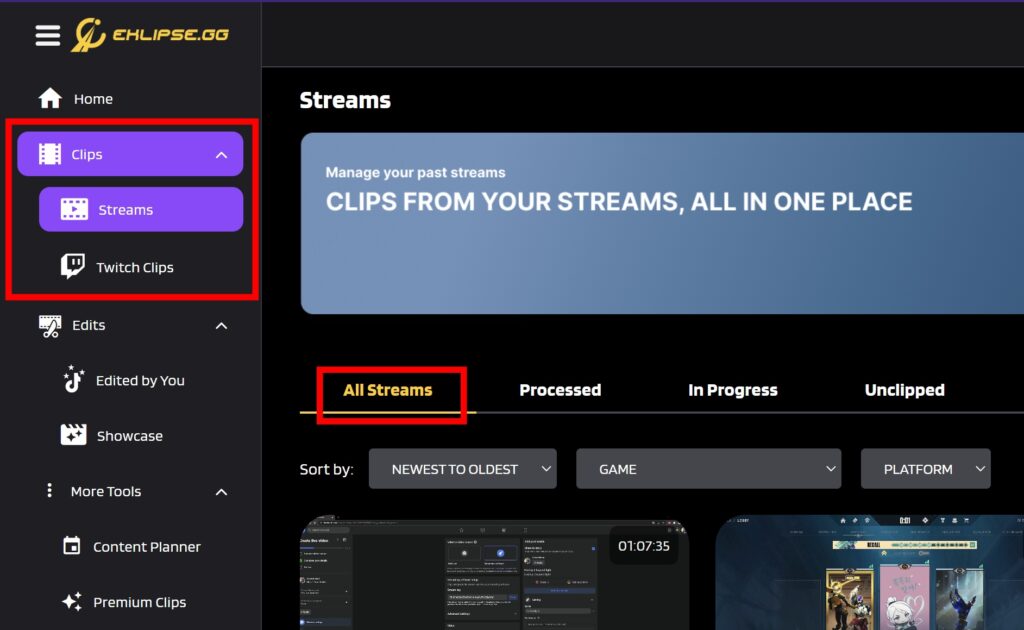
- Next up, navigate to the Clips option > Streams > All Streams to find the stream you want to clip.
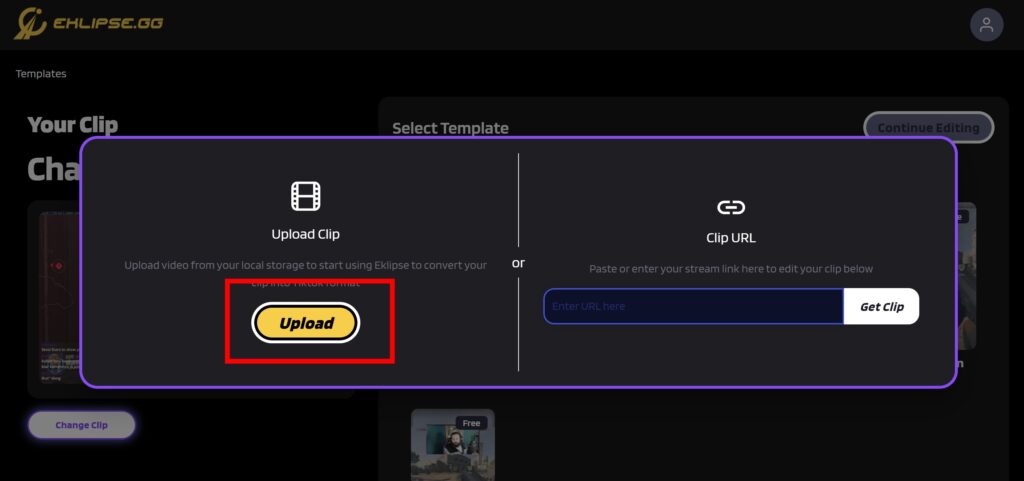
- Alternatively, you can click on the Upload button at the beginning to import your existing videos from the local device.
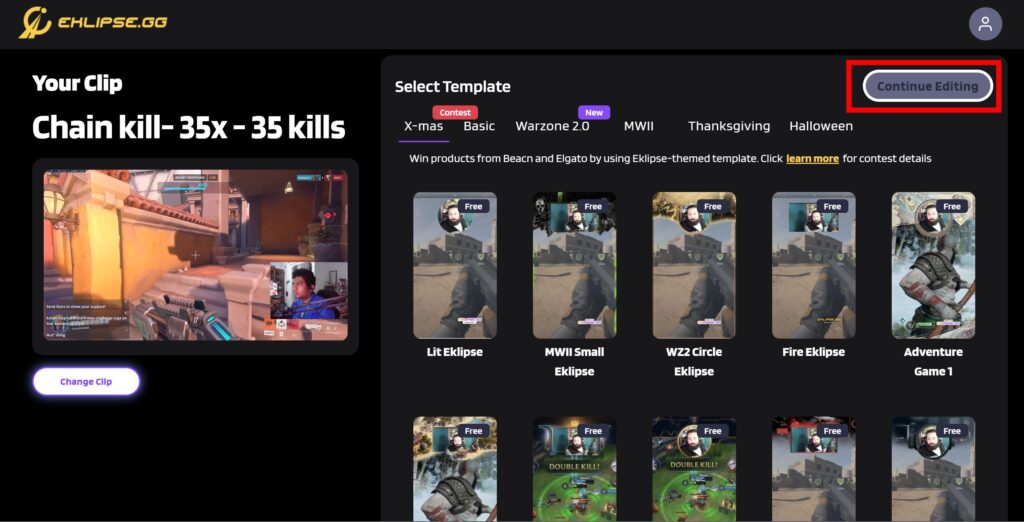
- Select your favorite template and hit Continue Editing.
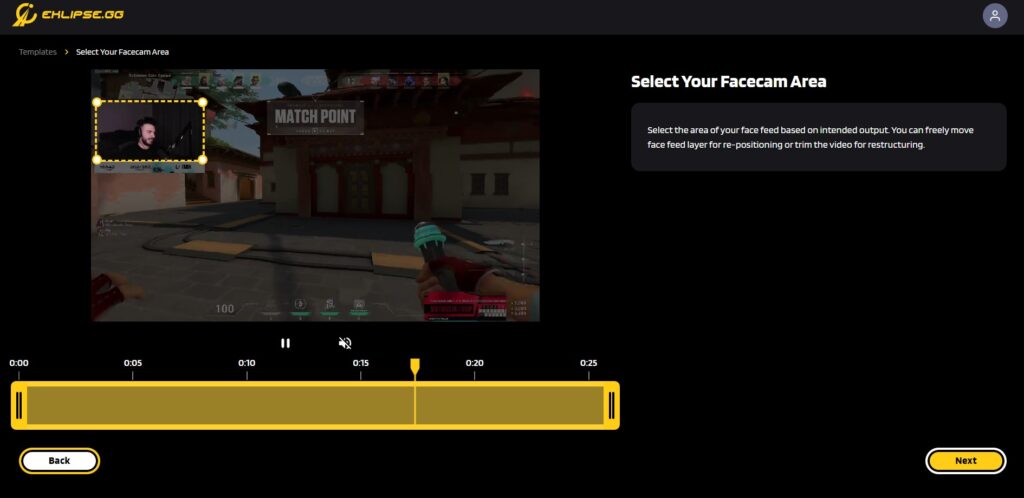
- Afterward, adjust the clip and the facecam area, as well as the duration > Next.
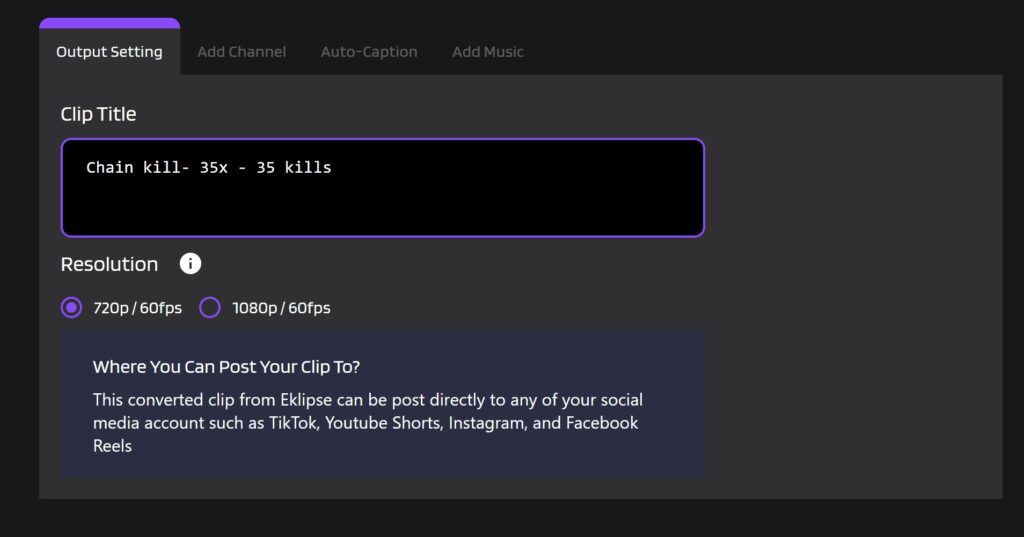
- Set the output by writing a title and selecting the output resolution.
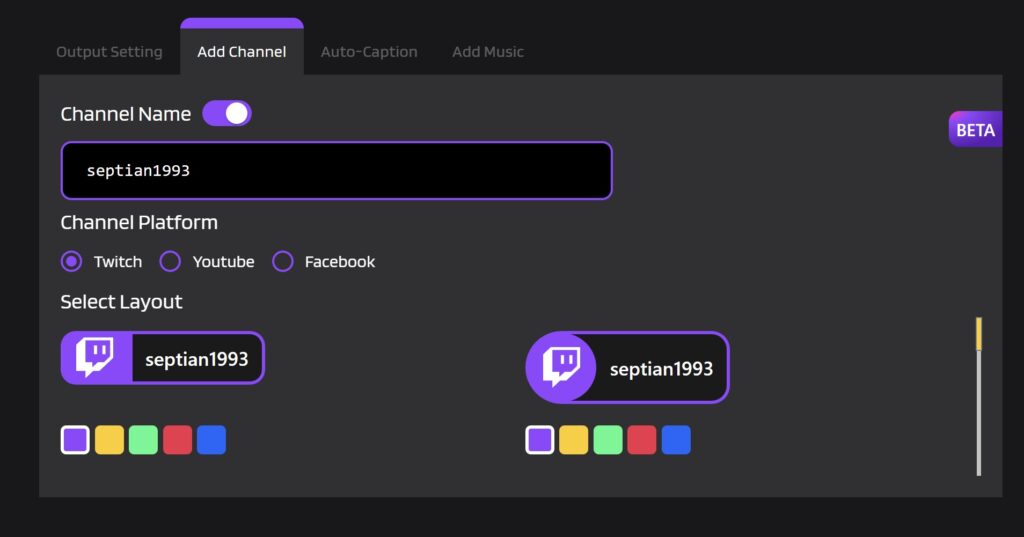
- Next up, add a channel name and auto-caption to make your clip cooler.
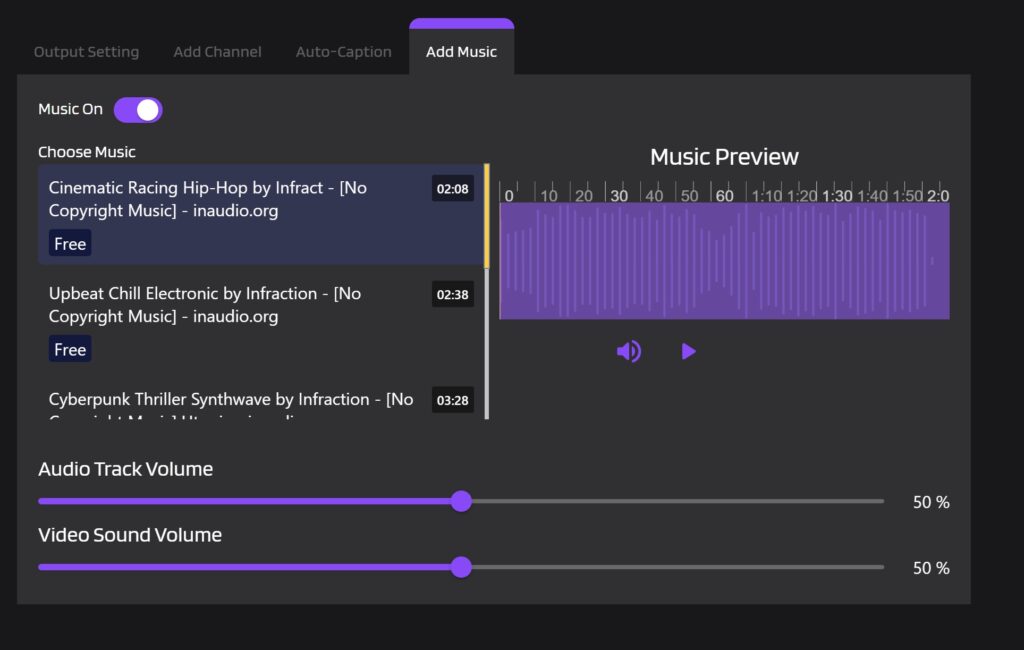
- Now, add a catchy soundtrack, adjust the volume, and hit Confirm once you’ve done.
- Now, find your edited clip by heading to the Edits tab > Edited by You.
- Sort by the Converted option and there your clips are.
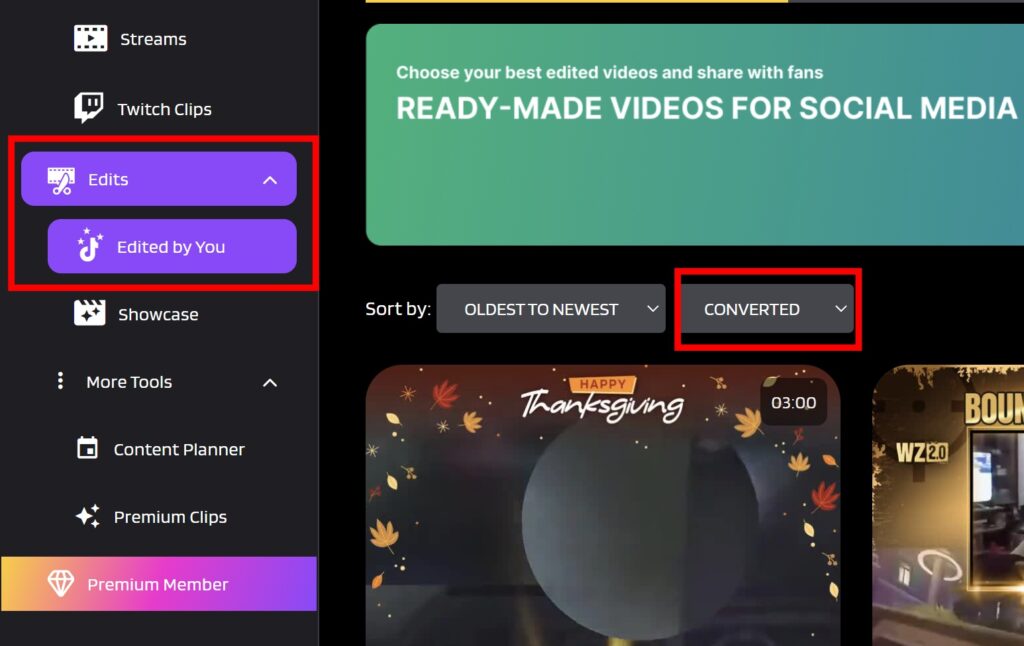
- Finally, you can download or share your highlight clips.
- If you want to share it, hit the Share button, write a description, and tick the small box next to the platform you want to share your clip on.
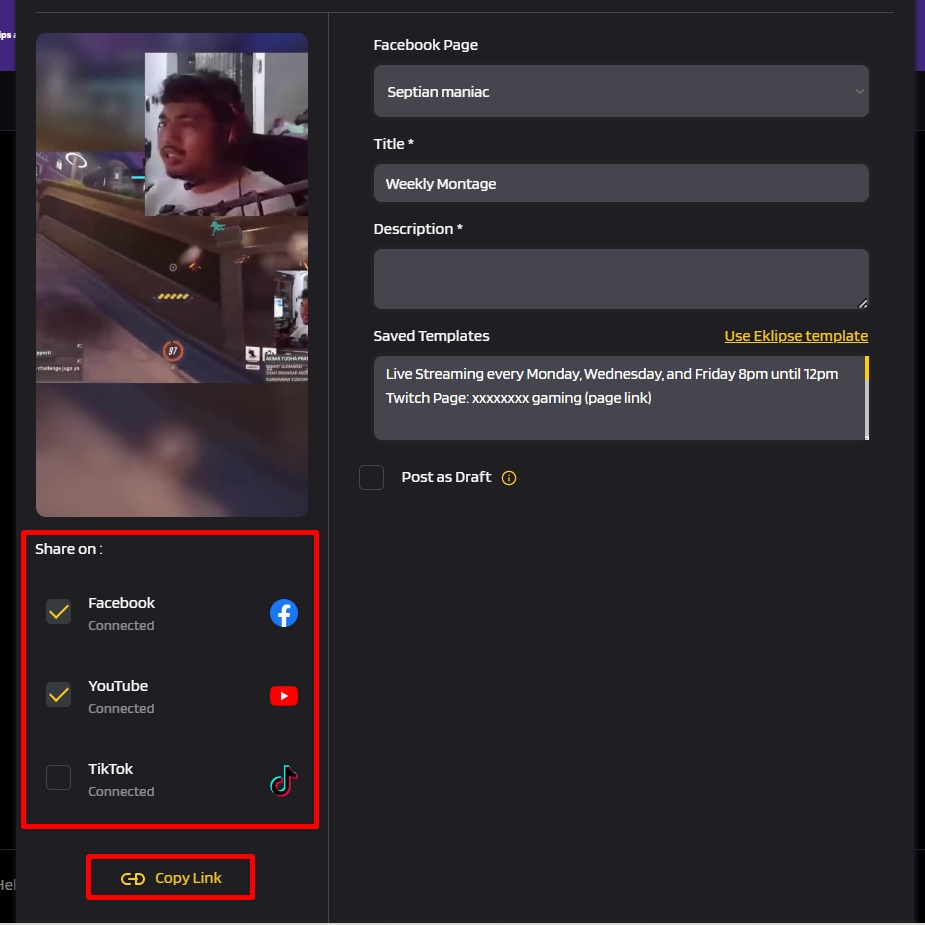
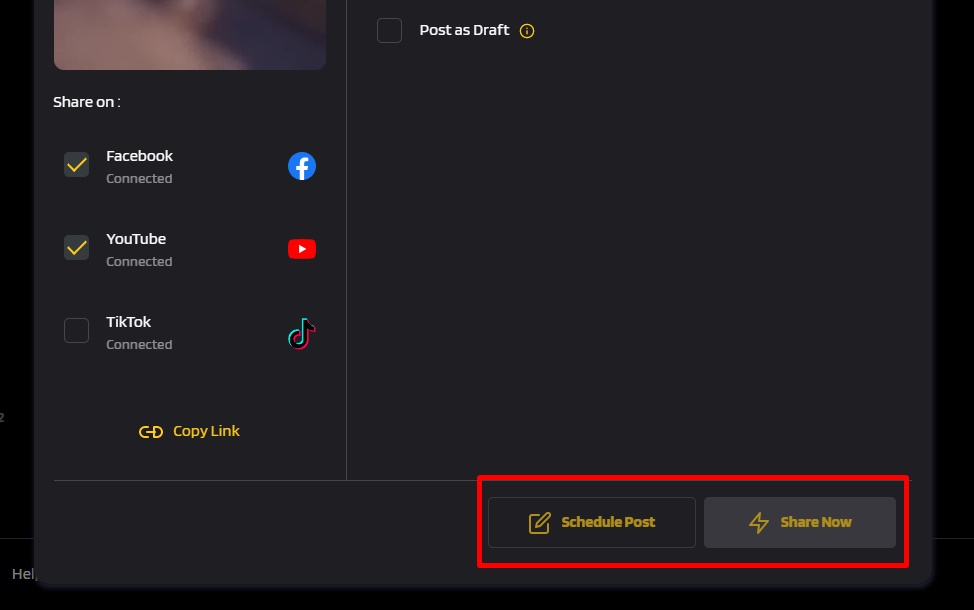
- Then, hit Share Now.
- Alternatively, click the Schedule Posts button to schedule your post.
Conclusion
That’s how to make highlight videos using Eklipse. See? Isn’t it easy? Now, you can give it a shot and start posting your highlights on your socials. Don’t let anyone miss out on your performance!
Maximize your Black Ops 6 rewards—Create highlights from your best gameplay with with Eklipse
Eklipse help streamer improve their social media presence with AI highlights that clip your Twitch / Kick streams automatically & converts them to TikTok / Reels / Shorts
🎮 Play. Clip. Share.
You don’t need to be a streamer to create amazing gaming clips.
Let Eklipse AI auto-detect your best moments and turn them into epic highlights!
Limited free clips available. Don't miss out!
