Level Up Your Marvel Rivals Gameplay
Capture your epic wins, clutch moments, and even hilarious fails with Eklipse. Easily create and share highlight reels with your friends—even if you're not streaming!
Learn MoreHow to turn iPhone live picture into a video for TikTok? Look no further. Here we will unveil the three easy steps to make captivating TikTok video from your iPhone gallery pics!
Live photos are a great source to make viral video TikTok. However, some users may find this editing strategy a bit tricky since live photos aren’t directly compatible with TikTok.
Therefore, we’ll show you how to easily turn your Live Photos into TikTok videos in just a few steps. Let’s dive in!
What is a live picture?

Social media and social entertainment platform apps like TikTok are flooding with many upcoming features nowadays. These new additions can add immense flavor and make these platforms more enjoyable to use.
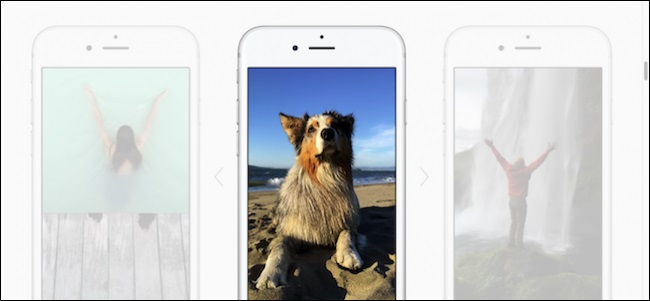
Live photos feature is also a recent and very interesting feature and it is quite fun to use. These live photos record for 3 seconds in total, with one and a half seconds recorded both before and after the shutter click.
To see the live photo, you just press and hold it. You would probably think it’s a video but actually, it is a High-Efficiency Image File ( HEIF ) format. The file chooses one picture as a lead image and it will show only that image when you share it but what if you want to send the whole sequence or you want to send it as a GIF? Among many other queries, users find it hard to convert a live picture into a video.
More on Eklipse Blog>>> Simple Steps on How to Edit Videos on iPhone
How to turn a live picture into a video?
You need to save a live photo as a video file before sharing it. This is because live photos don’t always shared as high-quality videos.
This feature previously needed third-party applications to perform this action . However, Apple made this changeover even effortless with the release of IOS 13 in 2019. Now no external app is required to do this.
Here’s a simple four step guide for you to convert your live photos into videos!
- Open your Tiktok App and select your live photo:
Simply open your Tiktok App on your mobile device and choose any live photo from your search feed that you want to convert into a video file.
- Click the option of share on your live photo:
Second step is quite easy. You just have to click the share button at the bottom left of your mobile screen indicated by a curved arrow. Isn’t it easy?
- Tap the option” Save as a video” :
After you press the share option, you will be given many choices . Scroll down to the bottom and choose save as video and boom! Your live photo has been converted into a video now. Super easy right?
- Return back to your gallery
In this final step, just Go back to your mobile’s photos App, and scroll down to most recent image in your phone. Your live photo will now reappear as a video file. From there, you can now share it wherever you want to. And now, you can also share it as GIF.
Last thing, if you thinking to do the reversed version (as in save TikTok video into a Live Photo), you try on this YouTube video tutorial.
More on Eklipse Blog>>> How To Add Pictures On TikTok Video Without Slideshow: 2 Easy Ways
How to combine multiple Live Photos into a single video clip
With iOS 16, you can also combine multiple Live Photos into a single video clip, effectively creating a montage of your Live Photos. You don’t need to use third-party app to combine multiple Live Photos into a single video clip. Here’s how:
- Open the Photos app and select the Live Photos you want to combine.
- Tap on the “Share” button in the bottom left corner of the screen.
- Scroll down and tap on “Save as Video”.
- A new window will appear with the option to “Save as Single Video”. Tap on this option to combine the Live Photos into a single video clip.
More on Eklipse Blog>>> 4 Easy Ways to Crop videos on iOS, Android and PC
Adding Live Photos to Your TikTok Video
Now that you have your live photos ready, it’s time to add them to your TikTok video. Here’s how to do it:
- Open TikTok and tap the plus sign to create a new video.
- Record or upload your video footage as you normally would.
- Tap the “Effects” button at the bottom of the screen.
- Scroll down until you see the “Live Photo” option and select it.
- Choose the live photo you want to use and adjust its placement and size on the video frame.
- You can add as many live photos as you want to your video, and even adjust their duration and placement to create a more dynamic and engaging video.
- Integrating Live Photos into Your TikTok Video Seamlessly and Creatively:
While adding live photos to your TikTok videos can be a great way to add extra interest and engagement, it’s important to do it seamlessly and creatively. Here are some tips to keep in mind:
- Use live photos that are relevant to your video’s theme or message. This will make your video more cohesive and engaging.
- Consider using live photos as a transition between different parts of your video, or to emphasize certain moments or actions.
- Play with the timing of your live photos – for example, you can slow them down or speed them up to create a more dynamic effect.
- Experiment with different placements and sizes for your live photos. Try overlaying them on top of your video footage, or positioning them in a way that creates a unique visual effect.
- Remember to keep your live photos in line with your overall TikTok aesthetic and style
More on Eklipse Blog>>> How To Edit Duration of Photos On TikTok On Phone
How to Convert Live Photos to Animated GIFs
If you find yourself wanting to share your Live Photo as a GIF rather than a video, especially on platforms that favor GIFs, here’s a step-by-step guide on how to achieve that.
While iOS 16 lacks a native method for this conversion, the App Store offers various alternatives. One popular choice is Giphy, which not only transforms Live Photos into animated GIFs but also allows customization and direct social media sharing. Here’s how to do it:
- Download and open Giphy from the App Store.
- Sign in or create an account, with the option to use Sign in with Apple.
- Click on “Create” in the top right corner of the Giphy app.
- Grant access to your Camera when prompted and select the photo thumbnail in the bottom left corner to open your photo library. Once again, provide access if prompted.
- Choose “Live Photos” at the bottom to filter and display only your Live Photos.
- Open the Live Photo you wish to convert to a GIF.
- Customize your Live Photo using the editing tools provided by Giphy. These tools include cropping, trimming, and adding stickers or text effects. Once done, click the Right Arrow in the bottom right corner to proceed.
- Preview your finished GIF. Choose “Share GIF” to continue or “Tap to Copy GIF” for direct copying to your clipboard.
- On the “Share Video” screen, opt to “Save GIF” to store a copy in your photo library or “Save Video” to save it as a conventional video clip.
- Alternatively, use the provided options to share the GIF directly to Messages, Facebook Messenger, Snapchat, or Instagram.
More on Eklipse Blog>>> Top 5 AI Portrait Generator: Create Your Stunning Work of Art!
Tips on How to Edit a Live Photo

Do you want to create stunning content? If so, make sure to follow these tips on how to edit a great live photo:
1. Trim Video Clips
Trim video clips to remove unwanted parts from your live photo. Click on the video clip, then the scissors icon, and adjust the video buffers to make it shorter or longer.
2. Add Transitions
Choose video transitions under the “Design” icon and “VIDEO SETTINGS” tab for a polished look.
3. Add Text for Better Engagement
Enhance your video by adding text. Click on “Add text,” drag it to the perfect spot, choose a standout color, and match the font as you like.
4. Apply Filters for Cohesiveness
Make your clips more cohesive with video filters. Click on the “Design” tab, go to the “Filter” section, and select a filter that aligns with your brand.
5. Add Music for Emotion
Want to gain more engagement? Add some viral songs as music background for your video!
6. Add Voice-Over for Connection
Stand out and connect with your audience by recording and adding a voice-over track.
7. Add Compelling CTA
Ensure your video is actionable by adding a bold and clear call to action at the end using a text box.
8. Choose Correct Aspect Ratio
Last but not least, optimize your content for different platforms by selecting the appropriate aspect ratio. For example:
- Square 1:1 for Facebook, Instagram, and LinkedIn
- Landscape 16:9 for YouTube, Facebook, and LinkedIn
- Vertical 9:16 for Facebook, Reels, TikTok, and Instagram Stories
More on Eklipse Blog>>> 4 Easy Ways to Add Pictures to TikTok Video After Recording
Conclusion
Following these four easy steps will solve your all problems regarding live photos and will make your experience of sharing live photos with your near ones more simple, smooth, and way more interesting! We hope you understand how to turn your live picture into a video.
You also can use our tool, Eklipse, to create your gaming highlights into short videos for your TikTok. It’s free and easy to use too. Stay tuned to our blog for more tiktok related content and check our amazing feature for tiktok as well. Happy Streaming!
Maximize your Black Ops 6 rewards—Create highlights from your best gameplay with with Eklipse
Eklipse help streamer improve their social media presence with AI highlights that clip your Twitch / Kick streams automatically & converts them to TikTok / Reels / Shorts
🎮 Play. Clip. Share.
You don’t need to be a streamer to create amazing gaming clips.
Let Eklipse AI auto-detect your best moments and turn them into epic highlights!
Limited free clips available. Don't miss out!


