Ever wondered how top Fortnite players consistently climb the ranks and dominate their matches? Watching your past matches in Fortnite is a powerful way to sharpen your skills, analyze your gameplay, and relive your most memorable moments.
Whether you’re battling it out on PC, PlayStation, Xbox, or a mobile device, mastering the art of viewing and saving replays can transform your gaming experience.
In this guide, we’ll walk you through easy steps to watch Fortnite replays across different platforms and share essential tips to help you manage and maximize your game highlights effectively.
Note: The exact path may vary depending on your installation.
Viewing Replays on Mobile Devices (Nintendo Switch, iOS, Android)
Not Supported Directly
Fortnite does not support viewing replays directly on mobile devices like Nintendo Switch, iOS, or Android. However, you can use screen recording apps as an alternative.
Alternative Steps:
Use Screen Recording Apps:
iOS: Use the built-in screen recording feature.
Android: Use apps like AZ Screen Recorder.
Nintendo Switch: Use external capture devices.
Record Your Gameplay:
Start the screen recording before you play.
Stop the recording after your match ends.
Save and Watch:
Access the recorded video in your device’s gallery or storage.
Note: Screen recordings won’t have the same replay features as on PC and consoles.
Important Notes
1. Version Compatibility
Same Version Only: Replays can only be watched in the Fortnite version they were recorded in. After game updates, older replays might not work unless saved.
Save Before Updating: Always save important replays before the game updates to ensure they remain playable.
2. Storage Limits
Consoles: You can save up to 10 replays on consoles.
PC: There’s no strict limit, but it depends on your hard drive space.
3. File Size
Match Replay Size: Each replay file is about 10MB. Ensure you have enough storage space.
4. Fortnite: Save the World
No Replays: Replays are only available for the Battle Royale mode. The Save the World mode does not support replay saving.
Tips for Managing Your Replays
Save Important Matches: Only the top 5 highlights are saved automatically for 24 hours. Manually save any matches you want to keep.
Use Replays to Improve: Watch your replays to identify areas where you can improve, such as positioning, strategy, or teamwork.
Report Bugs Effectively: If you encounter issues during a match, save the replay and note the Battle ID to provide detailed reports to Fortnite support.
Conclusion
Watching and saving replays in Fortnite is a valuable tool for enhancing your gameplay and enjoying your best moments. While PC and consoles offer built-in replay systems for easy access and management, mobile devices require alternative methods like screen recording. Always remember to save your important matches manually and keep your game updated to ensure your replays remain accessible.
By following this guide, you can easily access and manage your Fortnite replays, helping you become a better player and enjoy the game even more. Happy gaming!
Watching your past matches in Mobile Legends (ML) is a great way to improve your skills, analyze your gameplay, and relive your best moments. However, there’s some confusion about using a Battle ID to watch replays. This guide will explain why you can’t use a Battle ID for watching replays and show you the correct way to access and save your ML game highlights.
A Battle ID is a unique identifier for each match you play in Mobile Legends. Its primary purpose is to help you report bugs or issues to the support team. Unfortunately, you cannot use a Battle ID to watch replays of your matches. Replays are managed directly within the game, and the Battle ID doesn’t provide access to these recordings.
Is it possible to watch ML replays using a battle ID? @http_llouie via TikTok
How to Watch ML Replays
To watch your Mobile Legends replays, follow these simple steps using the in-game replay system:
1. Accessing the Replay System
Open Mobile Legends: Launch the ML app on your device.
Go to Your Profile: Tap on your profile picture or avatar to open your profile page.
Navigate to the Battlefield Tab: Within your profile, find and select the Battlefield tab.
Select Replay: In the Battlefield section, tap on the Replay option. This will display a list of your recent matches.
2. Watching a Replay
Choose a Match: Browse through your recent matches and select the one you want to watch.
Tap Play: Click on the Watch or Play button to start viewing the replay of that match.
Saving Your Replays
By default, Mobile Legends automatically saves your top 5 highlights from the past 24 hours. To keep these replays longer or save additional matches, you need to save them manually.
1. Saving a Highlight
Select the Match: In the Replay section, choose the match you want to save.
Tap Save: Look for the Save button or option and tap it.
Adjust Settings (PC Users): If you’re playing on PC, a window may pop up allowing you to choose the resolution and file size before saving. Confirm your settings and save the replay.
2. Locate Saved Replays (PC Users)
Saved replays on PC are typically stored in your Documents folder under Mobile Legends > Replays. The exact path might vary based on your system setup.
Common Misconceptions: Battle ID and Replays
Some videos, especially on platforms like TikTok, suggest that you can watch Mobile Legends replays using a Battle ID. This information is incorrect. The Battle ID is solely for reporting issues and cannot be used to access or watch replays.
Why Battle ID Doesn’t Work for Replays
Purpose: Battle ID is designed for bug reporting, not for replay access.
Access: Replays are managed within the game’s replay system, independent of Battle IDs.
Always use the in-game Replay system to watch your past matches.
Tips for Managing Your Replays
Save Important Matches: Since only the top 5 highlights are saved automatically for 24 hours, make sure to manually save any matches you want to keep.
Use Replays to Improve: Watch your replays to identify areas where you can improve, such as positioning, strategy, or teamwork.
Report Bugs Effectively: If you encounter issues during a match, save the replay and note the Battle ID to provide detailed reports to Mobile Legends support.
Conclusion
While the Battle ID in Mobile Legends is essential for reporting bugs, it cannot be used to watch replays. To access and save your game highlights, use the in-game Replay system by navigating through your profile and battlefield tabs. Always save important matches manually to keep them beyond the automatic 24-hour storage.
Avoid relying on misleading information from social media platforms and stick to the official methods provided within the game. By following this guide, you can easily watch and manage your Mobile Legends replays, helping you become a better player and enjoy your gaming experience even more.
Recording gaming highlights on a low-end PC can be tough, especially when performance is at stake. Selecting the best clipping software for low-end PCs is crucial to ensure smooth gameplay and high-quality footage. OBS is the best customizable free clipping software, but it can be demanding on low-end PCs. If your PC can’t handle OBS, try GeForce Experience, Medal, or Outplayed as alternatives.
This guide showcases the best clipping software for low end PCs free of lag, helping you capture memorable moments. Discover the best clipping software for PC to enhance your gaming experience while recording.
1. Bandicam – Best for High-Performance Screen Recording
Source: YouTube
Bandicam is one of the best clipping software that is compatible with low-end PCs but comes with complete features. With Bandicam, you can record your screen or gameplay in multiple modes. Other than that, it also supports game recording with a 480 frame rate.
What’s more interesting, you can use this fantastic tool to record your gameplay not only on PC but from external game consoles, including Xbox, PlayStation, and Nintendo Switch due to its HDMI recording mode.
You can adjust the settings to suit your PC spec. Other than that, Bandicam is also able to clip iconic moments from your stream without affecting performance due to its hardware acceleration.
Key Features:
Hardware Acceleration: smooth recording for demanding games
Multiple Recording Modes: screen, specific window, webcam, etc.
High Frame Rate Recording: up to 480 FPS for gameplay
HDMI Recording: capture gameplay from consoles like Xbox, PlayStation, and Switch
Customizable Recording Settings: adjust for PC performance
Pros:
Free to use
Can record and clip game console gameplay
Allows capturing the best moment without affecting the quality
Cons:
The free version comes with a watermark
Only available for Windows
It is priced at $39.95 for the lifetime full version
Pricing:
Free: Records up to 10 minutes with a watermark.
One-Time License: Starts at $39.95 for a single PC.
2. Eklipse – Best for Stream Highlights and Social Sharing
Source: eklipse.gg
Eklipse stands out as a lightweight clipping tool with social media integration, making it a great choice for low-end PCs. It goes beyond simple clipping by offering automatic highlight generation using AI.
This means Eklipse can analyze your Twitch, YouTube, or Facebook Gaming streams and identify the most exciting moments, saving you the time of manually sorting through footage.
While Eklipse offers some editing features, it might not be as powerful as some dedicated editing software. However, its focus on social media and automatic highlights makes it a compelling option for low-end PC users who want to share their best streaming moments quickly and easily.
Key Features:
Automatic Highlight Generation: Eklipse utilizes AI technology to analyze your livestreams (Twitch, YouTube, Facebook Gaming) and automatically identify the most engaging or exciting moments.
Clip Management: Easily manage the clips generated from your streams within the Eklipse mobile app.
Social Media Sharing: Effortlessly download and share your generated clips directly to popular social media platforms like TikTok, YouTube Shorts, and Instagram Reels.
Short-form Video Creation: Convert lengthy Twitch streams or videos into bite-sized, engaging content specifically tailored for social media consumption.
Pros:
A friendly and intuitive interface
Many different templates to spice up your video
Convert Twitch or any other stream video to TikTok/Reels/Short in a snap
Provides automatic service
Supports many popular games
Allows importing videos from the local device
Enables instant sharing
Cons:
May require some learning to fully utilize its features for creative editing.
Limited editing options compared to more advanced software.
Pricing: Free plan with basic features; Premium plans start at $19.99/month.
FBX is not originally clip-maker software. It’s more of a game-streaming recorder. Nonetheless, it offers great features such as hardware acceleration that helps to keep the game’s performance.
What’s more interesting is, despite this being probably the lightest recording tool, it’s able to record HD gameplay videos with no lag at all. In addition, FBX can record the gameplay in 1440p resolution.
Despite being a video recorder, FBX allows its users to customize the recording mode, including the video area which makes it enables to create highlight clips from your gameplay record. To make your clip even more stunning, you can add stickers, sound, or text captions, freeze the game, and any other cool features. Eventually, you can save your recording to your device or share it directly on your social media platforms.
Key Features:
High-Performance Recording: FBX Game Recorder utilizes hardware acceleration to capture gameplay smoothly, minimizing the impact on your frame rates. This ensures you can record high-quality footage without sacrificing your in-game performance.
Instant Replay: This innovative feature acts like a DVR for your gameplay. FBX continuously buffers your gameplay in the background, allowing you to save the previous moments (customizable duration) after an impressive feat or hilarious blunder. No more scrambling to hit the record before the magic happens!
Manual Recording: For planned recordings or longer sessions, FBX offers traditional recording functionality. You can initiate and stop recordings with hotkeys at any time.
Highlight Clip Capture: Similar to Instant Replay, you can capture specific moments even while recording. Hit a hotkey, and FBX will save a configurable time window (typically 10 seconds) of your gameplay, ensuring you capture those epic moments you don’t want to miss.
Multiple Capture Modes: Choose between capturing your entire screen, a specific window (ideal for focusing solely on the game), or a custom area.
Simple Editing Tools: FBX offers basic editing functionalities like trimming unwanted footage from the beginning or end of your recordings.
Webcam Overlay: Add a personal touch to your recordings by incorporating your webcam feed alongside your gameplay footage. This can be useful for creating video commentaries or reactions.
Pros:
Light-weight software
Produce HD resolution
It has many great features like hardware acceleration, record HD gameplay with no lag, etc
Allows users to add text captions, stickers, and sounds, and even freeze the game.
Offers instant sharing to social media
Cons:
Manual edit
Unable to record and clip other activities besides gaming
Pricing: Free to use with watermark; $9.50 per year (Pro plan); $25 for a plan that includes all future updates.
4. Xbox Game Bar – Best Easy-to-Use Clipping Software
Source: Variety – What is the best 60fps clipping software?
For all Windows users, you might be familiar with this software. Xbox Game Bar is a pre-installed app available on Windows 10 or later.
If you are looking for super simple and quick clipping software, Xbox Game Bar could be your perfect choice. It even provides in-app chatting with Xbox users while playing games.
However, unlike other software that provides complete features to enhance your clips, Xbox Game Bar lacks editing tools. So, you might need other tools to edit your video.
Key Features:
Effortless Access: Simply press the Windows logo key + G to open or close the Xbox Game Bar overlay while in-game or using any desktop application.
Screen Recording: Capture your gameplay or desktop activity with a simple hotkey combination (default: Windows logo key + Alt + R). You can choose to record from the moment you press the hotkey or retroactively capture the previous moments (customizable duration).
Screenshots: Take high-resolution screenshots of your gameplay or desktop with the dedicated camera icon in the Xbox Game Bar.
Basic Editing Tools: Trim unwanted footage from the beginning or end of your recordings using the built-in editing tools within the Xbox Game Bar.
Sharing: Share your screenshots and clips directly to social media platforms like Twitter or YouTube, or save them to your local storage for further editing.
Performance Overlay: Monitor your system performance while gaming, including frame rates (FPS), CPU usage, and GPU temperature (requires enabling in settings).
Audio Recording: Choose to record game audio, microphone audio, or both for your gameplay clips, allowing you to narrate your recordings.
5. NVIDIA ShadowPlay – Best for Effortless Gameplay Recording
Source: YouTube – What is the best recording software for low end computers?
NVIDIA ShadowPlay can be a good choice if you need a tool that allows you to record the screen, do live streaming, or even clip the last 30 seconds of gameplay. Something that makes people love to use this software is the capability to give minimal effect to the game performance during recording.
You don’t need to have a high-spec PC or laptop to have a 4K resolution at 60 FPS. It is still achievable if you use NVIDIA despite you only having a low-end PC.
Aside from all of its unique features, you can share the video recording to YouTube Live, Twitch, or Facebook Live instantly using this tool.
Key Features:
Hardware Acceleration: Leveraging the power of your Nvidia GPU, ShadowPlay captures gameplay footage with minimal impact on frame rates. This ensures smooth gameplay recording, even for demanding titles.
Instant Replay: Functioning like a DVR for your gameplay, ShadowPlay continuously buffers your gameplay in the background. Hit a hotkey, and you can save the previous moments (customizable buffer time) to capture that unexpected play or hilarious blunder you just witnessed. No need to constantly record everything!
Manual Recording: For planned recordings or longer sessions, ShadowPlay offers traditional recording functionality. You can initiate and stop recordings with hotkeys at any time.
Highlight Capture: Similar to Instant Replay, you can capture specific moments even while recording. A hotkey saves a configurable time window (default: 30 seconds) of your gameplay, ensuring you snag those epic moments you don’t want to miss.
Multiple Resolutions & Frame Rates: Choose recording resolutions and frame rates to optimize file size and video quality based on your needs. ShadowPlay supports high-definition recording and even 4K capture for Nvidia RTX 30 series and above graphics cards.
Microphone & Webcam Overlay: Incorporate your voice commentary and webcam footage alongside your gameplay recordings, allowing you to create personalized content.
Pros:
It’s the painless option if you have a GeForce graphic card
Allows instant sharing to social networks
Produce high-quality results
Cons:
You need to use an NVIDIA GeForce graphic card
Limited editing features within ShadowPlay (requires separate software for advanced editing)
Pricing: Free for users who own Nvidia’s graphics cards.
6. D3DGear – Best Lightweight Game Recording and Streaming
Source: D3DGear
Are you looking for lightweight yet functional clipping software that works for a game or any streaming moment? D3DGear is the answer. Despite the small size of its file, D3DGear offers you excellent features such as the capability to record screen and gameplay in 1440p resolution, while still being able to preserve the video quality.
In addition to that, D3DGear also provides you with a super simple function where you can directly click on the start and stop buttons to capture the screen or the video. No need to take a lot of time just to find out how it works.
Have a slow uploading speed issue? No worries, because D3DGear is still able to work in that situation. So, if you need a simple yet complete package, this tool is worth trying.
7. Medal.tv – Best Free App to Capture and Share Gaming Highlights
Source: CB Insights
When it comes to the best clip-maker tool, Medal.tv is certainly not to be missed. It’s a worthy opponent of Eklipse. Just like Eklipse, Medal.tv is powered with an AI, making it able to create clips and montages effortlessly.
Medal.tv is a free, all-in-one platform tailored for gamers to capture, edit, and share their best moments. Since its launch in 2018, Medal has provided an easy-to-use experience for PC, PlayStation, Xbox, and mobile gamers.
Medal automatically records your gameplay in the background, so you don’t need to adjust any settings. A simple hotkey allows you to clip those exciting plays or funny fails, and the clips are stored in the cloud, saving device space. So, is Medal the best clipping software? Many gamers think it’s a top contender for its convenience and features.
Key Features:
Capture & Clip Anything: Medal runs in the background, always recording. Save those awesome moments with a single hotkey.
Edit & Share Quickly: Trim clips, add text, and share them with friends or the Medal community in seconds.
Play Together, Share: Connect with other gamers, browse their clips, and build a network around your shared passion.
Game On, Anywhere: Capture and share gameplay from PC, PlayStation, Xbox, and even mobile devices – all in one place.
Store Your Victories: Free cloud storage keeps your clips safe and accessible.
Pros:
Friendly interface
Clips specific scenes and record full gameplay
Provides complete and incredible editing tools
Unlimited free storage for videos
Supports many games
Available for Windows, Mac, or mobile
Cons:
Longer video clips are only available for the Premium version
8. Gecata by Movavi – Best for Simple and Affordable Gameplay Recording
Source: Movavi
Gecata by Movavi is a free and user-friendly screen and game recording software designed specifically for PC gamers. Launched in 2018, Gecata boasts a lightweight design that prioritizes smooth performance, allowing you to capture your gameplay without experiencing lag or compromising in-game frame rates.
Gecata offers a streamlined recording experience. With just a single click, you can start capturing your gameplay footage or your entire Windows desktop. The software also seamlessly integrates webcam recording, allowing you to add your reactions and commentary alongside your gameplay.
Key Features:
Simple Interface: Gecata boasts a clean and intuitive interface, making it easy to navigate and configure recording settings, even for those new to screen recording software.
Recording Modes: Choose between capturing your entire screen, a specific window, or focusing on gameplay with the dedicated game capture mode.
Webcam Overlay: Incorporate your webcam footage alongside your screen recording for a more personalized touch.
Basic Editing Tools: Perform essential edits like trimming unwanted footage or adding intros and outros to your recordings.
Hotkeys: Customize hotkeys for starting, stopping, and pausing recordings to streamline your capture workflow.
Pros:
Completely free to use with no hidden fees or limitations
Lightweight design minimizes impact on system resources
Simple and intuitive interface for easy capture and streaming
Supports recording webcam alongside gameplay for enhanced commentary
Streams directly to popular platforms for easy content sharing
Cons:
It comes with a watermark for the free version
Can only record for 10 minutes on the free version
Pricing:
Free: Limited to 5 minutes recording length per session and adds a watermark to videos.
Paid (Gecata Pro): One-time purchase starting at $29.95 (price may vary depending on region and promotions). Unlocks unlimited recording length, removes the watermark, and offers additional features like scheduling recordings and noise reduction.
9. Wondershare DemoCreator – Best Flexible Clipping Software
Source: Wondershare
Wondershare DemoCreator is a powerful screen recording and video editing software designed for educators, presenters, business owners, and gamers. Launched in 2011, DemoCreator offers a comprehensive suite of tools to capture your screen, edit your recordings, and create professional-looking explainer videos or presentations.
Wondershare DemoCreator goes beyond simple screen recording. It allows you to capture your screen, webcam, system audio, microphone audio, and even record gameplay footage, all simultaneously. This flexibility makes it ideal for creating tutorials, software demos, webinars, and even capturing those epic gaming moments.
And best of all, its cloud-based storage will save a lot of your computer space.
Key Features:
Screen Recording: Capture your entire screen, a specific window, or a custom area with ease. DemoCreator also boasts a dedicated game recording mode optimized for capturing smooth gameplay footage.
Webcam Recording: Overlay your webcam feed on top of your screen recording to add a personal touch, perfect for creating video tutorials or presentations.
Video Editing Suite: Go beyond basic trimming with DemoCreator’s built-in video editing suite. Edit clips, add transitions, captions, and annotations, and incorporate royalty-free music and sound effects to enhance your recordings.
Advanced Features: For more polished productions, DemoCreator offers features like green screen recording, video effects library, and teleprompter support.
Intuitive Interface: Despite its comprehensive features, DemoCreator maintains a user-friendly interface, making it accessible to users of all experience levels.
Pros:
Versatile recording capabilities capture all your video and audio needs
The User-friendly editing interface makes creating polished videos a breeze
A rich library of resources like music, effects, and avatars enhances your productions
Green screen functionality opens doors for creative video editing techniques
The free version offers basic recording and editing functionalities
Cons:
The free version has limitations on recording length and watermarks exported videos
Advanced editing features and extended recording lengths require paid subscriptions
Pricing:
Free: Watermarked videos, limited export time (5 minutes), and basic recording features.
Monthly Plan ($5.99/month): Removes watermark, extends export time, and unlocks additional editing features.
Yearly Plan ($39.95/year): Most cost-effective option, includes all features and benefits.
10. EaseUS RecExperts – Best for Budget-Friendly Screen Recording with Editing Options
Source: Fossybytes
EaseUS RecExperts features a trimming tool that allows you to split unnecessary parts of your video. Aside from that, this software also enables you to capture high-quality gameplay without even lagging.
No need for additional editing software to make your clip look appealing since EaseUS features shapes, text, arrows, or more tools.
Key Features:
Screen Recording: Choose to record your entire screen, a specific window, or a custom area. EaseUS RecExperts allows you to capture system audio, microphone audio, or both simultaneously for a comprehensive recording.
Schedule Recording: Schedule recordings in advance to capture online events, webinars, or lectures that you might otherwise miss.
Webcam Overlay: Add a personal touch to your recordings by incorporating your webcam feed alongside your screen capture.
Basic Editing Tools: Trim unwanted footage, cut out unnecessary sections, and split your recording into separate clips. You can also add text captions and simple annotations to your videos.
Real-time Drawing: Draw and annotate on your screen in real time to highlight key areas or add visual emphasis during your recordings.
Pros:
Enables users to flexibly adjust the FPS from 1 to 144
Features complete editing tools
Captures high-quality video without lagging
Available for Windows and macOS
Cons:
The free version can only record the screen for a 1-minute duration without any other features mentioned above
The Pro version is a bit pricey compared to others on this list
Pricing:
Free: Limited recording time (2 minutes), watermarked videos, and basic features.
Paid (Starting at $19.95/month): Offers various subscription plans (monthly, yearly, lifetime) with increasing discounts for longer commitments. Paid plans remove watermarks, unlock unlimited recording time, and provide additional features like video conversion and noise reduction.
11. Opus – Best for Effortless Social Media Clip Creation from Long-Form Videos
Source: Opus Clip
Opus Clip is another best game recording software that fits a low-end PC. You just have to share a YouTube link, and it works best for videos where people talk a lot, like podcasts, educational stuff, reviews, and motivational speeches.
However, it’s not great for vlogs, gaming, or music videos. It supports English, German, Spanish, French, and Portuguese languages right now.
Key Features:
Pros:
AI-Powered Video Editing: Opus Clip leverages artificial intelligence to analyze your long-form videos, identifying the most compelling moments and transitions. Based on this analysis, it automatically generates shorter clips optimized for social media platforms.
Multiple Clip Formats: Choose from various clip formats tailored to specific social media platforms, eliminating the need for manual resizing and editing.
Automatic Captions & Emojis: Captivate viewers with automatically generated captions and emojis, adding dynamism and personality to your short clips.
Branding Customization: Maintain brand consistency by applying your logo, color scheme, and fonts to your generated clips.
Viral Score Prediction: Gain valuable insights with Opus Clip’s viral score prediction feature, which estimates the potential reach and engagement of your generated clips.
Efficient: Quickly creates multiple short clips from one long video.
AI-Powered: Uses AI for smart video clip generation.
Customizable: Allows control over the clipping process.
High Quality: Offers free 1080p resolution for videos.
Cons:
Limited Video Types: Best suited for talk-heavy videos.
Language Limitation: May not support all languages.
AI Dependency: Effectiveness depends on content and video quality.
Subscription Cost: Some features may require a paid subscription.
Pricing:
Free: Watermarked videos, limited export quality (720p), and limited clip generation per month.
Basic (Starting at $19/month): Removes watermarks, allows HD exports, and offers increased clip generation quota.
Pro (Starting at $49/month): Unlocks advanced features like custom branding templates and priority customer support.
12. Spikes Studio – Best for Effortless Clip Creation from Long Videos
Source: Spikes Studio
Looking for the best clipping software for Valorant? You can try Spikes Studio.
Spikes Studio is a game-changing tool for content creators looking to transform long-form content into viral clips for platforms like YouTube, TikTok, and Reels. Equipped with a powerful AI editor featuring auto-captions and more, Spikes Studio is your gateway to growing your social media influence.
Key Features:
AI-Powered Video Editing: Spikes Studio utilizes AI technology to analyze your video content, identifying key moments, audience trends, and high-engagement potential. Based on this analysis, it automatically generates sharp, captivating short clips optimized for various social media platforms.
Social Media Integration: Seamlessly schedule and publish your generated clips directly to your favorite social media platforms, saving you time and effort.
Auto Captions & Titles: Spike Studio automatically generates captions and titles for your short clips, further enhancing viewer engagement and accessibility.
AI-powered Styling: The platform offers AI-powered styling options, allowing you to add visual effects and flourishes to your clips for a more polished and dynamic look.
Call to Action Integration: Spikes Studio empowers you to include clear calls to action within your generated clips, prompting viewers to subscribe, like, or follow your content.
Pros:
Effortlessly convert lengthy content into attention-grabbing viral clips.
Powerful AI editor enhances the editing process, saving time and effort.
Auto-captions feature for improved accessibility and engagement.
Ideal for repurposing content on popular platforms like YouTube, TikTok, and Reels.
Enhances social media influence by providing a streamlined content creation process.
Cons:
May require a learning curve to master all of its advanced features.
Compatibility with specific content formats or platforms may vary.
Users should ensure that auto-generated captions are accurate for their content.
Advanced features might necessitate a subscription or additional costs.
The availability of customer support or tutorials may vary, affecting ease of use for some users.
Pricing:
Free: Limited processing time (30-minute videos), basic features, and watermarked videos.
Starter (Starting at $5/month): Increased processing time, HD exports, and watermark removal.
Pro (Starting at $29/month): Unlocks advanced features like scheduling, AI-powered styling options, and priority customer support.
13. Fraps – Best for Simple and Lightweight Gameplay Recording
Source: YouTube
Fraps is a lightweight screen recording software that can be used to capture gameplay videos on low-end PCs. This clipping software for gaming low-end PCs is relatively easy to use and doesn’t require a lot of system resources, making it a good option for users with older or less powerful computers.
Key Features:
Gameplay Recording: Fraps excels at capturing fast-paced gameplay. It utilizes DirectX or OpenGL technology to record your games, ensuring smooth video without compromising frame rates.
FPS Overlay: Monitor your in-game performance in real time with the customizable FPS overlay. Display frame rates in a corner of your screen to gauge the impact of recording on your gameplay performance.
Screenshots: Capture high-resolution screenshots (BMP format only in the free version) of your most epic gaming moments or scenic in-game landscapes.
Benchmarking: Fraps offers basic benchmarking functionalities, allowing you to measure frame rates over specific in-game sections.
Features:
Captures gameplay videos at up to 120 frames per second (FPS)
Records audio from both the microphone and the game
Saves videos in a variety of formats, including uncompressed AVI, BMP, and JPEG
Can be used to take screenshots
Provides an on-screen frame rate counter
Pros:
Lightweight and easy to use
Doesn’t require a lot of system resources
Can capture high-quality videos
Saves videos in a variety of formats
Can be used to take screenshots
Cons:
The user interface is a bit dated
Can be resource-intensive when recording at high resolutions and FPS
Does not have as many features as some other screen-recording software
Paid (License starts at $39): Removes all limitations, allows unlimited recording time, watermark removal, and supports various screenshot formats (JPG, PNG, TGA).
14. Dxtory – Best for High-Performance Recording with Advanced Features
Dxtory is a premium screen and game recording software designed for users who demand the utmost performance and control over their captures. Unlike lightweight screen recorders, it prioritizes capturing high-quality footage with minimal impact on system resources.
Launched in 1999, Dxtory has established itself as a veteran in the recording software industry, trusted by professional gamers, YouTubers, and content creators.
Key Features:
Record up to 120 FPS for silky-smooth clips, perfect for fast-paced games.
Capture game audio, microphone input, and system sounds separately for maximum control.
Bind clipping and other actions to convenient hotkeys for a seamless experience.
Preserve the original pixel data of your recordings for stunning clarity.
Immortalize those in-game moments with high-quality screenshots.
Pros:
Ideal for low-end PCs.
Up to 120 FPS and lossless codec for sharp clips.
Customizable hotkeys, multiple audio sources, and more.
One-time purchase with no subscriptions.
Cons:
The interface can be less intuitive than some beginner-friendly options.
Focuses purely on recording, not post-production.
No Mac or Linux support.
Pricing:
Dxtory is paid software with a one-time license fee:
License (Starts at $39.95): Provides full access to all features and functionalities.
1. Which is best video editing software for low end PC?
For slow PCs, VSDC and Kdenlive are excellent choices due to their low RAM and disk space requirements. VSDC, exclusive to Windows, uses about 250 MB of disk space and runs on just 1 GB of RAM.
2. How to clip on PC without losing FPS?
The only way to record gaming without major FPS loss is by using a secondary recording machine. However, some performance impact is unavoidable due to the overhead of transferring data between devices.
3. Which recorder is best for a low-end PC?
Movavi Screen Recorder excels at video and audio capture, while Bandicam is ideal for recording gameplay on PCs or Xbox. OBS Studio supports live broadcasting across platforms, and Fraps is perfect for screen recording on older low-end PCs.
Final Thoughts
The best clipping software for low-end PCs ensures you can capture gaming highlights without disrupting performance. With the right software, you can create shareable clips of memorable moments while keeping gameplay smooth on less powerful systems.
For a lightweight option, Eklipse.gg is designed to work seamlessly on low-end PCs. It offers easy recording and automatic clip creation, helping you transform your gaming moments into impressive highlights with minimal effort.
In the world of short-form video content, selecting the right AI-powered clipping tool has never been more important. Eklipse.gg vs. Opus Clip are two leading platforms that streamline the video production process for streamers, gamers, and content creators. These tools aim to enhance your workflow by automating editing tasks, saving time and effort.
Both platforms offer unique features that cater to different content needs, making them contenders for the title of the best AI clipping platform for short-form video content. By understanding their strengths, you can make an informed decision to suit your creative style and requirements.
In a world where viewers have shorter attention spans, short-form content on platforms like TikTok, Instagram, and YouTube Shorts has become essential. AI clipping tools like Eklipse.gg and Opus Clip help creators streamline the process by automatically identifying key moments, applying templates, and even integrating audio—all aimed at maximizing viewer engagement with minimal effort.
Eklipse.gg: Tailored for Gamers and Streamers
Eklipse.gg is crafted with a specific audience in mind: gamers and live streamers. This platform is designed to clip and enhance gaming highlights, making it ideal for Twitch and YouTube streamers looking to repurpose their content effortlessly.
Key Features
Auto-Clipping for Gaming Moments: Eklipse.gg uses AI to identify the most exciting moments in gaming sessions and automatically clips them for easy sharing.
Gaming-Specific Templates: With templates optimized for game streams, Eklipse.gg helps clips look polished and professional.
Hands-Free Voice Commands: Streamers can activate and end clips hands-free, maintaining a seamless streaming experience.
Social Media Integration: Eklipse makes it easy to share directly to platforms like TikTok and Instagram, helping users build a multi-platform presence.
Multi-Platform Support: It supports various streaming platforms, including Twitch, YouTube, and Facebook Gaming, making it versatile for different content creators.
Ideal Users
Eklipse.gg is ideal for gaming streamers who want to build an audience on TikTok and Instagram without spending hours in post-production. By focusing on gaming-specific needs, Eklipse.gg offers a simplified yet powerful tool tailored to the gaming community.
Pricing
While specific pricing details vary, Eklipse.gg offers a free plan with basic features and paid options start from $19,99 that unlock more advanced functionality, allowing flexibility for creators at any level.
Opus Clip: Versatile Clipping for All Content Creators
In contrast, Opus Clip caters to a broader range of creators, from vloggers to educators. It’s designed to support diverse content types, making it more versatile for creators looking to edit long-form content into captivating short-form videos.
Key Features
AI-Driven Clipping Across Content Types: Whether you’re clipping a gaming stream, tutorial, or lifestyle vlog, Opus Clip’s AI adapts to different genres, making it a more flexible option.
Customizable Templates: Unlike Eklipse.gg’s focus on gaming, Opus Clip provides templates for various content categories, allowing creators to tailor clips to their brand style.
Intuitive User Interface: The platform is designed to be beginner-friendly, so users with minimal video editing experience can jump in and start creating.
In-Depth Editing Tools: Opus Clip allows for more customization in clip editing, including enhanced control over text, audio, and transitions.
Animated Captions: The tool provides customizable animated captions that can be generated automatically with high accuracy. This feature is crucial for enhancing viewer retention on platforms where videos often autoplay without sound.
Ideal Users
Opus Clip is best for creators across multiple niches who need flexibility in styling and editing their clips. From educational content to beauty tutorials, Opus Clip provides the adaptability needed to meet varied creative needs.
Pricing
Opus Clip offers both free and premium options, start from $15 per month.
Side-by-Side Comparison: Eklipse.gg vs. Opus Clip
Feature
Eklipse.gg
Opus Clip
Primary Audience
Gamers, Twitch & YouTube streamers
Diverse content creators
Auto-Clipping
Yes, optimized for gaming highlights
Yes, adaptable across content types
Templates
Gaming-specific, ready-to-share formats
Customizable for varied content
Voice Command Clipping
Yes
No
Social Media Integration
Direct to TikTok, Instagram
Broad integration with platforms
User Interface
Simple, streamlined for gaming workflows
Intuitive, designed for flexibility
Pricing
Free and premium plans
Free and premium options
Choosing the Right Platform for You
Both Eklipse.gg and Opus Clip provide unique advantages depending on your content goals.
If you’re a gaming streamer, Eklipse.gg may be your best bet. Its automated gaming highlights, voice-activated clipping, and direct social media integration make it perfect for capturing and sharing epic game moments effortlessly.
If you’re a general content creator, consider Opus Clip. The platform’s versatility and range of customization options allow you to repurpose longer content into engaging clips tailored for multiple platforms and content genres.
Final Thoughts
AI-powered clipping platforms, such as Eklipse.gg vs. Opus Clip, are revolutionizing content creation. Each platform offers unique features, so it’s essential to match your choice with your content style and objectives. Whether you’re posting gaming highlights on TikTok or creating tutorial snippets from vlogs, these tools are designed to enhance your content production.
For gaming creators, Eklipse.gg stands out with its AI-driven highlights, helping turn Twitch and YouTube streams into compelling short-form videos. Embrace the ease of clipping and elevate your content creation process.
Standing out as a Kick streamer and keeping viewers engaged is tough in today’s competitive landscape, which is why many streamers are using AI tools to boost their performance and grow their audience. These AI tools for Kick streamers will take care of the “small tasks” that may occur during a live session, allowing you to focus on entertaining your audience.
In this article, we’ll explore some of the best AI tools to meet your needs as a streamer. You’ll discover useful tools like Eklipse to automatically clip the best moments from your streams, and CleanVoice to ensure clear audio. Ready to level up your streaming game? Let’s dive in!
Source: eklipse.gg – The ultimate automatic clip maker for twitch
Eklipse is one of the best AI tools for Kick streamers in 2025, as this app will revolutionize the way streamers create highlight clips. By automatically analyzing your live streams, Eklipse identifies epic moments from your stream and generates short, shareable clips.
These clips can be easily posted on social media, helping you attract new viewers and expand your audience. Plus, Eklipse has an online video editor that allows you to convert Kick clips to TikTok-like vertical short-form video content.
Key Features:
AI Highlights: Eklipse uses AI to automatically convert hours of streams into dozens of short highlights. You don’t need to manually review or edit your streams; Eklipse does it for you in minutes.
Supports Over 200 Games: Eklipse is compatible with a wide range of games, from popular titles like Call of Duty and Fortnite to niche games like Phasmophobia. It works with various genres, including FPS, RPG, and MOBA.
Voice Command AI: Eklipse allows you to create perfect highlights with simple voice commands. Say “Clip it,” “Clip This,” or “Clip That” during a stream, and Eklipse will mark the moment for you. You can also adjust the clip’s duration and quality with voice commands.
TikTok Video Editor: Eklipse includes a user-friendly video editor to convert clips into vertical videos for TikTok, Reels, and Shorts. You can add auto-captions, channel name stickers, popular templates, and even your images or GIFs. Eklipse also lets you save custom preset templates for later use.
Content Publisher: Eklipse makes it easy to schedule and publish your clips across multiple social media platforms with a single click. Additionally, you can track the performance and analytics of your clips.
Pros:
Automatically generates highlights from Twitch, YouTube, and Facebook streams and videos
Offers manual editing and trimming of clips
Provides custom templates and copyright-free music for clips
Compatible with any console and supports all top streaming platforms
Has a mobile app for convenience
Cons:
Some users have reported issues with the app not being able to process streams over 5 hours long
Some users have reported that the app does not always accurately identify the start and end points of clips, leading to unnecessary trimming or cutting
There have been complaints about the app’s lack of support for certain features, such as the ability to add custom watermarks or logos.
Source: Design Shack. Best ai tools for kick streamers
Engaging with your viewers is crucial for building a loyal community. ChatGPT serves as your brainstorming partner, helping you generate ideas and grow your stream channel.
One of the best parts of this AI chatbot is this can assist you with content ideas. Even better, if you need channel marketing strategies, or some ideas to help you grow your Kick channel, ChatGPT is your best companion.
Key features:
Conversational AI: ChatGPT can hold conversations that mimic human interaction, making it useful for chatbots and virtual assistants.
Text Generation: It can generate different creative text formats like poems, code, scripts, emails, etc.
Multilingual Capabilities: ChatGPT can communicate and understand multiple languages.
Continuous Learning: It can learn and improve from every interaction it has.
Pros:
Automates repetitive tasks
Improves customer service response times
Generates content drafts
Provides educational materials in different languages and for those with disabilities.
Helps with creative writing, brainstorming ideas, and generating different content formats.
Cons:
Bias and factual errors
Struggles with complex queries and may not grasp context fully
Potential for misuse in spreading misinformation or creating deep fakes
Price:
Free to use for ChatGPT-4o mini
Plus package starts from US$20 per month (billed annually)
3. KickBot: Best for Automating Conversations
Source: Elgato Marketplace – Ai tools for kick streamers free
If Twitch has Nightbot, then Kick has KickBot. KickBot is a cloud-based chatbot designed to help Kick streamers improve their content and engage with viewers. It offers a variety of features, including a VOD downloader, a clip editor, custom overlays, and a text-to-speech feature.
The chatbot can also be used to moderate chats, set up timed messages, and respond to viewers with custom commands. Streamers can sign up for free to access all of KickBot’s features.
Key features:
Conversation Automation: Builds chatbots that can answer frequently asked questions, handle customer service inquiries, and qualify leads.
Multi-Platform Integration: Works across various platforms like messaging apps, websites, and social media.
Intent Recognition: Understands the user’s intent behind their questions and tailors responses accordingly.
Machine Learning: Learns from user interactions and improves chatbot responses over time.
Pros:
Provides 24/7 support, reduces wait times, and resolves common issues efficiently.
Increase your lead generation
Cost-effective
Handles large volumes of inquiries simultaneously, making it suitable for growing businesses
Provides integrations and the Stream Deck plugin for stream control.
Cons:
Limited problem-solving (may struggle with complex situations)
The quality of responses depends on the comprehensiveness and accuracy of training data.
Limited user reviews
Price:
Free, but they charge a 8.9% platform fee plus $0.30 for each tip
Google Bard, now known as Gemini, is a versatile language model that streamers can leverage for a variety of purposes. From generating creative content to answering viewer questions and even translating languages, Google Bard adds depth and interactivity to your streaming sessions.
It serves as an invaluable AI tool for Kick streamers free seeking to create engaging content and foster meaningful connections with their audience.
Key features:
Natural Language Processing (NLP): Understands and generates human language exceptionally well, making interactions feel natural.
Multilingual Capabilities: Processes and translates information across multiple languages.
Knowledge Access and Search: Integrates information from the real world through web searches and provides summaries of factual topics.
Creative Text Generation: Similar to ChatGPT, Gemini can generate different creative text formats like poems, code, scripts, etc.
Multimodality: While still under development, Gemini has the potential to handle various data formats like text, code, and images, opening doors for future applications.
Pros:
Easy to interact/intuitive interface
Applicable across various industries like finance, sports, entertainment, and more, for tasks like content creation or information retrieval.
Delivers nuanced responses and avoids factual errors (“hallucinations”) common in other AI models.
Requires less computational power compared to competitors
Integrated with Google Workspace apps seamlessly
Cons:
Limited integrations with other apps
Smaller knowledge base
Gemini’s outputs could reflect biases present in its training data.
Price:
Free for basic features
US$20 per month for Gemini Advanced
5. CleanVoice: Best AI for Text-to-Speech Conversion
Source: AIstacked.com
Another essential AI for streamers is CleanVoice. This app is an AI-powered audio editor that ensures high-quality sound by removing background noise, normalizing volume levels, and even applying compression and reverb effects.
With CleanVoice, you can provide your viewers with a seamless and immersive audio experience. Remember that crystal-clear audio is essential for a professional streaming experience.
Key features:
AI-powered Noise Reduction: Utilizes artificial intelligence to effectively remove unwanted background noise from audio recordings.
Multiple Noise Profiles: Can distinguish and eliminate various types of noise, like traffic, wind, or static.
Real-time Processing: Some versions might offer real-time noise reduction for applications like video conferencing.
Audio Enhancement Tools: These may include features like audio normalization and basic editing tools.
User-friendly Interface: Designed for easy navigation and straightforward noise removal.
Pros:
Improve audio quality (remove background noise)
Makes audio content more accessible for people with hearing difficulties
Simple editing tools
Useful for podcasters, video creators, and educators
Deadair Remover feature identifies and shortens overly long silences
Cons:
Potential audio distortion
Limited functionality (depending on version)
Might require a computer with higher processing power
Price:
Free trial
Premium plans start at €10 per month
FAQ
1. What is the best AI game clip generator?
The best AI game clip generator is Eklipse.gg. It automatically creates highlight clips from your gaming streams, saving you time and effort.
2. How is AI used in streaming?
AI helps in optimizing streaming quality in real-time, adjusting video according to the viewer’s internet speed and ensuring a smooth, buffer-free experience.
Final Thoughts
Various AI tools for Kick streamers are now available to enhance your Kick live sessions with ease and for free. Remember to choose wisely, as each app caters to different needs—like CleanVoice for improving audio quality or KickBot to help you engage with viewers.
You can also rely on Eklipse to create captivating content from your live streams and boost your Kick channel’s performance. Just upload your latest Kick stream, and Eklipse will pick the best moments to highlight and attract new viewers. Try it today and don’t miss the opportunity for leveraging your channel!
NVIDIA ShadowPlay (also known as NVIDIA Instant Replay and Highlights) is a popular choice for gamers, thanks to its low performance impact and seamless integration with GeForce Experience. However, if you don’t have an NVIDIA GPU or need extra features beyond what ShadowPlay offers, there are plenty of viable alternatives.
This guide focuses on the 9 best NVIDIA ShadowPlay alternatives for capturing gameplay. Whether you want easy social sharing, AI-generated highlights, or top-tier streaming features, these tools cover a range of needs and budgets. Let’s explore each solution and find the best fit for your gaming content creation journey.
Lightweight, basic game capture, real-time FPS display
Simple, minimal performance impact, easy to use
Outdated interface, no editing or social sharing
Gamers with older systems or low requirements
Paid (Free trial)
1. OBS Studio
Why It’s Great: OBS Studio is free, open-source, and highly customizable. It’s known for both recording and streaming capabilities, making it a top pick for creators seeking a flexible, all-in-one solution.
Key Features:
Multi-platform support (Windows, macOS, Linux).
Scene composition for mixing multiple sources (webcam, gameplay, overlays).
Advanced audio mixer with filters and noise suppression.
Plugin ecosystem for added functionality.
Pros:
Completely free with regular community updates.
No time or resolution limits.
Strong streaming tools for multi-scene setups.
Cons:
Steeper learning curve for beginners.
Manual configuration required for best results.
Ideal For: Streamers and advanced users who need full control over their recording and live streaming setup.
2. Eklipse.gg (AI-Powered Highlight Generator)
Why It’s Great: Eklipse.gg specializes in automated highlight creation. Instead of manually recording and editing, let Eklipse.gg’s AI detect your best gaming moments. It’s perfect for Valorant, Marvel Rivals, and many other popular titles.
Source: Eklipse.GG
Key Features:
AI-driven highlight detection for automated clipping.
Integration with Twitch, YouTube, and more for easy import.
Online editing tools to fine-tune your clips and add effects.
Simple social sharing to TikTok, Instagram, and YouTube Shorts.
Pros:
Saves time by auto-detecting top plays.
User-friendly, suitable for beginners and busy streamers.
Free plan available with optional premium features.
Cons:
Dependent on AI accuracy for highlight detection.
Fewer manual editing controls for in-depth customization.
Ideal For: Content creators wanting an automated way to capture and share their best gameplay highlights on social media.
3. Medal.tv
Why It’s Great: Medal.tv focuses on quick clip creation and sharing, boasting an active social community. Gamers can instantly capture and upload highlights, then engage with others’ clips in a shared space.
Vibrant community for sharing and discovering content.
Free with optional premium features (longer clips, additional editing).
Cons:
May affect performance on lower-end systems.
Limited in-depth editing capabilities.
Ideal For: Gamers seeking a straightforward tool to capture and share short highlights in a social environment.
4. Xbox Game Bar
Why It’s Great: Pre-installed on Windows 10 and 11, Xbox Game Bar is a simple solution for capturing gameplay without additional software. It’s especially helpful for casual players or those on low-end PCs.
Key Features:
Basic screen capture and recording for Windows games.
Quick access overlay via Win + G shortcut.
Performance monitoring and screenshot tools.
Low impact on system resources compared to third-party software.
Pros:
Free and built-in, no extra installation.
Lightweight, suitable for older or low-end PCs.
Fast access for capturing sudden highlights.
Cons:
Limited editing options and features.
Not designed for advanced or multi-scene streaming.
Ideal For: Casual gamers or those on lower-end PCs wanting an easy, zero-install capture tool.
5. Bandicam
Why It’s Great: Bandicam is renowned for high-FPS capture, going up to 480 FPS. It offers advanced features like scheduled recording, compression technology, and webcam overlay, making it ideal for serious gamers.
Key Features:
High-FPS capture (up to 480 FPS).
Webcam overlay for picture-in-picture effects.
Scheduled recordings and system sound capture.
Efficient compression for smaller file sizes.
Pros:
Exceptional capture quality at high frame rates.
Reliable compression tech to manage file sizes.
Good performance even for longer sessions.
Cons:
Free version includes watermarks and limits.
No built-in live streaming feature.
Ideal For: Gamers with powerful PCs who want high-FPS recordings and can tolerate watermarks until they purchase a license.
6. Gecata by Movavi
Why It’s Great: Gecata by Movavi provides a user-friendly interface and reliable performance, particularly for HD recordings. It’s a good choice for beginners looking for a balanced approach to recording.
Ideal For: Beginners who want hassle-free setup and decent video quality.
7. EaseUS RecExperts
Why It’s Great: EaseUS RecExperts is flexible, supporting up to 4K/60FPS capture and region-based recording. It’s a solid mid-range option for gamers who need a feature-rich but still user-friendly recorder.
Key Features:
UHD footage capture and scheduled recording.
Multiple audio inputs for game sound and voiceover.
Region-based recording for targeted captures.
Pros:
Comprehensive feature set.
Easy to navigate interface.
Free and premium versions available.
Cons:
Advanced features limited to the premium plan.
Might be overkill for quick highlights.
Ideal For: Mid-level gamers who need flexible recording modes without delving into more complex programs like OBS.
8. Action!
Why It’s Great: Action! is a paid tool known for high-quality recordings up to 4K and easy live streaming integration. It caters to advanced users seeking polished captures and real-time editing.
Key Features:
Capture up to 4K resolution at 240 FPS.
Time-Shift mode for saving recent gameplay instantly.
Live streaming support to major platforms.
Pros:
Professional-grade features and performance.
Wide range of output formats.
Real-time editing with overlays and effects.
Cons:
Requires a paid license for full functionality.
Resource-intensive, affecting lower-end systems.
Ideal For: Professional streamers and advanced gamers needing top-quality captures and live streaming in a single package.
9. Fraps
Why It’s Great: Fraps is a classic, simple tool best suited for older PCs or low-spec setups. While it lacks modern features, it’s still handy for straightforward gameplay recording.
Key Features:
Lightweight game capture with minimal setup.
Real-time FPS monitoring and benchmarking.
Basic interface easy for novices.
Pros:
Minimal system impact.
Quick start/stop recording.
Ideal for basic captures.
Cons:
Limited editing features, no social sharing.
Outdated design compared to newer tools.
Ideal For: Gamers with older hardware who want a simple, no-frills recorder for basic capture needs.
Conclusion
Whether you’re seeking high-quality recording, automatic clipping, easy sharing, or minimal system impact, these NVIDIA ShadowPlay alternatives cover every need and skill level. OBS Studio offers comprehensive control and power, Eklipse.gg provides AI-driven highlights for seamless social sharing, while tools like Medal.tv and Xbox Game Bar cater to users who prefer quick, user-friendly solutions.
Choosing the right software boils down to your personal workflow, PC specs, and budget:
Beginner-Friendly: Medal.tv, Xbox Game Bar, and Gecata by Movavi are straightforward and easy to set up.
AI-Driven: Eklipse.gg automates clip generation, saving time for creators wanting quick social media highlights.
Advanced Users: OBS Studio, Action!, and Bandicam provide high-FPS capture and flexible settings for polished results.
Low-End PC Solutions: Xbox Game Bar and Peeps (by Overwolf) ensure minimal performance hits.
For a modern approach that highlights your best gaming moments automatically, consider using Eklipse.gg. Eklipse’s AI-powered system detects your top plays across various games, enabling you to share them effortlessly on social media without juggling multiple tools or editing software.
Playing Marvel Rivals 2025 with friends makes the game more fun. You can team up for battles, share strategies, and enjoy the game together. Thanks to Marvel Rivals’ crossplay feature, you can connect with friends no matter what platform they are using—Xbox, PlayStation, or PC.
This guide will show you how to add friends in Marvel Rivals, invite them to play, and solve any problems you might face. Whether you’re new to the game or just want to improve your multiplayer experience, these steps will help you connect and play with friends easily.
Add your friend to play MR together – Source: Gamerant
1. Using the Friends Menu
Open the Friends Menu:
Look for the Friends icon (a silhouette or tab) in the top-right corner of the main menu.
Search by Username:
Type your friend’s username into the search bar and press Enter.
Ensure the username is entered correctly, including capitalization and special characters.
Send a Friend Request:
Click the Add Friend button next to your friend’s name.
2. Adding Friends via UID
Find Your UID:
Open your Profile Menu to locate your User ID (UID).
Copy your UID and share it with your friend.
Add Friends by UID:
Your friend can enter your UID into the search bar and send a friend request.
3. Adding Recent Players
Recent Players Tab:
Open the Friends Menu and navigate to the Recent Players tab.
Add Players:
Find the name of a player you’ve recently played with and click Add Friend.
Playing with Friends in Marvel Rivals
1. Invite Friends to Matches
Open the Play Menu:
Select Play or Custom Game modes from the main menu.
Invite Friends:
Look for empty boxes under your username in the Play menu.
Click an empty box to open your friends list.
Invite Friends:
Right-click on a friend’s name and select Invite, or click the + sign next to their name.
2. Utilize Crossplay
Crossplay Enabled:
Marvel Rivals supports crossplay, allowing players on Xbox, PlayStation, and PC to team up seamlessly.
Invite Across Platforms:
Use the Friends Menu to find and add friends regardless of their gaming platform.
Troubleshooting Friend Requests and Invites
1. Common Issues
Incorrect Username:
Verify the username you’re entering is correct.
Remember that usernames may be case-sensitive.
Privacy Settings:
Ensure your friend’s privacy settings allow friend requests.
Connection Problems:
Check your internet connection and ensure your game is updated.
Conclusion
Adding and playing with friends in Marvel Rivals 2025 is easy thanks to its user-friendly interface and crossplay support. By following these simple steps, you can connect with friends, invite them to games, and enjoy playing together no matter what platform they use. If you run into any problems, use the troubleshooting tips to fix them quickly.
Playing with friends makes Marvel Rivals more enjoyable and helps you build a strong gaming community. So, start adding your friends today and enjoy epic battles together!
For more tips and tools to enhance your gaming experience, visit Eklipse.gg. Eklipse.gg offers features to help you optimize your gameplay, create content, and connect with the Marvel Rivals community.
Capturing and sharing your most memorable moments in Marvel Rivals enhances your gaming experience, allowing you to showcase impressive plays, analyze strategies, and engage with the gaming community. While saving highlights on PC involves in-game features and specific file directories, the process on Xbox is streamlined through the console’s built-in capture system.
This guide will walk you through the steps to save highlights in Marvel Rivals on Xbox, highlighting the key differences from the PC version and providing additional tips to optimize your highlight management. Whether you’re a casual gamer looking to share epic victories or a dedicated competitor aiming to review your gameplay, mastering the highlight-saving process on Xbox is essential.
Step-by-Step Guide to Saving Highlights in Marvel Rivals on Xbox
Source: camzminajj via Reddit
1. Enable Xbox Capture Settings
Before diving into your battles, it’s crucial to ensure that your Xbox’s capture settings are properly configured. This setup allows your console to record and save gameplay clips seamlessly.
Steps:
Access Settings:
Press the Xbox button on your controller to open the guide.
Navigate to Profile & system > Settings.
Configure Capture Settings:
Go to Preferences > Capture & share.
Customize Recording Length: Choose how long your recordings will be (e.g., the last 30 seconds, last 1 minute).
Set Resolution and Frame Rate: Select your preferred resolution (e.g., 1080p) and frame rate (e.g., 60FPS) based on your Xbox model and storage capacity.
Enable Camera Recording: If you wish to include your webcam footage, ensure this option is toggled on.
Why It Helps: Properly configuring these settings ensures that your Xbox can capture high-quality clips of your best moments without missing critical gameplay.
Press the Y button to capture the last few seconds of gameplay based on your preset recording length.
Alternatively, hold the Xbox button + X to start a new recording session.
Capture Specific Moments:
During intense moments, quickly press the capture button to save significant plays such as kills, clutches, or aces.
Why It Helps: This real-time capturing ensures that you don’t miss out on recording spontaneous and exhilarating moments during your gameplay sessions.
3. Access Your Capture Library
After recording your highlights, you can easily access and manage your clips through the Xbox’s capture library.
Steps:
Open Capture Library:
Press the Xbox button to open the guide.
Navigate to Capture & share > Recent captures.
View and Manage Clips:
Browse through your saved clips in the Recent captures section.
Select a clip to watch, trim, or share directly from the library.
Why It Helps: The capture library serves as a centralized hub for all your recorded highlights, making it easy to review and organize your best moments.
4. Edit and Share Your Clips (Optional)
Editing your clips can make them more engaging before sharing them with friends or the broader gaming community.
Steps:
Basic Editing on Xbox:
Select the clip you wish to edit from the capture library.
Choose the Edit option to trim unwanted sections or add annotations.
Advanced Editing on PC:
Transfer clips to your PC by uploading them to OneDrive or using a USB drive.
Use video editing software like DaVinci Resolve or Adobe Premiere Pro for more detailed edits.
Share Directly:
From the capture library, select the clip and choose Share.
Post directly to social media platforms like Twitter, Facebook, or Instagram.
Why It Helps: Editing allows you to highlight the most exciting parts of your gameplay, making your clips more appealing and shareable.
Key Differences from PC Highlight Saving
Understanding the distinctions between saving highlights on Xbox and PC can help you navigate each platform more effectively.
1. No In-Game Saving on Xbox
Xbox: Highlights are saved directly to your Xbox’s capture library, independent of the Marvel Rivals game interface.
PC: Highlights are saved through the game’s interface, typically accessed via the “Career” > “Favorites” tab.
2. Centralized Capture Library
Xbox: All highlights are stored in the Xbox’s capture library, ensuring easy access and management.
PC: Highlights are stored in a specific folder, usually located at: C:\Users\[YourUsername]\Videos\Marvel Rivals\Highlights
3. System-Controlled Settings
Xbox: Resolution, frame rate, and recording length are managed through the Xbox system settings, not within the game.
PC: These settings can often be adjusted directly within the game’s menu, providing more granular control over your recordings.
Additional Information
1. Expiration of Highlights
Xbox: Highlights may expire after certain game updates or after a set period. It’s advisable to regularly back up important clips.
PC: Similar expiration rules may apply, so saving critical clips promptly is essential.
2. Sharing Highlights
Xbox: Utilize built-in sharing features or QR codes (if available) to share your clips on platforms like TikTok.
PC: More extensive sharing options are available through direct file access and integration with various social media platforms.
3. Storage Management
Xbox: Monitor your capture library to manage storage effectively, deleting unnecessary clips to free up space.
PC: Organize your highlights in designated folders and back them up to external drives or cloud storage to prevent data loss.
Tips for Managing Highlights on Xbox
Regularly Update Capture Settings: Adjust your capture settings based on your gameplay style and storage capacity to ensure optimal recording quality.
Organize Your Clips: Use descriptive names and categorize your clips within the capture library for easy retrieval.
Backup Important Highlights: Transfer your favorite clips to external storage or cloud services to safeguard against accidental deletion or expiration.
Utilize Editing Tools: Edit and add annotations, effects, and transitions to make your clips more engaging before sharing.
Conclusion
Saving highlights in Marvel Rivals on Xbox is a straightforward process facilitated by the console’s built-in capture system. By enabling and configuring your Xbox capture settings, you can effortlessly record and manage your most exciting gameplay moments. While the process differs from PC, understanding these key differences ensures that you can effectively capture, edit, and share your highlights across various platforms.
Whether you’re aiming to showcase your skills on social media, review your strategies, or simply preserve your best plays, mastering the highlight-saving process on Xbox enhances your overall gaming experience. Remember to regularly manage your capture library and consider transferring important clips to external storage to maintain a comprehensive collection of your Valorant victories.
For more advanced content creation tools and tips, consider exploring Eklipse.gg. Eklipse.gg offers a range of features designed to optimize your gaming content, streamline the clipping process, and enhance your engagement with the Marvel Rivals community.
Sponsorships for Twitch streamers play a crucial role in building a stronger brand, boosting credibility, and expanding their audience. To get sponsors as a Twitch streamer, you can attract potential sponsors such as Acer, Adobe, Amazon.
For both new and experienced streamers, sponsorships offer lucrative opportunities to monetize content and elevate their streaming careers. By partnering with the right brands, you can grow your channel, engage your audience, and unlock your full potential as a Twitch streamer.
Laptops and PCs are brands with great potential to sponsor Twitch streamers. These are essential tools for streamers, and a strong partnership can benefit both parties.
However, high-quality PCs can be expensive, especially for small streamers just starting. That’s where sponsors come in. Sponsorships offer a way for both the streamer and the brand to gain mutual benefits.
Here’s a list of companies you can consider approaching for potential partnerships.
Company
Type
Accessible for
Profit
BenQ
Sponsorship
Streamers
Varies
Xidax
Affiliate
Streamers, Influencers
3% Commission
Ironside Computers
Sponsorship
Streamers
Varies
CyberPowerPC
Sponsorship
Streamers, Influencers
Varies
Alienware
Affiliate
Streamers, Gamers
1-6% Commission
Digital Storm
Sponsorship
Streamers, Influencers
Varies
NZXT
Affiliate
Streamers, Influencers
8% and Perks
ThermalTake
Sponsorship
Streamers
Varies
MainGear
Sponsorship, Affiliate
Streamers
Perks
Origin PC
Affiliate
Gamers
Commission
2. Gaming Gear Sponsors for Twitch Streamers
Source: Razer
In addition to PCs, gaming gear like webcams, microphones, and headsets also presents a significant sponsorship opportunity for Twitch streamers. These peripherals enhance a streamer’s setup and improve the overall viewing experience. Check out the sponsorship list below to find the best brands to collaborate with.
Company
Type
Accessible For
Profit
NVIDIA
Affiliate
Streamers
Commission
Logitech
Sponsorship
Streamers, Influencers
Varies
AVerMedia
Sponsorship
Streamers, Gamers
Varies
Razer
Sponsorship Affiliate
Streamers
20% Commission, Special Offers
Viper Gaming
Sponsorship
Gamers, Streamers, Teams
Discount codes, gear, affiliate links
Astro Gaming
Affiliate
Streamers, Gamers
5% Commission and Perks
Tt eSPORTS
Sponsorship
Teams, Gamers
Varies
HyperX
Sponsorship
Streamers, YouTubers
Varies
Cooler Master
Sponsorship
Streamers, Gamers
Varies
SteelSeries
Affiliate
Streamers, YouTubers
8% Commission
OnFire Gaming
Affiliate
Streamers, Gamers
Commission and Perks
NETGEAR
Sponsorships
Gamers, Teams
Varies
Floating Grip
Sponsorship, Affiliate
Streamers, Influencers
15% Commission, Giveaways
Newegg
Affiliate
Content Creators
Commission
ROCCA
Sponsorship
Content Creators
Commission, Payment
Bose
Affiliate
Streamers
2-3% Commission
Turtle Beach
Affiliate
Streamers, Gamers
Varies
MSI Gaming
Sponsorship
Streamers, Gamers
Varies
Corsair
Sponsorship, Affiliate
Streamers
Varies
Finalmouse
Affiliate
Streamers, Gamers
25% Commission Rate
Floating Grip
Sponsorship, Affiliate
Streamers, Influencers
15% Commission, Giveaways
3. Gaming Controller Sponsorships
Source: Battle Beaver Customs
Calling all console gamers and PC gamers who love controllers! There are great sponsorship opportunities available for you. Partnering with a controller brand allows you to earn commission by promoting their products to your audience.
Look for a brand that offers controllers that you genuinely enjoy using.
Company
Type
Accessible for
Profit
Battle Beaver Customs
Sponsorship, Affiliate
Streamers, Gamers
Merch
Cinch Gaming
Affiliate
Streamers, Influencers
5% Commission in Store Credit
Fatal Grips
Affiliate Program
Streamers, Gamers
10% Commission, Merch
Forever Grips
Affiliate
Streamers, Gamers
Varies
Iconic Controllers
Sponsorship
Streamers
Varies
KontrolFreek
Affiliate
Gamers, Streamers
10% Commission
ModdedZone
Affiliate
Streamers, Influencers
5% Commission
Playbudz
Sponsorship
Streamer, Gamer
Varies
Scuf Gaming
Sponsorship
Streamers
Varies
4. Gaming Chair Sponsors for Twitch Streamers
Viewers are impressed not only by your content, gaming skills, and graphic editing but also by your streaming setup. That’s why creating a visually appealing desktop setup is important. A quality gaming chair enhances your comfort and adds a professional touch for your audience.
These sponsorships go beyond aesthetics. They can also help you earn passive income through commission.
Company
Type
Accessible for
Profit
TechniSport
Affiliate
Streamers, Influencers
Commission and free products
Herman Miller
Affiliate
Streamers, Influencers
Varies
Chairs4Gaming
Affiliate
Streamers, Gamers
15% Commission
Arozzi
Sponsorship
Streamers
Varies
Vertagear
Affiliate
Streamers
Commissions and bonuses
OPSEAT
Sponsorship, Affiliate
Teams, Streamers
Varies, $15 per chair, potential free chair
EwinRacing
Sponsorship, Affiliate
Gamers, Streamers
Sponsorship – varies, Affiliate – 10% and bonuses
DXRacer
Affiliate
Streamers, Influencers
5-12%
AKRacing
Sponsorship & Affiliate
Streamers
5% Comm. on Affiliate Sales
MAXNOMIC
Sponsorship
Teams, Streamers
Varies
Secretlab
Sponsorship, Affiliate
Gamers, Streamers
12% commission
GT Omega
Sponsorship, Affiliate
Teams, Streamers
5% Commission
5. Games and Software Sponsorship
Game sales often see a significant increase whenever content creators stream or promote a new title. This strong connection between exposure and sales incentivizes many game and software companies to collaborate with streamers. Some companies are even willing to pay streamers thousands of dollars for a single day of gameplay.
Company
Type
Accessible for
Profit
Kinguin
Affiliate
Content Creators
Commission
Streamlabs
Affiliate/Sponsorship
Streamers
Commission/Varies
Adobe
Affiliate
Content Creators
Commission
StreamElements
Sponsorship
Content Creators
Varies
Green Man Gaming
Affiliate
Streamers, Gamers
Commission
Nexus.GG
Affiliate
Content Creators
Commission
Gamestop
Affiliate
Content Creators
Commission
6. Graphics Sponsorships
High-quality content paired with strong editing is a powerful combination guaranteed to grab viewers’ attention. To achieve this, you’ll need video editing software that offers impressive tools to elevate your stream’s production value.
But did you know creating stellar content can even lead to earning commission on some platforms? Absolutely! Check out the list below to see which companies might partner with you.
Company
Type
Accessible for
Profit
Own3D
Affiliate
Streamers, Influencers
Up to 30% Commission
Placeit
Affiliate
Streamers, Influencers
Commission
Visuals by Impulse
Affiliate
Streamers, Influencers
Varies
Streamlabs Prime
Affiliate
Streamers
Commission
Nerd or Die
Affiliate
Streamers, Influencers
Up to 30% Commission
Fiverr
Affiliate
Streamers, Influencers
Varies
Sketchfab Inc
Affiliate
Content Creators
10% Commission
StreamShift
Affiliate
Content Creators
Varies
7. Computers Sponsorship
Landing free computer sponsorships is also a possibility. Many brands are eager to support skilled gamers, especially those with a deep passion for and knowledge of computer parts and trends. You can attract sponsors by creating content that discusses various components ideal for building a gaming PC.
Brand
Type
Ironside Computers
Sponsorship
MainGear
Sponsorship
Origin PC
Affiliate
Xidax
Affiliate
8. Clothing Sponsorships
Clothing sponsorships for Twitch streamers have become increasingly accessible, providing opportunities for both large and small creators to partner with brands. Streamers earn a commission on sales generated through their unique links or brands may pay streamers a flat fee or provide free merchandise in exchange for promotion.
Brand
Type
IntoTheAM
Sponsorship and Affiliate
Nerdvana
Affiliate
Peepo Paradise
Affiliate
How to Approach Twitch Sponsors
Securing sponsorships on Twitch can feel overwhelming, especially for new streamers. The following tips will help you approach potential sponsors and make a positive impression.
Building Your Appeal:
Develop a Strong Brand and Audience: Establish a clear identity for your channel. Cultivate a dedicated audience with consistent streaming schedules and engaging content. Sponsors favor streamers with a loyal following.
Identify Your Niche and Target Sponsors: Define your niche within Twitch and target brands whose products or services align with your content and audience demographics. This targeted approach increases partnership success.
Preparing for Partnerships:
Create a Media Kit: Craft a compelling media kit showcasing your channel’s statistics, demographics, engagement metrics, and past collaborations (if applicable). This document effectively communicates your value to potential sponsors.
Finding Opportunities:
Network with Other Streamers: Connect with fellow streamers for insights into sponsorships and negotiation strategies. Building community relationships offers valuable guidance and potential connections.
Utilize Available Platforms: Explore Twitch’s official sponsorship marketplace (if still available) or other platforms where brands seek streamer partnerships. These platforms streamline the connection process.
Securing Partnerships:
Craft a Compelling Pitch: Develop a targeted pitch for each potential sponsor. Highlight your channel’s strengths, audience reach, and the benefits of partnering with you. Demonstrate your understanding of their goals and target audience.
Negotiate with Confidence: Approach negotiations knowing your value and the value you offer. Be prepared to discuss sponsorship terms like compensation, deliverables (what the sponsor expects from you), and brand integration (how you’ll promote the sponsor).
Final Thoughts
Building a thriving Twitch channel demands effort, from creating engaging content to fostering a community and securing sponsorships for Twitch streamers. However, new streamers often face challenges with stricter requirements when seeking brand partnerships.
To stand out, connect with companies via social media and explore their affiliate programs. Showcase your credibility and ability to drive traffic while negotiating fair benefits. Eklipse, an AI-powered clipping tool, helps transform your best Twitch moments into TikTok, Shorts, and Reels, making it easier to grow your audience. Sign up for free and take your Twitch channel to new heights!
Having trouble with Twitch VODs not showing up on your channel? You’re not alone. Many new streamers face this problem due to Twitch’s default settings, which don’t save broadcasts automatically. This can be frustrating for those wanting to share past streams or review their content.
In this article, we’ll uncover why Twitch VODs are not showing up and outline 11 simple fixes to resolve it. Additionally, we’ll explain how to access unpublished VODs and ensure your streams are saved for future viewing. Let’s get started!
Twitch has a significant number of users, both watching and streaming. Just consider how much space Twitch would require if thirty percent of its users saved their streams—it’s a substantial amount!
That’s why the default setting for “Keep my previous broadcasts” is typically not enabled. If you want to save your broadcasts, you must ensure that you manually turn this option on in your settings. However, this can happen due to other factors.
If you notice that Twitch isn’t saving your broadcasts as it should, here’s a simple guide on how to fix that.
6 Things to Know When Your Twitch VODs not Showing Up
Source: Chrome Store
Are your Twitch VODs missing or disappearing sooner than expected? This is a common issue for many streamers due to Twitch’s default settings. From enabling the “Store Past Broadcasts” option to understanding Twitch’s storage policies, here’s everything you need to know to resolve it.
1. Your “Store Past Broadcasts” Option is Turned Off
Yes, that’s right. One of the reasons why your VODs not showing up on your Twitch channel is that the option to “Store Past Broadcasts” is simply turned off by default.
Technically, it means that if you turn on that option then the VODs will start showing up on your channel. Don’t forget that Twitch VODs are also not saved indefinitely, especially for all of you newbie streamers.
Twitch official help blog says that they only save the past broadcast for 7 days, except if you are a Partner, Turbo, or Prime user.
2. How to Turn on the “Store Past Broadcasts” Settings on My Twitch Account
So your Twitch channel starts showing up on your VOD, you need to turn on the Store Past Broadcasts option. Here’s how to ensure that your past videos are saved on Twitch:
You can go to Twitch.tv via the browser or open your Twitch app
You can go to this menu by clicking your Avatar which will show up in the sidebar menu
Click Settings, select Stream
Scroll down, switch on the Store Past Broadcast option
After that, then your Twitch VODs will start showing up after you finish your stream. There’s an option to “Always Publish VODs”. You can check that also if you want Twitch to automatically show up your VOD publicly on your channel.
3. Why My Twitch VODs Still Don’t Show Up?
Well, if the tips on how to enable Twitch to store past broadcasts do not resolve your issue, you may want to try clearing up some of your tools to open Twitch. You can clear your browser cache and history, or even reinstall the Twitch app.
Clear Browser Cache and History (Chrome)
Open your browser
Use hotkey ctrl + shift + delete
Let all the checkmarks on
Choose All Time on the Time Range dropdown menu
Click Clear Data
4. How Can I Download My Past Broadcast?
If your stream’s VODs already appear on your channel, you may want to download these VODs so you can create a clip from it and share it on other platforms like TikTok, Facebook, YouTube, Twitter, or even Reddit.
Unfortunately, Twitch does not support this feature by default. However, don’t worry, as the internet is full of tools and solutions to help you with this problem! You can try downloading Twitch VODs using Eklipse by following these 5 easy steps:
Go to Eklipse.gg, do free registration with Twitch, Facebook, or Email
Connect your Twitch account
Load and choose your Twitch VODs
You can edit, trim, also convert your stream to TikTok through the Eklipse app
Download your VODs
5. Why are My Old Streams’ VODs Not Showing Up on My Twitch Account?
How long does it take for past broadcasts to appear on Twitch? By default, Twitch only stores your past broadcasts for 7 days. Therefore, you can rewind your Twitch stream within that period.
If you want more storage for your VODs, you need to be a Twitch Affiliate first, which allows you to store past broadcasts for up to 14 days. If you want even larger storage, Prime Users enable you to store past broadcasts for up to 60 days.
6. Twitch Turbo And Longer Storage Periods
You may want to subscribe to Twitch Turbo, which includes a longer storage period for previous broadcasts.
How to Troubleshoot and Fix Twitch VODs Not Showing Up
Source: Reddit
If your Twitch VODs are not showing up, it can be frustrating, especially if you’re trying to share your content or analyze your gameplay. Here are some step-by-step instructions for troubleshooting and fixing Twitch VOD issues.
1. Check Privacy Settings
Ensure that your privacy settings are set to allow VODs to be saved and shared. Go to your Twitch settings, select “Channel & Videos,” and then ensure that the “Store Past Broadcasts” option is enabled.
2. Wait for Processing
Sometimes, Twitch deleted VODs may take some time to process before they appear on your channel. Wait a few hours and check back to see if they have appeared.
3. Check Your Internet Connection
Ensure that you have a stable and reliable internet connection. Poor connection quality can cause issues with VODs appearing.
4. Contact Twitch Support
If the VODs are not showing up due to technical issues, contact Twitch support for assistance. Provide them with details about the issue, such as error messages or specific VODs that are not showing up.
5. Use Third-Party Software
If you’re having issues with Twitch’s built-in VOD system, consider using third-party software to download and share your VODs. These tools can provide more flexibility and control over your VODs.
In addition to these troubleshooting steps, it’s important to regularly check and maintain your Twitch account to prevent future VOD issues. This can include checking your privacy settings, using trusted third-party software for downloading and sharing VODs and following Twitch’s copyright guidelines.
FAQ
1. Why are my VODs not publishing on Twitch?
That happens when Twitch detects copyrighted sounds in your vods. You won’t be able to publish them until the copyrighted parts are removed from all of the infringing ones you have stored.
2. Where are my Twitch VODs?
To get there, go to your Creator Dashboard, then select Video Producer under the Content dropdown menu.
3. Why are my Twitch VODs muted?
If copyrighted audio is detected in a VOD, we automatically mute that portion of the VOD.
Final Thoughts
Twitch VODs are essential for streamers to analyze gameplay, share highlights, and engage audiences across different platforms. When Twitch VODs are not showing up, it can disrupt these efforts and create unnecessary frustration.
By enabling the “Store Past Broadcasts” setting and utilizing tools like Eklipse, you can ensure your VODs are saved and accessible. Eklipse, an AI-powered clipping tool, makes it easy to turn streams into engaging content for platforms like TikTok, Shorts, and Reels. Take control of your content and elevate your Twitch channel with these solutions.


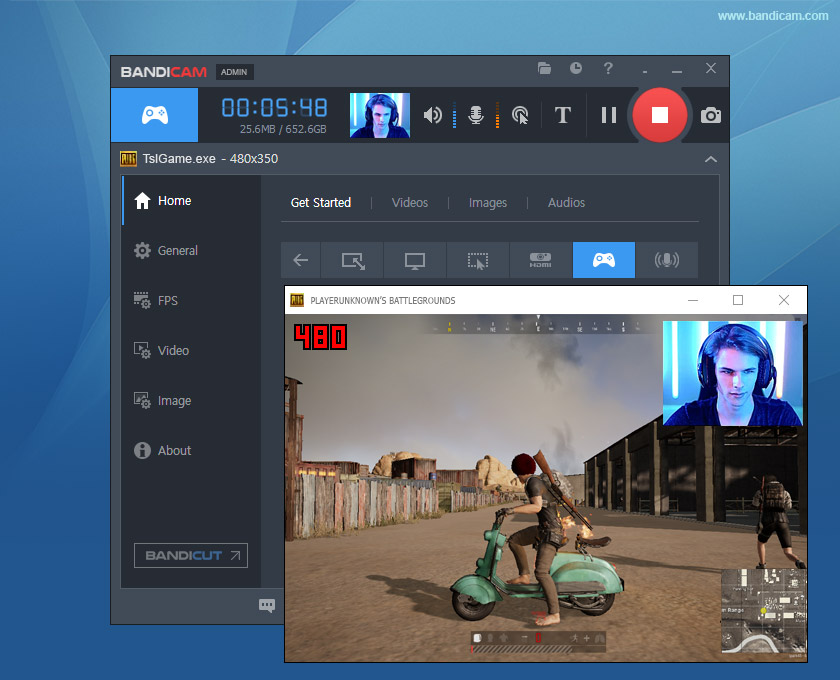
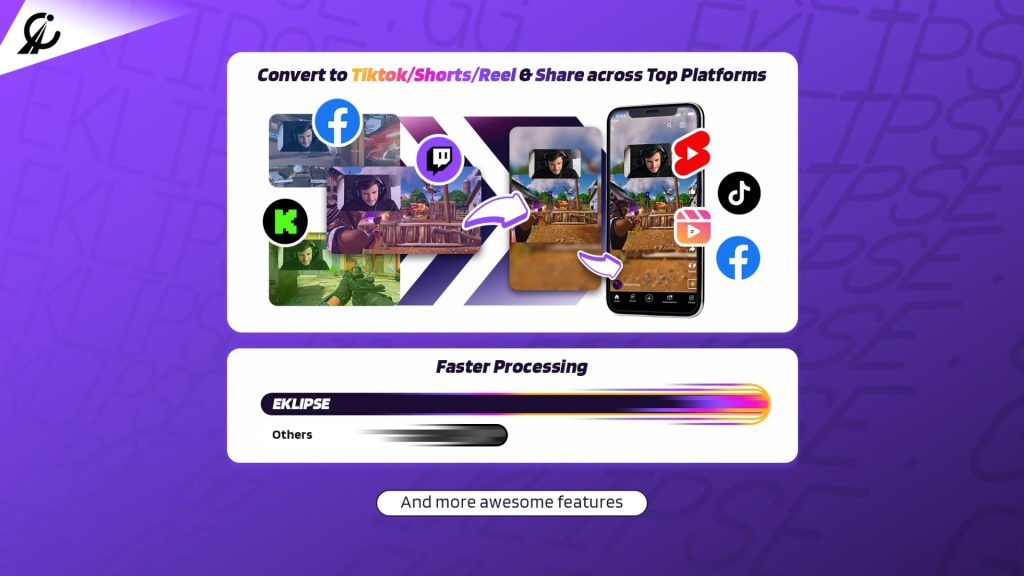


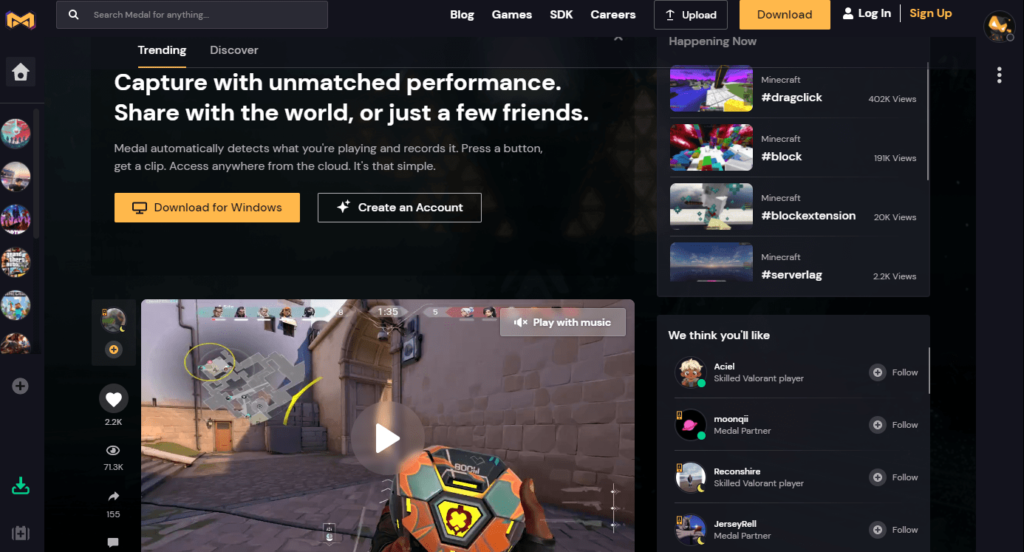
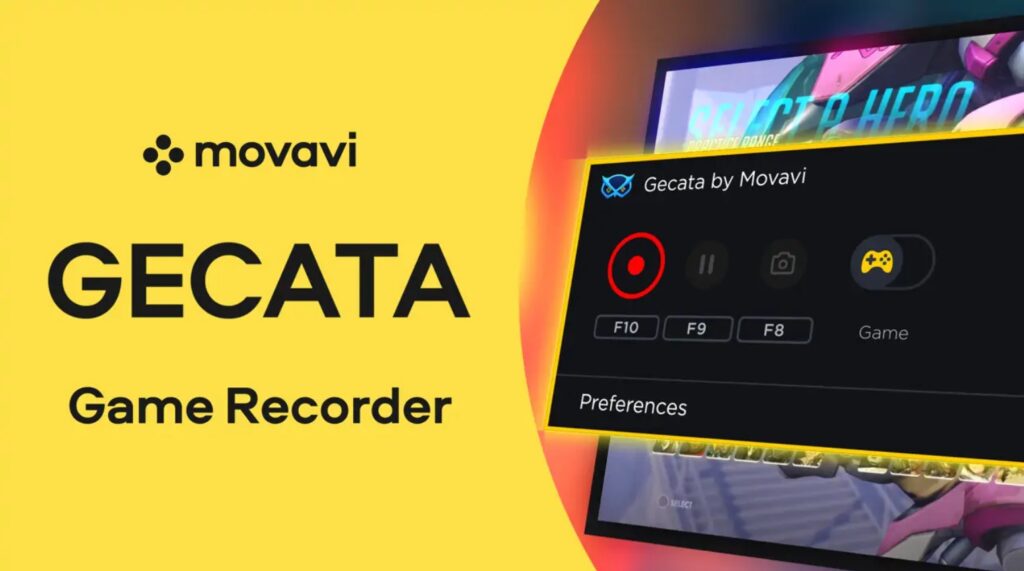
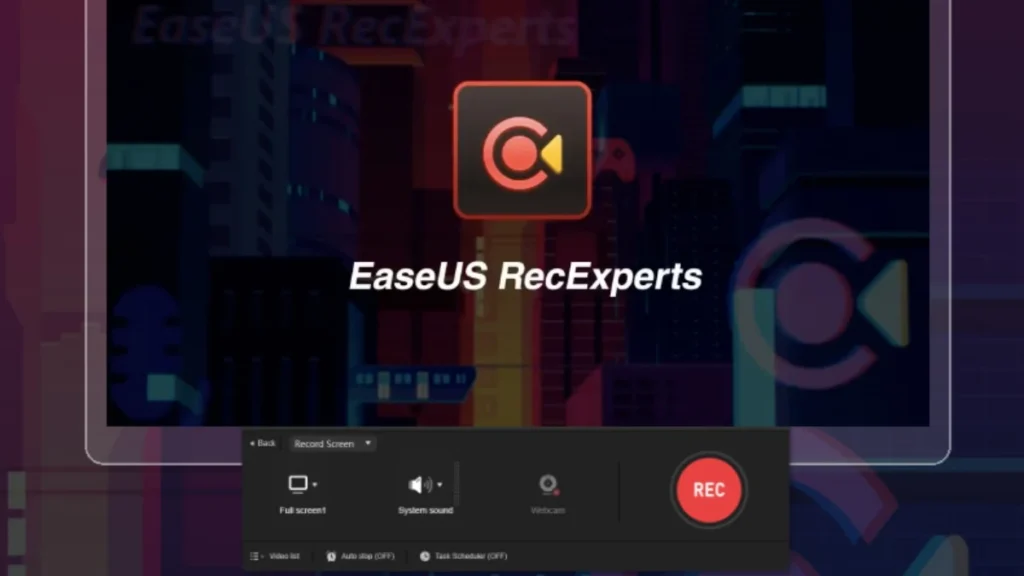
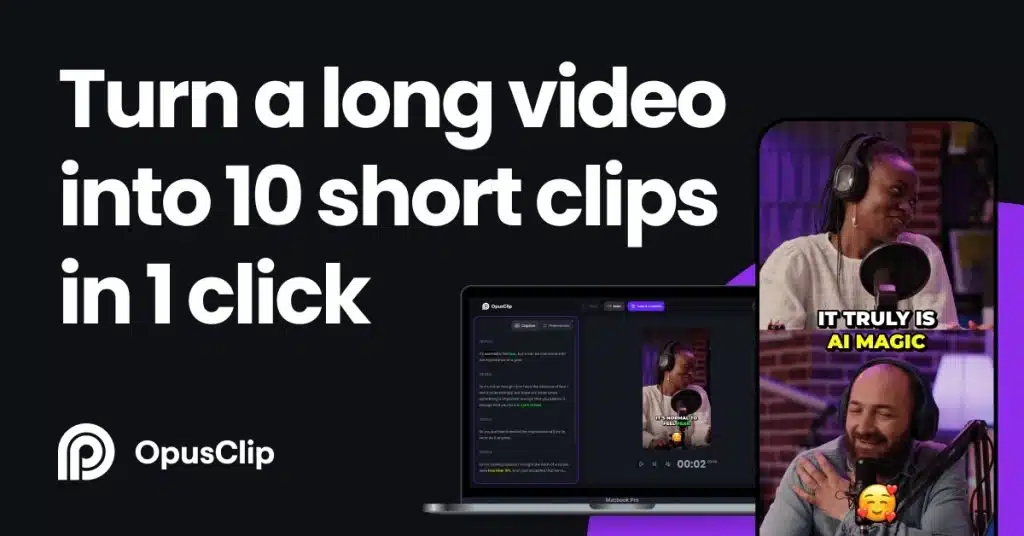
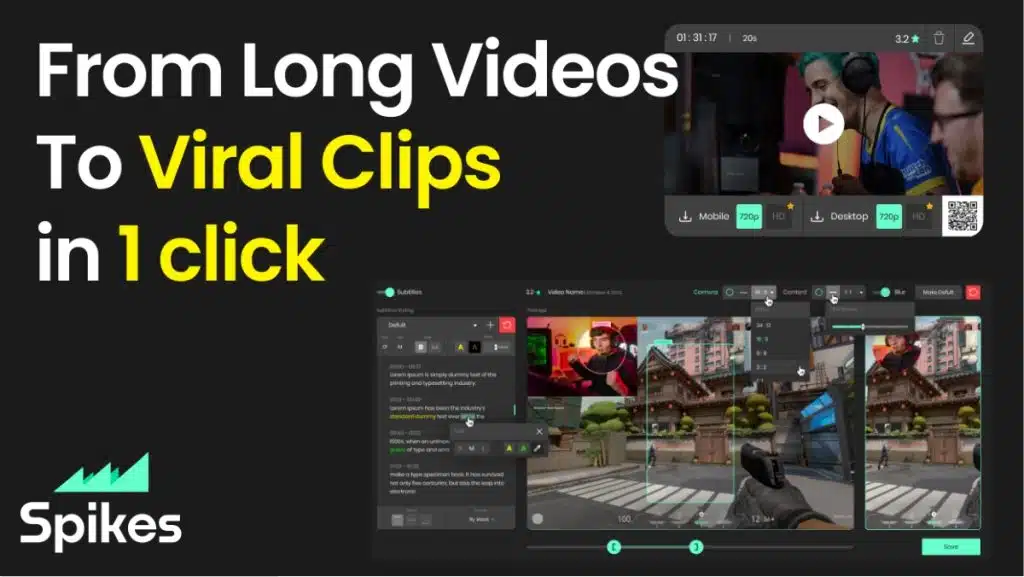
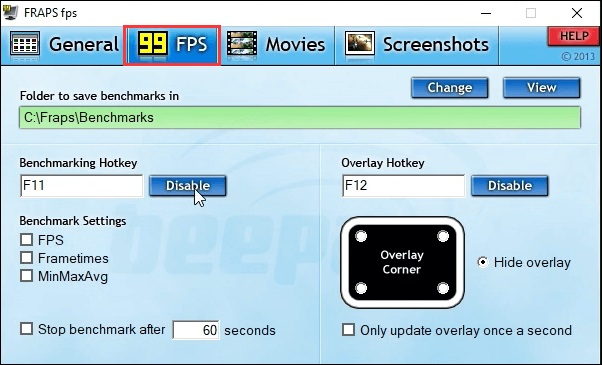


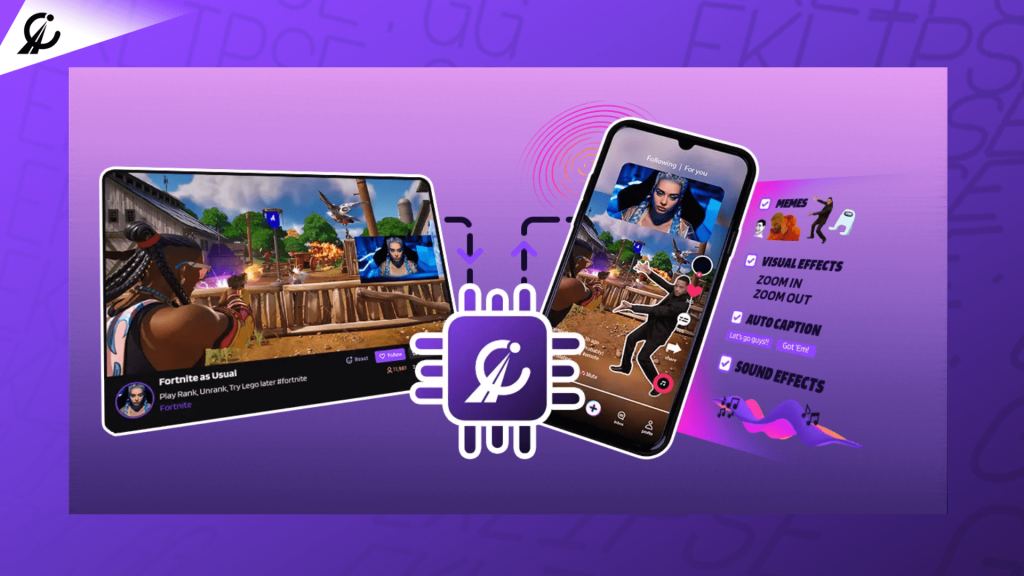

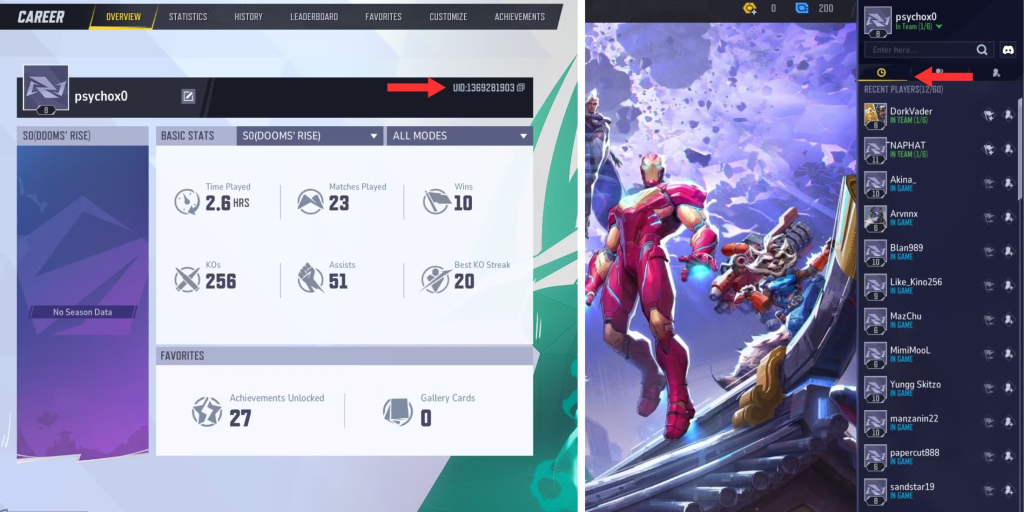


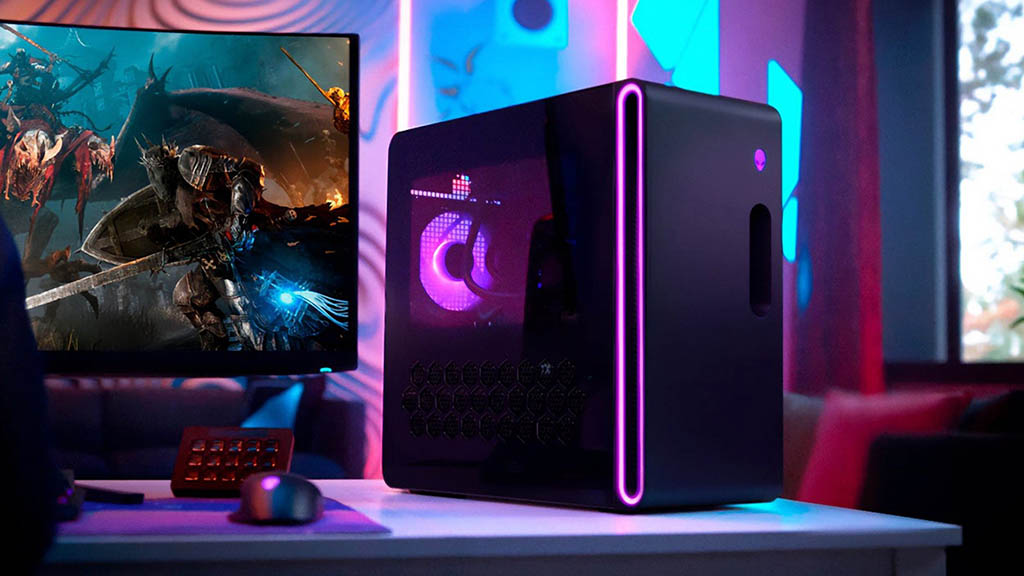
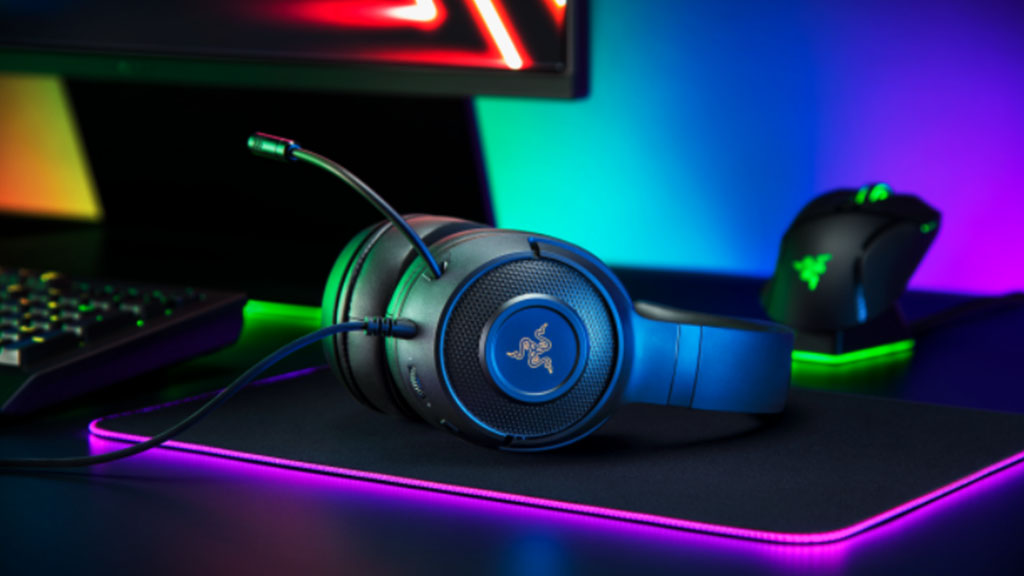

")