
Level Up Your Marvel Rivals Gameplay
Capture your epic wins, clutch moments, and even hilarious fails with Eklipse. Easily create and share highlight reels with your friends—even if you're not streaming!
Learn MoreCreating a compelling compilation video requires time and advanced editing skills, which many gamers might lack. This is where Eklipse Studio becomes a great help!
Eklipse offers updated features that make it easier than ever to highlight your best streaming moments and convert them into engaging social media posts on platforms like TikTok, YouTube Shorts, and Instagram Reels.
Curious about how to make the best game highlights using Eklipse to showcase your victory moments, epic fails, or hilarious moments during a live-streaming session? Read on to learn some strategies to make the most of Eklipse for free!
How to Make Best Game Highlight Using Eklipse: Step-by-Step Guide
Forget the hassle of manual clip editing. Eklipse.gg, an advanced AI tool, lets you create stream highlights quickly and easily. Follow these steps to get started:
Step 1. Register and Log in
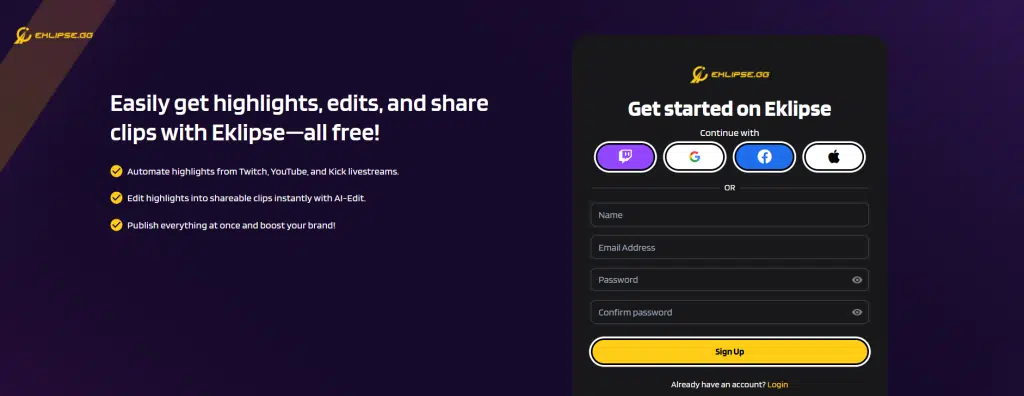
Sign up on Eklipse.gg with your email, Twitch, or Facebook account, then log in. You can also register instantly by clicking here.
Step 2. Link the Platform with Eklipse
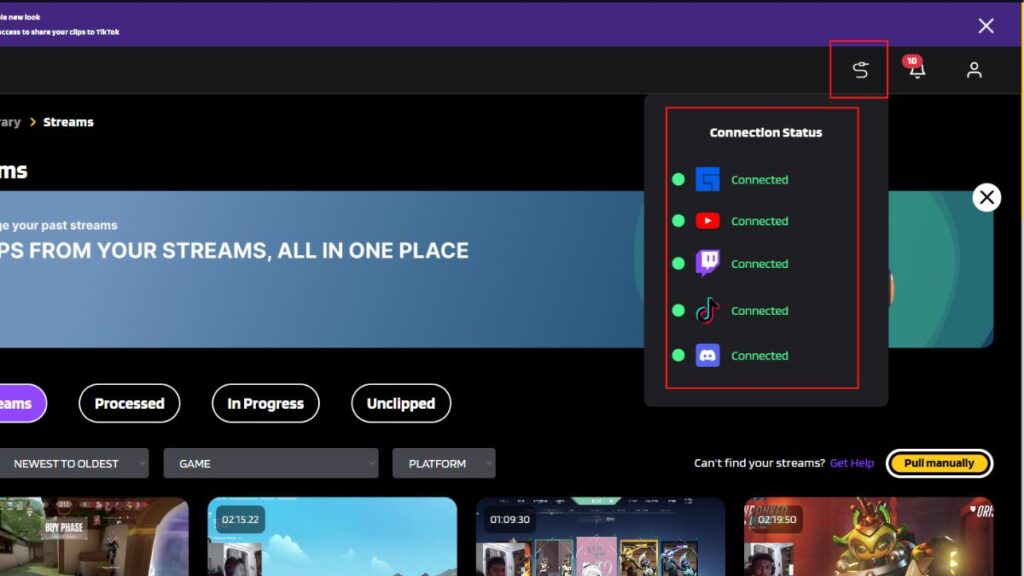
Connect your social media accounts to Eklipse by clicking the cable icon at the top-right corner and selecting your platform (Facebook, YouTube, Twitch).
Step 3. Find the Videos

Once connected, the AI will load your videos. Navigate to the Stream tab on the left menu and click on All Streams to find your videos.
Step 4. Choose your Clips

In seconds, your clips will be ready. Select from AI Compilation (3-10 minute clips) that is great for YouTube and Instagram feeds; or Short Clips, suitable for TikTok, Reels, or YouTube Shorts.
Step 5. Convert to TikTok/Reels
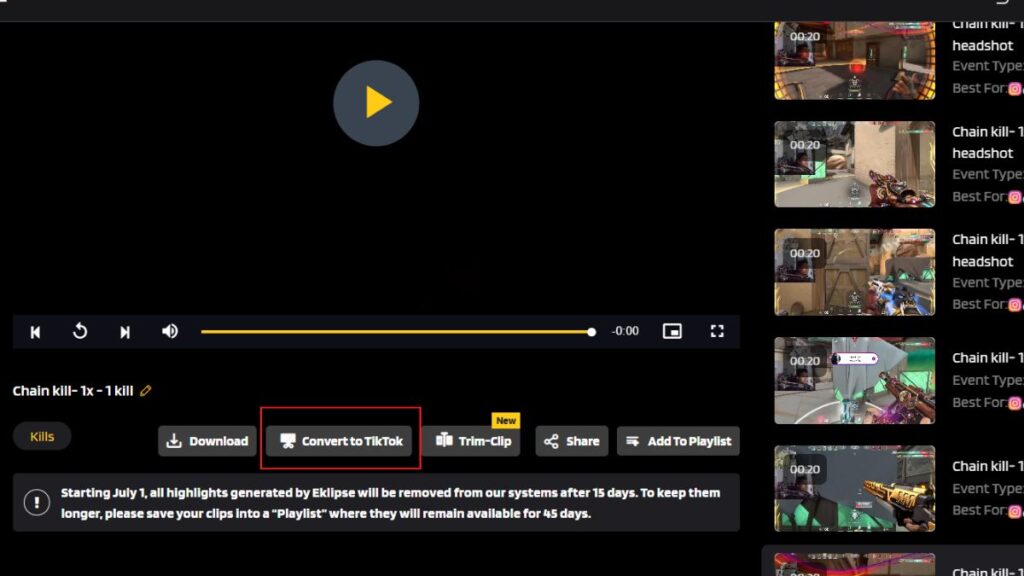
Click the Convert to TikTok/Reels button at the bottom of the video preview to let the AI process it.
Step 6. Choose the Template You Like
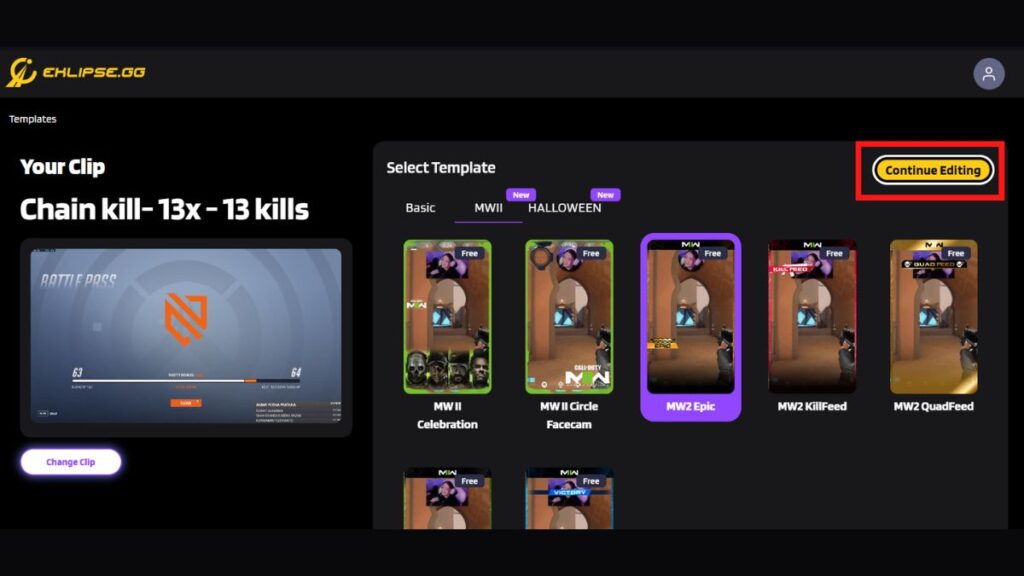
Eklipse offers various templates, including the latest COD MWII overlay template. Pick one to enhance your clip!
Step 7. Adjust Your Video
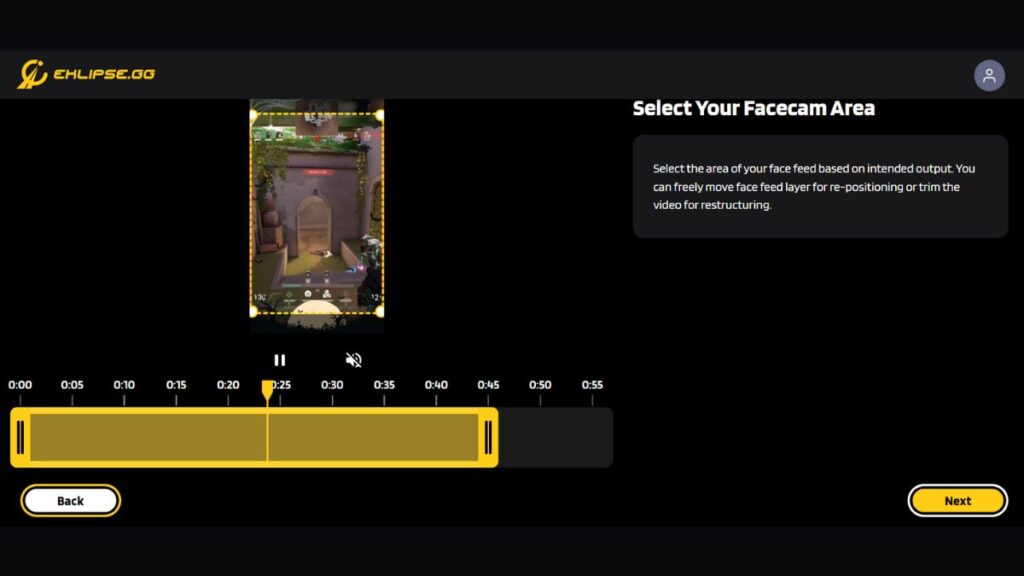
Select the video area which you want to show on other social media. Don’t forget to adjust the video length as well.
Step 8. Customize Your Clip
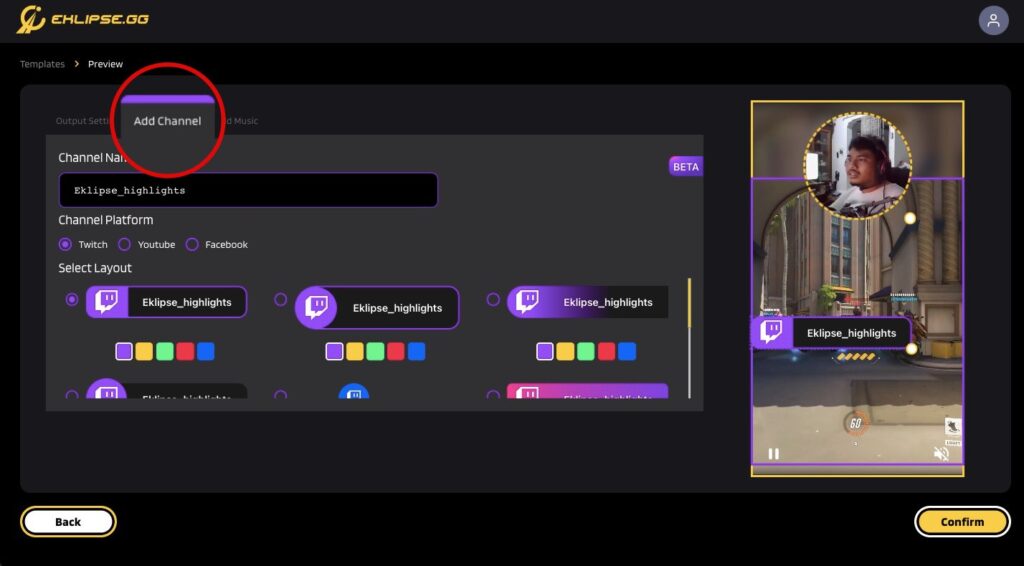
Set output settings, add music, and use Eklipse’s latest feature, “Channel Sticker Name,” to add a channel name sticker for easy discovery!
Step 9. Share to Social Media
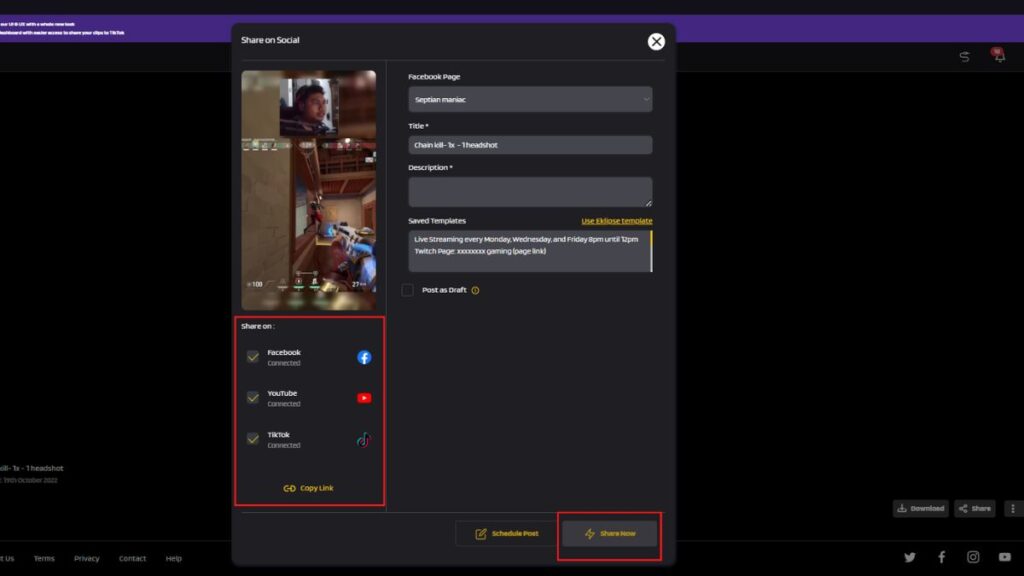
Once edited, hit the Confirm button and share your clip on social media. Go to the Edited Clips tab, find your video, and click Share. Choose your platform, add a title and caption, and hit Share Now.
More on Eklipse Blog >>> How to Edit Video with AI Edit (Beta) – No Editing Skills Needed!
Bonus: Tips to Get the Best Live Streaming Quality
Eklipse simplifies creating high-quality clips, but here are some tips for optimal results:
1. Maintain a 16:9 Aspect Ratio and Border Layout Below 30%
Using the correct aspect ratio is important during your live stream. Ensure to use a 16:9 aspect ratio and border layout below 30% or your screen will be cut off and Eklipse won’t be able to capture your moments properly.
2. Optimize Bitrate Settings
A large bitrate will make your clip look crystal clear as it won’t lose a lot of details. Even if the quality of your video drops when you render it, it won’t look pixelated. Match your bitrate to your hardware capability to ensure your stream runs smoothly.
What is a good video bitrate for streaming? You can use the recommended bitrate and resolution combinations from the table below:
| Resolution Combinations | Video bitrate 24, 25, 30 fps | Video bitrate 48, 50, 60 fps |
| 2160p (4K) | 35,000–45,000 kbps | 53,000–68,000 kbps |
| 1440p (2K) | 16,000 kbps | 24,000 kbps |
| 1080p (HD) | 8,000 kbps | 12,000 kbps |
| 720p | 5,000 kbps | 7,500 kbps |
| 480p | 2,500 kbps | 4,000 kbps |
| 36p | 1,000 kbps | 1,500 kbps |
Conclusion
From effortlessly linking platforms to customizing clips with eye-catching templates, the process is designed to be intuitive and efficient. The additional tips on maintaining optimal streaming quality further enhance the overall content creation experience, ensuring that the final product is as polished as possible.
Ready to elevate your content creation game? Visit Eklipse.gg today and start turning your streams into shareable masterpieces!

🎮 Play. Clip. Share.
You don’t need to be a streamer to create amazing gaming clips.
Let Eklipse AI auto-detect your best moments and turn them into epic highlights!
Limited free clips available. Don't miss out!
