
Level Up Your Marvel Rivals Gameplay
Capture your epic wins, clutch moments, and even hilarious fails with Eklipse. Easily create and share highlight reels with your friends—even if you're not streaming!
Learn MoreKick.com, a rapidly growing player in the streaming industry, is quickly gaining popularity. This new streaming platform is renowned for its generous creator program, offering a 95/5 revenue share towards creators.
If you’re eager to dive into the world of Kick and start streaming your gameplay, this step-by-step tutorial will guide you through the process using Streamlabs OBS, a powerful streaming software.
Step 1: Create a Kick Account, Edit Stream Info, and Copy Your Stream URL
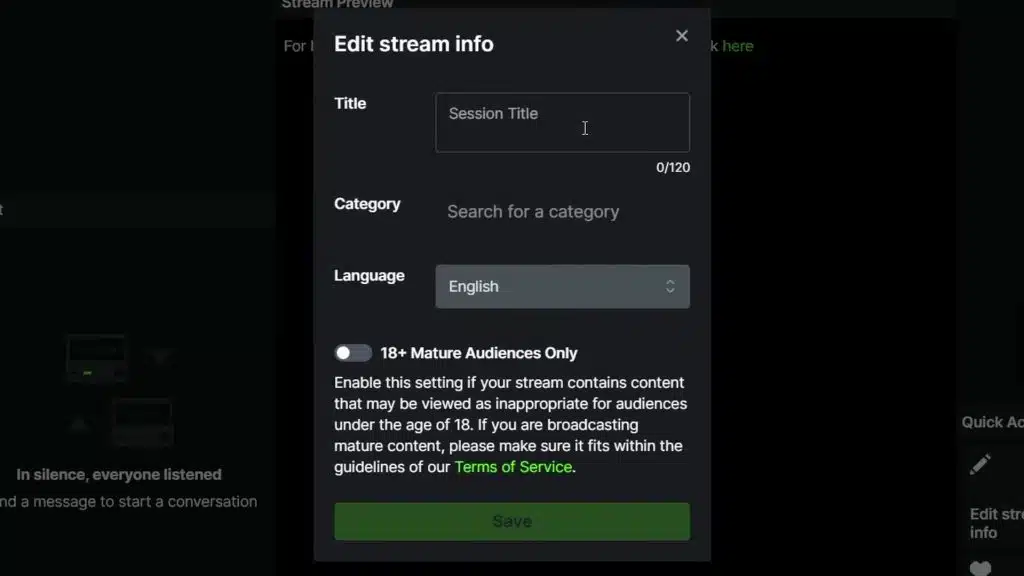
To get started, visit the Kick website and sign up for an account. Once you’ve completed the registration process, log in and access the “Creator Dashboard.” Look for the “Edit Stream Info” button located in the bottom right corner.
Within the “Edit Stream Info” section, you have the opportunity to customize your stream title and select the game category you’ll be streaming. Once you’re done, click “Save” to apply your changes.
Navigate to the “Settings” tab situated on the left-hand side of the Creator Dashboard. Locate the “Stream Key” option and click on it. You’ll find a button that allows you to copy both your stream URL and Stream Key.
Here are the step-by-step instructions:
- Create your Kick account.
- Go to the Creator Dashboard and edit your stream info.
- Customize your stream name and description as desired, then click “Save” when you’re done.
- Go to “Settings” > “Stream Key” on the left sidebar.
- You’ll see the Stream URL and Stream Key.
Now, keep your browser open on the last steps. The next steps will require you to set up your Streamlabs OBS to start streaming on Kick.
Step 2: Set up Streamlabs OBS
Before you begin streaming, it’s essential to configure Streamlabs OBS, which you can download and install if you haven’t done so already.
Once you have Streamlabs OBS open, follow these instructions:
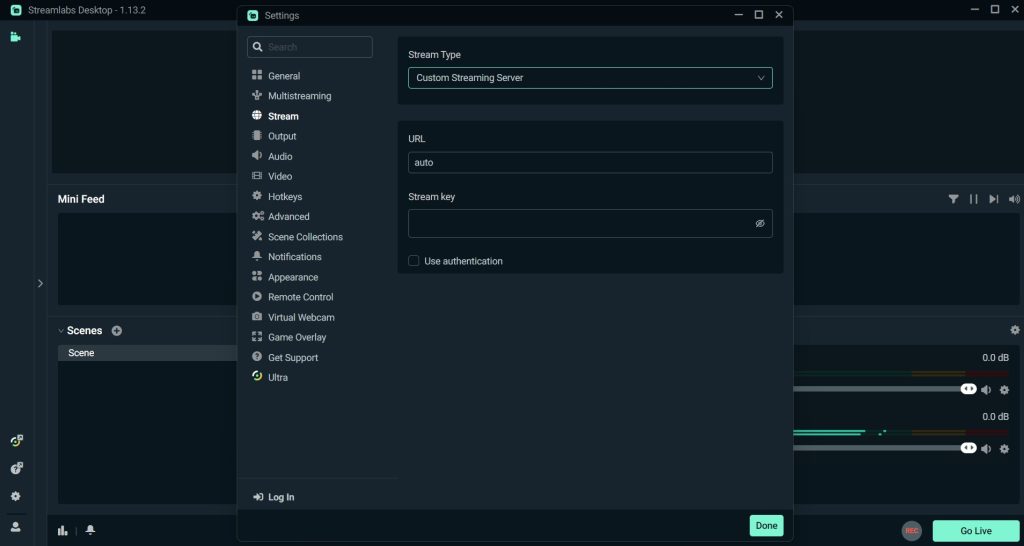
- Click the “Gear icon” on the bottom left corner.
- Within the “Settings” menu, navigate to the “Stream” tab.
- Change your “Streaming Type” to “Custom Streaming Server.”
- Copy and paste your stream URL from your Kick dashboard into the “URL” box.
- Copy and paste your stream key from your Kick dashboard into the “Stream key” box in Streamlabs OBS.
- Hit “Done,” and you’re good to go!
Now your Streamlabs OBS setup is complete, and you can start streaming on Kick by clicking the “Go Live” button on the bottom right of your interface. Not using Streamlabs OBS? You can also check out our guide on how to stream on Kick using OBS Studio if you prefer another broadcasting software.
Bonus Tips – Clips Your Kick Stream Automatically with Eklipse
Congratulations on your first stream on Kick! Now, what’s next? Enhance your streaming career by sharing clipped highlights of your live stream content on social media. For an effortless solution, try Eklipse, a Kick extension.
Eklipse automatically generates clips from your streams, saving you time scrolling through hours of VODs. Easily select the most engaging moments to share and attract attention to your stream. With Eklipse, focus on creating captivating content while it handles the clipping process.
You can check out our guide to learn about how to clip your Kick stream automatically using Eklipse.
Conclusion
Remember, creating engaging and high-quality content is just as crucial as the technical aspects of streaming. Interact with your audience, be consistent with your streaming schedule, and continuously improve your skills to stand out in the competitive landscape of online gaming. Happy streaming!
Maximize your Black Ops 6 rewards—Create highlights from your best gameplay with with Eklipse
Eklipse help streamer improve their social media presence with AI highlights that clip your Twitch / Kick streams automatically & converts them to TikTok / Reels / Shorts
🎮 Play. Clip. Share.
You don’t need to be a streamer to create amazing gaming clips.
Let Eklipse AI auto-detect your best moments and turn them into epic highlights!
Limited free clips available. Don't miss out!
