
Level Up Your Marvel Rivals Gameplay
Capture your epic wins, clutch moments, and even hilarious fails with Eklipse. Easily create and share highlight reels with your friends—even if you're not streaming!
Learn MoreHaving clips from your YouTube streaming videos is necessary since it can be more flexible to share on other social media, like TikTok or Instagram Reel. That’s why you need to learn how to take a clip from a YouTube video using Eklipse.
Unfortunately, YouTube doesn’t feature a clipping tool which can particularly turn your video into short clips with a certain aspect ratio. But thankfully, you can use Eklipse.
Eklipse is an AI-driven clip maker that can seamlessly capture the best moment of your streams. Only with a couple of clicks, everything is ready. You can have your incredible clip in seconds! Here’s how to take clip from a YouTube video with Eklipse.
How to Take Clip From a YouTube Video Using Eklipse
To be able to create highlights with Eklipse, you should follow the steps below. Here we go.
Step 1. First thing first, go to Eklipse.gg and register yourself with your Facebook, Twitch, or email. Alternatively, you can also hit the following button.
Maximize your Black Ops 6 rewards—Create highlights from your best gameplay with with Eklipse
Eklipse help streamer improve their social media presence with AI highlights that clip your Twitch / Kick streams automatically & converts them to TikTok / Reels / Shorts
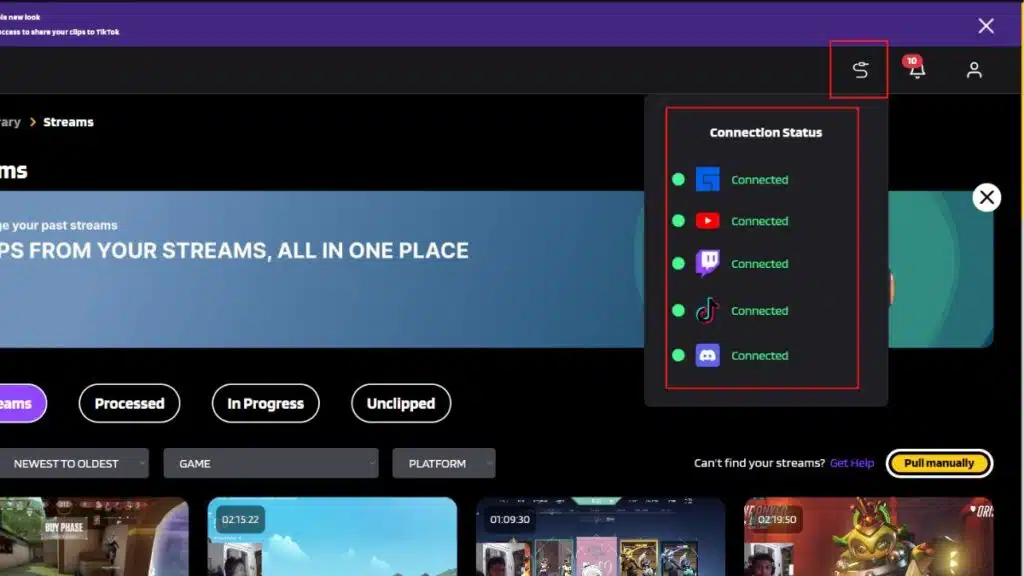
Step 2. Secondly, link your Eklipse account with your social media by clicking the cable icon at the upper-right side of the screen.
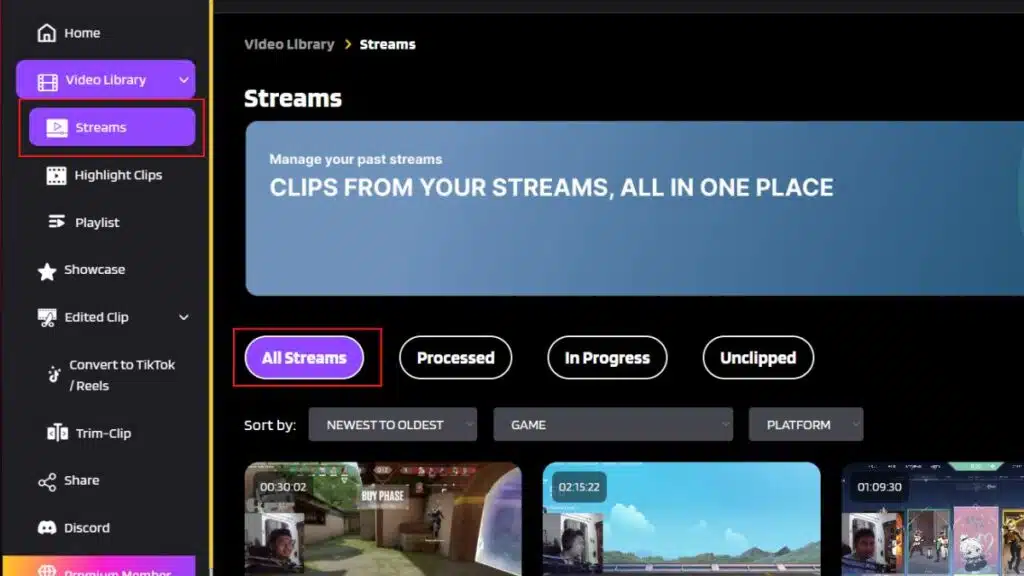
Step 3. Once your accounts are connected, your videos will be loaded automatically. Find them in the Streams tab under the Video Library option. Then, click the All Streams tab.
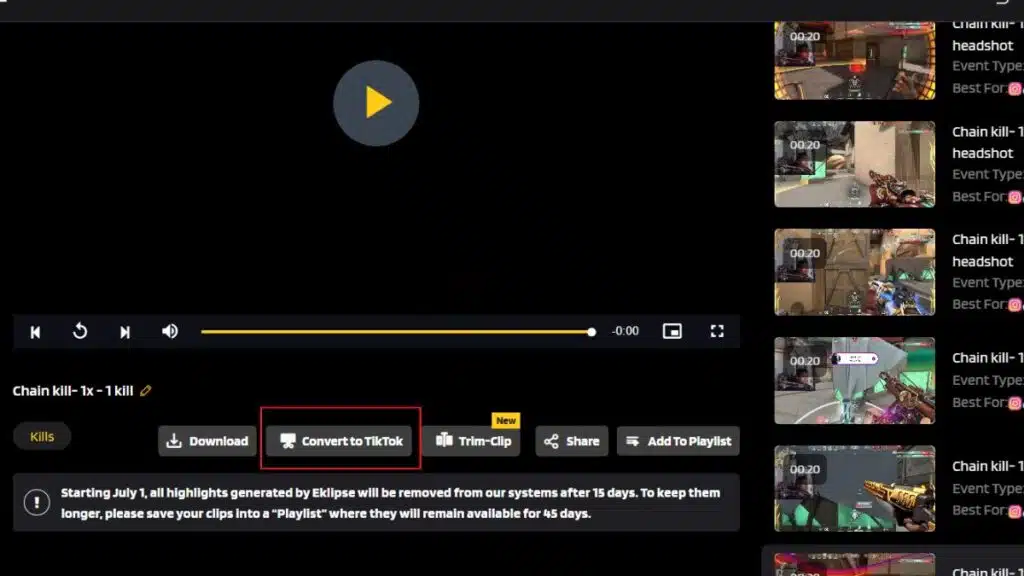
Step 4. Click Get Clip in the video you’d like to clip and the AI will process it instantly. You’ll see any short clip options, and to convert it to TikTok/reel, just hit the Convert to TikTok/Reel option underneath the preview.
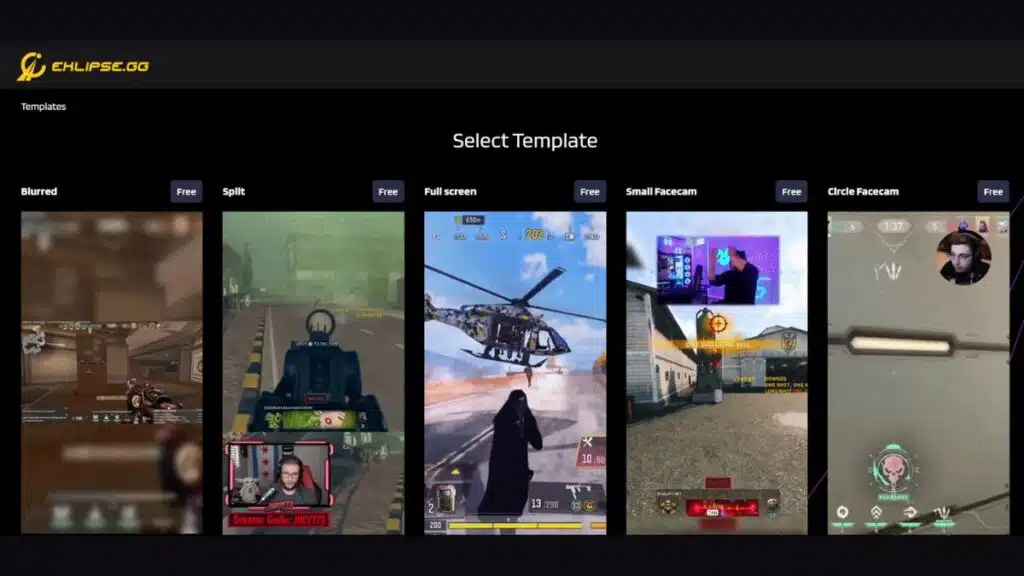
Step 5. Pick the best template from Eklipse template options. Anyway, don’t forget to try our Halloween-themed templates to make your clip cooler.
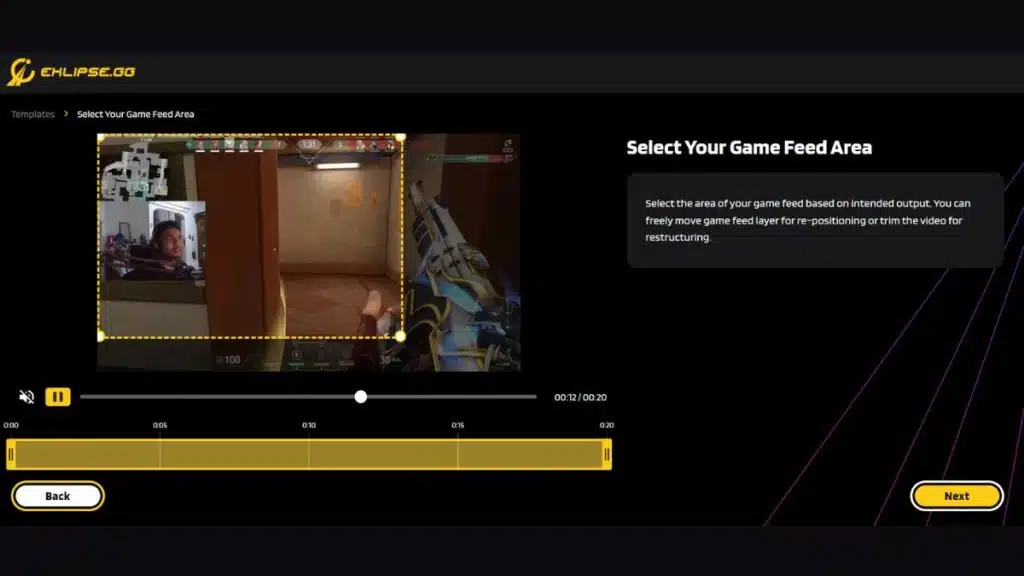
Step 6. After that, adjust the feed area you would like to capture, as well as the length of the audio. Then, hit Next.
Step 7. Add a catchy soundtrack by navigating to Add Music option. There, you’ll see the music options. Once you’ve clicked the preferred music, hit Select Music.
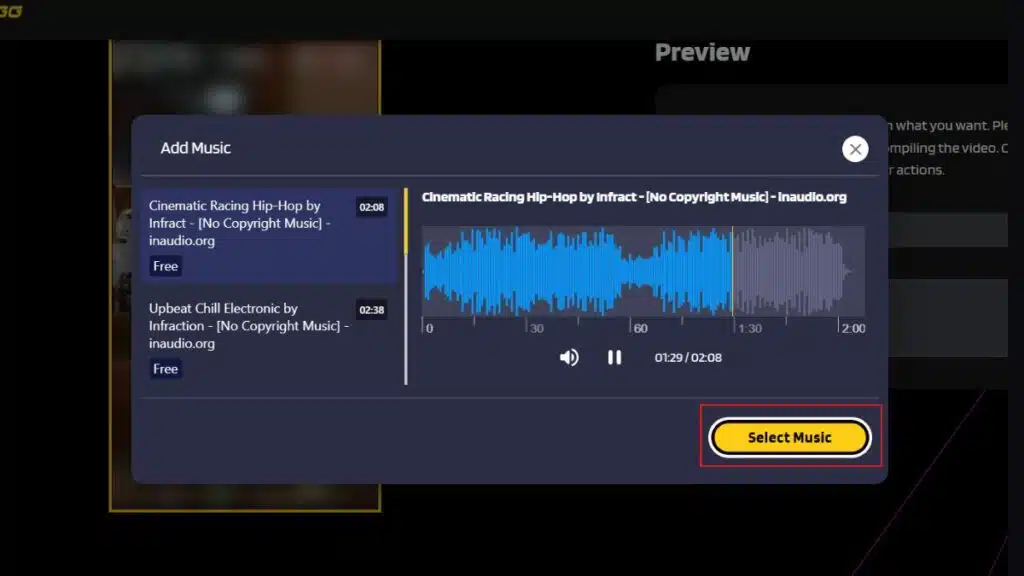
Step 8. Select the music part you are going to use, and adjust the length of the music. In addition, you can also play around with the audio and music volume. After finishing, hit Confirm.
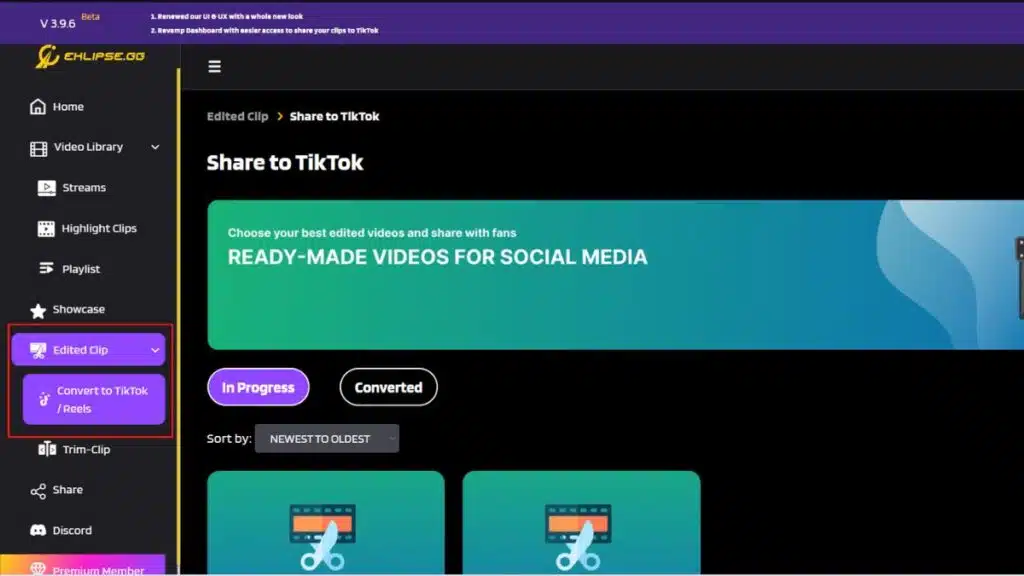
Step 9. Find your edited clip in the Convert to TikTok/reel option under the Edited Clips section.
Step 10. Finally, share your clip to TikTok, YouTube short, or Facebook by clicking on the share icon under the video, next to the Download button.
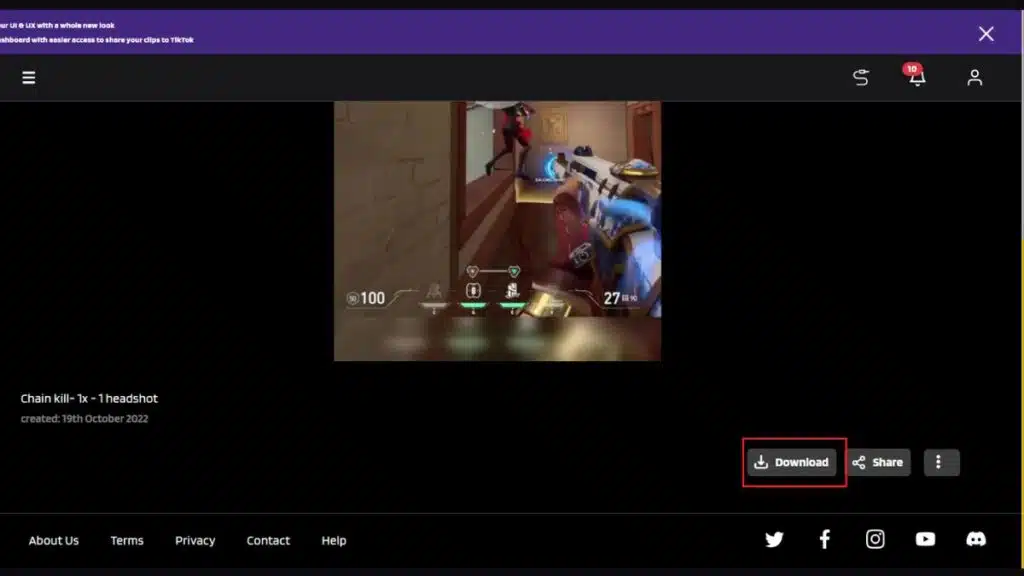
There you have it. Now you can directly send your clip to your social media. Isn’t it super simple?
In case you want to clip a YouTube video using the native feature of YouTube, you can learn from our guide here: How To Clip and Share A YouTube Video.
Benefits of Uploading a Highlight Video
There are many benefits of uploading a highlight video. A highlight video acts as a refreshing memory of some of your best moments that the viewers can match. There’s a good match that your new viewers have missed your best gaming moments. By your highlight video, they will be able to see you in action and appreciate your gaming skills.
You can upload a highlight video every month or every year. A highlight video of the best gaming moments of the last year is a great way to end the year.
More on Eklipse Blog >> How To Trim Video In Windows Media Player: A Guide
How to Upload the Highlight Video to Your YouTube Channel
Now, that you have clipped your YouTube video using Eklipse tools, you can continue to the next step which is uploading your video clip to YouTube or other platforms. Follow these steps to upload the highlight video to your YouTube channel:
- Log in – First, open YouTube and log in to your YouTube account.
- Click on the video icon – Click on the video icon at the top right corner next to your user icon.
- Upload – Now you can click “upload video”. This will open a window where you can select a file to upload. Select the highlight video you have created with Eklipse. You can also drag it and drop it.

- Add title and description – Now it’s time to add an engaging title that will compel your viewers to click the highlight video. Also, add a fitting description to your highlight video so your viewers know what the video is about. Keep everything engaging and concise.
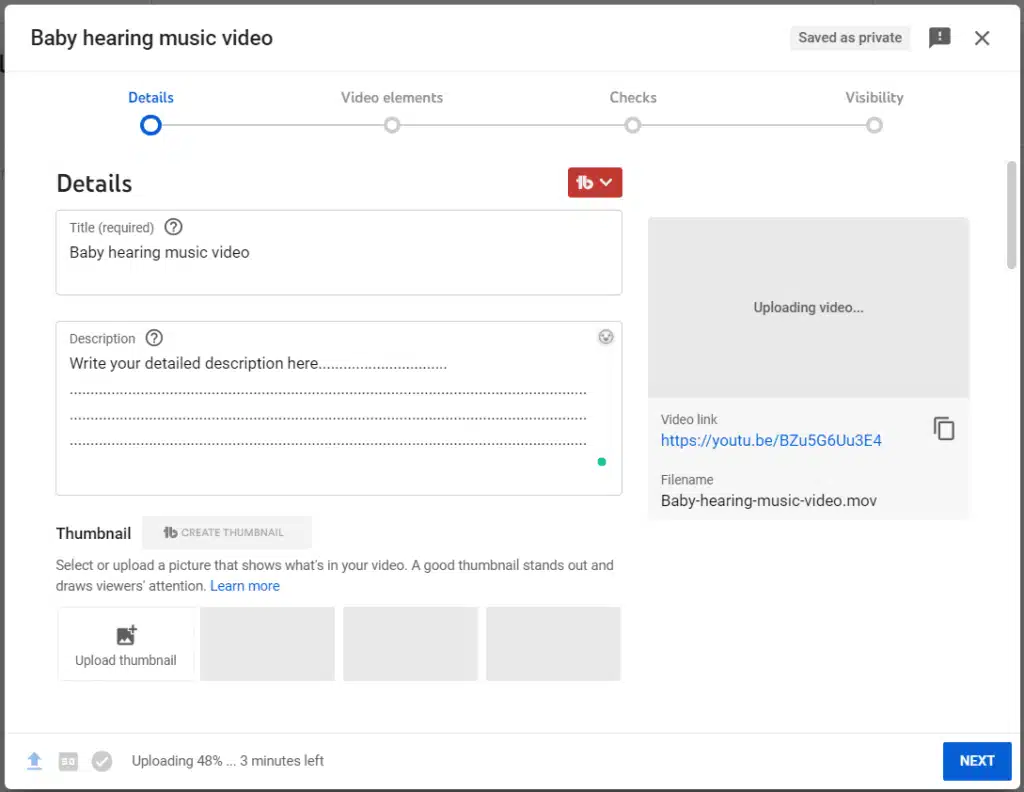
- Add tags – Adding tags will help you with Search engine optimization. If you want your video to be on the first page, you need to add relevant tags.
And you’re all done! Don’t forget to add a good thumbnail for your highlight video. This will bring in more views.
Conclusion
So that’s how you can create a highlight video using Eklipse and upload it to your YouTube channel. Make sure you are uploading your videos in high-quality to YouTube. Do this by selecting higher quality when the AI is creating clips from your streams. Make sure to upload your video with a catchy song, title and enticing thumbnail.
By the way, we have essential tips and tricks on making YouTube gaming videos. Before giving it a shot, make sure you check this article now: How To Make Gaming Videos For YouTube Using Eklipse.
🎮 Play. Clip. Share.
You don’t need to be a streamer to create amazing gaming clips.
Let Eklipse AI auto-detect your best moments and turn them into epic highlights!
Limited free clips available. Don't miss out!
