Home Blog Page 29

Create Stunning Mobile Legends Highlights Effortlessly with Eklipse GG

0

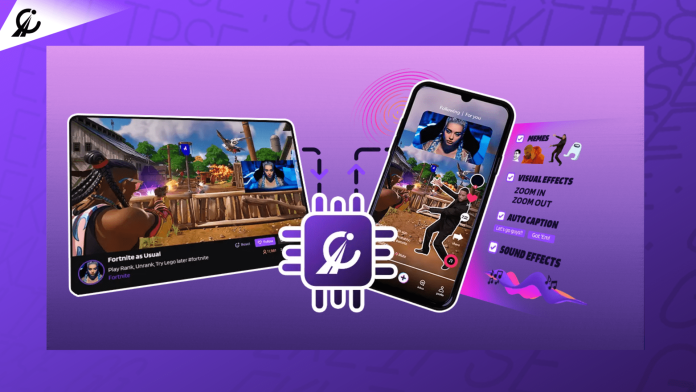
Creating highlights from your Mobile Legends gameplay has never been easier, thanks to innovative AI tools like Eklipse GG. This powerful application automates the process of capturing and editing your gaming moments, allowing you to focus more on playing and less on manual editing.

Whether you’re a casual gamer or an aspiring streamer, understanding how to effectively use Eklipse can enhance your content creation strategy. Let’s jump into the specifics of making those memorable highlights that will engage viewers across multiple platforms!

How to Create Mobile Legends Highlights Video with Eklipse GG

How to Live Stream Mobile Legends on PC and Mobile in 2024
Creating Mobile Legends highlights video never been easy with Eklipse!

Eklipse GG is designed not only for Mobile Legends but also supports various other streaming platforms, making it a versatile tool for content creators. By linking your streaming account, Eklipse leverages its AI capabilities to identify and clip significant moments from your gameplay automatically.

We’ll delve into the step-by-step process of getting started with Eklipse, along with tips for optimising your clips for social media sharing.

Step 1: Set Up Your Eklipse Account

To begin using Eklipse, you’ll need to create an account. Visit the Eklipse website and sign up for free. Once registered, log in and connect your preferred streaming platform (Twitch, YouTube, or Kick) by clicking on your profile icon and navigating to account settings.

Step 2: Stream Your Gameplay

Start streaming Mobile Legends as you usually would on any supported platform. Ensure that live stream mode is enabled within the game settings; this allows Eklipse to capture all key moments seamlessly while you play.

Step 3: Capture Highlights Automatically

After finishing your stream, head back to the Eklipse dashboard. The AI will have processed your stream automatically, generating highlight clips based on significant actions during gameplay. You can browse through these suggested clips under the “Processed” tab.

Step 4: Edit Your Clips

Select any clip that stands out to you for further editing. With Eklipse’s built-in tools, you can trim unwanted footage, add text overlays for context, and even integrate background music that resonates with your style or theme.

Step 5: Convert Clips for Social Media

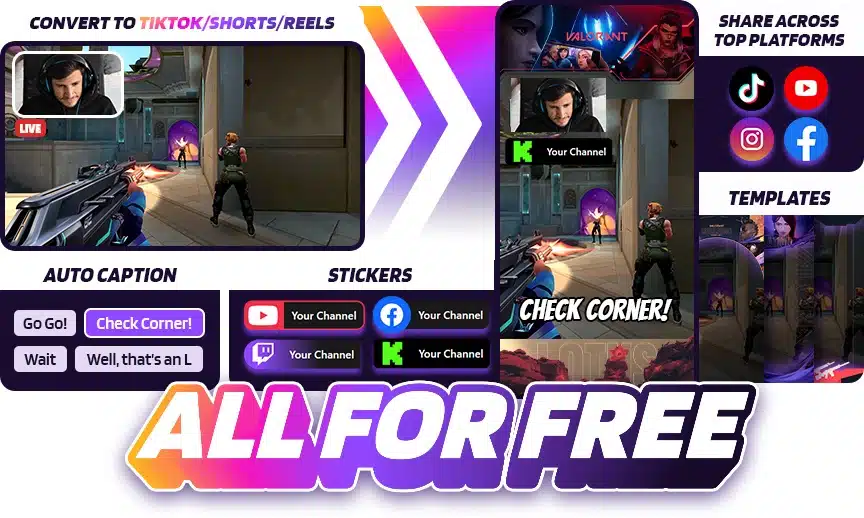
Once you’ve finalised edits on your clips, it’s time to share them! Use the “Convert” feature in Eklipse to tailor your highlight videos specifically for social media formats such as TikTok or Instagram Reels. Choose from a selection of templates designed for these platforms.

Step 6: Publish and Share

Finally, publish your edited clip directly through Eklipse or download it onto your device for manual sharing later. Engaging captions or hashtags can help boost visibility when posting online!

Key Features of Using Eklipse GG

Eklipse GG is one of the best AI tools for streamer. Source: Eklipse

1. Powerful AI Capabilities

Eklipse uses advanced AI technology that identifies exciting moments in real-time during streams without requiring manual input from users.

2. Seamless Integration

The software easily integrates with popular platforms like Twitch and YouTube so you can streamline workflows without switching between applications frequently.

3. Custom Editing Tools

You have access to precision trimming tools along with options for adding music tracks and text overlays which enhance viewer engagement significantly.

4. Ready-Made Templates

Easily convert long clips into short ones suitable for social media publishing by choosing from various ready-made templates tailored specifically towards different platforms.

5. User-Friendly Interface

Even if you’re new at video editing or streaming content creation—Eklipse’s intuitive design makes it easy to navigate through functionalities without prior experience necessary.

6. Free Access

Easily sign up at no cost; although there may be premium features available later down the line if users desire additional capabilities beyond standard offerings!

Conclusion

In conclusion, utilising Eklipse GG allows Mobile Legends’ players not just fun but also practical strategies towards enhancing their online presence via engaging Mobile Legends highlights reels compiled effortlessly through automated systems! Start exploring today—create those unforgettable moments worth sharing!

Don’t let your memorable moments go unnoticed—start with Eklipse GG now!

How Long to Get Emotes Accepted as a Twitch Affiliate

0

As a new Twitch affiliate, one of the most exciting milestones is uploading emotes for your subscribers. However, many affiliates find themselves in a frustrating waiting game when it comes to emote approval. Understanding the timeline for emote acceptance can help you manage your expectations and keep your audience engaged.

In this guide, we’ll explore everything you need to know about emote approval times on Twitch. Knowing what to expect can not only alleviate some anxiety but also ensure that you’re prepared for potential delays while waiting to enhance your channel’s subscriber experience.

Factors Influencing Emote Approval Time

Image: Engadget

Emote approval times can vary widely based on multiple factors, including the current queue of submissions and whether you have instant upload status. While some streamers report quick approvals within days, others experience delays lasting weeks or even months. By examining these timelines and user experiences, we aim to provide clarity and tips for new affiliates navigating this process.

The time it takes for Twitch to approve your emotes is influenced by several factors:

  • Current Queue Status: Emote approvals are processed in batches; a high volume of submissions can lead to longer wait times.
  • Content Guidelines Compliance: Emotes that may be deemed inappropriate or suggestive may take longer due to additional scrutiny.
  • Affiliate Status: New affiliates often do not have instant upload capabilities initially, which can prolong the wait.

Typical Approval Times

Image: Twitch Blog

Individual experiences vary drastically; while some may receive rapid approvals once they establish a history with Twitch, others might face recurring delays regardless of prior successes.

Several users have shared their experiences regarding how long it took for their emotes to get approved:

Quick Approvals (1-3 Days):

Some streamers report that their first few emotes were approved almost instantly or within two days after submission. Having clear and compliant designs seems crucial here.

Moderate Delays (1 Week):

Many new affiliates note that they waited around one week before receiving approval notifications for their emotes. This timeframe is common during peak seasons or holidays.

Long Waits (2 Weeks – 2 Months):

Unfortunately, there are cases where streamers faced delays of up to two months before seeing any action on their submissions. These instances often coincide with busy periods like holiday seasons or significant platform updates.

Tips for Expediting The Process

Here are some strategies that may help speed up the approval process:

  • Re-uploading Emotes: If your initial submission is pending for too long, consider re-uploading them under different names or slightly altered designs.
  • Simplicity Matters: Designs should be simple yet engaging—overly complex designs may attract more scrutiny.
  • Patience Is Key: Understand that staffing levels and specific circumstances at Twitch can lead to varying wait times; patience often yields results.

Common Concerns Among Affiliates

New affiliates frequently express concerns about subscriber engagement during prolonged wait times:

  • Subscriber Expectations: Many subscribers eagerly await the introduction of custom emotes as part of their subscription perks; delays can lead to dissatisfaction.
  • Communication Is Vital: Keeping communication open with subscribers about potential delays helps manage expectations effectively.

Final Thoughts

Understanding the timeline for Twitch emote approval is an important step for new affiliates aiming to level up their channel’s engagement in 2024. Approval times can vary from hours to weeks, but knowing the factors that influence this process empowers you to stay prepared and proactive. If delays arise, take the opportunity to revisit your submissions and refine them if needed. Keep your audience in the loop—they’ll appreciate the transparency and excitement about what’s to come!

While there’s no set timeline, being informed about the process and following best practices can help you navigate it with confidence. Emotes are a key part of your channel’s personality, so take the time to create designs that resonate with your community and make your Twitch experience even more memorable!

Chance “Sodapoppin” Morris: Networth Breakdown & Bio

0

Chance “Sodapoppin” Morris has established himself as a prominent figure in the online streaming world, particularly on Twitch. Known for his comedic flair and engaging personality, he has attracted millions of followers and carved out a significant niche for himself.

With an estimated net worth ranging from $6 million to $10 million as of 2024, Sodapoppin’s earnings are derived from multiple sources. From Twitch subscriptions to YouTube ad revenue, along with sponsorships and merchandise sales, there’s much to unpack regarding his financial landscape. By examining each aspect of his income streams, readers will gain insights into how this influencer has sustained and grown his wealth over the years.

For those curious about the mechanics behind streaming success or wondering how influencers like Sodapoppin manage their finances, this article provides a comprehensive overview. We’ll break down various components of his net worth and highlight key features contributing to his impressive financial standing.

Chance “Sodapoppin” Morris: An Overview

Sodapoppin’s infamous “NO I AM NOT GAY” Q&A video. Source: YouTube.

Chance Morris is better known by his moniker Sodapoppin. He was born on February 15, 1994, in Texas and first began streaming on XFire before transitioning to Twitch in 2012. His unique approach to content creation—characterized by humour and spontaneity—has made him one of the most followed streamers on the platform with nearly 9 million followers.

Sodapoppin’s Bio

  • Real Name: Thomas Jefferson Chance Morris
  • DOB: February 15, 1994 (age: 29)
  • Height: 5 ft 7
  • Weight: Approximately 60 kg
  • Current Residence: Austin, Texas
  • Marital Status: Unmarried but reportedly dating fellow streamer Veibae

Strengths: Engaging personality; extensive social media presence
Weaknesses: Limited information on sponsorship deals

Income Sources Breakdown

Source: Dexerto

Sodapoppin’s wealth is not merely a result of luck; it’s backed by several diversified income streams that capitalise on both direct revenue from platforms like Twitch and indirect earnings through various affiliations.

1. Twitch Earnings

Twitch represents the cornerstone of Sodapoppin’s financial portfolio. As a partner on the platform with almost nine million followers, he earns primarily through:

  • Subscriptions: With approximately $3.50 earned per Tier1 subscriber.
  • Bits & Donations: Regular contributions during live streams.
  • Ad Revenue: Generated through viewership numbers averaging around 18k per stream.

His monthly earnings from Twitch alone can reach roughly $21,000 or more depending on subscriber count.

2. YouTube Revenue

Sodapoppin operates two YouTube channels that collectively attract substantial viewer traffic:

  • Estimated views over time: Over 460 million.
  • Monthly views: Approximately 520k.

The channel generates between $130 – $2.1k monthly which culminates in annual revenues ranging from $1.6k – $25k based on fluctuating view counts.

3. Sponsorships and Brand Endorsements

While specific figures remain undisclosed regarding sponsorship deals:

  • He previously partnered with gambling websites during earlier streaming days.
  • Brands like NordVPN have been involved in collaborations.

These partnerships significantly bolster his overall earnings but details are sparse due to privacy policies surrounding such contracts.

4. OTK (One True King)

In early 2022, Sodapoppin became a co-owner of OTK—a media organisation dedicated to gaming content creators:

  • Provides additional exposure across various platforms.

This affiliation further solidifies his position within the eSports community while enhancing potential revenue opportunities.

5. NRG Esports

As an advisor at NRG Esports:

  • His role contributes not only financially but also strategically within competitive gaming circles.

This involvement strengthens ties to other influential gamers and streamers while promoting collaborative ventures that can lead to increased profitability.

Lifestyle & Expenditures

Living in Austin showcases Sodapoppin’s vibrant lifestyle filled with appearances at gaming events and conventions. Despite facing setbacks—including losing a previous gaming house due to fire—he soon recovered financially thanks largely to viewer donations following that incident.

Details about expenditures remain mostly private but it is apparent he enjoys a lavish lifestyle befitting someone of his status within the streaming community:

| Expense Category | Description | |———————|————————————–| | Housing | New home post-gaming house fire | | Events | Attendance at numerous conventions | | Personal Spending | Varied lifestyle choices indicative of success |

Conclusion: The Financial Landscape of Sodapoppin

Sodapoppin stands out as a leading figure within online streaming due not only to entertaining content but also robust financial strategies that underpin his success. With an estimated net worth between $6 million – $10 million as reported in early 2024, he exemplifies how dedication combined with savvy business decisions can lead one towards significant fiscal achievement in today’s digital age.

As eSports continues its rapid growth trajectory alongside online entertainment culture, there’s no doubt that figures like Sodapoppin will continue shaping this landscape while inspiring others aspiring for similar successes within this thriving ecosystem.

Want to create professional gaming highlights like Sodapoppin? Try Eklipse GG for automated editing and start sharing your epic moments effortlessly!

Optimal YouTube Shorts Length to Boost Views and Engagement

0

YouTube Shorts have revolutionized the social media landscape, offering creators a dynamic platform to share quick, engaging content. But determining the perfect length for your Shorts can be challenging. Is shorter always better? How long is too long?

Understanding the ideal duration for your YouTube Shorts is essential to capturing your audience’s attention and driving repeat views. The optimal length varies depending on your niche, target audience, and message. This article provides a comprehensive breakdown of the best video lengths for different content types, actionable tips to boost engagement, and insights to refine your Shorts strategy for 2024.

The Importance of Video Length

Image: Pixcap

Length is critical for viewer retention and engagement on YouTube Shorts. To succeed, your videos must keep viewers engaged throughout their runtime—and ideally encourage replays.

Data shows that many viral Shorts range between 15-35 seconds, balancing brevity with delivering a clear, impactful message. A shorter video that fully retains its audience is more likely to be rewatched, shared, and favored by YouTube’s algorithm.

Here’s why:

  1. Rewatchability: Shorter videos are more likely to be replayed, boosting overall watch time.
  2. Retention: Keeping viewers until the end signals to YouTube that your content is engaging, increasing its reach.
  3. Snackable Content Appeal: Audiences often prefer bite-sized content they can quickly consume.

For example, many successful creators report that Shorts with clear, focused storytelling gain traction over time—even weeks after their initial upload.

Best Lengths for Different Types of Content

Image: Iltalehti

Different content types require tailored durations to optimize engagement. Here’s a breakdown of ideal lengths based on audience expectations:

1. Informative Shorts

Informative Shorts aim to deliver concise tips, facts, or insights that provide immediate value to viewers. The challenge lies in keeping the information brief and digestible without overwhelming the audience. These videos excel when they focus on a single idea or concept, making them easy to follow. However, if they attempt to cover too much information, they risk losing the viewer’s attention before the end.

Ideal Duration: 30–60 seconds

2. Comedy Skits

Comedy Shorts rely on punchy humor and relatable scenarios to engage viewers. The short format complements humor by delivering quick, snappy jokes that hit their mark without overstaying their welcome. Effective timing is crucial to landing jokes, and poorly executed skits may feel awkward or rushed. When done well, these Shorts keep audiences laughing and encourage shares across platforms.

Ideal Duration: 15–30 seconds

3. Music Videos

Music-based Shorts showcase catchy hooks, dance routines, or snippets of popular tracks to captivate viewers. These videos are highly visual and rhythmic, making them ideal for driving engagement. However, the limited time frame may not do justice to the full essence of the music, leaving some audiences wanting more. Striking a balance between showcasing creativity and respecting the format’s brevity is key.

Ideal Duration: 30–60 seconds

4. Tutorials

Tutorial Shorts focus on teaching viewers a specific skill or providing step-by-step instructions. These videos work best when they concentrate on a single task, delivering clear and actionable guidance. Overly complex topics can feel rushed or incomplete in this format, so creators must be selective about what they choose to showcase. Tutorials should be visually engaging to maintain interest throughout.

Ideal Duration: 45–60 seconds

5. Product Reviews

Product review Shorts highlight key features and benefits of a product in a concise, engaging manner. They aim to inform viewers quickly, making them ideal for those considering a purchase. However, the short runtime can limit the depth of the review, potentially leaving out critical details needed for informed decision-making. To succeed, these Shorts should prioritize visual demonstrations of the product in action.

Ideal Duration: 30–45 seconds

6. Challenges & Viral Trends

These Shorts tap into trending formats or viral challenges to connect with a broader audience. Their quick, fun nature makes them highly shareable, encouraging participation and engagement. However, trends can become repetitive or oversaturated, so creators must find ways to add a unique twist to stand out. Creativity and timely execution are crucial for success in this category.

Ideal Duration: 15–30 seconds

7. Personal Stories & Experiences

Personal storytelling Shorts focus on creating an emotional connection with viewers through relatable anecdotes. These videos work best when they are heartfelt and delivered in a straightforward manner. Rushing through a story can dilute its impact, so creators should ensure their narratives are both concise and compelling. Adding a call to action or engaging question at the end can drive interaction.

Ideal Duration: 30–60 seconds

Final Thoughts

The ideal length for your YouTube Shorts will depend on your content type and audience. Focus on creating value-packed videos that retain viewers from start to finish. Experimentation is key: track your analytics to see what works best and refine your approach accordingly.

Remember to keep Shorts between 15–35 seconds for maximum retention, unless the content demands more time, prioritize rewatchable hooks that engage viewers within the first few seconds, and leverage YouTube Analytics to monitor your average view duration and optimize future uploads.

By mastering these strategies, you can create captivating YouTube Shorts that not only boost engagement but also enhance your reach within the ever-evolving social media ecosystem.

Now’s the time to experiment and shine—go create your next viral Short!

7 Best Free Tools for Creating Gaming Highlights

0

Every gamer has those incredible moments they want to share with the world: that perfect headshot, an epic comeback, or a hilarious glitch that had everyone laughing. If you’re building a presence on Twitch or YouTube, these golden moments can help you connect with viewers and build a loyal following.

The good news is you don’t need expensive equipment or software to capture and share your gaming highlights. Here’s our curated list of the best tools available in 2024 to help you turn your gameplay into shareable, standout clips.

1. Eklipse.gg

Eklipse.gg spots your best stream moments automatically – from epic plays to chat reactions. It’s perfect for creators who need quick highlights without the editing hassle. It even has a feature called Private Stream for those who want to stream without interacting with the audience, so they can just relax and secretly highlight all your best moments.

Top Features:

  • Automatic highlight detection
  • Cross-platform support (e.g., Twitch, YouTube)
  • Auto-captioning options

Pros: Saves time with automation; beginner-friendly.
Cons: AI may miss subtle moments, so minor tweaks might be needed.

More on Eklipse Blog>>> DaVinci Resolve vs. Eklipse GG: Which Video Editing Tool Is Right for You?

2. OBS Studio with Replay Buffer

OBS Studio isn’t just for streaming – a lot of gamers don’t realize its Replay Buffer can save your recent gameplay with a quick keystroke. Perfect for capturing those unexpected moments that make you want to hit rewind!

Top Features:

  • Adjustable replay buffer (up to several minutes)
  • High-quality recordings without additional software
  • Completely free and open-source

Pros: Full control over clips; integrates seamlessly with OBS setups.
Cons: Getting started might take some time to figure out.

3. Powder

Image: Powder

Powder watches your gameplay and picks out the good stuff automatically. Even if you’re not tech-savvy, you can just drag and drop your clips. You’ll love to see how it turns your plays into those addictive vertical videos that do so well on social media.

Top Features:

  • AI-driven highlight selection
  • Social media-friendly outputs (e.g., TikTok, Instagram)
  • Easy uploading and sharing

Pros: Intuitive and quick to use; perfect for short, punchy clips.
Cons: Limited customization for those who want more control; depends heavily on AI accuracy.

4. Clideo

Clideo keeps things simple. You just need to hop on their website and edit your clips right there in your browser. While it wasn’t made specifically for gaming, it’s perfect as a go-to for quick edits, especially when you’re using a device with low specification. You can trim videos, merge clips, and compress files without downloading anything.

Top Features:

  • No downloads required
  • Supports multiple video formats
  • Basic editing tools (trim, merge, compress)

Pros: Accessible from any device; beginner-friendly.
Cons: Limited features for advanced editing.

More on Eklipse Blog>>> Top 7 Best Sports Highlight Video Makers in 2024

5. Shotcut

Image: Shotcut

Shotcut is the real deal if you want to get serious about editing. Sure, it takes a while to learn all the bells and whistles, but once you get the hang of it, you can make some pretty professional highlights. Just be ready to spend some time learning how everything works.

Top Features:

  • Advanced editing tools
  • Supports a wide range of video formats
  • Cross-platform compatibility

Pros: Completely free with no restrictions; highly customizable.
Cons: Steeper learning curve compared to simpler applications.

6. Kapwing

Kapwing is perfect when you need to crank out highlights fast. They’ve got templates ready to go, and the best part is you can work on projects with your team online. Their editing tools are solid and super easy to use.

Top Features:

  • Intuitive drag-and-drop functionality
  • Collaborative editing tools
  • Templates for social media formats

Pros: Quick turnaround times due to user-friendly design; excellent support resources available online.
Cons: Free version includes watermarks; some features locked behind a paywall.

More on Eklipse Blog>>> 7 Best Free Video Editors for PC Without Watermarks in 2024

7. Assistant.gg

Image: Assistant GG

Assistant.gg focuses on summarizing gameplay highlights with community-driven insights. It’s perfect for streamers looking to engage niche audiences with tailored content. Plus point, you can utilize Assistant.gg’s insights to identify trending moments that resonate with your audience.

Top Features:

  • Game-specific AI analysis
  • Customizable clip formatting
  • Community feedback integration

Pros: Targeted features for specific games; evolving platform.

Cons: Still in development, so occasional bugs may occur.

Final Thoughts

At the end of the day, just pick what works best for you to capture the unforgettable moments in your gameplay. Whether you want Eklipse.gg to do everything automatically or you enjoy getting into the nitty-gritty with Shotcut, there’s a free option that’ll fit your style. The perfect play deserves to be shared, and now you know how to make it happen!

11 Things to Do When Your Twitch VODs Are Not Showing Up

0

Are your Twitch VODs not showing up on your channel? You’re not alone. Many streamers, especially newcomers, face this issue due to Twitch’s default settings, which don’t automatically save past broadcasts. Missing VODs can be frustrating, especially if you’re trying to share your content or revisit past streams.

In this guide, we’ll explore the reasons why your Twitch VODs are not showing up and provide 11 straightforward solutions to fix the problem. Plus, we’ll share tips on how to watch unpublished VODs and ensure your videos are saved and accessible for future use. Let’s dive in!

Why Isn’t Twitch Saving My Broadcasts?

Source: Restream

Twitch has a significant number of users, both watching and streaming. Just consider how much space Twitch would require if thirty percent of its users saved their streams—it’s a substantial amount!

That’s why the default setting for “Keep my previous broadcasts” is typically not enabled. If you want to save your broadcasts, you must ensure that you manually turn this option on in your settings. However, this can happen due to other factors.

If you notice that Twitch isn’t saving your broadcasts as it should, here’s a simple guide on how to fix that.

5 Things to Know When Your Twitch VODs not Showing Up

1. Your “Store Past Broadcasts” Option is Turned Off

Yes, that’s right. One of the reasons why your VODs not showing up on your Twitch channel is that the option to “Store Past Broadcasts” is simply turned off by default.

Technically, it means that if you turn on that option then the VODs will start showing up on your channel. Don’t forget that Twitch VODs are also not saved indefinitely, especially for all of you newbie streamers.

Twitch official help blog says that they only save the past broadcast for 7 days, except if you are a Partner, Turbo, or Prime user.

2. How to Turn on the “Store Past Broadcasts” Settings on My Twitch Account

So your Twitch channel starts showing up on your VOD, you need to turn on the Store Past Broadcasts option. Here’s how to ensure that your past videos are saved on Twitch:

  • You can go to Twitch.tv via the browser or open your Twitch app
  • You can go to this menu by clicking your Avatar which will show up in the sidebar menu
  • Click Settings, select Stream
  • Scroll down, switch on the Store Past Broadcast option
  • After that, then your Twitch VODs will start showing up after you finish your stream. There’s an option to “Always Publish VODs”. You can check that also if you want Twitch to automatically show up your VOD publicly on your channel.

    3. Why My Twitch VODs Still Don’t Show Up?

    Well, if the tips on how to enable Twitch to store past broadcasts do not resolve your issue, you may want to try clearing up some of your tools to open Twitch. You can clear your browser cache and history, or even reinstall the Twitch app.

    Clear Browser Cache and History (Chrome)

    1. Open your browser
    2. Use hotkey ctrl + shift + delete
    3. Let all the checkmarks on
    4. Choose All Time on the Time Range dropdown menu
    5. Click Clear Data

    4. How Can I Download My Past Broadcast?

    If your stream’s VODs already appear on your channel, you may want to download these VODs so you can create a clip from it and share it on other platforms like TikTok, Facebook, YouTube, Twitter, or even Reddit.

    Unfortunately, Twitch does not support this feature by default. However, don’t worry, as the internet is full of tools and solutions to help you with this problem! You can try downloading Twitch VODs using Eklipse by following these 5 easy steps:

    1. Go to Eklipse.gg, do free registration with Twitch, Facebook, or Email
    2. Connect your Twitch account
    3. Load and choose your Twitch VODs
    4. You can edit, trim, also convert your stream to TikTok through the Eklipse app
    5. Download your VODs

    5. Why are My Old Streams’ VODs Not Showing Up on My Twitch Account?

    How long does it take for past broadcasts to appear on Twitch? By default, Twitch only stores your past broadcasts for 7 days. Therefore, you can rewind your Twitch stream within that period.

    If you want more storage for your VODs, you need to be a Twitch Affiliate first, which allows you to store past broadcasts for up to 14 days. If you want even larger storage, Prime Users enable you to store past broadcasts for up to 60 days.

    6. Twitch Turbo And Longer Storage Periods

    You may want to subscribe to Twitch Turbo, which includes a longer storage period for previous broadcasts.

    How to Troubleshoot and Fix Twitch VODs Not Showing Up

    If your Twitch VODs are not showing up, it can be frustrating, especially if you’re trying to share your content or analyze your gameplay. Here are some step-by-step instructions for troubleshooting and fixing Twitch VOD issues.

    1. Check Privacy Settings

    Ensure that your privacy settings are set to allow VODs to be saved and shared. Go to your Twitch settings, select “Channel & Videos,” and then ensure that the “Store Past Broadcasts” option is enabled.

    2. Wait for Processing

    Sometimes, Twitch deleted VODs may take some time to process before they appear on your channel. Wait a few hours and check back to see if they have appeared.

    3. Check Your Internet Connection

    Ensure that you have a stable and reliable internet connection. Poor connection quality can cause issues with VODs appearing.

    4. Contact Twitch Support

    If the VODs are not showing up due to technical issues, contact Twitch support for assistance. Provide them with details about the issue, such as error messages or specific VODs that are not showing up.

    5. Use Third-Party Software

    If you’re having issues with Twitch’s built-in VOD system, consider using third-party software to download and share your VODs. These tools can provide more flexibility and control over your VODs.

    In addition to these troubleshooting steps, it’s important to regularly check and maintain your Twitch account to prevent future VOD issues. This can include checking your privacy settings, using trusted third-party software for downloading and sharing VODs and following Twitch’s copyright guidelines.

    Final Thoughts

    Twitch VODs are a valuable resource for streamers to review gameplay, create engaging content, and share their moments with audiences across platforms. However, when issues arise, such as VODs not showing up, it can be frustrating.

    By following the steps outlined in this guide—from enabling the “Store Past Broadcasts” option to exploring third-party tools like Eklipse—you can ensure your VODs are properly saved and utilized.

    Once you’ve resolved any VOD issues, you can focus on creating engaging content and growing your audience. To take your Twitch channel to the next level, consider using Eklipse, an AI-powered clipping tool that helps you turn your best live moments into captivating social media content.

    With Eklipse, you can easily create clips for TikTok, Shorts, or Reels, and share them with your audience. Sign up for Eklipse here and start your journey to Twitch stardom.

    7 Essential Tricks to Make Your YouTube Shorts Go Viral in 2024

    0

    YouTube Shorts has rapidly gained popularity as a platform for creators to showcase their talent and creativity. With the right approach, you can create content that not only entertains but also captures the attention of a wider audience. This article will explore seven essential tricks that can help your YouTube Shorts go viral, drawing from successful strategies employed by top creators.

    By employing these techniques, you’ll be able to craft engaging content that resonates with viewers and encourages sharing. Whether you’re new to creating shorts or looking to enhance your existing strategy, these tips will provide valuable insights. Let’s dive into the tricks that could elevate your content in 2024!

    1. Create Engaging Hooks

    Source: AdrenalinePlus

    The first few seconds of your YouTube Shorts are critical in capturing viewer attention. Starting with a compelling hook, such as a surprising fact or an intriguing question, ensures your audience stays engaged. For instance, opening with, “What if I told you this trick could save you hours every day?” immediately grabs curiosity, compelling viewers to watch through to the end.

    An effective hook not only retains viewers but also encourages them to interact with your content, boosting visibility through YouTube’s algorithm.

    2. Leverage Trending Music

    Source: Engadget

    Music can make or break your Shorts. Incorporating trending tracks from YouTube’s music library not only enhances the mood of your video but also aligns it with popular content trends. Viral songs resonate with larger audiences, increasing the likelihood of your video being shared and recommended.

    Ensure the music complements your content’s tone. Whether you’re showcasing humor, tutorials, or inspirational moments, selecting the right track amplifies the emotional connection with viewers.

    3. Optimize Video Length

    While YouTube Shorts allow up to 60 seconds of content, shorter videos (15-30 seconds) often perform better. Concise content caters to the platform’s quick-scrolling audience, maintaining their interest and prompting repeat views. Each additional play boosts your video’s engagement metrics, making it more likely to go viral.

    Remember, quality over quantity is key. Ensure every second of your video delivers value, whether it’s entertainment, education, or inspiration.

    4. Use Effective Hashtags

    Hashtags are essential for discoverability on YouTube Shorts. Tags like #Shorts, #YouTubeShorts, and topic-specific hashtags categorize your content, helping it reach the right audience. By using trending and niche-relevant hashtags, you optimize your video for the algorithm, increasing its chances of appearing on viewers’ feeds.

    Conduct research to find hashtags that resonate with your target audience and test combinations to identify what drives the most engagement.

    5. Post at Optimal Times

    Timing matters. To maximize your video’s impact, analyze your audience’s activity patterns and post during peak engagement periods. For many creators, late afternoon and early evening hours work best, but this can vary depending on your niche and viewer demographics.

    Experiment with posting times, track performance metrics, and refine your schedule to ensure your content gets the attention it deserves.

    6. Engage with Your Audience

    Building a connection with your viewers is essential for creating loyal followers. Encourage comments by asking questions, responding to feedback, or prompting viewers to share their opinions. Engaging directly with your audience fosters a sense of community, increasing the likelihood of likes, shares, and repeat views.

    Interactions also signal to YouTube’s algorithm that your content is resonating with viewers, further enhancing its visibility.

    7. Analyze Performance Metrics

    Regularly reviewing your analytics is vital for refining your content strategy. Metrics like Average Percentage Viewed (APV) and Watch Per Swipe provide insights into what works and what doesn’t. High APV scores indicate strong viewer retention, a key factor in achieving viral success.

    Use this data to identify trends, experiment with new formats, and continuously improve your Shorts’ performance.

    Final Thoughts

    By implementing these YouTube Shorts viral strategies, creators can unlock new opportunities to grow their audience and enhance engagement in 2024. The key lies in understanding your audience, staying consistent, and adapting to emerging trends.

    With dedication and creativity, your Shorts can capture attention and leave a lasting impact in the competitive world of digital content creation.

    Click here to join our Discord and win the prize!


    Maximize your Black Ops 6 rewards—Create highlights from your best gameplay with with Eklipse

    Eklipse help streamer improve their social media presence with AI highlights that clip your Twitch / Kick streams automatically & converts them to TikTok / Reels / Shorts


    How to Use Permanent Unlock Token in Call of Duty

    0
    Permanent Unlock Token in Call of Duty
    Permanent Unlock Token in Call of Duty

    In Call of Duty: Black Ops 6, the permanent unlock token is a valuable tool for enhancing your gameplay. This feature lets players unlock specific weapons, perks, and other items permanently, giving them a competitive advantage in multiplayer matches. However, new players may find it challenging to fully understand how and when to use these tokens effectively.

    To make the most of your permanent unlock token, follow these simple steps and helpful tips. By doing so, you’ll ensure a more rewarding gaming experience and a strategic edge in your matches.

    Step-by-Step Guide to Using Your Permanent Unlock Token

    How to Use Permanent Unlock Token in Call of Duty – Source: powerpyx

    To help you make the most of your Permanent Unlock Token in Call of Duty: Black Ops 6, here’s a straightforward step-by-step guide on how to use it effectively.

    1. Access the Main Menu
      Start by launching Call of Duty: Black Ops 6 and navigating to the main menu.
    2. Go to Barracks
      Select the ‘Barracks’ option from the main menu.
    3. Navigate to Progression
      Within Barracks, locate and click on ‘Progression’.
    4. Open Level Unlocks Tab
      Find and select the ‘Level Unlocks’ tab for available unlock options.
    5. Choose Your Item
      Browse through your unlocked items and decide which weapon or perk you wish to permanently unlock.
    6. Confirm Your Choice
      After selecting an item, you will receive a prompt asking if you’re sure about unlocking it. Confirm this action by clicking ‘Yes’.
    7. Check Your Inventory
      Once confirmed, check your inventory to ensure that the item is now permanently unlocked for future use.

    Using these steps will not only ensure that you successfully utilise your permanent unlock token but also maximise its potential impact on your gameplay experience in Black Ops 6.

    Important Considerations for Using Permanent Unlock Tokens

    While using permanent unlock tokens can significantly enhance your gameplay experience, there are several things you should keep in mind:

    • One-Time Use: Each permanent unlock token can only be used once; choose wisely which item will benefit you most.
    • Strategic Selection: Focus on unlocking items that match your playstyle or those that might be crucial for upcoming challenges.
    • Timing Matters: Consider unlocking items early in a season where new content might change dynamics (weapons and perks may become more viable).

    Final Thoughts

    Now that you understand how to use the permanent unlock token in Call of Duty: Black Ops 6, you’re ready to upgrade your gaming experience. Using these tokens wisely can give you a competitive edge while allowing you to customise your arsenal to match your playstyle.

    Be sure to carefully consider which items will benefit you most in competitive matches. Enjoy your enhanced gameplay!

    When is Ranked Play in Call of Duty Warzone Coming Out? December 2024 Update

    0
    Ranked Play in Call of Duty Warzone
    Ranked Play in Call of Duty Warzone

    Ranked Play is returning to Call of Duty: Warzone in early December 2024, aligning with the Season 1 Reloaded update. While the exact date remains unannounced, players can expect an upgraded competitive experience with new features.

    This article covers the details of Ranked Play’s return, highlighting key changes and improvements that will elevate the gameplay for both new and experienced players.

    Return of Ranked Play

    Ranked Play in Warzone is set to make its highly anticipated return alongside the Season 1 Reloaded update. Although a specific date is not yet confirmed, it’s expected that this mode will go live sometime in early December 2024. Players can look forward to engaging in intense matches on Urzikstan—the main map designated for this competitive format.

    Details

    • Skill Divisions: Players will climb through various divisions based on skill rating (SR), similar to previous seasons.
    • Gulag Mechanics: Unlike past modes where players could respawn without consequence during Resurgence matches, players must now fight their way out of the Gulag.
    • Exclusive Rewards: As part of the ranked experience, there will be unique rewards available for those who demonstrate exceptional skill and dedication.

    More on Eklipse Blog >>> Black Ops 6: How to Unlock the Safe in the “Hunting Season” Mission

    Competitive Environment

    The competitive landscape within Warzone is evolving with the return of Ranked Play. This mode promises a more serious atmosphere where strategy and teamwork play crucial roles.

    Strengths

    • Enhanced Competition: Players face opponents of similar skill levels, which fosters fairer matches.
    • Strategic Depth: The Gulag mechanic encourages intense confrontations that can shift game momentum dramatically.

    Weaknesses

    • High-Stakes Pressure: The intensity may deter casual gamers looking for a more relaxed gaming experience.

    Final Thought

    Ranked Play is making a return to Call of Duty: Warzone with new features and challenges designed for both seasoned players and newcomers. Expect the official launch in early December, with more details coming soon.

    Stay tuned to official channels for updates to ensure you don’t miss important announcements as the next Warzone season approaches.

    Click here to join our Discord and win the prize!

    How to Live Stream on YouTube Shorts

    0

    Live streaming on YouTube Shorts has rapidly gained traction among creators seeking to connect with their audience in real-time. As short, engaging video content continues to dominate online platforms, mastering how to live stream on YouTube Shorts can distinguish you from competitors. This guide will provide essential steps and tools for effectively live streaming on YouTube Shorts, ensuring your streams are captivating and impactful.

    In this article, we’ll explore various methods and tools that can help facilitate effective live streaming on YouTube Shorts. From understanding technical requirements to maximizing viewer engagement during your stream, we aim to equip you with all the necessary information.

    Understanding Streaming Formats

    Live stream on YouTube Shorts – Source: Pexels/Szabó Viktor

    To successfully live stream on YouTube Shorts, it’s essential to understand video formats. The recommended resolution is 1080×1920 pixels in a vertical orientation. This ensures that your content appears correctly in the Shorts feed, attracting viewers looking for quick entertainment.

    Key Features

    • Vertical video format: 1080×1920 pixels
    • Instant access via mobile or desktop
    • Engaging real-time interaction with viewers

    Tools Required for Streaming

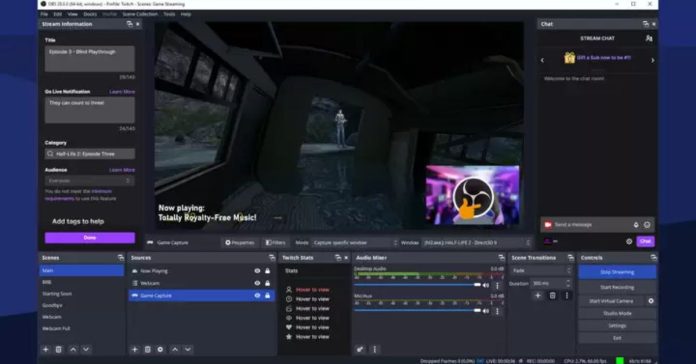
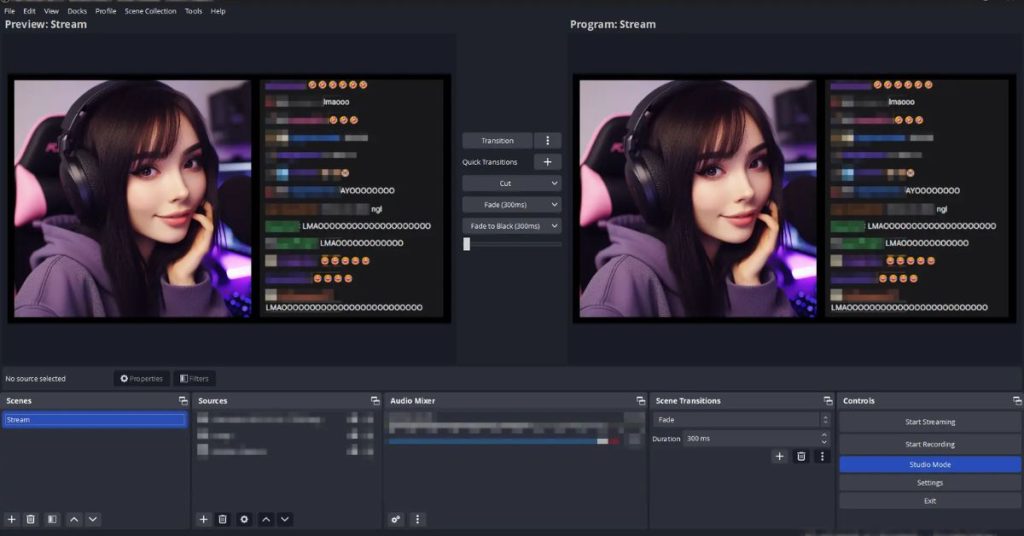
    • OBS Studio: A free and open-source software that allows users to create high-quality streams. It supports multiple platforms and offers extensive features such as scene transitions and audio mixing.
    • Aitrium Plugin: Designed specifically for streaming vertically formatted content like YouTube Shorts, this plugin allows multi-streaming capabilities using different keys for regular and shorts formats.

    Stream Key Setup

    You’ll need a stream key obtained from your YouTube dashboard under “Live” settings. You do not need separate keys for regular and shorts formats; you can use one key for vertical streaming.

    Key Features of Tools

    • Free software with advanced features (OBS)
    • Multi-stream capability (Aitrium)
    • User-friendly interface

    Step-by-Step Instructions

    1. Download OBS Studio: Get it from the official website.
    2. Install Aitrium Plugin: Follow installation instructions provided by Aitrium.
    3. Create Stream Key: Go to YouTube Studio > Live > Create New Stream Key.
    4. Set Up Your Scene: Open OBS; add sources like camera or screen capture.
    5. Configure Settings: Change resolution to 1080×1920 in OBS settings.
    6. Start Streaming: Begin your regular stream; ensure it’s set to vertical format.
    7. Engage with Viewers: Use chat features during the stream to interact.

    Tips for Successful Streams

    • Promote Ahead of Time: Announce when you’ll be going live across social media platforms.
    • Test Your Setup: Conduct a private practice stream before going public to check quality and audio levels.
    • Engage Audience Actively: Respond to comments and questions during the live session.
    • Use Eye-Catching Thumbnails: Create attractive thumbnails that entice viewers to click on your stream.

    Potential Earnings from Streaming

    Earnings can vary based on viewer engagement, sponsorships, ad revenue, or donations received during streams:

    • Minimum earnings could range around £50 per month based solely on ad revenue if starting out small.
    • Experienced creators might earn upwards of £500+ per month through diversified income sources including sponsorships.

    Conclusion

    Live streaming on YouTube Shorts opens exciting opportunities for content creators aiming to connect dynamically with their audience in 2024. By utilizing tools like OBS Studio and plugins such as Aitrium while adhering closely to technical requirements such as maintaining a vertical format—you can maximize viewer impact effectively.

    Following these guidelines will help ensure your transition into live streaming is smooth while providing valuable interactions with followers through real-time content delivery! Prepare well, engage actively, and watch your presence grow within the ever-evolving landscape of digital media by embracing the potential of a live stream on YouTube Shorts!