The surge in live streaming highlights the growing need for secure platforms that prioritize privacy and exclusivity. Businesses hosting events or individuals sharing moments now seek tailored solutions. This article uncovers the best private streaming platforms for streamers in 2025, each offering advanced features to protect your content.
Netflix is one of the best streaming service with offers endless streaming of TV shows, movies, and comedy specials. It also features a wide range of original content. Twitch, meanwhile, is one of the most popular streaming platforms, especially for gaming.
From security measures to customization options, we will explore what sets these platforms apart. Get ready to find the ideal service that ensures your content remains accessible only to your intended audience!
1. Eklipse Private Stream – Best Private Streaming Platform for Gamers
What is Eklipse?
For gamers who want to keep their gameplay private without the distractions of a live audience, Eklipse’s Private Stream feature offers the perfect solution. Unlike traditional live streaming platforms that come with audience interactions and feedback, Eklipse allows you to record your gaming moments in a completely private setting.
Key Features:
Stream Without Distractions: Enjoy uninterrupted gaming, free from chat and comments.
Premium Streaming Quality: Offers sharp, up-to-1440p resolution with no compression.
Automatic Stream Processing:Eklipse automatically processes your streams once you’re done.
Optimized Storage: Records are stored locally to keep your device free from excess storage use.
Accessible to All Games: Designed for all kinds of gameplay.
Who is Eklipse Private Stream For?
Solo Gamers
Former Streamers/Ex-Content Creators
Content Creators Seeking Privacy
Competitive Grinders
Beta Testers/Explorers
Pricing: Private Stream is available for Premium users who get full access to all its features. Free users can try it with limited access.
Strengths:
Focused, audience-free gaming experience.
High-quality streaming with no compression.
Instant replay available for review.
Weaknesses:
Available only to Premium users.
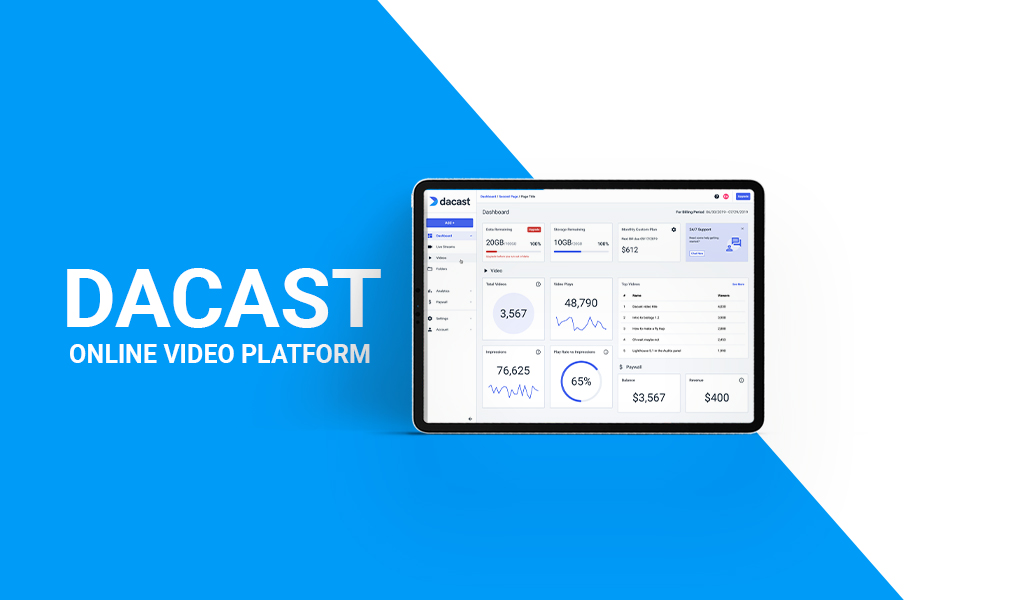
2. Dacast – Best Private Streaming Platform for Security
Dacast stands out as one of the most comprehensive solutions for private streaming. Known for its robust security features such as AES encryption and password protection, it allows seamless broadcasting of live events while maintaining control over content distribution.
3. Vimeo Livestream – Best Private Streaming Platform for Corporate Use
Vimeo Livestream offers a powerful blend of privacy and high-quality streaming capabilities. With extensive privacy controls including domain restrictions and password protection, it’s perfect for corporate meetings or exclusive webinars.
Key Features:
High-definition streaming support
Comprehensive video management tools
Customizable player options
Pricing: Plans range from $25/month (Starter) to $65/month (Advanced).
Strengths: No ads during broadcasts; great analytics.
Weaknesses: Limited storage on lower-tier plans.
4. JW Player – Best Private Streaming Platform for Advanced Video Technology
JW Player is renowned for its advanced video technology combined with strong privacy controls. It supports adaptive bitrate streaming and offers robust DRM options essential for safeguarding sensitive content.
Pricing: Custom pricing available based on requirements.
Strengths: Excellent quality HD streaming; user-friendly interface.
Weaknesses: Higher cost compared to competitors for advanced features.
5. Wowza – Best Private Streaming Platform for Scalability
Wowza is a well-established name in the live-streaming industry known for its reliable performance and scalability. Its strong focus on security makes it a top choice for businesses needing secure event broadcasting.
Key Features:
Supports up to UHD/4K streaming
Cloud management services
Powerful API access
Pricing: Pay-as-you-go model starts at $0/month with $2.50/hour of streaming.
Weaknesses: Complex setup process may deter beginners.
6. IBM Video Streaming – Best Private Streaming Platform for Enterprises
IBM Video Streaming excels in providing enterprise-grade solutions designed specifically for larger organizations needing meticulous control over their streams. With real-time analytics and advanced security features, this platform meets high-level compliance standards.
Weaknesses: Higher price point may not suit smaller businesses.
7. Kaltura – Best Private Streaming Platform for Education
Kaltura offers versatile solutions catering primarily to educational institutions but also suits corporate environments well due to its scalable nature and solid security protocols.
Key Features:
Multi-bitrate adaptive streaming
Extensive integrations with learning platforms
Strong customizability options
Pricing: Pricing varies based on use case; contact sales for quotes.
Strengths: Tailored solutions for educational use; good customer feedback.
Weaknesses: Can be complex due to numerous choices available.
FAQ
1. Which streaming platform pays streamers the most?
These are Qobuz, a French streaming service that offers high-quality lossless audio, and Peloton.
2. What is replacing Twitch?
For gaming creators looking beyond Twitch, platforms like Kick, YouTube Gaming, Facebook Gaming, and Trovo provide alternatives worth exploring
3. Is Streamlabs better than OBS?
Streamlabs is easier to use than OBS, but OBS uses fewer computer processing resources.
Final Thoughts
Choosing the best private streaming platforms for streamers starts with identifying your priorities, like robust security or seamless system integration. Each platform offers unique advantages, catering to diverse needs while safeguarding your content.
These seven platforms combine innovation and privacy to meet modern demands. They ensure your streaming experience stays secure and tailored to your requirements.
Have you ever felt that sinking feeling of potentially losing your precious TikTok videos? With the looming possibility of TikTok ban in the US on January 19, 2025, many users are scrambling to find ways to safeguard their content. The good news is there’s a solution! Eklipse offers a way to back up your TikTok videos.
Eklipse has introduced a feature to help you back up your content before the potential ban. This tool is not only a backup, but can also help migrate your videos to other platforms, ensuring your creative work isn’t lost, and allows you to expand your audience reach. This guide will show you how to use this feature in Eklipse to secure your TikTok videos.
Ready to take control of your TikTok content? Let’s explore how you can use Eklipse to back up and save your videos, making sure your creativity lives on.
Why you should backup your TikTok videos before January 19.
The potential ban of TikTok in the US on January 19, 2025, has caused concern among content creators and users alike. For those who have invested time and creativity into their TikTok accounts, the thought of losing those videos is disheartening. This makes backing up your videos not just a good idea, but a necessity.
Eklipse offers a solution that allows you to easily secure your content and make it accessible even if the ban goes into effect. By using Eklipse, you ensure that your hard work and creative endeavors are protected.
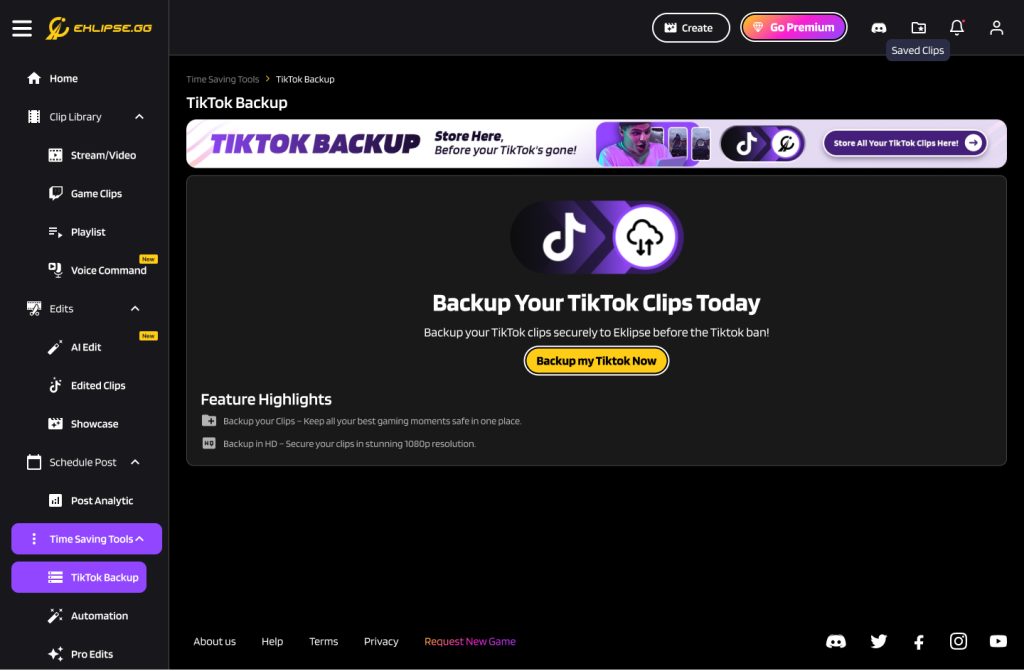
Eklipse is a platform designed with content creators in mind and is equipped with a set of tools to streamline your content management. One of its standout features is the “TikTok Backup” tool, located in the “Time Saving Tools” section.
Eklipse not only backs up your TikTok videos but also provides features to help you view, share, and even download your saved content. The platform aims to make the backup process simple and efficient. It also allows you to migrate your videos to other platforms, so you won’t be limited by the TikTok ban.
Step-by-Step Guide: How to Back Up and Save TikTok Videos Using Eklipse
Time-saving Tools feature in Eklipse to backup TikTok videos. Source: Eklipse
The process of backing up your TikTok videos using Eklipse is straightforward. Follow these steps to ensure your content is safely stored.
Go to Time-saving Tools from the left menu on the Eklipse website.
Select TikTok Backup from the options.
Click the Backup my TikTok Now button to log in.
Enter your TikTok email and password. (Note: This function is only available before the TikTok ban on January 19, 2025).
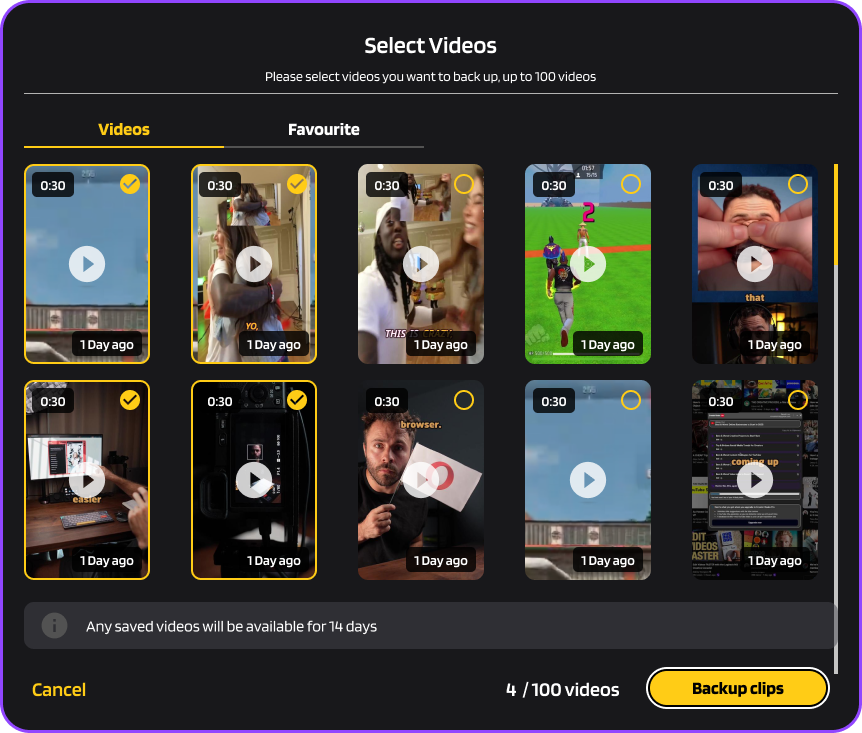
Select the clips you wish to back up.
Hit confirm to begin the backup.
Once connected, Eklipse will display your TikTok videos, including thumbnails, titles, view counts, likes, and comments. Videos that have not been backed up are selected by default for your convenience. Eklipse supports backing up to 50 clips per batch with a maximum migration time of 2 minutes per clip.
After successfully backing up your videos, Eklipse offers several additional features. You can easily view your backed-up videos within the platform. It also provides options to share or download your videos, giving you full control over your content.
If you have more videos to back up, the “Backup TikTok Clips” button will remain available, making it easy to keep your content safe. Eklipse ensures you have multiple ways to access and manage your backed up content, which will be very useful if TikTok gets banned.
Understanding Storage Limitations and Video Deletion
Eklipse has a tiered storage system. For free accounts, videos are stored for 14 days. If you upgrade to a premium account, your videos are stored for up to 90 days. Regardless of your account type, you have the flexibility to delete your backed-up videos at any time. Knowing these storage limitations and deletion options allows you to better manage your content and plan accordingly.
Conclusion
With the potential TikTok ban in the US on January 19, 2025, backing up your videos is more important than ever. Eklipse provides a practical and easy solution for users to save and secure their content.
By following the steps outlined in this guide, you can back up your videos, ensuring they are safe and accessible even if TikTok is banned. Eklipse’s features go beyond backup by letting you view, share, and download your videos, as well as enabling automatic migration to other platforms. Make sure you utilize these features before the deadline to safeguard your hard work and creativity. Visit Eklipse now to get started!
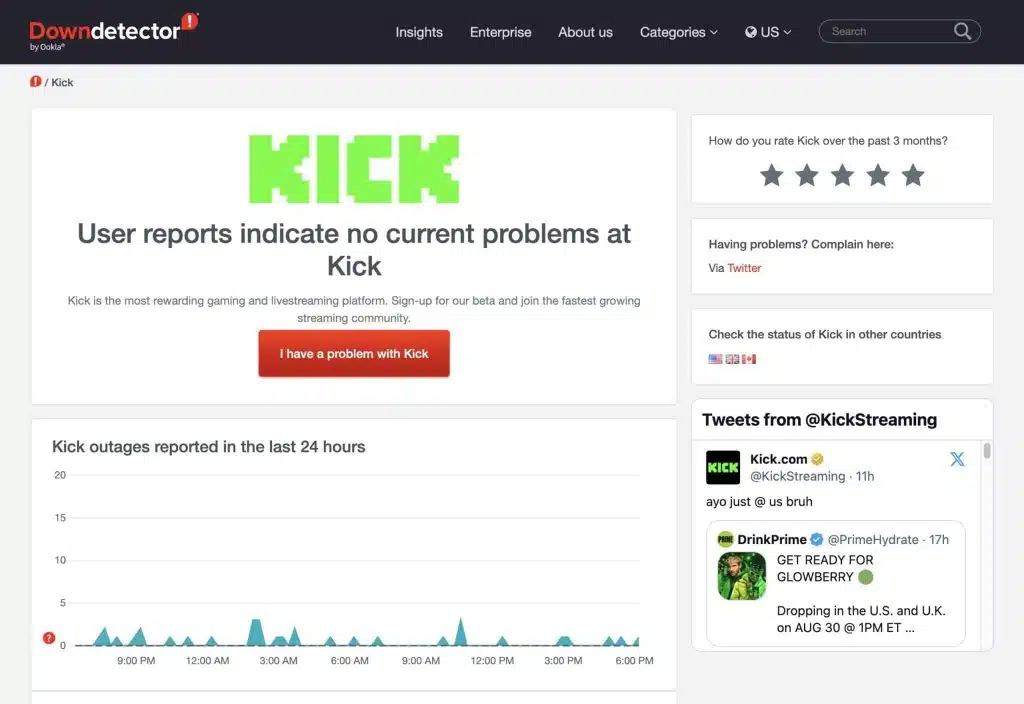
Tired of asking, “Why does my Kick Stream keep going offline?”. Several factors may affect your stream without you realizing it, such as settings that don’t meet Kick’s requirements or an unstable internet connection. Experiencing these disruptions while streaming on Kick can be frustrating, but you’re certainly not alone.
Don’t worry! We’ve compiled several easy tips to fix Kick streaming issues. With these tips, you can quickly resolve common problems and get back to enjoying uninterrupted streaming. Let’s dive in!
Inaccessibility or slow performance on Kick.com can result from server issues or scheduled maintenance on the platform’s end.
2. Network Inconsistencies
If you experience “Kick not working” errors, it could be due to your network connectivity or internet service provider. A stable and fast internet connection is crucial for smooth streaming.
3. Browser-Related Complications
An incompatible web browser or outdated version of Kick.com might cause the “Kick not working” problem. Try clearing your browser’s cache or using a different browser to see if the issue persists.
4. Device-Related Glitches
Sometimes, the issue is specific to the device you’re using. If you encounter problems on one device, try streaming on another to identify if it’s device-related.
If you’re experiencing problems streaming on Kick, this guide offers simple solutions to restore smooth streaming. From checking server status to clearing your browser cache, these steps can help troubleshoot and fix common Kick streaming issues effectively.
1. Verify Kick.com Server Status
Source: Pletaura
First, check Kick’s online server status. A server issue could be the root cause. Resources like Downdetector provide real-time service reports. Kick’s official social media channels (e.g., X (formerly Twitter), or others if applicable) are also good sources for outage updates. If the site works for others but not you, the problem might be your local network, browser, or your Kick stream settings.
2. Check Internet Connection
Ensure a stable internet connection. Poor connectivity can cause streaming problems. Try switching to a different network (e.g., Wi-Fi to Ethernet, or vice-versa) if possible. For mobile users, ensure a strong cellular or Wi-Fi signal.
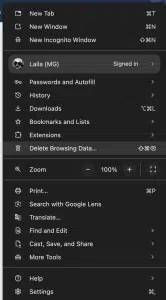
Clearing your browser’s cache and cookies often resolves streaming issues. The process varies slightly between browsers. Generally, look for “Clear Browsing Data” or similar options within your browser’s settings or history menu. Select a relevant time range and the data types to clear (cache, cookies, etc.).
Delete your browsing data to fix Kick streaming error source: Eklipse
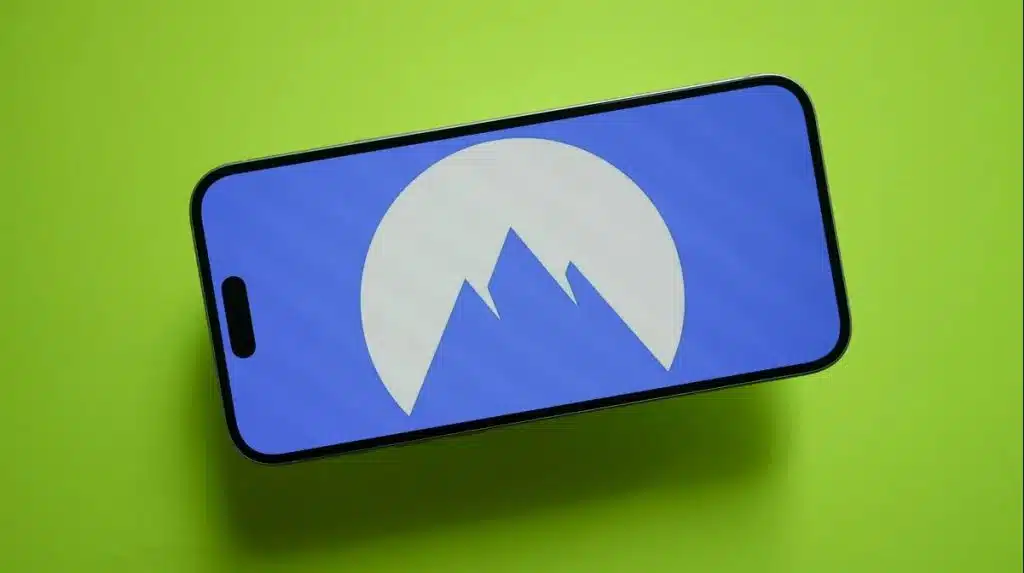
4. Use a VPN (Virtual Private Network)
Source: ZDNet
A VPN can sometimes bypass location restrictions and improve connection stability. If other troubleshooting steps fail, consider trying a VPN. Be aware that using a VPN might have privacy implications and may not be allowed in all regions.
5. Reboot Your Device
Restarting your device can resolve minor software glitches that might interfere with streaming. This simple step is often effective.
6. Update Your Browser
An outdated browser can cause compatibility issues with modern websites like Kick. Updating your browser ensures you have the latest features, performance improvements, and security patches. Check your browser’s settings or “About” section for updates.
7. Disable Browser Extensions
Browser extensions, especially ad blockers or privacy tools, can sometimes conflict with streaming platforms. Temporarily disable extensions to see if they’re causing the issue. If so, reactivate them one by one to identify the culprit.
8. Refresh Kick Website
After troubleshooting, refresh the Kick webpage to establish a new connection and apply any changes you’ve made. Refreshing also helps to remove any corrupted or cached elements that might be causing issues.
9. Contact Kick Support
If you still can’t watch Kick stream, contact Kick support directly for personalized assistance. Look for contact information on the Kick website or app.
10. Enjoy Smooth Streaming on Kick.com
These steps should help resolve most “Kick not working on Chrome” issues. For optimal performance, ensure your device and software are up-to-date and your internet connection is stable.
Verify that your internet connection is stable and reduce the video quality in the stream settings to prevent the Kick stream keeps buffering issue.
2. How do I fix bad stream quality?
Ensure you’re streaming at the correct resolution for your internet speed. Try refreshing the page or switching to a different browser for better performance.
3. Why does my streaming keep stopping?
This could be due to a slow internet connection or server issues on Kick. Try restarting your device or adjusting your video settings to improve streaming stability.
Final Thoughts
Those are the 10 easy steps to fix Kick streaming issues. You can start by checking the Kick.com website server, verifying your connection strength, and clearing your browser cache to ensure a smoother stream. If the issue persists, we recommend contacting the Kick team as soon as possible for further assistance.
For streamers seeking to elevate their content, Eklipse offers excellent tools to enhance and share highlights. This platform simplifies creating, editing, and showcasing your best moments. Sign up today and explore its powerful features to take your streaming game to new heights.
Maximize your Black Ops 6 rewards—Create highlights from your best gameplay with with Eklipse
Eklipse help streamer improve their social media presence with AI highlights that clip your Twitch / Kick streams automatically & converts them to TikTok / Reels / Shorts
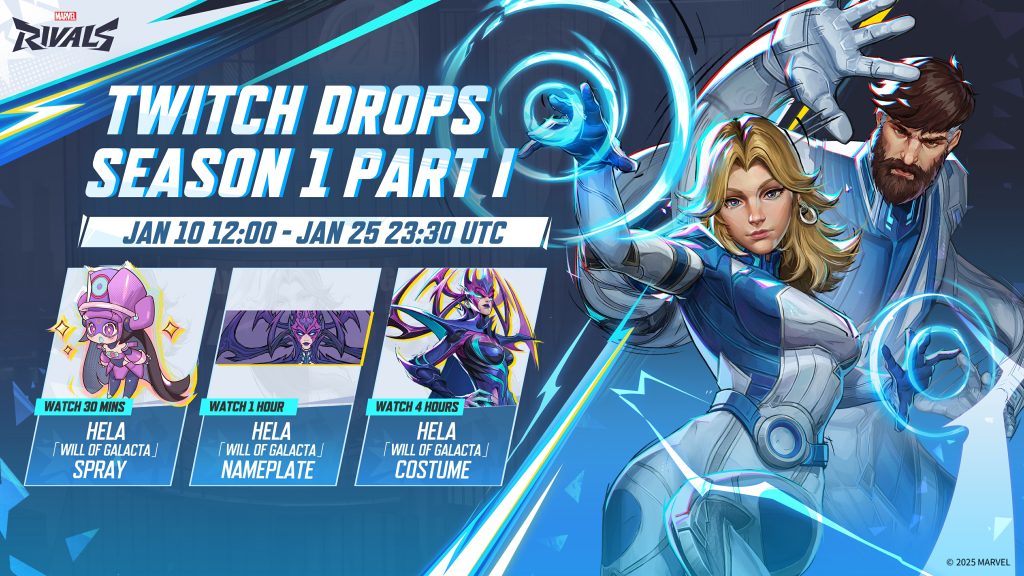
Ready to unlock a whole new dimension of the Marvel Rivals experience? Connecting your Marvel Rivals account to Twitch and Discord isn’t just about ticking boxes; it’s your gateway to exclusive rewards, exciting community events, and deeper engagement with fellow players. Whether you’re dreaming of becoming a streaming sensation, diving into challenging quests, or simply joining the fun, linking your accounts is a straightforward way to elevate your gaming experience.
This guide simplifies the process, cutting through the technical jargon, so you can connect with ease and get right back to the action.
Earn Marvel Rivals Season 1 Twitch Drops by linking your Twitch account!
Why bother connecting your accounts? Let’s be real, it’s not just about the bragging rights. There’s a whole host of perks waiting for you.
Unlock Rewards: Imagine snagging rare in-game items just by watching your favorite streamers or participating in Discord events! That’s the magic of linking your accounts. Get ready to gain access to Twitch Drops and Discord-exclusive quests, making your hero even more awesome.
Create Stunning Highlights with Eklipse.gg: Ever pulled off an epic move and wished you had it on camera? With Eklipse.gg, you can! Easily capture and edit your best Marvel Rivals moments to share on Twitch and Discord. Forget complicated editing software—Eklipse automatically transforms your gameplay into professional-quality clips, perfect for streaming and engaging with the community. It’s like having your own personal hype man.
Community Engagement: The heart of any great game lies in its community. Connect with the vibrant Marvel Rivals community on Discord, join lively discussions, and stay updated with all the latest news. It’s where the real conversations happen.
Streamline Gameplay: If you’re looking to share your skills with the world, enjoy seamless integration with Twitch for enhanced visibility and immersive gameplay. Get ready to show off your best moments!
Steps to Connect to Twitch
Source: Games Radar
Ready to get your Twitch account linked? Here’s the simple step-by-step guide to get you connected and earning those drops:
Visit the Marvel Rivals Website: Head to www.marvelrivals.com, the official site for all account settings and integrations. This is your mission control for connecting your accounts.
Log In to Your Account: Click Log In in the top-right corner and use your credentials for your gaming platform (Steam, PlayStation, Xbox, or Epic Games Store). Make sure you’re logged into the account you use to play Marvel Rivals.
Access Account Settings: After logging in, select My Account from the dropdown menu under your profile name. This is where the magic happens.
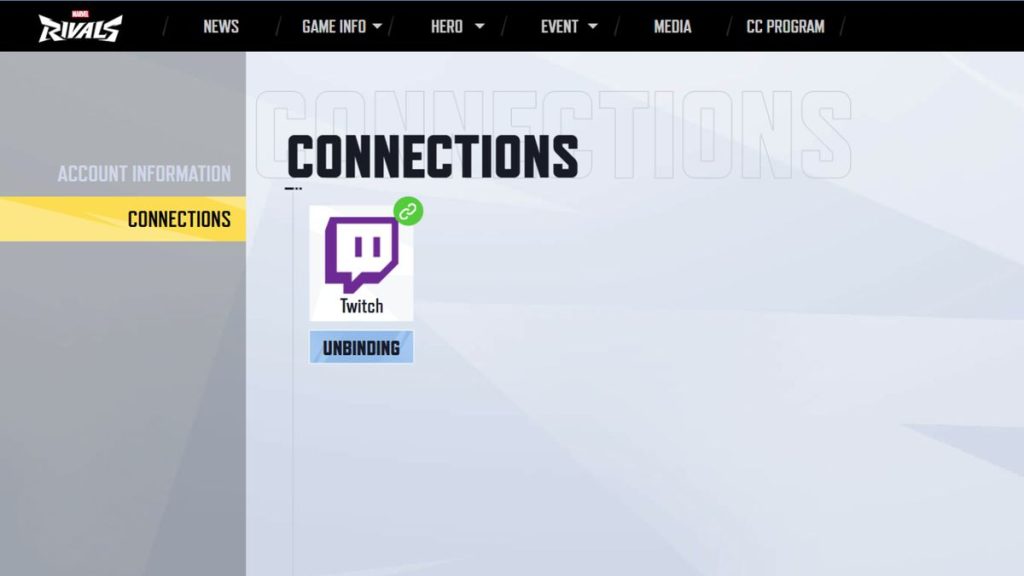
Navigate to Connections: In the settings menu, locate and click the Connections tab. We’re getting closer!
Link Your Twitch Account: Find the Twitch logo and click Connect. Log in to your Twitch account and click Authorize to grant access. It’s time to make things official!
Confirm Your Connection: A success message will confirm that your Twitch account is now linked to Marvel Rivals. Get ready for those sweet rewards!
Steps to Connect to Discord
Linking up with Discord is just as simple, and there are two ways to do it. Choose the method that works best for you:
Method 1: In-Game (Preferred)
This method is the quickest and most reliable, bringing you straight to the action:
Launch the Game: Open Marvel Rivals on your preferred platform. It’s time to dive back into the game!
Open Options Menu: Access the Options menu from the main screen or in-game menu.
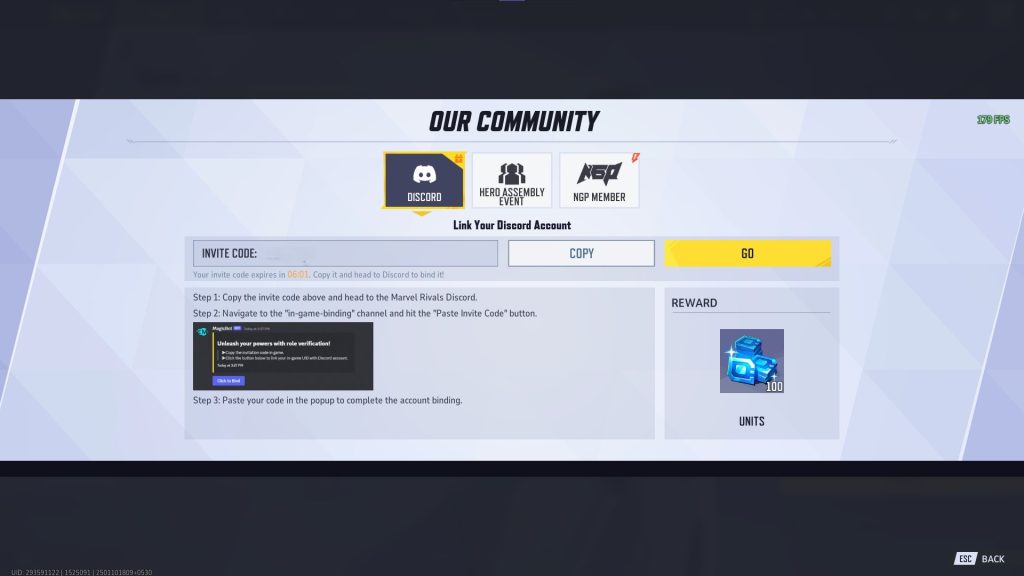
Generate a Binding Code: Navigate to Community > Discord to generate a unique code for linking your account. Remember, the code will expire after a short time, so be ready to use it!
Join the Marvel Rivals Discord Server: Use this link to join the official server: discord.gg/marvelrivals. Get ready to mingle with fellow heroes!
Enter the Code: Go to the #in-game-binding channel in the server and paste your binding code. Press Enter to complete the process. It’s like giving the secret handshake.
Verify the Connection: Your accounts will link automatically after a successful code entry. Congratulations, you’re officially connected!
Method 2: Via Website (Alternative)
If needed, linking through the Marvel Rivals website is also possible, but the in-game method is faster and more reliable. Consider this your backup plan if the in-game method doesn’t work for you.
Exclusive Rewards
It’s not just about linking your accounts, it’s about what you get in return. Here’s a taste of the goodies that await you:
Claim your rewards via the Twitch Inventory page after meeting the viewing requirements. It’s like a treasure hunt, but without the map!
Discord Quests
Participate in special in-game quests by linking your Discord account. For example, playing for 15 minutes during an event can earn you the Jeff the Land Shark avatar decoration. Stay active in the server to track upcoming rewards and opportunities. It’s all about being in the know and participating!
Troubleshooting Tips
Sometimes things don’t go as planned. Here are a few tips to tackle common connection issues:
Expired Binding Codes: Generate a new code in-game if the previous one expires. They’re like cookies, they expire fast!
Connection Issues: Ensure a stable internet connection and double-check your credentials. Sometimes the simplest solutions are the best.
Authorization Problems: Make sure you grant all required permissions during the linking process. Don’t be stingy with those permissions; it’s all part of the process!
Community Engagement and Future Benefits
Connecting your Marvel Rivals account to Twitch and Discord isn’t just about the rewards, it’s about the future. You’re also taking your content creation to the next level using Eklipse.gg. This powerful tool automatically highlights your best in-game moments, making it easier than ever to share professional-quality clips across platforms. Whether you’re showcasing epic plays or hilarious moments, Eklipse ensures your content shines.
Conclusion
Don’t miss out on the rewards and opportunities that come with connecting your Marvel Rivals account to Twitch and Discord. From Twitch Drops to exclusive Discord quests, these integrations enhance your gameplay and community involvement. Follow this guide, link your accounts today, and take your Marvel Rivals journey to the next level. It’s time to unlock your full potential!
Eklipse.gg is an AI-powered tool that simplifies editing and creates Marvel Rivals clips. Save up to 90% of your editing time by generating viral clips effortlessly.Try Eklipse for free and access expert tips on their blog to enhance your streaming.
Marvel Rivals has recently gained significant traction on TikTok, with various clips showcasing gameplay, highlights, and community challenges going viral. The game’s fast-paced action, unique hero abilities, and entertaining moments have resonated with the TikTok audience, making it a trending topic on the platform. This surge in popularity can be attributed to several key factors, which we will explore in this article.
So, why is everyone suddenly talking about Marvel Rivals on TikTok? It’s not just luck; a few specific things have really caught fire, creating the perfect storm for viral content. Let’s dive into the core reasons behind this trend.
Engaging Gameplay
Ever seen a video that just makes you go “Whoa!”? Marvel Rivals is full of those moments. It’s not just about winning, it’s about how you win. The game’s dynamic, strategic gameplay translates exceptionally well into short, exciting clips perfect for TikTok.
The unique mechanics, such as hero combinations and epic finishing moves, create visually appealing moments that are easy to share. Players often highlight clutch plays or intense battles, captivating viewers with the fast-paced action. It’s these shareable, “did you see that?!” moments that are driving the hype.
Humor and Entertainment
Let’s be real, sometimes games can be a bit serious. But that’s not the whole story with Marvel Rivals, and TikTok knows it! Humor plays a significant role in why Marvel Rivals clips go viral. Many videos showcase funny or unexpected moments, from glitches to humorous interactions between characters.
These clips not only entertain existing players but also intrigue potential newcomers who are drawn to the game’s lighter, comedic side. It’s those “wait, what just happened?” moments that stick in our minds and get shared.
Community Challenges and Trends
TikTok isn’t just about watching, it’s about participating! The platform thrives on trends, and Marvel Rivals has capitalized on this by encouraging community-driven challenges. These challenges often involve showcasing specific skills, unique character combinations, or creative gameplay strategies.
The user-generated content further amplifies the game’s visibility as players eagerly participate and share their contributions. It’s about being part of something bigger, a collective experience that everyone can get in on.
Influencer Marketing
Let’s face it, we all look up to certain creators, and TikTok is no different. Popular TikTok creators like SgtFrost (@sgtfrost7) and Stylosa (@stylosaul) have played a pivotal role in promoting Marvel Rivals.
SgtFrost’s gameplay breakdowns and Stylosa’s reaction to the Season 1 trailer have generated thousands of likes and comments, exposing the game to a broader audience. Their engagement demonstrates the power of influencer marketing in driving game trends. It’s not just about ads, it’s about genuine excitement from people we follow.
Accessibility and Shareability
The magic of TikTok lies in its simplicity. TikTok’s focus on short-form video content makes it an ideal platform for sharing gaming clips. Marvel Rivals’ integration with TikTok allows players to effortlessly share in-game highlights.
Despite initial technical issues, this feature has since become a valuable tool for boosting the game’s presence on social media. The platform’s easy-to-use editing tools also encourage creativity, enabling players to add music, captions, and effects to their clips. It’s all about making it easy to show off your best moments.
Okay, let’s get a bit more analytical. Beyond just the obvious fun, there are some real numbers and data points to understand the scale of the Marvel Rivals trend. Let’s break it down.
Statistical Context
When we talk about going viral, numbers really tell the story. The hashtag #MarvelRivals has garnered over 20 million views on TikTok, with individual clips like SgtFrost’s gameplay breakdown achieving 13.1K likes and 848 comments. This level of engagement highlights the game’s growing popularity and its resonance with the TikTok audience. These numbers are not just random; they’re proof of how well the game is connecting with people.
Developer Insights
Even the game developers are taking note of TikTok’s power. According to Marvel Rivals’ community manager, “TikTok’s virality has encouraged us to engage players with more shareable in-game content, which helps in reaching a broader audience and fostering community growth.” It’s a win-win: players get to share their fun, and the game gets more attention.
Comparisons to Other Games
What makes Marvel Rivals different? While games like Fortnite have dominated TikTok with dances and emotes, Marvel Rivals takes a different approach, focusing on action-packed gameplay clips and unique hero moments. This strategy sets it apart and attracts a distinct audience segment. It’s not about trying to be like everyone else; it’s about being unique.
Role of Player Creativity
The players are the real stars of this show. Standout player contributions have significantly driven the trend. For instance, a fan-created Marvel Rivals montage featuring Scarlet Witch’s ultimate move synced to trending TikTok audio amassed over 500K likes. These creative efforts demonstrate the game’s potential as a canvas for user expression. The players are not just playing, they’re creating art.
Potential Challenges
Even the best trends have their limits. Despite its success, Marvel Rivals must be cautious about oversaturation. Relying too heavily on TikTok trends can backfire if content starts feeling inauthentic or repetitive. Maintaining a balance between organic content and strategic promotion is essential. It’s about riding the wave without wiping out.
Projections and Predictions
So, what’s next for Marvel Rivals on TikTok? With Season 2 on the horizon, the release of new heroes and maps is expected to spark fresh TikTok trends. Developers may also explore collaborations with influencers and themed community challenges to sustain engagement. The future is all about keeping the game fresh and the content engaging.
Practical Tips for Players
Ready to join the TikTok party? If you’re looking to create your own viral Marvel Rivals clip on TikTok, consider these tips:
Focus on Unique Moments: Capture gameplay that showcases impressive abilities, creative strategies, or funny interactions. It’s about standing out!
Sync with Trending Audio: Use popular TikTok sounds to enhance your clip’s appeal. Music is key!
Leverage TikTok Highlight Editing Tools: Add captions, effects, and transitions to make your clip more engaging. Make it shine!
Participate in Challenges: Join trending Marvel Rivals challenges to increase visibility and connect with the community. Join the fun!
For players looking to elevate their content effortlessly, tools like Eklipse.gg can be invaluable. Eklipse automates the process of creating shareable gaming highlights by detecting your best in-game moments. With easy integration for TikTok, it enables you to craft professional-quality clips in just a few clicks. Whether you’re showcasing epic plays or hilarious moments from Marvel Rivals, Eklipse ensures your content stands out and keeps up with TikTok trends. It’s about working smarter, not harder.
Impact on the Game and Community
This isn’t just about videos, it’s about the community. The TikTok trend has had a real impact on the game’s overall trajectory. Let’s see how.
Increased Visibility
Trending clips on TikTok have significantly boosted Marvel Rivals’ visibility, introducing it to a diverse audience beyond its core player base. This exposure has led to an influx of new players eager to experience the game’s unique features. It’s all about getting the word out to more people.
Community Growth
The TikTok trend has fostered a thriving community around Marvel Rivals. Players engage with each other through comments, shares, and duets, building a sense of camaraderie and shared enthusiasm for the game. It’s about making new friends and being part of something awesome.
Feedback and Discussion
TikTok’s interactive nature provides a platform for players to discuss strategies, share tips, and offer feedback. This level of engagement helps developers understand player preferences and fosters continuous improvement of the game. It’s a direct line of communication between the players and the creators.
Conclusion
The convergence of engaging gameplay, humorous content, community challenges, influencer marketing, and TikTok’s platform dynamics has propelled Marvel Rivals clips to viral status. This trend has not only increased the game’s visibility but also strengthened its community, ensuring continued success and growth. As Marvel Rivals continues to evolve, its presence on TikTok will likely remain a key factor in its ongoing popularity. This isn’t just a fad, it’s a new era of gaming.
For those ready to join the trend, Eklipse.gg is the ultimate tool to create standout content effortlessly. Elevate your Marvel Rivals gameplay, capture your best moments, and make a mark on TikTok with Eklipse. It’s time to get your name out there!
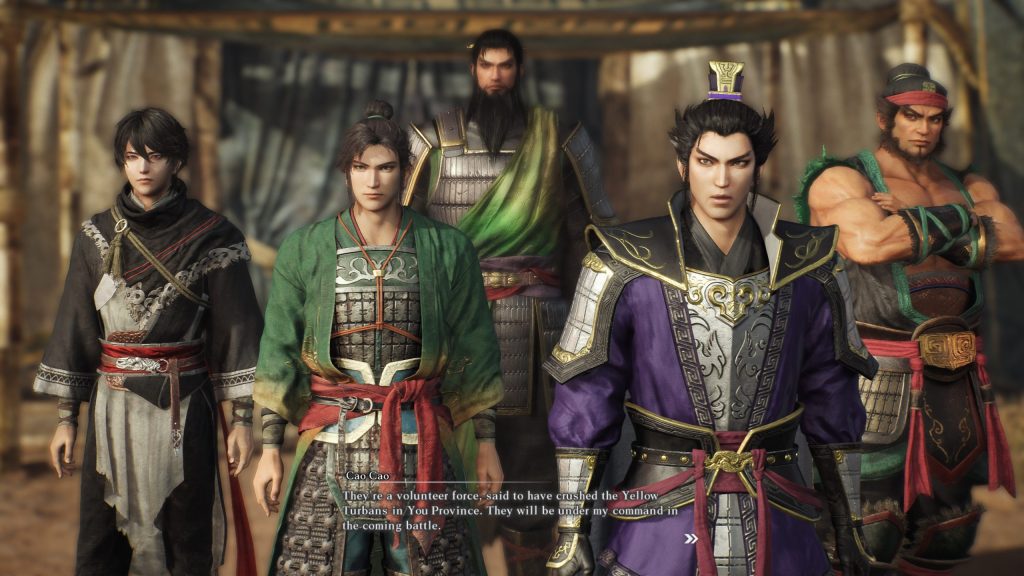
Dynasty Warriors Origins has just stormed onto the gaming scene, and players and streamers alike are diving into its epic battles and over-the-top action. But with so much happening on screen, capturing those perfect, shareable moments can be a real challenge. Manually clipping those intense fights and hilarious glitches can feel like a chore, taking up precious gaming time. But what if there was a way to effortlessly capture and share those highlights?
This article explores how AI is changing the game for highlight clipping, saving time and making the best moments shine. Let’s dive into how to easily create shareable clips using AI.
Why Highlight Clips Matter for Dynasty Warriors Origins?
Dynasty Warriors Origins – Source: IGN
Highlight clips are more than just bragging rights; they’re a way to connect with other players and relive the thrill of the game. For Dynasty Warriors Origins, with its chaotic battles and over-the-top action, these clips can truly show off the unique gameplay. Capturing those moments is vital for:
Preserving Epic Moments: Keep a record of the most impressive plays and victories.
Sharing with Friends: Show friends and the gaming community the best moments.
Boosting Social Media Engagement: Create content that resonates and expands the gaming reach.
Creating a Personal Gaming History: Keep the amazing journey in Dynasty Warriors Origins.
Traditionally, creating these clips was a pain. It meant spending significant time recording, reviewing, and editing footage with complex software. This often discouraged many players from sharing their gameplay. But AI is changing this.
How AI Streamlines Highlight Clipping
AI technology is revolutionizing how games are captured and shared. It tackles the challenges of manual editing with automated solutions, making the process quick and easy for everyone. Here’s how AI is streamlining highlight clipping:
Automated Moment Detection: AI automatically identifies key moments such as multi-kills, boss battles, or funny in-game glitches.
Rapid Clip Compilation: AI can quickly cut and compile highlights, saving hours of manual editing.
Simplified Editing Process: AI tools make editing simple, eliminating the need for advanced editing skills.
With AI, you can now spend less time editing and more time playing the games you love.
Step-by-Step Guide to Clipping Dynasty Warriors Origins Highlights with AI
Source: WCCFTech
Let’s walk through the simple steps of using AI to create highlight clips from Dynasty Warriors Origins.
1. Select an AI-Powered Tool
First, choose an AI-powered platform that suits the needs. While several options are available, Eklipse stands out for its comprehensive support for gaming content, user-friendly interface, and ability to convert clips for platforms like TikTok, Reels, and YouTube Shorts. Eklipse does a great job and even has automatic meme integrations.
2. Record Your Gameplay
Record your Dynasty Warriors Origins gameplay as usual, making sure there is good quality footage. The clearer the recording, the better the AI can detect those crucial moments.
3. Upload Your Video
Upload the recorded gameplay to the chosen AI platform. Eklipse is a great option for this step. The AI will then analyze the video.
4. Let the AI Work Its Magic
The AI will now analyze the video, automatically spotting the exciting moments based on in-game events. This includes impressive kills, victories, and even the hilarious glitches that might be encountered. It’s pretty neat to see it pick out the moments that were not realized were highlight-worthy.
5. Customize Your Clips (Optional)
Most platforms allow customization of the clips after the AI does its initial cut. This means adding captions, stickers, trimming the clips, and incorporating transitions. This feature can help to make the clips a bit more personalized.
6. Download and Share
Once satisfied with the edits, download the highlight clips and share them on social media platforms. Now the amazing gameplay will be available to all friends.
Using AI for clipping game highlights isn’t just a trend; it’s a significant step forward in gaming content creation. The main benefits include:
Saves Time: AI tools, like Eklipse, can reduce editing time by an average of 70%, as claimed by the company. This allows more time for actual gaming instead of tedious editing.
User-Friendly: These tools are intuitive, requiring no prior editing knowledge. Even beginners can create professional-looking clips.
Accurate Moment Detection: The AI excels at pinpointing key in-game moments, ensuring no highlight plays are missed.
Focus on Gaming: With AI taking over the editing, there can be a focus on enjoying the game and sharing the best moments without the hassle of complicated software.
Try Eklipse for Effortless Highlight Clipping
If you’re looking for the easiest way to create highlight clips, Eklipse is a top choice. It’s not just about automation; Eklipse is designed specifically for gamers. Its advanced AI is trained to recognize the nuances of gaming footage, making it more accurate at identifying the best moments compared to generic video editors.
Eklipse excels at providing a seamless experience by automatically converting clips for various social media platforms like TikTok, YouTube Shorts, and Instagram Reels, ensuring your content is ready for sharing without additional steps.
Additionally, features like automatic meme integration and voice command support further streamline your workflow. For gamers who want to share their content quickly and efficiently, Eklipse offers a comprehensive solution focused on ease of use and high-quality results.
While Eklipse offers many advantages, the automatic clipping feature for Dynasty Warriors Origins is not yet available. Stay tuned for updates as Eklipse continues to expand its game support.
Conclusion
In conclusion, using AI to clip your game highlights is a game-changer, simplifying the process and saving valuable time. Eklipse stands out as a powerful tool in this space because of its specific focus on gaming content, user-friendly interface, and innovative features that make highlight clipping incredibly efficient.
Ready to experience the future of highlight clipping? Try Eklipse today and transform your gaming moments into shareable content! By utilizing Eklipse, you are not just clipping videos; you are enhancing your overall gaming experience. Embrace the power of AI to elevate your gameplay sharing experience and connect with other gamers through compelling highlights.
With free Twitch overlay templates, you can enhance the visual appeal of your Twitch stream without spending any money. These templates offer a variety of styles and themes, allowing you to create a unique and professional look for your broadcast.
You can get free Twitch overlay templates through platforms like StreamElements Super Themes, Coffee Inn: Free Neon Stream Overlays, or Strike: Clean Red Free Stream Overlay.. From sleek minimalist designs to dynamic animations, Free Twitch Overlay Templates help make your stream more engaging and memorable for viewers.
Canva provides a range of customizable free Twitch overlay templates, making it an ideal choice for streamers. With this Twitch overlay maker, streamers can improve their broadcast’s visual quality without spending extra money.
Key Features:
Canva’s intuitive design platform allows users to create overlays without extensive graphic design experience.
Users can modify colors, fonts, and layouts to match their personal branding.
There are numerous templates available for different streaming needs.
Canva provides a wide range of graphics and elements that can be incorporated into overlays.
You’ll be able to effectively customize your Twitch overlay templates using Canva’s versatile toolset designed specifically for creators like yourself
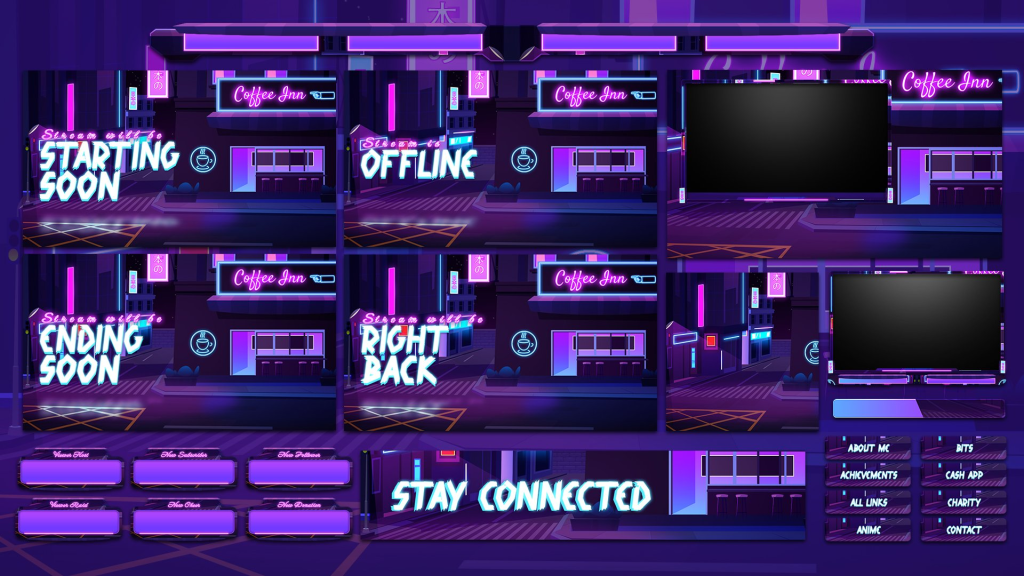
2. Coffee Inn: Free Neon Stream Overlays
Source: Hexeum
The Coffee Inn overlay offers a visually captivating urban café theme with neon aesthetics. This overlay is ideal for streamers seeking a relaxed, lo-fi vibe that resonates with audiences looking for chill streams. Its neon elements and warm tones create a welcoming atmosphere.
Key Features:
20 customizable Twitch panels.
Ready-to-use screens for intermission, BRB, and stream starting.
Includes a webcam overlay and an offline banner.
Photoshop source files are provided for additional personalization.
Compatible with OBS, Streamlabs, and other streaming platforms, this overlay is an excellent choice for streamers who value creative design and easy setup.
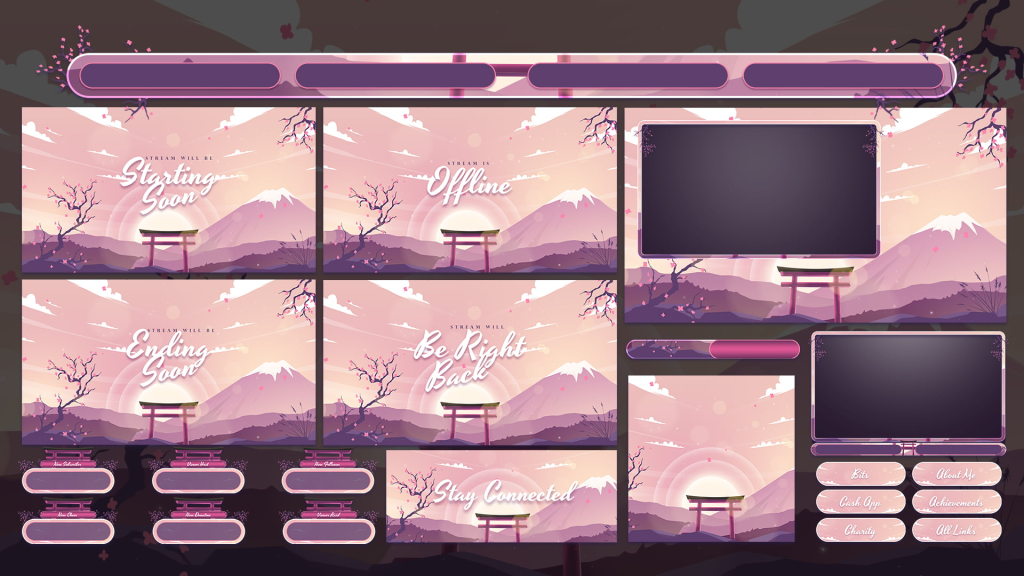
3. Kosuke: Free Japanese Stream Overlay
Source: Hexeum
Kosuke offers a Japanese-inspired design, ideal for anime lovers or streamers wanting to showcase Japanese culture. Its detailed features and sleek layout make it a standout among free animated stream overlays.
Key Features:
Available in six different languages, including English and Japanese.
Includes alerts, profile picture frames, and other essentials.
Sleek design elements that blend modern and cultural aesthetics.
Works seamlessly with Twitch, YouTube, and Facebook Live.
With its diverse language options and culturally rich theme, Kosuke is a versatile choice for global streamers.
Strike’s minimalist red design offers a clean and professional look, suitable for streamers who want simplicity without sacrificing style. This overlay emphasizes clarity and functionality, making it perfect for competitive gaming or casual streaming.
Key Features:
Multiple language options.
Webcam frames, alerts, and integrated chat boxes.
A bold red theme that stands out without being overwhelming.
Easy-to-install files compatible with major streaming platforms.
Strike’s simple yet effective design ensures your content remains the focal point while maintaining a polished appearance.
5. Incision: Complete Animated Overlay Pack
For streamers seeking a fully animated overlay, Incision delivers a cutting-edge experience. Its dynamic elements and modern design make it ideal for tech-savvy creators aiming to captivate their audience.
Key Features:
Interactive widgets for viewer engagement.
Animated screens, including stream starting and intermission.
One-click setup links for Streamlabs and OBS.
High-quality visuals tailored for professional-grade streams.
Incision’s animated features provide an immersive experience that keeps viewers engaged throughout your broadcast.
6. StreamElements Super Themes
StreamElements offers a wide range of free overlay templates, designed to fit various streaming styles and themes. These templates include everything from futuristic sci-fi aesthetics to playful cartoon designs, catering to all kinds of streamers.
Key Features:
Fully customizable overlays with alerts and widgets.
Comprehensive packages, including chat boxes, panels, and more.
Easy integration with Twitch, YouTube, and Facebook Live.
Regularly updated designs to keep your stream fresh and relevant.
StreamElements’ versatility and comprehensive approach make it a favorite among streamers looking for a one-stop solution.
How to Download and Install Free Overlays
Downloading and installing free stream overlay templates for Twitch is straightforward:
Choose a Template: Select an overlay from trusted sources like StreamElements, Canva, or Nerd or Die.
Download the Files: Follow the download instructions on the respective platform. Most overlays come in ZIP or PSD formats.
Integrate with Streaming Software:
For OBS Studio: Import the overlay files as scenes or sources.
For Streamlabs: Use the drag-and-drop feature to set up your overlays.
Customize Your Setup: Adjust colors, text, and layouts to align with your branding.
With just a few steps, you can transform your Twitch stream into a professional-grade broadcast.
Final Thoughts
Free Twitch overlay templates provide an easy and effective way to improve your channel’s look and engage viewers. Whether it’s the vibrant Coffee Inn design or the sleek Strike layout, there’s a perfect template for every style.
By selecting the best free Twitch overlay templates and customizing them to match your brand, you can create a standout stream. Explore free Twitch overlay templates download options today and give your channel a polished, professional appearance.
Maximize your Black Ops 6 rewards—Create highlights from your best gameplay with with Eklipse
Eklipse help streamer improve their social media presence with AI highlights that clip your Twitch / Kick streams automatically & converts them to TikTok / Reels / Shorts
Subtitle editor online have gained significant popularity for adding captions to videos. These tools enable users to create, edit, and integrate subtitles directly from their browsers. By utilizing an Online Subtitle Editor, you can enhance the accessibility of your videos, making them easier to understand for a broader audience.
This article explores the top 5 Online Subtitle Editors, highlighting the unique features, advantages, and disadvantages of each. Whether you’re a filmmaker, content creator, or someone simply looking to add captions, these tools provide a convenient and effective solution for your video needs.
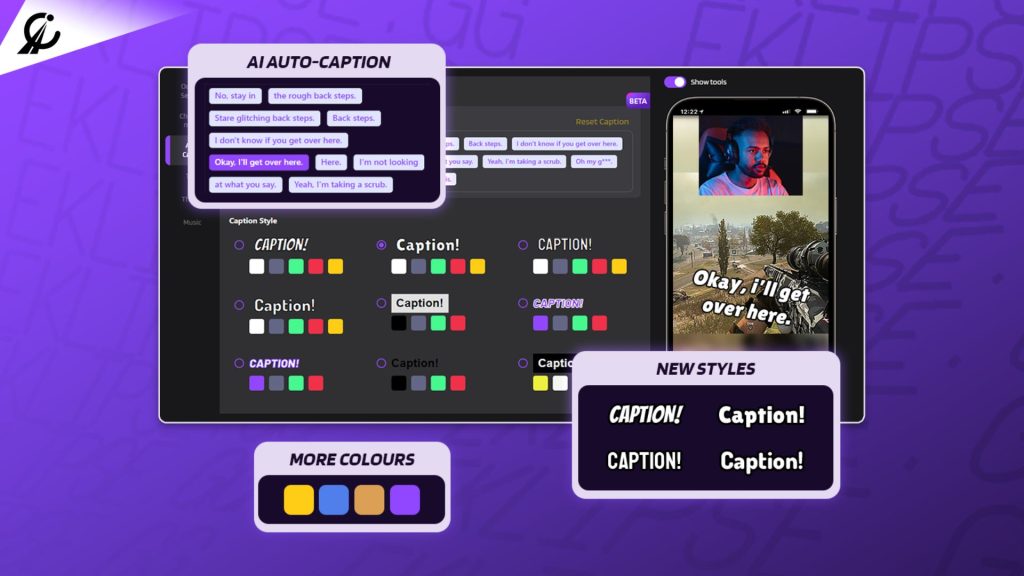
If you’re in search of a tool that can assist you in adding subtitles to your video without any difficulties, Eklipse is worth a try. Although Eklipse is not specifically designed as a subtitle editor, it functions as an AI-based clip creator that highlights the best parts of your stream.
However, it does offer an automatic captioning feature that allows you to add subtitles with 80% accuracy, particularly if you convert your clip to formats such as TikTok, Reel, or YouTube Shorts. With Eklipse, there’s no need to manually design the text, as it takes care of everything for you. The drawback of this feature is that it is only available in English and only applicable to videos in a vertical format.
Key features:
Captioning Feature: Use automatic captioning to add subtitles with 80% accuracy and convert your clip to various formats.
Automatic Highlights: Generate clips from your Twitch, YouTube, and Facebook streams/VODs using AI.
Multiple Game Support: Works with over 20 popular games including Call of Duty, Fortnite, and Apex Legends.
Social Media Sharing: Convert and share highlights directly to TikTok, YouTube Shorts, Instagram Reels, and Facebook Reels.
Limited Clip Generation: The free plan allows up to 15 AI-generated clips per game.
Pros:
Easy and free to use
Saves time and effort through automated highlight creation
Allows you to clip the best moment of your stream automatically
Enable users to convert the clip into a short and vertical format
Allows you to add auto-caption
Cons:
The subtitle feature only supports the English language
The free plan includes limited features and watermarked exports
Only applies to TikTok/Reel/Shorts form
Pricing: $19.99 per month
Available on: Android, iOS, Web
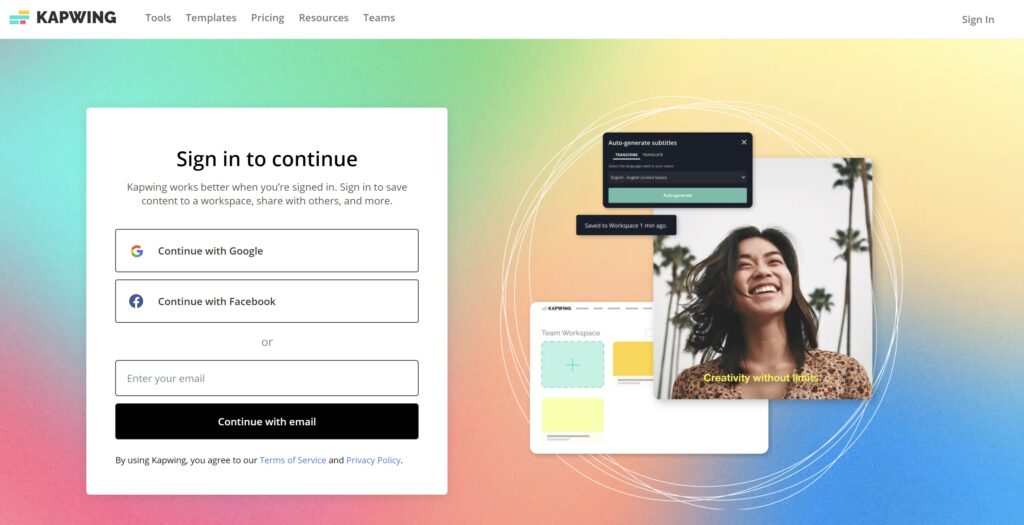
2. Kapwing: A Must-Try Subtitle Editor Online
Source: Kapwing
Another tool to customize your subtitle is Kapwing. Kapwing offers a user-friendly interface and advanced editing tools. With Kapwing, you can add, edit, and create subtitles with ease, making it a great choice for both novice and experienced users.
Additionally, Kapwing supports multiple video formats, including MP4, AVI, and more, and its video editing tools allow you to trim, resize, and add text to your videos. Aside from its subtitle editing features, Kapwing also offers additional tools for editing your video, making it a comprehensive solution for video editing needs.
Key features:
AI-powered Auto-Generation: With a single click, Kapwing’s automatic captions feature utilizes AI (Artificial Intelligence).
High Accuracy: While not perfect, Kapwing boasts high accuracy in its automatic captions.
Easy Editing & Customization: After auto-generation, you can directly edit the captions within the Kapwing interface.
Accessibility Features: Kapwing offers features that improve caption accessibility, such as adjusting line height and adding text outlines.
Export Flexibility: Once you’ve finalized your captions, you can either permanently embed them into your video.
Pros:
User-friendly interface
Advanced editing tools
Edit and personalize captions
Supports multiple video formats
Additional video editing features
Cons:
Limited language support
Reliance on audio quality
Some advanced features may require a paid subscription
Pricing: $16 per month for Pro, $50 per month for Business
Available on: Windows, Mac, Linux, Chromebook
3. Subtitle Horse: Best Browser-Based Captions Editor
Doc. Behance
Are you looking for a caption tool that supports a wide range of languages? If so, then Subtitle Horse is the answer. With its intuitive interface and advanced editing tools, Subtitle Horse makes it easy to create and edit subtitles with precision.
The special thing about this tool is that it is community-driven, allowing users to collaborate and share subtitles with others, making it a great choice for those looking to work with others on subtitle projects. However, Subtitle Horse may not have as many advanced editing options as other subtitle editors.
Key features:
Automatic Subtitle Generation: Likely uses AI to transcribe audio into subtitles for your videos.
Multiple Language Support: This feature allows subtitle generation in different languages.
Editing Capabilities: The ability to edit and refine the auto-generated subtitles might be offered.
Sharing Options: Exporting or embedding subtitles within your video for sharing could be a feature.
Speaker Identification: Distinguishing between different speakers in the video for proper attribution.
Pros:
Wide range of language support
Intuitive interface
Effortless results in no time
Advanced editing tools
Community-driven platform
Cons:
Limited video format support
May not have as many advanced editing options as other tools
Video format support may be more limited
Pricing: Free download
Available on: Windows
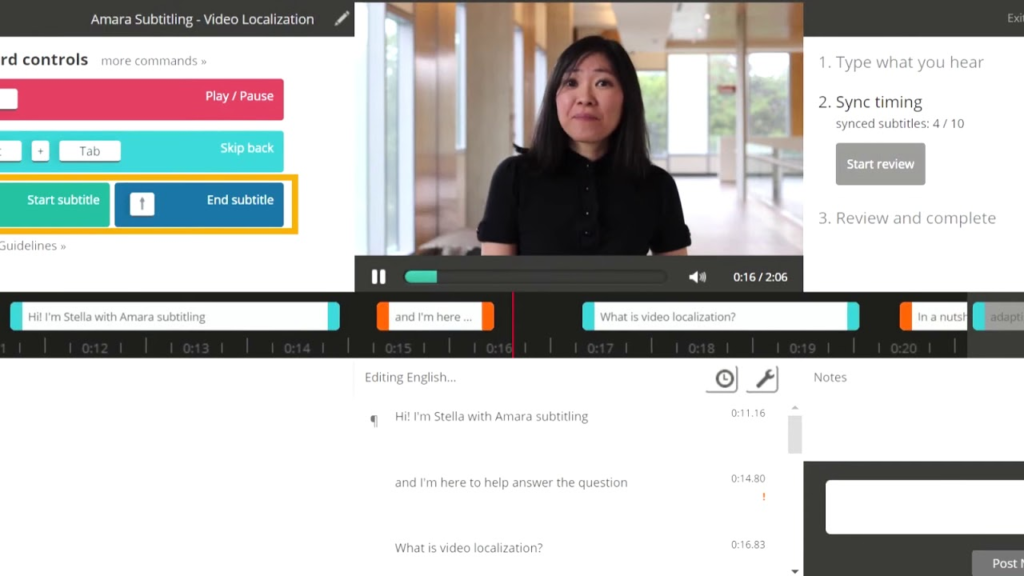
4. Amara: A Feature-Rich Subtitle Editor Online
Source: Amara.org
You can use Amara as your alternate editor for making captions. Amara is a feature-rich online subtitle editor that supports multiple languages and video formats. With its user-friendly interface and automated editing tools, Amara makes it easy to create and edit subtitles with precision.
Other than that, the platform also offers a collaborative platform where users can work together to create and edit subtitles, making it a great choice for those working on projects with multiple contributors. However, Amara may require a learning curve to fully utilize its features, and some advanced features may require a paid subscription.
Key features:
Collaborative Editing: Work with others in real-time on caption creation and editing, perfect for teams.
Multi-lingual Support: Supports a vast range of languages for both manual and potentially automatic captions.
Free Basic Plan: Core features like manual caption editing and basic project management are available for free.
Web-based Interface: Access Amara from any device with a web browser, no software downloads required.
Workflow Management Tools: Organize your caption projects, assign tasks, and track progress within Amara’s interface.
Pros:
Collaborative caption editing
Supports multiple languages and video formats
User-friendly interface
Advanced editing tools
Collaborative platform
Cons:
May require a learning curve to fully utilize its features
Automatic captions as an add-on service, not its core function
Some advanced features may require a paid subscription
Pricing: $24 per month for Plus
Available on: Windows, Mac
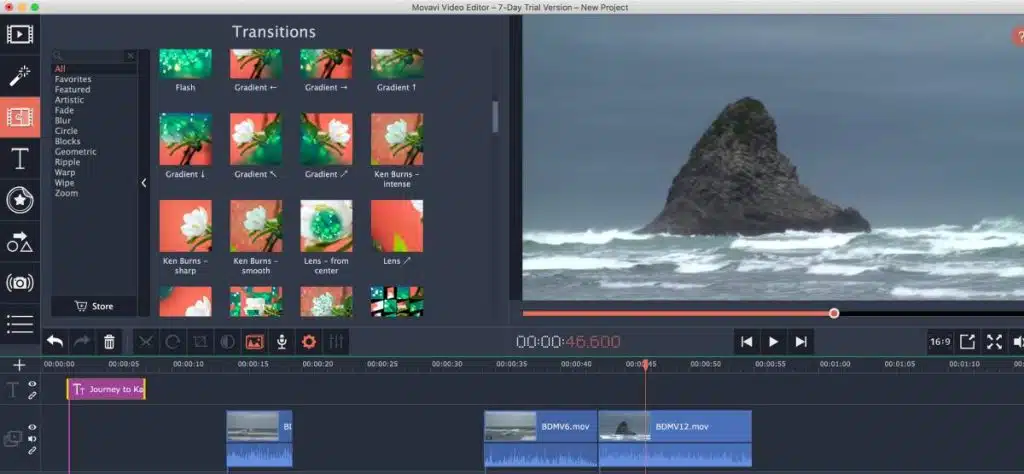
5. Movavi Video Editor: Best Overall Video Editing
Source: Movavi.com
Movavi Video Editor can be a great choice if you want to add captions and subtitles to your videos. Its user-friendly interface makes it easy for beginners to jump in and start adding text overlays to their projects. You can import your video file and then use the Titles & Text tab to choose from a variety of caption and subtitle styles.
As an AI video editor, Movavi allows you to customize the font, size, color, and position of your captions, ensuring they perfectly match the tone and style of your video. Additionally, you have granular control over the timing of your captions, allowing you to precisely match them to the spoken dialogue or audio cues in your video.
Key features:
Intuitive Interface: Movavi boasts a clean and easy-to-learn interface, making it accessible.
Media Management: Import and export videos, photos, and audio files in various formats.
Basic & Advanced Editing Tools: Cut, trim, crop, and split video clips while offering functionalities like transitions, effects, and filters.
Caption & Subtitle Support: Add captions and subtitles to your videos with various customization options for appearance and timing.
Multitrack Editing: Arrange video, audio, and text elements on separate tracks for precise control.
Pros:
Intuitive and straightforward interface
A comprehensive set of tools
Seamlessly add captions and subtitles to your videos
Import and export your projects in various video and audio formats
Capture screen or record footage from the webcam
Cons:
Limited advanced features
Watermark on the free version
Requires installation on your device
Pricing: $19.95 per month for Video Editor, $79.95 per year for Video Editor Plus
Available on: Windows, Mac
6. Jubler: Best Free Subtitle Editing Tool
Jubler is a free and open-source tool specifically designed for subtitle editing. It caters to both novice and experienced users. Beginners will appreciate Jubler’s intuitive interface that allows them to create subtitles from scratch or edit existing ones with ease. Features like spell-checking and a visual preview window ensure accuracy and clarity in your subtitles.
Jubler also offers advanced functionalities like translation mode, allowing them to easily convert subtitles between languages. It also supports various subtitle formats, making it compatible with a wide range of video editing workflows.
Key features:
User-Friendly Interface: Jubler boasts a clean and intuitive interface, making it easy for beginners to learn and navigate.
Comprehensive Editing Tools: Create new subtitles from scratch, edit existing ones, and adjust timing with precise control.
Spell Checking & Preview: Ensure accuracy in your subtitles with built-in spell checking and a visual preview window.
Multiple Subtitle Formats: Import and export subtitles in various formats, including common ones like SRT, ASS, and SSA.
Advanced Options (for power users): Jubler offers translation mode, allowing conversion of subtitles between languages.
Pros:
Free and open-source
Easy for newcomers with an intuitive interface
Granular control over subtitle timing
Import and export subtitles in various formats
Advanced functionalities (for power users)
Cons:
Limited to subtitles
Requires installation
Technical knowledge or exploration
Pricing: Free to use
Available on: Windows, Mac, Linux
FAQ
1. How do I edit a subtitle file?
To edit a subtitle file, open it in a subtitle editor or text editor. Modify the text, timing, and format as needed, then save the file.
2. What is the best free subtitle editor?
Some popular free subtitle editors include Aegisub and Subtitle Edit. They offer a range of features, from basic editing to advanced formatting options.
3. Where can I edit subtitles?
You can edit subtitles using online tools like PlaySubtitle Editor Online or desktop software like Subtitle Edit. Many platforms provide easy-to-use interfaces for subtitle creation and adjustments.
Final Thoughts
These 6 subtitle editor online tools provide various options to enhance your videos’ accessibility and clarity. Whether you’re a content creator, filmmaker, or simply need captions, these tools offer valuable solutions for elevating your video content.
If you’re seeking AI-powered editing, Eklipse stands out as an excellent choice. Try Eklipse for free and discover the remarkable benefits of AI editing. Sign up today and let your content gain more visibility.
Green screen is a visual graphic technique used to replace your background with stunning visuals or dynamic videos effortlessly. Now, you don’t even need to set up a large green screen or record yourself in front of it. The best green screen software listed below can easily add a green screen effect to your video.
So, what software should you use for green screen editing? Clipchamp, VSDC Free Video Editor, and iMovie offer excellent features to elevate your video creativity. In this article, we’ll explore these top green screen software options, helping you find the perfect fit for your needs. Let’s dive in!
Green screen technology is a filmmaking and photography technique where a specific color background, typically green, is used to replace part of an image or video with another background. The use of green screens is widespread in various media, from movies to weather broadcasts and video games.
The process involves filming a subject in front of a green backdrop, then using software to remove the green and layer the subject onto a different scene. This technique is popular because green is a color that is least likely to match skin tones, making it easier to separate the subject from the background.
How to Choose a Green Screen?
By selecting the right green screen, you can ensure smooth and professional results for your projects. Here are some points to consider before choosing the right video editors for your green-screen videos:
Ease of Use: Look for an editor with a user-friendly interface that is easy to navigate, especially if you are new to green screen editing. Tutorials and support resources can also be helpful.
Features: Consider the features you need, such as advanced chroma key options, background replacement, and color correction tools. Ensure the software includes the capabilities required for your projects.
Compatibility: Make sure the green screen editor is compatible with your computer’s operating system and hardware. Check the system requirements to avoid performance issues.
Price: Green screen editors range from free options to high-end professional software. Determine your budget and find an editor that offers good value for money, balancing cost with the features you need.
Support and Updates: Choose software that offers good customer support and regular updates. This ensures you have access to help when needed and that the software stays current with new features and improvements.
Free Green Screen Software for Content Creation
Here are free green screen tools that will empower you to bring your visual storytelling to life. These software options offer chroma key effects and a range of features to enhance your content creation journey. Let’s dive in and discover the perfect tool for your needs!
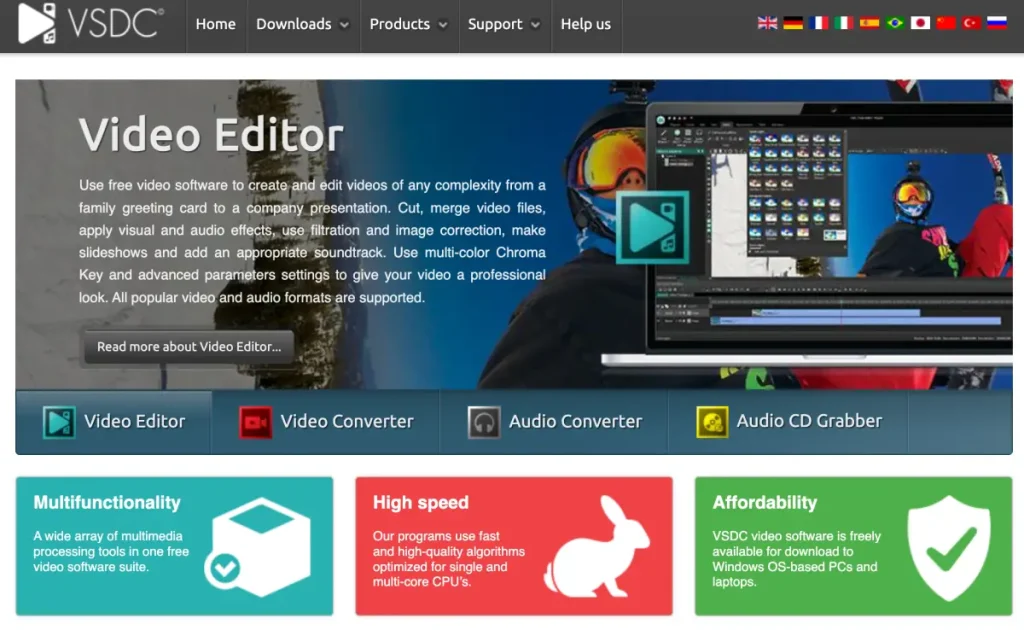
1. VSDC Free Video Editor – Best Free Green Screen Software
Source: videosoftdev.com
VSDC Free Video Editor is a versatile software that caters to both beginner and amateur videographers. With an array of selection tools, lighting correction, filters, transitions, special effects, and more, VSDC offers a comprehensive package for video editing enthusiasts.
Take advantage of its chroma key settings to unleash your creativity and create captivating movies. Keep in mind that VSDC has a slight learning curve, so it might be helpful to watch tutorial videos on platforms like YouTube to maximize its features.
Key Features:
Basic Editing Tools: Cut, trim, and split videos, adjust playback speed, and add transitions.
Green Screen Editing (Free): Chroma key compositing allows you to replace a green background with your chosen image or video.
Text & Titles: Add titles, captions, and text overlays to your videos.
Filters & Effects: Apply various visual effects and filters to enhance your video.
Export Options (Free with limitations): Export videos in various formats, though free options have limitations on resolution and file size.
Pros:
Free and no watermark
User-friendly interface
Supports multiple formats
Lightweight
Regular updates
Cons:
Limited features in the free version
Export limitations
Occasional pop-up ads
Available on: Windows
Pricing: Free to use
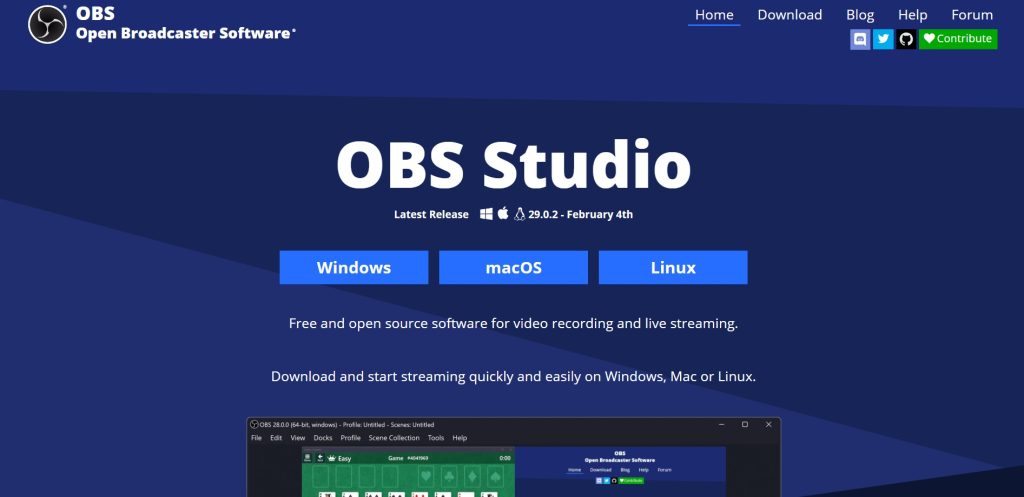
2. OBS Studio – Best Green Screen Software for Streamers
Source: obsproject.com
OBS Studios was originally designed for broadcasting such as livestream to Twitch, YouTube, or even Kick. It offers a range of functionalities beyond basic video editing. While it may not be as beginner-friendly as Streamlabs, OBS Studios provides endless possibilities through its numerous plugins.
Removing your green screen with OBS Studios is a relatively straightforward process, allowing you to adjust brightness and contrast for optimal results. The great thing about OBS is that you can instantly remove your green screen while live streaming, eliminating the need for video editing software.
Key Features:
High-Performance Streaming & Recording: Handles demanding tasks like high-resolution streaming and recording efficiently.
Customizable Scenes & Sources: Create complex scenes with multiple sources like cameras, capture cards, and images.
Powerful Plugins & Scripting: Extends functionality with a vast library of plugins and the ability to write scripts for automation.
Multiplatform Support (Windows, Mac, Linux): Works seamlessly across different operating systems.
Free and Open Source: Free to use and modify with a large, supportive community.
Designed for multimedia creators, OpenShot not only serves as green screen software but also provides features like special effects and 3D animation. You can export your creations to various formats, including Xbox 360, DVD, YouTube, and Vimeo.
While it may require some prior experience with video editing software, OpenShot offers a robust set of tools to enhance your content. However, this budget-friendly video editor may be overwhelming for beginners.
Key features:
Free and Open-Source: OpenShot is a completely free and open-source video editor, making it a great choice for budget-conscious creators.
Keyframe Animations: OpenShot allows for keyframe animations, letting you animate the properties of clips and effects over time.
Unlimited Tracks: The software boasts unlimited video and audio tracks, giving you the freedom to create complex projects with multiple layers.
Trim, Cut, and Slice Tools: OpenShot provides essential editing tools for trimming, cutting, and slicing clips to precisely edit your footage.
Transitions and Effects: A library of transitions and effects is included to add polish and creative flair to your videos.
Pros:
100% free and open-source software
Allows export to many devices
Featured numerous advanced editing tools
Supports most audio and video formats
Available for Windows, Mac, and Linux
Cons:
A bit technical for beginners
A bit laggy and buggy
Limited advanced features
Available for: Windows, macOS, Linux, Chrome OS
Pricing: Free to use
4. Streamlabs – Green Screen Software Alternative for Streamers
Source: streamlabs.com
Streamlabs, initially for Twitch live-streamers, is a versatile tool for streaming and recording. Create tutorials or capture moments with ease. Customize videos with overlays, on-screen elements, and seamless transitions.
Effortlessly remove the green screen, replacing or eliminating the background in a few steps. Streamlabs provides continuous updates for a smooth editing experience. Streamlabs is similar to OBS, a broadcasting software that enables you to eliminate the green screen during your live streams.
Key features:
Built-in Alerts and Widgets: SLOBS comes with several built-in alerts and widgets that you can use to interact with your viewers.
User-friendly Interface: SLOBS has a simple and intuitive interface that makes it easy to get started.
Multi-track Recording: SLOBS can record multiple audio tracks, such as your microphone, desktop audio, and game audio.
Integration with Popular Platforms: SLOBS integrates with popular streaming services like Twitch, YouTube, and Facebook.
Monetization System: SLOBS includes a monetization system that allows you to receive tips and donations from your viewers.
Pros:
Streamlined interface
Integrates well with popular streaming platforms
Built-in monetization tools
Stream management features
Free and open-source
Cons:
Limited customization compared to OBS Studio
Relies on cloud storage
Potential performance impact on lower-end machines
Available on: Windows,Mac
Pricing:
Free plan available
Standard: $9 per month
Pro: $17 per month
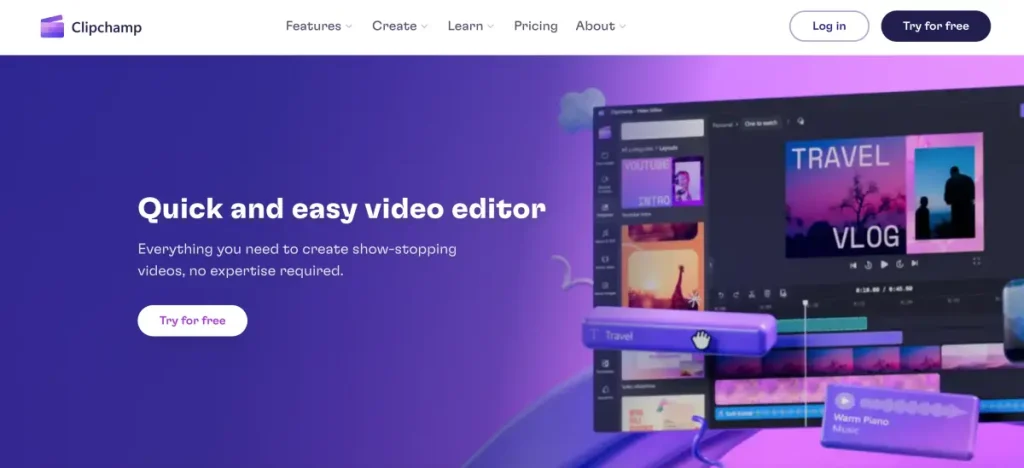
5. Clipchamp – Best for Beginners on a Budget
Source: clipchamp.com
If you’re looking for an intuitive green-screen video editor, Clipchamp is a fantastic choice. Not only does it enable you to change your background with ease, but it also offers a wide array of special effects to enhance the realism of your videos.
You have the option to use your footage or explore Clipchamp’s extensive library of high-quality content. This cloud-based editor even provides customizable templates that streamline the editing process. The basic program is available for free, allowing you to try it out and unleash your creativity.
Key features:
Intuitive Interface: Clipchamp boasts a clean and easy-to-navigate interface, making it accessible for anyone to jump in and start editing.
Built-in Recording Tools: Clipchamp allows you to directly record your screen or webcam footage within the platform.
Rich Stock Asset Library: Clipchamp offers a vast library of royalty-free stock videos, images, and audio tracks.
Pre-made Templates: These templates can be a great starting point, saving you time and effort in constructing your video from scratch.
Cloud-Based Editing: Clipchamp is a cloud-based platform, meaning your projects are automatically saved online.
Pros:
Intuitive user interface
Ease of use
Content Library
Microsoft Integration
Multi-platform support
Cons:
Limited control over effects
Export limitations
Slow export rendering
Available on: Windows, Mac, Linux
Pricing:
Free plan available
Premium: $119.99 per year
6. Lightworks – Best Free Non-linear Editor
Source: lwks.com
With a legacy spanning over 25 years, Lightworks is renowned for its advanced editing capabilities, including its free green screen editor. Access powerful chroma key features that enable you to remove backgrounds and create original content.
This low-end PC video editor also offers an extensive range of special effects and supports the creation of high-quality 4K films. While it may have a learning curve, especially for beginners, once you grasp its intricacies, you’ll be able to seamlessly upload your work directly to platforms like YouTube.
Key features:
Non-linear editing: Freely assemble clips and edit in any order.
Proxy editing: Work with lower-resolution files for smoother editing on less powerful machines.
Color grading tools: Adjust colors to achieve a specific look.
Multitrack audio editing: Edit and mix multiple audio tracks.
Export to various formats: Export your video in different formats for different uses.
Pros:
Provides ease of use
Supports direct exportations to YouTube
Web-based tool
Can be accessed through mobile phone
Professional-quality video editing
Cons:
Smaller user base
Require updates for extra tools
Unable to export to 1080p or above
Available on: Windows, MacOS, and Linux
7. iMovie – Best Video Editor for iOS
Source: pcmag.com
For Apple users, you must be familiar with this free video editor for Mac and other iOS devices. This free video editing tool is designed for Mac computers, iPhones, and iPads by Apple. It’s free and doesn’t require downloading since it’s built-in software.
Despite its cost, iMovie empowers you to create Hollywood-style videos in 4K resolution, offering a plethora of features. You can add filters, transitions, and themes, as well as rotate and trim videos at your discretion. Importantly, it doesn’t imprint a watermark on your video.
Key features:
Green Screen Editing: iMovie allows you to utilize green screen technology to replace the green background with other visuals for creative effects.
Video Stabilization: The software can help stabilize shaky footage captured handheld or with unstable cameras.
Drag-and-Drop Editing: The software utilizes a drag-and-drop approach, allowing users to easily add, arrange, and edit clips on the timeline.
Pre-made Templates: iMovie offers a library of pre-made templates and themes that can quickly enhance your videos with a professional look and feel.
Sound Effects and Music Library: Access a built-in library of sound effects and royalty-free music to add audio elements to your videos.
Pros:
Offers plenty of essential editing tools
Supports 4K editing
Provides 100+ soundtrack
Enables users to create Hollywood-grade films with ease
Pre-made contents
Cons:
Complex color correction feature
Limited customization
Only available for Apple devices
Available on: Mac, iOS
Pricing: Free to use
Top Premium Green Screen Software
While this article primarily focuses on free green screen software, it’s essential to highlight a few professional-grade options that can elevate your editing capabilities. These premium software programs offer advanced features and are widely used in the industry:
1. Adobe Premiere Pro – Best for Industry-Standard Editing
Source: adobe.com
Adobe’s long-standing reputation in photography and video editing extends to green screen software. Whether you’re working with live-action or animated footage, Adobe Premiere Pro provides a comprehensive suite of tools, including graphics, layers, and more.
However, it’s important to note that this AI-powered editor has a steep learning curve and comes with a higher price tag. If you’re a beginner with limited video editing knowledge, it may be more beneficial to start with more affordable or free software before transitioning to Premiere Pro.
Key features:
Professional Video Editing: Powerful tools for cutting, trimming, and arranging video clips.
Multi-Track Editing: Combine video, audio, graphics, and effects on separate tracks for precise control.
Motion Graphics & VFX: Create stunning animations and visual effects with built-in tools.
Color Correction & Grading: Fine-tune the look and feel of your videos with advanced color tools.
Audio Editing & Mixing: Mix and edit audio tracks with professional features.
Pros:
Make automatic clips from a raw video
Extensive editing options
Flexibility and file format support
Industry-standard
Available on various platforms
Cons:
Need to upload your stream
Steep learning curve
Limitation on the free version
Available on: Windows, Mac
Pricing:
Premiere Pro: $22.99 per month
Premiere Pro for teams: $37.99 per license
2. Adobe After Effects – Best High-End Video Editor
Source: videomaker.com
Adobe After Effects is a professional-grade software specifically designed for motion graphics, visual effects (VFX), and compositing. It’s an industry standard used in filmmaking, television production, and creating high-quality videos for web and social media.
While After Effects is incredibly powerful, it’s important to note that it has a steeper learning curve compared to simpler video editing software. It’s geared towards professional video editors and motion graphics artists who require advanced creative control.
Key features:
Animation Powerhouse: Bring your ideas to life with fluid animations since it lets you animate anything, even complex character rigs.
Visual Effects Wizard: After Effects provides the tools to manipulate footage and create believable visual effects.
Compositing Mastermind: Seamlessly combine elements from various sources into a cohesive final image.
Presets and Templates for Efficiency: After Effects offers a vast library of pre-built motion graphics templates and animation presets.
Highly Customizable & Extendable: Take your creativity further with advanced customization options.
Pros:
Powerful animation capabilities
Industry-standard
Masterful compositing
Streamlined workflow
Highly extendable and customizable
Cons:
Steeper learning curve
A subscription-based model with ongoing costs
Resource-intensive software
Available on: Windows, Mac
Pricing:
Free plan available
After Effects: $34.49 per month, $263.88 per year
3. PowerDirector – Best Tool with Precise Controls
Source: cyberlink.com
As another advanced video editing software, PowerDirector offers a range of visual effects features, including robust green screen capabilities. With full control over every effect, you can fine-tune your videos to achieve the desired results.
PowerDirector’s Picture in Picture designer allows you to visualize changes in real time, streamlining the editing process. Additionally, you can storyboard your production from start to finish, taking your video editing skills to the next level. PowerDirector empowers you to create high-quality videos effortlessly.
Pros:
Precise editing with a timeline
Keyframe animation
Multicam editing for complex projects
Powerful tools
Good balance of features and user-friendliness
Cons:
Limited free features
Watermarks on the free version
Requires a subscription for full functionality
Available on: Windows, Mac
Pricing:
PowerDirector 365: $51.99 per year
Director Suite 365: $93.99 per year
PowerDirector 2024 Ultimate: $139.99 per year
4. Hitfilm Pro – Best Tool for VFX Integration
Source: fxhome.com
If you’re seeking green screen software that combines both 2D and 3D imaging capabilities, Hitfilm Pro is worth considering. Alongside its top-notch green screen features, it offers a range of effect editing tools that enhance the overall quality of your videos.
Hitfilm Pro is more affordable and easier to use compared to software like PowerDirector and After Effects. While it may have fewer video editing features, many professionals regard its chroma key tool as the best in the market.
Key features:
Advanced Compositing & VFX: Hitfilm Pro boasts powerful compositing tools.
3D Editing & Animation: Take your creativity to new heights with Hitfilm Pro’s 3D editing and animation capabilities.
Professional Color Grading: Elevate your video’s look with Hitfilm Pro’s extensive color grading tools.
High-Performance Editing: Hitfilm Pro supports editing in resolutions up to 8K and utilizes 32-bit floating-point color.
Built-in Asset Library: Hitfilm Pro provides a library of royalty-free stock footage, music, sound effects, and project templates.
Pros:
Powerful VFX tools
Cost-effective
User-Friendly for beginners
Customizable workspace
Mac and PC compatible
Cons:
Demanding system requirements
Basic audio editing
Limited customization of transitions
Available on: Windows, and Mac
Pricing:
Free plan available
Creator: $7,99 per month
Pro: $12.99 per month
Final Thoughts
That’s our list of the best green screen software for video editing, free in 2025! For beginners and personal use, you can try OBS Studio or OpenShot, as they are open-source software and completely free.
If you want to explore more advanced features to make your videos stand out among the competition, we suggest trying Eklipse! With Eklipse, you can streamline your content creation process and reach a wider audience effortlessly. Click the button below to try it for free!
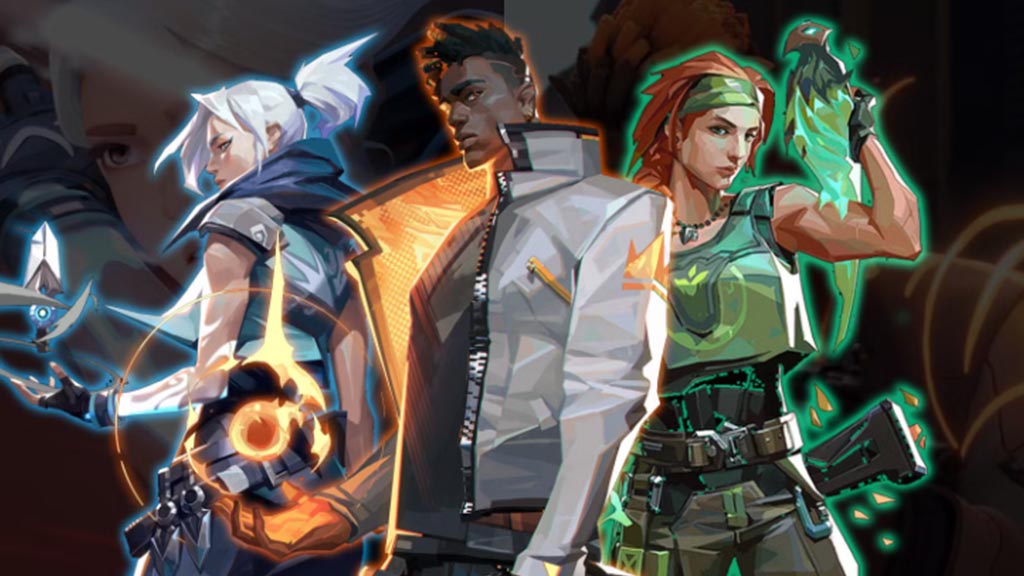
Many Valorant players face challenges selecting agents, often leading to mismatched squads and preventable losses. Crafting a winning team requires understanding how maps influence agent roles. Effective strategies depend on a balanced lineup tailored to each map’s unique demands. This article delves into best Valorant team compositions for each map and highlights key tips for building cohesive teams.
A well-rounded squad can elevate gameplay and boost your chances of victory. Mastering team composition involves thoughtful agent selection and synergy. By analyzing map-specific strategies, players can confidently assemble teams that dominate in any scenario. Explore how to pick the right agents and create unstoppable teams.
Understanding the Importance of Team Composition in Valorant
Best Valorant Team – Source: Valorant
Teamwork lies at the core of Valorant’s gameplay, and strategic agent selection defines the outcome. Crafting best Valorant team comps requires understanding each map’s distinct design, which influences agent roles and their synergies. Staying informed about meta shifts is critical to staying competitive.
For effective Valorant team comps for each map, balance is key. The best agents for each map Valorant include a Duelist, Controller, Sentinel, and Initiator. These roles ensure superior map control, enhance strategy execution, and significantly increase the chances of victory.
On Ascent, mid control is vital, making best Valorant team comps crucial for success. Effective VCT comps for each map often feature agents like Jett, Omen, Sova, Killjoy, and KAY/O. Sova’s recon abilities provide valuable mid intel, enabling safer pushes. Meanwhile, Killjoy and KAY/O strengthen defenses and improve site retake strategies, showcasing their importance in optimal Valorant agent comps.
Pros and Cons:
Pros: Balanced, strong mid control, good for both attack and defense
Cons: Can be predictable if not played dynamically
Bind: Explosive Plays with Raze and Brimstone
Bind is a map where mobility and area control are key. A team comp featuring Brimstone, Raze, Viper, Fade, and Gekko is effective. Raze’s explosive abilities allow her to clear out tight corners, while Brimstone’s smokes help control key areas.
Pros and Cons:
Pros: Very effective at taking sites, high aggression potential
Cons: Can be countered by long-range agents
Breeze: Utilizing Long Sightlines with Viper and Sova
Breeze is known for its open spaces and long sightlines. Effective strategies often involve agents suited for these features. The suggested composition is Cypher, Viper, Sova, Jett, and KAY/O.
Pros and Cons:
Pros: Good for long-range engagements and picks
Cons: Can struggle in close-quarters situations
Haven: Versatility with Breach and Killjoy
Haven requires a versatile approach due to its three bomb sites. A recommended team composition consists of Breach, Omen, Jett, Sova, and Killjoy.
Haven’s three-Site layout supports both close-range skirmishes and long-range duels, emphasizing individual gunplay skills. Omen disrupts vision at critical points, while Neon’s speed aggressively counters early attackers or pressures defenders to retreat.
Pros and Cons:
Pros: Balanced for all three sites
Cons: Can be challenging to coordinate attacks on multiple sites
Icebox: Smokes and Intel with Viper and Sova
Icebox requires a combination of close-quarters and long-range engagements. A suitable team composition may include Viper, Sova, Jett, Killjoy, and Gekko.
The revamped Icebox prioritizes B-Site engagements, requiring Attackers to push Green aggressively and secure Yellow defensively. Verticality remains essential, making Jett’s Updrafts and smokes key for entry. Sova complements this aggression with angled Recon Bolts and Shock Darts, effectively clearing crucial areas.
Pros and Cons:
Pros: Good balance of engagements
Cons: Requires good coordination
Fracture: Aggressive Plays with Neon
Fracture rewards aggressive playstyles. Agents that can quickly push sites are often the most effective.
Although Fracture is currently excluded from Valorant’s Unrated and Competitive map pool, its unique layout still intrigues players. The map’s mid-area Defender Spawn allows quick access to east and west Sites, while ziplines connect the northern and southern zones. With three entry routes per Site, strategic detection becomes essential. Sova’s Recon Bolts and Killjoy’s turret prove invaluable for pinpointing enemy positions and maintaining control.
Pros and Cons:
Pros: Rewards quick plays
Cons: Requires strong coordination
Lotus: Synergy with Viper and Omen
Lotus has multiple entrances; thus area control is vital. A great team comp might be Raze, Viper, Omen, and Killjoy.
Pros and Cons:
Pros: Good at taking sites
Cons: Difficult to manage multiple entrances
Pearl: Duelists Dominate with Neon and Yoru
Pearl allows duelists like Neon and Yoru to excel by creating space while the team provides support.
Pros and Cons:
Pros: Rewards aggressive playstyle
Cons: Vulnerable to counter aggression
Abyss: Fast Paced Play with Omen and Jett
Abyss benefits from fast-paced agents who can utilize its features effectively.
Pros and Cons:
Pros: Good for fast-paced plays
Cons: Difficult for slower compositions
Agent Synergies: The Key to Victory
Understanding agent synergies is extremely beneficial. Combining certain abilities can greatly enhance their impact. For instance, Sage’s Slow Orb used in conjunction with Raze’s Paint Shells creates a powerful combo. Adapting strategies based on agent synergies can significantly improve your chances of winning matches.
Adapting to the Ever-Changing Meta
The Valorant meta is subject to constant change due to new agents like KAY/O or frequent buffs/nerfs that can alter team compositions. Remaining up-to-date is crucial; what may be effective today might not be as effective tomorrow.
Final Thoughts
Creating the best Valorant team compositions for each map relies on understanding map-specific needs and adapting to your team’s playstyle. No single setup fits every situation; balancing agent roles is crucial. Staying updated on meta shifts ensures your strategies remain effective and competitive over time.
Effective communication brings out the full potential of every agent, key to crafting the best Valorant team compositions for each map tier list. Prioritize a balanced lineup featuring duelists, controllers, initiators, and sentinels for adaptability and synergy. This strategic mix improves gameplay and positions your team for top-tier success in Valorant.