Looking to unlock exclusive in-game items with the latest Roblox toy redeem codes? You’ve come to the right place! These codes, found in specially marked Roblox toys and merchandise, grant players free virtual accessories, collectibles, and occasionally even Robux to elevate their gaming experience.
Since 2011, Roblox toy redeem codes have been a sought-after feature for fans. Don’t miss out—our step-by-step guide on how to redeem Roblox toy codes is here to help you maximize your Roblox adventure!
Have you ever struggled to make your streams stand out with visuals that truly grab your audience’s attention? Many streamers face the challenge of balancing cost and creativity, often settling for overlays that fail to impress. But what if creating stunning, animated stream overlays didn’t require expensive software or professional skills?
In this guide, you’ll discover how to craft professional-looking overlays for free, transforming your stream into a visually captivating experience. Let’s get to know more and start building your unique streaming brand!
Stream overlays are more than just visuals; they’re an essential part of your branding and viewer engagement. Animated overlays, in particular, add a dynamic touch that keeps your audience invested in your content. Whether you’re streaming on Twitch, YouTube, or Facebook Live, professional overlays can:
Enhance visual appeal
Showcase your personality and brand
Highlight important information like recent subscribers or donations
Keep viewers engaged with a polished, professional look
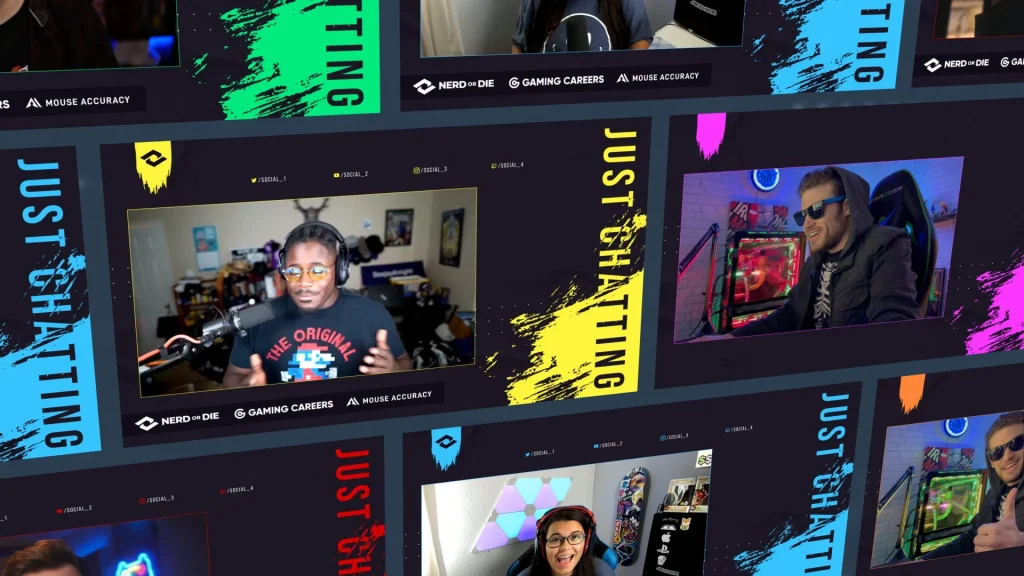
Best Free Tools for Creating Animated Stream Overlays
Image: StreamElements
Here are three of the best free tools you can use to create professional-looking animated stream overlays:
1. Canva
Canva is a versatile graphic design platform that offers pre-designed templates for stream overlays. With its drag-and-drop interface, even beginners can create stunning designs.
How to Use Canva for Overlays:
Look for “Twitch overlay” or “animated overlay” templates.
Add your branding elements, such as logos, colors, and fonts.
Use Canva’s animation features to make elements dynamic.
Download your design as a video file or GIF.
Pros:
User-friendly interface
Extensive library of free templates
Animation options included
Cons:
Limited advanced customization
2. StreamElements
StreamElements is a streaming-focused platform that provides free tools for creating overlays and widgets tailored to platforms like Twitch and YouTube.
How to Use StreamElements:
Sign up and link your streaming platform.
Choose from pre-made animated overlays.
Use the online editor to tweak colors, text, and animations.
Copy the overlay URL into your streaming software.
Pros:
Designed specifically for streamers
Real-time overlay integration
No need to download files
Cons:
Requires internet connection for use
3. Adobe Express
Adobe Express is another excellent tool for creating overlays with its easy-to-use design features and animation capabilities.
How to Use Adobe Express:
Start with a blank canvas or use a ready-made overlay template.
Add text, shapes, and images that match your brand.
Use the animation tools to bring elements to life.
Export your design as a video file or GIF.
Pros:
Powerful customization options
Seamless integration with other Adobe tools
Cons:
Requires Adobe account registration
Tips for Designing Effective Overlays
Creating a visually appealing overlay doesn’t have to be complicated. Here are some tips to keep in mind:
Keep It Simple: Avoid cluttering your screen with too many elements.
Use Branding: Incorporate your logo, colors, and fonts to reinforce your identity.
Prioritize Information: Highlight key details like your social handles, recent donations, or chat alerts.
Test Visibility: Ensure text and graphics are clear against your gameplay or camera feed.
Optimize for All Platforms: Check how your overlay looks on different screen sizes.
Final Thoughts
With free tools like Canva, StreamElements, and Adobe Express, creating professional animated stream overlays is easier than ever. By following this guide, you can design overlays that not only enhance your stream’s aesthetics but also keep your audience engaged. Don’t let budget constraints hold you back—start crafting your custom overlays today and elevate your streaming game!
Creating engaging behind-the-scenes content for streamers is one of the most effective ways to connect with your audience on a personal level. It’s not just about sharing what happens off-camera—it’s about inviting your viewers into your world, showing them the effort, creativity, and personality that drive your streams. Whether it’s a glimpse of your setup, a behind-the-scenes blooper, or a sneak peek at upcoming projects, this type of content makes your audience feel closer to you and your brand.
For streamers, behind-the-scenes content serves as more than just filler; it’s a tool for fostering loyalty, sparking curiosity, and building a sense of community. When done right, it helps you stand out in a crowded streaming landscape while keeping your viewers engaged and coming back for more. If you’re ready to elevate your streaming game, let’s dive into how you can create engaging behind-the-scenes content that resonates with your audience.
Daily routines give your audience a peek into the preparation and effort that go into your streams. From setting up your gear to grabbing your favorite snack before going live, these seemingly mundane moments can captivate viewers and create a relatable narrative. Sharing routines on platforms like Instagram Stories or TikTok adds a personal touch, making your community feel involved.
Highlight moments like brainstorming session ideas, testing your tech setup, or even prepping your streaming backdrop. These insights remind viewers that behind every polished stream is a human effort, fostering a genuine connection.
2. Meet the Team
If you collaborate with editors, moderators, or co-streamers, introducing them through BTS content can enhance community engagement. Highlighting your team’s contributions allows viewers to connect with the people who make your streams successful. Short videos, fun interviews, or team Q&A sessions can spotlight their roles and personalities.
For larger teams, regular shoutouts or behind-the-scenes footage of team meetings can deepen the sense of belonging among your audience. This approach not only builds rapport but also emphasizes the collaborative effort behind your content.
3. Sneak Peeks of Upcoming Content
Generating excitement about upcoming projects is an excellent way to engage your audience. Share teaser clips, preview your next big stream theme, or hint at upcoming collaborations. Sneak peeks give your viewers something to anticipate, creating buzz and encouraging higher turnout for your live sessions.
Whether it’s an exciting giveaway, a new game launch, or a special guest appearance, offering a taste of what’s to come ensures that your audience stays intrigued and connected to your content.
4. Showcasing Equipment and Setup
Many viewers are curious about the technology and tools streamers use. A detailed tour of your streaming setup—cameras, microphones, lighting, and even software—can be both informative and engaging. Aspiring streamers can benefit from your insights, and tech enthusiasts will appreciate the effort you put into crafting a professional setup.
Additionally, sharing tips on optimizing equipment or giving recommendations for budget-friendly gear positions you as an authority in the streaming space, further elevating your brand.
5. Interactive Q&A Sessions
Interactive Q&A sessions allow you to engage directly with your audience. These sessions can cover topics like your journey into streaming, gaming tips, or behind-the-scenes challenges. By encouraging your viewers to submit questions beforehand or ask live during a session, you create a two-way conversation that fosters community involvement.
Pair these Q&A sessions with exclusive behind-the-scenes anecdotes or quick demonstrations to make the content even more engaging and memorable.
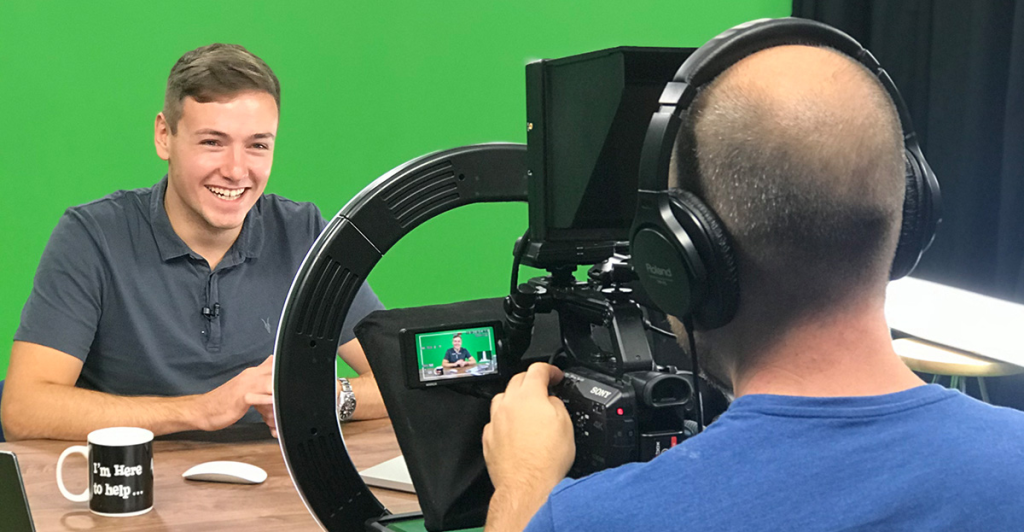
Tips for Creating Engaging BTS Content
Source: Atisfyre Blog
1. Be Authentic
Audiences value authenticity. Share genuine moments that reflect both the highs and lows of streaming. Whether you’re celebrating a milestone or sharing a funny mishap, authenticity builds trust and relatability, strengthening your connection with viewers.
2. Use Diverse Formats
Experiment with different content formats to keep things fresh. Create short clips for TikTok, post casual updates on Twitter, or share in-depth BTS videos on YouTube. Each platform offers unique opportunities to connect with varied audience segments.
3. Incorporate Viewer Feedback
Ask your audience what they’d like to see more of. Conduct polls or encourage comments to gauge interest in specific types of BTS content. Incorporating their suggestions demonstrates that you value their input, enhancing engagement.
4. Leverage Social Media
Platforms like Instagram, TikTok, and Twitter are ideal for sharing bite-sized BTS moments. Use these platforms to tease longer content on your primary streaming channel, driving traffic while keeping your audience engaged across multiple platforms.
5. Collaborate with Other Creators
Team up with other streamers to create joint BTS content. Collaboration not only broadens your reach but also introduces fresh perspectives, making your behind-the-scenes content even more dynamic and appealing.
Final Thoughts
Learning how to create engaging behind-the-scenes content for streamers can transform your audience’s perception of your channel, fostering loyalty and deepening connections. By sharing daily routines, showcasing your setup, and involving your team, you create a relatable and engaging narrative that resonates with viewers.
Combine authenticity, diverse content formats, and strategic use of social media to maximize your BTS content’s impact. Embrace these strategies, and watch your community grow stronger and more connected to your streaming journey.
Crafting compelling hooks is essential for capturing viewers’ attention of short-form videos. On platforms like TikTok, Instagram Reels, and YouTube Shorts, creators have only seconds to engage their audience. A well-designed hook not only entices viewers to keep watching but also sets the tone for the entire video.
The effectiveness of a strong hook extends beyond initial engagement; it significantly impacts viewer retention and performance metrics. By using strategies like provocative questions, bold statements, or emotional storytelling, creators can enhance their videos’ appeal and ensure they resonate with their target audience. Ready to elevate your content? Start implementing these strategies today!
Crafting compelling hooks is the cornerstone of a successful short-form video. With platforms like TikTok, Instagram Reels, and YouTube Shorts thriving on brevity, the first few seconds of your content determine whether viewers stay or swipe away. A compelling hook:
Grabs attention instantly: Audiences decide within 3 seconds whether to keep watching.
Boosts engagement rates: Higher retention leads to better algorithm visibility.
Establishes trust: A well-executed hook signals quality content and builds credibility.
Effective Hook Strategies
1. Provocative Questions
Example:“What if I told you your morning routine is ruining your productivity?”
Tap into curiosity by posing questions viewers feel compelled to answer mentally.
Ensure relevance to your target audience’s pain points or interests.
2. Bold Statements
Example:“Stop wasting your time with boring workouts!”
Make a striking claim that challenges conventional thinking.
Use confident language to assert authority on the subject.
3. Surprising Facts
Example:“Did you know 70% of people fail to complete their New Year’s resolutions?”
Share a lesser-known statistic or fact that intrigues viewers.
Ensure the fact is directly related to your content’s topic.
4. Emotional Storytelling
Example:“I was on the verge of giving up until this happened…”
Begin with a personal anecdote or relatable scenario.
Focus on emotions like joy, fear, or surprise to forge a connection.
5. Creating Urgency
Example:“You only have 24 hours to claim this offer!”
Use time-sensitive language to create FOMO (Fear of Missing Out).
Highlight a limited opportunity or exclusive benefit.
6. Open Loops
Example:“What happened next will blow your mind…”
Create suspense by starting a story but withholding the resolution.
Encourage viewers to stick around to satisfy their curiosity.
7. Upfront Value Promises
Example:“In the next 30 seconds, I’ll show you how to double your productivity.”
Clearly state the benefit viewers will gain by watching.
Ensure your promise aligns with their interests or goals.
Common Mistakes to Avoid
1. Misleading Viewers
Avoid overpromising or using clickbait that doesn’t deliver.
This leads to viewer frustration and poor engagement metrics.
2. Overcomplicating the Hook
Keep your opening simple and easy to understand.
Too much information upfront can overwhelm and alienate viewers.
3. Ignoring the Target Audience
Tailor your hook to resonate with your specific demographic.
A generic approach may fail to connect with anyone.
4. Failing to Deliver on the Hook
Follow through on the promise made in the opening.
Consistency builds trust and encourages repeat viewership.
Final Thoughts
Crafting compelling hooks is essential for any content creator in the short-form video space. By using strategies like provocative questions, bold statements, and emotional storytelling, you can grab attention and boost viewer retention. Avoid common pitfalls like misleading or overcomplicating your hooks to ensure a positive audience experience.
Ready to make your videos irresistible? Apply these tips to your next project and watch your engagement soar. Happy creating!
Unlocking the Overkill Wildcard in Call of Duty: Black Ops 6 lets players equip two primary weapons, boosting combat versatility. To unlock it, reach Level 24 in multiplayer, then go to the “Create-a-Class” menu and select Overkill as your Wildcard. This replaces your secondary weapon slot with a second primary weapon for a more adaptable loadout.
With Overkill, strategically combine weapon types, like pairing a long-range assault rifle with a close-range SMG or shotgun. Keep in mind that Overkill occupies a Wildcard slot and may limit perk options. Mastering the use of primary weapons in Black Ops 6 can greatly enhance your gameplay and adaptability on the battlefield.
The Overkill Wildcard is essential for equipping two primary weapons. Follow these steps to unlock it:
Reach Level 24: Progress through multiplayer matches to unlock the Overkill Wildcard at Level 24.
Customize Your Loadout: Navigate to the “Create-a-Class” menu and select a loadout.
Select the Wildcard Slot: Choose Overkill as your preferred Wildcard.
By unlocking this feature, you can replace your secondary weapon slot with a second primary weapon.
Equipping Two Primary Weapons
Once you’ve unlocked Overkill, follow these steps to equip two primary weapons:
Open Loadout Selection: Access the loadout menu in multiplayer.
Choose a Primary Weapon: Select your primary weapon for the first slot.
Add a Second Primary Weapon: Use the Overkill Wildcard to assign a second primary weapon to the secondary slot.
Customize Attachments: Optimize both weapons with attachments for enhanced performance.
Strategic Tips for Using Overkill
Using Overkill effectively requires strategic planning. Here are some tips:
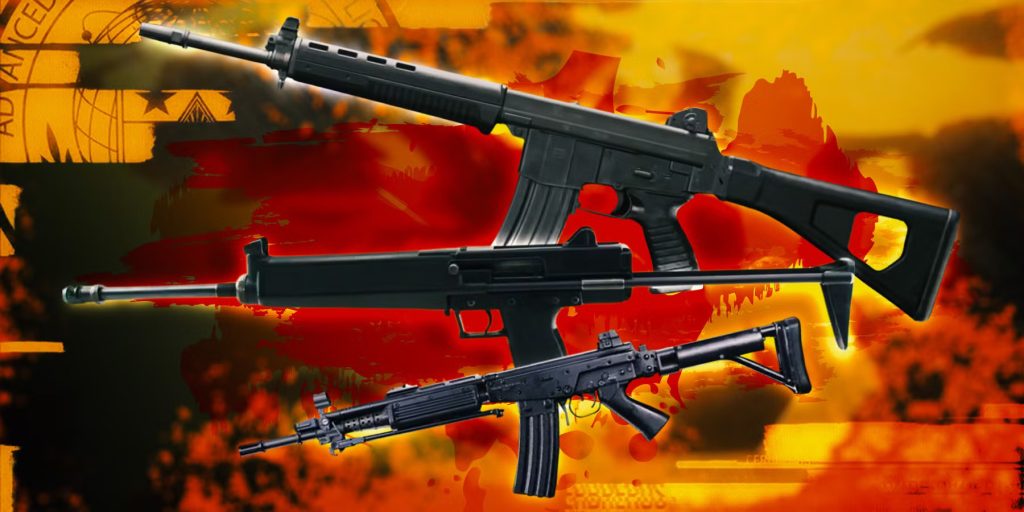
Combine Weapon Types
Pair a long-range weapon, like an assault rifle or sniper rifle, with a close-range option, such as a shotgun or SMG.
Example: Combine the AMES 85 AR with the Jackal PDW SMG for a versatile loadout.
Balance Perks
Choose perks that complement your dual-primary setup. For example, use perks like Scavenger to ensure ammunition availability or Ghost to remain undetected.
Consider the Map
Adjust your weapon selection based on the map. Smaller maps benefit from close-range setups, while larger maps favor long-range combinations.
Potential Drawbacks of Overkill
While the Overkill Wildcard is powerful, it comes with trade-offs:
Wildcard Slot Usage: Overkill occupies the Wildcard slot, preventing you from using other Wildcards.
Limited Perk Options: Balancing perks may require compromises in other areas of your loadout.
Conclusion
The Overkill Wildcard is a game-changer for players who want to equip two primary weapons in Black Ops 6. By unlocking and strategically using this feature, you can enhance your gameplay versatility and adapt to different combat scenarios. Experiment with weapon combinations and find the loadout that best suits your playstyle. Dominate the battlefield with dual-primary firepower!
In Call of Duty: Black Ops 6 (BO6), bot lobbies are a hot topic among players looking to level up faster, complete challenges, or simply enjoy a less competitive gaming experience. If you’re wondering how to create bot lobbies BO6, this guide will walk you through the most effective methods and considerations to safely implement them into your gameplay.
Bot lobbies are multiplayer matches filled with inactive players or bots, providing an opportunity to farm kills and explore new strategies without the stress of high-level opponents. Let’s dive into the different ways to create these lobbies while maintaining account security and following best practices.
Bot lobbies are designed to simulate easier multiplayer matches, often populated by less-skilled players or AI-controlled bots. These lobbies allow players to focus on improving their skills, experimenting with loadouts, or completing challenges with minimal resistance.
In BO6, where skill-based matchmaking (SBMM) ensures that you’re paired with players of similar skill levels, bot lobbies offer a reprieve from the grind of intense competitive matches. They’re particularly useful for players aiming to rank up or achieve mastery camo challenges.
How to Create Bot Lobbies BO6
Source: MitchCactus
1. Manipulate Skill-Based Matchmaking (SBMM)
Skill-based matchmaking is the backbone of BO6’s lobby system. Manipulating SBMM to your advantage can help you land in easier matches.
Host with a Lower KD Ratio: Invite a friend with a lower kill-death (KD) ratio to host the game. The matchmaking system will prioritize their stats, increasing the likelihood of easier opponents.
Join Poor Performers: After a match, review your recent players’ list for someone with lower performance stats. Join their lobby for a chance at a less competitive game.
2. Use Two Consoles for Match Setup
Using two consoles is an effective method for creating bot lobbies without external tools.
Create a Secondary Account: On one console, create a new account and deliberately underperform in several matches to lower the account’s skill rating.
Session Join: Use this secondary account to search for a match. Once the lobby is ready, join with your main account to participate in a game tailored to the secondary account’s lower skill level.
This technique ensures that you can experience relaxed gameplay on your main account without disrupting normal matchmaking rules.
3. Purchase Pre-Made Bot Lobbies
If you’re looking for a convenient solution, some services offer pre-configured bot lobbies for a fee.
Reputable Services: Providers like Leprestore offer safe, pre-managed bot lobbies that do not rely on external cheats or hacks. These services allow you to enter bot lobbies hassle-free, saving time and effort.
Be sure to verify the reputation of the service to avoid scams and protect your account.
4. Use VPNs for Easier Matchmaking
VPNs are another viable option for finding easier lobbies. By connecting to servers in regions with fewer competitive players, you can effectively lower the difficulty of your matches.
Steps to Use a VPN:
Select a reliable VPN service with servers in low-traffic regions.
Connect to the server before launching BO6.
Search for matches to enjoy less intense gameplay.
VPNs also provide the added benefit of securing your internet connection.
Tips for Safe Bot Lobby Practices
Avoid Third-Party Software: Stick to legitimate methods like SBMM manipulation or using a secondary account. Third-party tools can lead to account bans.
Follow Game Policies: Always ensure your actions align with BO6’s terms of service to protect your account integrity.
Collaborate with Friends: Teaming up with trusted friends can make the process smoother and more enjoyable.
Final Thoughts
Mastering how to create bot lobbies BO6 can significantly improve your gameplay experience, offering a chance to achieve goals without the pressure of intense competition. Whether through SBMM manipulation, using multiple consoles, or opting for VPN solutions, there are various safe and effective ways to enter bot lobbies. Always prioritize security and choose methods that protect your account while enhancing your gaming experience.
By following these strategies, you can enjoy BO6 with more control and less frustration, making every session both fun and productive.
Maximize your Black Ops 6 rewards—Create highlights from your best gameplay with with Eklipse
Eklipse help streamer improve their social media presence with AI highlights that clip your Twitch / Kick streams automatically & converts them to TikTok / Reels / Shorts
The BO6 Citadelle des Morts wonder weapons guide is your ultimate companion to mastering one of the most thrilling aspects of Call of Duty: Black Ops 6. Set in the eerie and mysterious Citadelle des Morts, this Zombies map offers a blend of strategic gameplay, elemental Wonder Weapons, and hidden Easter eggs that will keep players immersed and challenged. Whether you’re battling waves of the undead or uncovering the map’s secrets, these weapons are key to surviving and thriving.
Each Wonder Weapon in Citadelle des Morts brings unique powers and gameplay mechanics, making every match a dynamic experience. This guide will walk you through unlocking these incredible tools, solving the puzzles they require, and exploring Easter eggs that add depth to the game. Ready to take your zombie-slaying skills to the next level? Let’s dive in!
The highlight of Citadelle des Morts is the set of four elemental Wonder Weapons, each offering unique abilities to help you survive and thrive against relentless zombie hordes. These powerful weapons include:
Caliburn (Dragon’s Fire Sword)
Durendal (Stag of the Storms Sword)
Balmung (Raven’s Shadow Sword)
Solais (Lion of Light Sword)
Acquiring these weapons requires players to complete challenging quests and interact with intricate in-game mechanics. Each Wonder Weapon is designed to complement different playstyles, from dealing massive fire damage to strategically controlling hordes with light and electricity.
How to Obtain Each Wonder Weapon
Source: One Esports
1. Caliburn: Dragon’s Fire Sword
Caliburn is the ultimate tool for those seeking to unleash fiery destruction on zombies.
Steps to Unlock:
Begin by activating the Pack-a-Punch Machine in the Oubliette Room by completing main quest objectives.
Locate three dragon fire cauldrons scattered across the map. Light each cauldron and carry the flames back to the dragon statue in the entrance hall.
Once all flames are returned, interact with the Bastard Sword to transform it into Caliburn, granting powerful fire-based attacks.
Unique Features: Caliburn’s fiery abilities allow for massive area-of-effect damage, making it perfect for clearing hordes in tight spaces.
2. Durendal: Stag of the Storms Sword
Durendal specializes in electrifying enemies and controlling the battlefield with lightning-based attacks.
Steps to Unlock:
Collect three lightning rods:
Near Deadshot Daiquiri.
From a broken electrical box in the Upper Village.
Dropped by a glowing zombie in a special wave.
Insert the Bastard Sword into a spinning vase, survive incoming zombie waves to charge the weapon, and retrieve it as Durendal.
Unique Features: Durendal’s lightning effects are particularly effective for stunning enemies and creating chokepoints in tight corridors.
3. Balmung: Raven’s Shadow Sword
Balmung offers players the ability to harness dark powers to devastate enemies.
Steps to Unlock:
Defeat glowing zombies in specific areas to collect dark energy fragments.
Solve aetherial puzzles, which include intricate mazes and timed challenges that test your agility and coordination.
Transform the Bastard Sword into Balmung after completing these steps.
Unique Features: Balmung’s shadow powers allow it to debilitate larger enemies and bosses, making it an essential weapon for high rounds.
4. Solais: Lion of Light Sword
Solais is the ultimate Wonder Weapon for players who thrive on precision and versatility.
Steps to Unlock:
Locate Zodiac symbols scattered throughout the map and solve their corresponding puzzles.
Interact with specific knight statues while holding the Bastard Sword to imbue it with light-based abilities, transforming it into Solais.
Unique Features: Solais excels at precise, high-damage attacks and features a unique ability to blind and slow down enemies.
Easter Eggs in Citadelle des Morts
The Citadelle des Morts map is packed with hidden Easter eggs that add depth and excitement to the gameplay. One notable Easter egg involves collecting headphones hidden around the map, which unlocks a special song to enhance the immersive experience.
These fun discoveries provide a rewarding side quest for players who enjoy exploring every corner of the map.
Final Thoughts
The BO6 Citadelle des Morts Wonder Weapons Guide equips players with the knowledge to conquer one of the most thrilling Call of Duty: Black Ops 6 Zombies maps yet. From mastering elemental swords like Caliburn and Durendal to uncovering hidden Easter eggs, this map offers endless opportunities for strategic gameplay and rewarding challenges.
By unlocking these Wonder Weapons and engaging with Easter eggs, you’ll elevate your Zombies experience to new heights. Prepare to wield unmatched power and dominate the undead in Citadelle des Morts.
Maximize your Black Ops 6 rewards—Create highlights from your best gameplay with with Eklipse
Eklipse help streamer improve their social media presence with AI highlights that clip your Twitch / Kick streams automatically & converts them to TikTok / Reels / Shorts
Have you ever missed out on sharing the best moments from your Twitch stream because clipping and editing felt like too much work? You’re not alone. Many streamers struggle with creating highlights manually, which can be time-consuming and frustrating.
Fortunately, AI highlight tools are here to simplify the process. These tools can automatically detect your most exciting moments and convert them into shareable clips for platforms like TikTok, YouTube Shorts, and Instagram Reels. Whether you’re a beginner or an experienced streamer, this guide covers the best free AI-powered tools to help you shine. Let’s explore the options and find the perfect solution for you!
Eklipse is one of the most popular tools among Twitch streamers for automatic highlight generation. Its user-friendly interface and efficient AI algorithms make it a top choice for beginners and intermediate creators. With its seamless integration, Eklipse enables you to capture memorable moments and easily share them across social platforms.
Top Features:
Automatic highlight detection from Twitch streams
Support for TikTok, Reels, and Shorts formats
Basic video editing tools for customization
Pros: Easy to use, optimized for multiple social platforms, free plan available
Cons: Limited customization options in the free tier
2. Powder AI
Powder AI is designed for streamers who want versatility. It supports not only Twitch but also other platforms like YouTube and Facebook Gaming. Powder AI’s intuitive design and advanced algorithms make it a strong contender for creators who need a reliable multi-platform tool.
Clipbot focuses on speed and reliability, making it ideal for streamers who need quick results. This tool simplifies the process of capturing highlights, ensuring that you never miss an epic moment during your streams.
Top Features:
Real-time highlight detection
Export options for various social media formats
No watermark on free clips
Pros: Fast processing, watermark-free exports
Cons: Limited cloud storage for free users
4. OBS Studio with Highlight Plugins
OBS Studio, paired with highlight plugins, offers a flexible and free way to generate clips. While it’s not an AI tool out of the box, adding plugins like Replay Source can automate some tasks. This setup is ideal for tech-savvy streamers who enjoy customizing their workflow.
Top Features:
Open-source and highly customizable
Integration with third-party highlight plugins
No cost for software or plugins
Pros: Fully customizable, no cost involved
Cons: Requires manual setup and configuration
5. Streamladder
Streamladder specializes in converting Twitch clips into vertical formats for social media. While primarily a formatting tool, its AI capabilities streamline the process, making it perfect for streamers looking to expand their reach on platforms like TikTok and Instagram.
Top Features:
Converts horizontal clips into TikTok-friendly formats
Customizable templates and overlays
Free and premium plans available
Pros: Tailored for social media, intuitive interface
Cons: Limited features in the free version
6. LvlUp AI:
LvlUp AI is a newer entrant in the highlight tool space, focusing on game-specific algorithms to capture key moments. It’s designed for gamers who want highlights that truly reflect the intensity of their gameplay.
Top Features:
Advanced AI trained on gaming genres
Integration with Twitch and YouTube
Free for basic features
Pros: Game-specific highlight detection, growing feature set
Cons: Smaller user base, fewer editing options
Final Thoughts
For Twitch streamers, choosing the right AI highlight tool depends on your needs and workflow. Tools like Eklipse and Powder AI excel in simplicity, while OBS Studio and its plugins offer customization for advanced users. If social media optimization is your priority, Streamladder and Clipbot stand out. Evaluate each tool’s features, test them out, and find the one that fits your style best.
Have you ever found yourself overwhelmed by hordes of zombies in Call of Duty: Black Ops 6 (BO6), wishing your melee weapon packed a bigger punch? You’re not alone. Many players struggle to survive the later rounds without powerful weapons, but upgrading your sword can turn the tides.
This guide reveals how to elevate your sword’s rarity to dominate the battlefield and face every challenge BO6 throws your way. Let’s enhance your arsenal and ensure your survival in the toughest battles.
Understanding weapon rarity is crucial for making your sword an unstoppable force. Here’s a breakdown of the rarity tiers and their impact on damage:
Common (White): No bonus damage.
Uncommon (Green): 50% bonus damage.
Rare (Blue): 100% bonus damage.
Epic (Purple): 200% bonus damage.
Legendary (Orange): 300% bonus damage.
Wonder (Yellow): No further damage boost.
Progressing through these levels ensures your sword stays effective against increasingly tough enemies.
Methods to Upgrade Your Sword in BO6
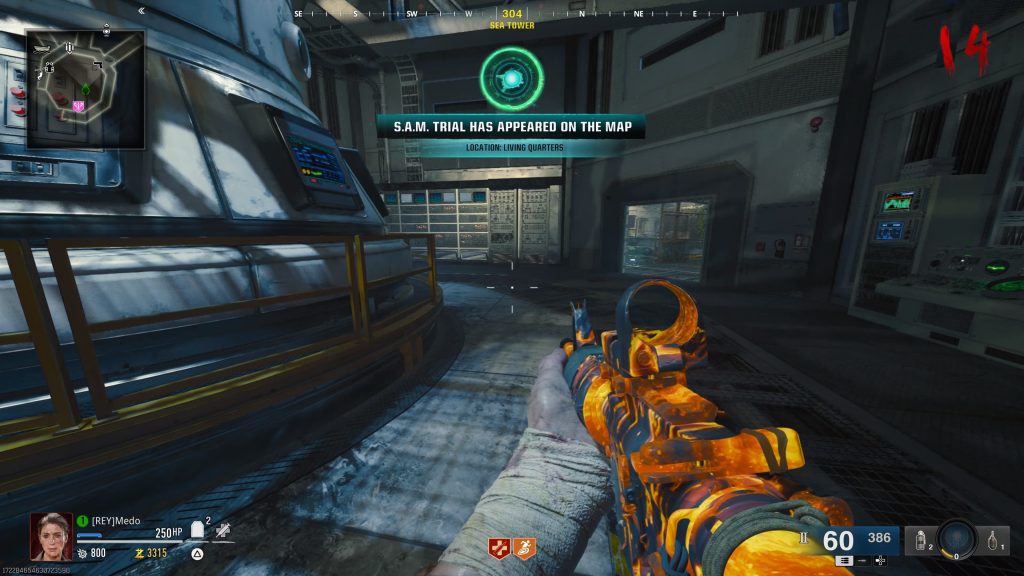
Image: The Gamer
1. Complete S.A.M. Trials
S.A.M. Trials are mini-challenges that become available mid-match. Successfully completing these trials rewards players with an Aether Tool, which upgrades your weapon’s rarity. Here’s how to approach these trials:
Check Objectives: Pay attention to the specific tasks assigned, like getting headshots or surviving certain waves without damage.
Play Strategically: Balance completing the trial with staying alive—don’t get too aggressive if it compromises your survival.
2. Use the Pack-a-Punch Machine
The Pack-a-Punch Machine is a classic feature in Zombies Mode, offering upgrades that increase damage and add special effects. To upgrade your sword:
Locate the Pack-a-Punch Machine in your map.
Earn enough in-game currency through kills and objectives.
Use the machine to enhance your sword’s performance.
Pro Tip: Upgrading multiple times in the same match ensures you’re ready for tougher rounds.
3. Look for Weapon Rarity Drops
Weapon rarity drops are items earned by defeating elite zombies or completing map-specific objectives. These drops automatically enhance your weapon rarity. Focus on:
Targeting Elite Zombies: They often drop rare and valuable loot.
Exploring Objectives: Complete in-map tasks for additional rewards.
Tips for Efficient Sword Upgrades
Earn Points Wisely: Prioritize actions like headshots and combo kills to amass points quickly.
Map Awareness: Learn the location of key machines and trial stations.
Work with Teammates: Coordinate efforts to keep each other safe while upgrading weapons.
Conclusion
Upgrading your sword in BO6 is a game-changer, offering the damage boost you need to face escalating zombie waves. By mastering S.A.M. Trials, leveraging the Pack-a-Punch Machine, and securing rarity drops, you’ll turn your sword into a lethal tool for survival. Ready to take on the challenge? Start upgrading and show those zombies who’s boss!
Small streamers often feel overlooked despite their hard work. With fierce competition and shifting algorithms, standing out can be tough. However, there is a way to break through the noise and build a dedicated following.
By mastering platform nuances and using effective strategies, visibility and engagement can grow. Let’s explore the best social media tactics for small streamers. You’ll learn how to select platforms, create engaging content, and connect with your audience.
Platform Selection: Picking the Right Spaces for Growth
Twitch Streamer – Source: Doc.
Choosing the right social media platform is the foundation of your strategy. Each platform has its strengths and caters to different audiences.
Why It Matters
Not all platforms suit every streamer. For instance:
TikTok: Ideal for younger, Western audiences.
Facebook: Great for Southeast Asian demographics.
Twitter: Highly effective for Japanese streamers.
Actionable Tips
Start with One or Two Platforms: Focus your energy on platforms that resonate with your target audience.
Diversify Later: Once you’ve established a presence, expand to platforms like Instagram, YouTube, or Discord.
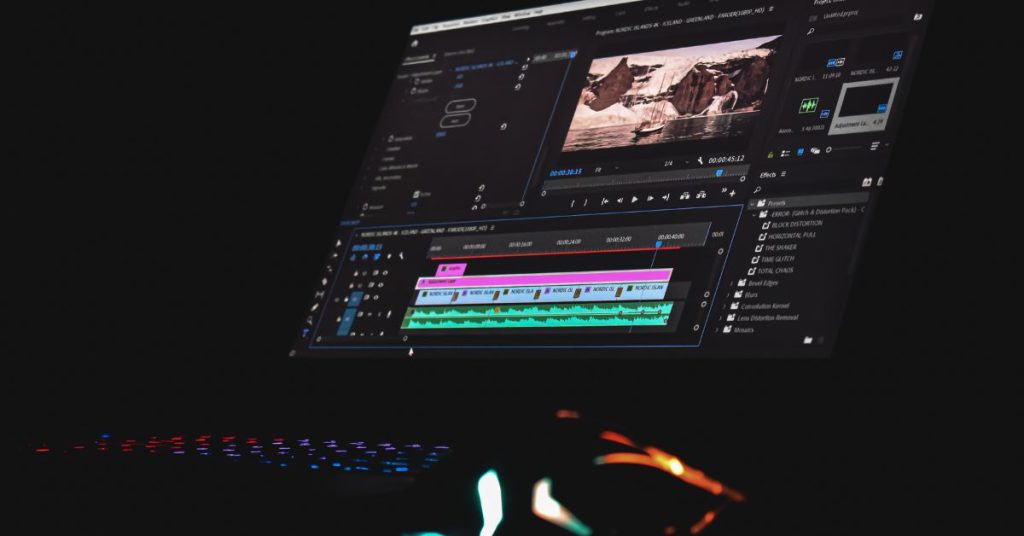
Content Strategy: Consistency and Quality
Creating engaging content is essential to attract and retain followers. Your content should align with your streaming niche and audience interests.
Key Elements of a Winning Strategy
High-Quality Visuals: Use professional-looking thumbnails, graphics, and video clips to grab attention.
Content Variety: Experiment with:
Short clips for TikTok.
Highlights and tutorials for YouTube.
Real-time updates on Twitter.
Behind-the-Scenes Content: Share relatable moments like stream setups or Q&A sessions to foster connection.
Pro Tip
Stick to a consistent posting schedule to improve algorithm favorability and keep your audience engaged.
Promotion & Engagement: Build Anticipation and Interact
Building relationships with your followers can significantly boost engagement and stream attendance.
How to Promote Effectively
Pre-Stream Announcements: Use teasers, countdowns, or interactive posts to generate excitement.
Real-Time Engagement: During streams, interact with viewers through shoutouts, polls, and live chats.
Leverage Cross-Promotion
Share short clips of your best moments across all platforms.
Collaborate with other streamers to expand your reach.
Community Building: Create a Loyal Follower Base
A strong sense of community sets successful streamers apart. Social media is a powerful tool for fostering this connection.
Steps to Build a Community
Engage Consistently: Respond to comments and messages.
Encourage Participation: Use polls, questions, and contests to involve your followers.
Analytics: Fine-Tune Your Strategy
Using analytics can help you understand what works and what doesn’t.
Tools to Use
Platform Insights: Utilize tools like YouTube Analytics or Twitter Insights.
Track Metrics: Monitor follower growth, engagement rates, and video performance.
Final Thoughts
For small streamers, growing an audience requires a strategic approach to social media. Choosing the right platforms, producing compelling content, and building a community are key factors in success.
By applying these strategies, you can set the foundation for a successful streaming career. Start now, and watch your audience expand!


")