
Level Up Your Marvel Rivals Gameplay
Capture your epic wins, clutch moments, and even hilarious fails with Eklipse. Easily create and share highlight reels with your friends—even if you're not streaming!
Learn MoreOBS Studio is a powerful tool for streamers and content creators, offering versatile options for video capture and streaming. If you’re looking to refine your visuals and highlight specific areas of your captured window, learning how to crop window capture in OBS is essential. This simple yet impactful skill allows you to customize your stream’s layout and enhance its overall quality.
In this guide, we’ll walk you through the steps to crop window captures in OBS Studio, helping you focus on key elements and create a polished, professional-looking stream. Let’s dive in and elevate your content creation game!
How to Crop Window Capture in OBS
If you want to record a single open window instead of the entire screen, OBS Studio’s Window Capture feature can be useful. However, it has limitations when capturing pop-ups, menus, and additional panels.
To overcome this, you can crop a standard Display Capture to fit the screen, allowing you to record all necessary elements. Here are three methods to achieve this:
1. Using the Crop/Pad Filter
Source: Eklipse.gg
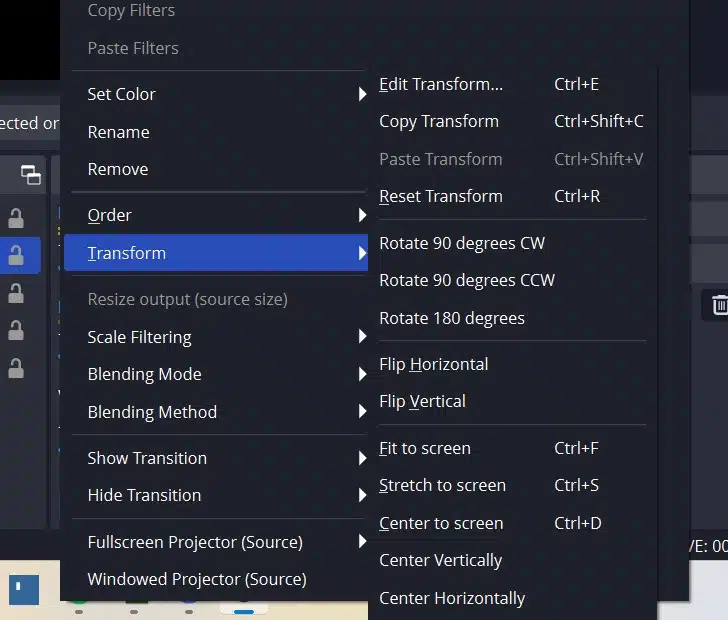
- Right-click on the Display Capture source in the “Sources” box and select “Transform,” then choose “Edit Transform.”
- A new window will appear. If needed, click “Reset” to adjust the source settings.
- Enter the desired width in the “Crop: Right” field and the height in the “Crop: Bottom” field.
- Once done, close the window and go to “Settings.”
- In the “Video” tab, ensure that the Canvas Resolution matches the window capture.
More on Eklipse Blog >>> How to Change Your YouTube Shorts Thumbnail
2. Cropping With Edit/Transform Feature
Source: Eklipse.gg
- Select the Display Capture source in the “Sources” box and right-click on it.
- Choose “Transform” and click “Edit Transform.”
- Adjust the “Crop: Right” and “Crop: Bottom” fields to achieve the desired cropping.
- Close the window.
- In the “Settings” menu, make sure the Canvas Resolution matches the window capture in the “Video” tab.
3. Using ALT Button to Crop Window Capture in OBS
- Select the Display Capture source using your cursor.
- Hover your cursor over the red dots on the red outline and press “Command” (Mac) or “ALT” (Windows and Linux).
- While holding the key, left-click and drag the red circles to crop the Display Capture to your desired size.
Capturing Windows in OBS on a Mac or Windows PC
Source: Eklipse.gg
In addition to cropping, you may want to capture specific windows while using OBS Studio on a Mac or Windows PC. Here’s how to do it:
Method 1: Using Window Capture
- Open OBS Studio and navigate to the “Sources” box.
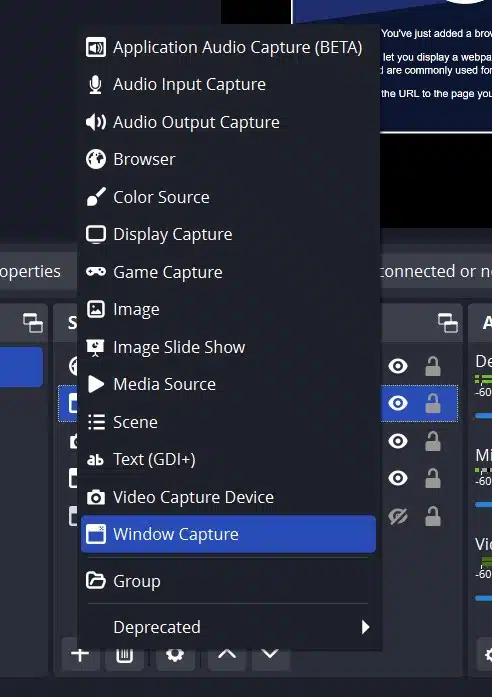
- Click on the “+” button at the bottom-left corner of the box.
- Select “Screen Capture” from the pop-up menu.
- A small window will appear, allowing you to name the source. Enter a name and click “OK.”
- Next to “Window,” click the downward arrow to access a drop-down list. Select the window you want to capture.
- Ensure that the “Capture Cursor” box is checked. Then, click “OK.”
- If the window capture doesn’t match the screen size, go to “Settings” and adjust the Base Resolution in the “Video” tab.
Method 2: Combining Display Capture and Cropping
- Launch OBS Studio and locate the “Sources” box.
- Right-click and choose “Add” and select “Display Capture” as the source.
- Name the source and click “OK”.
- If you have multiple monitors, manually select the desired monitor.
- Check the “Capture Cursor” box and click “OK”.
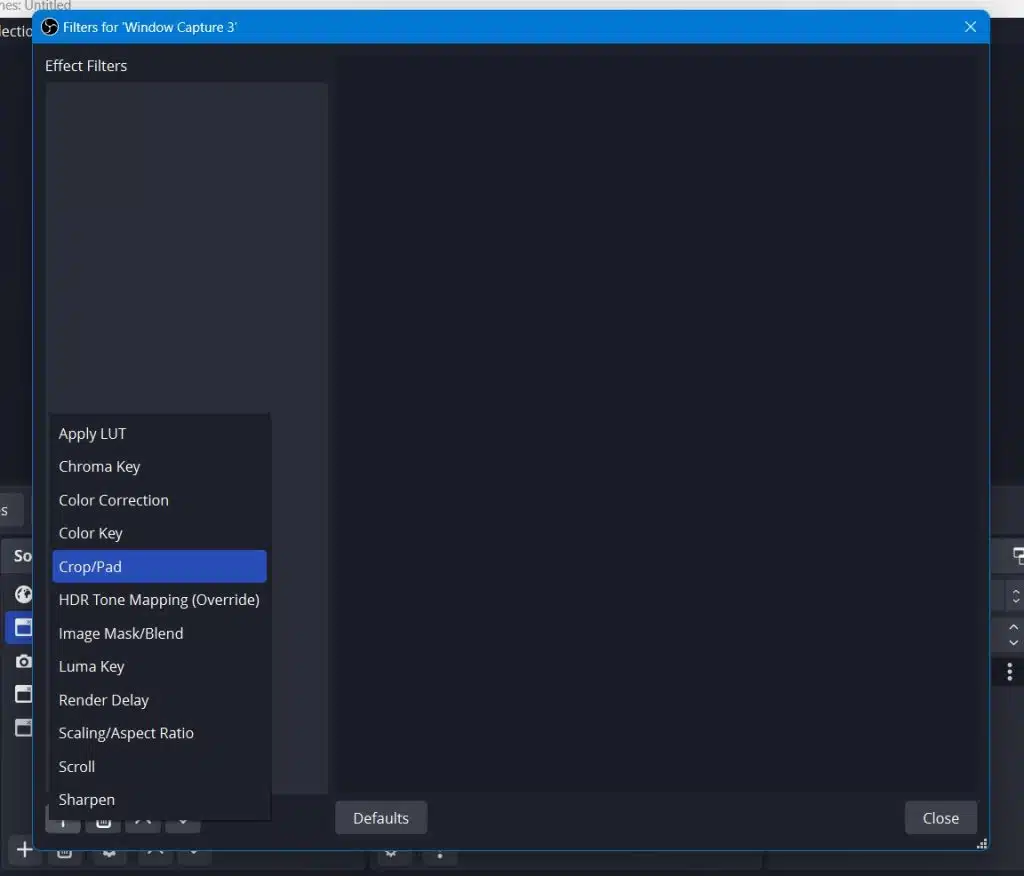
- Right-click on the Display Capture source in the “Sources” box and select “Filters”.
- In the pop-up window, click the “+” button at the bottom-left corner.
- Select the “Crop/Pad” filter from the list and click “OK”.
- Adjust the cropping parameters and click “Close”.
By following these methods, you’ll gain complete control over your OBS Studio window, perfectly aligning it with your desired capture area for stunning, perfectly sized recordings.
FAQs
- What is the difference between display capture and window capture OBS?
Display capture records your entire screen, including all windows, applications, and desktop activity. Window capture, on the other hand, records only a specific window or application, ensuring other parts of your screen remain private. - How do I fix OBS video capture?
- To fix OBS video capture issues:
- Ensure your capture device is properly connected.
- Check the device settings in OBS and match them to the hardware specifications.
- Update your capture device drivers and OBS to the latest versions.
- Try switching between hardware and software encoding in the OBS settings.
- To fix OBS video capture issues:
- Can OBS capture a minimized window?
No, OBS cannot capture a minimized window because the application stops rendering its content when minimized. To capture such a window, keep it open or use display capture as an alternative.
Final Thoughts
Mastering the art of capturing and cropping windows in OBS Studio is crucial for creating an engaging livestream. By utilizing the methods described in this guide, you can enhance your content creation workflow and produce outstanding videos.
Experiment with different techniques and find the approach that works best for your needs. With OBS Studio’s versatile features and creative flair, you’ll be on your way to producing professional-quality video content.
However, if you’re going for that pro stream vibe, just cropping window captures might not cut it. You can try to refine your content after streaming by clipping your best moments using Eklipse, the AI video editing tool designed for streamers and content creators. Try Eklipse now!

🎮 Play. Clip. Share.
You don’t need to be a streamer to create amazing gaming clips.
Let Eklipse AI auto-detect your best moments and turn them into epic highlights!
Limited free clips available. Don't miss out!
