
Level Up Your Marvel Rivals Gameplay
Capture your epic wins, clutch moments, and even hilarious fails with Eklipse. Easily create and share highlight reels with your friends—even if you're not streaming!
Learn MoreDo you want to reach a larger audience on your Kick live? Then, you must be aware of these three best OBS settings for streaming 2024 on Kick.
Live streaming on platforms like Kick is a great way to connect with like-minded people and engage with your audience in real-time. To have a successful live stream, you need the right tools, and OBS Studio is a popular choice among streamers. However, many people still use the wrong OBS settings for their live streams, resulting in poor video quality.
In this article, we’ll guide you on using OBS and optimizing settings for the best-looking Kick stream, along with tips for streaming on Twitch. Let’s dive in!
Accessing OBS Studio
Before starting a live stream on Kick, it’s essential to configure the best OBS settings to ensure the best video quality. There are three setting you need to adjust for the best kick stream: video bitrate, audio bitrate, and advance setting.
Those elements can be modified on the “Output” tab. Here’s how to access them:
- Open OBS Studio and navigate to the bottom-right of your screen.
- Click on “Settings”
- Select the “Output” tab on the left.
More on Eklipse Blog >> Best OBS Settings for Streaming in Low-end PC
Best OBS Streaming for Kick
1. Video Bitrate
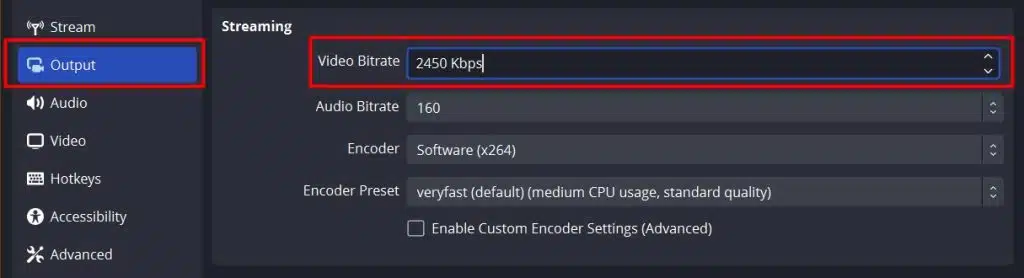
What’s best OBS settings for no lag? Before we delve further, you need to know that the video bitrate determines the video quality of your stream.
A higher bitrate generally leads to better quality, but you should choose a bitrate that matches your upload speed. Excessive bitrate is a waste of bandwidth.
There are some recommended best OBS settings for Kick available depending on the video’s resolution; including the best OBS settings for streaming 1080p 60fps 2023.
For example, the best OBS streaming settings for 4K videos should be 8000, while the OBS bitrate for 1080P is 3000 or 5000. Here’s a table that can help you select the most suitable bitrate:
| Quality | Resolution | Video Bitrate |
|---|---|---|
| Ultra-High Definition | 4K | 8000 |
| High Definition | 1920×1080 (1080P) | 3000/3500 |
| High Definition | 1280 x 720 (720P) | 1800/2500 |
| Medium | 640 x 360 (360P) | 600/800 |

2. Audio Bitrate
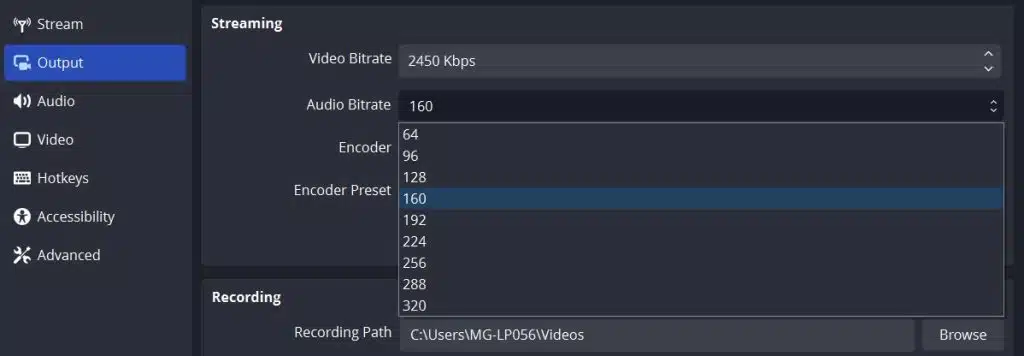
The audio bitrate is equally important as the video bitrate and decides the audio quality in your stream.
A higher bitrate results in better quality, and audio makes up 80% of the content in a live stream. OBS offers recommended audio bitrate settings:
| Quality | Audio Bitrate |
|---|---|
| High Quality | 320 |
| High Quality | 256 |
| Medium | 128 |
More on Eklipse Blog>>> 8 Tips to Promote Kick Stream and Building Your Fanbase
3. Advanced Settings
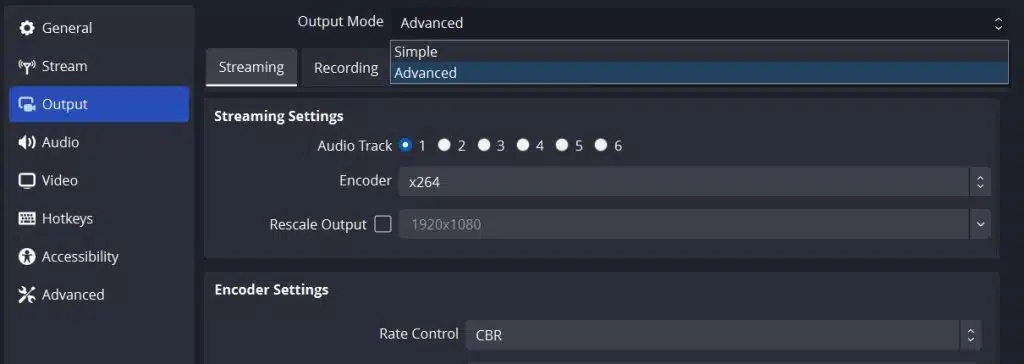
For professional users, OBS offers a more advanced output mode. You can activate this mode by selecting “Advanced” from the dropdown menu after “Output Mode.”
In this mode, you can stream with multiple audio tracks and adjust each track’s bitrate precisely. While most users may not need these options, they are beneficial for those who want a perfect live stream.
Another important aspect to keep in mind is the “CPU Usage Preset”. You can tweak this setting gradually based on your CPU power level.
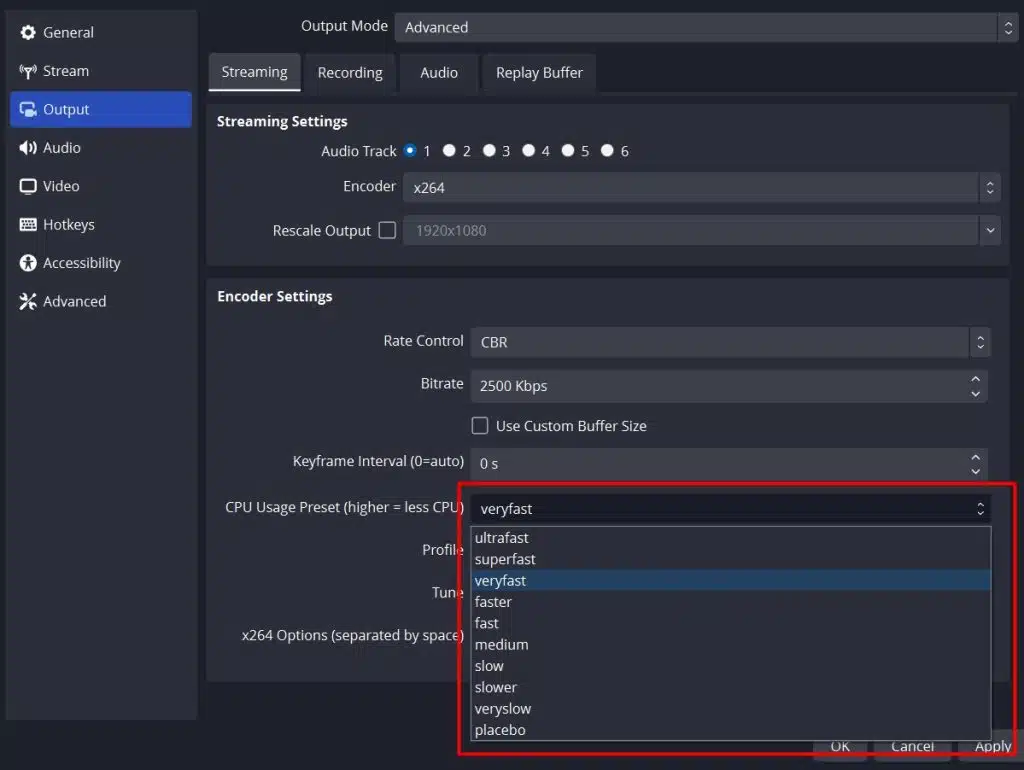
If you are using an older PC with an outdated processor, the “ultrafast” option can provide a smoother streaming experience. However, if you are using a newer PC with a more advanced processor, feel free to choose the “fast” option for improved graphics output.
Whether you choose best OBS settings for recording low end pc or advanced mode, the best OBS settings for a Kick stream should match your PC’s device performance and network speed. So, make the choices according to your situation.
More on Eklipse Blog>>> 7 Tips to Boost Kick Stream Viewer Engagement
Bonus Tips – Recommended OBS Setting for General Streaming
- Optimizing Video Bitrate: For pixel-perfect Full HD (1080p) live streams at 30fps, set the Video Bitrate to 4000 Kbps.
- Enhancing Audio Quality: Increase the Audio Bitrate to 320 Kbps for the best sound quality. For non-music streams, 160 Kbps is recommended on most platforms.
- Adjusting Keyframe Interval: Set the Keyframe interval to 2 seconds. This determines how often a frame with a higher amount of data is sent, acting as a base for subsequent frames.
- Optimizing CPU Usage Preset: Check the CPU Usage Preset. A slower preset enhances stream quality but puts more strain on your hardware. Adjust accordingly based on your device’s capabilities for smooth broadcasts.
More on Eklipse Blog >> Adding and Editing Kick Emotes (2023): Boost Your Chats!
💡Now your OBS has been set. It’s time to jumpstart your live-streaming career on Kick! Check out our guide on How to Clip Kick Stream Automatically and How to Edit a Kick Clip to TikTok to grow your Kick channel using social media
Tips After You’re Done Your First Stream
Congratulations on successfully completing your first Kick stream! You’ve taken the first step into the exciting world of live streaming.
Now, to help you make the most of your streaming journey, here are some valuable tips to consider after your inaugural broadcast:
1. Review Your Stream
Take time to watch your stream and identify areas for improvement, including audio and video quality, commentary, and technical issues.
2. Analyze Analytics
Study streaming platform analytics to understand what worked and what didn’t, helping you refine future streams.
3. Plan Future Streams
Schedule future streams, consider content, and plan special events or collaborations to attract and retain viewers.
4. Repurpose Your Livestream Content
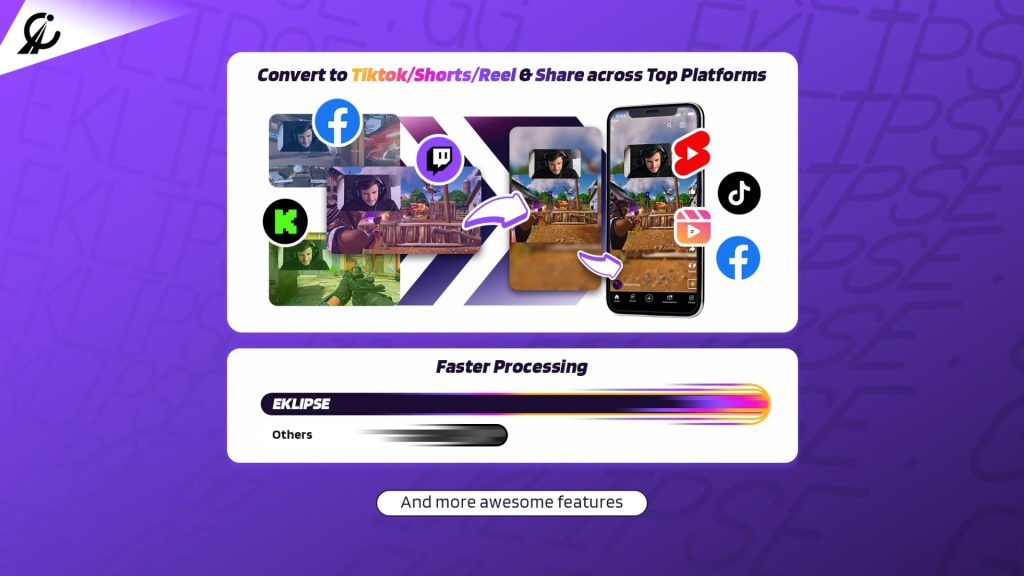
To grow your Kick channel followers, promoting your content is a must. You can consider to repurpose your livestream content to short vertical format for TikTok, Shorts, or Reels. The good news is, now you can do that easily with tools like Eklipse.
You can check up our tips to learn more: 5 Content Repurposing Tips: Long Videos to Vertical Content
5. Invest in Quality Equipment
Consider upgrading equipment for better audio, video, and lighting to enhance your stream’s overall quality.
More on Eklipse Blog >> How to Improve Kick Stream Quality: 10 Things to Check
FAQ
Here are some popular questions regarding the best OBS settings for streaming reddit:
1. What Bitrate Should I Record at OBS for High Quality?
The recommended bitrate for high-quality recordings in OBS typically falls between 10,000-20,000 kbps.
2. How Do I Record My PS4 with OBS?
Set up a capture card by connecting your PS4 to it and then linking the capture card to your computer through an HDMI cable. In OBS, create a new scene, add a video capture device source, select your capture card, and adjust settings accordingly.
3. What’s the Best OBS Settings for Recording Gameplay?
Optimal settings depend on your setup. Generally, match video settings to your desired resolution, use the H.264 encoder, and experiment with bitrates and presets.
Conclusion
In conclusion, the best OBS settings for kick stream are crucial for a successful live stream. Configure the settings according to your situation, and don’t forget to engage with your audience during the stream. Happy streaming!
Maximize your Black Ops 6 rewards—Create highlights from your best gameplay with with Eklipse
Eklipse help streamer improve their social media presence with AI highlights that clip your Twitch / Kick streams automatically & converts them to TikTok / Reels / Shorts
🎮 Play. Clip. Share.
You don’t need to be a streamer to create amazing gaming clips.
Let Eklipse AI auto-detect your best moments and turn them into epic highlights!
Limited free clips available. Don't miss out!
