TL;DR Battlefield 6 requires Secure Boot for anti-cheat. You need to enable it in your PC’s BIOS/UEFI settings. The exact steps vary by motherboard, but generally involve restarting your PC, entering BIOS, and finding the Secure Boot option.
As PC gamers dive into the highly anticipated Battlefield 6 beta, some are encountering a frustrating roadblock: the “Secure Boot Not Enabled” error. This message prevents players from launching the game, leaving many wondering why this requirement exists and how to resolve it. Understanding the purpose behind Secure Boot and the steps to enable it is crucial for a smooth entry into the Battlefield 6 experience.
This error is a direct result of Electronic Arts and DICE’s commitment to maintaining a fair play environment. Secure Boot, a security feature found in modern PCs, is now a mandatory requirement for Battlefield 6 on PC to combat cheating. While this might seem like an extra hurdle, enabling Secure Boot is a straightforward process that will not only allow you to play the beta but also enhance your system’s overall security. We’ll guide you through the necessary steps to get you back on the battlefield.
What is Secure Boot and Why is it Required for Battlefield 6?
Secure Boot is a security standard developed by members of the PC industry to help ensure that your PC boots using only software that is trusted by the original equipment manufacturer (OEM). When the PC starts, the firmware checks the signature of each piece of boot software, including firmware drivers (Option ROMs), EFI applications, and the operating system. If the signatures are valid, the PC boots, and the firmware gives control to the operating system. If the signatures are invalid, the PC won’t boot.
For Battlefield 6, EA and DICE have implemented Secure Boot as a mandatory requirement primarily to enhance their anti-cheat measures. By ensuring that only trusted software is loaded during the game’s launch, it becomes significantly harder for malicious programs, including cheats and hacks, to inject themselves into the game process. This creates a more level playing field for all legitimate players and contributes to a healthier gaming environment.
How to Enable Secure Boot in Your BIOS/UEFI Settings
Enabling Secure Boot involves navigating your computer’s BIOS (Basic Input/Output System) or UEFI (Unified Extensible Firmware Interface) settings. The exact steps can vary slightly depending on your motherboard manufacturer and BIOS version, but the general process is as follows:
Restart Your PC: Save any open work and restart your computer.
Enter BIOS/UEFI: As your PC restarts, repeatedly press the designated key to enter your BIOS/UEFI settings. Common keys include Delete, F2, F10, or F12. You might see a message on your screen indicating which key to press.
Navigate to Security or Boot Settings: Once in the BIOS/UEFI menu, look for sections like “Security,” “Boot,” “Authentication,” or “Advanced.”
Find Secure Boot Option: Within these sections, locate the “Secure Boot” option. It might be under a sub-menu like “Boot Options” or “UEFI Firmware Settings.”
Enable Secure Boot: Change the setting from “Disabled” to “Enabled.”
Save and Exit: Save your changes and exit the BIOS/UEFI. Your PC will then restart.
Important Notes:
You may need to disable “CSM” (Compatibility Support Module) or enable “UEFI Mode” before you can enable Secure Boot.
Some systems might require you to set a BIOS password before enabling Secure Boot.
If you encounter issues after enabling Secure Boot (e.g., your PC doesn’t boot), you may need to revert the changes or consult your motherboard’s manual.
While enabling Secure Boot is generally straightforward, you might encounter a few common issues:
Cannot Find Secure Boot Option: Ensure your system is running in UEFI mode, not Legacy BIOS. Secure Boot is a UEFI feature. You might need to convert your drive to GPT if it’s MBR.
PC Won’t Boot After Enabling: This can happen if your operating system or drivers are not compatible with Secure Boot. You might need to disable it again, update your OS and drivers, and then re-enable it.
BIOS Password Required: Some motherboards require you to set an administrator password in the BIOS before you can modify Secure Boot settings.
“Secure Boot State: Off” Even After Enabling: Sometimes, even after enabling Secure Boot in BIOS, the system might report it as off. This could be due to other settings like CSM being enabled. Ensure CSM is disabled.
If you continue to face difficulties, it’s always recommended to consult your motherboard’s manual or visit the manufacturer’s support website for specific instructions tailored to your system. EA also provides a detailed guide on their help website that can assist you further.
Optimize Your Battlefield 6 Highlights with Eklipse.gg
Once you’ve successfully enabled Secure Boot and are back in the Battlefield 6 beta, you’ll be ready to capture all your epic moments. This is where Eklipse.gg can become your ultimate companion. Eklipse.gg is an AI-powered platform designed to automatically highlight and clip the best parts of your streams and gameplay, saving you countless hours of manual editing.
Imagine effortlessly sharing your multi-kills, clutch plays, and hilarious moments from Battlefield 6 without lifting a finger. Eklipse.gg’s AI identifies these key moments, allowing you to focus on playing. You can even process up to 3 streams for free, connecting to Twitch, YouTube, and Facebook, and get 720p clip quality.
For streamers and content creators looking to maximize their impact, consider upgrading to Eklipse Premium. Premium features include 1080p clip quality, no watermarks, 3x faster processing, a social media caption and hashtag generator, and a Discord Auto-Share Bot. Let Eklipse.gg handle the heavy lifting of content creation, so you can dominate the Battlefield and grow your audience.
Conclusion
The “Secure Boot Not Enabled” error in the Battlefield 6 beta is a security measure designed to enhance fair play. While it might require a quick trip to your BIOS settings, enabling Secure Boot is a necessary step to join the fight. By following the steps outlined in this guide, you can quickly resolve this issue and dive into the intense action of Battlefield 6. Remember to leverage tools like Eklipse.gg to capture and share your most thrilling moments, turning your gameplay into engaging content for your audience. See you on the battlefield!
TL;DR You can get early access through Twitch Drops by watching specific streams, or if you participated in Battlefield Labs or are an EA Play Pro subscriber. The open beta officially starts on August 9th.
The highly anticipated Battlefield 6 is on the horizon, and gamers worldwide are eager to jump into the action. If you’re looking to get a head start and experience the game before its official release, securing early access to the Battlefield 6 Open Beta is your best bet. This guide will walk you through the various methods to gain early entry, ensuring you’re among the first to explore the new maps, modes, and features.
Getting into the Battlefield 6 Open Beta early offers a significant advantage, allowing you to familiarize yourself with the game’s mechanics and provide valuable feedback to the developers. Whether you’re a long-time fan of the franchise or a newcomer, understanding the pathways to early access is crucial for maximizing your pre-launch experience. We’ll cover everything from Twitch Drops to subscription benefits, ensuring you have all the information needed to join the fight.
One of the most accessible ways to gain early access to the Battlefield 6 Open Beta is through Twitch Drops. Electronic Arts and DICE have partnered with Twitch to offer beta keys to viewers who watch participating streams. Here’s how you can get your code:
Link Your Accounts: First, ensure your Twitch account is linked to your EA account. This is a crucial step for the drops to be registered correctly.
Find Participating Streams: Look for streamers playing Battlefield 6 who have ‘Drops Enabled’ in their stream titles or descriptions. These are typically popular Battlefield content creators or official EA/DICE channels.
Watch for 30 Minutes: Simply watch a participating stream for at least 30 minutes. The platform will notify you when you’ve earned a drop.
Claim Your Key: Once earned, your beta key will appear in your Twitch Drops Inventory. You’ll then need to redeem this code on the official Battlefield 6 code redemption website.
DICE has also been adding additional days for these code drops, so keep an eye out for announcements if you missed the initial windows.
2. EA Play Pro and Battlefield Labs: Other Paths to Early Access
Beyond Twitch Drops, there are other avenues to secure early access to the Battlefield 6 Open Beta:
EA Play Pro Subscribers: If you are an EA Play Pro subscriber, you are automatically granted early access to the beta. This premium subscription service from Electronic Arts often provides early access to new titles and other in-game benefits.
Battlefield Labs Participants: DICE’s Battlefield Labs is a pre-release feedback program. Players who have participated in this program are also granted early access to the beta. This rewards dedicated community members who have helped shape the game’s development.
Battlefield 6 Open Beta Schedule: Mark Your Calendars
Even if you don’t secure an early access code, you’ll still have opportunities to play the Battlefield 6 Open Beta. The beta is typically divided into two main phases:
Early Access Period: This period is for those who have secured early access through Twitch Drops, EA Play Pro, or Battlefield Labs. It usually starts a few days before the open beta. For Battlefield 6, this began on August 7th.
Open Beta Weekends: The beta then opens up to all players for specific weekends. For Battlefield 6, these dates are:
First Open Beta Weekend: August 9-10
Second Open Beta Weekend: August 14-17
Preloading the beta client is highly recommended. This allows you to download the game files in advance, so you can jump straight into the action as soon as the beta goes live on your preferred platform (PC, PS5, Xbox Series X and S).
PC-Specific Notice: Secure Boot Requirement
For PC players, there’s an important technical requirement to be aware of. DICE and EA have implemented a Secure Boot requirement for Battlefield games to combat cheating. This means that to play the Battlefield 6 Open Beta on PC, you will likely need to enable Secure Boot in your computer’s BIOS settings. If you’re unfamiliar with this process, EA provides a detailed guide to assist you. Check this page to see the detailed guide.
Enhance Your Battlefield 6 Experience with Eklipse.gg
As you dive into the intense battles of Battlefield 6, capturing and sharing your most epic moments becomes a key part of the experience. This is where Eklipse.gg steps in as your invaluable partner. Eklipse.gg is designed to help both beginner and experienced streamers and gamers effortlessly create high-quality clips and highlights from their gameplay.
Struggling to find time for manual editing? Eklipse.gg’s AI Highlights can do the heavy lifting for you, automatically identifying and clipping the best parts of your streams. This means less time editing and more time playing Battlefield 6. You can even process up to 3 streams for free, connecting to Twitch, YouTube, and Facebook, with 720p clip quality as a starting point.
Ready to take your Battlefield 6 content to the next level? Consider upgrading to Eklipse Premium. With Premium, you unlock features like 1080p clip quality, no watermarks, 3x faster processing, a social media caption and hashtag generator, and even a Discord Auto-Share Bot. Think of Eklipse as your personal editing assistant, ensuring your best Battlefield 6 moments are always ready to share.
Conclusion
Securing early access to the Battlefield 6 Open Beta is an exciting opportunity to experience the game ahead of its official launch. Whether you earn your way in through Twitch Drops, leverage your EA Play Pro subscription, or participate in Battlefield Labs, getting an early look at the game will give you a competitive edge. Remember to utilize tools like Eklipse.gg to capture and share your most thrilling Battlefield 6 moments, turning your gameplay into engaging content for your audience.
TL;DR To enable Secure Boot for Battlefield 6, access your PC’s BIOS/UEFI settings (usually by pressing F2, Del, or F10 during startup), navigate to the Boot or Security section, disable CSM, enable UEFI mode, and then enable Secure Boot. Save changes and exit.
The highly anticipated launch of Battlefield 6 brings with it not only cutting-edge graphics and immersive gameplay but also new system requirements designed to enhance security and fairness. For PC gamers eager to dive into the action, one crucial prerequisite is enabling Secure Boot on their system. This guide will provide a comprehensive, step-by-step walkthrough on how to enable Secure Boot, ensuring you meet Battlefield 6’s requirements and can enjoy a seamless, secure gaming experience.
Secure Boot is a security feature of the Unified Extensible Firmware Interface (UEFI) that helps prevent malicious software from loading during the system startup process. By ensuring that only trusted software can boot your PC, it acts as a critical defense against rootkits and boot-time malware. For Battlefield 6, this feature, alongside TPM 2.0, is a mandatory component of the new EA Javelin Anticheat system, designed to create a more level playing field for all players. Understanding and correctly configuring Secure Boot is essential for a smooth entry into the game.
What is Secure Boot and Why is it Required for Battlefield 6?
Secure Boot is a security standard developed by members of the PC industry to help ensure that a device boots using only software that is trusted by the Original Equipment Manufacturer (OEM). When the PC starts, the firmware checks the signature of each piece of boot software, including firmware drivers (Option ROMs), EFI applications, and the operating system. If the signatures are valid, the PC boots. If the signatures are tampered with or unrecognized, the PC won’t boot, or it will prompt the user to resolve the issue.
For Battlefield 6, the requirement for Secure Boot is directly tied to its new anti-cheat system, EA Javelin Anticheat. This system is designed to combat the pervasive issue of cheating in online multiplayer games, which can severely degrade the experience for legitimate players. By mandating Secure Boot, EA aims to create a more secure environment, making it significantly harder for cheaters to inject unauthorized software or manipulate game files at a low level. This commitment to fair play is a welcome development for the community, ensuring that competitive integrity is maintained.
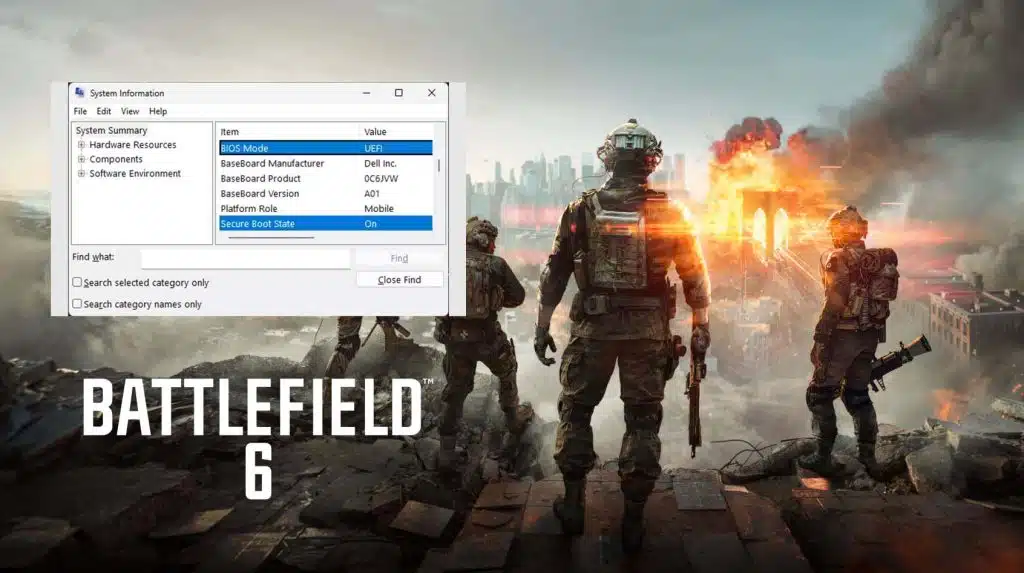
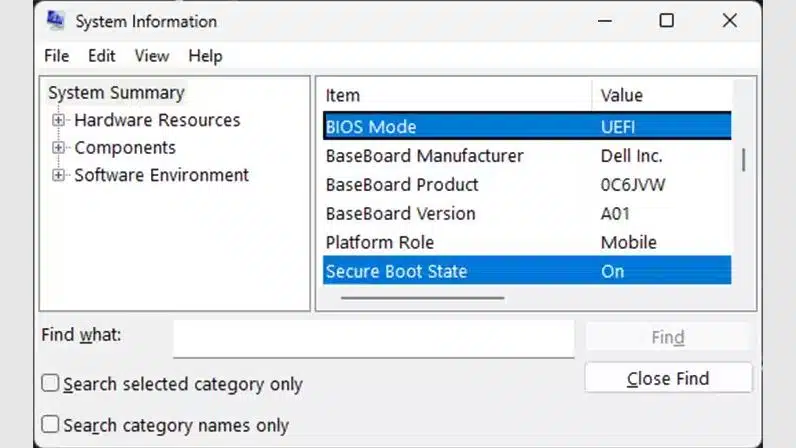
Checking Your Secure Boot Status in Windows
Before attempting to enable Secure Boot, it’s a good idea to check its current status on your Windows PC. This will help you determine if any action is needed. The process is slightly different for Windows 10 and Windows 11, but both are straightforward:
For Windows 10 and Windows 11:
Press the Windows Key + R to open the Run dialog.
Type msinfo32 and press Enter to open the System Information window.
In the System Information window, look for “Secure Boot State”.
If it says “On”, Secure Boot is already enabled, and you are good to go for Battlefield 6.
If it says “Off” or “Unsupported”, you will need to enable it. If it says “Unsupported,” your system may not have UEFI firmware, which is a prerequisite for Secure Boot.
Step-by-Step Guide: Enabling Secure Boot in BIOS/UEFI
Enabling Secure Boot typically involves accessing your PC’s BIOS/UEFI firmware settings. The exact steps and menu names can vary slightly depending on your motherboard manufacturer (e.g., ASUS, MSI, Gigabyte, Dell, HP, Lenovo). However, the general process remains consistent. It’s crucial to proceed carefully, as incorrect BIOS settings can affect your system’s stability.
General Steps to Enable Secure Boot:
Restart Your PC: Save any open work and restart your computer.
Enter BIOS/UEFI Setup: As your PC starts, repeatedly press the designated key to enter the BIOS/UEFI setup. Common keys include F2, Del, F10, F12, F1, or Esc. You might see a message on the screen indicating which key to press (e.g., “Press DEL to enter Setup”). If you miss it, restart and try again.
Navigate to Boot or Security Settings: Once in the BIOS/UEFI, look for sections labeled “Boot,” “Security,” “Authentication,” “Boot Options,” or “UEFI Firmware Settings.” You might need to switch to an “Advanced Mode” if your BIOS has a simplified interface.
Disable Compatibility Support Module (CSM): Secure Boot requires your system to be in UEFI mode, and CSM (Compatibility Support Module) can interfere with this. Locate the CSM option (often under “Boot” or “Boot Options”) and disable it. This ensures your system boots in native UEFI mode.
Enable UEFI Mode (if not already): Ensure your operating system is installed in UEFI mode. If your system is in Legacy BIOS mode, you might need to convert your disk from MBR to GPT and reinstall Windows in UEFI mode. This is a more advanced step and might require data backup. Most modern systems are already in UEFI mode.
Locate and Enable Secure Boot: Within the “Boot” or “Security” section, find the “Secure Boot” option. It might be listed as “Secure Boot State,” “Secure Boot Control,” or similar. Set this option to “Enabled.”
Save Changes and Exit: After making the changes, navigate to the “Exit” or “Save & Exit” tab. Select “Save Changes and Exit” or a similar option. Your PC will restart.
Upon restarting, your PC should boot with Secure Boot enabled. You can verify this again using the msinfo32 command in Windows. You can read more complete guidelines on the official EA page here.
Motherboard Specific Guides:
Since BIOS interfaces vary, here are links to common motherboard manufacturer guides for enabling Secure Boot:
Enabling Secure Boot can sometimes lead to issues, especially if your system configuration is not fully compatible or if you have older hardware. Here are some common problems and their potential solutions:
“Secure Boot State: Unsupported”: This usually means your system is not running in UEFI mode, or your motherboard does not support UEFI. Secure Boot requires UEFI. You might need to convert your disk to GPT and reinstall Windows in UEFI mode, or your hardware may simply not be compatible.
Boot Loop or Failure to Boot: If your PC enters a boot loop or fails to boot after enabling Secure Boot, it often indicates that your operating system or some drivers are not signed or compatible with Secure Boot. You may need to disable Secure Boot again in BIOS to regain access to your system. Ensure your Windows installation is in UEFI mode and your disk is GPT.
Graphics Card Issues: Some older graphics card drivers or VBIOS might not be compatible with Secure Boot. Updating your graphics drivers to the latest version is recommended.
CSM (Compatibility Support Module) Conflicts: Secure Boot requires CSM to be disabled. If you enable Secure Boot but forget to disable CSM, you might encounter boot issues.
If you encounter persistent issues, it’s advisable to consult your motherboard’s manual or the manufacturer’s support website for specific guidance. Backing up your data before making significant BIOS changes is always a good practice.
Conclusion: Ready for Battlefield 6!
Enabling Secure Boot is a necessary step for PC players looking to enjoy Battlefield 6. While it might seem like a technical hurdle, following these steps will ensure your system meets the game’s security requirements, contributing to a fairer and more secure gaming environment for everyone. By taking the time to properly configure Secure Boot, you’re not just preparing for Battlefield 6; you’re also enhancing the overall security of your PC. Get ready to deploy and experience the next generation of Battlefield!
TL;DR To get a Battlefield 6 Early Access Code via Twitch Drops, link your EA and Twitch accounts, then watch any eligible Battlefield 6 stream for 30 minutes during the Early Access period (August 7-8, 2025). Claim your code from Twitch Drops inventory.
The excitement for Battlefield 6 is palpable, and for many gamers, getting an early jump into the action is a top priority. While there are several paths to secure early access to the highly anticipated beta, one of the most accessible and popular methods is through Twitch Drops. This innovative approach allows you to earn your Battlefield 6 Early Access Code simply by engaging with your favorite streamers on Twitch.
It’s a win-win: you get to watch exciting gameplay, and you unlock your ticket to the battlefield before the masses.
This guide will walk you through everything you need to know about obtaining your BF6 early access code via Twitch Drops. We’ll cover the essential steps, from linking your accounts to identifying eligible streams and claiming your rewards. Let’s make sure you’re ready to deploy when the beta goes live!
What Are Twitch Drops and Why Are They Important for Battlefield 6 Early Access?
Battlefield 6 Twitch Early Access Code – Source: EA
Twitch Drops are in-game rewards that viewers can earn by watching live streams of participating games on Twitch. For Battlefield 6, these drops are particularly significant as they offer a direct pathway to early access for the beta. This means you don’t necessarily need a pre-order or a special invitation; simply by watching eligible content, you can unlock the opportunity to play the game ahead of its wider release.
The concept is straightforward: game developers partner with Twitch to distribute exclusive content or access to their games as a reward for viewer engagement. For Battlefield 6, this translates into a valuable Early Access Code. This method not only rewards dedicated fans but also helps build hype and community around the game, making it a crucial component of the beta launch strategy.
How to Link Your EA and Twitch Accounts
Before you can start earning Twitch Drops for Battlefield 6, the most crucial step is to ensure your Electronic Arts (EA) account is properly linked to your Twitch account. This connection is what allows EA to verify your viewership and grant you the early access code. Here’s a step-by-step guide:
Visit the Official EA Account Linking Page: Navigate to the designated EA account linking page. You can usually find this by searching for “EA Twitch account link” or by visiting the official EA website and looking for account settings or connections.
Sign In to Both Accounts: You will be prompted to sign in to both your EA account and your Twitch account. Make sure you are logging into the correct accounts that you wish to link.
Authorize the Connection: Once logged in, you will be asked to authorize the connection between the two platforms. Confirm that you grant EA permission to access your Twitch account information for the purpose of Drops.
Verify the Link: After authorization, you should receive a confirmation message indicating that your accounts are successfully linked. You can often verify this in your Twitch settings under “Connections” or in your EA account settings under “Connected Accounts.”
It is essential to ensure this link is established and active before the Early Access period begins to avoid any issues with receiving your code.
Earning Your Battlefield 6 Early Access Code Through Twitch Streams
Once your EA and Twitch accounts are linked, you’re ready to start earning your Battlefield 6 Early Access Code. Here’s how the process works during the Early Access window:
Identify Eligible Streams: During the Battlefield 6 Early Access period (August 7th – 8th, 2025), look for Twitch streams that have “Drops Enabled” or are specifically promoting Battlefield 6 beta drops. Many popular streamers and official channels will be participating.
Watch for 30 Minutes: To qualify for the early access code, you typically need to watch an eligible stream for a minimum of 30 minutes. You don’t need to actively engage in chat, but simply have the stream open and running.
Monitor Your Drops Inventory: After watching for the required duration, your Battlefield 6 Early Access Code should appear in your Twitch Drops inventory. You can access this by clicking on your profile icon in the top right corner of Twitch and selecting “Drops.”
Claim Your Code: Once the code appears in your inventory, you’ll need to claim it. Follow the instructions provided to redeem the code on the appropriate platform (e.g., EA App, PlayStation Store, Xbox Store).
Remember, the Early Access period is limited, so make sure to watch and claim your code within the specified dates to avoid missing out.
Congratulations! You’ve successfully obtained your Battlefield 6 Early Access Code. Now, it’s time to get the game ready for deployment:
Redeem the Code: Depending on your platform, you will redeem the code either through the EA App (for PC), the PlayStation Store, or the Xbox Store. Follow the on-screen prompts to complete the redemption process.
Pre-load the Beta: Once the code is redeemed, you should be able to pre-load the Battlefield 6 beta client. Pre-loading allows you to download the game files before the beta officially begins, ensuring you can jump in immediately when the servers go live.
Prepare Your System: For PC players, ensure your system meets the minimum requirements and that Secure Boot is enabled in your BIOS. This is a crucial step for a smooth experience.
Twitch Drops Beyond Early Access: Exclusive In-Game Rewards
Battlefield 6 Twitch Drops – Source: EA
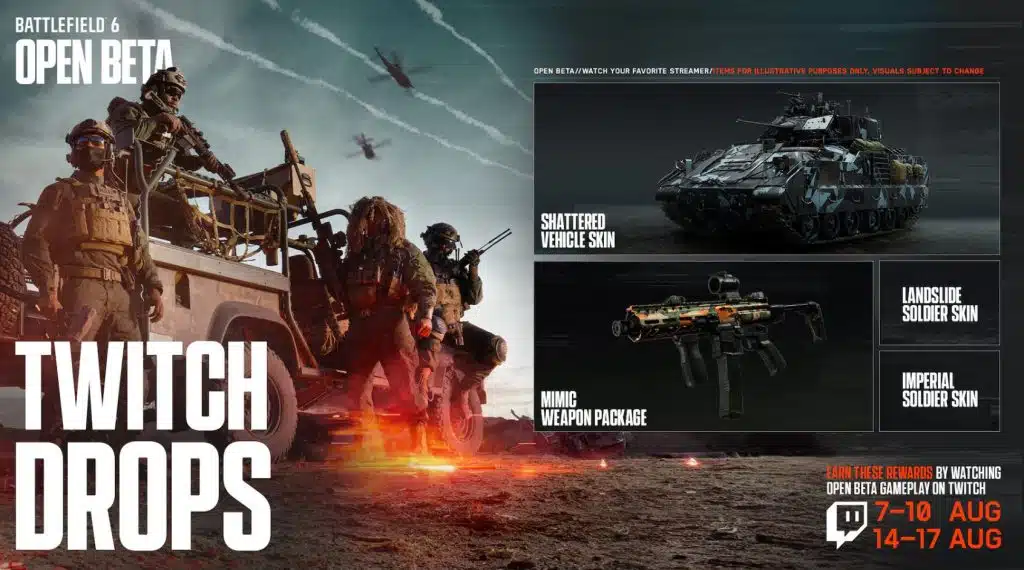
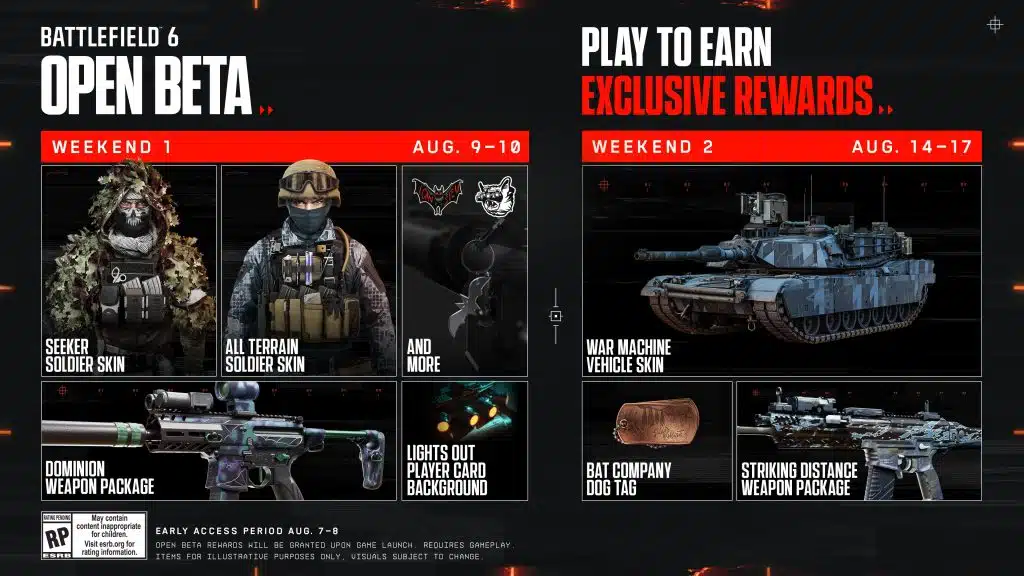
Beyond the early access code, Twitch Drops for Battlefield 6 also offer exclusive in-game cosmetic items that you can earn during the beta period. These rewards are a great way to customize your soldier and vehicles and show off your dedication to the game. Keep an eye out for streams with Drops enabled to earn these additional items:
Shattered Vehicle Skin
Mimic Weapon Package
Landslide Soldier Skin
Imperial Soldier Skin
These drops are typically earned by watching eligible streams for specific durations, similar to the early access code process. Make sure your accounts remain linked to receive these rewards.
Troubleshooting Common Issues with Twitch Drops
While the Twitch Drops system is generally reliable, you might encounter some issues. Here are a few common problems and their solutions:
Drops Not Appearing: Double-check that your EA and Twitch accounts are correctly linked. Sometimes, a simple re-linking can resolve the issue. Also, ensure the stream you are watching has “Drops Enabled.”
Progress Not Updating: If your watch time isn’t registering, try refreshing the stream page or switching to a different eligible stream. Ensure you are not muted on Twitch, as some systems might interpret this as inactivity.
Code Redemption Problems: If you have trouble redeeming your code, verify that you are entering it correctly and on the right platform. If the issue persists, contact EA Support for assistance.
Conclusion: Your Path to the Battlefield 6 Beta
Securing your Battlefield 6 Early Access Code through Twitch Drops is a fantastic way to experience the game ahead of its official launch. By linking your accounts, watching eligible streams, and claiming your rewards, you’ll be among the first to deploy in the next iteration of the Battlefield franchise. Remember to keep an eye on the beta schedule and prepare your system to ensure a seamless experience. We’re excited to see you on the battlefield!
TL;DR You can participate in the Battlefield 6 Open Beta through Early Access (Battlefield Labs registration, EA Play Pro, Twitch Drops) or by joining the open weekends (August 9-11 and August 14-18, 2025). The beta is available on PS5, Xbox Series X|S, and PC.
The highly anticipated Battlefield 6 Open Beta is just around the corner, offering eager gamers their first taste of the next installment in the iconic franchise. If you’re looking to jump into the action and experience the modern military combat that Battlefield 6 promises, understanding how to participate is key. This guide will walk you through all the necessary steps, from securing early access to understanding the beta schedule and platform compatibility, ensuring you’re fully prepared to join the fight.
Whether you’re a long-time fan or new to the series, the Battlefield 6 Open Beta provides a crucial opportunity to experience the game’s new maps, modes, and mechanics firsthand. We’ll cover everything you need to know to ensure a smooth entry into the beta, including detailed schedules, various access methods, and important considerations for PC players. Get ready to deploy and get a head start on the battlefield!
How to Secure Early Access to the Battlefield 6 Beta
If you want to jump into the action before the general public, there are three main ways to secure early access:
Battlefield Labs Registration: If you registered for Battlefield Labs before July 31st, 2025, you are automatically eligible for early access. Simply log in to the EA Account you used for registration, and the beta will be available for pre-load.
EA Play Pro Subscription: Subscribers to EA Play Pro will also gain immediate early access. Log into your EA account, and you should be able to download the beta directly.
Twitch Drops: During the Early Access period, you can earn a beta code by watching any creator streaming Battlefield 6 on Twitch for 30 minutes. Once you’ve watched for the required time, you’ll receive a code that you can redeem for access.
It’s important to note that the Battlefield Labs registration for early access was specifically for those who signed up before July 31st, 2025. If you registered after this date, or are looking to register now, you will not be eligible for early access through the Battlefield Labs program.
However, you can still gain early access via an EA Play Pro subscription or by earning a Twitch Drop during the Early Access period. Otherwise, you can participate in the Open Beta weekends, which are freely accessible to all players on supported platforms.
Beyond Early Access, the Open Beta weekends are freely accessible to all players on supported platforms.
Battlefield 6 Open Beta Schedule: When Can You Play?
The Battlefield 6 Open Beta is structured into several distinct periods, allowing both early access participants and the wider public to experience the game. Mark your calendars with these critical dates:
Early Access: Thursday, August 7th – Friday, August 8th, 2025. The action kicks off at 8:00 UTC (1 AM PT / 4 AM ET).
Open Beta Weekend 1: Saturday, August 9th – Monday, August 11th, 2025.
Open Beta Weekend 2: Thursday, August 14th – Monday, August 18th, 2025.
These periods provide a substantial window for players to explore the new content and provide valuable feedback to the developers.
What Maps and Modes Will Be Available During the Open Beta?
The Battlefield 6 Open Beta will feature a diverse selection of maps and game modes, showcasing the variety of combat scenarios the full game will offer. Players can expect both expansive battlegrounds and intense close-quarters engagements.
Maps Available:
During the first weekend, players will be able to play across three distinct maps:
Siege Of Cairo: An urban map designed for intense close-quarters combat amidst the city’s architecture.
Liberation Peak: A rural, mountainous map set in Tajikistan, offering vast open areas ideal for aerial combat and long-range engagements.
Iberian Offensive: Another urban environment, this map takes the fight to the streets of Gibraltar.
For the second Open Beta weekend, an additional map will be introduced:
Empire State: This map brings the battle closer to home, with gunfights unfolding across the iconic streets of Brooklyn.
Game Modes:
The beta will feature a rotation of fan-favorite game modes:
Weekend 1: Conquest, Breakthrough, and Closed Weapons Breakthrough. The latter mode restricts weapons to specific classes, offering a more tactical experience.
Weekend 2: In addition to the modes from the first weekend, Rush and Deathmatch will be added to the rotation, providing even more ways to play.
Supported Platforms for the Battlefield 6 Open Beta
Battlefield 6 is a next-generation title, and as such, the Open Beta will be available exclusively on the latest hardware. You can participate on:
PlayStation 5
Xbox Series X|S
PC (via Steam, Epic Games Store, and the EA App)
It’s important to note that the game will not be available on older consoles like the PlayStation 4 and Xbox One, nor is it planned for release on the Nintendo Switch.
Important Considerations for PC Players
PC players will need to ensure they have Secure Boot enabled in their system’s BIOS to play the beta and the full game. This, along with the new EA Javelin Anticheat system, is in place to combat cheating and ensure a fair experience for everyone.
Twitch Drops: Earn Exclusive In-Game Items
During the beta, players can earn exclusive in-game items by watching their favorite streamers on Twitch. These drops include:
Shattered Vehicle Skin
Mimic Weapon Package
Landslide Soldier Skin
Imperial Soldier Skin
Get Ready for the Full Release
The Battlefield 6 Open Beta is just the beginning. The full game is scheduled to launch on October 10, 2025, for PlayStation 5, Xbox Series X|S, and PC. The beta is an excellent opportunity to hone your skills, explore the new maps, and get a feel for the next generation of all-out warfare.
TL;DR The Battlefield 6 Open Beta kicks off with Early Access on August 7-8, 2025, followed by two Open Beta weekends (August 9-11 and August 14-18). Players can gain early access through Battlefield Labs registration, EA Play Pro, or by watching Twitch streams.
The highly anticipated Battlefield 6 Open Beta is upon us, offering eager gamers their first taste of the next installment in the iconic franchise. This beta period is crucial for both developers to gather feedback and for the community to experience the game’s new maps, modes, and mechanics firsthand before its official launch.
For those looking to jump into the action as soon as possible, securing early access to the Battlefield 6 beta is a key consideration. Whether through prior registration with Battlefield Labs, an EA Play Pro subscription, or even by simply watching Twitch streams, there are multiple avenues to get a head start.
This article will provide a comprehensive guide to everything you need to know about the Battlefield 6 Open Beta, including detailed schedules, how to gain access, available content, and platform compatibility, ensuring you’re fully prepared to join the fight.
The Battlefield 6 Open Beta is structured into several distinct periods, allowing both early access participants and the wider public to experience the game. Mark your calendars with these critical dates:
Early Access: Thursday, August 7th – Friday, August 8th, 2025. The action kicks off at 8:00 UTC (1 AM PT / 4 AM ET).
Open Beta Weekend 1: Saturday, August 9th – Monday, August 11th, 2025.
Open Beta Weekend 2: Thursday, August 14th – Monday, August 18th, 2025.
These periods provide a substantial window for players to explore the new content and provide valuable feedback to the developers.
How Can You Get Into the Battlefield 6 Early Access?
While the Open Beta is, as its name suggests, open to all, there are ways to gain a two-day head start through Early Access. Here’s how you can secure your spot:
Battlefield Labs Registration: If you signed up for Battlefield Labs before July 31st, 2025, you’re automatically in. Simply log in to the EA Account you registered with, and the beta will be available for pre-load.
EA Play Pro Subscription: Subscribers to EA Play Pro will also gain immediate access without needing a code. Just log into your account and download the beta.
Twitch Drops: A popular method for many, you can earn Early Access by watching any creator streaming Battlefield 6 on Twitch for 30 minutes during the Early Access period. Upon completion, you’ll receive a code that can be redeemed for access.
Beyond Early Access, the Open Beta weekends are freely accessible to all players on supported platforms.
What Maps and Modes Will Be Available During the Open Beta?
The Battlefield 6 Open Beta will feature a diverse selection of maps and game modes, showcasing the variety of combat scenarios the full game will offer. Players can expect both expansive battlegrounds and intense close-quarters engagements.
Maps Available:
During the first weekend, players will be able to play across three distinct maps:
Siege Of Cairo: An urban map designed for intense close-quarters combat amidst the city’s architecture.
Liberation Peak: A rural, mountainous map set in Tajikistan, offering vast open areas ideal for aerial combat and long-range engagements.
Iberian Offensive: Another urban environment, this map takes the fight to the streets of Gibraltar.
For the second Open Beta weekend, an additional map will be introduced:
Empire State: This map brings the battle closer to home, with gunfights unfolding across the iconic streets of Brooklyn.
Game Modes:
The beta will feature a rotation of fan-favorite game modes:
Weekend 1: Conquest, Breakthrough, and Closed Weapons Breakthrough. The latter mode restricts weapons to specific classes, offering a more tactical experience.
Weekend 2: In addition to the modes from the first weekend, Rush and Deathmatch will be added to the rotation, providing even more ways to play.
What Platforms Is the Battlefield 6 Open Beta Available On?
Battlefield 6 is a next-generation title, and as such, the Open Beta will be available exclusively on the latest hardware. You can participate on:
PlayStation 5
Xbox Series X|S
PC (via Steam, Epic Games Store, and the EA App)
It’s important to note that the game will not be available on older consoles like the PlayStation 4 and Xbox One, nor is it planned for release on the Nintendo Switch.
Key Features and What to Expect
The Battlefield 6 Open Beta provides a glimpse into the core gameplay and features of the full game. Here are some key aspects to look out for:
Modern Military Setting: The game returns to a modern combat environment, reminiscent of the beloved Battlefield 3 and Battlefield 4.
Grounded Realism: The developers have emphasized a commitment to a more grounded and realistic experience, avoiding the over-the-top cosmetic items seen in some competing titles.
PC-Specific Requirements: PC players will need to have Secure Boot enabled in their system’s BIOS to play the beta and the full game. This, along with the new EA Javelin Anticheat system, is in place to combat cheating and ensure a fair playing field for everyone.
Twitch Drops: During the beta, players can earn exclusive in-game items by watching their favorite streamers on Twitch. These drops include the Shattered Vehicle Skin, Mimic Weapon Package, Landslide Soldier Skin, and Imperial Soldier Skin.
Get Ready for the Full Release
The Battlefield 6 Open Beta is just the beginning. The full game is scheduled to launch on October 10, 2025, for PlayStation 5, Xbox Series X|S, and PC. The beta is an excellent opportunity to hone your skills, explore the new maps, and get a feel for the next generation of all-out warfare.
TL;DR Season 5 for Call of Duty: Black Ops 6 and Warzone is set to launch globally on Thursday, August 7, 2025. Expected release times are 9 AM PT / 12 PM ET / 5 PM BST.
With Season 4 drawing to a close, players worldwide are eagerly anticipating the next wave of content. The question on everyone’s mind is, when does COD Black Ops 6 Season 5 start? This new season promises to inject fresh life into both Multiplayer and Warzone, while also delivering a thrilling conclusion to the Zombies storyline.
Officially, Season 5 for Call of Duty: Black Ops 6 and Warzone is set to kick off on Thursday, August 7, 2025. The update will roll out simultaneously across all platforms at 9 AM PT / 12 PM ET. Players should expect to download the update before they can jump into the action, so be prepared for potential server downtime as the patch is applied.
Season 5 will introduce a wealth of new content for Multiplayer fans, including maps, modes, and more.
New Multiplayer Maps
Four new maps will be added throughout the season, offering diverse environments for combat:
Runway (Launch): A 6v6 Core map set in a devastated airport, filled with debris and chaos.
Exchange (Launch): A 6v6 and 2v2 Strike map set in an open-air market with tight lanes that encourage close-quarters confrontations.
WMD (In-Season): A classic map from the original Black Ops returns, taking players to an abandoned weapons facility.
Jackpot (In-Season): More details on this map will be announced closer to the mid-season update.
New and Returning Multiplayer Modes
Three new and returning game modes will be added to spice things up:
Aim High (Launch): A new mode where headshots are instant kills, while body armor minimizes damage elsewhere.
Snipers Only (In-Season): A fan-favorite mode returns, limiting players to sniper rifles only.
Cranked Moshpit (In-Season): A high-stakes mode where kills grant you an advantage but also start a bomb countdown on your operator.
Major Warzone Updates in Season 5
Warzone players can look forward to significant changes to the Verdansk map and new game modes.
Stadium POI: The Stadium will finally open up, albeit with a massive hole in its roof, rather than the fully open design of yesteryear.
Satellite Hijack (Limited-Time Event): During the first week of Season 5, players can participate in this new event, which requires them to breach the stadium to complete special missions.
Stadium Resurgence (LTM): Starting from week two, this limited-time mode will transform the Stadium into an intense 36-player Resurgence map.
Thrilling Conclusion to Black Ops 6 Zombies
Season 5 will bring the final chapter of the Dark Aether storyline in Black Ops 6.
New Zombies Map: Reckoning: Set in a crumbling tower near Liberty Falls, this map is the narrative conclusion to the Zombies story.
New Elite Enemy: Uber Klaus: This gigantic mecha-zombie promises a formidable challenge for players.
New Wonder Weapon: Gorgofex: A bio-mechanical weapon that can fire charged attacks for wide-area damage.
New Field Upgrade: Mister Peeks: Utilize this sentient teddy bear to attract and counter hordes of zombies.
Enhance Your Experience with Eklipse!
As you prepare to dive into Season 5, don’t let your best gaming moments slip away. Whether you’re a seasoned streamer or just starting, capturing and editing clips can be time-consuming. This is where Eklipse comes in to help.
Think of Eklipse as your personal editing assistant. With our advanced AI tools, you can automatically generate high-quality highlights from your Twitch or Kick streams, allowing you to focus more on playing and less on editing.
Why Choose Eklipse?
Save Time: Our AI does the heavy lifting, turning hours of streaming into shareable, ready-to-go clips.
High-Quality Clips: With Eklipse Premium, you can get clips in 1080p with no watermarks, ensuring your content looks professional.
Grow Your Audience: Easily share your best highlights on social media with our caption and hashtag generator, and use our Discord Auto-Share Bot to keep your community engaged.
Ready to take your stream to the next level? Get started for free to process up to 3 streams and see the difference. For the ultimate features, including 1080p clip quality, 3x faster processing, and Kick support, upgrade to Eklipse Premium.
Frequently Asked Questions (FAQ)
Q: When exactly does Season 5 start? A: Season 5 begins on Thursday, August 7, 2025, at 9 AM PT / 12 PM ET.
Q: How long do Call of Duty seasons typically last? A: A season typically lasts around two months, with a “Reloaded” content update mid-season.
Q: What are the new weapons in Season 5? A: The Battle Pass will include two new free base weapons: the PML 5.56 LMG and the ABR A1 AR.
Q: Will there be a new Battle Pass? A: Yes, Season 5 will feature a new Battle Pass with over 100 tiers of rewards, including new Operators, weapon blueprints, and COD Points. A BlackCell option will also be available for exclusive rewards.
Q: Can I continue progressing my Season 4 Battle Pass after Season 5 starts? A: No, once a new season begins, you can no longer progress the previous season’s Battle Pass.
TL;DR Eklipse emerges as the top AI alternative, offering broader game support, seamless social media integration, and advanced features like Voice Command AI, making it superior for modern streamers.
When Athenascope, a streamer-favorite clip maker, ceased operations on April 5th, 2022, it left a significant gap in the market for creators who relied on its AI to capture their best gaming moments. While its departure was a loss for the community, it also paved the way for more advanced and versatile tools to emerge, ready to meet the evolving demands of content creation in 2025.
If you’re one of the many searching for a powerful replacement, your search ends here. Eklipse has not only risen to the occasion but has established itself as the premier AI-powered platform for generating stream highlights. It’s designed to save you time and elevate your content, ensuring your best plays get the spotlight they deserve.
For streamers looking for a reliable alternative to the discontinued Athenascope, Eklipse.gg presents a compelling and future-forward option. Let’s break down how these two services compare across key features, pricing, and overall availability for 2025.
Features Comparison:
Game Support: Athenascope was limited to a specific list of supported games. Eklipse, however, can generate highlights from any game you stream, offering universal compatibility.
Highlight Creation: Both platforms use AI to automatically create clips. Eklipse takes it a step further with integrated tools like ‘Convert to TikTok,’ allowing for seamless sharing on social media platforms.
Platform Integration: Athenascope often required app downloads. Eklipse operates smoothly through a direct connection to your Twitch, YouTube, or Facebook account, simplifying your workflow.
Content Versatility: Athenascope was exclusively for gameplay. Eklipse expands this by allowing you to clip content from long-form YouTube videos, such as podcasts, tutorials, or commentaries.
Editing Suite: While both offer basic editing, Eklipse provides a more robust suite of tools, including transitions, aspect ratio adjustments for vertical video, and the ability to add music and text overlays.
Advanced AI Features: Eklipse introduces unique functionalities not seen in its predecessor, like Voice Command AI to create clips on the fly and dedicated support for clipping non-gaming YouTube content.
Pricing:
Athenascope: No longer applicable due to service closure.
Eklipse: Offers a generous free tier to get you started. The Premium plan, which unlocks the full suite of features, is available for $14.99/month or a discounted annual plan.
Availability:
Athenascope: Service discontinued.
Eklipse: Fully operational, with continuous development and new features being added regularly.
Eklipse is more than just a tool; it’s a comprehensive platform designed with the modern streamer in mind. The interface is clean, intuitive, and built for speed. In just a few clicks, you can have AI-generated highlights ready for your audience. There’s no need to download entire VODs and re-upload them. Simply connect your streaming account (Twitch, YouTube, or Facebook), select the video, and let the AI do the heavy lifting. This streamlined process is a massive time-saver.
Once your highlights are compiled, the built-in video editor gives you full creative control. You can trim clips with precision, add professional transitions, and instantly format your montage for TikTok, Reels, or YouTube Shorts. The ability to add background music, text overlays, and custom intros and outros ensures your content is not only high-quality but also perfectly branded. We’re constantly innovating with features like Voice Command and expanded YouTube clipping to ensure you have the most powerful tools at your fingertips.
Eklipse vs. Athenascope: The Final Verdict
The table below provides a clear, at-a-glance overview of why Eklipse is the definitive upgrade.
Feature
Eklipse
Athenascope (Legacy)
AI Accuracy
Captures highlights accurately across any game
Often produced off-target clips
Workflow
Easily import clips directly from your streams
Required clips to be created on their website
Social Media Readiness
Instantly adjust clips for TikTok, Reels, & Shorts
Clips were primarily formatted for YouTube
Content Support
Supports non-gaming content like podcasts
Gameplay only
Supercharge Your Content with Eklipse Premium
While the free version of Eklipse is powerful, the Premium plan is designed to truly elevate your content creation. For just $14.99/month (or save with the annual plan!), you unlock a suite of professional-grade features:
1080p HD Output: Deliver crystal-clear quality to your audience.
Longer Stream Processing: Process up to 3 streams of up to 12 hours each, every day.
Priority Processing: Get your clips 3x faster and jump to the front of the queue.
Full Template Access: Unlock all premium templates for TikTok and other platforms.
Extended Storage: Keep your clips safe for 90 days.
While Athenascope laid the groundwork for AI-powered highlights, Eklipse has perfected the formula for 2025 and beyond. By offering universal game support, superior content versatility, and a more intuitive user experience, Eklipse stands as the clear successor. The accessible free tier removes any barrier to entry, while the premium plan provides the power and speed that serious streamers need to grow their brand.
The void left by Athenascope’s departure has been emphatically filled. Eklipse.gg is more than just an alternative; it’s an upgrade. It’s the essential tool for any streamer looking to save time, create professional-quality highlights, and engage their community more effectively. Don’t wait—sign up and let the power of AI transform your content creation process in just a few clicks!
TL;DR The best Athenascope alternative is Eklipse, an AI-powered platform that automatically creates highlights from your streams. New contenders worth checking out include Powder, which uses AI to create montages, and StreamLadder, which excels at converting clips into vertical video formats.
Since Athenascope, a streamer-favorite clip maker, ceased operations on April 5th, 2022, many creators have been searching for a worthy replacement. Finding the right tool isn’t just about functionality; it’s also about how it impacts your gaming performance. Choosing the wrong Athenascope alternative could risk causing frame drops, which would undoubtedly disrupt the quality of your live broadcast.
Fortunately, the streamer software ecosystem has continued to evolve, giving rise to many advanced options designed to simplify the content creation process. From AI-driven tools like Eklipse to other innovative platforms, there is now a solution for every need. Here is a comprehensive list of the best Athenascope alternatives you can rely on in 2025.
1. Eklipse – Best For Effortless Highlight Creation
Source: eklipse.gg
The first alternative tool to replace Athenascope is Eklipse. Eklipse is an AI-powered clip maker that helps streamers capture amazing moments from their streams in seconds, making it an excellent choice for creating Athenascopehighlights effortlessly. You don’t need to put in extra effort and skills to get your stunning highlight like in other tools. That’s why this athenascope alternatives ps4 is a perfect match for all beginners in the streaming world.
Due to its powerful AI, you can trim your clip, add a catchy soundtrack, and even convert your clip to TikTok/reel format just in a couple of clicks!
To be able to use this tool, simply do a free registration, then link your Eklipse account with your social media, and let yourself play around with its features.
Growing your channel will be a lot easier since you can create high-quality content with Eklipse. Say bye to flat layout as Eklipse offers several cool TikTok templates to make your clip more attractive.
Now, Eklipse also has a new feature called YouTube Video Highlights which caters to the needs of general content creator who makes talking videos like motivational, podcast, educational, etc. Now you can automatically clip your talking videos from YouTube by copying and pasting the link into Eklipse. Worry not, you also can share your vertical highlights directly to social media!
Key Features:
Automatically generates highlights using AI
Converts highlight for TikTok, Reels, and Shorts formats
Integrates with Twitch, YouTube, and Facebook Gaming
Mobile app to manage and share clips
Offers templates, customization options, and auto-captions
Pros:
100% web-based tool
Easy and free to use
Modern and friendly interface
Supports many popular platforms and games
Automatic TikTok/reel/YouTube Shorts converter
Cons:
Limited editing features
AI isn’t fully equipped for all games
Doesn’t allow video importing from the device library
Pricing:
Free plan available.
Premium plan: $19.99/month
Available on: Windows, macOS, Linux, Android, iOS
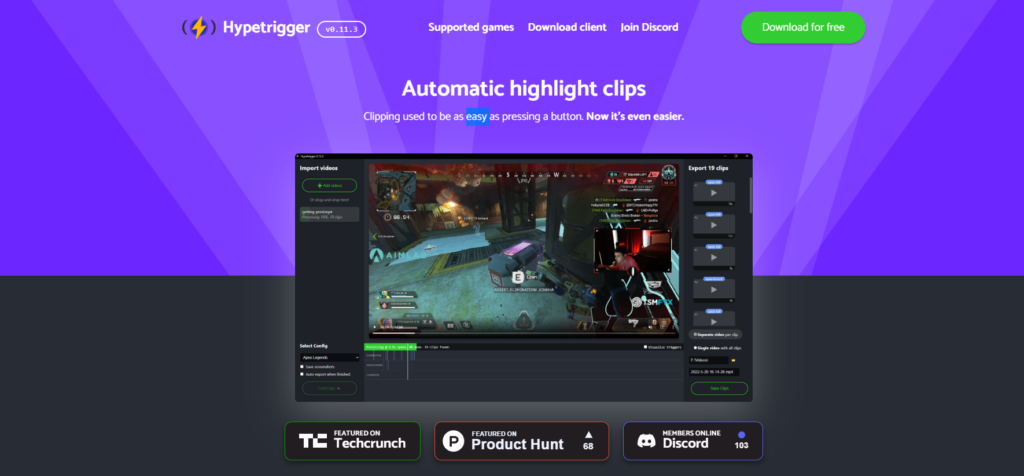
2. HyperTrigger – Best for Automatic Gaming Highlight Clips
Another tool that works just like Athenascope is HyperTrigger. HyperTrigger is very helpful in terms of capturing the highlights of your streaming videos. The best news is, that all Windows users can download this tool for free!
Don’t worry about this tool being so time-consuming because HyperTrigger allows you to get your best clips quickly. The AI will automatically clip your videos once you get to the app.
You can start clipping the video by hitting the find clips and letting the AI work for you. Additionally, this software works as a companion app to OBS.
Key Features:
Screen Capture: HyperTrigger can capture your gameplay directly from your screen1.
Autoclip: This feature automatically creates clips of your gaming highlights.
Replay Buffer
Support for Popular Games
Pros:
Enables users to convert videos to highlights quickly
Quick export
Record overlays
Able to make audio highlights
Easy to use
Cons:
Only supports very few games
Only compatible with OBS
Only available for Windows
Pricing: Free
Available on: Windows
3. Vibby – Best for Video Clipping and Sharing for Collaboration
Source: Vibby – Athenascope alternatives for twitch
Vibby is another convenient highlight maker at your disposal. This athenascope alternatives for twitch allows you to create highlights from any video in seconds! Just select the videos you want to use for your content and Vibby will create highlights from them. Vibby gives you a lot of variety when it comes to creating highlight clips. For instance, you can make a YouTube video and create clips from it.
However, Vibby does not work automatically. To use Vibby, you need to paste a link to the video you want to clip and then highlight the parts you want to use for your content. However, Vibby is still very helpful for those who want to clip certain parts of videos on the internet without having to manually go through the clipping process.
Key Features:
Highlighting and Clipping
Sharing and Collaboration
Detailed Analytics
Compatibility
Customization
Pros
Easy and friendly interface
Capturing highlight videos in three steps.
Free to use
Compatible with YouTube and more
Integrates with all major video providers and social networks
Cons:
Doesn’t make the automatic highlight
Not dedicated to games
Limited Customization
Pricing: Free
Available on: Windows, macOS, Linux
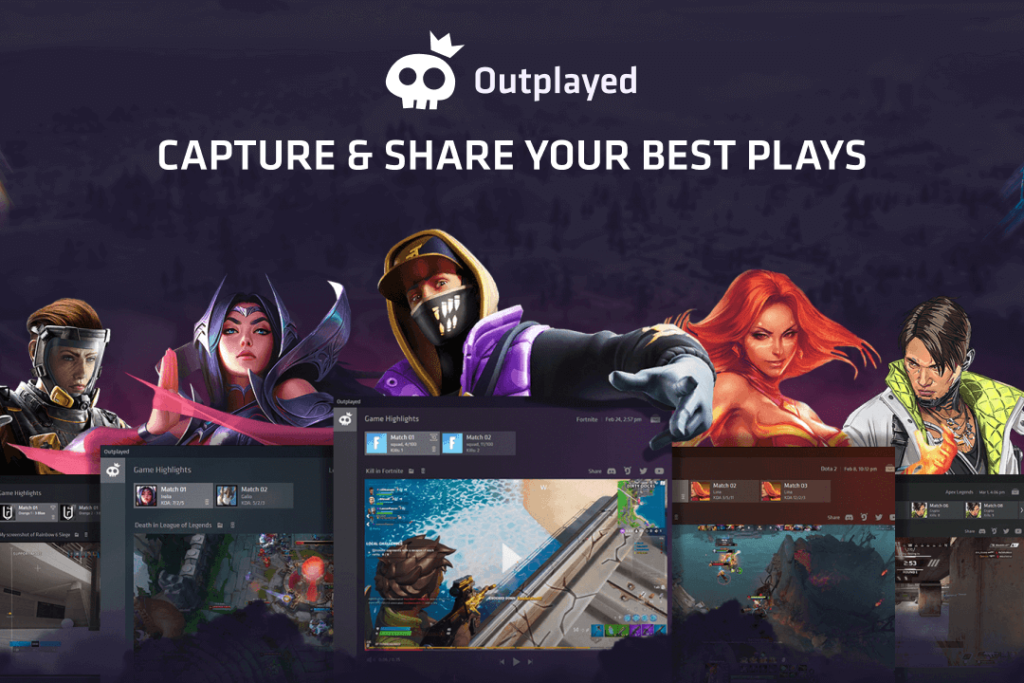
4. Outplayed – Best Free Video Capturing App for Gamers
Source: Overwolf
Looking for another clip-maker that offers you a complete package? Then Outplayed is the answer. Outplayed has similar features to Eklipse as a highlight clipper. It’s generated with AI, and it comes with various incredible features that assist you in producing high-quality clips.
Automatic clipping is a feature everyone loves about this tool. But if you have your editing style and don’t mind taking a little more time to capture the best moment of your gameplay, then Outplayed will allow you to do it.
All you have to do is link your Twitch with Outplayed, then you can start to explore it. On top of that, Outplayed will never take up too much space in your hard drive.
Key Features:
Automatic Recording
Users can review your captured clips, trim them, or move to the video editor to combine them into an epic collage.
Once you’re done editing, you can easily share your highlights with friends and foes alike across social networks.
Supports Over 5000 Games
Pros
Easy to use
Offers various capture modes
Allows to adjust clip duration
Launches automatically
Integration with social networks
Cons
No video editing options
Require download and install to use
Ads in the free version
Pricing: Starts from $75.00/month
Available on: Windows, macOS
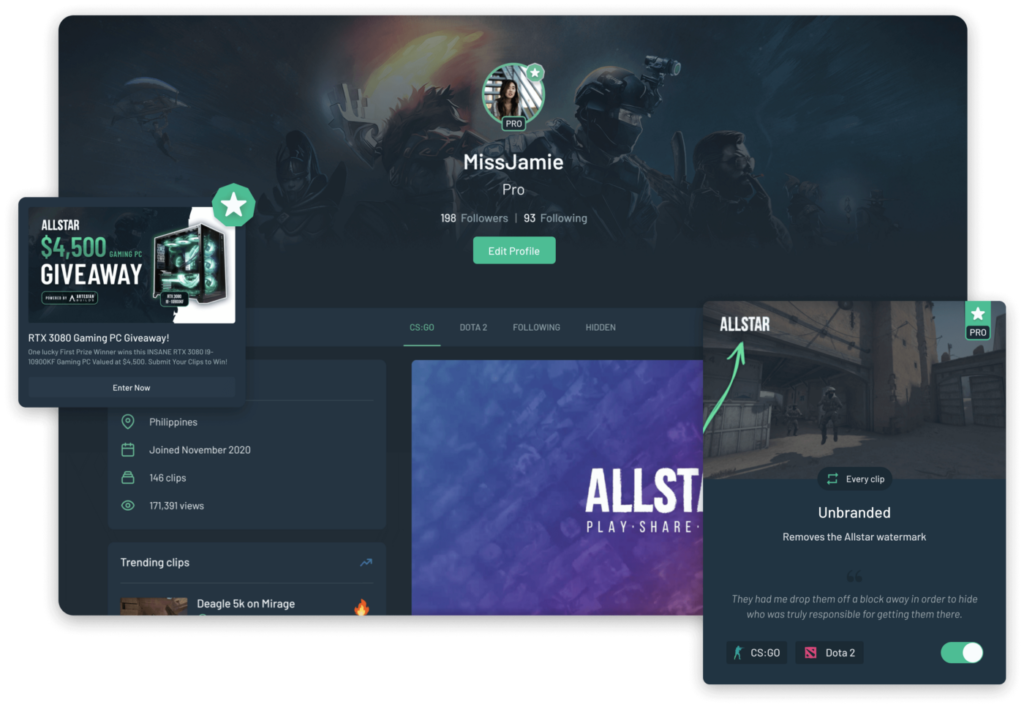
5. Allstar – Best Free Cloud-Based Clip Capture for Gamers
Source: Medium
Having a clipping tool that supports many online games is something all streamers need. If you are looking for this kind of tool, Allstar could be a great choice.
Yep, Allstar is compatible with several popular games, such as Counter-Strike: GO, Dota 2, League of Legends, and Fortnite just like Eklipse. Only by getting the app into your device, you’ll be able to use it.
Although Allstar hasn’t yet supported more games like Apex Legends, Valorant, or other well-known games, users can still request which game they should support next. On top of that, this tool can capture your best perfect jump shot or sick dodge without decreasing your gameplay FPS. That’s fantastic, right?
Key Features:
Automatically captures your gaming highlights.
Allows you to customize your clips with filters and FX4.
Makes it easy to share your clips on various platforms.
Provides a platform for gamers to interact and share their experiences.
Pros:
Easy to use
Modern interface
Capture without decreasing the game’s FPS
No sign-in required
Authenticode signed
Cons:
Supports only a few games
Requires download to use
Watermark for the free version
Pricing:
Pro ($3.19/month): Unlimited remixes, mobile clips, clip downloads per month, and more.
Pro Plus ($7.99/month): Includes all Pro features plus premium montage music, automatic mobile clips, and more.
Platinum ($19.99/month): Includes all Pro Plus features plus unlimited montage credits per month, private Discord, priority service, and more.
Available on: Windows, macOS, Linux
6. Highlight Play – Best for Automated Twitch Highlights
Source: Twitch
Are you regularly streaming on Twitch and want to highlight your best gaming scene? Try Highlight Play. This tool works well on analyzing your Twitch channel and automatically clips your streams. To use Highlight Play, you can just go to the Highlight Panel on Twitch whenever you finished streaming, and pick the clips you would like to trim.
You can just sit back and let it work for you. However, Highlight Play lets you do manual editing as well if you wish for that. Just send out a command! highlight with video length to your Twitch chat and the clips will instantly come up on the Highlight Panel.
In addition, to be able to use the features of this tool, you’ll need to spend about $19,95/month with a 7-day money-back guarantee. Yes, this tool isn’t free to use.
So, if you are looking for a free clipping tool, Highlight Play may not suit your needs. Other than that, it seems that Highlight Play only works for Twitch. It may not allow you to clip streaming videos from YouTube or other platforms.
Key Features:
Highlight Play starts recording and analyzing data as soon as you start streaming.
You can trim, save, and delete clips from here.
Highlight Play uses AI to generate summaries that highlight the key aspects of an app.
You can give your trusted viewers access to produce highlights.
Pros:
Helps you create highlights efficiently, saving you time.
Highlight Play can help increase your visibility on Twitch.
You can make money by showing ads and keeping 100% of the revenue.
Allows streamers to involve their community in the highlight-creation process
Streamers can monetize their highlights by showing ads.
Cons:
Not free to use
Only works for the Twitch platform
Limited Customization
Pricing: Starts from $19.95 per month
Available on: Windows, macOS
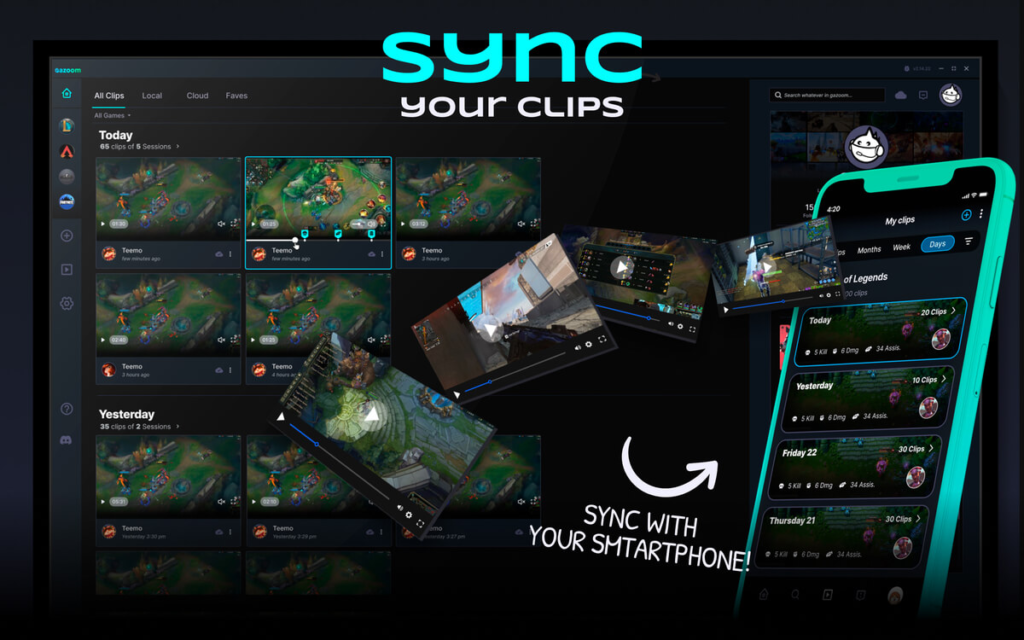
7. Gazoom App – Best for Capturing and Reviewing Gaming Clips
Source: Overwolf
Gazoom is one of the best Athenascope alternatives that is worth trying. This game clipper offers you with friendly interface and complete tools to support your streaming needs.
Additionally, Gazoom is a little bit different from the previous tools as it requires to be downloaded before you use it. However, this tool is compatible with Windows and even iPhone and Android. Go to the App Store or Google Play Store, and you’ll get it.
To be able to operate Gazoom, all you have to do is play the gameplay on your device screen, and it will automatically capture the highlights. That’s it. Once you’ve got the clips, Gazoom will let you share them immediately on other platforms. Do a few clicks and you are all set.
Key Features:
Automatically capture and edit all your gaming clips and share them across all socials.
Enables you to review your clips with your friends and analyze every moment
Offers a building block style strategy creator for games like Valorant and Counter-Strike that makes creating and understanding complicated strategies easy.
Pros:
Friendly interface and easy-to-use
Free cloud storage
Supports many games
Low Impact on PC Performance
Available on mobile and PC
Cons
Launching issues
Requires download to work
Requires manual upload for review
Pricing: Free
Available on: Windows, macOS, Linux
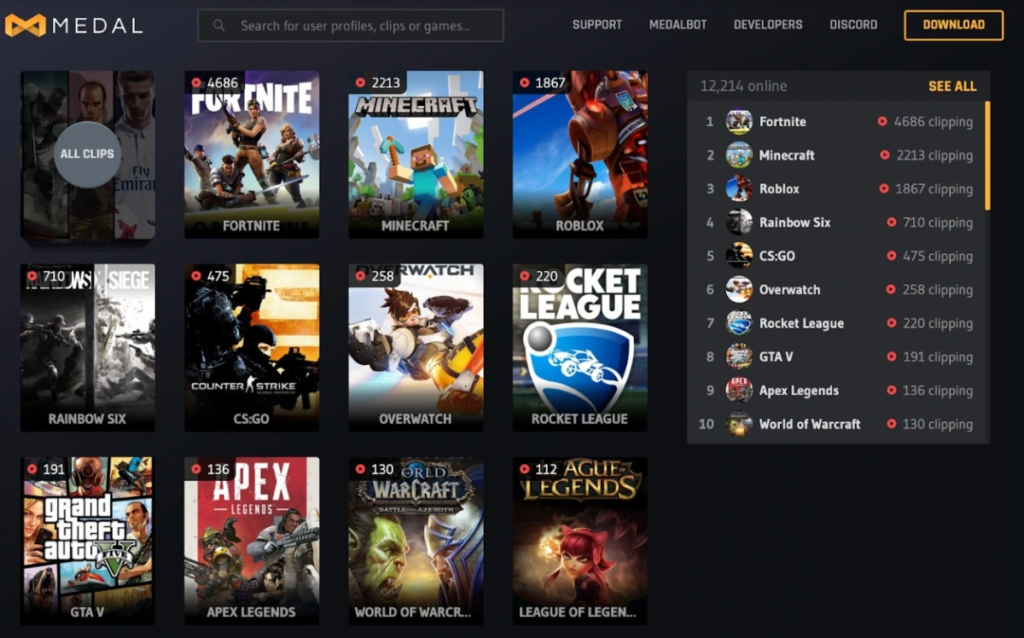
8. Medal TV – Best Free Game Clip Sharing App for Gamers
Source: VentureBeat
Last but not least, we have Medal TV on our list for your Athenascope alternatives. Medal TV allows users to record their gameplay and clip them seamlessly. However, you’ll only be able to record for 15 seconds to 10 minutes.
The interesting thing about this tool is Medal TV offers a lot of editing features that will help you enhance your clips. They include a greenscreen effect, text, stickers, GIFs, slow-motion and fast-forward effects, and even copyright-free soundtracks.
Key Features:
Allows you to record your gameplay and save it as a clip.
The app comes with a built-in editor for enhancing your clips.
You can share your clips on various platforms including Discord, TikTok, and more.
Allows you to follow your friends and see their clips.
You can stream your gameplay to a group of friends.
Pros:
Friendly interface and easy-to-use
Allows users to record and clip easily
Features many editing tools
Enables users to add a catchy soundtrack
Produces high-quality video
Cons:
The free version contains a watermark
Requires download to work
Requires editing skills to create cool clips
Pricing: Starts from $9.99 per month
Available on: Windows, macOS, Android, iOS
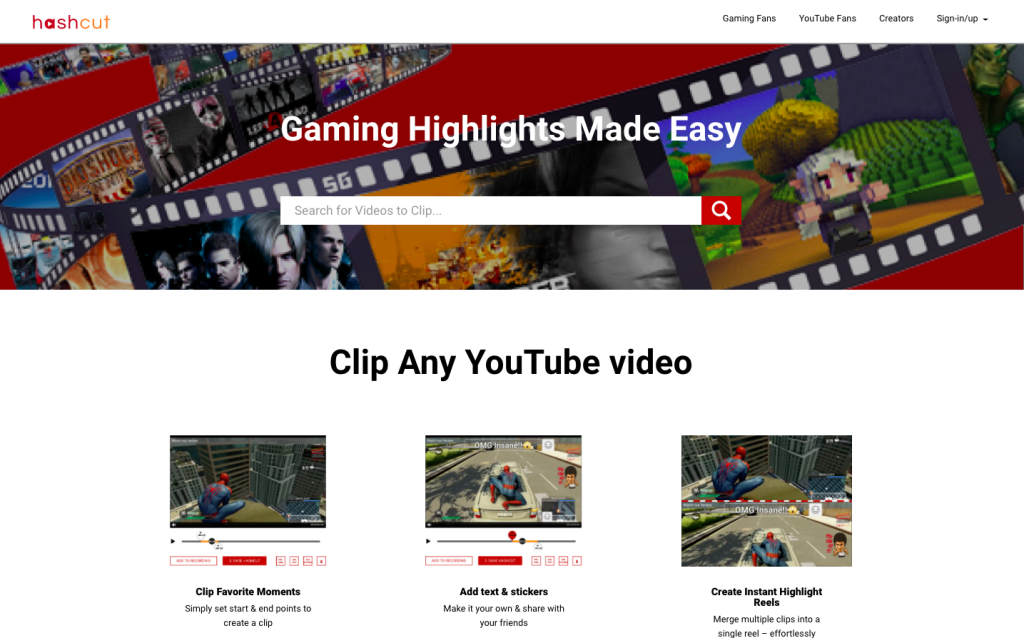
9. HashCut – Best Free Tool for Creating Clips, Memes, and Mashups of YouTube Videos
Hashcut – Source: ProductHUnt
HashCut is a web-based service that lets you easily create clips, memes, and mashups of YouTube videos and share them with your friends. You can clip, annotate, and share YouTube videos directly from your browser with the HashCut Chrome extension.
Key Features:
Allows you to set start and end points for your clips.
You can add text and stickers to your clips to create memes.
Lets you combine multiple clips to create a mashup.
Once you’ve created your clip, meme, or mashup, you can share it directly from HashCut.
Pros:
Free to use
Easy to use and has a user-friendly interface.
Support many games and genres, as well as non-gaming videos.
Share clips instantly on various platforms.
HashCut is a web-based service, so there’s no need to download or install any software
Cons:
Only works with YouTube videos.
A limited number of templates and stickers.
Internet requirement
Pricing: Free
Available on: Windows, macOS, Linux, Android, iOS
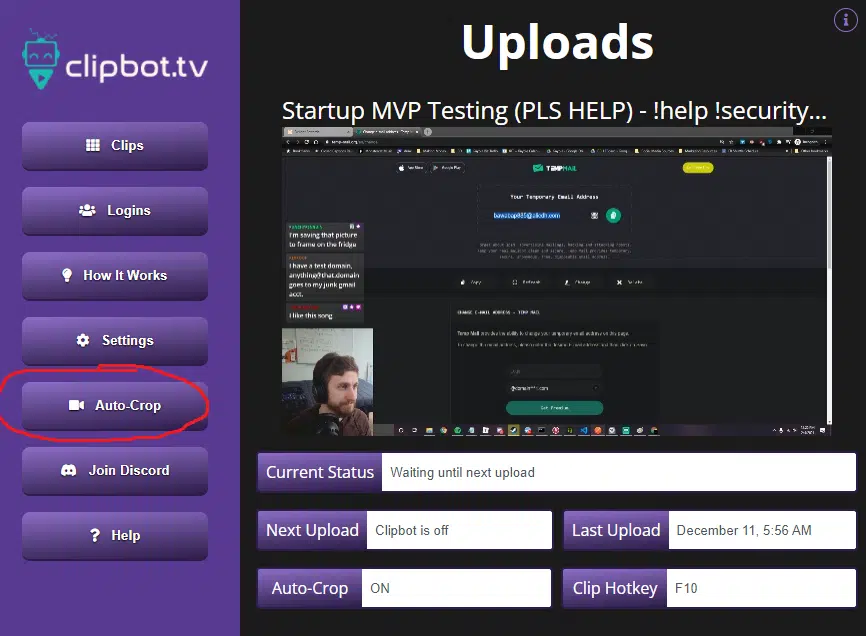
10. ClipBot – Best for Automating Twitch Clips Uploads to YouTube and TikTok
Source:clipbot
Tired of spending hours editing and uploading your Twitch clips to TikTok and YouTube Shorts? This athenascope alternatives free like Clipbot can help you.
This Athenascope alternative isn’t just about making things easy, it’s about doing the content creation process for you. Simply set your preferences, link your social accounts, and sit back as Clipbot transforms your clips into polished, mobile-ready content overnight.
Key Features:
Automatic TikTok uploads
Automatic YouTube Shorts
Choose your favorite clips and only upload those.
Filter what clips get uploaded based on views on Twitch so only your best clips get posted.
Crop any clip by itself to create an awesome vertical video
Pros:
Automatic process
Customize your settings once to apply for all video
Quick service
Cost-effective
Easy to use
Cons:
Setting up Clipbot requires a bit of effort, unlike some simpler editing tools.
You won’t have the same level of granular control over each clip as you would with manual editing.
Lack of customization
Pricing: Free
Available on: Windows, macOS, Linux
11. Powder – Best for AI-Powered Montages
Source: Powder.gg
Powder is a modern alternative designed specifically for the short-form content era. This PC companion app intelligently records your gaming sessions in the background. Once you’re done, its AI analyzes the footage to automatically detect and clip the most exciting moments. Its key strength is the ability to create montages—combining multiple clips into a single, dynamic video ready to be shared on social media.
This platform is ideal for gamers who want to generate engaging content for TikTok, Reels, and Shorts without spending hours on editing. With a focus on automation and ease of use, Powder allows you to turn long streaming sessions into concise, impactful highlights with minimal effort.
Key Features:
Background recording with automatic AI highlight detection.
Automatic montage creation.
Direct sharing to social media platforms.
Low impact on PC performance.
Pros:
Free to use.
Excellent for creating short-form content.
Supports a wide variety of games.
Encourages a fast content creation workflow.
Cons:
Requires a software download on your PC.
Primarily focused on short-form content, not long-form editing.
Lacks community collaboration features.
Pricing: Free
Available on: Windows
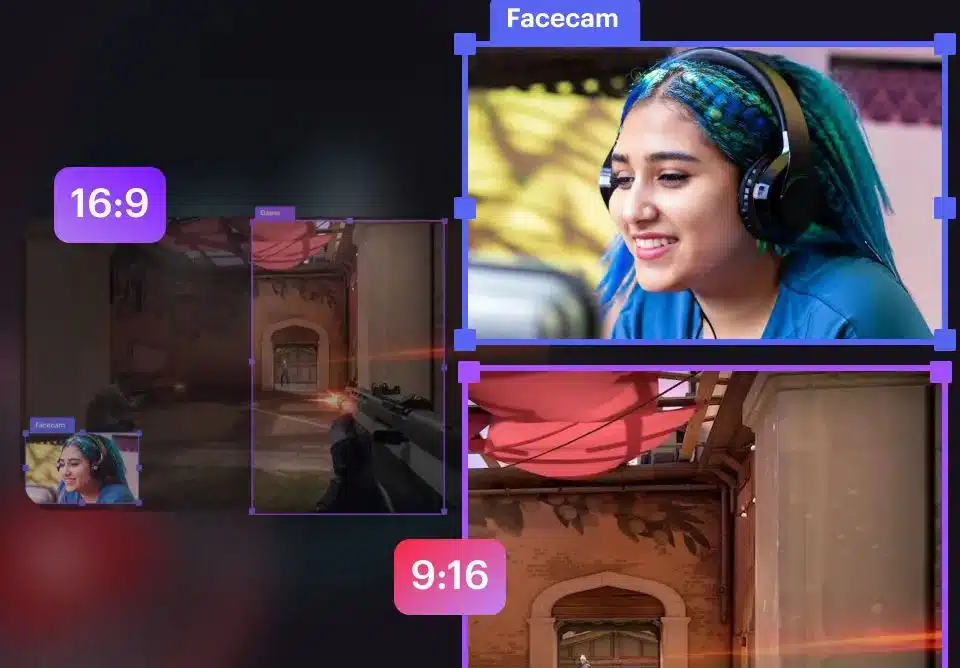
12. StreamLadder – Best for Converting Clips to Vertical Video
Source: Creator Tools
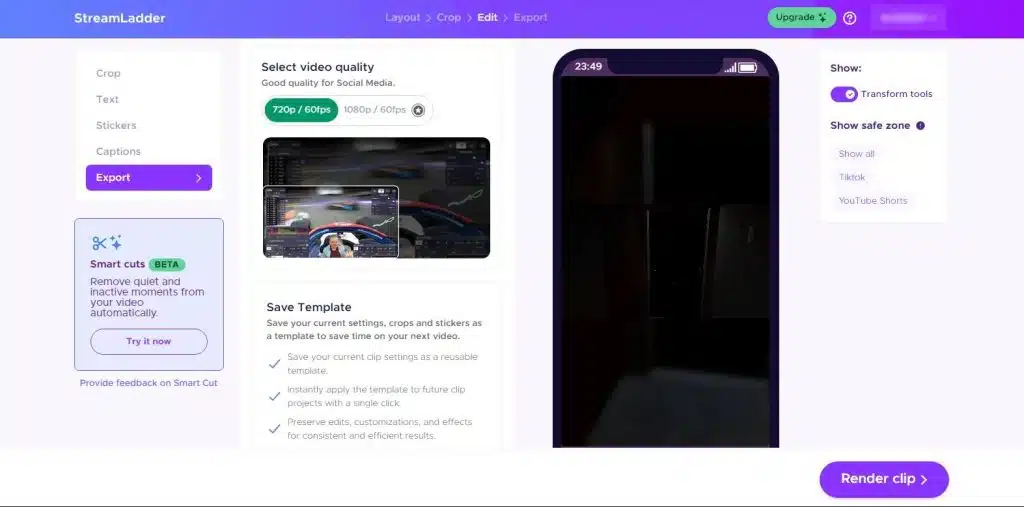
StreamLadder addresses a specific challenge many streamers face: turning horizontal clips from Twitch into engaging, vertical formats for TikTok, Reels, and YouTube Shorts. Instead of recording gameplay, StreamLadder lets you import existing Twitch clips by pasting a link. From there, it presents you with an intuitive editor.
The tool provides various layout templates, including popular split-screen layouts to feature both your gameplay and face cam. You can also add text and stickers to make your content pop. While it doesn’t automate the initial clip creation, StreamLadder is an indispensable tool for streamers who want to efficiently repurpose their Twitch content to reach a wider audience on other platforms.
Key Features:
Import clips directly from Twitch.
Easy-to-use drag-and-drop editor.
Pre-made templates for vertical formats.
Options to add text and stickers.
Pros:
Extremely easy to use, even for beginners.
Web-based, no installation needed.
Generous free plan.
Perfect for repurposing existing content.
Cons:
Doesn’t automatically create clips from streams.
Advanced features and high-quality exports require a Pro subscription.
Relies on having pre-existing clips on Twitch.
Pricing:
Free plan available.
Pro plans start at $9.50/month.
Available on: Windows, macOS, Linux (Web-based)
Final Thoughts
Finding the right Athenascope alternative can significantly enhance your streaming experience by simplifying the process of capturing and sharing highlights. Each tool listed offers unique features tailored to different needs, from the AI-powered clip creation of Eklipse to the full automation of ClipBot.
With options ranging from free tools like Gazoom to subscription services such as Outplayed, streamers can easily find a solution that fits their requirements. Explore these alternatives to continue delivering engaging content to your audience and elevate your streaming journey! According to the list above, Eklipse is a sort of complete package that can support your streaming journey. Therefore, don’t miss out on Eklipse and register now!
TL;DR For a viewer, 1,000 Twitch Bits cost $14.00 USD. For a Twitch Affiliate or Partner, 1,000 Bits are worth $10.00 in revenue.
If you’re an active member of the Twitch community, you’ve definitely seen them: colorful, animated emotes flooding the chat, accompanied by messages of support for the streamer. This is “Cheering,” a unique way to support creators using Twitch’s own virtual currency. So, if you’re thinking of joining in, you’ve probably asked: how much are 1000 Bits on Twitch?
This two-sided economy is what makes Bits special. Unlike direct donations or subscriptions, Bits are a native Twitch currency that allows viewers to show support in real-time, directly within the chat, and unlock special perks like animated emotes and badges. Think of them as a form of digital applause that not only hypes up the stream but also provides direct financial support to your favorite creators.
Twitch Bits are a virtual good you can buy and use to “Cheer” in a channel. Cheering is the act of using Bits in chat. When you Cheer, special animated emotes appear in the chat feed, making your message stand out. The more Bits you use, the more flashy and impressive the animation becomes. For streamers, Bits are a key source of income and a way to gauge audience engagement.
To receive Bits, a streamer must be a Twitch Affiliate or Partner. This ensures that your support is going to creators who are committed to their streaming journey.
The Cost of 1,000 Bits for a Viewer
While the base value of 100 Bits is $1.40 (making 1,000 Bits equal to $14.00), Twitch offers small discounts for buying Bits in larger bundles. This encourages viewers to invest more into the platform’s economy.
Here is a typical breakdown of Twitch Bits pricing in the US for 2025:
Amount of Bits
Price (USD)
100
$1.40
500
$7.00
1,000
$14.00
1,500
$19.95 (Slight Discount)
5,000
$64.40 (Slight Discount)
10,000
$126.00 (Slight Discount)
25,000
$308.00 (Best Discount)
How Much Are 1,000 Bits Worth to a Streamer?
This is where the value proposition becomes very clear for creators. For every Bit that is Cheered in their channel, a Twitch Affiliate or Partner receives exactly one cent ($0.01).
So, when a viewer uses 1,000 Bits, the streamer earns $10.00. The difference between the purchase price ($14.00) and the streamer payout ($10.00) is Twitch’s share, which covers processing fees, platform development, and other operational costs.
Bits vs. Subscriptions vs. Donations: What’s the Difference?
It can be confusing to understand the different ways to support a streamer. Here’s a quick comparison to clear things up:
Support Method
What It Is
Key Benefit for Viewers
Key Benefit for Streamers
Bits (Cheering)
A one-time virtual currency purchase used to send animated alerts in chat.
A direct payment via a third-party service like PayPal or Streamlabs.
100% of your intended amount can go to the streamer (minus fees).
Higher revenue percentage per transaction.
Turn Your Hype Moments into Growth with Eklipse
When a viewer Cheers with a large number of Bits, it can trigger a “Hype Train”—an event where the whole community works together to fill a meter by Cheering and subscribing. These moments are pure content gold: the streamer’s reaction, the chat’s excitement, the on-screen alerts. But what happens after the stream ends? How do you leverage that amazing moment?
This is where Eklipse becomes your ultimate streaming partner. Instead of manually searching through hours of VODs, Eklipse’s AI automatically detects your best moments—including massive Bit cheers and Hype Trains—and turns them into ready-to-share vertical clips. You can turn that incredible moment of support into a viral TikTok or YouTube Short that showcases how exciting your community is.
Get started today and let Eklipse handle the editing grind for you. Sign up for free at https://eklipse.gg.
Want to unlock even more power? Upgrade to Eklipse Premium to get clips in stunning 1080p, remove watermarks, generate AI captions and hashtags, and get 3x faster processing. It’s the perfect way to invest in your channel’s growth.
Frequently Asked Questions
Are Twitch Bits refundable? No, according to Twitch’s Terms of Sale, Bits are non-refundable.
Can I get Twitch Bits for free? Occasionally, Twitch offers ways to earn free Bits by watching ads (“Bits for Ads”). However, this feature is not always available and can vary by region.
Is there a limit to how many Bits I can buy? Yes, there are daily and account-based limits on how many Bits you can purchase to prevent fraudulent activity.
Final Thoughts
So, 1,000 Bits on Twitch represents a $14.00 investment from a viewer and a $10.00 payout for a streamer. More than just a transaction, Bits are a core part of the Twitch experience that fosters a direct and engaging connection between creators and their communities. They fuel the hype, celebrate big moments, and provide a vital income stream that helps streamers turn their passion into a profession.