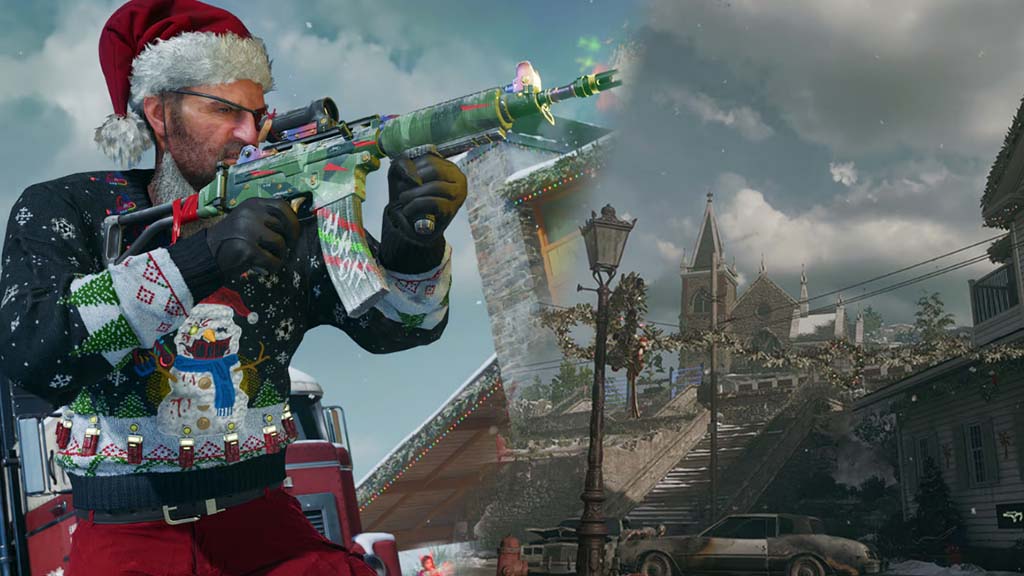
Surviving zombies is always a challenge, but the “Jingle Hells Mode” in Black Ops 6 Zombies adds a festive twist. This limited-time mode takes players to snow-covered battlegrounds, where explosive snowmen and winter-themed chaos await. As undead enemies shuffle through Liberty Falls, players must adapt to the cold and unpredictable elements in a battle for survival.
Whether you’re a veteran of Zombies or seeking a fresh challenge, Jingle Hells Mode offers plenty of excitement. The new features, gameplay mechanics, and holiday-themed surprises promise a thrilling experience. Ready to conquer this icy wasteland? Keep reading to discover how to navigate the chaos and claim victory.
Jingle Hells Mode in Black Ops 6 Zombies – Source: Activision
The highly anticipated Jingle Hells mode in Call of Duty: Black Ops 6 Zombies will officially launch on December 17, 2024. It will go live at 10 AM Pacific Time (PT), marking the end of other ongoing in-game events.
This year’s Jingle Hells brings a fresh experience with holiday-themed elements and new changes to the Liberty Falls map. These updates will elevate the festive mood while introducing exciting challenges for players to tackle.
What’s New in Gameplay?
Jingle Hells reinvents traditional Zombies gameplay by adding festive mechanics and holiday-themed items:
Snowballs as Weapons: These frosty projectiles can slow down or eliminate zombies. Aim wisely, as they’re crucial for survival.
Loot-Filled Snowmen: Destroy these snowy figures to uncover power-ups, weapons, or… an unexpected zombie ambush.
Holiday Cheer Gobblegum: This new Gobblegum boosts team morale and grants special seasonal perks to aid you in tough situations.
Increased Challenge for the Main Quest
Liberty Falls’ main quest is playable in Jingle Hells, but the holiday theme doesn’t make it any easier. Expect tougher zombie waves and the need for strategic use of new features to succeed.
How Liberty Falls Gets a Holiday Makeover
Liberty Falls takes on a festive new look in Jingle Hells, with the map undergoing a dramatic holiday makeover. From snow-covered landscapes to vibrant Christmas decorations, the transformation adds an exciting twist to the usual zombie chaos. Players will also face new dynamic challenges, including snowstorms that heighten the intensity of the battle.
Winter Aesthetics: Snow blankets the landscape, creating a stark contrast to the usual dark and eerie ambiance.
Christmas Decorations: Twinkling lights, festive trees, and colorful ornaments adorn the map, adding a touch of holiday magic.
Dynamic Effects: Snowstorms occasionally sweep through, adding visibility challenges and immersing players deeper into the wintery chaos.
Why You Should Play Jingle Hells
Jingle Hells mode in Black Ops 6 Zombies offers a fresh, holiday-themed experience, adding festive elements to the usual gameplay. The Liberty Falls map is transformed with snow, Christmas trees, and holiday decorations, creating a winter wonderland. Custom audio enhances the festive mood, immersing players in a unique atmosphere while they face the undead.
Gameplay mechanics are also revamped for the holiday event. Snowmen spawn zombies or drop loot when destroyed, while present boxes dropped by zombies offer rewards. Limited-time S.A.M.T.A. Trials provide challenges that can earn players valuable items, increasing the competition and excitement.
The mode also introduces new challenges and rewards. Frozen rounds slow player movement, requiring strategic play, and key resources are hidden by the winter storm. The Naughty or Nice power-up adds risk and reward, while GobbleGum gifts provide valuable bonuses. Despite these changes, the main quest remains available for players to complete, offering standard rewards.
Final Thoughts
Jingle Hells Mode in Black Ops 6 Zombies offers a festive yet intense twist on the classic gameplay. The Liberty Falls map is reimagined with holiday-themed elements like snowballs, snowmen, and vibrant decorations, enhancing the seasonal atmosphere. Players must face a holiday horde in this limited-time mode, combining survival and holiday cheer.
Now is the perfect time to gather your team and dive into this chaotic winter event. With its unique challenges and limited availability, Jingle Hells Mode promises thrilling gameplay that’s not to be missed. Prepare to conquer the undead and embrace the mayhem of this festive adventure.
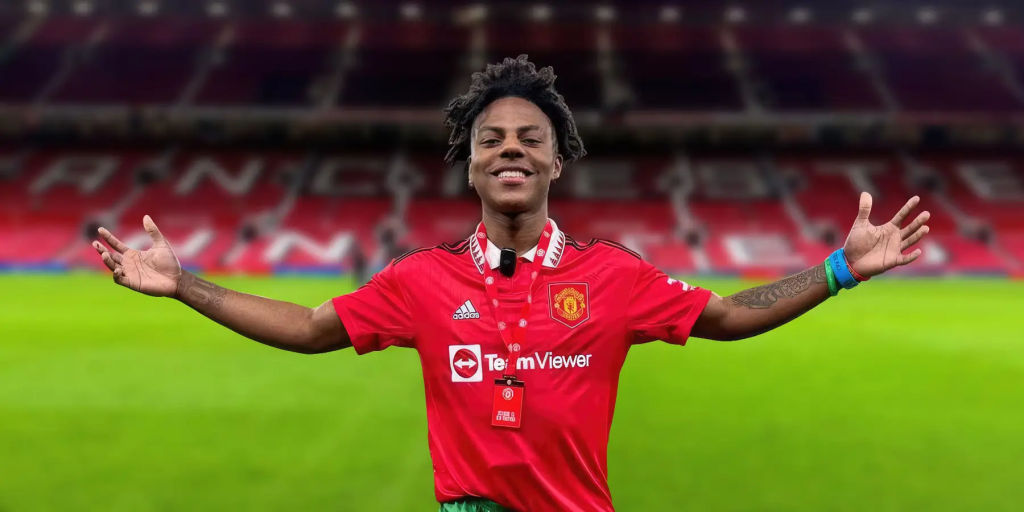
Darren Watkins Jr., widely known as IShowSpeed, has captivated millions with his energetic personality and viral gaming content. iShowSpeed’s rise to fame highlights the power of authenticity, as his humor and passion have built a loyal global fanbase.
What sets him apart is his ability to turn gaming into unforgettable moments, from his admiration for Cristiano Ronaldo to his viral antics. More than just a content creator, IShowSpeed has created a thriving community fueled by excitement and connection.
Born on January 21, 2005, in Cincinnati, Ohio, IShowSpeed showed an early interest in the online world. He launched his YouTube channel in March 2016, primarily posting gameplay videos of popular titles such as NBA 2K and Fortnite. However, it wasn’t until 2021 that his channel skyrocketed in popularity.
The turning point in his career was his ability to captivate audiences with his explosive reactions and comedic commentary. Viral clips on TikTok showcasing his gaming highlights and antics helped propel his subscriber base from 100,000 to over 33 million by the end of 2023. His enthusiastic admiration for soccer star Cristiano Ronaldo also contributed significantly to his fan base, earning him recognition beyond the gaming community.
Personal Life
Source: Social Nation
Despite his online persona, IShowSpeed offers glimpses into his personal life through social media. As the eldest of three siblings, he often shares moments with his family and behind-the-scenes experiences outside of gaming.
In July 2023, IShowSpeed faced health challenges, including hospitalization in Tokyo due to severe sinusitis and headaches. These moments showed a more vulnerable side of the creator, further endearing him to his fans. Additionally, his philanthropic efforts, such as donating over $50,000 for earthquake relief efforts in Turkey and Syria, showcase his commitment to using his platform for good.
The Controversies That Keep Fans Talking
IShowSpeed’s journey to fame hasn’t been without its share of controversies. Known for his unfiltered and sometimes provocative content, he has faced bans from platforms like Twitch for inappropriate behavior during live streams.
While these incidents have sparked debates about his approach, they have also fueled his notoriety, keeping fans and critics alike engaged.
Many of his followers admire his unapologetic authenticity, while others believe his antics cross the line. Regardless of the perspective, these controversies have played a significant role in amplifying his visibility, making him a topic of conversation across social media platforms.
Net Worth and Achievements
With an estimated net worth of $1 million to $2.5 million, IShowSpeed’s success stems from multiple revenue streams. His YouTube ad earnings, merchandise sales, sponsorships, and burgeoning music career all contribute to his financial growth.
Notable tracks like Shake and Bounce That Booty have gained millions of streams, further solidifying his position as a multifaceted entertainer. His entrepreneurial ventures, including a thriving merchandise line, demonstrate his ability to capitalize on his ever-growing influence.
Final Thoughts
IShowSpeed’s rise to fame highlights the power of engaging content and the vast potential of digital media platforms like YouTube and TikTok. From his humble beginnings to becoming a household name in the gaming and entertainment community, his story is a testament to perseverance and creativity.
As he continues to expand his reach through music, philanthropy, and captivating content, IShowSpeed remains a dynamic force in online entertainment. His evolving journey ensures that he will be a significant figure in the industry for years to come.
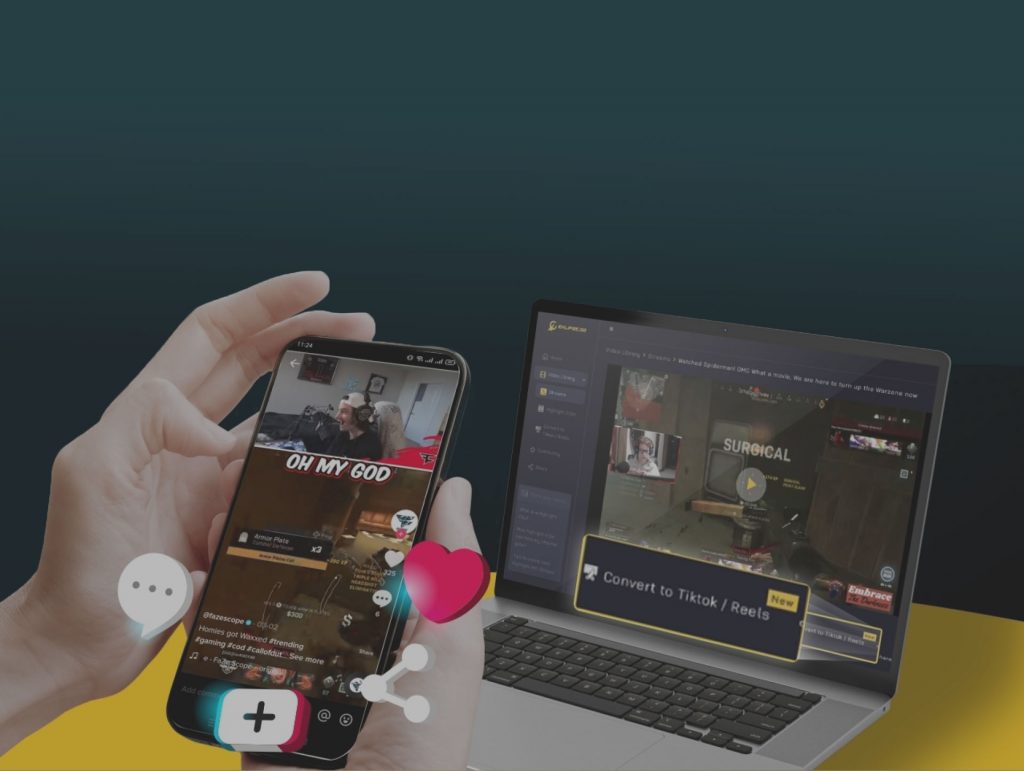
Maximize your Black Ops 6 rewards—Create highlights from your best gameplay with with Eklipse
Eklipse help streamer improve their social media presence with AI highlights that clip your Twitch / Kick streams automatically & converts them to TikTok / Reels / Shorts
Are you stuck with plain, uninspiring stream visuals while trying to stand out in the highly competitive world of online streaming? Whether you’re on Twitch, YouTube, or Facebook Live, your stream graphics play a crucial role in grabbing attention and keeping viewers engaged. Yet, the cost of professional overlays often seems prohibitive, making it difficult to achieve that polished look.
The good news? You don’t need to spend a fortune to create stunning visuals. There are several free and affordable overlay tools that can transform your stream into a visually dynamic experience. From customizable designs to easy-to-use interfaces, these tools make it possible for anyone to level up their streaming game. Ready to find out which ones will work best for you? Let’s get started!
1. StreamElements: An Affordable All-In-One Overlay Solution
Affordable Overlay – Source: StreamElements
StreamElements is a must-have for streamers who want high-quality overlays without the hassle or expense. This browser-based tool provides a variety of professional-grade templates and customizable widgets that integrate seamlessly with platforms like Twitch, YouTube, and Facebook Live. For beginners, StreamElements offers simplicity and ease of use. You don’t need to download any software or worry about complicated settings. Everything is handled online, making it a favorite among streamers seeking to enhance their graphics quickly. Whether it’s sleek overlays or interactive alerts, StreamElements ensures your stream looks sharp and polished.
Key Features:
Free overlays and alerts.
Browser-based interface—no downloads needed.
Integration with streaming platforms for seamless setup. Why Choose StreamElements?:
Perfect for beginners who want an easy way to enhance their streams. The overlays are stylish and optimized for performance.
If variety is what you’re after, PixelPro.io delivers with over 250 free live stream overlays designed for versatility. These templates cater to everything from high-energy gaming streams to chill lifestyle content. Compatible with OBS Studio, Streamlabs, and xSplit, PixelPro.io’s overlays ensure seamless integration regardless of the software you use. What sets PixelPro.io apart is its commitment to keeping the library fresh with regular updates and new designs.
Key Features:
Extensive overlay library with diverse styles.
Regular updates and new designs.
Free for personal use with premium options available. Why Choose PixelPro.io?:
Ideal for streamers looking for variety. The large collection ensures you’ll find something that fits your brand perfectly.
3. OverlayForge: Free Twitch Overlay Specialist
OverlayForge is a standout tool for streamers focused on Twitch. Known for its sleek and modern templates, OverlayForge’s designs work seamlessly with OBS and Streamlabs, allowing you to tailor your visuals to match your unique style. Best of all, the platform is beginner-friendly, making it easy to create professional-quality overlays without advanced design skills.
Key Features:
High-quality free overlays specifically designed for Twitch.
Ideal for streamers who want polished overlays tailored to Twitch, requiring no design expertise.
4. Kittl: Creative Affordable Overlay Maker
Kittl’s overlay maker is the go-to choice for streamers who value creativity and control. Its intuitive drag-and-drop interface allows even non-designers to craft custom overlays reflecting their unique personality. Pre-made templates serve as a starting point, enabling tweaks to colors, fonts, and graphics to create something truly distinctive.
Key Features:
Intuitive drag-and-drop design tools.
Pre-made templates for quick customization.
Export options in various file formats. Why Choose Kittl?:
Suitable for streamers wanting full control over their designs. Kittl’s user-friendly platform offers unlimited creative possibilities.
5. Streamlabs: Free and Premium Affordable Overlay Options
Streamlabs is a household name in the streaming community, offering an impressive library of overlays catering to all levels of experience. From free templates to premium designs, Streamlabs ensures that streamers have access to high-quality visuals easily implemented. One of Streamlabs’ strongest features is its seamless integration with its broadcasting software via one-click installation processes, eliminating technical headaches.
Key Features:
Free and premium overlay options.
One-click installation with Streamlabs OBS.
Customizable widgets for additional branding. Why Choose Streamlabs?:
Reliable option for streamers who want everything in one place. Its free overlays are professional and easy to install, while premium options provide added flexibility.
Conclusion
Creating an engaging stream doesn’t have to break the bank. With tools like StreamElements, PixelPro.io, and Streamlabs, you can enhance your visuals and impress your audience without overspending. Whether you’re a beginner or a seasoned streamer, these affordable overlay tools offer something for everyone. So, pick your favorite and start designing your dream stream setup today with these budget-friendly solutions!
Expanding your reach as a creator or business goes beyond just streaming content. To truly stand out, it’s about building a brand beyond stream merchandise partnerships that resonates with your audience. By integrating high-quality merchandise and forging meaningful collaborations, you can create deeper connections with your fans while unlocking new revenue streams.
Merchandise and partnerships aren’t just about profits—they’re a way to tell your story, share your values, and build loyalty among your audience. With the right approach, these tools can transform your brand into a movement. Ready to explore how to combine creativity and strategy for maximum impact? Let’s dive into the essentials of turning your brand into something unforgettable!
Brand partnerships provide an opportunity for businesses and creators to collaborate and amplify their reach.
These partnerships can take many forms, including co-marketing, co-branding, and sponsorships, each serving a unique purpose in building brand awareness and driving sales.
Types of Brand Partnerships
Co-Marketing: Collaborating on campaigns that target shared audiences to maximize visibility.
Co-Branding: Combining elements of two brands to create a new, appealing product or service.
Sponsorships: Offering financial or resource support in exchange for promotional exposure during events or campaigns.
The Role of Merchandise in Brand Building
Source: Linkedin
Merchandise is a powerful tool for extending a brand’s presence beyond digital platforms. Well-designed products not only serve as additional revenue streams but also foster deeper connections with loyal fans. For streamers, branded merchandise like apparel or accessories can become a badge of support for their audience.
Strategies for Merchandise Success
Focus on Quality: High-quality merchandise builds trust and reflects positively on the brand.
Create Exclusivity: Offer limited-edition items to drive urgency and appeal to collectors.
Involve Your Audience: Engage fans by inviting them to contribute to product design through polls, feedback, or contests.
Collaborating for Greater Impact
Strategic collaborations are invaluable for growing a brand’s influence. By partnering with brands that share similar values and audiences, businesses can pool resources and attract new customer segments. Effective collaborations require alignment in goals, strong communication, and shared marketing efforts.
Ensure Value Alignment: Collaborate with brands that reflect similar values and resonate with your target audience.
Craft Joint Campaigns: Create impactful content or marketing initiatives that showcase the strengths of both partners.
Real-Life Partnership Success Stories
A&W x Beyond Meat: This collaboration introduced plant-based burgers, attracting a broader customer base and driving significant sales for both brands.
Doritos x Taco Bell: Their co-branded menu items, like the Doritos Locos Tacos, were a hit, combining the strengths of both brands to boost popularity.
Final Thoughts
Building a brand beyond stream merchandise partnerships requires a thoughtful, strategic approach. By understanding the nuances of partnerships and prioritizing quality merchandise, brands can amplify their presence and deepen audience engagement.
Aligning with like-minded collaborators and involving fans in the process ensures lasting success in an increasingly competitive market. Start leveraging these strategies today to elevate your brand and unlock new opportunities for growth!
Take your brand to the next level with Eklipse, the ultimate tool for content creators. Whether you’re crafting highlight reels from your streams or showcasing merchandise to your audience, Eklipse’s AI-powered platform makes it seamless and efficient. Transform long-form videos into eye-catching clips tailored for platforms like TikTok, Instagram, and YouTube. Ready to boost your visibility and connect with your audience on a deeper level? Start creating standout content with Eklipsetoday and see the difference!
Maximize your Black Ops 6 rewards—Create highlights from your best gameplay with with Eklipse
Eklipse help streamer improve their social media presence with AI highlights that clip your Twitch / Kick streams automatically & converts them to TikTok / Reels / Shorts
The live streaming trend is rapidly evolving, reshaping how we connect, shop, and consume content. With billions of users globally, the industry is set to undergo significant transformations driven by cutting-edge technology and changing consumer demands. Staying ahead of these trends is crucial for creators, marketers, and businesses aiming to maximize the potential of live streaming. Read more.
Augmented Reality (AR) is enhancing live streaming by making broadcasts more interactive and engaging. Viewers can participate in virtual concerts with 3D holograms or attend live tutorials where digital objects appear in their real-world environment. This trend extends beyond entertainment into sectors like education and eCommerce, where AR can improve learning and shopping experiences.
Key Innovations:
Real-Time Filters: Popular on platforms like Snapchat and Instagram, these effects add creativity to streams.
3D Object Integration: Enables viewers to interact with products during the stream, particularly useful in eCommerce.
Virtual Environments: Hosts can create immersive backdrops that captivate audiences.
2. Hyper-Personalized Content
The era of one-size-fits-all content is fading. With advancements in AI and machine learning, live streams are becoming highly personalized based on viewer preferences. This personalization enhances engagement and fosters community loyalty among audiences.
Applications:
Dynamic Recommendations: Platforms suggest streams tailored to individual user data.
Custom Interaction: Features like live polls and Q&A sessions are tailored for specific audience segments.
AI-Generated Content: Predictive tools help creators design streams that resonate with viewers.
3. Live Stream eCommerce Growth
Live stream shopping has emerged as a powerful sales tool, particularly on platforms like TikTok and Instagram. This format allows influencers and brands to showcase products in real-time, driving immediate purchases through interactive features.
Interactive Features: Sellers receive instant feedback through chat or polls.
Simplified Transactions: Seamless payment integrations enhance the shopping experience.
4. Integration of 5G Technology
The rollout of 5G technology is set to revolutionize live streaming by providing faster speeds and lower latency, resulting in smoother high-definition streams even in crowded environments.
Impact on Live Streaming:
Higher Resolution Streams: Support for 4K and 8K quality becomes feasible.
Global Accessibility: Consistent streaming quality in remote areas.
Enhanced Interactivity: Faster response times improve viewer engagement.
5. Emphasis on Ethical Live Streaming Practices
As the industry grows, there is an increasing focus on ethical practices such as viewer privacy protection and content moderation. Platforms are under pressure to create safe environments while fostering user trust.
Key Considerations:
Content Moderation: AI tools help detect harmful content.
Viewer Privacy: Safeguarding data collected during streams.
Inclusivity: Ensuring content is accessible to all audiences.
Final Thoughts
The live streaming trend is evolving at an unprecedented pace, driven by technological advancements and changing audience preferences. From immersive AR interactions to the transformative potential of 5G technology, the future of live streaming holds immense possibilities for creators, brands, and consumers alike. By staying ahead of these trends, you can harness the full potential of live streaming—whether it’s building your brand, engaging your audience, or innovating new experiences. The time to adapt and innovate is now—what will you create?
Mobile live streaming apps have become essential for gamers, content creators, and entrepreneurs alike. As smartphones evolve, these apps now offer advanced features and ease of use, making live streaming more accessible and professional. With numerous options available, selecting the right app can be a challenge.
Let’s explores the top five mobile live streaming apps. We will highlight their key features, benefits, and potential drawbacks, assisting you in choosing the best app tailored to your needs.
Streamlabs is widely regarded as the gold standard for live streaming, especially for those seeking a polished and professional broadcast. Originally designed for PC streamers, Streamlabs has successfully translated its robust toolkit into a mobile app that caters to gamers, influencers, and businesses alike. Whether you’re streaming gameplay, hosting a webinar, or interacting with fans, Streamlabs equips you with all the tools you need for success.
Key Features:
Customizable overlays for branding your streams.
Multi-platform streaming to Twitch, YouTube, and Facebook.
Integrated alerts for followers, donations, and chats.
Strengths:
User-friendly interface, even for beginners.
Advanced features like face masks and themes.
Free version available with essential tools.
Weaknesses:
Some advanced features require a premium subscription.
May consume more battery compared to simpler apps.
2. Prism Live Studio: Great for Social Media Creators
Prism Live Studio is a rising star in the mobile live streaming world, designed to meet the creative demands of social media influencers. It seamlessly combines video editing capabilities with live streaming, making it an excellent choice for creators who want to add a personal touch to their broadcasts. Whether you’re streaming on Instagram, TikTok, or Facebook, Prism allows you to captivate your audience with professional-quality visuals and interactivity.
Key Features:
Supports multi-platform streaming, including Instagram Live and TikTok.
Video editing tools for adding filters, stickers, and text.
Options to pre-record and schedule live content.
Strengths:
High-quality streams with added creative tools.
Free to use with no watermarks.
Compatible with both iOS and Android.
Weaknesses:
Limited advanced features for gamers.
No monetization options within the app.
3. Twitch: Best for Gaming Live Streams
Twitch is synonymous with live streaming, especially in the gaming community. As the world’s leading platform for gaming content, Twitch’s mobile app ensures that creators can stream effortlessly while maintaining the same level of engagement as desktop users. Whether you’re showcasing your skills or chatting with fans, Twitch offers unmatched visibility and monetization opportunities for gamers.
Key Features:
Built-in chat features for real-time interaction.
High-definition streaming optimized for games.
Subscriptions and Bits for monetization.
Strengths:
Huge audience base for gamers.
Simple setup for streaming directly from your phone.
Opportunities to grow as a Twitch Partner or Affiliate.
Weaknesses:
Limited to Twitch streaming only.
High competition for new streamers.
4. Instagram Live: Best for Instant Engagement
Instagram Live offers unparalleled access to your social media audience, leveraging the platform’s massive user base to maximize your reach. Perfect for creators and brands who prioritize instant interaction, Instagram Live allows you to engage followers in real time. With interactive features like Q&A and polls, it’s an ideal choice for casual streamers and professionals alike.
Key Features:
Instant notifications to followers when you go live.
Interactive features like Q&A, polls, and reactions.
Built-in filters and effects for enhanced visuals.
Strengths:
Easy to use and widely adopted.
Great for connecting with an established Instagram audience.
Free with no additional downloads required.
Weaknesses:
Limited to vertical video formats.
Streams cannot be multi-platform.
5. YouTube Live: Best for Video Creators
YouTube Live combines the platform’s unmatched audience reach with powerful streaming tools, making it the go-to choice for video creators. Whether you’re hosting a live Q&A, streaming a tutorial, or sharing your gaming highlights, YouTube Live helps you build a long-term connection with your audience. The ability to monetize through Super Chats, memberships, and ads further solidifies its position as one of the best live streaming apps available today.
Key Features:
Streams directly integrate into your YouTube channel.
Monetization options like Super Chats and memberships.
High-definition streaming with detailed analytics.
Strengths:
Massive potential audience on YouTube.
Permanent storage of live streams as video content.
Excellent for monetization and discoverability.
Weaknesses:
Requires at least 50 subscribers to go live on mobile.
Limited interactive features compared to other apps.
Final Thoughts
Selecting the ideal live streaming app depends on your specific objectives. For gamers, Twitch and Streamlabs stand out. Social media influencers will appreciate Prism Live Studio or Instagram Live, while YouTube Live excels in monetization and audience growth.
Explore these mobile live streaming apps to find the one that suits your style and audience. With streaming more accessible than ever, it’s the perfect time to begin broadcasting. Eklipse is an AI tool that effortlessly captures and shares highlights from your streams. It automatically edits moments into TikTok, Reels, or Shorts, making it easy to showcase your best content.
Have you ever noticed your aiming feels inconsistent in Marvel Rivals? Even with the best gaming mouse, your crosshair might not move the way you expect it to, making precise shots difficult. The likely culprit? Mouse acceleration.
Mouse acceleration causes your cursor speed to change based on how quickly you move your mouse. While helpful for daily PC use, it can severely impact accuracy in games where precision is critical. In this guide, I’ll show you how to disable mouse acceleration in Marvel Rivals and optimize your settings for smoother, more reliable aiming. Let’s get started!
Mouse acceleration adjusts the speed of your cursor based on the velocity of your mouse movements. If you move your mouse faster, the cursor travels further; move it slower, and it doesn’t go as far. While this might be helpful for office tasks, it’s a nightmare for competitive games like Marvel Rivals.
Why Disable It?
Precision Aiming: With mouse acceleration off, mouse movement becomes consistent (1:1) with hand movement. This means more precise and predictable aim.
Better Control: Competitive players rely on muscle memory, which becomes impossible with inconsistent cursor behavior.
Improved Accuracy: Turning off mouse acceleration allows you to focus on refining your aim without unexpected jumps.
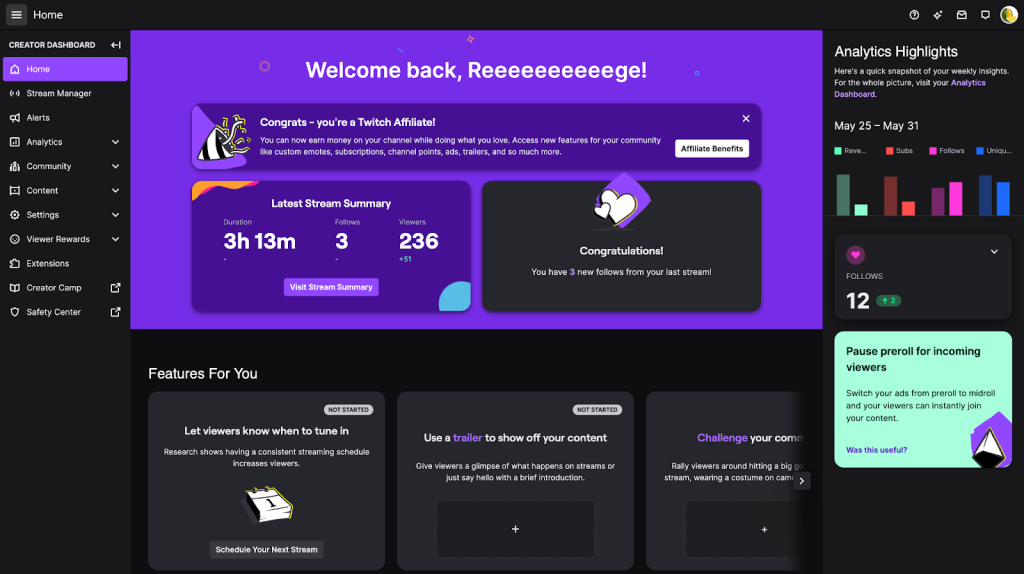
2. How to Turn Off Mouse Acceleration In-Game
Image: Auslogics
Unfortunately, Marvel Rivals doesn’t offer an in-game option to disable mouse acceleration directly. However, you can disable it by editing the game’s configuration files. Here’s how:
Step-by-Step Instructions:
Open File Explorer: Press Win + E to open File Explorer.
Navigate to the Configuration Folder:
Go to the following path: C:\Users\[YourUsername]\AppData\Local\Marvel\Saved\Config\Windows
Replace [YourUsername] with your actual Windows username.
Locate GameUserSettings.ini:
Find the file named GameUserSettings.ini.
Right-click and select Open With > Notepad.
Edit the Configuration File:
Scroll to the bottom of the file.
Paste the following lines:graphqlCopy code[/script/engine.inputsettings] bEnableMouseSmoothing=False bViewAccelerationEnabled=False
Save and Close the File:
Press Ctrl + S to save the changes, then close Notepad.
Restart Marvel Rivals: Launch the game again to ensure the changes take effect.
By disabling mouse smoothing and acceleration in the configuration file, you’ll achieve consistent mouse movement for better in-game accuracy.
3. How to Disable Mouse Acceleration in Windows
Even if you disable mouse acceleration in the game, Windows can still interfere by applying system-level acceleration. To eliminate this, follow these steps:
Step-by-Step Instructions:
Open Mouse Settings:
Press Win + R, type control, and hit Enter to open the Control Panel.
Go to Hardware and Sound > Mouse.
Disable Enhance Pointer Precision:
Navigate to the Pointer Options tab.
Uncheck the box labeled “Enhance pointer precision”.
Apply Changes:
Click Apply and then OK to confirm.
Test Your Mouse Movement: Move your mouse and notice the difference. Your cursor movement should now feel more consistent.
4. Additional Mouse Settings for Better Performance
After turning off mouse acceleration, you can optimize your mouse settings further to gain a competitive edge in Marvel Rivals.
Recommended Settings:
Set Mouse DPI (Dots Per Inch):
For FPS games like Marvel Rivals, a DPI between 400–800 is ideal. Lower DPI offers better control for precise aiming.
Adjust In-Game Sensitivity:
Pair your DPI with low in-game sensitivity. Start with a range of 3–6 and tweak it until it feels right.
Disable Mouse Smoothing:
Ensure any mouse smoothing options are turned off, both in-game and in Windows settings.
Polling Rate:
Set your mouse polling rate to 1000Hz for the most responsive cursor movement.
Consistent Surface:
Use a high-quality mouse pad to ensure smooth tracking.
By combining these settings, you’ll eliminate inconsistencies, improve control, and enhance your overall aiming performance.
Final Thoughts
Disabling mouse acceleration in Marvel Rivals is a game-changer for players seeking better precision and control. By tweaking both the game’s configuration file and your Windows settings, you can eliminate inconsistent aiming and take your gameplay to the next level.
Whether you’re competing at a high level or just enjoying casual matches, precise aiming makes a huge difference. Follow these steps and see how much your performance improves in Marvel Rivals.
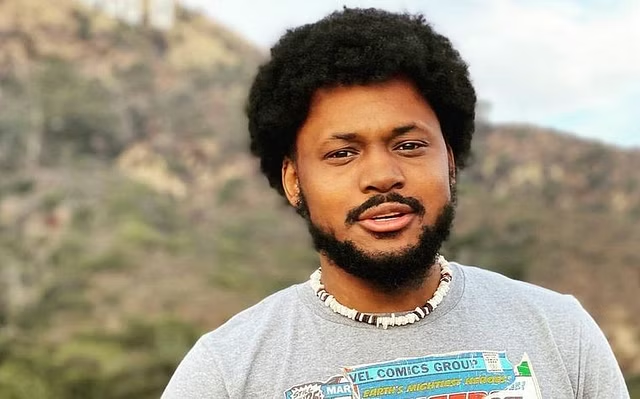
CoryxKenshin, a name synonymous with humor, creativity, and gaming excellence, has captured the hearts of millions worldwide. Known for his thrilling horror game playthroughs and lighthearted comedic flair, the CoryxKenshin profile is a fascinating tale of determination and authenticity. With a growing legacy on YouTube and an ever-loyal fanbase, Cory has become a beacon of inspiration in the online entertainment world, blending passion with unmatched relatability.
From his humble beginnings in Michigan to his rise as “The Shogun” of the gaming community, Cory’s journey is a testament to the power of staying true to oneself. Whether it’s his epic gameplay, quirky music tracks, or heartfelt connection with fans, CoryxKenshin continues to redefine what it means to be a digital creator. Dive into his incredible story, and discover how this one-of-a-kind personality turned his dreams into reality.
Cory DeVante Williams was born on November 9, 1992, in Ann Arbor, Michigan, making him 32 years old. Raised in Detroit, Cory grew up in a supportive household that fostered his creativity and passion for entertainment.
His father worked at Ford Motors, while his mother played a key role in his upbringing. Cory has two siblings: his brother Anthony and his sister Aleya. This strong family bond has been a cornerstone of his grounded personality, which resonates with his fans.
Education
Cory initially pursued higher education at Michigan State University in 2010, studying Media Arts. However, he left after two years to follow his growing passion for content creation.
Later, he enrolled at the University of Michigan-Ann Arbor, focusing on Computer Science with an emphasis on Game Development. Despite not completing his degree, his decision to commit to his YouTube channel proved to be the turning point in his career.
Career
Source: YouTube/CoryxKenshin
CoryxKenshin started his YouTube journey on April 26, 2009, posting vlogs before shifting his focus to gaming content in 2014. His rise to fame began with comedic and entertaining playthroughs of horror games like Five Nights at Freddy’s and Mortal Kombat X. With his unique commentary and engaging personality, Cory quickly amassed a loyal following.
Today, CoryxKenshin boasts an impressive 19 million subscribers and nearly 8 billion total views on his YouTube channel. Known affectionately as “The Shogun” by his fans, he has built a strong brand based on humor, positivity, and relatable content. Beyond gaming, Cory has ventured into music, releasing tracks such as No Luv and The Pizza Rap.
His influence extends beyond YouTube, as he has attended major gaming events like Comic-Con and PAX while collaborating with other popular creators. His success highlights his ability to adapt and innovate in the ever-evolving world of online entertainment.
Net Worth
As of 2024, CoryxKenshin’s net worth is estimated at $15 million, a testament to his thriving career as a content creator and entrepreneur. His income streams include YouTube ad revenue, brand sponsorships, merchandise sales, and music streaming.
Cory also operates a successful clothing line that features unique designs, further diversifying his revenue sources.
Personal Life
Despite his massive fame, CoryxKenshin maintains a low-key personal life. He is known to be single and often shares light-hearted moments from his day-to-day life on social media.
His dog, Samson, is a frequent guest star in his videos, showcasing his love for pets. Cory’s down-to-earth personality and commitment to his audience have earned him widespread respect and admiration.
Final Thoughts
The CoryxKenshin profile is an inspiring story of passion, determination, and authenticity. From a college student to one of YouTube’s most celebrated gaming creators, Cory has made an indelible mark on the gaming and entertainment industry.
With a growing fanbase, continued success in content creation, and ventures into music and entrepreneurship, CoryxKenshin’s influence shows no signs of slowing down. His journey serves as a reminder that creativity and perseverance can truly make dreams a reality.
Maximize your Black Ops 6 rewards—Create highlights from your best gameplay with with Eklipse
Eklipse help streamer improve their social media presence with AI highlights that clip your Twitch / Kick streams automatically & converts them to TikTok / Reels / Shorts
Source: Eklipse Blog - how to add twitch link to tiktok
If you’re a streamer looking to expand your audience and enhance your engagement, linking your Twitch account to TikTok is a strategic move that can significantly boost your visibility. However, many streamers encounter challenges when trying to figure out how to link your Twitch to TikTok effectively.
It’s not as straightforward as linking other social media accounts, and the process can seem daunting, especially if you’re unsure about the requirements or the steps involved.By the end of this article, you’ll be equipped with all the knowledge you need to effectively promote your content across both platforms.
How to Link Your Twitch to TikTok – Source: Pushbio
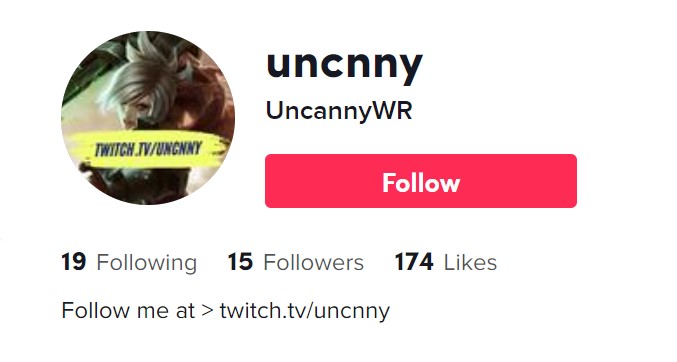
As above mentioned, you have two different ways to link Twitch with TikTok. The first one of how to add Twitch link to TikTok 2024 is by putting the Twitch link into your TikTok bio. Here’s how to add link to TikTok bio.
To begin with how to link your twitch to TikTok on phone, launch a TikTok app, then log in with your account.
After that, go to your profile by hitting the Profile icon on the right-bottom corner of the screen.
In your profile, tap on the three horizontal lines on the top right side of your screen.
Then, navigate to the Settings and Privacy menu.
Tap on the Manage Account option.
Under the Manage Account option, you’ll find the option to switch to a Pro account.
Change your account to a Pro account.
Now, you can go to your Twitch account to copy the link.
On Twitch, tap on the Profile icon and navigate to Stream Manager.
See and hit a pencil icon at the top right corner of the screen.
Then, find the link by hitting the Share link to channel option and tap on Copy to clipboard.
Back to your TikTok, go to your profile, and hit the Edit Profile tab.
After that, find the Website option and a keyboard will pop up on your screen.
Finally, just paste the link onto the website option.
Your Twitch link has now perfectly attached to your TikTok bio. Though it requires more steps, it’s not quite hard to do, right?
How to Add Link to TikTok Video Caption
can i link my twitch to tiktok
Alternatively, you can also put your Twitch link on the caption of your TikTok video. Thankfully, it’s as simple as you put it on your bio. Just follow the steps below.
Start over by logging in with your TikTok account.
Then, record a new video or add the existing ones from your camera roll.
Once you’ve finished creating and editing a new video, you’re being taken to the caption part.
All you need to do is just write anything to describe your video and paste your Twitch link there as well.
To copy your Twitch link, you can follow the same steps as above explained.
And voila! Your Twitch link is now available to see on your video caption.
Why Can’t I Add a Link to My TikTok Bio Or Video Caption?
Many users complained about it as they were unable to attach a clickable link on TikTok. However, how to add clickable link to TikTok bio is easy. Before you start to do it, you have to meet several requirements from TikTok. Let’s see what you need to fulfil first.
Change your account to a Business account – Currently, the website link feature is not available for TikTok general account. Therefore, you will need to do some things to get your Business account.
Have at least 1000 followers – other than a Business account, you are also required to have 1000 followers. If your followers are less than 1000, then you can’t add a clickable link to your TikTok.
Make sure the link feature is available in your country – sometimes the problem isn’t always on your account. If you were still unable to add a link after you get your Business account and 1000 followers, then maybe this feature isn’t available in your country. This feature is currently available in the United States, United Kingdom, Russia, Indonesia, and Canada.
How to Add a Link to Your Twitch
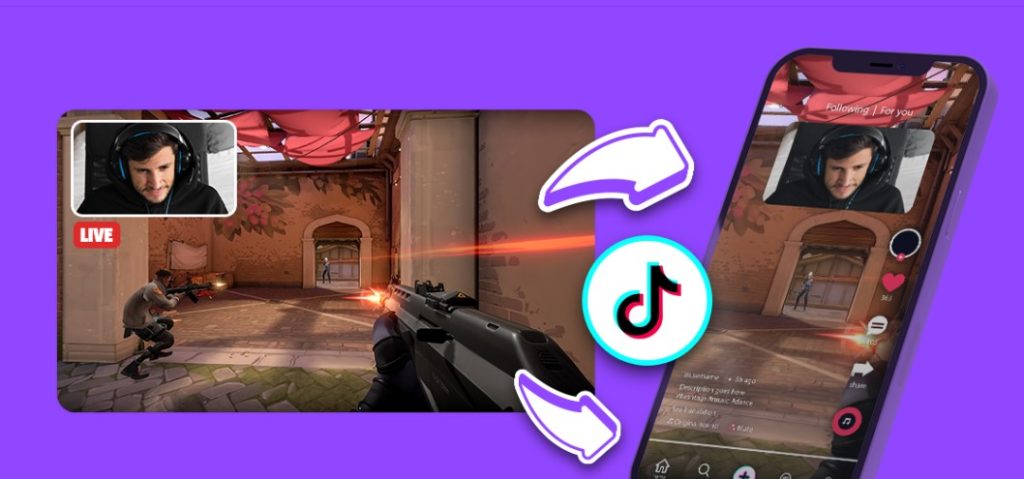
Source: YouTube – how to stream twitch to tiktok
How to copy your twitch link to TikTok is not challenging. By adding a link to your Twitch channel you can directly in touch with your TikTok followers and vice versa. By doing so, you can create a more engaged community and grow your audience. In this section, we’ll provide you with step-by-step instructions for adding a link to your Twitch channel and customizing your profile to promote your TikTok account.
Step 1: Log in to Your Twitch Account The first step is to log in to your Twitch account. Once you’re logged in, click on your profile picture in the top right corner of the screen and select “Settings.”
Step 2: Edit Your Profile Next, click on the “Profile” tab and scroll down to the “About Me” section. This is where you’ll add your TikTok link.
Step 3: Add Your TikTok Link In the “About Me” section, click on the “Edit Panels” button. This will open the panel editor, where you can add custom panels to your profile. Click on the “Add a Panel” button and select “Add a Link.” Then, paste your TikTok link into the “URL” field and add a custom title for your panel, such as “Follow Me on TikTok.” You can also choose an image or color for your panel to make it stand out.
Step 4: Save Your Changes Once you’ve added your TikTok panel, click on the “Submit” button to save your changes. Your new panel will now be visible on your Twitch profile.
Step 5: Customize Your Profile To further promote your TikTok account on Twitch, you can customize your profile to include your TikTok handle or promote your latest TikTok videos. For example, you can add a section to your profile that displays your latest TikTok videos or include your TikTok handle in your profile description.
Don’t have a Business account or more than 1000 followers? No worries, you can still add a link to your TikTok bio. However, the link will be unclickable as it’s supposed to be. But at least other users can copy and paste it on a new tab in a browser to open the link. Therefore, it shouldn’t be a problem.
You just need to go to your profile page and hit the Edit Profile tab. Instead of tapping the Website option, hit the bio option. Then, you can write anything there to describe yourself, including your Twitch link. You are all set now.
BONUS: Convert Your Twitch Stream into Viral TikTok using Eklipse!
So you’ve decked out your Twitch channel, mastered the art of epic gameplay, and cultivated a vibe so chill it could cure freezer burn. But there’s one challenge left: breaking the TikTok barrier without breaking a sweat. Forget juggling platforms and manually clipping highlights – enter Eklipse, the AI wizard that seamlessly links your Twitch to TikTok, turning your streams into viral gold on autopilot.
Imagine this: you stream your heart out, and Eklipse works its magic in the background. It scans your VODs like a hawk, pinpointing hilarious fails, clutch plays, and moments that’ll have TikTok viewers begging for more. Then, bam! Eklipse spits out bite-sized TikTok masterpieces, complete with trendy music, captions, and visuals that’ll make your grandma jealous. All you have to do is download and post – instant virality, served on a silver platter.
Intrigued? You can read more about how to convert your Twitch streams into viral TikTok with Eklipse here:
Yes, you can link your Twitch and TikTok accounts in two ways: by adding your Twitch link to your TikTok bio or video caption, or by streaming on both platforms at the same time.
2. How do I promote my Twitch stream on TikTok?
Make sure to mention your Twitch channel and link it in your TikTok profile. You can also use TikTok’s “Live” feature to promote your Twitch streams in real-time.
3. How do I get my Twitch link?
To get your Twitch link, you need to go to your channel page on Twitch, sign in, click your profile picture on the top right corner, and select channel. Then, copy the Twitch URL from the address bar of your browser. That is your Twitch link.
Conclusion
Linking your Twitch to TikTok is a powerful strategy for streamers aiming to broaden their audience and enhance engagement. By learning how to add a Twitch link to TikTok bio or video captions, you can easily direct followers between platforms. Remember to meet the necessary requirements, such as having a Business account and at least 1,000 followers, to utilize these features effectively. Start connecting your communities today!
Want to grow your Twitch and TikTok audience? Look no further than Eklipse! Experience the magic of our AI-powered tool, seamlessly transforming your Twitch livestream moments into captivating TikTok/Short/Reels content with just a single click!
Maximize your Black Ops 6 rewards—Create highlights from your best gameplay with with Eklipse
Eklipse help streamer improve their social media presence with AI highlights that clip your Twitch / Kick streams automatically & converts them to TikTok / Reels / Shorts
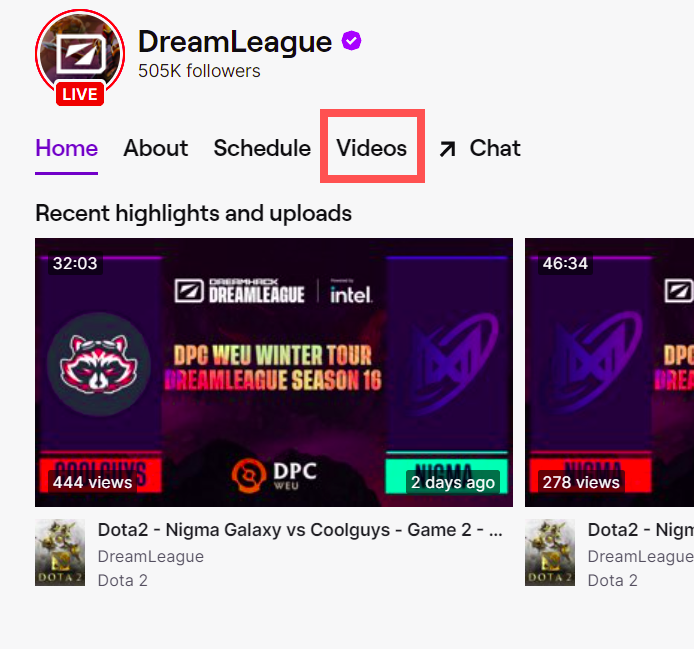
Ever wonder how to rewind Twitch streams and catch a missed moment? Unlike YouTube, Twitch doesn’t have a rewind button for live streams. But don’t worry! There’s a neat trick that lets you go back in time on a stream and watch those epic plays or hilarious moments again.
To do this, simply head to the streamer’s profile page and click on the image of the stream that’s currently live. This will turn the live stream into a Twitch replay live stream, allowing you to rewind and watch previous moments just like you would with a regular video. No more missing out on the action, just hit rewind and enjoy all the highlights!
Can’t rewind live streams on Twitch? While Twitch doesn’t offer a rewind button directly on live streams, there’s a clever way to revisit past moments.
This guide will show you a handy trick to jump back a bit in a Twitch stream. Here’s what to do:
Go to the streamer’s profile page.
Click the picture of the current broadcast (the thumbnail).
This will open the stream as a video-on-demand (VOD), allowing you to rewind and rewatch anything you missed using the playback controls.
So next time you miss a clutch play or a funny moment, you can easily jump back and enjoy it again!
1.How to Rewind Twitch Streams Using Rewind Extension
Want to rewind live Twitch streams? Here’s a handy extension!
Twitch doesn’t have a built-in rewind button, but a handy Chrome extension called Twitch DVR Player can help you revisit those missed moments.
Install the Extension. Head over to the Chrome Web Store and search for “Twitch DVR Player.” Click “Add to Chrome” to install it.
Once installed, the extension will automatically replace the standard Twitch player on your browser. Now, while watching a live stream, you’ll be able to use rewind controls just like you would on a regular video.
Source: Doc. getonstream
While this extension offers a great solution, it’s always a good idea to check if the streamer has uploaded the stream as a VOD later. This ensures you can revisit the content even if the extension isn’t available.
2. How to Rewind Twitch Streams With Clip Function
While Twitch doesn’t offer full stream rewind, you can use the clip function to revisit the most recent 90 seconds of a broadcast, as long as the streamer has clips enabled. Here’s how to do it:
Locate the clip icon on the Twitch player. It usually looks like a movie clapperboard or filmstrip icon in the bottom right corner of the video player. Alternatively, you can use the keyboard shortcut Alt + X.
Click the clip icon or press the shortcut. This will create a clip of the current moment and open it in a new tab.
In the new clip tab, you’ll see a blue bar representing the clip’s timeline. Click and drag this bar backwards to revisit the moments leading up to the clip.
3. Rewinding Twitch By Watching Streamers VODs
If you miss a live stream or want to revisit a specific moment, Twitch VODs come to the rescue! These recordings of past broadcasts allow you to rewind, pause, and fast forward just like a regular video.
Here’s how to access and rewind a VOD:
Source: doc. getonstream – twitch dvr player
Navigate to the streamer’s channel page where the live stream took place.
Look below the video player or on the channel’s navigation bar for a section labeled “Videos” or “VODs.” This is where past broadcasts are stored.
Click on the VOD you want to watch. It might take a few minutes to appear if the stream just ended.
Once the VOD loads, you’ll see familiar playback controls like rewind, pause, and fast forward. Use these controls to jump back to the part of the stream you missed.
Now click on the VOD and you will be able to pause, fast forward, and rewind the stream. That’s it.
4.How to Watch the Most Recent Minute on Twitch
Source: Riverside
Twitch doesn’t offer a way to rewind live streams on the fly, but you can use the clip function to capture the most recent minute of a broadcast. Here’s how:
While watching a Twitch stream, look for the scissors icon in the bottom-right corner of the player window. This is the clip creation button.
Click the scissors icon. This will capture and open a window showing the last 60 seconds of the stream (not 90 seconds).
Use the playback bar to highlight the specific portion within the last minute you want to save. Once you’re happy with the selection, hit the “Create Clip” button. Your clip will be saved to your Twitch account for future viewing.
While this method isn’t perfect, it allows you to capture fleeting moments during a live stream. Keep in mind that the clip length is limited to 60 seconds, not the full minute.
FAQs
1. Can you rewind while streaming?
The YouTube’s DVR feature lets your viewers pause, rewind, and continue during the live stream. Once a viewer resumes playing, the live stream will continue from where they hit pause.
2. How do I go to past streams on Twitch?
You can see your previous broadcasts in the Twitch app or Twitch website on your computer.
3. Why does Twitch not have a rewind?
It is technically complex and potentially expensive (to implement rewind).
4. Can Twitch streams be rewatched?
If you’ve just missed a live stream, you can always go back and watch it again if the streamer has made it available to rewatch. You can also view 30-second clips from a past stream.
Final Thoughts
This concludes our guide on how to rewind Twitch streams. While Twitch doesn’t yet offer an official rewind feature, you can still catch those missed moments using clever workarounds. Whether you’re using browser extensions or VOD timestamps, these options allow you to enjoy the highlights of a Twitch replay live stream even after it’s aired.
Additionally, if you want to easily capture and share the best scenes from your favorite Twitch streams, try Eklipse. This AI-powered tool can highlight specific moments and turn them into TikTok, Reels, or Shorts videos with no editing skills needed. Eklipse automatically handles the editing for you, so your stream’s best moments are just a few clicks away. Try Eklipse today, it’s free!


")