
Level Up Your Marvel Rivals Gameplay
Capture your epic wins, clutch moments, and even hilarious fails with Eklipse. Easily create and share highlight reels with your friends—even if you're not streaming!
Learn MoreReady to take your channel to the next level? Eklipse just dropped a bomb update on our Channel Stickers feature, and it’s cooler than ever! Say goodbye to the plain old stickers! So what’s the buzz? Well, we revamped the layout, making it a breeze to use. But that’s not all, folks!
Now, the Channel Stickers Eklipse feature has a new layout that makes it easier for you to use. Plus, there are also some other additional features like multi-channel stickers, adjust time to show the channel stickers, and call-to-action. Have your own channel sticker design? You can also upload your own stickers and use them through this new Eklipse feature.
More on Eklipse Blog>>> How to Promote Your Kick Stream With Channel Name Sticker
Single Channel
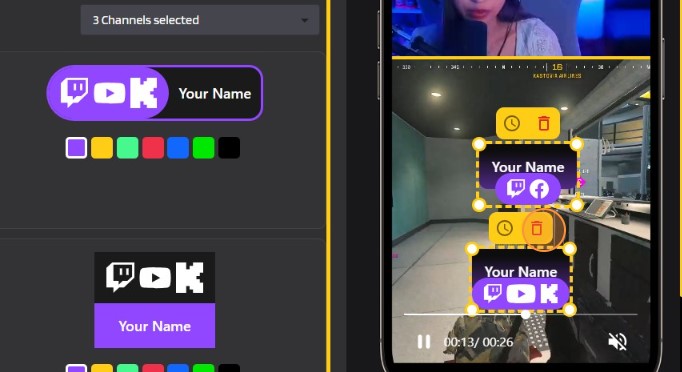
You’re probably already familiar with the Single Channel sticker feature. This feature becomes more advanced and easy to use thanks to the latest update of the Channel Stickers creation page.
Multi-Channel
Say goodbye to sticker monotony! Introducing Multi-Channel stickers – one sticker, all your platforms. Twitch, YouTube, Facebook, Kick – unite those logos in sticker harmony!
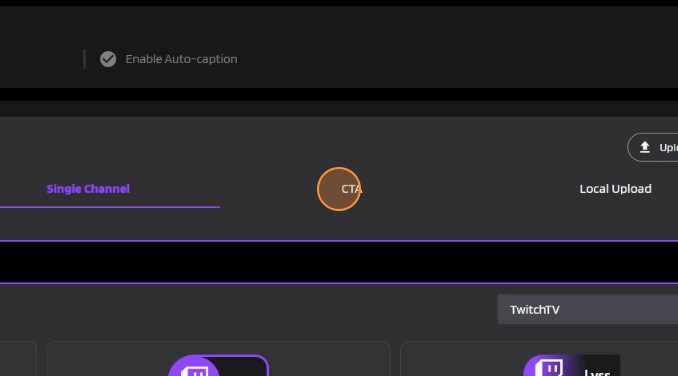
Call to Action
It’s not just a sticker; it’s a call to action! Get your viewers in on the action with stickers that say, “Follow me, love me, let’s make magic!” Exclusive to Twitch, YouTube, and Kick only.
More on Eklipse>>> 10 Best Twitch Extensions for Streamers in 2023: Take Your Channel to the Next Level!
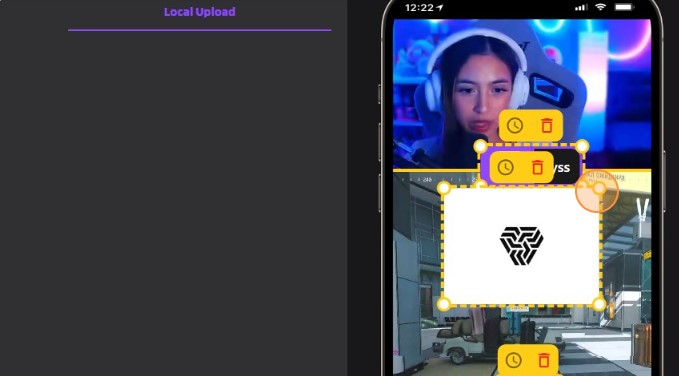
Local Upload
Are templates feeling a bit meh? Unleash your inner design maestro with Local Upload. Craft your Channel Stickers masterpiece and upload it straight to Eklipse Studio. Because who wants to be basic?

Try the New Eklipse Channel Stickers Now!
You seem excited to try out the latest update of the Channel Stickers feature. Well, don’t wait any longer, just follow these easy-peasy steps:
1. Open the eklipse.gg website.
2. Sign up if you don’t have an Eklipse account yet. Don’t worry, it’s free. Or log in with your account if you already have one.
3. From home, click Start Editing if you don’t have any clip generated yet. If you already have clips, just click Convert to TikTok/Shorts/Reels.
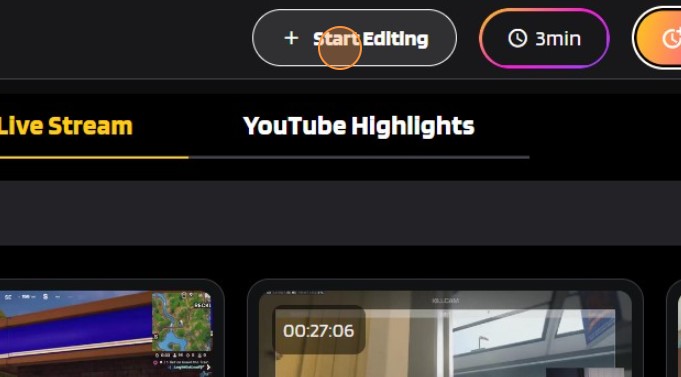
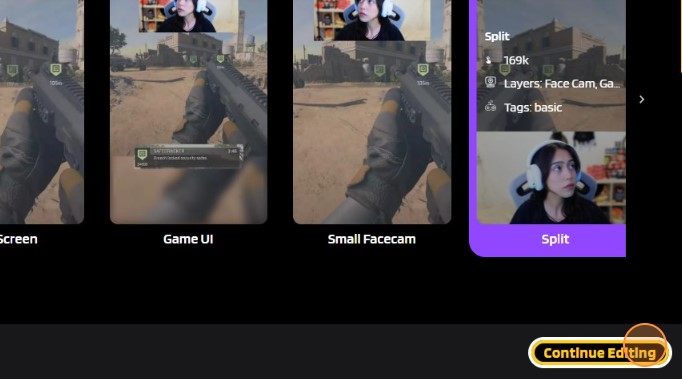
4. Choose the template you want to use > Continue Editing.
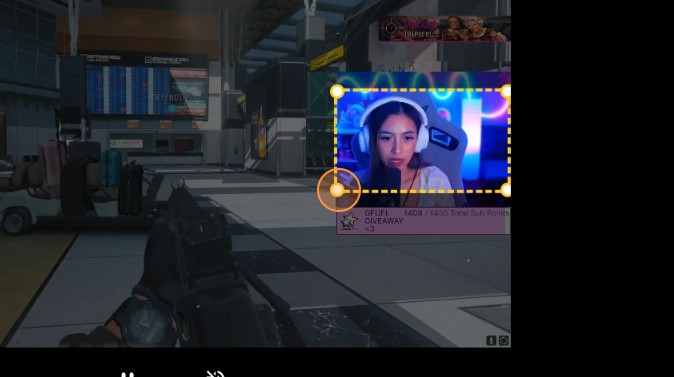
5. Crop the Facecam and the area of the clip that you want to make into a Highlight > Next.
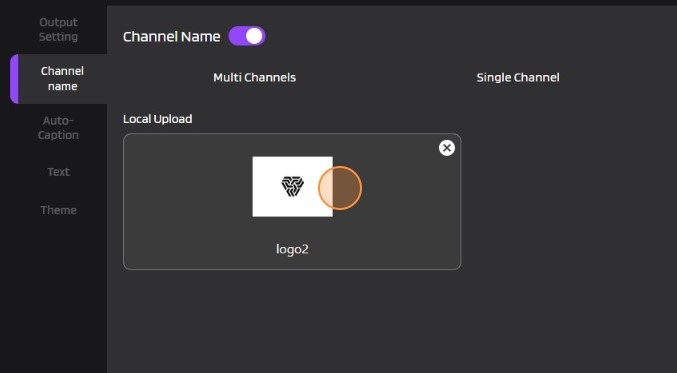
6. Go to Channel Name. Activate the feature by clicking the Channel Name toggle until it turns purple.
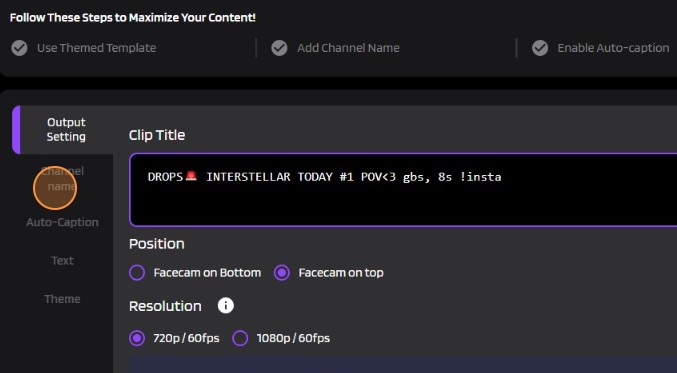
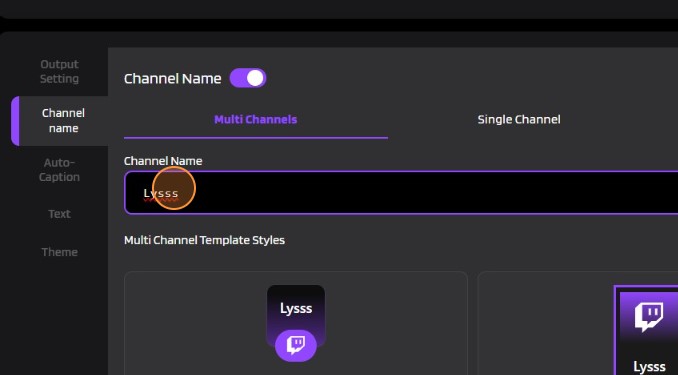
7. Here, you can choose Single Channel or Multi-Channel.
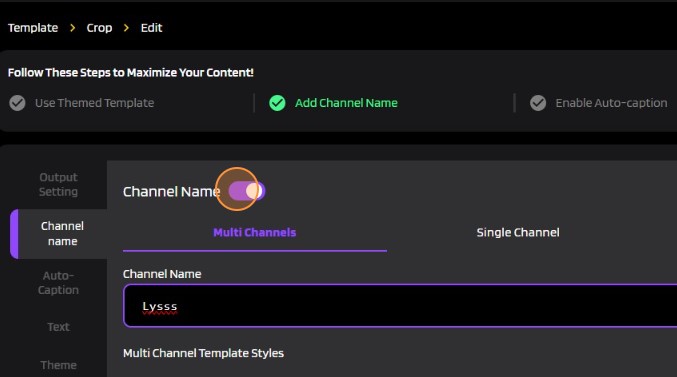
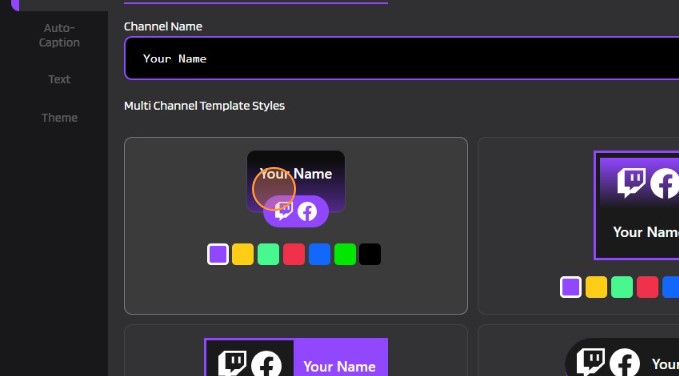
8. Select the Channel Name menu > Type your channel name in the column provided.
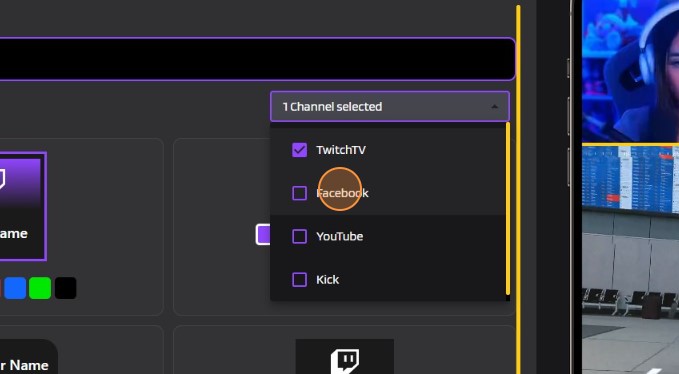
9. If you want to add multiple channels at once go with the Multi Channel feature. Click the drop-down menu 1 Channel Selected. If you have multiple channels with different names, you can create another sticker customization with the steps above.
10. If you only want Single Channel, choose one channel that you like.
11. When you’re done, choose the available sticker template. You can also choose the color, of course. Choose the color first, then the template.
12. You can insert up to 5 stickers in one highlight clip.
13. If the result is not that great for you, just redo it. Delete the sticker that’s already done by clicking the trash icon.
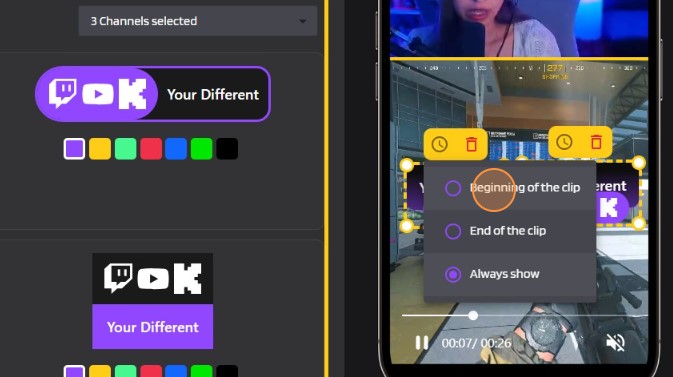
14. Try the new feature where you can set when to show the sticker. You can show it throughout the clip, only at the beginning, or only at the end of the clip. Just click the clock icon and choose the time you want.
More on Eklipse Blog>>> How to Grow Your Viewership as Console Streamers
Call-to-Action
15. Another new feature is Call to Action or CTA. You can add it by clicking the CTA menu.
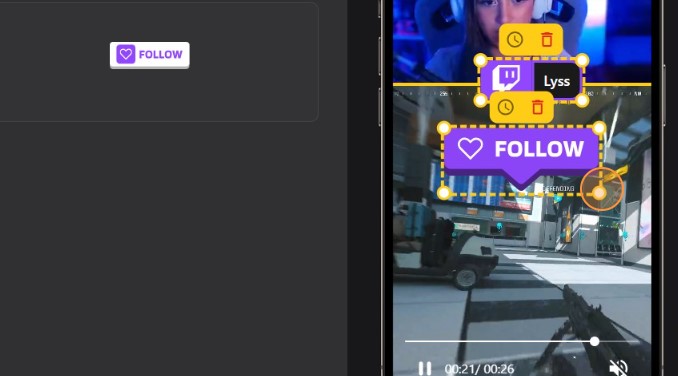
16. Choose the sticker template that you like, there are Follow, Like, or both.

17. Place it where you want and choose the time of its appearance like the previous step.
Local Upload
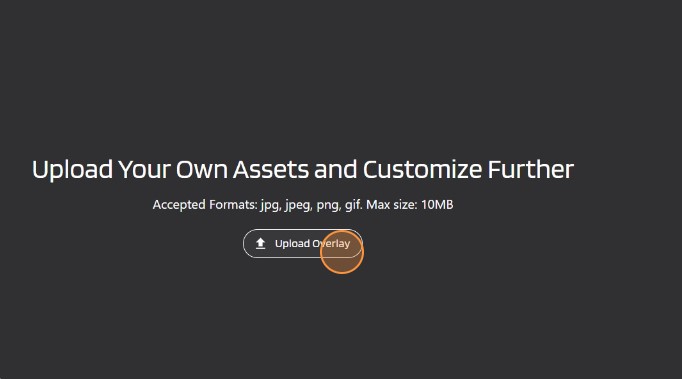
18. Need more options? Try the new Local Upload feature, by clicking the Local Upload menu or navigate to https://studio.eklipse.gg/preview.
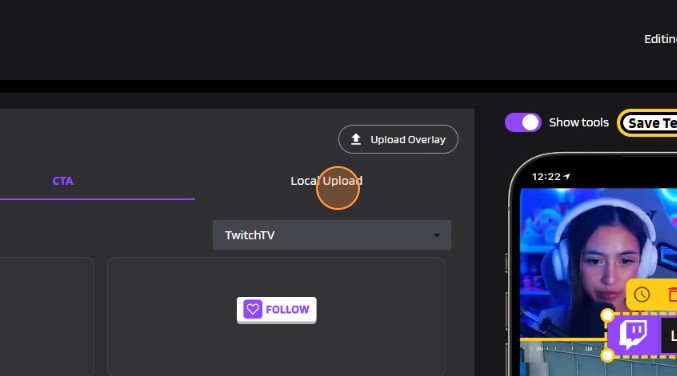
19. Click Upload Overlay. Pay attention to the image requirements. The image must be in JPG, JPEG, PNG, or GIF format with a maximum size of 10MB. You can only upload up to 10 different images. You can delete the existing image to insert a new template.
20. Choose the image that you just uploaded.
21. Adjust the size.
Tip: Easier Edit with Save Template
Finally, you’ve made your own channel stickers. Now don’t go just yet. We advise you to save the sticker template you made earlier so that you can easily use it again the next time you edit a clip. Here’s how to do it:
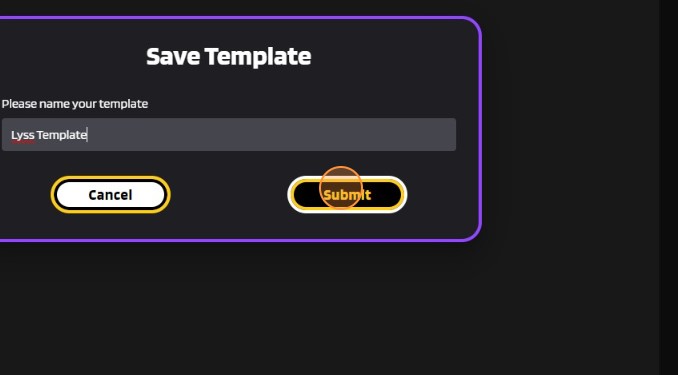
21. Click Save Template.
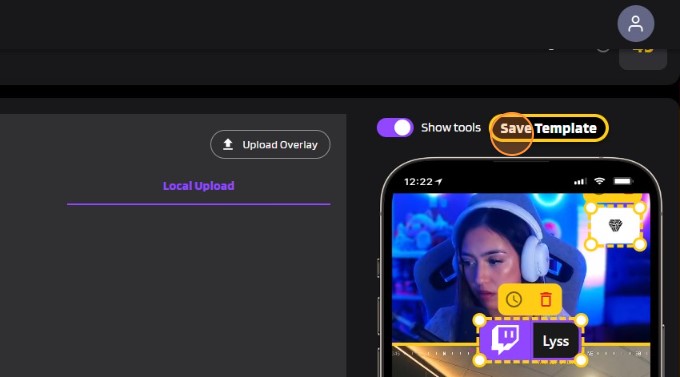
22. Write the template name > Submit.
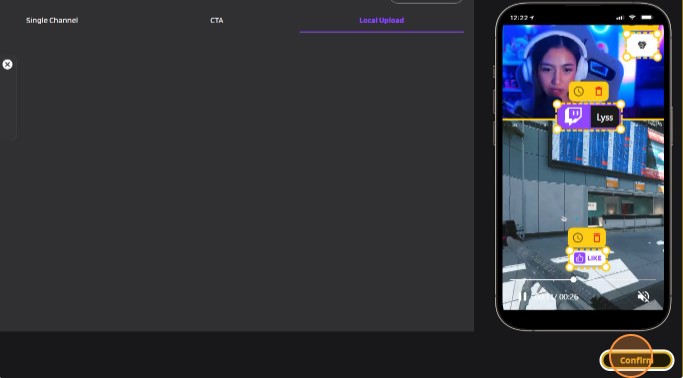
23. Set the sticker position > Confirm.
24. Click Got it.
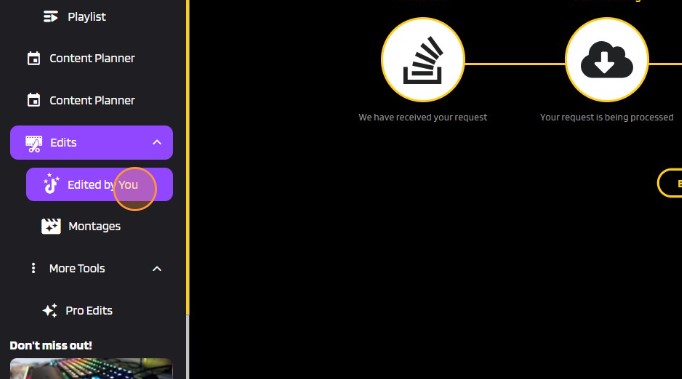
25. Click the Edited by You menu > In Progress to see the clip that’s finished editing. After that, you can download the clip or directly convert it to TikTok/Shorts/Reels and share it on your social media account.
More on Eklipse Blog>>> How to Use TikTok and YouTube Shorts to Grow on Twitch
Conclusion
Now you’re armed with the ultimate Channel Stickers upgrade. Level up your streaming game, let the stickers do the talking, and remember – basic is so last season. It’s like your channel just got a turbo boost! Now you can turbocharge your social media growth with a breeze.
With a bunch of snazzy templates and cool new features in the mix, you can whip up Channel Stickers that scream “you.” Your channel, your stickers, your rules. Here’s to leveling up your sticker game – happy experimenting!
Maximize your Black Ops 6 rewards—Create highlights from your best gameplay with with Eklipse
Eklipse help streamer improve their social media presence with AI highlights that clip your Twitch / Kick streams automatically & converts them to TikTok / Reels / Shorts
🎮 Play. Clip. Share.
You don’t need to be a streamer to create amazing gaming clips.
Let Eklipse AI auto-detect your best moments and turn them into epic highlights!
Limited free clips available. Don't miss out!
