
Learning how to record Minecraft gameplay is essential for sharing your best gaming moments with friends. Fortunately, numerous screen recording tools are available to assist you in this endeavor. This article will guide you through recording Minecraft gameplay on both PC and consoles, ensuring you capture every exciting moment. Let’s dive in.
How to Record Minecraft Gameplay on PC
How to Record Minecraft on Windows 10 /11 with OBS Studio
OBS Studio is one of the most well-known screen recorders among streamers. Additionally, OBS does not just allow you to record your screen but lets you do a live stream. That’s fantastic, right? Though it’s considered an advanced tool, it’s still fairly easy for beginners. Here’s how to use it.
- Download and install OBS Studio on your device. Once it is successfully installed.
- Once you’ve launched the app, hit the small ‘+’ button on the bottom-left side of the Sources box. Alternatively, right-click anywhere and select Add.
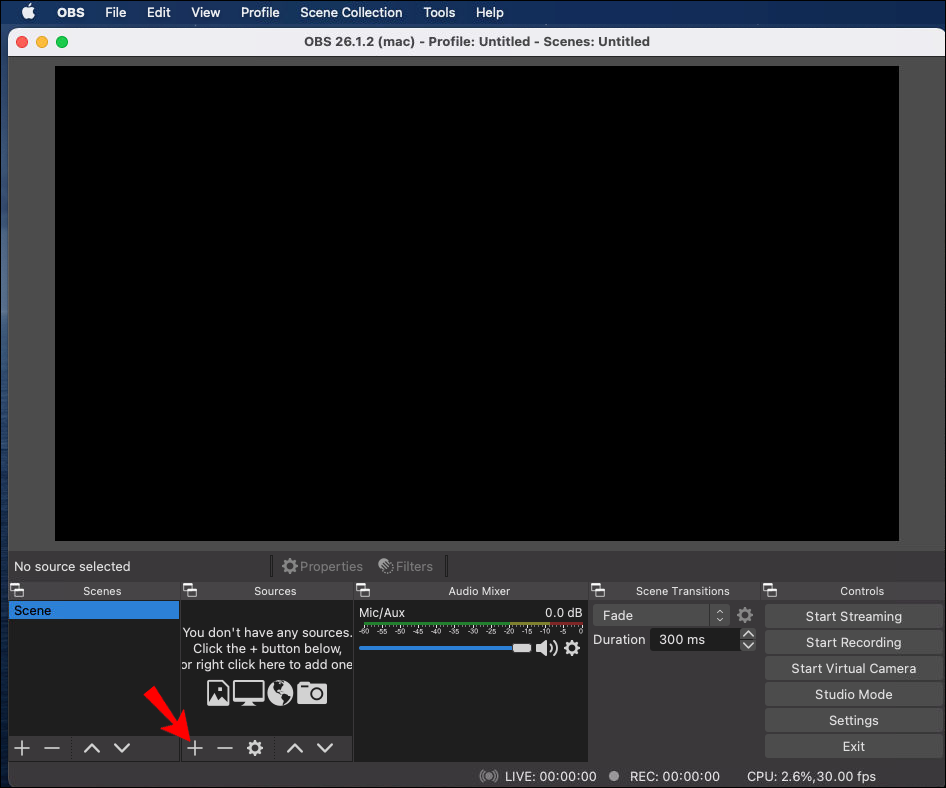
Add the source by hitting the plus button | Source: Alphr
- There will be several options for your recording. Select the Game Capture option. Leave it named Game Capture and click OK.
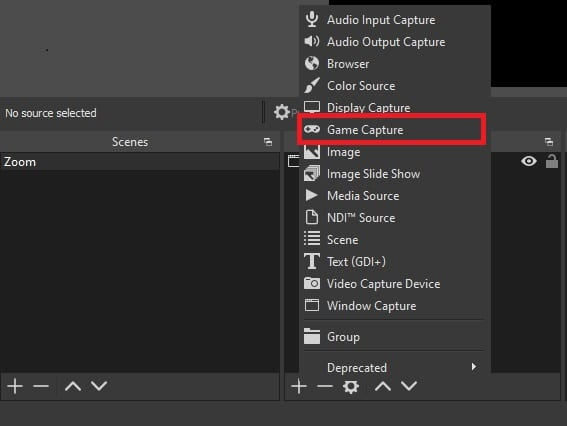
Source: OTTVerse
- Select Capture any full-screen application for the capture mode, then hit OK. The Game Capture now appears in the Sources list.
- Next, launch Minecraft on Full Screen. If OBS recognizes the game, it is supposed to appear in the window.
- Other than that, OBS still has another gaming capture option. If you want to try the second mode, select Game Capture from the Sources list and hit the gear icon.
- Next, change the mode to Capture specific window, select the specific game from the list, and then click OK.
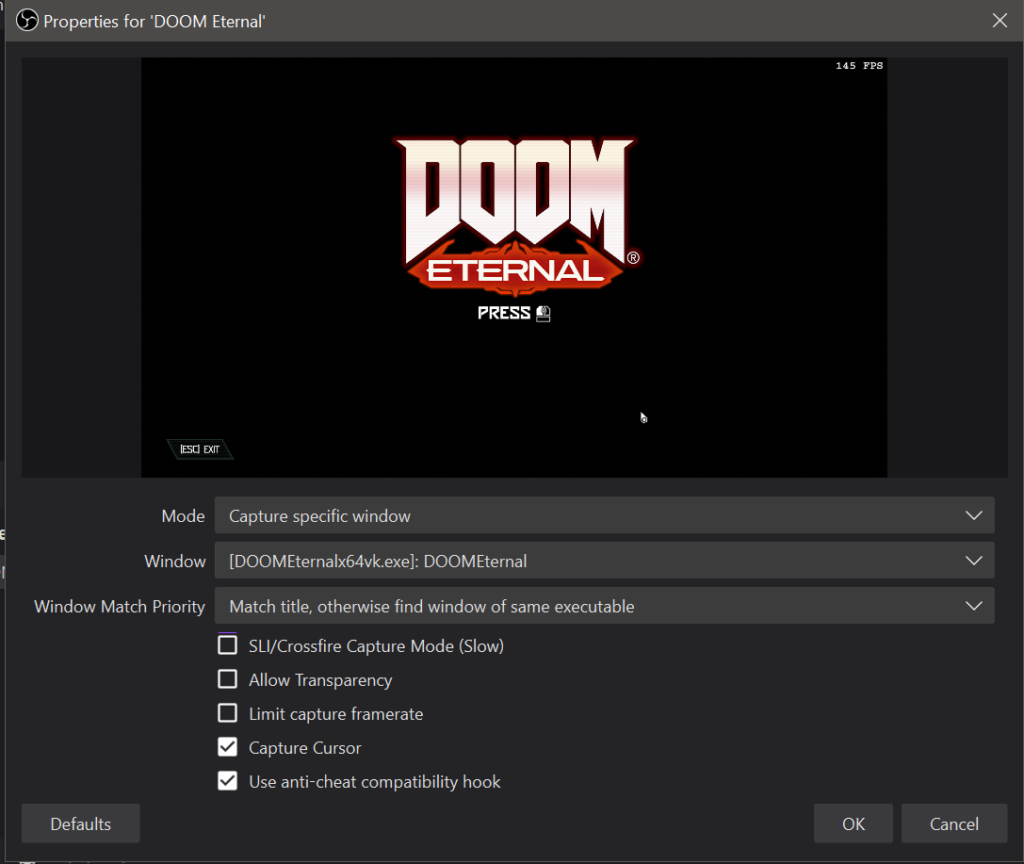
Source: OBS Studio
- Finally, OBS has been recording your gameplay now.
More on Eklipse Blog >> 5 Best Game Highlight Recorder That You Need to Try
How to Capture Minecraft Gameplay Using Bandicam
Another alternative for capturing your Minecraft gameplay is by using Bandicam. In comparison with OBS Studio, Bandicam may be much easier for beginners. It has no complicated steps to record the screen, but it still provides high-quality recordings. To record the Minecraft gameplay, please follow the guide below.
- Start over by downloading and installing Bandicam on your device.
- Once it has been installed, launch the app immediately.
- Then, select the Game Recording mode (the joystick icon) to get a high-quality image.

Source: Bandicam
- After that, open and start the Minecraft game to record.
- Next, you’ll see the green number on the gameplay screen. It’s showing you the FPS. It will only appear if the game runs DirectX or OpenGL technology.
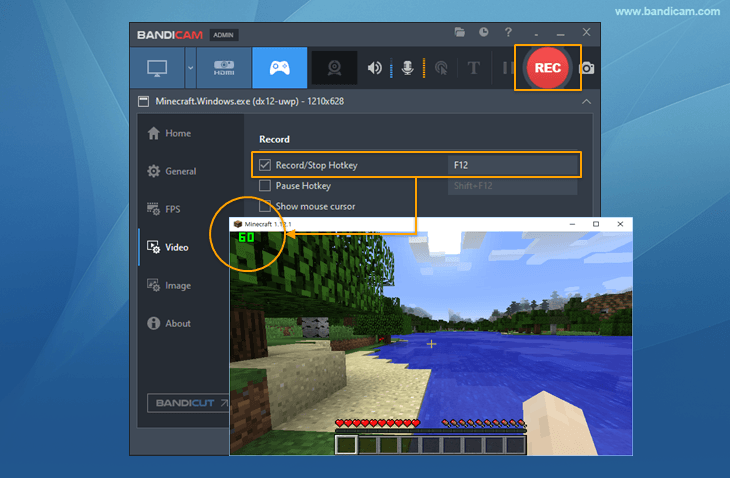
See the green-colored number to know the FPS | Source: Bandicam
- If you want to control the FPS, head to the FPS tab. Additionally, during the recording, the FPS will turn red.
- However, if you don’t see the green number, you can go to the Target button, and select the Screen Recording mode.
- To start recording, press the F12 function key or the Record button. Hit the same button if you finished recording.
Press the F12 or the Record button to start recording | Source: Software Advice
- Finally, find your video in Home and click the Video button. You can edit, play, or even upload videos.
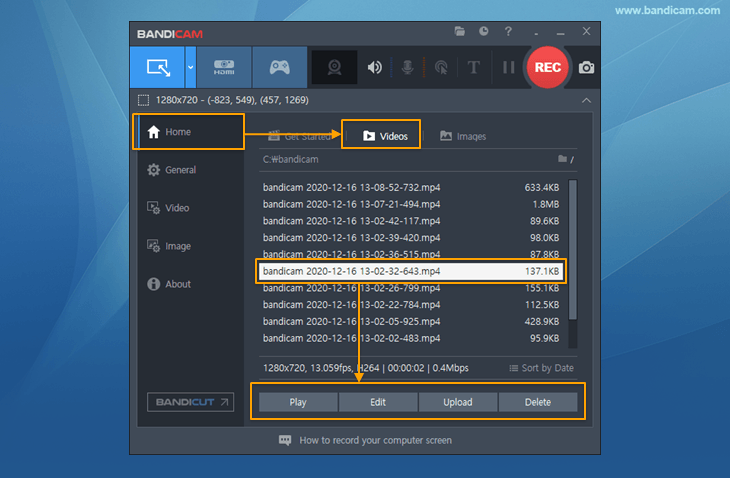
Source: Doc. Bandicam
How to Record Minecraft Java Edition on Consoles
Alternatively, you can capture the gameplay from PlayStation 4 or 5, Xbox, and even Nintendo Switch. Recording the screen on PS4 or PS5 is quite easy to do. You can either do it directly from the console or use a capture card. You won’t need a capture card if the game lets you use the built-in share features on the console.
Capture Minecraft gameplay on console gaming | Source: Quora
Apart from that, Xbox also allows you to record the gameplay from the Xbox console. It’s unlike PlayStation which needs to use a capture card in a certain condition, you don’t need additional hardware or software to capture using Xbox. You can just directly do it from the joystick. So does the Nintendo Switch.
As long as you have connected your game console to your PC, you can record or capture any of your gaming screens. Recording gameplay with Switch is quite less complicated. If you want to know how to record a screen using these three game consoles, visit our blog for the specific article. Just go here and find what you need!
How to Record Minecraft Videos on Mac
If you are a Mac user and want to record your Minecraft gameplay conveniently, you will need QuickTime Player as your recording tool. Now that it’s a preinstalled application, you can simply install it (if it hasn’t) and directly use it. Here’s how.
- To begin with, launch the QuickTime player.
- Then, select the Files option.
- Click New Movie Recording under the drop-down menu.
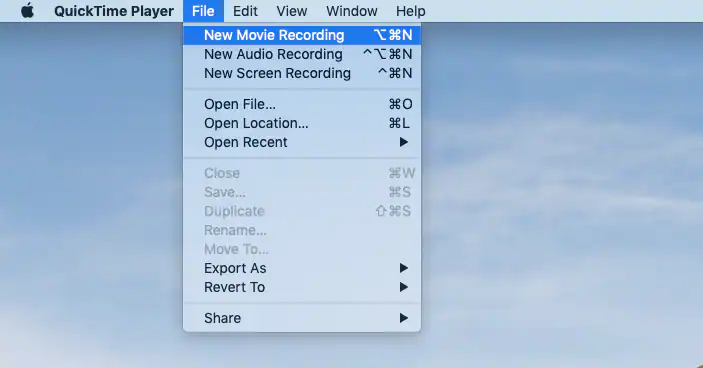
QuickTime Player is one of the easiest recording tools for Mac users | Source: filmora.wondershare.com
- Afterward, the app will start recording in 3 seconds.
- Now, start playing the Minecraft game as you normally do.
- Finally, hit the stop button as an overlay on your screen.
- Congratulations! Your Minecraft gameplay record is now saved in your local library.
By the way, if you’re looking for a thrilling Minecraft experience that’s worth recording, we recommend trying out Minecraft Hunger Games servers. You won’t regret it. For more information, check out this article: The Best Minecraft Hunger Games Server 2022.
How to Clip Minecraft on Mac, Windows, and Phone Using Eklipse
Do you want to capture the epic moments of your gameplay and share them on other social media such as TikTok, Instagram, or YouTube Shorts? If so, just leave it to Eklipse. Only with several clicks, your highlight clip will be perfectly served on your table. Just follow this guide.
- First, go to the Eklipse Studio website.
- Sign in with your Eklipse account, or create a new one.
- Then, click on the Upload button to import your existing videos from the local device.
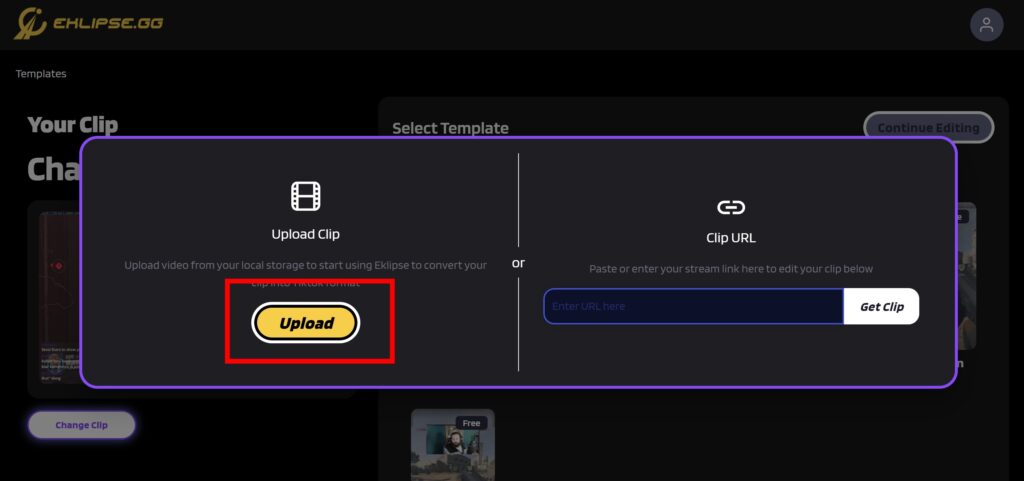
Import a file by hitting the Upload button or drag-and-drop the file
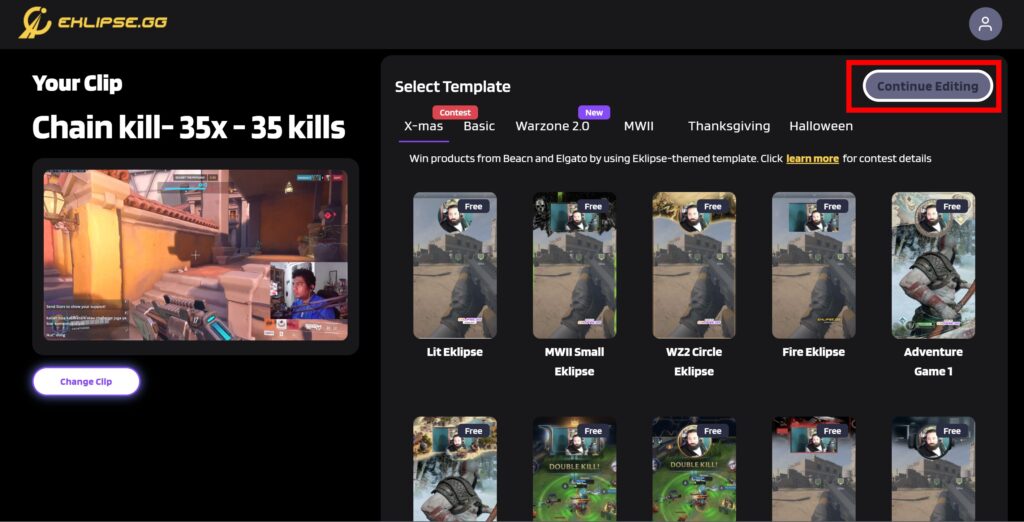
- Select your favorite template and hit Continue Editing.
Choose your favorite template
- Afterward, adjust the clip and the face cam area, as well as the duration > Next.

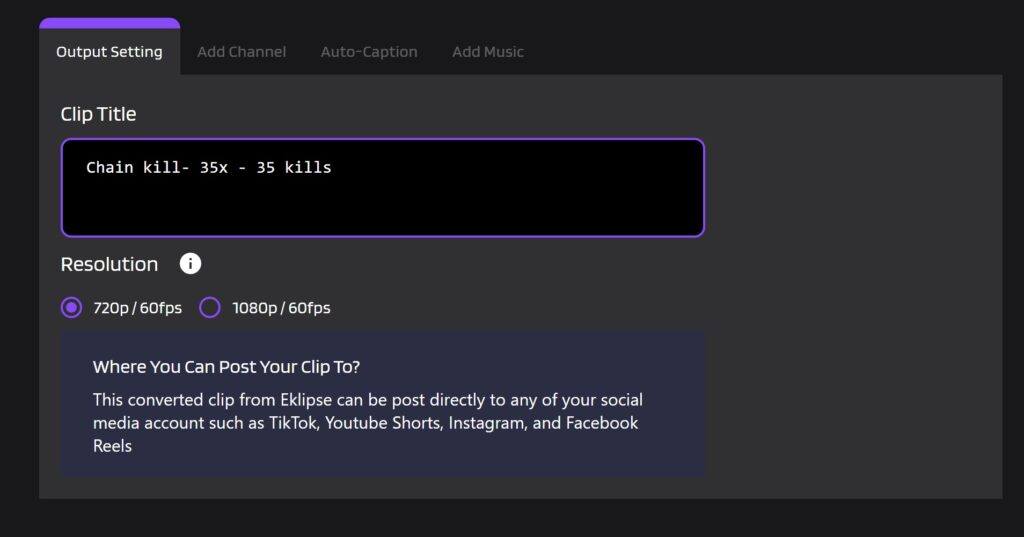
- Set the output by writing a title and selecting the output resolution.
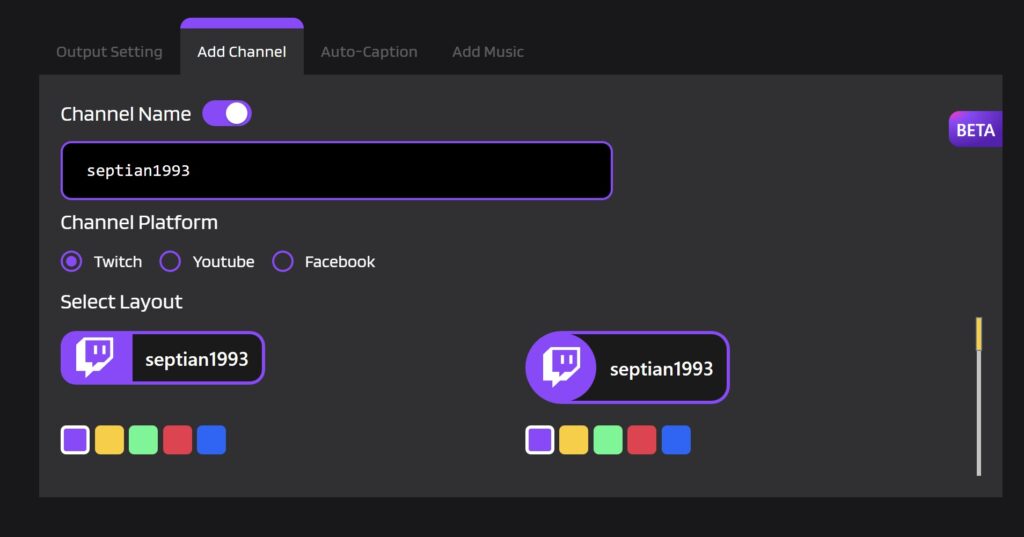
- Next up, add a channel name and auto-caption to make your clip cooler.
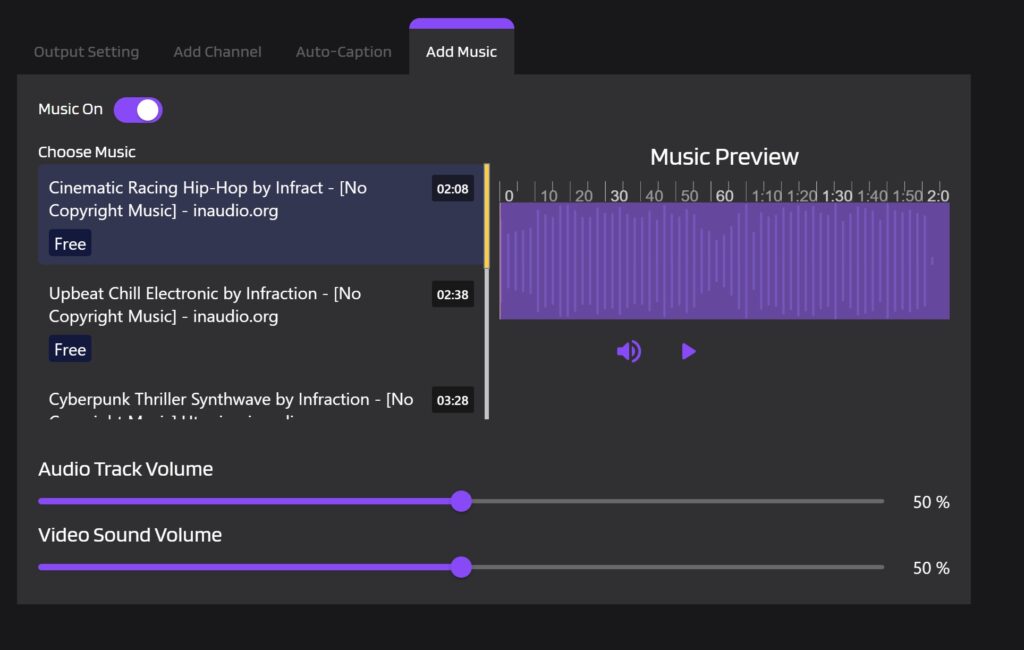
- Now, add a catchy soundtrack, adjust the volume, and hit Confirm once you’ve done.
- Now, find your edited clip by heading to the Edits tab > Edited by You.
- Sort by the Converted option and there your clips are.

- Finally, you can download or share your highlight clips.
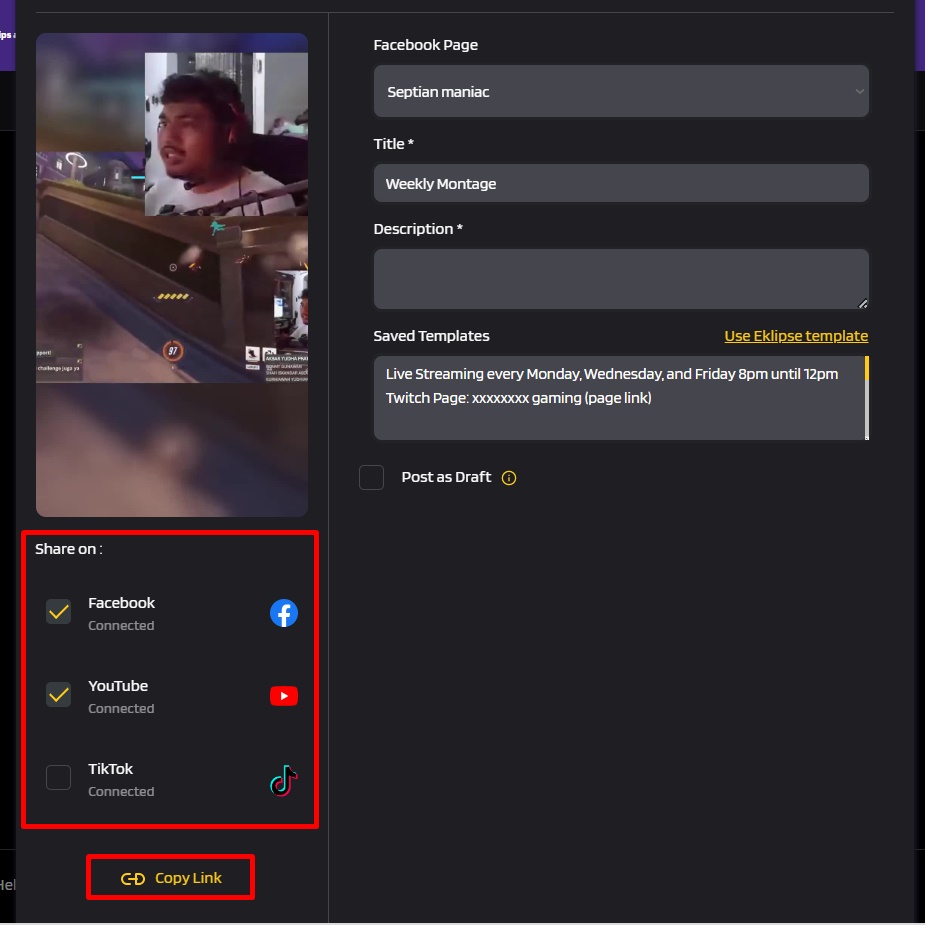
- If you want to share it, hit the Share button, write a description, and tick the small box next to the platform you want to share your clip on.
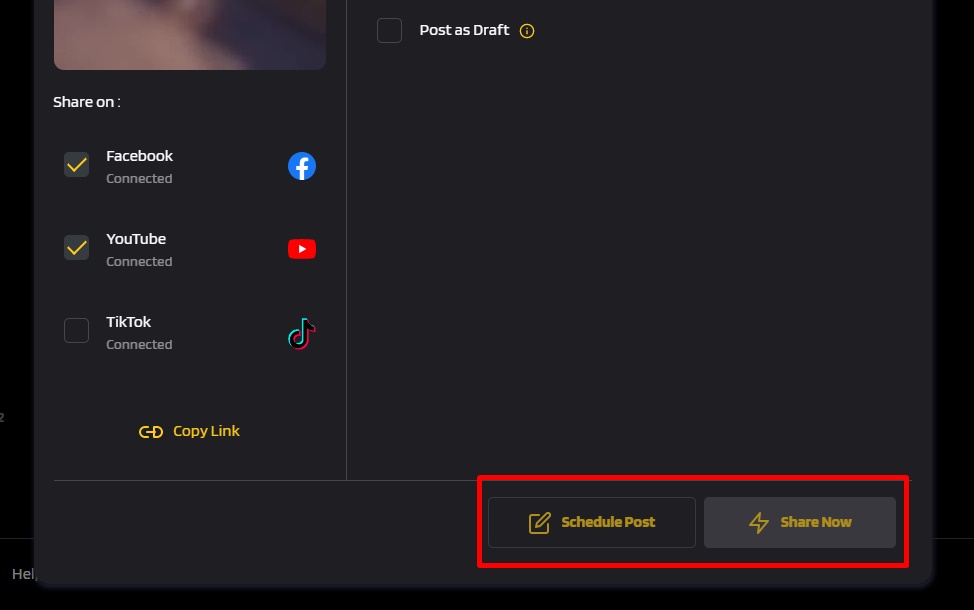
- Then, hit Share Now.
- Alternatively, click the Schedule Posts button to schedule your post.
That’s how to clip your video recording using Eklipse. Additionally, Eklipse also enables you to get your highlights through your mobile phone. All you need is to go to the browser to open the Eklipse website and do the same steps as above. For a more convenient way, you can try the Eklipse Mobile app which is currently available on Android. Now, you can get your highlight clips on the go. Try Eklipse now!
Final Thoughts
Now that you know how to record Minecraft gameplay on PC or other platforms, you can then share it on your social media and get a lot of viewers.
Furthermore, if you want to highlight the best moments from your recorded videos, look no further than Eklipse. As the ultimate AI-driven tool, Eklipse requires no extra effort or expertise to curate the perfect highlights. Our powerful AI does it all automatically!
Stay tuned to our blog to get more details and tutorials about Eklipse! Don’t forget to take your first step by clicking the following button:


A gaming writer and Twitch community management expert. My entertaining and informative content provides value to readers looking to improve their streaming setup or stay up-to-date with the latest gaming trends