Switching from Valorant to Marvel Rivals can feel like a whole new ballgame, especially when it comes to aiming. You’ve spent countless hours dialing in your perfect sensitivity in Valorant, but it might not translate directly to Marvel Rivals. It’s a common pain point that many of us have experienced, and it’s a crucial aspect of improving gameplay in any FPS game.
The way sensitivity feels in different games can vary a lot due to different engine mechanics. It’s not just about the numbers, it’s also how responsive your mouse feels. This is especially true when you’re moving from a relatively slower paced tactical shooter like Valorant to something as fast-paced and chaotic as Marvel Rivals. Understanding the nuances of sensitivity is key to making the switch without losing your aim.
Ready to make a smooth transition and maintain your precision in Marvel Rivals? Let’s dive into the world of sensitivity settings, DPI, eDPI, and how to bridge the gap between Valorant and Marvel Rivals.
Understanding Sensitivity in FPS Games
Before we jump into conversions, let’s quickly review what sensitivity actually means in first-person shooters. Sensitivity determines how much your in-game view moves when you move your mouse. It’s a balancing act: too high, and you’ll be twitchy and inaccurate; too low, and you’ll struggle to react quickly.
I’ve personally felt the frustration of trying to aim with a sensitivity that doesn’t feel right. It can throw off all your muscle memory and make even simple shots feel like a struggle. Finding that sweet spot that is both comfortable and effective is absolutely essential for consistent performance.
Why Sensitivity Matters for Aim
Sensitivity is the foundation of your aiming mechanics. A good sensitivity allows you to perform micro-adjustments for precise shots, track moving targets smoothly, and react quickly in unexpected situations. It directly impacts your ability to make consistent, accurate shots.
DPI and eDPI Explained
Two key terms you need to know are DPI and eDPI.
- DPI (Dots Per Inch): This is a hardware setting of your mouse which defines how many counts your mouse sensor reports per inch of physical movement.
- eDPI (Effective DPI): This is calculated by multiplying your DPI by your in-game sensitivity. It allows you to have a common ground for comparing across games.
I’ve found that keeping track of my eDPI is the best way to understand my overall sensitivity, especially when moving between games. For example, using a higher DPI but a lower in-game sensitivity can be similar to lower DPI with higher in-game sensitivity, but it will feel different.
The Difference Between Valorant and Marvel Rivals Sensitivity

Valorant and Marvel Rivals have distinct approaches to sensitivity and game feel.
- Valorant: Generally, Valorant players use relatively low sensitivity. The gameplay is more methodical, so precision is paramount. The low sensitivity allows you to make more precise movements with your mouse.
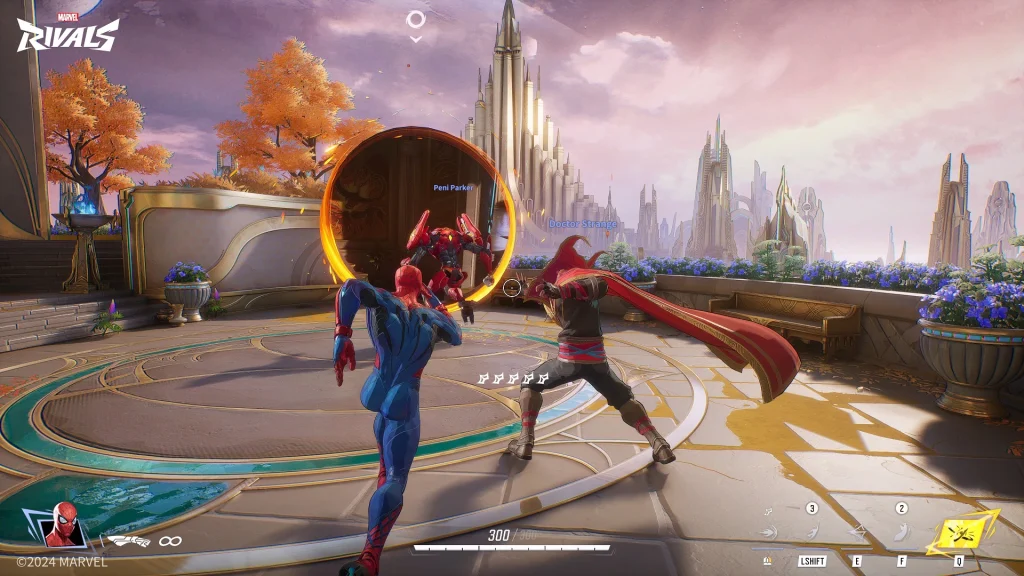
- Marvel Rivals: This game is fast-paced and has a more agile movement system. I’ve noticed that many players tend to lean towards higher sensitivity to keep up with the action. However, precision is still vital, so a happy medium needs to be found.
When I first jumped into Marvel Rivals, the first thing I noticed was how much faster everything felt. My usual Valorant settings felt sluggish. The change is noticeable, and something that all Valorant players will have to adjust to.
Converting Your Sensitivity Settings: Step-by-Step
There isn’t a perfect 1:1 formula to convert your Valorant sensitivity to Marvel Rivals, but here’s how you can get a close approximation. The best way to do it that I have found is by focusing on matching the 360 distance.
- Find Your Valorant 360 Distance: In Valorant, find your sensitivity by measuring how far your mouse moves in inches or centimeters, to complete one full 360-degree turn in game.
- Match the Distance in Marvel Rivals: Adjust your Marvel Rivals sensitivity so that your mouse has to move the same physical distance to complete the same 360-degree turn in-game.
- Use the eDPI as a Guide If you know your eDPI in Valorant, it is a great starting point for Marvel Rivals.
- Adjust as needed: The feel may still be different due to the different engines used by the games, so adjust slowly to find that sweet spot.
I suggest that you perform this conversion several times in a controlled environment, such as a training map, until the mouse movement feels natural to you.
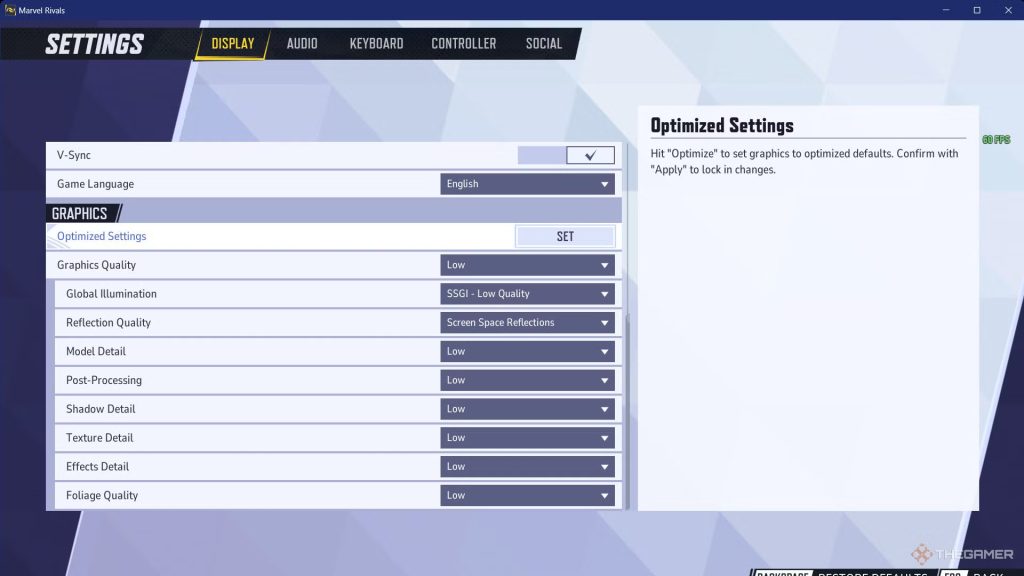
Fine-Tuning Your Sensitivity in Marvel Rivals
Once you’ve converted your sensitivity, it’s time to fine-tune it to fit your playstyle.
- Start with the Conversion: Use the method I explained above as a starting point.
- Play Test: I suggest you play several rounds in different modes with your converted sensitivity and note down how it feels.
- Small Adjustments: Do small adjustments and pay close attention to how your aim feels. Too much adjustment can throw you off.
- Practice and Refine: Spend time in the training mode to adjust, then switch over to actual games.
It’s important to be patient here. What might feel good in training might not always work in actual battles. Try out different things until you are completely comfortable.
Tips for Finding the Best Sensitivity for Your Playstyle
Your preferred sensitivity depends on how you like to play:
- Aggressive Players: If you like to move fast and engage in close-range battles, a slightly higher sensitivity might suit you.
- Precise Players: If you are more of a player who prefers longer range engagements with very accurate shots, then a lower sensitivity is the way to go.
- Character-Specific Needs: Some characters might benefit from a slightly higher or lower sensitivity based on their abilities and playstyle in Marvel Rivals. Try playing with a certain character for a long time, and adjust the sensitivity accordingly.
I encourage you to experiment and find what works best for you and the Marvel Rivals characters you like to play the most.
Common Mistakes to Avoid
Here are some common pitfalls I’ve seen people make when adjusting sensitivity:
- Large, Sudden Changes: Don’t change your sensitivity drastically all at once. Small, incremental adjustments are key.
- Copying Others Blindly: Just because a pro player uses a specific sensitivity doesn’t mean it’s right for you. Use their settings as a reference, but you need to find your own preference.
- Not Considering eDPI: Make sure you take into consideration both your mouse DPI, and your in-game sensitivity, as both are important.
- Ignoring the Feel: Don’t just focus on the numbers; pay attention to how your sensitivity feels during gameplay.
It’s crucial to fine-tune your settings until you find what is optimal for your playstyle.
Advanced Tips and Considerations
Here are a few extra tips I’ve picked up:
- Mouse and Mousepad: Your mouse and mousepad can affect how your sensitivity feels. Make sure they are suitable for gaming.
- Refresh Rate: A higher refresh rate monitor can make movement feel more responsive.
- Consistency: Stick with your adjusted settings for a while to build muscle memory. Don’t change them too frequently.
A good mouse and mousepad can make a world of a difference. I would recommend that you invest in good quality gaming equipment if you want to take it more seriously.
Final Thoughts
Converting your Valorant sensitivity to Marvel Rivals can be tricky, but it is possible to find settings that work for you with the right approach. Start by understanding DPI, eDPI, and 360 distance, then use my conversion method as a starting point. Remember to fine-tune your sensitivity, play test often, and adjust based on your playstyle and the specific characters you enjoy in Marvel Rivals.
By avoiding common mistakes, and being consistent with your sensitivity you will see great improvement. Remember to make small adjustments and not to copy someone else blindly. Good luck, and see you in the game!
")