Although TikTok has provided a draft folder to store and review videos, you might be experiencing unwanted loss of your saved videos. That’s why to prevent this kind of thing, it’s necessary to learn how to save TikTok drafts to camera roll.
Saving your TikTok drafts into your device can help preserve your video files. Sometimes if you need them back, or simply want to edit them using additional apps, you can just check your phone gallery.
Therefore, this article is going to guide you on how to save drafts to camera roll. Without further ado, let’s take a look at the tutorial.
Basically, saving TikTo into your device needs no extra effort to do. With only a few clicks, you’ll be all set. Here’s how.
Start over by opening the TikTok app and logging in with your account.
Then, hit the Profile icon in the bottom right corner of the screen.
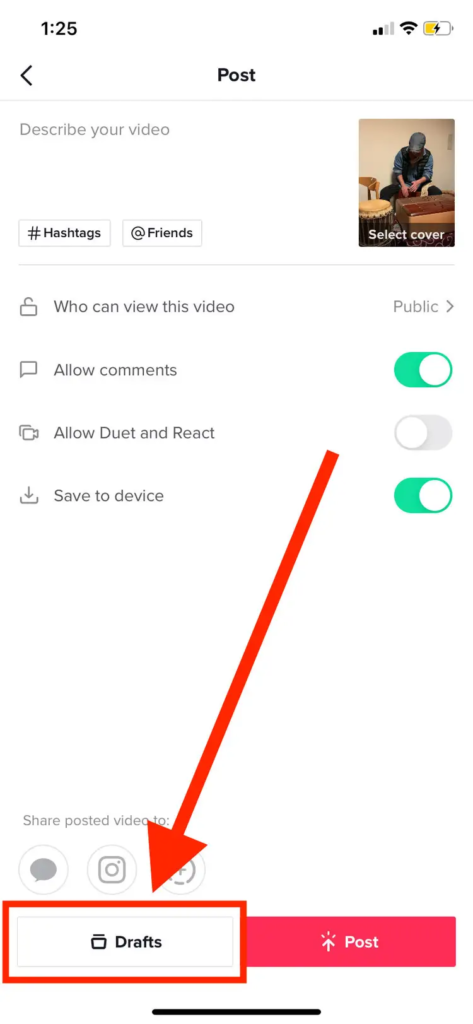
Once you’ve seen your profile page, tap Drafts on the left side of the screen.
Source: Business Insider
After that, select the video you would like to save.
Tap Next to the head of the options.
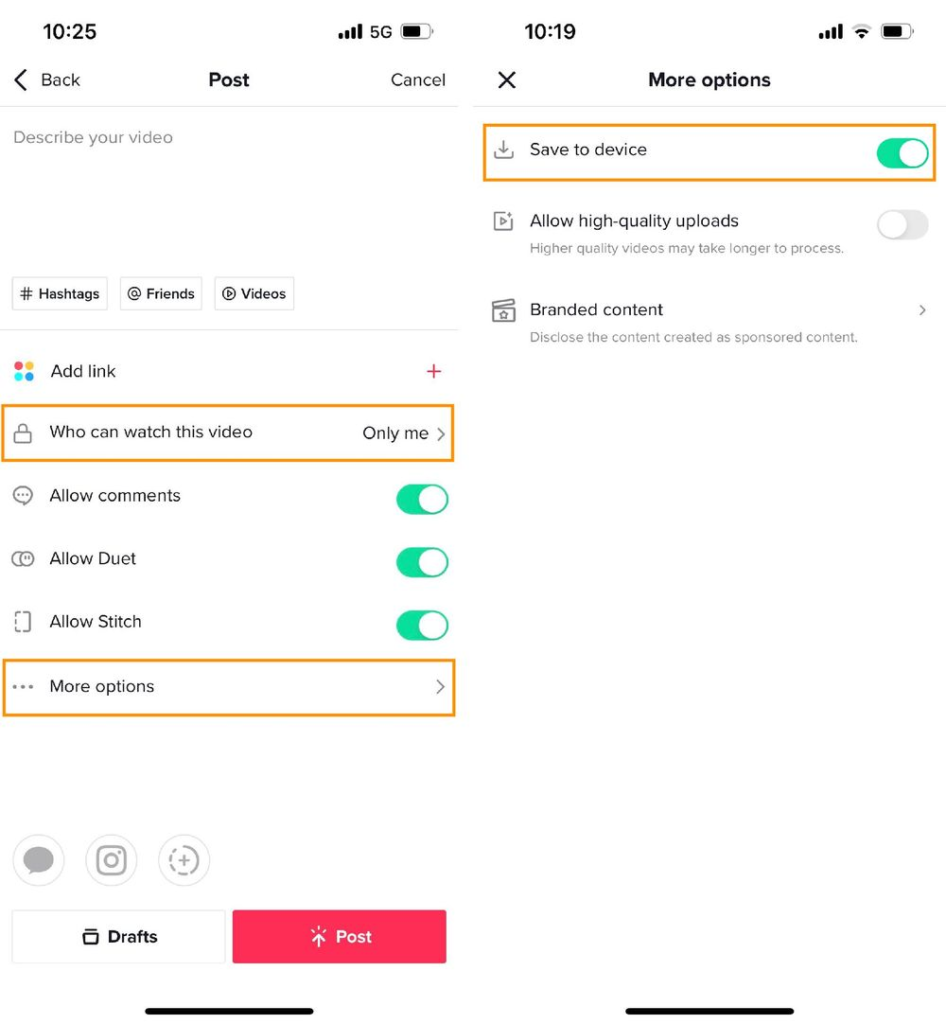
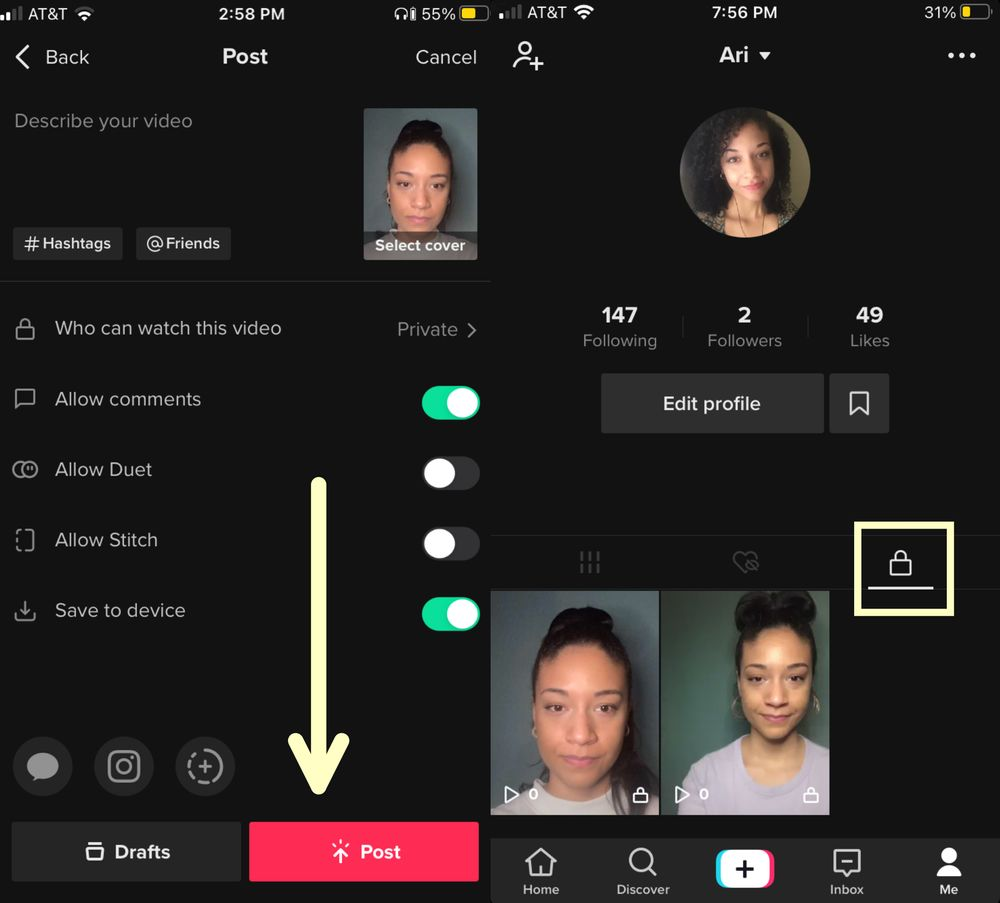
In the ‘who can watch this video’ section, change it to ‘Only me.’
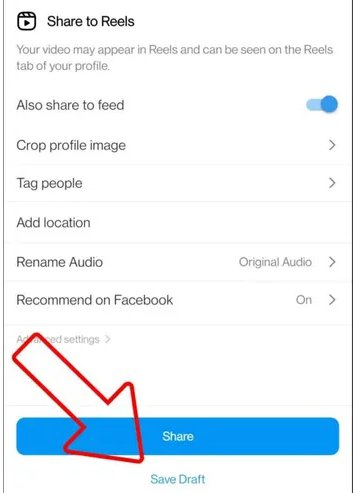
Then, under more options, make sure that the Save to Device option is toggled on.
Source: Kapwing
Next, hit Post to post your video.
Source: Kapwing
Your TikTok footage is supposed to be automatically saved to your camera roll.
One thing to take note, you’ll see a watermark in your video. Some people may get annoyed with this, but if it doesn’t matter to you, that will be good.
How to Save a TikTok Draft to Camera Roll without Watermark
Source: TechCult
Want to get rid of the watermark on your TikTok videos? You should do the following tutorial.
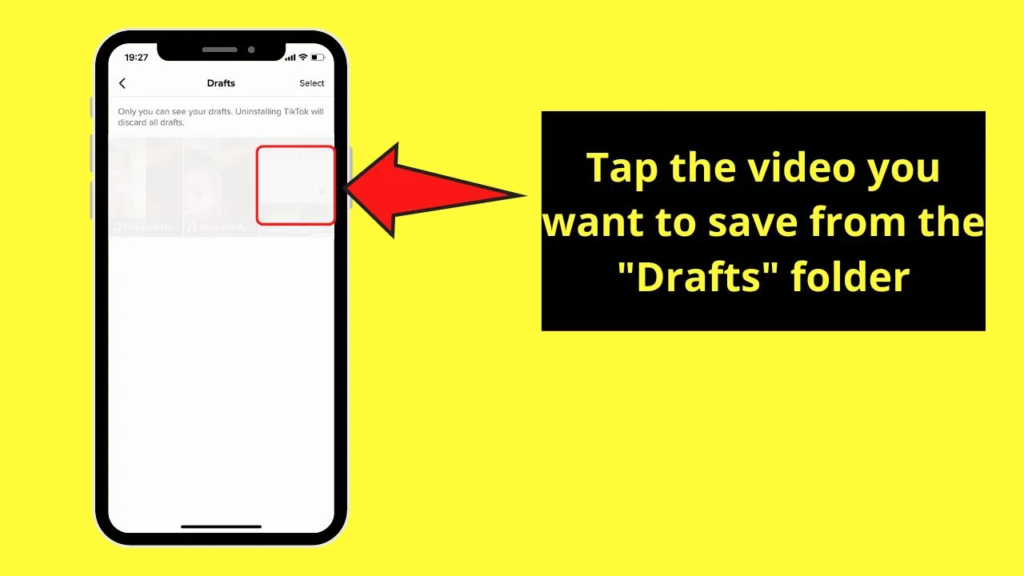
To begin with, open the TikTok Drafts folder from your profile.
After that, select the draft you want to save.
Then, tap on the thumbnail of the video to preview it.
Source: Maschituts
Hit the square in the top right corner of the screen to remove the option.
Once you’ve seen the video as a whole, use any screen recorder on your device to record it.
Finally, stop the recording process and save the video on your camera roll.
Other than using any screen recorder to get rid of the watermark, you can also delete them using TikTok watermark remover tool. In case you want to know more about how to save TikTok drafts on iPhone or Android without a watermark, you can read our previous article here.
Conclusion
So, that’s all about how to save TikTok drafts to camera roll easily. Although you need to post the video to save it to your gallery, your followers won’t see it since you have changed the watch permission setting. Now, your TikTok drafts are safely preserved on your phone.
Above all, if you want to edit your TikTok draft to be cooler, you can try Eklipse. Eklipse is basically an A.I-driven tool that can help you to clip the best gaming moment in just a snap. The special thing about this tool is that Eklipse now has a new feature called TikTok online video editor. Stay tuned to our blog to get more details about it.
One of the best things about Eklipse is its community. Your feedback and support encourage us to improve everyday. We want to make sure that the content you produce as a streamer is latest and trendy.
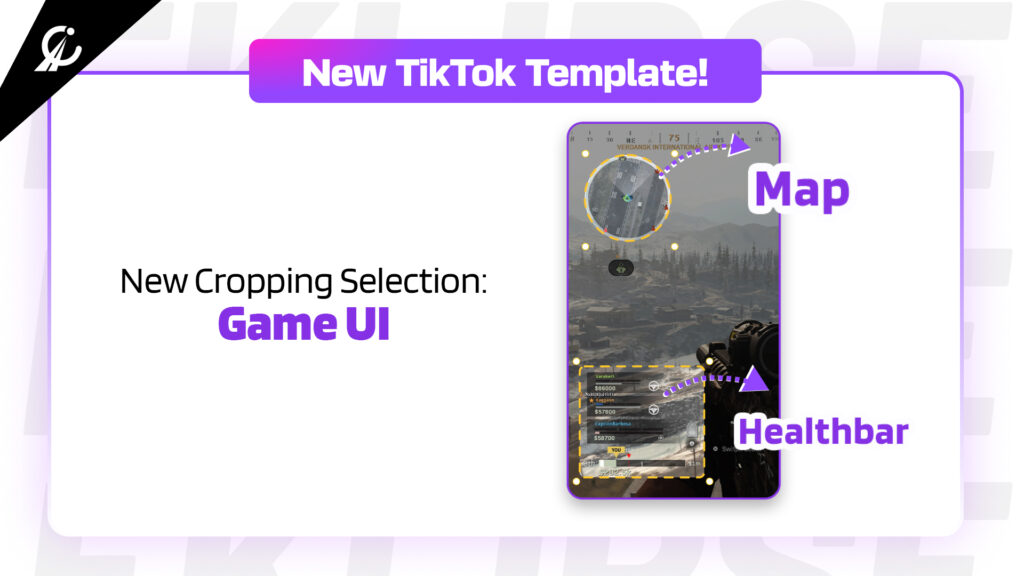
Growing on Tiktok also demands keeping up with the viral trends. So in today’s Eklipse update we have the new tiktok template that we launched this morning. Here are some details about this new template:
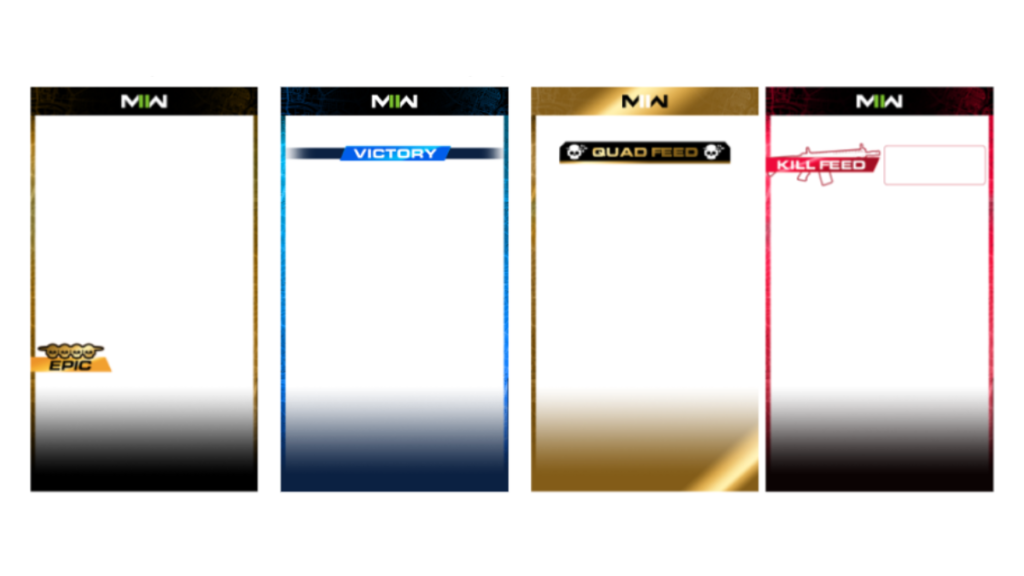
Users can now access a brand new free template alongside the many available templates. It is the “Game UI” template.
About Game UI
This template allows you to access an additional game UI area which you can crop and adjust as a layer. You can use this area for to setup a game UI area like weapon loadout, scoreboard, health bar, or mini-map based on your style for restructuring.
Source: Eklipse.gg
Tutorial
In order to access the new template following are the steps that you have to take:
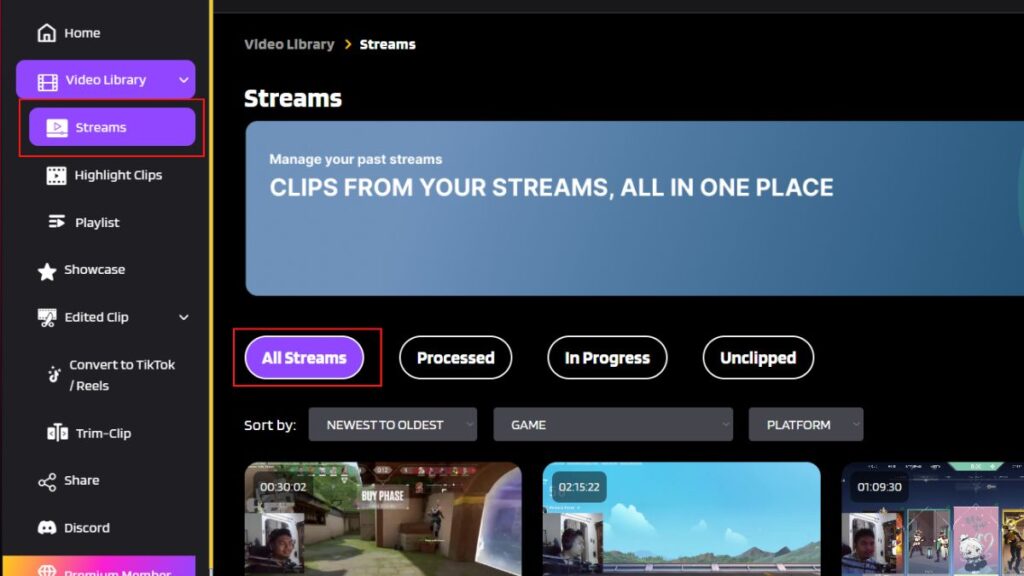
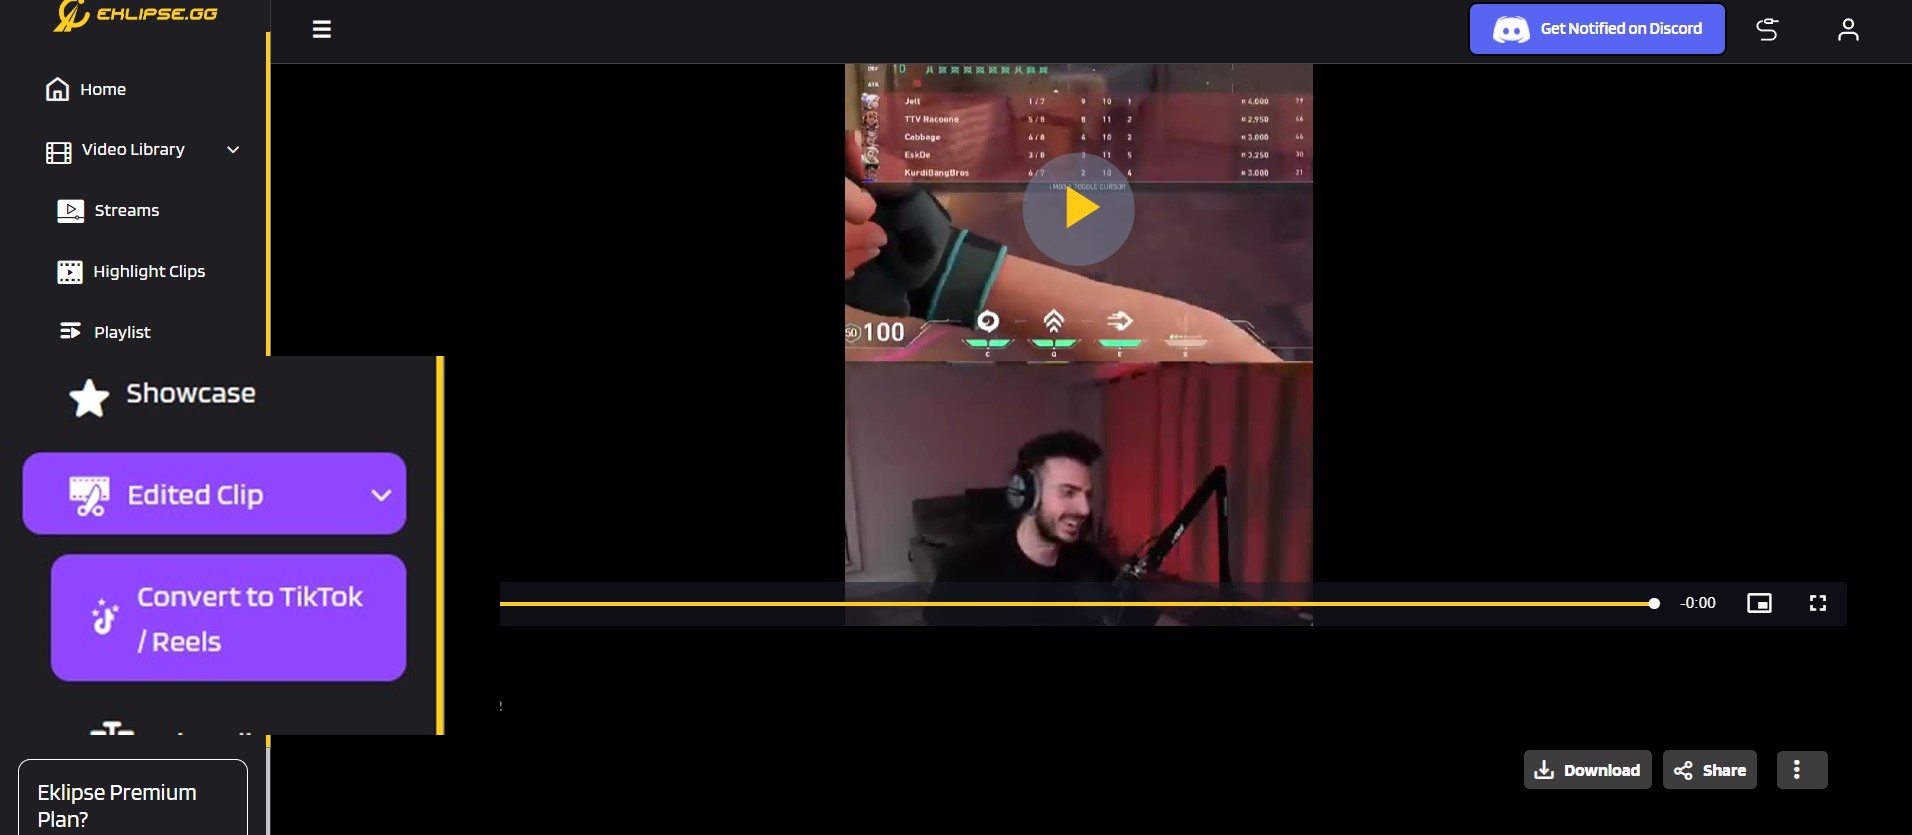
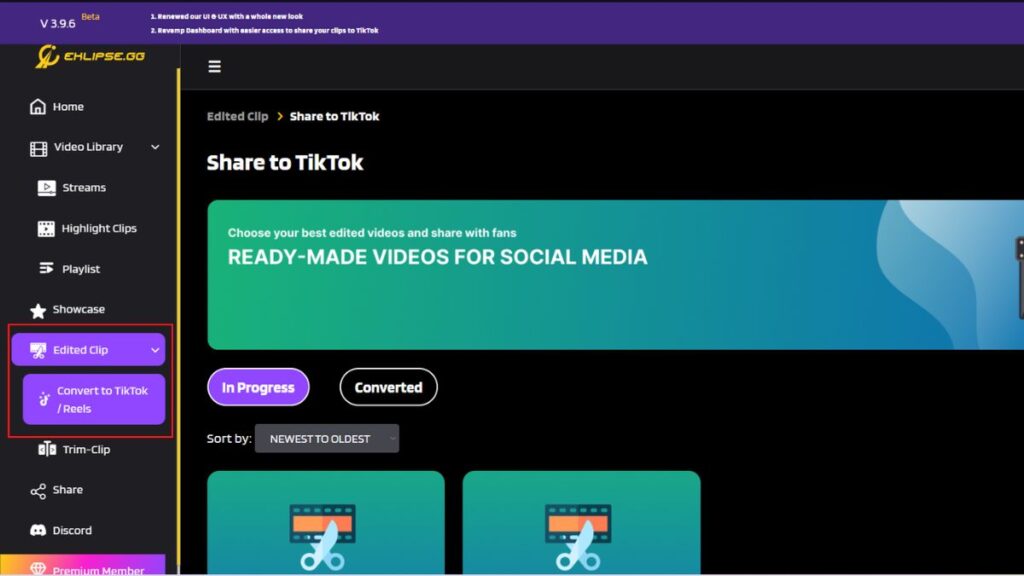
Log in to your Eklipse account and Go to Video Library
Then go to Highlight clips (if you already have some clips there)
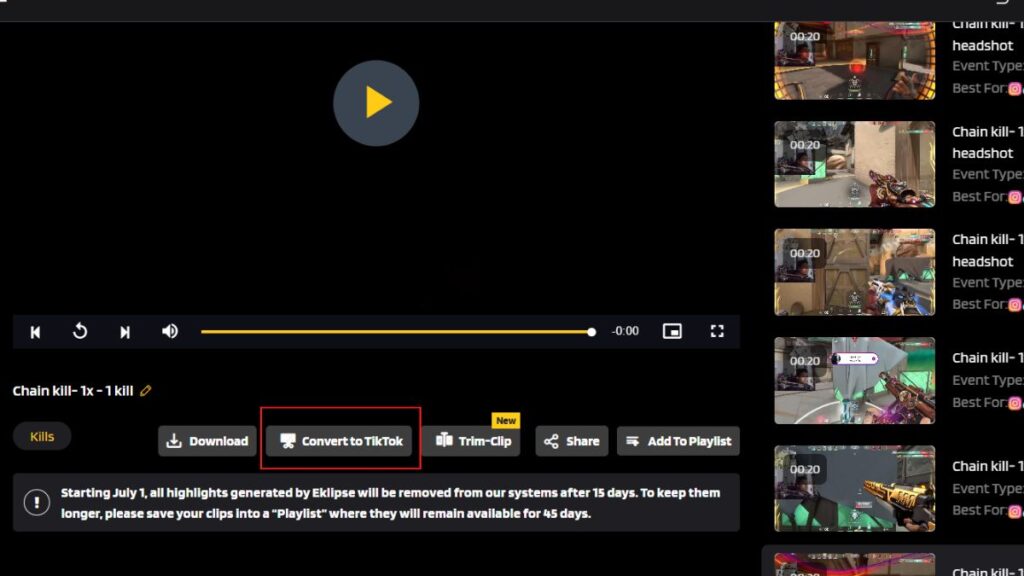
Select the clip you want the Click Convert to tiktok
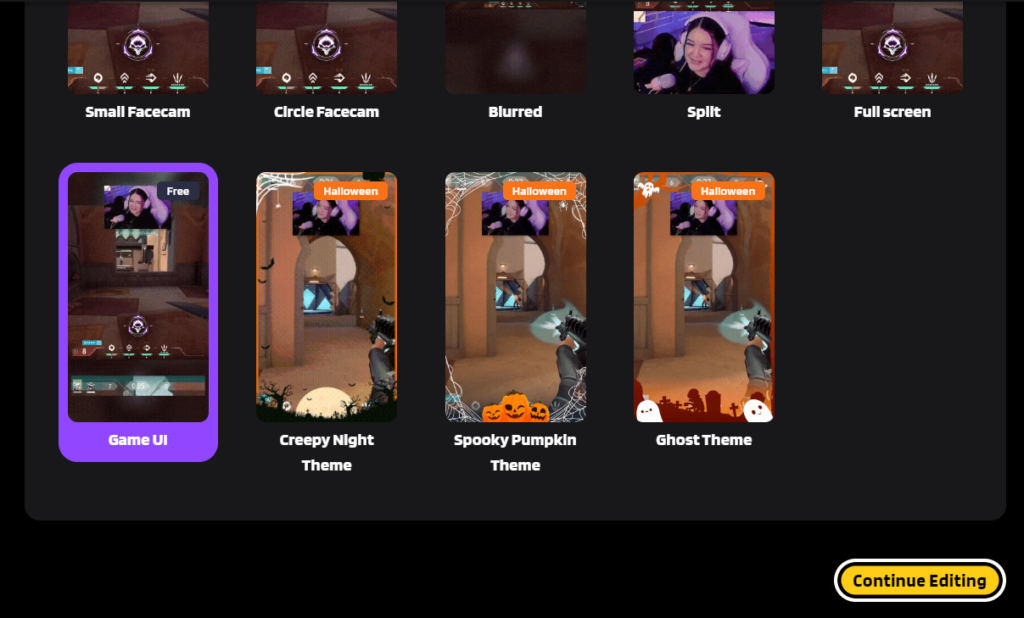
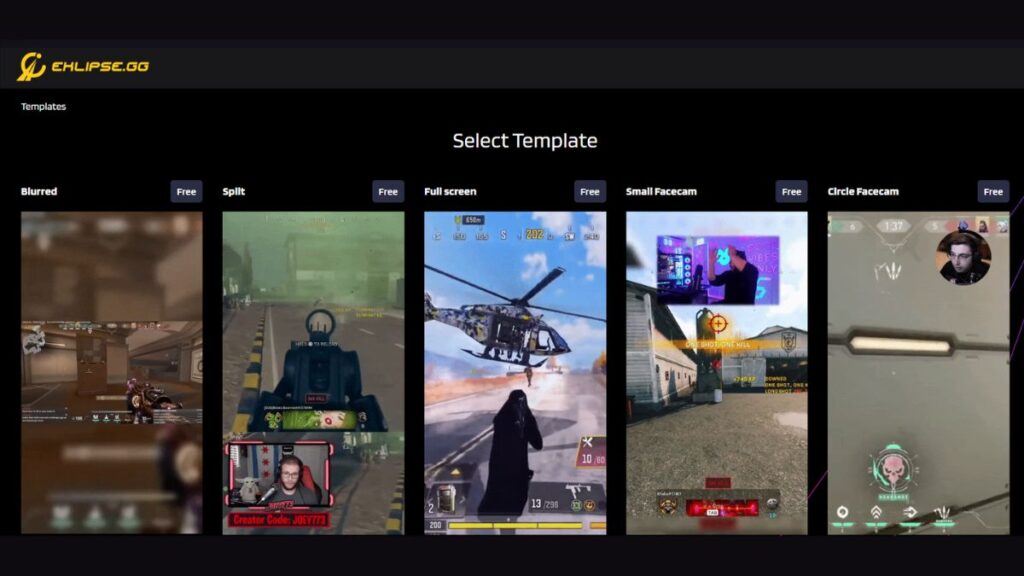
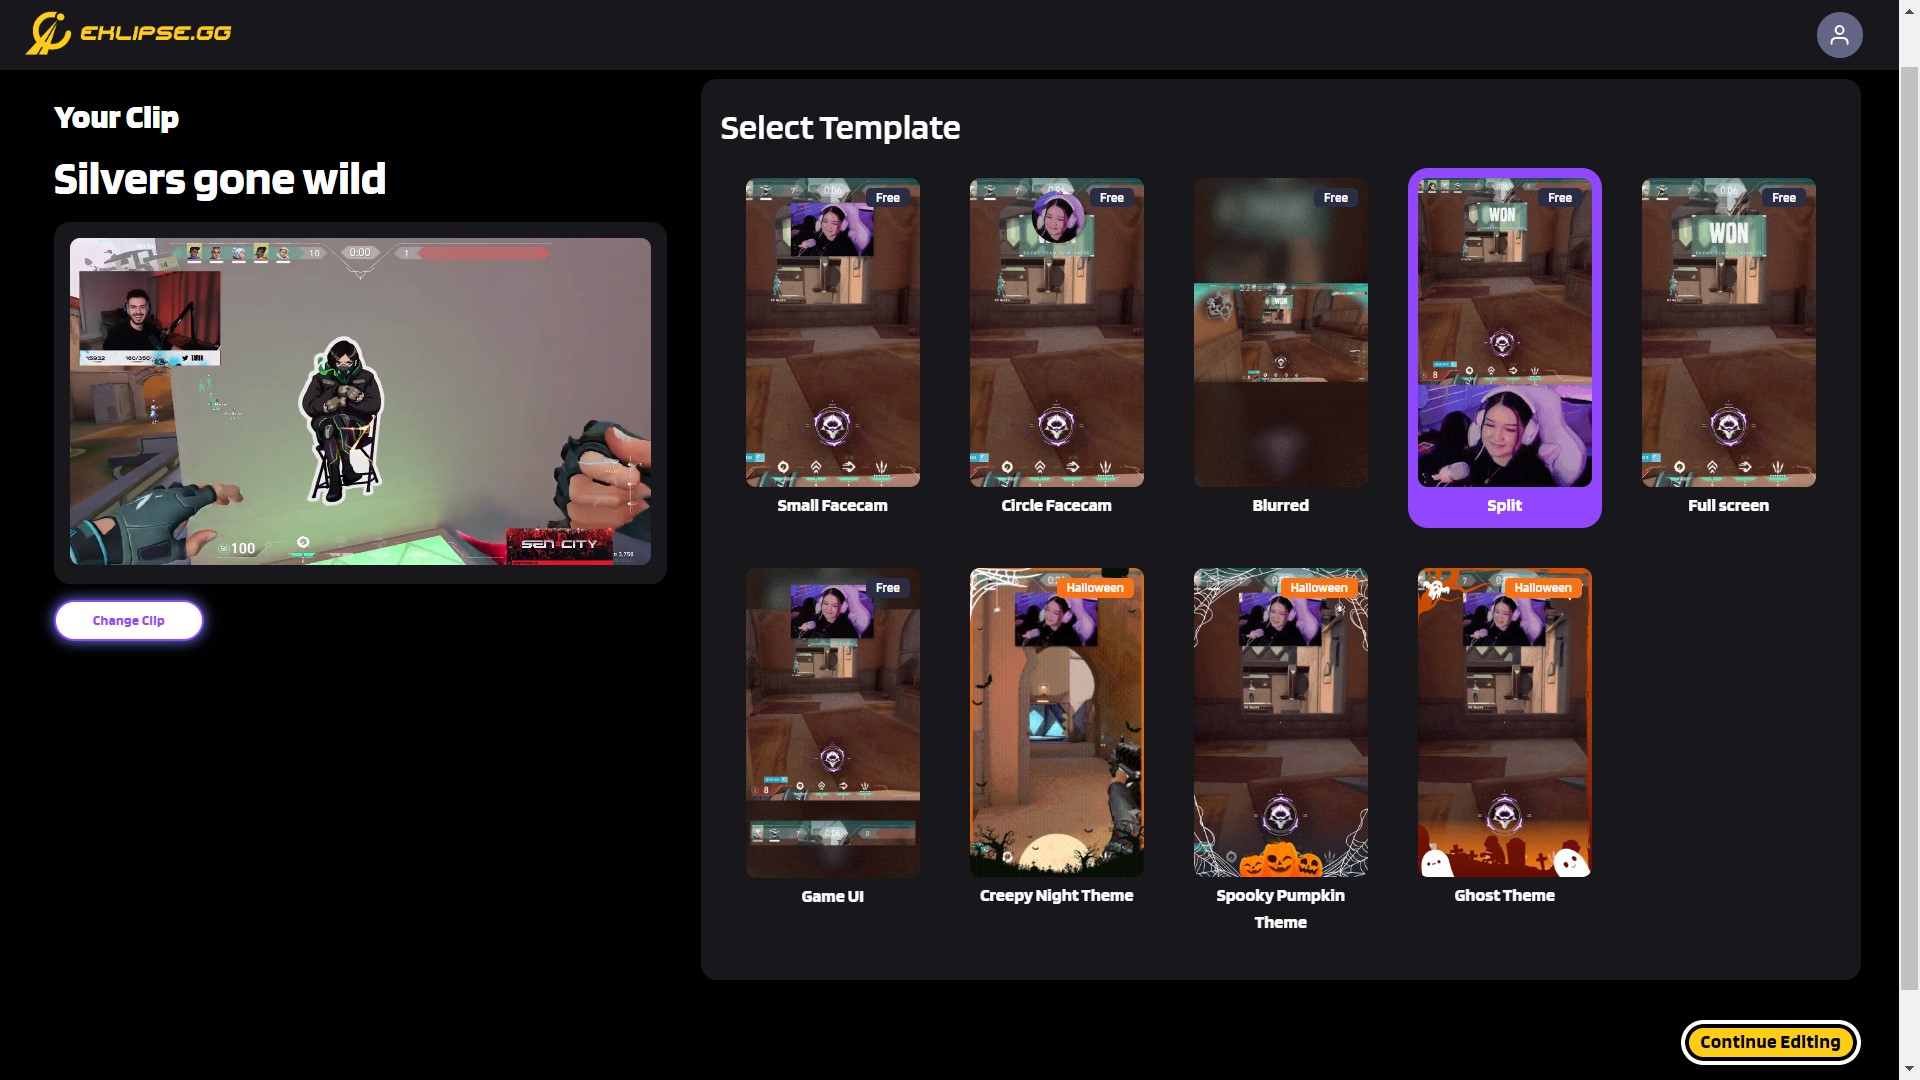
This will redirect you to the template selection page
Source: Eklipse.gg
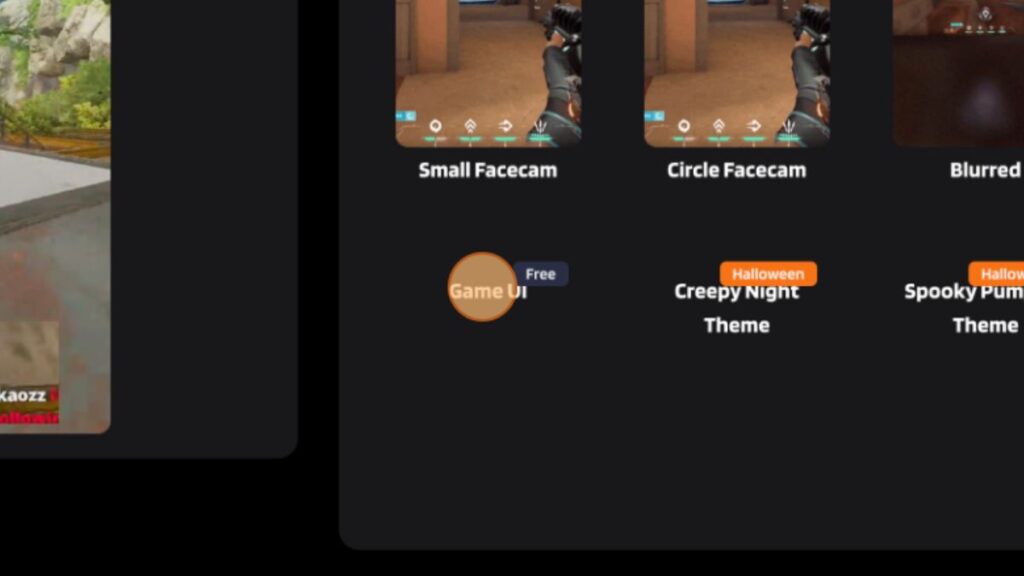
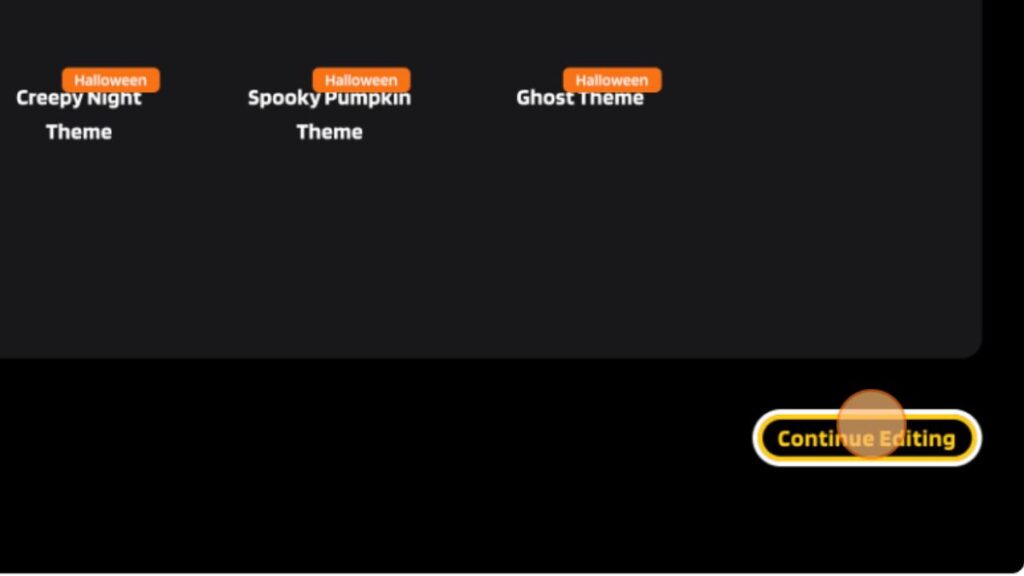
As shown in the image, select Game UI
Press Continue Editing (go through all the available steps in the template layout )
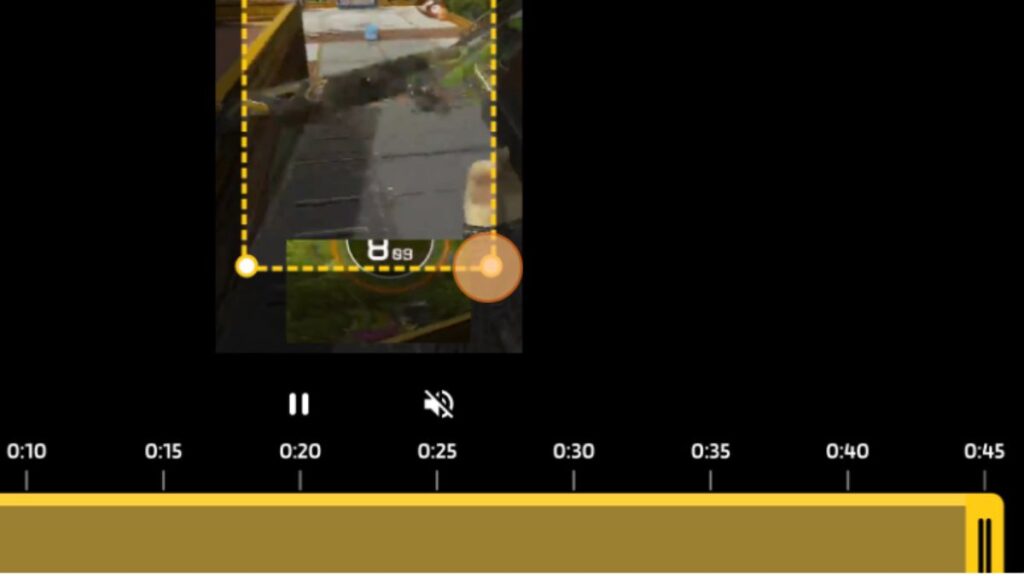
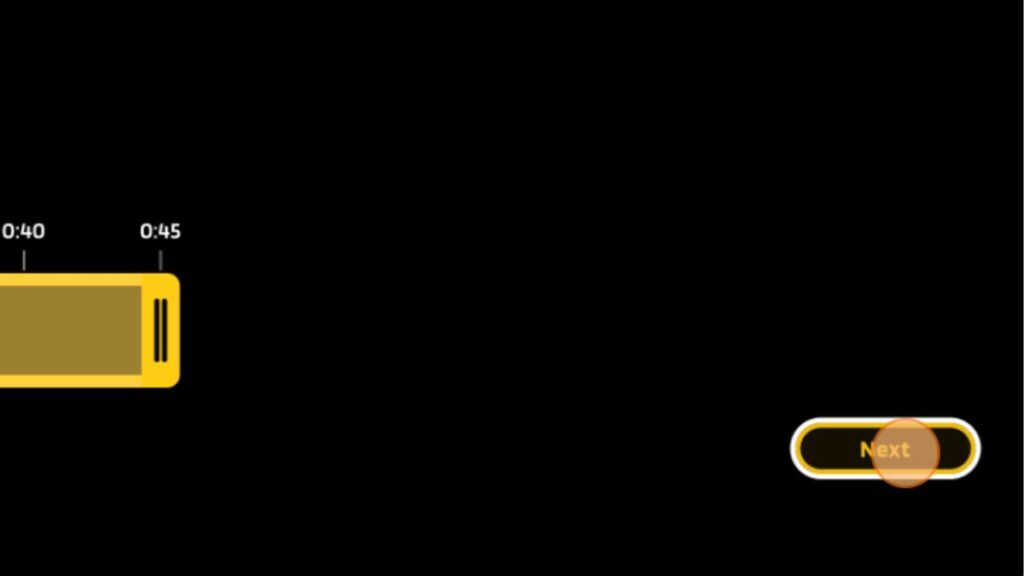
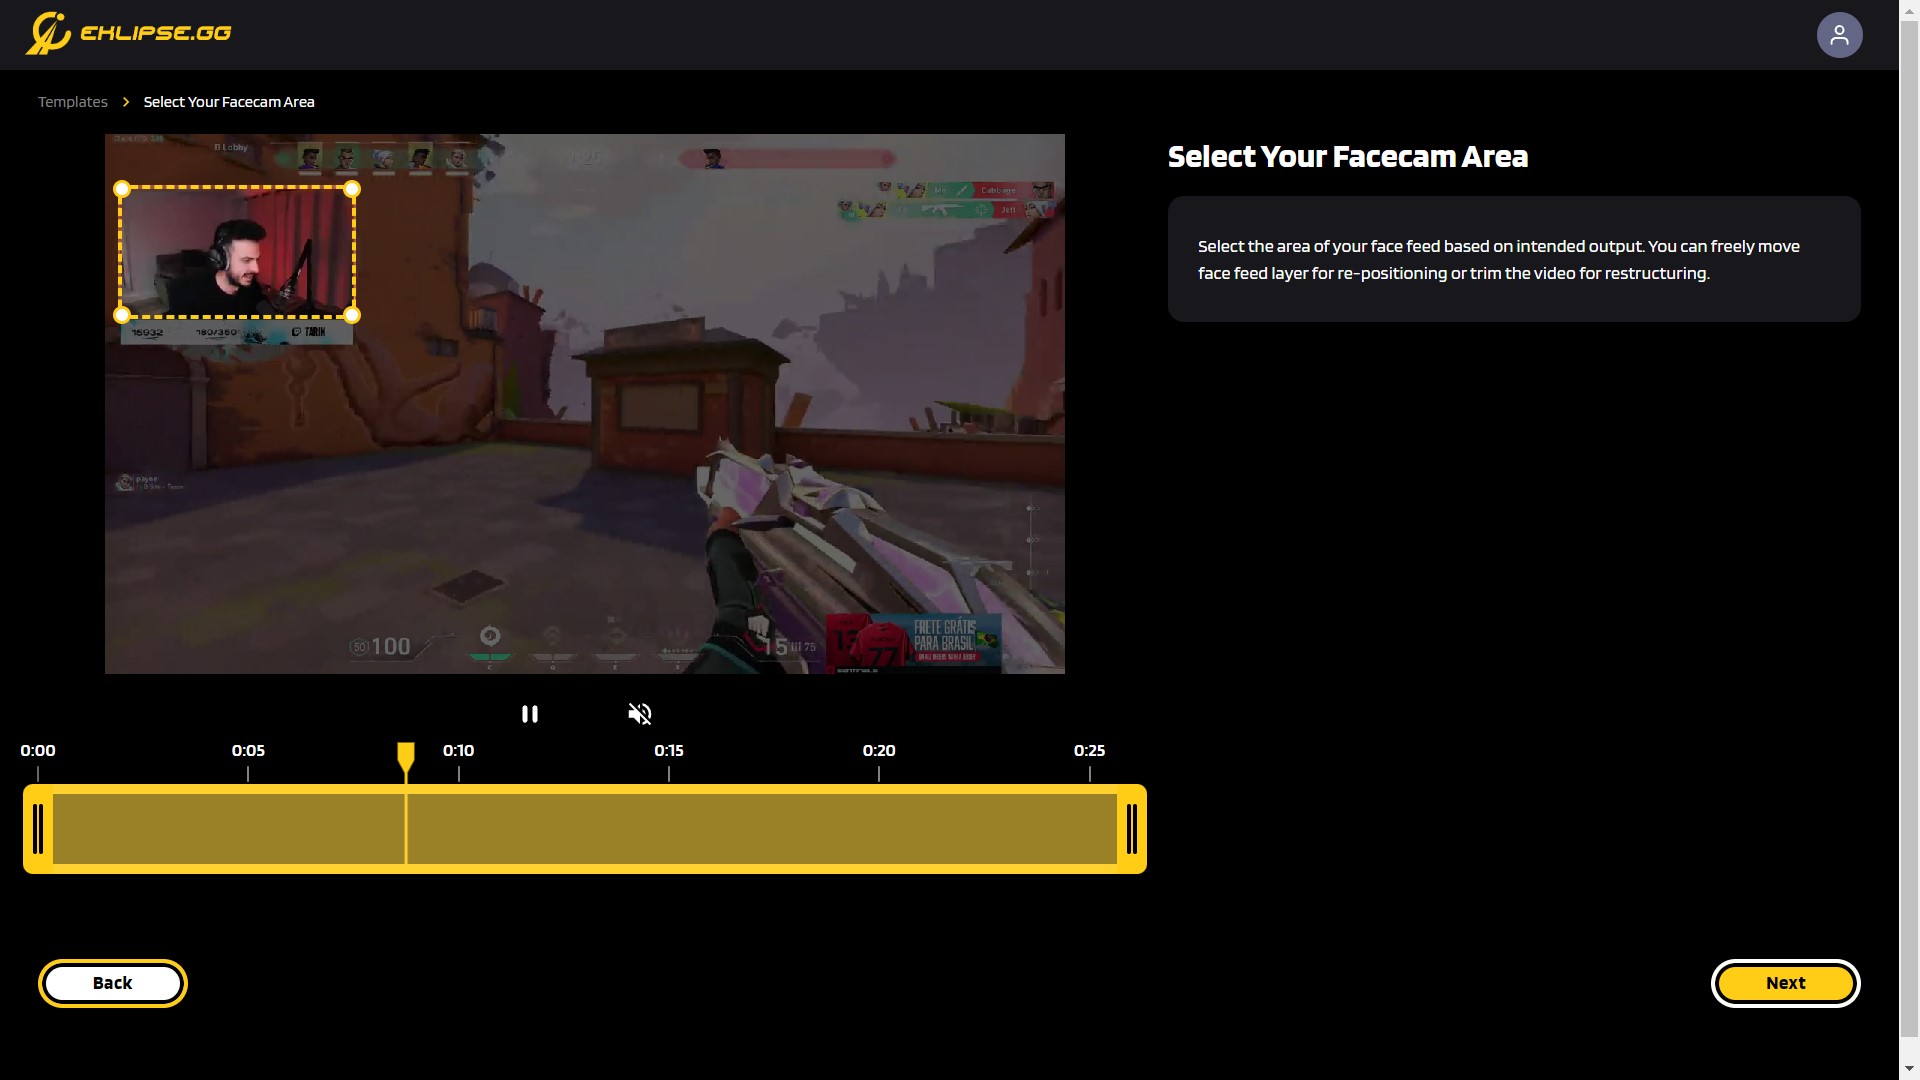
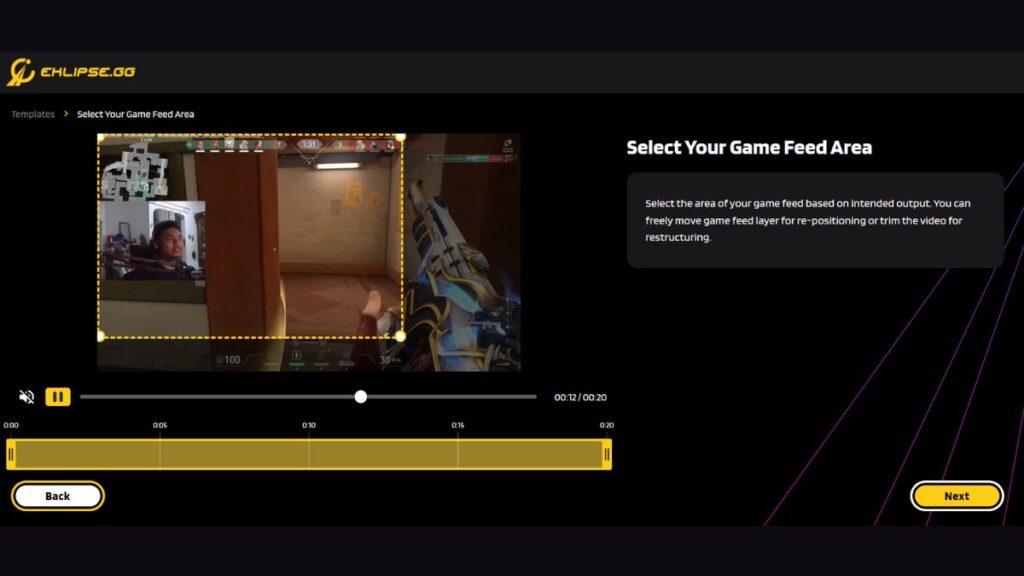
Select your Facecam > Select your Gamefeed area > Select your 2nd Gamefeed area
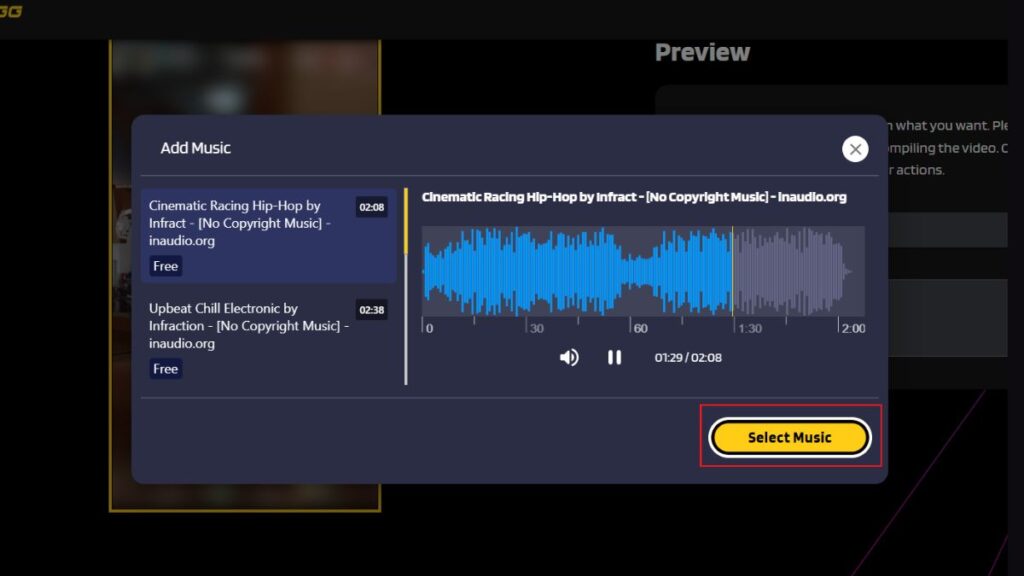
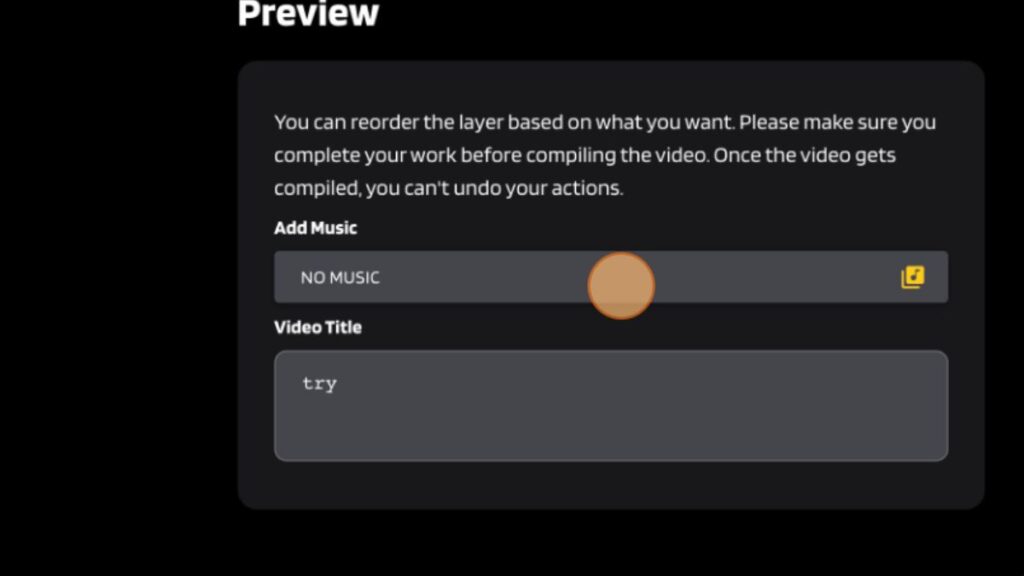
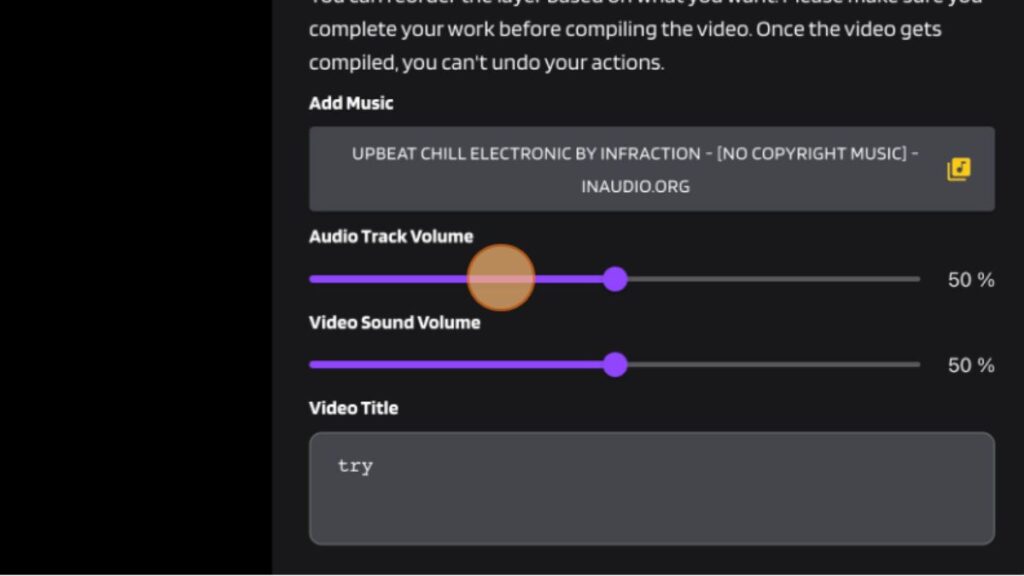
In the Preview Tab, add music and the title of your video
Once you are happy with how the video looks, press Confirm to covert your clip
We have a lot more templates available for you to make amazing tiktok videos for your channel. These also include our latest Halloween templates which are equally spooky and unique. Here’s a list of all free templates that are available right now:
Small Facecam
Circle Facecam
Blurred
Split
Full Screen
Game UI
Three Halloween Themed templates: Creepy night, spooky pumpkin and ghost
We have also issued some fixes for the minor bugs and errors. Do check them out in the recent update.
Conclusion
We hope this new tiktok template will give you more creative freedom and can aid you in editing the best videos for your tiktok channel. Use the template and tag Eklipse to share your creativity with us.
Share this post on your socials to let your friends and fellow streamers know about all the exciting new templates. We cover everything you need to know about going viral on Tiktok as a streamer. Check more relevant posts and happy streaming!
Are you a passionate gamer seeking to elevate your content creation and streaming experience? Look no further than Eklipse Premium, an AI-powered platform designed to transform your video moments into captivating, shareable highlights.
With Eklipse Premium, you gain access to a suite of powerful features that empower you to effortlessly create TikTok-ready highlights from your gaming streams or long-form YouTube videos. Bid farewell to tedious editing processes and embrace a streamlined approach to content creation, allowing you to focus on what matters most.
For those seeking to elevate their content creation experience to new heights, Eklipse Premium offers a range of exclusive features that empower them to produce even more captivating and shareable content. Here is a more in-depth breakdown of what is Eklipse Premium!
Now you may be getting impatient to know what is Eklipse premium so without further delay allow us to describe it. Eklipse Premium is basically our newest premium plan/subscription. It will let you enjoy some of the exclusive features and upgrades our users (you guys) have been requesting for a long time for a minimal fee.
Whether you’re a seasoned Twitch streamer, a budding YouTuber, or simply an avid gamer eager to share your gameplay experiences, Eklipse Premium is the key to unlocking the full potential of your gaming content.
Eklipse Premium Features
Here are the features you will be able to access through our premium subscription:
1080p, high-quality HD output
Priority stream processing
Longer stream/VOD support (up to 12 hours)
Process up to 3 streams/day
Up to 45 clips highlight output
No watermark
Premium templates for Tiktok
Live Chat & VIP Discord
Adjustable up to 31.400 minutes of YouTube Video Minutes
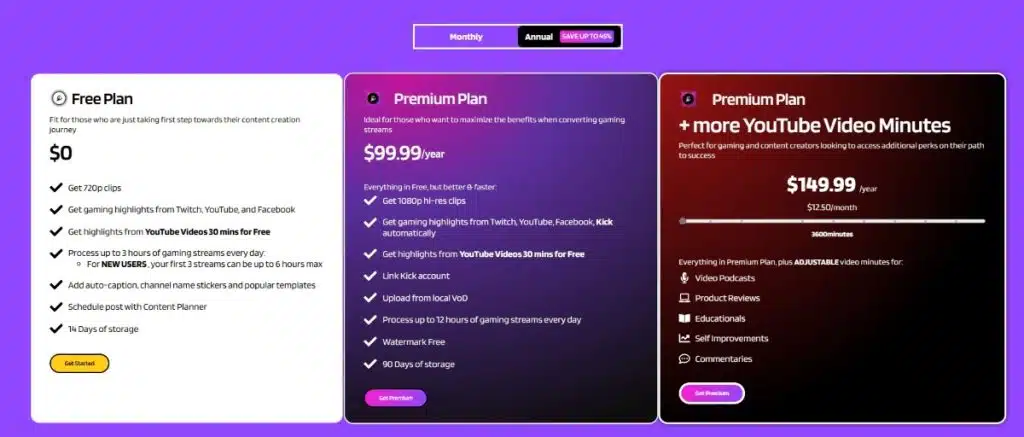
Payment Plan
The payment plan for Eklipse premium is as follows:
Premium Plan Monthly: $15.99
Premium Plan + more YouTube Video Minutes Monthly $19.99.
Premium Plan Annual $99.99.
Premium Plan + more YouTube Video Minutes Annual: $149.99
Here is a step-by-step guide to activate your premium membership:
For existing members:
Log in to your Eklipse account
Hover over the left hand menu
Find the “Upgrade” button below Discord
Press it (you are on the Premium Plan page now)
Select your plan (look at the options above)
Select the Payment Method (mentioned below)
Confirm your payment
For new members:
The only thing you need to do differently is to register with Eklipse. Use your email, Twitch or any other streaming account. Congratulations! You are a premium member now. You can also use an available redeem code to get a month of free premium.
Cancel your premium account by following these simple steps:
Press the profile icon (top right corner) > Account Settings > Premium Plan > Cancel Subscription
Note: People who get premium through a redeem code will be subjected to automatic cancellation after a month. They can renew their subscription later on using the CTA button.
Once you have chosen your plan you can select any of the following payment methods to purchase it and activate your premium subscription:
PayPal
Credit/Debit Card
Conclusion
We hope you feel as thrilled as we do about this announcement. For more details visit our premium page or register now. Eklipse still has many new and existing free features for you to try.
There will be plenty new stuff in store too. For example, our brand new “Game UI” template, to find out more. We bring you every Eklipse exclusive here on our blog so stay tuned and happy streaming!
Maximize your Black Ops 6 rewards—Create highlights from your best gameplay with with Eklipse
Eklipse help streamer improve their social media presence with AI highlights that clip your Twitch / Kick streams automatically & converts them to TikTok / Reels / Shorts
There are many ways to create nice and appealing videos. You can either take a shoot from the very beginning or compile several clips into a whole video. But a lot of people still don’t really know how to make a compilation of video clips. In fact, it’s quite easy to do.
You may wonder that compiling the clips into one will take so much effort and time. But you can make it easier by trying an online video clipper like Eklipse. This software works in AI and will let you not only clip the highlights but also transform them into a nice video.
This article will explain how to use this video compilation maker free in a comprehensive way. So let’s just begin the tutorial.
How To Make A Compilation of Video Clips With Eklipse
Eklipse is a video compilation maker online free that allows you to capture the best highlights from your streaming video. What’s special about this tool is that it is very convenient to use, even for every beginner. It doesn’t require you to have such advanced skills to operate this tool and make a nice video. Here’s how to use it.
First, open eklipse.gg or hit the following button.
Second, do a free sign up or just sign in to your account if you already registered.
Source: Eklipse
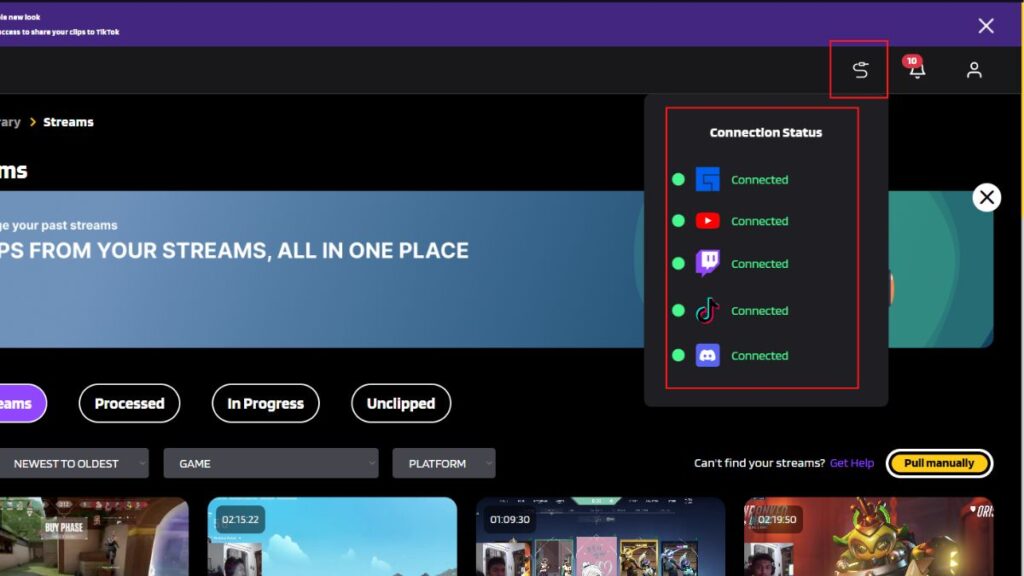
Go to the Connection status icon at the top-right corner of the screen.
Then, head to Stream on the left menu and find the video you want to clip.
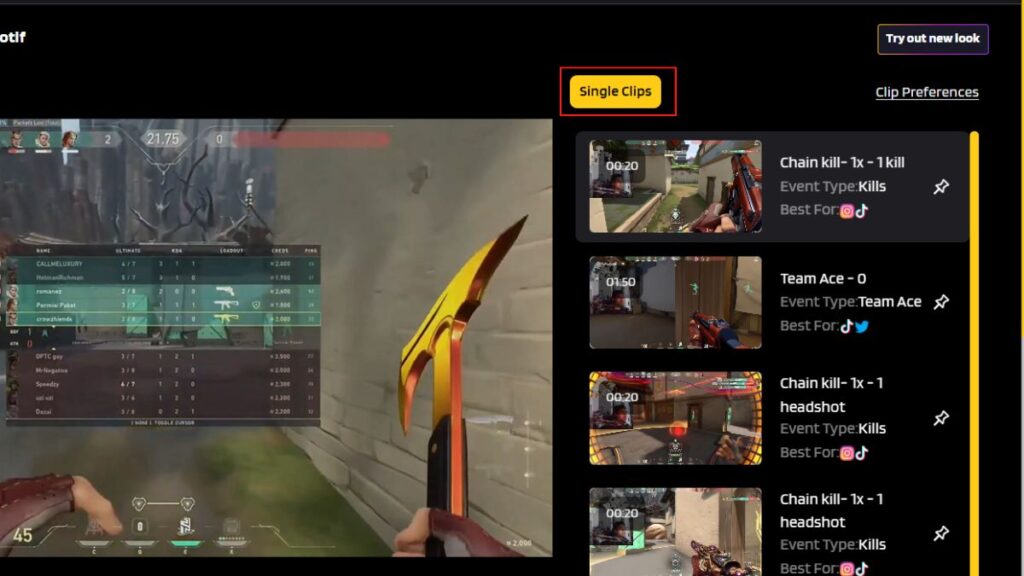
After that, select any clips you like under the Short Clips section.
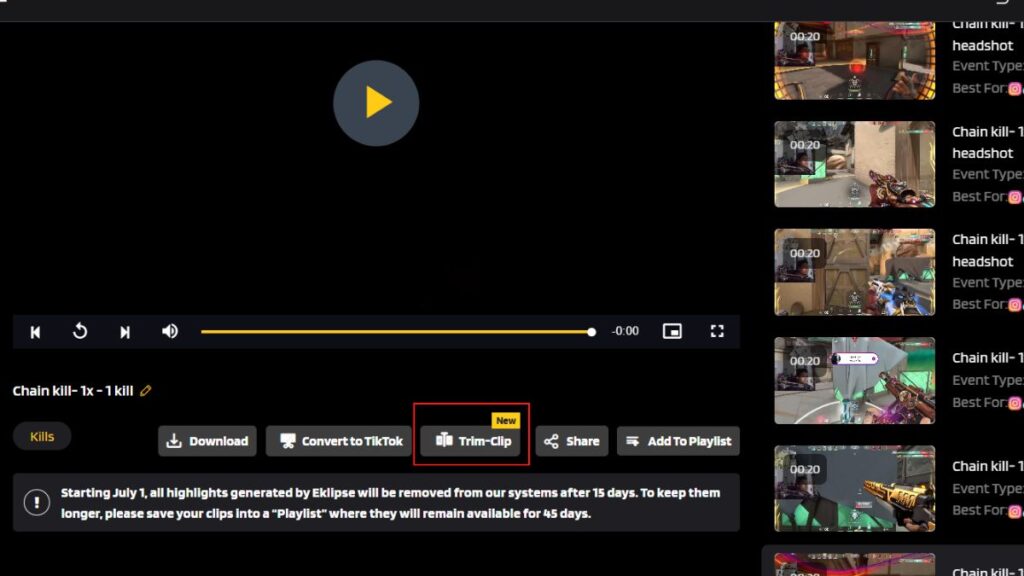
After you select the clips, you can either hit the Trim-clip or Convert to TikTok/reel button.
Next up, pick any TikTok ovelays and hit the Continue Editing.
Add background music > Select Music > Confirm.
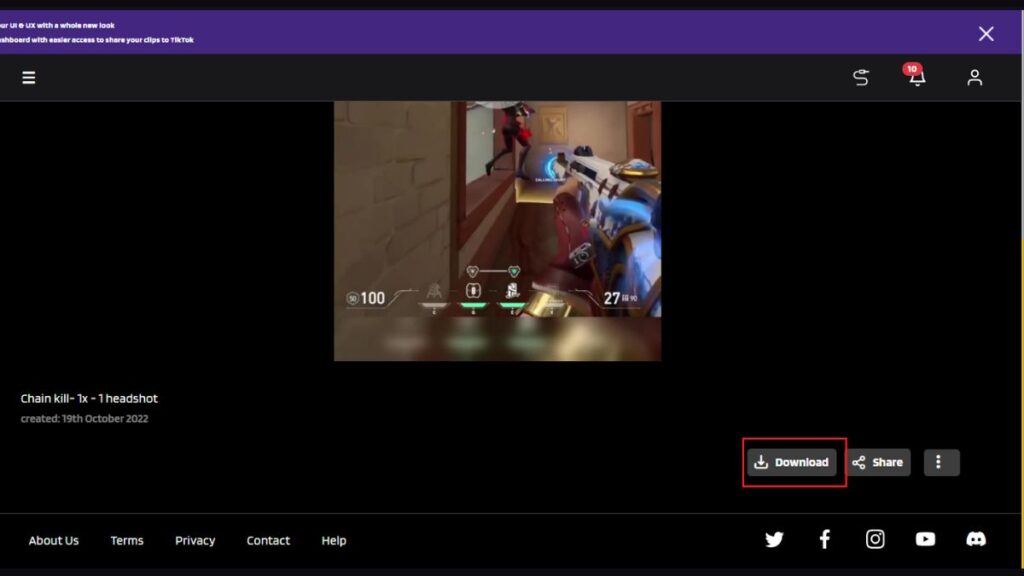
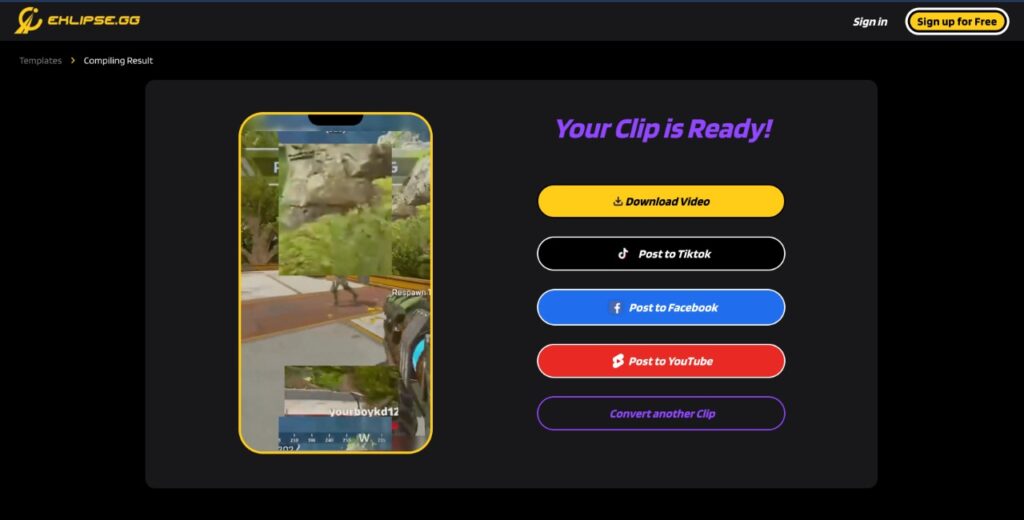
Finally, find your clip under the Edited Clips section. Share or Download your videos.
Conclusion
There you have it. You have known how to make a compilation of video clips easily with the amazing output using Eklipse. No need for extra effort, money, and no need to spend much time. Give it a try now!
Have you ever wondered how to make a video for Facebook easily? In case you are looking for an answer to that question, we’ve got you covered.
Thankfully, with Eklipse, you can create incredible videos for Facebook seamlessly. No time-consuming, no complicated steps, and you don’t even need to be a master in editing.
On top of that, Eklipse also features various editing tools and templates for TikTok/reel/Shorts clips, and even supports many popular games like Valorant, CoD, Fortnite, and more!
Let’s have a look at the guide below to learn how to make a video on Facebook for free using this amazing clip.
Making a video and posting it to a Facebook story is actually simple, especially when you use Eklipse as one of the Facebook video maker tools. Here’s how you can use Eklipse.
First, go to Eklipse.gg or click the following button to start to register and log in to your account.
Second, connect your Eklipse account to the streaming platforms you desire.
Then, you can select your streaming video from the Streams tab > All Streams section.
Pick any short video under the Short Clips section.
After that, click the Convert to TikTok/Reels button underneath the video and select any template.
Next up, select your streaming area and trim the length of your video. Then, press Next.
Add a music background from the music options and hit Select Music to proceed.
Finally, see the edited video on the Edited Clips tab > Convert to TikTok/Reels tab after 5 minutes.
Click your converted video, then hit the Download button.
How to Make a Video and Post It on Facebook
Additionally, Eklipse let you share your edited video directly without downloading it. However, if you wish to post it into your Facebook reel, you need to download it from Eklipse first. Then, you can only post a short video through a mobile phone. It’s advisable to operate Eklipse on your mobile and save your video there. Here’s how you can post a Facebook reel.
Go to Facebook.com and sign in with your active account.
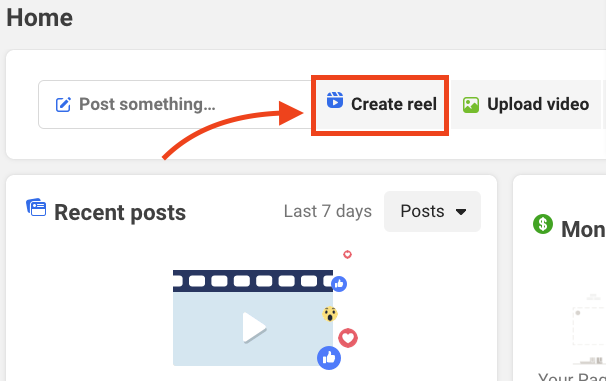
Then, head to the Reels section on the Feed and click Create.
Source: Search Engine Journal
Tap the photo icon and select the video clips you are going to post.
After that, you can add text, effects, or anything to your reel to look more appealing.
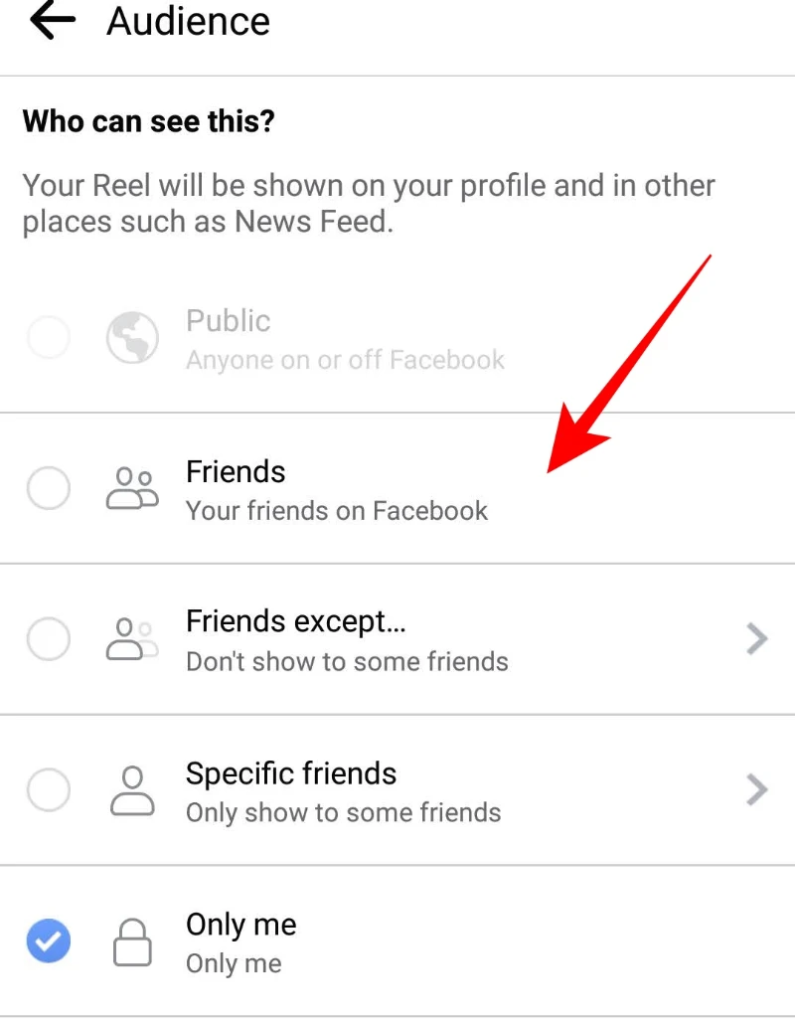
Choose the audience of your reel.
Source: Nerds Chalk
Finally, tap Share Reel to publish your video.
Source: Quora
Conclusion
That’s all about how to make a video for Facebook using Eklipse. Anyway, you can definitely edit your Facebook video anytime you want using Eklipse as well. If you find this article helpful, please share it to your friends so that you can help them as well.
As one of the most powerful free clip makers and TikTok Converters, Eklipse provides many excellent tools for creating stunning clips just in seconds. It’s just perfect for both beginner and advanced streamers. Surprisingly, Eklipse has made more updates to its features to give you a greater streaming experience.
After launching the Halloween-themed template last month, Eklipse launched a new TikTok template called Game UI. Game UI is basically a free template on Eklipse that shows your gameplay and your facecam in one layout.
So Basically, you’ll be able to create streaming content just like on Twitch or YouTube, but in a bite-size version. Sounds amazing, doesn’t it?
If you want to know deeper about this new feature, just keep your eyes on our article and keep scrolling!
Game UI is an Eklipse up-to-date template for TikTok clips. Unlike other previous templates, Game UI offers more flexibility for the users. That said, you can definitely customize your layout by adjusting the feed and facecam area.
Additionally, this template also allows you to select a third-cropping area you want to show. Either the kill stats, the health bar, or even the mini-map.They could be in portrait or landscape layout. Moreover, you can move the facecam part, the gameplay, and even the extra layer freely!
Layout selection determines the quality of your content and it plays a significant role in impressing your viewers at first sight. By adopting a new concept, we believe that Eklipse will definitely be useful to get more eyeballs and boost the engagement of your TikTok content.
Game UI Template Competitive Advantages
To be more specific, we have already listed some key features in Eklipse’s new Game UI template. Let’s take a look at them.
A new automatic layout for TikTok clips
100% free to use
Shows both gameplay and facecam in one layout
Offers adjustable layout
Enables users to select a third cropping area
Allows users to resize the UI layer in portrait or landscape layout
Allows users to move the gameplay, facecam, and UI layer freely
We believe that Eklipse has covered everything you need for TikTok clips. It is only Eklipse that is capable of giving you a complete package; great features, automatic templates, and free service.
You might try other tools like Streamladder and DaVinci to help you create a cool template for TikTok clips. However, Streamladder provides a similar template only in their paid version plan. That means you’ll need to spend a certain amount of bucks just to give a taste of a similar feature.
In addition, you can also try DaVinci to get a similar template for free. But it’s worth highlighting that you’d better have good skill in editing as well as more time because they require you to create it manually. Otherwise, you won’t be able to have a similar template to show off.
So, if you want to save a lot of your bucks as well as your precious time, Eklipse could be the best choice. Don’t worry about the watermark. To make your clip looks more professional, you can get rid of it by trying our premium plan. Say goodbye to the watermark, and get the best quality clip. Do you sure want to miss out on this? You decide!
How to Use Game UI Template on Eklipse
Now that you know what special things about this new template are, we’ll tell you how to apply this template and show it off on your TikTok or other social media. Here we go!
First, go to the Eklipse site.
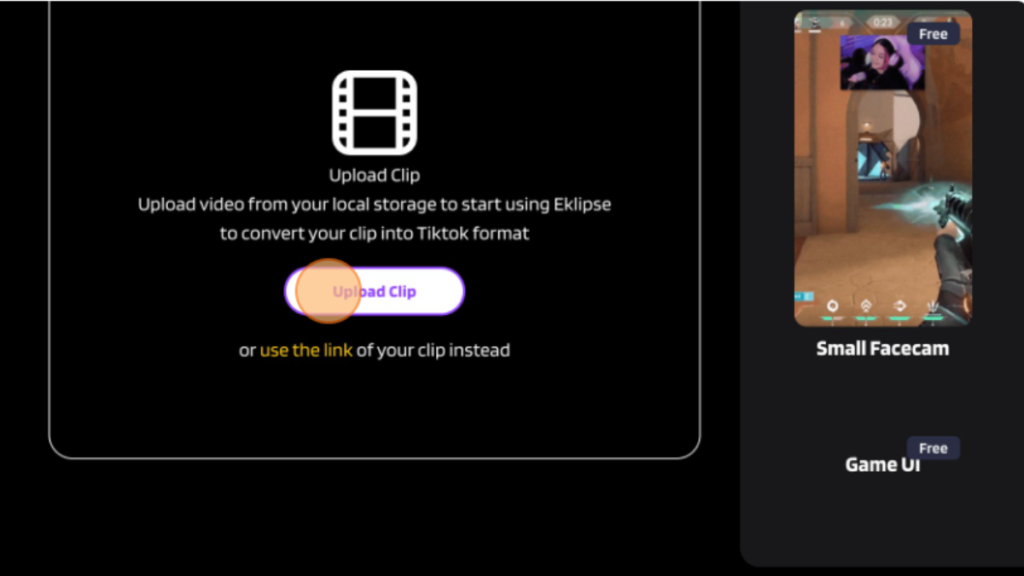
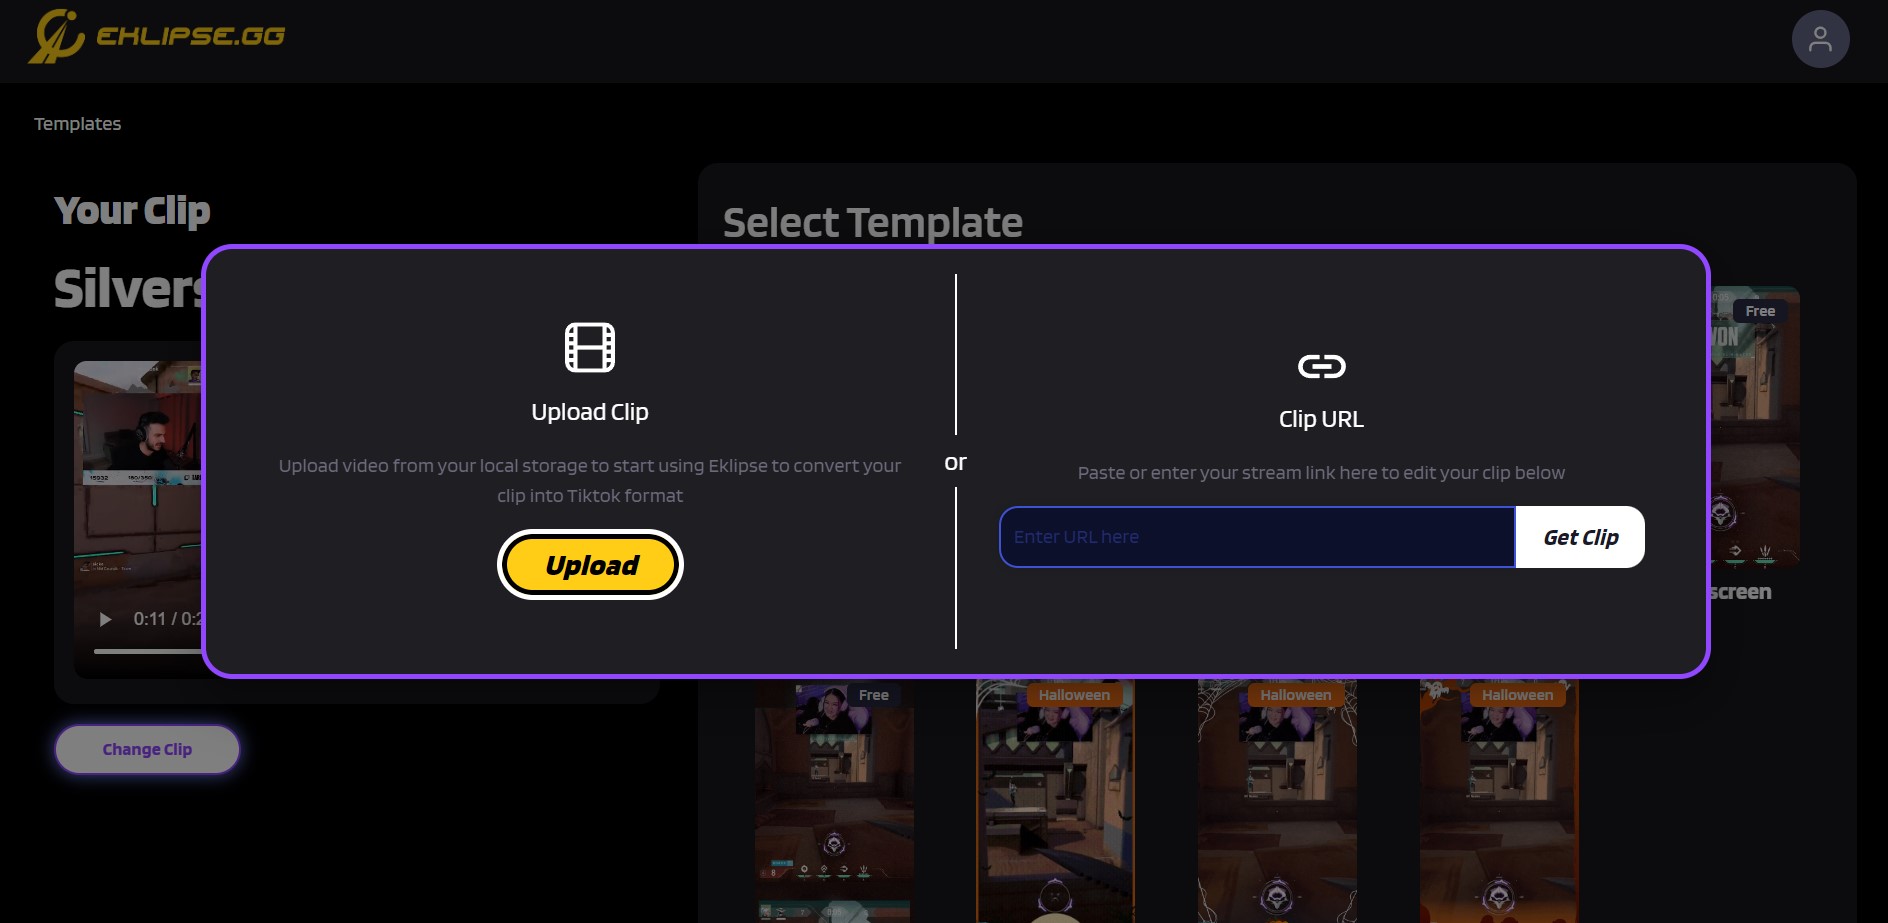
Click Upload Clip to upload from your computer or use the link to add your Twitch clip URL.
Next up, select the Game UI template on the TikTok template gallery.
Click Continue Editing to use the overlay.
Set your gameplay area and your facecam area.
Adjust your clip duration and hit Next.
Head up to the Add Music option, and hit Select Music to proceed.
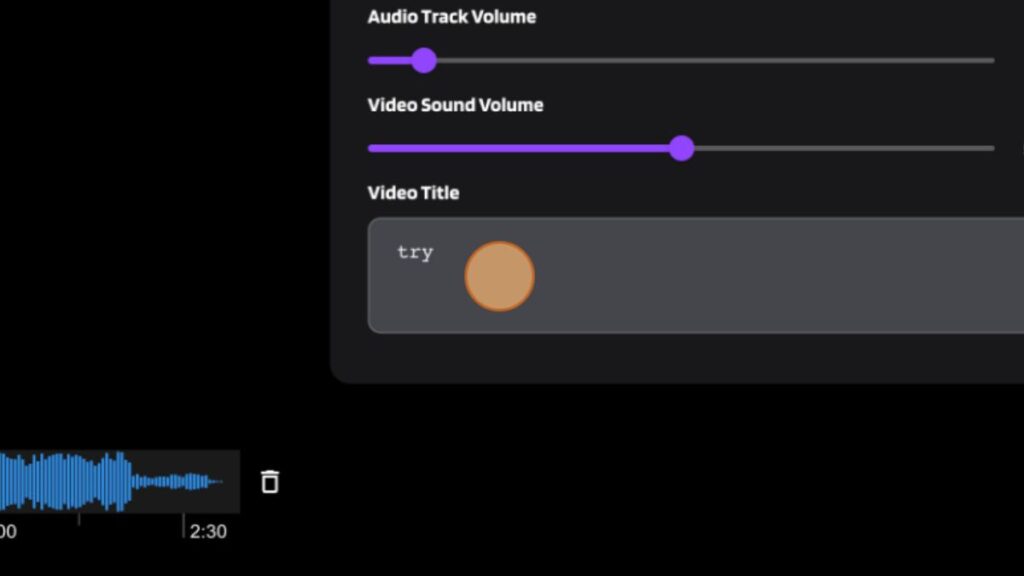
Then, play around with the Audio Track and Video Sound volume.
Don’t forget to add a title for your clip and hit Confirm.
Conclusion
So, that’s everything you should know about Eklipse’s new Game UI template. If you are curious and want to give it a shot, just follow the guide above and present your viewers with a more spectacular show. Let us know your thoughts once you’ve tried this feature in the comment box below.
As a streamer who frequently deals with the chat boom from the viewers, you may wonder how to set up Nightbot on Twitch. Nightbot is basically a chatbot that enables you to automate your live stream’s chat without distracting your stream.
If you feel like using this bot but don’t know how we can help you through this article. So, let’s just jump right into the guide.
This guide will cover several steps until you can finally use this bot on your Twitch. The first step is enabling the bot. Here are the steps.
First, open your Twitch chat.
Second, hop onto the Nightbot site and sign in to your Twitch account.
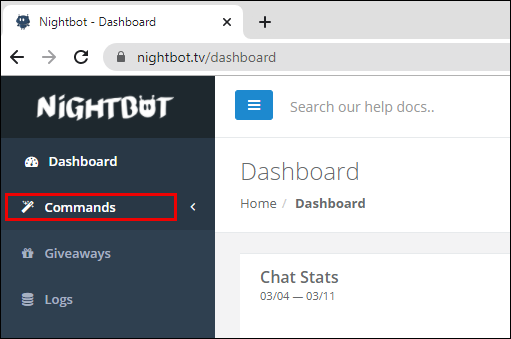
Then, navigate to the Command settings on the left sidebar to manage the bot command.
Source: Alphr
To turn the commands off, hit the Disable button beside them.
In addition, to change its cooldown and userlevel, hit the Options button.
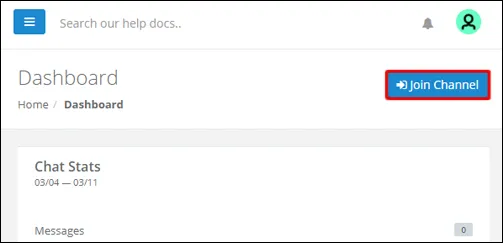
After that, go to the Dashboard and hit click Join Channel.
Finally, type in “\mod nightbot” to give the bot the necessary permission.
How to Enable/Disable The Nightbot on Twitch
Now that your Nightbot has already been set up, you are now able to turn it on/off with a couple of clicks. Here’s how.
Open your Twitch chat and head on to the Nightbot site then sign into your Twitch account.
After that, click Join Channel from the Dashboard.
Source: Alphr
Then, type in “/mod nightbot” into your Twitch chat.
To turn it off, simply type in “!nightbot remove” to your Twitch chat.
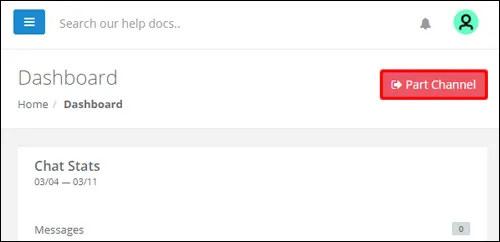
Alternatively, you can also disable the bot from the Dashboard and hit the Part Channel option.
Source: Doc. Alphr
How to Create Your Own Command
Apart from the default command, Nightbot also let you create your own command. To be able to do that, just follow the steps below.
To begin with, go to the Nightbot site and log into your Twitch account.
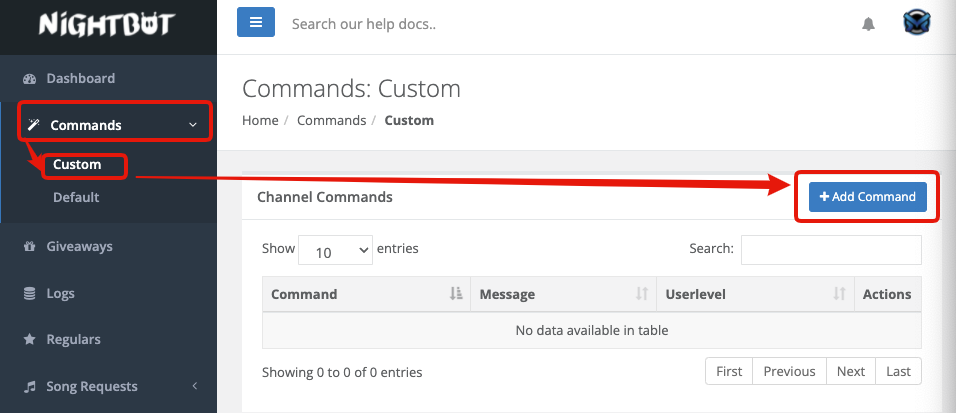
Hit the Command option on the left sidebar.
Source: Alphr
Under the Custom section, hit the Add Command button.
Source: Get On Stream
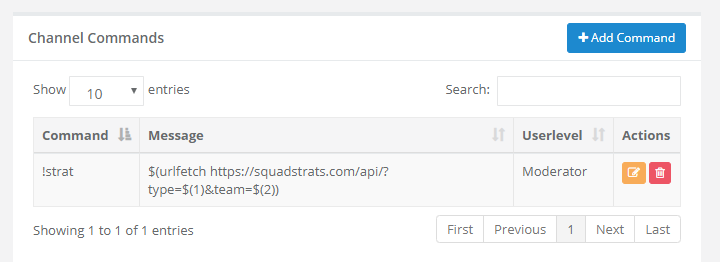
Then, submit the command name, message, cooldown, and userlevel to the form and confirm.
Additionally, to edit your customized command, simply click the pencil icon beside the command’s name and start editing the information.
You are also able to delete the command by hitting the trash icon next to the pencil icon.
Source: squadstarts
Conclusion
Learning how to set up Nightbot in Twitch is necessary if you want to enjoy your streaming more without being bothered by chat boom from the viewers. Besides, the viewers will also have a good streaming experience.
You maybe asking by knowing that fact. “How can I automatically convert your stream clip into a TikTok video?”
Don’t worry, we got you covered! You might want to try Eklipse.gg, an AI highlight generator that can create highlights from your stream automatically. Even better, it can convert Twitch streams to TikTok videos.
Go check it out and give it a try!
If you decide to try out Eklipse, you may be wondering about the capabilities of this tool, and how it can help your way in growing your channel. Today, we will share how to use a TikTok video template from Eklipse to create the best highlight montage from your stream! Go check it out!
How to use a TikTok video Template From Eklipse
You can follow this step-by-step to use a TikTok video template from Eklipse. For now, Eklipse has 9 TikTok video templates that you can choose to create the best gameplay highlight montage. To start using it, go check out our how-to guide here.
You could automatically create an account using Facebook or Twitch account or you could create it manually using email, all for FREE
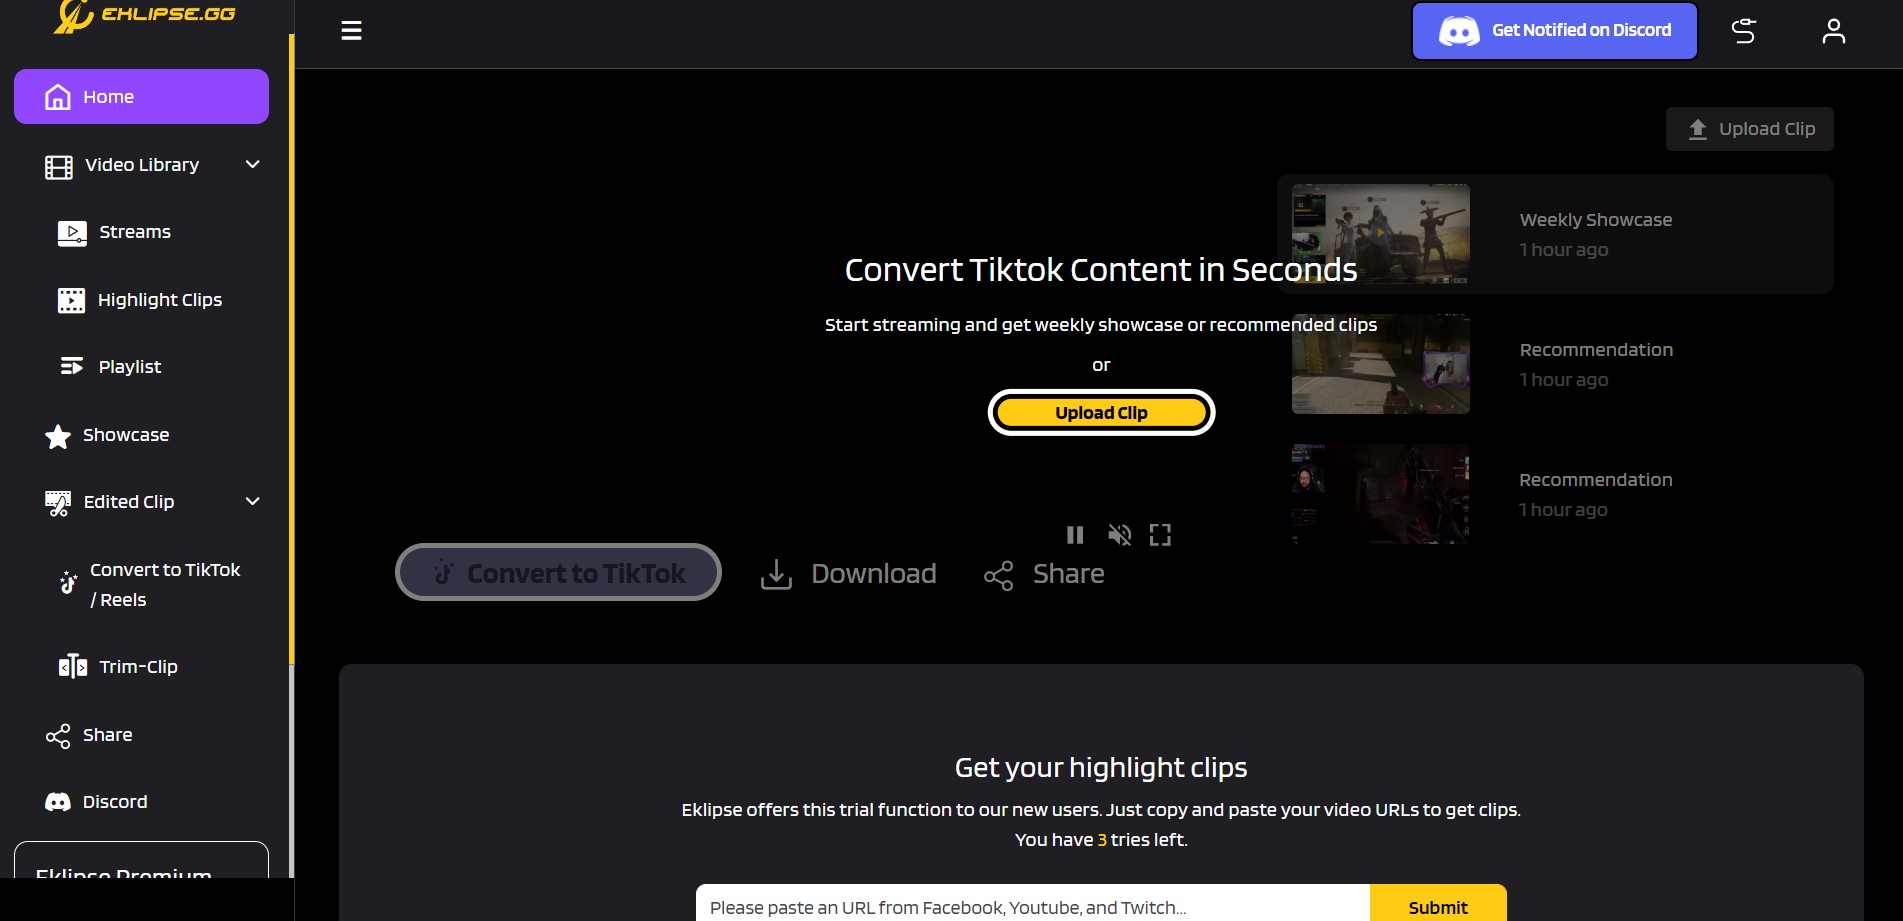
Click Upload Clip menu at the center of homepage
By clicking Upload Clip menu, you will be brought to the Eklipse Studio tools
Insert your clip into the app
You can just put Clip URL into Eklipse, then click Get Clip or you could upload it from your local storage
Choose the TikTok template you want to use
Eklipse has 9 TikTok video templates that you can choose to use. After done choosing, click Continue Editing button on the bottom-right
Select your facecam and game feed area
Make sure your Facecam area and Game feed area are in the right place, since it will affect your video output. You also can trim your video here to select the best moment from your gameplay montage
Customize your video
You can add a music, title, or changing the video layout here
Click Done to go back to the Eklipse app home page
Go to the Convert to TikTok/ Reels on the left sidebar menu
Click Download or Share straight to your social media account
You need to link your TikTok (or Facebook / YouTube) account to Eklipse app for you to use the Share feature
That’s all you need to know on how to use a TikTok video template from Eklipse app. If you need more tips about streaming, you can join Eklipse official Discord community.
Do you want to create a montage for your Call of Duty streams? You’ll need a proper editing or montage maker tool, then. When it comes to editing software, there are hundreds of Call of Duty montage maker you can find all over the internet. Each of them has their specialty and exciting features that is useful to create stunning montage.
You might get a little bit overwhelmed to pick the best one, right? Don’t worry about that since we have already covered 6 best software you can try for amazing montage. So, stay tuned and keep reading the blog.
Eklipse is an AI-generated clip maker that will help you make incredible montages in a flick. What makes this tool special is that you don’t need to do conventional methods such as importing videos from your local library and manually editing them.
All you need to do is just link your Eklipse account with your streaming platforms either YouTube, Twitch, and/or Facebook, and our powerful AI will automatically load your streams. Then, your amazing montage will be ready in a few seconds. Due to this feature, Eklipse can definitely save you so much time and energy to edit your montage.
Aside from that, Eklipse offers users some appealing TikTok templates to help them create stunning clips. Additionally, Eklipse will definitely launch new TikTok Warzone templates soon! Keep your eyes on our blog to see if there’s an update regarding the CoD templates.
Pros:
Beginner friendly and perfect for the advance
Great for creating clips or montages
Free to use
Leave no watermark and ad-free
Automatically import streaming video from the streaming platform
Enables users to convert montage video into TikTok/reel
Allows users to add background music
Cons:
Limited editing features
Doesn’t allow importing video from the local library
It’s very convenient and easy to create video montage from your CoD gameplay using Eklipse. To know more, check out our complete tutorial in this article: How To Make Video Montage: An Eklipse Guide.
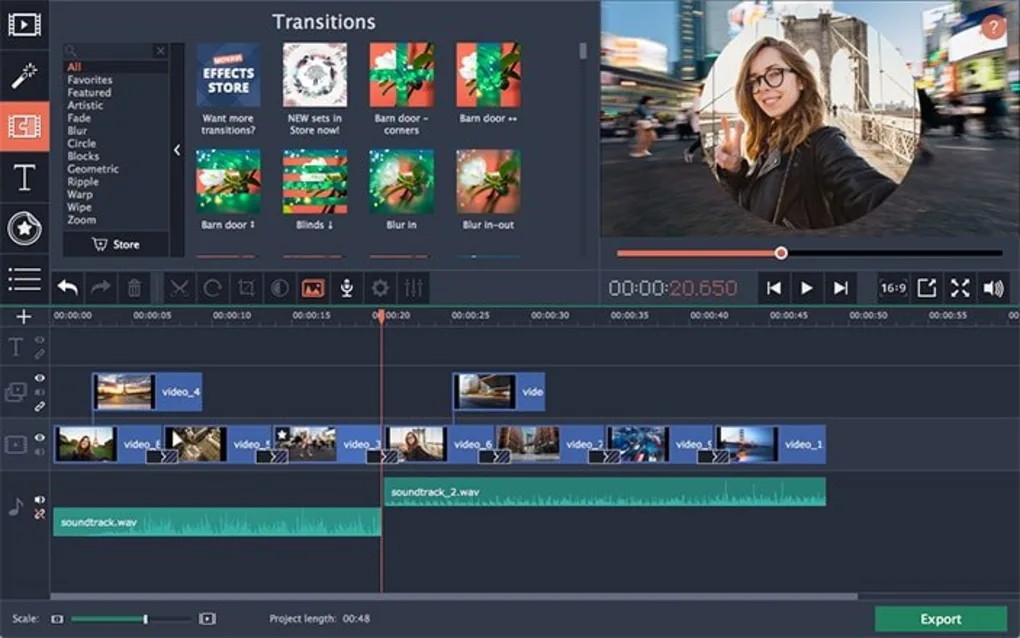
Movavi Video Editor
Source: Softonic
Another montage maker that is quite user-friendly is Movavi Video Editor. This tool has more amazing editing tools you can try. Only by doing the simple drag-and-drop method, you’ll then can try the features.
Movavi offers transition effects, text, zoom-in functions, and more! You can explore your idea in your project to produce excellent montages with 4K quality resolution. That what amazing. Moreover, you can enhance your video quality with more complete features by upgrading your subscription to a basic or plus version.
Pricing plans:
Free
Basic plan: $39.95/ month
Plus plan: $59.95/ month
Pros:
Support 4K resolution video
Offers complete features
Has a modern and friendly interface
Easy to use
Available for Windows and Mac
Cons:
The paid subscription is a bit pricey
Limited features in the free version
Slow rendering process
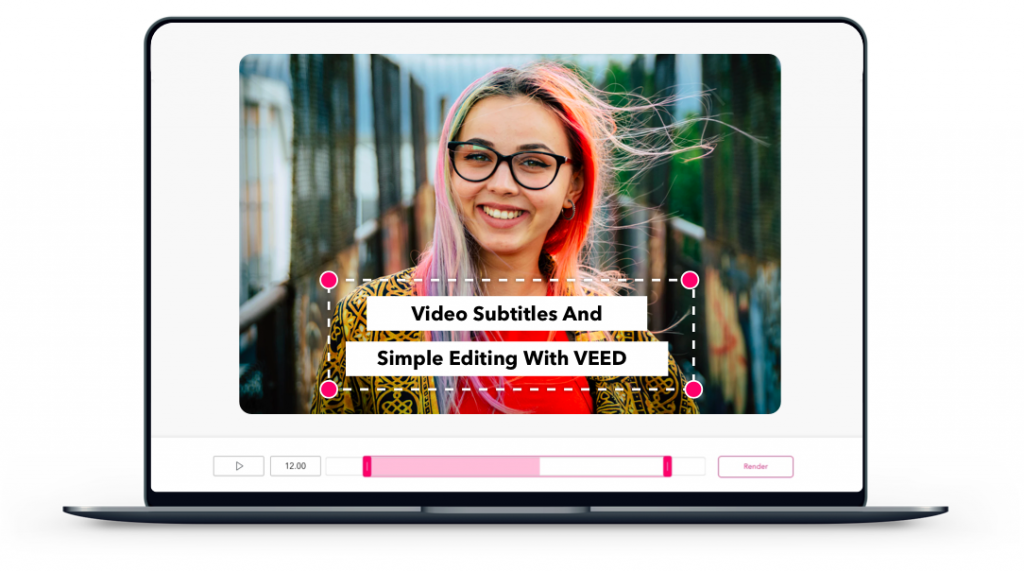
VEED.io: Another Great Call of Duty Montage Maker
Source: VEED
Looking for a tool that enables you to conveniently create montages without downloading bulky software or app? Then VEED.io is the best answer. VEED is a 100% web-based tool that will require a drag-and-drop method to start doing your project.
You can do anything you want using its features. Don’t worry, it won’t take so much of your time to get your montage done. Whether you are a beginner or professional, you’re gonna love this tool.
Pricing plans:
Free
Basic plan: $12/month
Pro plan: $24/month
Business plan: $59/month
Pros:
Product high-resolution video
Offers complete features
Friendly interface and easy to use
Available for Windows and Mac
Web-based tool
Cons:
Watermark in the free version
Limited file size upload
Video Editor for Windows
Source: angloamericancentre.io
A beginner and no editing experience at all? No worries. You can still make awesome gaming montages by using Video Editor for Windows. Basically, this tool is not literally a montage maker since it only has a very standard editing tool.
But that’s fairly enough for a beginner, though. The best thing about this tool is that it’s free to use because it’s built into your operating system.
Pros:
Extremely easy and free to use
Perfect for the beginner in video editing
No need to download or install anything
Cons:
Only provides very basic editing features
Only available in Windows 10
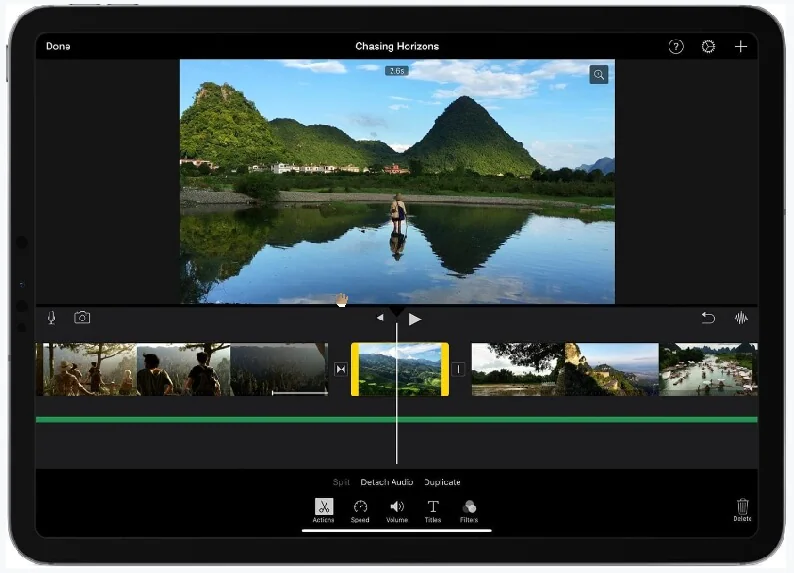
iMovie: Free Call of Duty Montage Maker
Source: Wondershare Democreator
If Windows has default Video Editor, Mac has iMove. It’s similar to Video Editor for Windows, which provides a basic editing tool for beginners.
Unlike Video Editor for Windows, iMovie has a green-screen feature and more tools for a great montage video. As a beginner, you shouldn’t be too confused about using this software.
Pros:
Produces 4K resolution video
Free and super easy to use
Has a greenscreen effect and more features to support your montage
Efficient media organization
Cons:
Take quite some time to proceed with 4K video
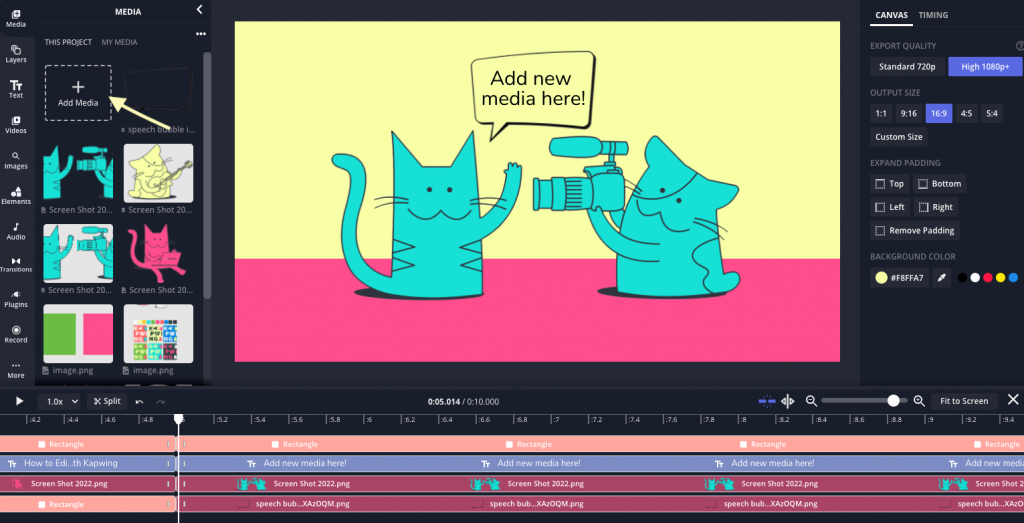
Kapwing
Source: Kapwing
Another popular online montage maker is Kapwing. It’s one of the best time-saving software for creating amazing montage videos. You can try its various features to make your video look cool and convert it into a different format, including GIFs, slideshow, MP4, and even MP3.
The best thing about this software is that Kapwing shows a really cute and attractive interface. And for the beginner, don’t worry about being lost in this software because it’s very easy to use. Again, just do drag-and-drop, make some changes, and voila! Your video is all set.
Pricing plans:
Free
Pro plan: $16/month
Team plan: $16/month
Pros:
Friendly interface and great for amateur and professionals
Doesn’t require you to forcefully install an app
Enables you to directly share the video on social media
Support various video formats
Offers various features
Leaves watermark in free version
Cons:
It somehow reduces the video quality output
A bit costly for beginners
Conclusion
So, that’s all about the list of Call of Duty montage maker that probably fit your needs. According to the list above, which one do you think is the best? Would you try Eklipse as the most convenient tool to create stunning montages? Or do you have another option? Please give your thought in the comment section below.
If you are on your way to growing your Twitch channel, you may realize that expanding your content marketing to other social media is necessary. It’s including sharing your content on YouTube. However, you need to learn how to edit Twitch videos for YouTube first to make them more catchy.
Luckily, you have headed to the right place. This article will show you how to edit stream videos to post on YouTube later using our tool, Eklipse. We promise you it won’t be as time-consuming as other tools you have tried.
Without further ado, let’s just jump right into the tutorial.
How to Edit Twitch Videos for YouTube Using Eklipse
Transforming your Twitch stream video to be cooler in seconds isn’t impossible with Eklipse. Our powerful AI will let you relax while your video is on its way to your hands. Here’s how to use the tool.
To begin with, go to the Eklipse website or simply hit the following button, and log in to your account.
In case you don’t have the account yet, just register using your email, Twitch, or Facebook account.
After that, hit the cable icon at the upper right side to connect your Eklipse account with your Twitch.
The AI then will load all your Twitch streams automatically so you can simply choose which one you’d like to edit.
To find them, simply head to the Streams tab under the Video Library option, and navigate to the All Streams section.
Pick any streaming video and click on the Get Clip button.
Then, you’ll get a bunch of short video options you can choose from.
Once you’ve picked the clip, you can either trim it, download it, or even share it to your social media like Facebook, TikTok, and YouTube directly by clicking the Share button. Yes, you don’t need to learn how to upload Twitch streams to YouTube
Lastly, to preserve your video clip without downloading it, simply add them to Eklipse Playlist.
If you want to export your Twitch stream directly to YouTube, you can check out our other guide by clicking the link below:
Wondering if to turn your clip to be TikTok/Reel/YouTube Shorts friendly? Eklipse has got you covered. No need for another Twitch clip editor for TikTok since everything is available on Eklipse.
Adjust your feed area and your clip length. Once finished, hit the Next button.
Add a cool soundtrack by navigating to the Add Music section and choosing the copyright-free music from the Eklipse library and hitting Select Music.
Select the music part you want to use on your video, as well as the length of the track.
Adjust the audio and music volume on the right side of the screen and click Confirm.
Find your video under the Edited Clips option on the homepage and share it on other social media.
Conclusion
Now that you can edit videos for YouTube effortlessly with Eklipse, why don’t you give it a shot?
You can save so much of your time and have cool clips to share on your social media. Hopefully, this strategy will help you attract more eyeballs for your content. Good luck!