Are you struggling with OBS game capture not working and encountering an annoying black screen while trying to capture gameplay? Fear not, as we have the perfect solutions for you.
In this article, we will present you with five highly effective methods to tackle the OBS game capture black screen problem.
By implementing these strategies, you’ll be able to capture your gameplay smoothly and bid farewell to the frustrating black screen issue.
So, let’s delve into the solutions and get your game capture up and running flawlessly!
Maximize your Black Ops 6 rewards—Create highlights from your best gameplay with with Eklipse
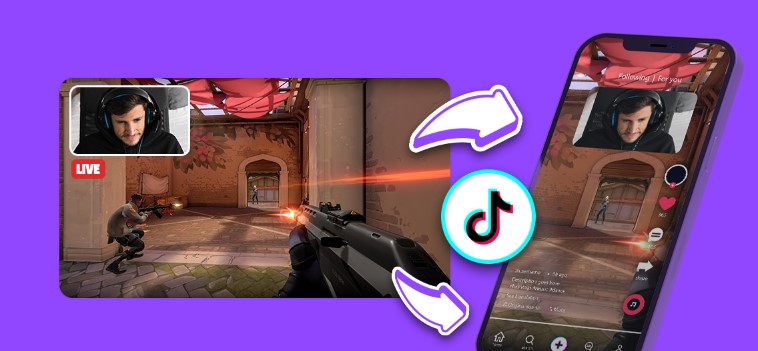
Eklipse help streamer improve their social media presence with AI highlights that clip your Twitch / Kick streams automatically & converts them to TikTok / Reels / Shorts
To begin, it’s essential to opt for the Game Capture mode in OBS, specifically selecting a specific window instead of alternative capturing methods.
This step is crucial because certain game software may not display correctly when captured in full-screen mode. Follow the instructions below to configure this setting precisely:
How to Choose Game Capture with Specific Window
Launch OBS.
Instead of using “Game Capture” select the “Window Capture” option.
Choose the window of your game
Right-click on the source dock and choose “Transform,” followed by “Reset Transform.”
Click the Transform button again and select “Center to screen.”
2. Run OBS as Administrator
If you’re experiencing a black screen issue while capturing games with OBS, it’s possible that OBS is being blocked.
To overcome this obstacle, running OBS as an administrator is crucial. By granting OBS administrative privileges, you ensure smooth game capture without any hindrances. Here are two simple methods to achieve this:
How to Run OBS as Administrator
Method 1: Locate the OBS Studio icon, right-click on it, and choose “Run as administrator.”
Method 2: Right-click on the OBS Studio icon, select “Properties,” go to the “Compatibility” tab, and enable the “Run this program as an administrator” option.
After running OBS as an administrator, restart OBS Studio and verify if you can now capture gameplay without encountering the black screen issue.
It’s worth noting that this method also applies to resolving issues related to capturing game audio in OBS, as capturing game audio also necessitates administrative privileges.
3. Switch GPU
Another possible cause for OBS recording a black screen is when your computer utilizes two GPUs: dedicated and integrated graphics cards.
If OBS Studio is set to use the integrated GPU while the game software relies on the dedicated GPU, it results in the black screen problem. To resolve this, you need to adjust the GPU settings in OBS Studio accordingly.
How to Switch GPU to fix Game Capture not Working on OBS
Locate OBS Studio among the listed applications on your desktop.
Click the “Options” button
Choose “High performance”
Set it as the dedicated graphics card. (Ex: NVidia RTX 3060)
Save the changes, restart your computer, and launch OBS Studio.
4. Enable Compatibility Mode
Compatibility issues can also lead to the OBS game capture black screen problem. In such cases, enabling compatibility mode can be an effective solution. Here’s how you can enable compatibility mode to fix OBS not capturing the game:
How to Enable Compatibility Mode to fix Game Capture not Working on OBS
Right-click on the OBS icon on your desktop.
Select Properties” from the context menu to open the OBS Studio Properties window.
Navigate to the “Compatibility” tab within the Properties window.
Enable the “Run this program in compatibility mode for” option.
Click the dropdown menu and select the appropriate operating system.
Click “Apply” to save the changes.
Restart OBS Studio and check if the black screen issue while capturing the game has been resolved.
Conclusion
In conclusion, capturing gameplay videos with OBS can be frustrating when the game capture is not working and encountering the black screen issue.
However, there are four methods outlined in this article that you can try to overcome this problem and enjoy seamless game capture.
Next Thing After Fixing Your OBS
After fixing your game capture, now it’s time to take your streaming journey to the next level!
Look no further than Eklipse, an innovative AI highlight generatordesigned to help streamers grow their presence on social media platforms.
Eklipse automatically clips your live stream content and converts it into captivating TikTok videos, that enable you to expand your reach and engage with a wider audience.
Since the game is notoriously difficult, you’ll be needing Elden Ring cheats to help you go through some missions. Elden ring cheat engine work to make your gaming experience a lot easier, by adding more health, upgrading items, or even to level up.
However, the cheat codes are not similar to the GTA Vice City cheats or maybe other games where you can just type the codes from your keyboard, but you need a cheat engine instead.
But do not worry, because in this article we are going to give you a guide about how to use the cheats, and even how to install the cheat mod or cheat engine. Without any further ado, let’s just start the discussion.
Can you use cheats while playing Elden Ring? Yes, you can. But since game cheating is considered for being an illegal thing, this cheating is only available for offline versions. If you try to activate the cheats while you are online, the system will detect it and ban you instantly for several days.
Additionally, since Elden Ring doesn’t have built-in cheat codes, you need to use the outside mods from any site. One thing that is necessary to note is some of the mods will require an additional app called Cheat Engine.
Have got confused yet? Let’s go to the next section to know how to get and operate the cheats mod, along with Elden Ring cheat engine.
How To Install Elden Ring Cheats Mod
To be able to use the cheats in this game, you need to download some cheat mods from reliable sites such as NexusMods or anything else. Here is the step by step on how you install the mod.
First of all, go to the official website of NexusMods.
Second, find the Elden Ring’s cheat table from the website and download it.
Disable the Elden Ring’s Anti-cheat setting by heading to the steam install folder.
Once you find the specified folder, rename the “start_protected_game.exe” folder to something else. Do not worry, you can still change it back.
Then, find another folder with the name “eldenring.exe” to “start_protected_game.exe” to replace the original Easy Anti-cheat launcher.
Until this session, your game is supposed to run offline.
Just in case it doesn’t happen, you can close the game and run the Steam in offline mode.
After that, you can start to run the cheat table and attach it to the folder named “start_protected_game.exe”.
The table will perform typical CheatEngine-y functions, and you can edit the stats, equipment, or anything.
Though you can activate the codes instantly from the cheat table, you’ll also need the ID codes to cheat for any various weapons, gear, Sites of Grace, or even new armour. Do not worry, the Elden Ring IDs have already been available.
Unleashing the Power of Elden Ring Cheat Engine
Prepare to embark on an extraordinary journey through the vast and treacherous world of Elden Ring. But wait, what if you could shape this world to your liking? With the mighty Elden Ring Cheat Engine at your command, you hold the power to unleash a realm of endless possibilities. Let’s delve into the incredible features and functionalities that make this cheat engine an indispensable tool for intrepid gamers like yourself.
Difficulty Adjustments
The Elden Ring Cheat Engine grants you the ability to tweak the game’s difficulty settings, catering to your skill level and preferences. Whether you crave an adrenaline-pumping challenge or seek a more relaxed experience to soak in the game’s rich lore, the cheat engine lets you fine-tune the difficulty to your heart’s content. No more feeling stuck or overwhelmed – conquer the game on your own terms.
Unlocking Hidden Content
Are you a seeker of secrets and a treasure hunter extraordinaire? The Elden Ring Cheat Engine has your back. With its help, you can reveal hidden content that lies dormant within the game’s depths. Unlock mysterious areas, discover clandestine paths, and unearth rare items that may otherwise remain forever out of reach. Become the ultimate explorer and unveil the enigmatic wonders that Elden Ring conceals.
Character Customization
Every hero needs their own unique identity, and the Elden Ring Cheat Engine enables you to forge your character into a true legend. With a few clicks, you can tweak character attributes, alter appearances, and even modify abilities to suit your desired playstyle. Unleash your creativity and fashion a hero that embodies your vision. Stand out among the heroes of Elden Ring with a character that is truly one-of-a-kind.
Enhanced Gameplay Mechanics
Are you yearning for a taste of power beyond the game’s natural constraints? The Elden Ring Cheat Engine empowers you to modify specific gameplay mechanics, enhancing your overall experience. Increase your movement speed to traverse the realm swiftly or fine-tune combat mechanics to sharpen your skills in battle. With the cheat engine, you can transcend the boundaries of the ordinary and embrace a gameplay experience that is uniquely tailored to you.
Expanding Modding Capabilities
If you’re a fan of tinkering and a creator at heart, the Elden Ring Cheat Engine opens up a realm of limitless possibilities. It provides a platform for modding, allowing you to create and share your own custom content. Craft new weapons, design awe-inspiring levels, or introduce innovative gameplay mechanics – the choice is yours. Join the vibrant modding community and leave your mark on the world of Elden Ring.
Conclusion
So, that’s all about Elden Ring cheats that you can try to use during the game. However, before you decide to use it in the game, make sure that you are ready to face any risks of this. In addition to that, do not forget to re-enable the Easy Anti-Cheat if you want to play the game online. All you need to do is undo the steps in reverse.
Picture this: you’re immersed in the thrilling world of Valorant, dodging bullets, strategizing with your team, and aiming for victory. But wait, there’s something missing… that extra touch of personalization that makes your gaming experience truly unique. Enter Valorant Pride Codes!
Valorant Pride Codes are more than just a bunch of random letters and numbers. They are your passport to a world of diversity, inclusivity, and unapologetic self-expression. These special in-game redeemable codes celebrate the LGBTQ+ community and all its vibrant colors, allowing players like you to unleash their creativity and stand proudly on the virtual battlegrounds.
Valorant has a thriving player base and an intense esports scene. The 15 agents are what make up the variety of characters that players get to pick from before entering into a 5v5 match, all with unique abilities they can use in different ways against opponents to achieve victory!
If you’re looking for a game that offers an excellent gameplay experience, with one of the best in-game items and cosmetic collections out there at this moment including weapon skins, player cards ornaments and more then Valorant might be what you need.
Not only does it have these great cosmetic items but also some other really cool stuff like battle pass which give players a new way to unlock cosmetics by playing the game.
Since Riot Games releases various codes from time to time, players have a chance of getting free player cards and titles.
Valorant redeem codes are the best way to get your hands on exclusive cards and titles. Redeem them before they’re gone!
If you’re a Twitch user, you’ve probably come across the term “bits” before. But what are they? Bits are important either for viewers or streamers.
As a viewer, bits will make the donation process more engaging. Meanwhile, streamers themselves wanted to receive Twitch bits since that is one of their sources of income.
In this article, we’ll take a look at what bits are on Twitch and how they can be used to support your favorite streamer.
We also have some tips for you who are just started streaming to unlock bits for your channel, so make sure to read this article till the end!
Bits are a virtual currency that can be used by Twitch users to support their favorite streamers. They can be used to Cheer in chat, which is a way of showing your support for the streamer.
Cheering with bits also allows you to unlock emoticons, badges, and more for the viewers, just like when subscription unlocking special emotes for the chat.
How Much Are Twitch Bits Worth?
Since bits are virtual currency, so it can be purchased with real money – and they’re worth around 1 cent each. So, if you Cheer 100 bits, that’ll be around $1 the streamer received. To calculate it without using Twitch bits calculator, check out the table below to know the conversion from bits to USD.
Bits
Cost (USD)
100
1.40
500
7.00
1,500
19.95
5,000
64.40
10,000
126.00
25,000
308.00
Bits to USD conversion
If you want to find out more about 10000 bits on Twitch and other related information, you can check out this post for all the details right now: How Much is 10000 Bits on Twitch?
Bits can be earned for free by watching ads or completing certain tasks. For example, you may watch an ad to earn bits. Generally, you may receive between 5-10 Bits for watching short ads. The amount earned is considerably low, since you need at least 100 bits to cheer a streamer. Some channels even prevent bit cheers below a certain amount, which makes the number of free bits can be considered even lower.
Click Get Bits in the upper right corner of the video player.
Click Buy and select the bundle of bits you wish to purchase.
Choose your desired payment method.
Continue your payment process.
Once your purchase is successful, your bits are immediately available for use!
How to Unlock Bits on Twitch
Since Twitch bits are also streamer’s source of income, it’s important for them to unlock this feature so you can start earning bits from viewers. To unlock bits on Twitch, you need to either be a Twitch partner or affiliate, with the requirements as follows:
Stream for at least 25 hours in a 30-day period
Stream for at least 12 different days in a 30-day period
Get an average of at least 75 viewers on your streams in those same 30 days
Once you qualify, you will unlock Path to Affiliate achievement and will be notified through notifications and via email.
By accepting the invite, you will be able to get subs and bits. After that, subscribe button will appear on your channel, indicating that you are ready to receive bits or subscription from viewers.
Tips to Unlock Bits on Twitch as a Streamer
One thing that you can do to attract and gather more audiences is by sharing your Twitch clips on social media, especially TikTok.
Creating TikTok content from your stream might sound like a demanding task to do. You need to download your stream first, choose the clips from it, and resize it to the TikTok format. Luckily, there are tools that can save you time and energy, it’s called Eklipse.gg!
Maximize your Black Ops 6 rewards—Create highlights from your best gameplay with with Eklipse
Eklipse help streamer improve their social media presence with AI highlights that clip your Twitch / Kick streams automatically & converts them to TikTok / Reels / Shorts
If you are feeling adventurous and want to try Eklipse to start convert your Twitch content to TikTok (or any other social media) you can follow these simple steps.
You can sign-up with Twitch or you can create an account manually using email, all for FREE.
Click Upload Clip menu at the center of homepage.
By clicking Upload Clip menu, you will be brought to the Eklipse Studio tools.
Insert your clip into the app.
You can just put Clip URL into Eklipse, click Get Clip, or upload it from your local storage. – If you insert a YouTube video URL, ensure the video duration is under 2 minutes long. – For manual clip upload, your video needs to be maximum 100MB in size and 5 minutes in duration.
Choose TikTok template you want to use.
Eklipse has 9 TikTok video templates that you can use for FREE. – After done choosing, click Continue Editing button.
Select your facecam and game feed area.
Make sure your facecam and game feed area are in the right place since it will affect your video output. You can also trim your video here to select the best moment from your gameplay montage.
Customize the video all you want
You can change your output settings, add music, or try our latest feature, add channel name sticker!
Go to Edited Clip > Convert to TikTok/ Reels on the left sidebar menu.
Click Download or Share straight to your social media account.
You can download your clip to share it as Instagram Reels, or you can share it to Facebook, directly from Eklipse.
Limitations and Restrictions
When it comes to using Twitch Bits, there are a few limitations and restrictions that users should keep in mind:
Geographic Restrictions: The use of Twitch Bits may be restricted in certain countries due to legal or regulatory reasons. In some cases, users may be unable to purchase or use Bits at all, while in others they may be subject to specific usage guidelines.
Maximum Donation Amount: There is a limit to the amount of Twitch Bits that can be donated to a streamer at one time. Currently, the maximum donation is 10,000 Bits, which is equivalent to $100 USD.
Usage Guidelines: Twitch has specific guidelines on how Bits can be used on the platform. For example, they cannot be used for illegal activities or to promote hate speech or harassment. Users who violate these guidelines may have their Twitch account suspended or terminated.
Conversion Rates: The conversion rate of Twitch Bits to real-world currency may vary depending on the user’s location and currency. Users should be aware of the conversion rates before purchasing or using Twitch Bits.
Conclusions
So, that’s your answer to a question about what are bits on Twitch, an important features for viewers or streamer to create an engagement on stream. We also have guided you on how to getbits on Twitch that you can try right away.
Don’t forget to share this article on your social media if you find it helpful!
The latest Cizzorz deathrun code is here! Cizzorz, a Fortnite YouTuber, is well-known for his expertise as well as his deathruns and other innovative maps.
Usually, he organizes an event when he announces a brand-new deathrun, and the fastest runners are rewarded handsomely. This can significantly increase the amount of competition on the maps.
This article contains a list of all the creative maps in Fortnite, including deathruns, published by Cizzorz. This post will be updated as Cizzorz creates another map.
Twitch stream team is a feature that allows you to create a group of streamers to collaborate. They go by unique names and find ways to support each other in overall channel growth. So how to make a Twitch team?
Twitch teams are a great way to connect with other streamers, collaborate on content, and build a community around your shared interests. If you’re thinking about creating a Twitch team, there are a few things you need to know.
In this article, we’ll provide you with a complete guide on how to make a Twitch team. We’ll cover everything from choosing the right members to promoting your team and building a community. So whether you’re just starting out or you’re a seasoned streamer, this guide is sure to help you create a successful Twitch team.
Finding other streamers with the same interests as you are the easy part. The trickier part is coordinating with each other and solving any technical issues that may arise. In this article, we’ll first elaborate on what a Twitch team is, how to create one, and what to do with it.
Now that we’ve got your attention, what is a Twitch Team? A Twitch Team is a collective of streamers on the platform who have been streaming for some time, share the same interests, and want to band together.
Streamers can either create their own Team or join a pre-existing one. All that is needed is to have a multitude of streamers under the same group name. Each Team will have its own URL on Twitch, with member profiles. and also elaborate on each team member.
What do you need?
You will, first and foremost, have to create a Twitch account (obviously). Now that you’re on Twitch, there is only one major prerequisite to creating a Twitch Team, which is that the founder must be a Twitch Partner.
Step 2: Send an email with the following information:
Your Team Name
Team Initials/Nickname/Screen name
Your Team’s preferred URL
Step 2: Choose the main account that will be responsible for leading the Team. Bear in mind, this person MUST be a Twitch Partner. Step 3: Wait for approval.
Once you are notified that Twitch has approved your Team request, you can go ahead and onvite new members! Additionally, you can then change the team’s information among other things.
How to Make a Team on Twitch Without Partner Status
Actually … you can hack your way to create a Twitch team even without Partner status. You can try the following methods to start making a team on Twitch without Partner status:
Option 1: Reach out to partnered streamers on Facebook groups
Reaching out other Twitch streamers is your great bet to make a team on Twitch without the Partner status, and Facebook Groups is a great place to find it. There is a group named Twitch Streamers and Networking (TSAN) on Facebook – according to many sources, that group has the most helpful community and many streamers with Twitch Partner status.
Try to reach them out, and initiate an idea to co-create a stream team with them!
Option 2: Reach out to partnered streamers on the Reddit Twitch forums
Reddit is another place for you to find a like-minded person, and a possible “co-founder” for you to start creating your Twitch team. Many streamers feel this as a means of giving back to the community by helping to answer the questions of new streamers on r/Twitch forum.
Just try it on, who knows? You may catch a break there!
Option 3: Ask a streamer you’re a fan on through their Discord channel
The last option that you can try is through the Discord channel. Often partnered streamers are interested in creating Twitch teams but, don’t have the time to personally build or manage them.
You might get lucky on this, try to offer your help to do the setup and management it may just be the perfect match!
How To Find A Twitch Team
So what if you’re not a Twitch Partner, but want to join a Team. How do you look for someone to send you an invite? Well, a bit of searching and a bit of luck go a long way!
Be an active member on Discord Channels featuring Streamers.
Start or Join a Team?
Provided that you’re a Twitch Partner, is it better to start your own Team or join a preexisting one? Well that depends on how much responsibility you’re willing to take on.
With your own team, you’ll be in charge of coordinating with your team members, moderating the Team and finding ways to market yourselves. If you join an existing Team, you’re free of all those responsibilities.
Since you need a Twitch Partner, so you’ll need to grow the channel to a certain point so eventually, you can create your own stream team. Maybe you can try start to share your clip on social media, to attract new viewers to your channel.
Wanted an easy way to create content and grow your stream channel? Try Eklipse.gg!
Eklipse.gg is an AI highlight generator that will automatically create highlights from your stream, and can convert a Twitch stream to a TikTok format! Go give it a try by clicking the link below:
Maximize your Black Ops 6 rewards—Create highlights from your best gameplay with with Eklipse
Eklipse help streamer improve their social media presence with AI highlights that clip your Twitch / Kick streams automatically & converts them to TikTok / Reels / Shorts
If you’re Team Leader, you can change the team as you see fit. Follow the steps below;
Visit the account linked to the Team.
Click on the avatar in the top corner of the screen.
In the drop-down menu, click ‘Settings’.
Go to the ‘Channel and Videos’ section.
The tab ‘My Teams’ will include all the teams you are a part of
Click on the team you want to moderate
Click the ‘Edit’ button to access the team dashboard.
Make any changes as you see fit – including adding new members, or remove the existing ones.
Building Your Twitch Team
If you’re looking to build a Twitch team, here are some strategies and tips to help you recruit members, build a diverse and inclusive team, and manage your team effectively:
1. Recruiting members for your Twitch team:
Reach out to other streamers and content creators who share your interests and values
Attend gaming events and conferences to meet potential team members in person
Use social media and online communities to connect with other streamers and content creators
Offer incentives or benefits for joining your Twitch team, such as exposure or collaboration opportunities
2. Building a diverse and inclusive team:
Set a clear mission statement and values for your Twitch team that reflect diversity, inclusivity, and positivity
Be intentional about recruiting members from a variety of backgrounds and identities
Foster a supportive and inclusive team culture that celebrates differences and encourages collaboration
3. Managing and communicating with your Twitch team:
Set clear expectations and goals for your team, such as streaming schedules, content focus, and branding guidelines
Establish a regular communication plan to keep your team members informed and engaged
Provide constructive feedback and support to help your team members improve their content and grow their audience
Recognize and celebrate your team members’ achievements and milestones to build morale and motivation
Using Eklipse.gg’s Software to Promote Your Twitch Team
If you’re looking to promote your Twitch team and attract more viewers and followers, Eklipse.gg’s software can help you turn your Twitch clips into shareable content that showcases your team’s best moments and enhances your branding and marketing efforts. Here’s how:
1. Introducing Eklipse.gg’s software:
Eklipse.gg’s software is an AI-powered tool that analyzes your Twitch clips and turns them into short, shareable videos that capture the excitement of your gameplay and highlight your team’s best moments
The software includes features such as custom captions, AI-powered editing tools, and custom thumbnails to make your videos more engaging and professional-looking
By using Eklipse.gg’s software, you can create videos that showcase your Twitch team’s brand and identity, and help you stand out in the crowded Twitch community
2. Using Eklipse.gg’s software to promote your Twitch team:
Upload your Twitch clips to Eklipse.gg’s software and choose the parts you want to include in your video
Use Eklipse.gg’s editing tools to add captions, subtitles, and other custom features to your video
Share your video on social media and other platforms to attract more viewers and followers to your Twitch team
3. Examples of how Eklipse.gg’s software can help enhance your Twitch team’s branding and marketing efforts:
Use Eklipse.gg’s software to create a highlight reel of your team’s best moments that showcases your team’s brand and identity
Create custom thumbnails that feature your team’s logo and branding to make your videos more eye-catching and recognizable
Use Eklipse.gg’s AI-powered editing tools to create polished and professional-looking videos that reflect your team’s professionalism and dedication
Conclusion
Now that you’re equipped with the knowledge on how to make a stream team Twitch (or join one), you’re more than ready to move up the ranks! If you’re a Twitch streamer looking to get the best highlights from your streams, look no further than Eklipse! Our AI tool can extract the moments such as epic kills, hilarious shenanigans, and more with the click of a button!
Follow our other guides in order to level up your Twitch streaming today!
Playing Xbox games – such as Call of Duty – is fun, but it feels like a waste if you don’t share your sharp gameplay to the internet. That’s why some of you might ask on how to stream YouTube on Xbox. It’s basically quite easy to do, but some people still need extra devices to easily capture their gameplay from Xbox to stream it on YouTube.
Nevertheless, you don’t need to worry about that. There are other ways that allow you to live stream YouTube on Xbox without an extra device. So, rather than keep dragging on, let’s check out this guide by Eklipse’s blog team so you can start show your gameplay from Xbox to YouTube!
As one of gaming consoles, Xbox allows you to do many things, including watch movies or TV, listen to music, and even do live streaming. If you want to start a Twitch stream through Xbox, you can just do it via the Twitch app. However, you can’t go live on YouTube through Xbox by connecting them directly without further intervention.
Therefore, you need some help to be able to start a YouTube live streaming from Xbox. You can either need Xbox Console Companion or a capture card. Whichever way you are going to choose, you can get the guide here.
To begin with, turn on your Xbox console, and go to the Settings menu.
Click on the Preferences tab, then select the Xbox App Connection menu.
You’ll find the Other devices option, and now check to Allow connection through all devices under that option.
Then, under This Xbox option, check to Allow streaming playback and Allow game streaming to other devices.
Next, start your PC and open Xbox Console Companion app in Windows.
Log in to your Microsoft account. This is also your Xbox account.
Then, click the hamburger icon menu on the left side of the page.
Under the menu, you’ll find the Connection tab, and click it.
Since you have set your Xbox console, now a pop-up window will appear and show your Xbox directly. Otherwise, if your Xbox is still off, it won’t be on that list.
After seeing your Xbox console, hit the Connect button next to it to connect your console to your PC.
If you successfully connect your Xbox to your PC, it will appear in the overview.
Next, hit Stream at the top corner of the page to make the Xbox screen displayed on your PC.
2. Setting Up the Stream
Now is time to set up your game recording scene using OBS Studio. Here’s how.
Find the Scene panel at the bottom left and hit the ‘+’ button.
There will appear an Add Scene box where you can name the scene, and click OK.
Then, hit the ‘+’ button in the Sources panel next to the Scene panel.
Select Game Capture, then select Create New as well as Make source visible, then click OK.
On the setup page, set Capture Specific Window for Mode. As for Windows, choose Xbox Console Companion.
After that, press OK.
Just in case you don’t see your Xbox screen, do a right-click Game Capture in the Sources panel. Then, select Transform > Center to Screen.
Next, navigate to the Setting menu (the gear icon) and go to General > Volume & audio output.
Go to Party chat output > select Headset or Headset and Speakers.
After that, hit Settings and click Stream.
For the Service, select YouTube and enter the stream key, and hit OK.
Finally, you are now able to stream YouTube from your Xbox console.
3. How to Live Stream on YouTube on Xbox With a Capture Card
Another alternative way to stream to YouTube from Xbox is by using the capture card. This device can allow you to connect the consoles to the PC directly. Additionally, it lets you stream your content to YouTube and other streaming platforms such as Twitch, or Facebook Gaming.
However, it may be quite expensive to purchase this device. But if you have owned this, let’s see how to operate it.
4. Connecting PC and Xbox Console With Capture Card
Make sure you launched OBS Studio and capture card software on your PC.
Secondly, connect your Xbox console to PC by using a capture card.
Open the capture card software on your PC, and now you are supposed to see your Xbox screen there.
Now, you can start to open the OBS Studio and open YouTube homepage and set up a stream and select Streaming Software.
Then, in the overview, you’ll find the stream key. Click on Copy and head back to your OBS.
5. Setting Up the Streaming Software
Ppen the OBS Studio app on your PC.
Find the Scene panel at the bottom left of the screen and hit the ‘+’ button.
There will appear an Add Scene box where you can name the scene, and click OK.
Then, hit the ‘+’ button in the Sources panel next to the Scene panel.
Select a Video capture device, then choose your Capture Card as the device to record your streaming.
After that, head to Settings and click Stream. Select YouTube as the platform and paste the copied stream key there.
Finally, you can now stream to YouTube with your Xbox using a capture card.
How to Stream on YouTube from Xbox Without Capture Card
If your Xbox is on the same network as your PC, you can directly connect the console to your PC to start a live stream on YouTube. The best thing about this method is that you don’t need any additional hardware such as a capture card . However, you will need to install Xbox Console Companion or Xbox app and OBS Studio on your PC. Once you launched them, now let’s move to the complete guide.
Going Live
When it comes to going live on YouTube Xbox, there are a few key things to keep in mind to attract viewers and build your audience:
1. Promote your stream
Use social media platforms like Twitter, Instagram, and Facebook to create engaging posts with a link to your stream. Join gaming communities and forums related to Fortnite and share your stream there.
2. Choose a catchy title and description
Your title should be attention-grabbing, while your description should provide more details about what you’ll be doing in the game and what viewers can expect from your stream.
3. Set your stream to public or private
If you want to attract as many viewers as possible, set your stream to public. If you want to limit your audience to a specific group of people or have privacy concerns, set it to private.
4. Share your Twitch clips with Eklipse.gg‘s software
Turn your best Twitch moments into shareable content that can be posted on Instagram, Twitter, and other platforms to attract more viewers and showcase your skills.
By following these tips, you can make your stream stand out and attract a larger audience, engage with your viewers, and establish yourself as a top Fortnite streamer. So don’t hesitate to go live and show the world what you’re made of!
Conclusion
Learning how to stream YouTube on Xbox is actually simple. You can pick whichever way you like. However, the thing that is worth noting is when you want to connect Xbox to PC without a capture card, make sure that both of the devices are in the same network. Besides, connect both devices to the router using a network cable to achieve ideal quality.
If you just start streaming and thinking to grow more your channel, you should try Eklipse.gg!
Eklipse.gg is an AI highlight generator that will automatically create highlights from your stream. Even better, it can convert a stream to a TikTok vertical video format! Go try out Eklipse by clicking the button below!
Streaming on Twitch is a fantastic way to connect with your audience and share your passions. However building a top-notch setup can be expensive, and webcams are often a significant cost factor.
Fear not! This guide unlocks the hidden potential within your pocket: your phone’s powerful camera. With the right app and a few simple steps, you can transform your phone into a high-quality webcam alternative.
This not only saves you money but also takes your Twitch streams to the next level. We’ll walk you through the entire process, ensuring a seamless transition from traditional webcams to your phone. Let’s dive in and unlock the hidden potential of your phone as a webcam!
Are you looking to turn your phone into a webcam? This comprehensive guide will walk you through the process. It’s a cost-effective solution for starting your Twitch stream without investing in specialized streaming equipment like a professional webcam. To achieve this, you’ll need to follow six straightforward steps.
Before exploring the world of phone-as-webcam, you’ll need to select the app that best fits your requirements. Here’s a summary of the top options available for both Android and iPhone users.
Step 1: Choose the App
Source: Elgato
EpocCam: Offers a user-friendly interface with smooth integration for both Android and iPhone. It supports various resolutions, including 1080p Full HD.
iVCam: Another excellent option for both Android and iPhone users, iVCam boasts additional features like adjustable camera settings for optimal stream quality.
DroidCam (Android): Designed for Android, DroidCam provides a simple setup process with wired and wireless connection options.
NDI HX Camera: Ideal for live streaming and videography, this app turns your phone into a wireless webcam for NDI-supported equipment on the same network.
iVcam Webcam (bonus): This app includes a built-in camera roll, adjustable resolution up to 1080p, automatic low-light correction, and even document camera functionality.
Consider factors like additional features, ease of use, and compatibility with your device when making your choice.
Step 2: Install the App and Drivers
Source: Google Play
Once you’ve selected your champion app, it’s installation time!
Android: Head to the Google Play Store, search for your chosen app, and install it on your phone.
iPhone: Visit the App Store, search for the selected app, and install it on your iPhone.
Most webcam apps provide the necessary drivers on their official websites. Download and install the appropriate drivers for your computer’s operating system to ensure smooth operation.
Step 3: Launch the App on Your Phone
With the app installed and drivers downloaded, launch the app on your phone. Make sure both your phone and computer are connected to the same Wi-Fi network for a seamless connection.
Android: Open the app to find a Wi-Fi IP address displayed on the screen.
iPhone: Launch the app, and it should automatically detect your computer on the same network.
Step 4: Connect Your Phone to Your Computer
To establish a connection between your phone and computer, follow these instructions:
Android Users: Open the app on your phone, and you’ll find a Wi-Fi IP address displayed on the screen.
iPhone Users: Launch the app on your iPhone, and it will automatically detect your computer.
Step 5: Connect Your Phone to OBS or Streaming Software
Source: Microsoft
To use your phone as a webcam with OBS or other streaming software, follow these steps:
Open OBS or Your Preferred Streaming Software: Launch OBS or the streaming software you typically use for your Twitch streams.
Add a New Video Capture Device: In OBS, click the “+” button under the “Sources” section to add a new source. Select “Video Capture Device” from the options.
Name Your Source: Give the source a descriptive name, such as “Phone Webcam” or something similar.
Select Your Phone as the Video Device: Choose your phone as the video device by selecting it from the dropdown menu.
Configure Video Settings: Adjust the video settings as needed, such as resolution, frame rate, and video format. It’s recommended to use a resolution that balances quality and performance for smooth streaming.
Configure Audio Settings (if desired): If you want to use your phone’s microphone for audio, ensure that the correct audio device is selected in the audio settings of your streaming software.
Now it’s time to connect your phone’s camera to your streaming software. Here’s a step-by-step guide using OBS, a popular option:
Open Your Streaming Software: Launch OBS (or your preferred streaming software) for your Twitch streams.
Add a New Video Capture Device: In OBS, click the “+” button under “Sources” to add a new source. Select “Video Capture Device” from the options.
Name Your Source: Give it a clear name, like “Phone Webcam.”
Select Your Phone as the Device: Choose your phone from the video device dropdown menu.
Configure Video Settings: Adjust video settings like resolution, frame rate, and format. Aim for a balance between quality and performance for smooth streaming.
Configure Audio Settings (Optional): If using your phone’s microphone, ensure the correct audio device is selected in your streaming software’s audio settings.
Step 6: Fine-tune Your Webcam Setup
Now that your phone is integrated, here are some final steps to optimize your setup:
Positioning and Stability: Use a phone holder or tripod for stability. Ensure the camera captures your desired angle and framing.
Lighting: Good lighting is key. Use softbox lights or ring lights for professional-looking illumination and minimize shadows.
Audio Setup: Test your phone’s microphone audio levels and quality. Adjust microphone sensitivity and position for optimal sound.
Internet Connection: A stable internet connection is essential. Connect your computer and phone to a reliable Wi-Fi network or use a wired connection if available to avoid lag or buffering.
Testing and Adjustments: Before going live, test your setup in your streaming software’s preview window. Check video and audio quality, and make adjustments until you’re satisfied.
By following these steps, you can leverage your phone’s camera as a high-quality webcam for your Twitch streams, saving on equipment costs while maintaining a professional look. So, unleash the power of your phone and take your Twitch streams to the next level!
Final Thoughts
Rock your Twitch streams with your phone as a webcam! With this guide, you’ve learned how to unlock your phone’s hidden potential and use it to capture high-quality footage. Remember, choosing the right app, connecting properly, and fine-tuning your setup is key to optimal performance.
Ready to level up your content creation? Eklipse, the AI highlight generator, can revolutionize your workflow. It automatically clips your best moments and transforms them into engaging TikTok videos. Effortlessly create bite-sized content to expand your reach and captivate viewers on new platforms.
Don’t wait – take your streaming to the next level! Explore the possibilities with Eklipse and unlock the full potential of your content across Twitch and TikTok. Let Eklipse help you captivate audiences and elevate your streaming game.
Twitch is a popular streaming service for gamers and streamers from all over the world.
Subscribing to a Twitch channel is a way to support your favorite streamers. However, if you wish to cancel your Twitch subscription for any reason, you can do it easily on your desktop or mobile device.
In this guide, we will explain Twitch subscription plans and provide step-by-step instructions on how to cancel Twitch subscriptions on desktop, Android, and iOS devices.
Twitch subscription plans are a way for viewers to support their favorite Twitch streamers by paying a monthly recurring amount.
In exchange, subscribers get access to exclusive benefits like custom emotes, ad-free viewing, and subscriber-only streams.
Twitch offers three subscription plans: Tier 1 for $4.99/month, Tier 2 for $9.99/month, and Tier 3 for $24.99/month. You can also gift subscription plans to friends using the Gift Subscriptions feature.
Open Twitch on your desktop or browser and log into your account.
Click on your Profile on the top right corner of the home page.
Go to Subscriptions -> Your Subscriptions.
Locate the particular channel you wish to unsubscribe from.
Click on the cog symbol next to the subscription.
Select “Don’t Renew Subscription.”
A page will appear asking you to choose a reason for canceling your subscription. Select the reason from the list and click “Don’t Renew Subscription.”
2. How to Cancel Twitch Subscription on Android
To cancel a Twitch subscription on your Android device, follow these simple steps:
Open the Twitch Mobile App and click on your Profile in the top left corner.
In the menu, select “Subscriptions.”
Tap on the specific channel you wish to unsubscribe from.
Click on the “Cancel Subscription” button.
It is advisable to use the Twitch Mobile App to manage all your subscriptions instead of the Google Play store.
3. How to Cancel Twitch Subscription on iOS
Managing your subscriptions on iOS is comparatively easy. On the iOS app, you are required to renew your subscription on a monthly basis. If you wish to cancel your subscription, wait till the end of the month to automatically cancel your subscription.
If you still wish to manually unsubscribe from a channel, follow these steps:
Log into your Twitch account on your iPhone.
Tap on your profile and click on the “Settings” icon.
Navigate to the “Subscriptions” option at the bottom of the screen.
Select the channel you wish to unsubscribe from and choose the “Don’t Renew” option.
Note: You will not receive a refund for the remaining days of the month after you cancel your subscription.
4. How to Cancel Twitch Turbo Subscription
To cancel your Twitch Turbo subscription through your desktop, follow these simple steps:
Open Twitch and log into your account.
Go to Profile -> Subscriptions -> Other Subscriptions.
Select the channel and click on “Don’t Renew.”
Conclusion
In conclusion, Twitch subscription plans allow viewers to support their favorite streamers by paying a monthly recurring amount.
Twitch offers three subscription tiers with exclusive benefits like custom emotes, ad-free viewing, and subscriber-only streams. If you wish to cancel your Twitch subscription, you can easily do it on desktop or mobile devices.
Follow the simple steps outlined in this guide to cancel your subscription.
–
Before we go, have you ever considered taking grow Twitch channel to the next level with Eklipse?
Eklipse is an AI highlight generator that can automatically clip your livestream content and convert it to TikTok. With Eklipse, you can effortlessly promote your Twitch streams on TikTok and reach a wider audience.
Try Eklipse today and grow your Twitch channel to new heights!
Maximize your Black Ops 6 rewards—Create highlights from your best gameplay with with Eklipse
Eklipse help streamer improve their social media presence with AI highlights that clip your Twitch / Kick streams automatically & converts them to TikTok / Reels / Shorts
Creating a VRChat avatar is an exciting adventure that lets you express yourself in unique ways. In this guide, we’ll walk you through the process of creating your first VRChat avatar, step-by-step.
Creating a custom VRChat avatar can be a challenging task, especially for those who are new to 3D modeling and animation.
The process can be time-consuming and requires dedicated focus. Fortunately, VRChat has provided comprehensive documentation to help with the process.
However, to provide a brief summary, here are the step-by-step instructions for creating a VRChat Avatar.
Choose a character design for your avatar.
Create or obtain 3D models of your character and its accessories.
Import the 3D models into a 3D modeling software, such as Blender or Unity.
Add textures and colors to your 3D models.
Rig the 3D models for animation and movement.
Create facial expressions and lip sync.
Add special effects, such as particle effects and shaders.
Test your avatar in VRChat and make any necessary adjustments.
Where You Can Get VRChat Avatars
If you’re looking to find the perfect avatar for your VRChat experience, there are several places where you can get one.
In addition to finding avatars within the VRChat game, there are other places to get customized avatars that fit your unique style. Here are some of the best places to find VRChat avatars:
1. Fiverr
Fiverr is a marketplace of artists who can create custom 3D models of your desired avatar. Prices range from $5-$350, depending on the complexity of the design. Be sure to check with the seller to ensure that the design is compatible with VRChat.
2. Unity Store
You can download premade 3D character models from the Unity Asset Store, which is one of the easiest ways to get a VRChat avatar. Just make sure that the asset has fewer than 70,000 triangles (or 10k for the VRChat game if you are playing on Oculus Quest) so that you can upload it.
3. Sketchfab
Sketchfab is a platform where artists can sell their 3D models. You can browse hundreds of avatars in any genre and use their 3D model viewer to see the design from all angles.
4. ReadyPlayerMe
This platform allows you to upload a photo of yourself and build an avatar based on your personal looks. You can customize your hair, eyes, clothes, and accessories to create a character that’s unique to you.
5. VRC Traders Discord Server
The VRC Traders Discord server is a place where you can commission VRChat items, 2D art, logos, and many other designs. You can also browse reviews to find a designer that fits your needs.
Conclusion
Creating a VRChat avatar can be a fun and unique way to express yourself, but it requires time and dedication to master.
Fortunately, there are resources available, such as VRChat’s documentation and various platforms like Fiverr and Sketchfab, to help you create the perfect avatar. Whether you choose to create your own or commission a designer, the end result is a personalized virtual representation of yourself that can enhance your VRChat experience.
Maximize your Black Ops 6 rewards—Create highlights from your best gameplay with with Eklipse
Eklipse help streamer improve their social media presence with AI highlights that clip your Twitch / Kick streams automatically & converts them to TikTok / Reels / Shorts