Home Blog Page 212

7 Top Discord Dating Servers

0

While Discord is typically used to connect gamers who are working as a team to dominate the game, it can also be used for multiple other purposes.

There is a broad range of Discord server types out there. People are able to find like-minded individuals in almost any category. But what if they are looking for love? In this post, we will cover five of the most popular Discord dating servers on the internet.

What is a Discord Dating Server?

A Discord dating server is a Discord server that was created for the purpose of helping other users meet new people to potentially date. The best dating servers have several options available to help people meet. They will also allow you to add roles to your profile so that others know what you are looking for.

7 Best Discord Dating Servers

Here is a list of 5 Discord Dating Servers for those who are over the age of 18 years old:

1. PlayRoom

A popular dating server with diverse users. Follow the verification guide to interact and find connections. Optional paid options available. Features “Blind match” for speed dates.

2. Like 18+

Active server with 15,000+ members. Emphasizes gender and age verification for a safe environment. Choose roles like gender, age, and sexual orientation. Selfie-sharing channels available.

3. Noose 18+

Welcomes all ages, but NSFW access requires ID verification. Set roles based on gender, orientation, and relationship status. Offers giveaways and voice chat rooms.

4. World’s Lounge

Read and agree to rules for access. Age verification unlocks NSFW channels. Assign roles like age, gender, and location. Text and chat channels for sharing and contests.

5. SKINS

Acknowledge rules for access. Verification required for NSFW content. Adult channels exclusively for verified members. It have chat channels and events like cooking shows.

6. Cutie Club

18+ server encouraging gender/age sharing. Active chat channels, profile browsing, and selfie sharing. It’s an active community, members are consistently sharing dating tips in advice channel.

7. Little Bunny

Assign roles based on gender, age, and more. Comprehensive rules and issue reporting. Verification needed for NSFW channels. Text and voice chat channels. Suggest features in suggestions channel.

Where to Find Discord Dating Servers

If you are looking for a niche dating server on Discord or prefer servers with fewer than 500 members, you can explore several promoted servers on the following three sites:

1. Top Discord Servers

On Top Discord Servers, you can search for specific niches or browse dating servers based on votes or member counts.

Each server on the website comes with a brief description and the number of members, making it easier for you to find a server that suits your preferences.

2. Disboard

Disboard is another platform where you can discover and join various Discord servers, including dating servers.

The servers are categorized, and you can search based on tags, server size, and language. It also provides information about the server’s rules and a description to help you decide which server to join.

3. Discord.me

Discord.me is a website dedicated to promoting Discord servers across different categories, including dating.

You can browse through the dating category and explore servers that catch your interest. Each server listing includes a short description, member count, and tags to help you find the right server for you.

Conclusion

In conclusion, Discord offers diverse dating servers where users can meet new people and find potential love interests.

These servers provide a platform for meaningful connections and conversations, whether you’re looking for something casual or a serious relationship.

Don’t overlook the possibilities that Discord dating servers offer in your search for love.

Do you know what Discord is best for, other than looking for a love interest? That’s right, it’s the ideal place to grow your network, especially if you’re starting your career as a Twitch streamer.

But there’s an even better tool available to help streamers enhance their presence on social media.

Introducing Eklipse!

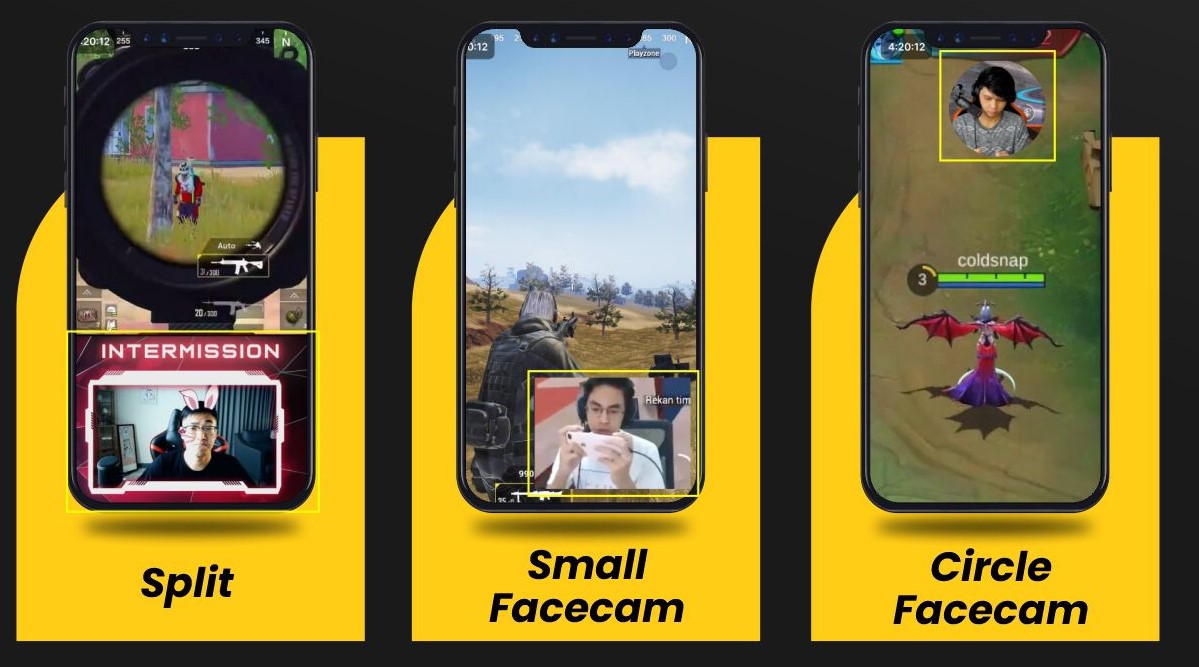
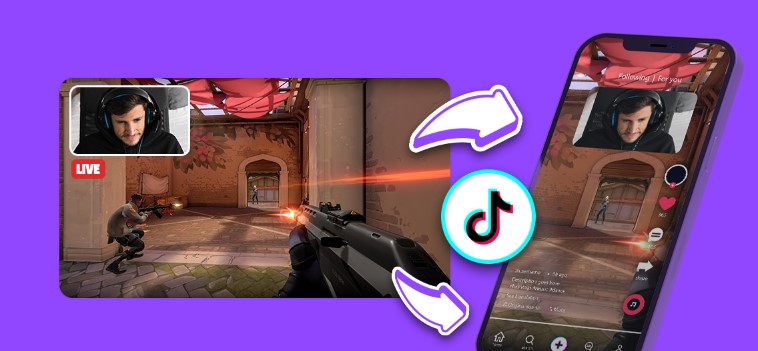
It utilizes AI highlight generators to automatically clip your livestream content and convert it into captivating TikTok videos. It’s a fantastic tool for expanding your online reach and connecting with a broader audience. Give your streaming career a boost with Eklipse today!

Visit Eklipse.gg to learn more and sign up today. It’s free!


Maximize your Black Ops 6 rewards—Create highlights from your best gameplay with with Eklipse

Eklipse help streamer improve their social media presence with AI highlights that clip your Twitch / Kick streams automatically & converts them to TikTok / Reels / Shorts
Twitch Streamers With The Most Followers: Top 10

0
twitch streamers with most followers
Source: Business Insider

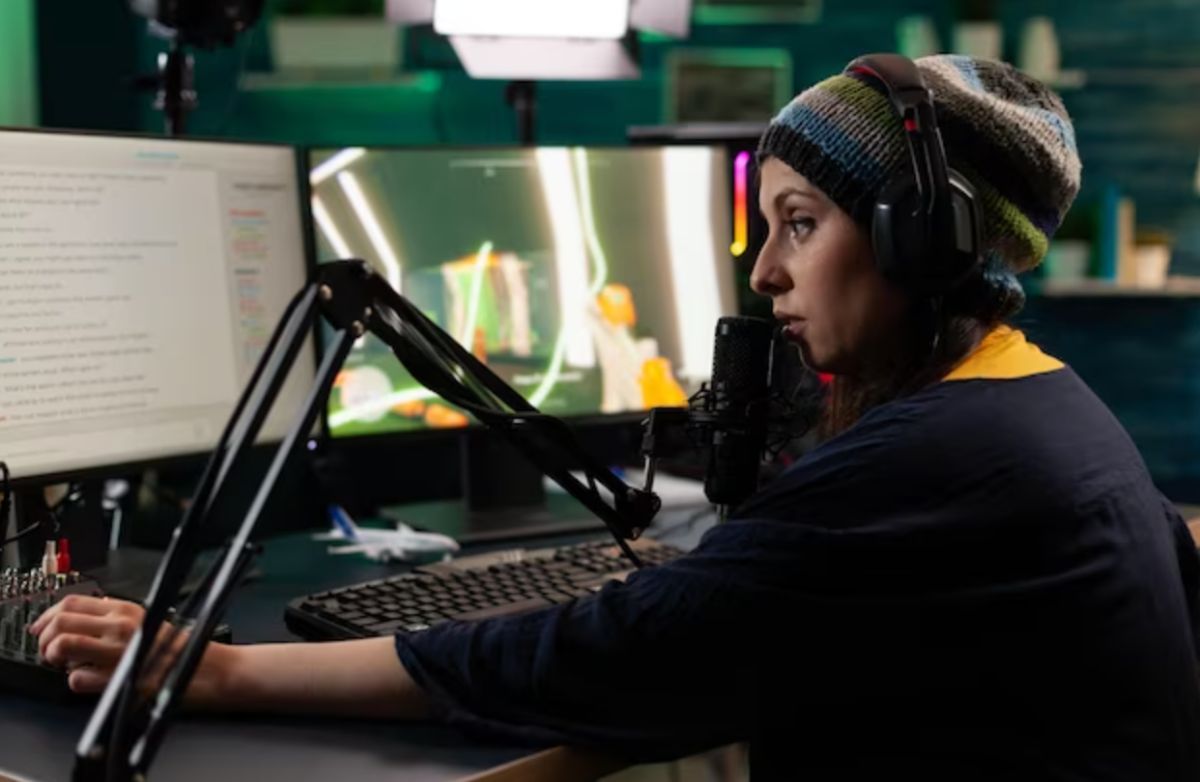
There are some Twitch streamers with the most followers that make Twitch the Netflix of video games. It’s a place where you can watch people play all sorts- and sometimes weird -likes, or chat with them while they do it! But who are these top Twitch stars that millions follow? Here I’ve compiled a list for those curious about their favorite game broadcasters’ rankings by follower count. 

Streaming has been taking off over the past three years, with Fortnite and game developers realizing how powerful Twitch is. As a result of this explosion in popularity, streaming became much more mainstream to watch for people who enjoy playing games on streams instead of YouTube or Facebook Gaming platforms. We have selected the top Twitch streamers with the most followers for you. 

Can You Lose Affiliate Status on Twitch? Exploring the Factors

0

Achieving affiliate status on Twitch is an exciting milestone that reflects your dedication and hard work.

However, you might have concerns about the potential loss of your affiliate status, especially if you experience a decline in followers or a decrease in your streaming frequency. In this article, we will delve into this topic to provide you with the information you need.

Let’s address the question: Can you lose affiliate status on Twitch?

Can you lose affiliate status on Twitch?

Losing your affiliate status on Twitch can occur due to various reasons, including account inactivity, violation of Twitch’s Terms of Service, voluntary termination by you or Twitch, or breaching the affiliate agreement between you and Twitch.

While there may be exceptional cases or additional factors that could lead to the loss of your Twitch Affiliate status, in most instances, it is attributed to one of these reasons. To determine your current affiliate status on Twitch, you can follow the steps outlined below.

How to Check Your Affiliate Status on Twitch

To check your current affiliate status on Twitch, follow these steps:

  1. Click on your profile icon and go to your “Creator Dashboard.”
  2. On the left side, click on “Analytics” and select “Achievements.”
  3. Click on the tab labeled “Path to Affiliate” to view your current Twitch Affiliate status.

Reasons for Losing Twitch Affiliate Status

There are several reasons why you might lose your Twitch Affiliate status:

  1. Account Inactivity: Twitch may terminate members of the Affiliate Program who show a complete lack of participation for more than 12 months. However, Twitch evaluates these situations on a case-by-case basis, considering various factors.
  2. Violation of Twitch’s Terms of Service: Breaking Twitch’s terms and services can result in the removal of your affiliate status and even the suspension or banning of your entire Twitch account.
  3. Voluntary Termination: Either you or Twitch can end the affiliate agreement at any time by providing written notice. Upon termination, Twitch will handle any outstanding payments owed to you.
  4. Breaking the Affiliate Agreement: Streaming simultaneously on another platform or engaging in activities that breach the affiliate agreement can lead to the loss of your affiliate status.

Conclusion

In conclusion, losing Twitch Affiliate status can result from account inactivity, violating terms, voluntary termination, or breaching agreements. Stay engaged, follow guidelines, and preserve your status.

And if you’re looking to enhance your streaming presence, consider trying Eklipse!

Eklipse is an AI highlight generator that automatically clips your stream and provides a tool to convert Twitch Clips into TikTok videos for seamless social media growth.

Visit Eklipse.gg to learn more and sign up now, it’s FREE!


Maximize your Black Ops 6 rewards—Create highlights from your best gameplay with with Eklipse

Eklipse help streamer improve their social media presence with AI highlights that clip your Twitch / Kick streams automatically & converts them to TikTok / Reels / Shorts

OBS Replay Buffer: How to Setup and Best Alternative

0

If you’ve been using OBS for streaming or recording, you should definitely take advantage of their Replay Buffer feature.

This feature works like all the other clipping tools, and all you have to do is enable it in OBS.

In this article, we will guide you on OBS Replay Buffer, including the step-by-step process to set it up, and explore the best alternative for clipping tool that may be suitable for you if you have a low-end PC.

How to Setup OBS Replay Buffer As Your Stream Clipping Tool

Setting up OBS Replay Buffer requires just three simple steps. First, you need to enable the feature. Second, adjust the recording quality settings. Lastly, set up your hotkey for instant clip creation. The short step-by-step instruction is as follow:

  1. Enable the Replay Buffer in Settings > Output.
  2. Adjust recording quality in the Recording tab under Output settings.
  3. Set up hotkeys for the Replay Buffer in Settings > Hotkeys.
  4. Start the Replay Buffer using the hotkey and start streaming or recording.
  5. To clip an exciting moment, press the hotkey for the “Save Replay Buffer” function.

If you’re interested in using OBS Replay Buffer as your stream clipping tool, read on for detailed instructions on the setup process.

Step 1: Enabling the OBS Replay Buffer

To enable the Replay Buffer in OBS, simply follow these steps:

  1. Go to Settings
  2. Select Output > change the mode to Advanced
  3. Tick the “Enable Replay Buffer” box
  4. Adjust the replay duration by changing the number on “Maximum Replay Time” box

Please keep in mind that the longer the replay buffer duration you set, the more RAM will be used by your PC. Therefore, it’s essential to adjust the duration to suit your PC’s specifications.

Now that you’ve enabled the OBS replay buffer, the next step is optional – adjusting the recording quality

Step 2 – Adjusting Replay Buffer Recording Quality

To adjust your recording quality, you need to go to the “Recording” tab under the “Output” settings.

There are two ways to adjust the recording quality – the easy way and the advanced way. Here are the step-by-step instructions:

Easy way to adjust OBS replay buffer quality:

  1. Go to “Output” in the left-side settings menu.
  2. Select “Recording.”
  3. Look for the “Encoder” section and set it to “(Use stream encoder).”

Advanced way to adjust OBS replay buffer

  1. Continuing from the step above, choose the encoder you want to use (x264 for example)
  2. After that, you can manually tweak every aspect of your encoder, like the “Rate Control”, “Bitrate”, “CPU Usage Preset”, and more

It’s important to keep in mind that adjusting the recording quality is crucial to ensure optimal performance on your PC. It’s recommended that you adjust the settings based on your PC’s specifications.

You can refer to our article on “Best Recording Settings for OBS” to find the most efficient settings that work best for your PC.

Step 3 – Setting Up Hotkey and Start Clipping with OBS Replay Buffer

The last thing you need to do is set up your hotkeys for the Replay Buffer feature. The most important keybind needs to be set so you can save the replay. This should be set to a combination or a dedicated key you can press easily during gameplay.

To set up OBS Replay Buffer hotkey, you can follow these instructions:

  1. Go to “Settings” on your OBS.
  2. Head to the “Hotkeys” menu.
  3. Type “Replay Buffer” in the search box.
  4. Set up the hotkey for these 3 functions:
    • Start Replay Buffer
    • Stop Replay Buffer
    • Save Replay Buffer

After you have finished setting up the hotkey, you can start streaming and clipping with OBS by following these steps:

  1. On the “Controls” section, click the “Start Replay Buffer” button (or use the hotkey you have set).
  2. Then, start streaming or recording based on your preference.
  3. To clip an exciting moment on your stream, simply press the hotkey for the “Save Replay Buffer” function.

OBS Replay Buffer Alternative – For Low-End PC

While OBS Replay Buffer is a great clipping tool for streamers, it can put a heavy load on your PC. If you have a low-end PC, there may be a better option.

One of the best OBS replay buffer alternatives is Eklipse.

It’s even better – Eklipse is actually an AI highlight generator. This means it can clip your best stream moments without using your PC’s CPU resources and can even do it automatically with its AI technology.

The setup process takes 1-2 minutes with only 3 steps.

  1. Visit Eklipse.gg and sign up with your Twitch account (or Email).
  2. Connect your Twitch/YouTube/Facebook Gaming account to Eklipse.
  3. Just stream as usual, Eklipse will automatically generate clips from your stream!

Once you’re done streaming, sign in to your Eklipse account, click the “Get Clip” button, and Eklipse will create dozens of 30-60 second clips from your live stream VOD.

The best part is that Eklipse has more features beyond its replay tool.

It also comes equipped with a “Convert to TikTok” tool, allowing streamers to easily transform their landscape videos into vertical format with templates, stickers, auto-captions, and more!

Conclusion

To summarize, OBS Replay Buffer is a great tool for streamers to clip exciting moments, but it can be heavy on low-end PCs.

Eklipse is an alternative that uses AI technology to clip moments without using PC resources, making it a hassle-free option. Regardless of which tool you choose, having a clipping tool is essential to create engaging content for viewers.


Maximize your Black Ops 6 rewards—Create highlights from your best gameplay with with Eklipse

Eklipse help streamer improve their social media presence with AI highlights that clip your Twitch / Kick streams automatically & converts them to TikTok / Reels / Shorts

How to Get Clips From PS4 to Phone?

0
Ps4
Source: t3

In this article, we will show you how to get clips from PS4 to phone. As a gamer, you will not only enjoy playing the game but  will also enjoy spotting the best move or finding an amazing moment in the game.

The best gaming moment is indeed worth being captured and to be shown off to your friends and fellow gamers through any social media. By doing this, you can let everyone see your gaming skill as well as get into the game’s vibe.

But unfortunately, PlayStation 4 limits its Capture Gallery feature to Twitter and YouTube only. That means, you cannot share your clips or recording to other social media or even directly with your friends. But don’t worry, because you can still share your game with  your friends or to any other platform by transferring them to your phone first.

So, here we will share the best way for you to learn how to share clips from PS4 to your phone. However, it’s worth noting that this article is going to be specific to iPhone. So, without further ado, let’s just jump right in!

How To Get Clips from PS4 to Phone Using DearMob iPhone Manager

It’s much easier to transfer the file into your phone as compared to the way you get the recording or the captures with PlayStation 4. You just need to follow the steps down below. But before that, make sure you have prepared the USB cable to connect your iPhone to the computer.

  • Starting off with downloading the DearMob iPhone Manager on your iPhone, and launch it.
  • Then, connect the iPhone to the computer.
  • Select the Video & Movie tab to transfer video.
Clips from PS4 to phone
Source: 5kplayer.com
  • Then click the Add Video button and browse the video you need to share on USB drive or just drag it down.
  • Finally, hit the Sync button to apply changes.
  • Voila! You’re all set.

Now, your selected clips or captures are already on your phone. You can share with your friends or post them directly on WhatsApp, Instagram, or any other social media. In addition to game clips, you are also able to transfer songs, photos, or other data in both directions using this tool.

If you have an Xbox One, you can follow this guide to save the clips to your phone > How To Save Xbox One Clips To Phone: An Easy Guide

How To Get Clips from PS4 to Phone Without a USB

Some of you may be too lazy to connect two devices just so you can transfer a clip. If so, you can still get the game recordings to your phone without using a USB. Then how to get clips from PS4 to phone without connecting it to the computer?

This way is so much easier than the previous steps. One thing that you need to succeed in transferring files is an internet connection. It is because you have to upload your clips to YouTube before getting into your pocket. Here’s how.

  • First, get into the PS4 Home Menu.
  • Then, click the Settings button > Account Management > Link with Other Services > YouTube.
how to get clips from ps4 to phone without youtube
  • Sign In to make your YouTube account > Enter Account Information.
  • After signing in to YouTube, now your PS4 has already synced with YouTube
  • Select the video from Capture Gallery.
how to get clips from ps4 to phone 2022
Source: AOMEI Backupper
  • Confirm Share to YouTube.
  • Next, Select YouTube and set the uploaded video as private.
  • Confirm Share.
how to get clips from ps4 to iphone
Source: Support.com

Now that you have shared the clip on your YouTube account, you can easily download the clips from YouTube to your phone. No need to connect devices and USB. Everything is just as simple as closing your eyes.

Have no idea how to save a video from YouTube? Fret not since there are numerous YouTube downloaders you can try on internet. They require no download and any technical steps to get it done. Visit out blog for more tutorials and tips!

How to Download Clip From YouTube Using Eklipse

Thankfully, there’s an AI-based tool called Eklipse that will help you to save your gaming clip. Only with several clicks, you’ll be good to go. Not only provides the simplest way to download a video, it is also able to convert your clip into TikTok/Reel/YouTube Shorts in a flick. Here’s how to do it.

  1. First, go to the Eklipse site and log in to your account.

  2. If you don’t have an account, just create it first.

  3. Tap on the Upload option under the URL bar to import the recorded stream from your camera roll.

  4. Next up, pick your favorite templates and hit Continue Editing.

  5. Now select the facecam and the gameplay area, and adjust the clip length. Tap Next.

  6. Then, set up your output, add the channel name, and add Music. Hit Confirm.

  7. Go to the homepage and navigate to the Edited Clips option to find your edited clip.

  8. Click on your edited clip and then hit the Download button under the preview.

Conclusion

With the advancement of technology, there are many ways to share recordings from PS4 to your phone easily. You can choose what is the best way that works for you. Hopefully, after this article, you have no more confusion about how to get clips from PS4 to your phone, and now you can enjoy your games and their clips or recordings with your friends and fellow players! Thank us later.

Anyhow, in case you want to edit your PS4 videos before sharing them with your friends or other players, you can learn how through our previous article. You’re not going to make your video looks lousy, are you?

7 Best VTuber Avatar Maker Software: Unleash Virtual Persona

0

Are you ready to step into the world of VTubing and captivate your audience with an impressive avatar?

Look no further, as we present the ultimate list of the best VTuber avatar maker software that will help you bring your virtual persona to life.

With these powerful tools at your disposal, you’ll be able to create stunning avatars that will elevate your online presence and engage your viewers like never before.

7 Best Vtuber Avatar Maker Comparison Table

VTuber Avatar MakerFeaturesCompatibility
Live 3D– Blends realism and imagination– Widely compatible
– Customizable avatars
– User-friendly interface
– Easy creation of original avatars
VRoid– Create avatars from scratch– Windows, Mac, iOS, Android
– User-friendly interface
– Extensive customization options
Wakaru– Stream virtual YouTubers– Windows OS (Twitch, YouTube)
– Various customization styles
– Free to use
VSeeFace– Advanced and efficient 2D avatar maker– Widely compatible
– High tracking accuracy
– Hand tracking system
FaceVTuber– Streamlined interface– Web-based (webcam, web browser)
– Versatile use for live streams and videos
– Premium-quality avatar designs
Steam– Diverse selection of avatar customization options– Dependent on individual software/games
Fiverr– Access to professional VTuber artists and designers– Online platform for collaboration

1. Live 3D: Blending Realism and Imagination

Live 3D is a leading VTuber avatar maker software that seamlessly blends realism and imagination.

It offers advanced features for creating highly detailed and visually captivating avatars. With Live 3D, you can easily customize every aspect of your avatar, from facial features to body movements.

It even allows you to create a VTuber avatar using the head of a real person, offering the easiest way to make an original and authentic virtual persona.

The user-friendly interface and extensive asset library make the avatar creation process enjoyable and efficient.

2. VRoid: Unleash Your Creative Control

VRoid Studio empowers you to create captivating visual presentations from scratch. With its user-friendly interface, even beginners can easily navigate and utilize its extensive features. No prior expertise or training is necessary.

Select your preferred VTuber content and unleash your creativity. Customize every aspect, from facial expressions and animations to eye and nose shapes, hairstyle, and body. VRoid Studio offers suggestions based on your chosen style, helping you fine-tune your 3D avatar.

Experiment with colors, facial features, and motion options to enhance your YouTube videos. Once you’re satisfied with your creation, save it for free and use it instantly. VRoid Studio is compatible with Windows, Mac, iOS, and Android devices.

3. Wakaru: The Pioneer VTuber Avatar Creator

Wakaru is one of the earliest VTuber avatar creator software available online. It allows you to stream your virtual YouTubers directly from the app. With a range of styles to choose from, like Kawai, you can customize your avatar with clothing, hairstyles, and accessories. While it lacks navigation options for eye and hand movements, Wakaru remains a great choice for Japanese anime avatars that stand out. Best of all, it’s free to use and compatible with Windows OS for Twitch and YouTube.

4. VSeeFace: Advanced and Efficient 2D VTuber Avatar Maker

VSeeFace is among the best 2D VTuber avatar maker software available. Widely used and highly efficient, it offers advanced features for creating high-quality avatars.

With its exceptional tracking accuracy and leap motion accessorized hand tracking system, VSeeFace stands out from the rest. Its user-friendly interface and automatic detection of facial expressions make it incredibly easy to use.

Best of all, it’s free! Give VSeeFace a try for a VTuber avatar maker that won’t disappoint.

5. FaceVTuber: Streamlined Interface and Versatility

FaceVTuber stands out with its highly-developed interface. Unlike other VTuber studio model makers, it operates seamlessly using just a webcam or web browser. This web-based software supports multiple formats, including VRM and FBX.

With FaceVTuber, you can easily use it for live streams or pre-recorded videos, leveraging computer-generated graphics to create premium-quality avatar designs. It’s an excellent choice for beginners.

However, it’s important to note that the interface is available only in Japanese.

6. Steam: A Treasure Trove of VTuber Tools

Steam, the popular gaming platform, is not only a hub for gaming enthusiasts but also a treasure trove of VTuber avatar maker software.

Within the Steam store, you’ll find a wide range of applications and games that offer avatar customization features, perfect for creating your VTuber persona.

Explore options such as “Character Creator” or “Avatar Maker” to find software that suits your preferences and requirements.

With the vast selection available on Steam, you’re bound to discover the perfect VTuber avatar maker that resonates with your creative vision.

7. Fiverr: Connecting with Professional VTuber Artists

While not a specific software, Fiverr is a platform that connects you with professional VTuber artists and designers.

If you prefer a customized approach to your avatar creation, Fiverr offers a vast pool of talented artists who can bring your vision to life. Simply browse through the profiles of experienced VTuber artists, review their portfolios, and collaborate with them to design a unique and high-quality avatar that represents your virtual persona.

Fiverr provides a convenient and reliable way to access top-notch artistic talent for your VTuber journey.

Choose Your Perfect VTuber Avatar Maker

Discover the best VTuber avatar maker software and resources from this curated list.

Each software offers unique features to design and customize avatars that showcase your creativity and captivate your audience. Whether you prefer realism, simplicity, interactivity, or customization, you’ll find the perfect VTuber avatar maker for you!

Next Step After Creating Your Vtuber Avatar

But that’s not all! If you are looking for the best ways to help you grow your VTuber channel popularity, you should try Eklipse.

Eklipse is an innovative platform that harnesses the power of AI highlight generator, while seamlessly convert your livestream content into engaging TikTok clips.

Embrace your VTuber persona! Visit Eklipse.gg to learn more and sign up now to conquer the digital realm like never before.


Maximize your Black Ops 6 rewards—Create highlights from your best gameplay with with Eklipse

Eklipse help streamer improve their social media presence with AI highlights that clip your Twitch / Kick streams automatically & converts them to TikTok / Reels / Shorts

Shoutout: A Twitch New Feature to Support Streamers

0
twitch new feature
Source: Sportskeeda

After introducing the Twitch Guest Star feature in June 2022, the company launched another Twitch new feature called Shoutout in September. As the name suggests, twitch new shoutout aims to ‘shoutout’ Twitch users from chat without any help from external bots.

As a result, you can definitely support other Twitch streamers by attracting other users to follow their channel. Thankfully, we have covered everything about this feature. Just read on below.

Shoutout: A Twitch New Feature

Alright…alright, we know that many of you have been wondering about this new feature since it has just launched on September 28. The shoutout feature allows the creators to ‘share the love’ and highlight notable members in the chat room. In another word, you are able to share a follow button directly in chat so that it can prompt others to follow the channel right away.

To be able to use this feature, you’ll only need to type “/shoutout” followed by the name of the Twitch user you are giving a shoutout to in a chatroom. Upon doing this, the user’s name will pop up on the top of the chat room so that the viewers can see this. Watch the video below to make it clear.

Who Can Use The Shoutout Feature?

Twitch New Feature
Source: Dexerto

The shoutout feature is currently only accessible to creators and mods. This has been done to prevent other viewers from spamming the chat box. However, the creators or broadcasters can deploy external bots to modify the feature as well.

In addition, the Twitch mods can generate auto shoutouts so that streamers no longer need to manually type the command.

How To Add the Shoutout Command on Twitch

There are three ways you should do if you want to set up the Shoutout command. Let’s get a closer look at the guide below.

Step 1. Mod The Bot

Before setting up the command, you’ll need a third-party bot. In this article, we’re going to guide you to use Nightbot. Here’s how to mod it in your Twitch chat.

  • Start off by heading to the Nightbot site and log in to your account.
  • Alternatively, you can create your account (if you haven’t).
How To Add the Shoutout Command on Twitch
Source: Streamcheme
  • Then, hop on to the Twitch site and log in to your account.
  • Navigate to Profile Picture icon > Creator Dashboard > Chat Box.
  • Afterward, type in /mod nightbot to mod the bot in your Twitch chat.
Source: Getonstream
  • Once done, you are now allowed to use commands in your stream.

Step 2. Add the Shoutout Command in Nightbot

Move on to the next step, now you need to custom command in Nightbot. To add it, follow the steps below.

  • Go to Nightbot.
  • Next up, navigate to the Commands option > Custom.
Source: How to Twitch
  • Hit the Add Command button.
Source: Alphr
  • Then, fill the Command section with !so to activate the Shoutout command.
  • In the Message section, add some codes which return the user’s channel you’re shouting out.
  • Try to write this code > Go check out $(touser) at Twitch.tv/$(touser), or you can customize it yourself.
  • Once done, you can set who can use the command under the Userlevel section. It’s best to set it to Moderator.
  • As for the Cooldown and Alias section, you can leave these sections blank.

Step 3 – Test the Command

Finally, to see that the command is working, go to the Twitch chat and type in !so [streamer username] in the chat box. Then, the command will return the streamer’s username along with their Twitch channel link.

Source: Get On Stream

The Significance of Shoutouts on Twitch

Shoutouts are more than just a quick mention during a Twitch stream – they hold immense importance and have a significant impact on the Twitch streaming community. Let’s explore the key reasons why shoutouts matter and how they contribute to the vibrant and thriving Twitch community.

Community Engagement

  • Shoutouts build connections: When streamers give shoutouts to viewers or fellow streamers, it fosters a sense of community and belonging. Viewers feel acknowledged and appreciated, creating a positive and inclusive environment.
  • Recognition and appreciation: Shoutouts are a way to recognize the support and contributions of viewers, rewarding them for their loyalty and active participation. This encourages viewers to actively engage with the streamer and become an integral part of the community.

Viewer Retention

  • Building viewer loyalty: Shoutouts create a sense of value and importance for viewers, making them more likely to continue watching and supporting the streamer’s content. When viewers feel acknowledged and valued, they develop a stronger connection to the streamer and are more likely to return for future streams.
  • Encouraging return visits: By giving shoutouts, streamers encourage viewers to return for subsequent streams. Viewers appreciate the recognition and the opportunity to be a part of the streamer’s community, leading to higher engagement and increased viewership.

Collaboration Opportunities:

  • Strengthening the Twitch network: Shoutouts provide opportunities for collaboration among streamers. By highlighting and showcasing other streamers, streamers can create a supportive network within the Twitch community. This collaboration can lead to cross-promotion, sharing audiences, and fostering a sense of camaraderie among streamers.
  • Growing together: Collaborative shoutouts enable streamers to introduce their viewers to other creators, diversifying the content and offering a broader range of experiences. This allows viewers to discover new streamers and form connections with a wider community.

Shoutouts are a powerful tool that builds connections, enhances viewer loyalty, and creates collaborative opportunities within the Twitch streaming community. By giving recognition and appreciation, streamers can nurture a thriving and engaged community. So, let your shoutouts resonate, strengthen your Twitch network, and watch your community thrive!

Conclusion

Get ready to show your support for your favorite streamers in new and exciting ways with the release of the Twitch new feature: Shoutout! Now, the supported gesture isn’t only limited to cheering them with bits or sending donations, but by promoting other streamers in the chat room using this feature as well.

Don’t hold back on expressing your loyalty – it’s not only a boost for the streamers but also for yourself. You never know, your dedication may even earn you a coveted Twitch VIP badge. Learn about it here: Twitch VIP: Perks and How To Get It.

How to Add Chat to OBS: Twitch, YouTube, and Facebook Gaming

0

Streaming has revolutionized content creators’ connection with their audience, allowing real-time engagement. Adding chat to OBS is a popular method to foster interactions, create inside jokes, and form lasting bonds.

In this article, we’ll guide you on how to add chat to OBS for streaming on platforms like Twitch, YouTube, or Facebook.

How to Add Twitch Chat to OBS

You need to use 3rd party extension to add Twitch Chat to OBS. You can use Streamlabs or StreamElements. Here are the step-by-step instructions to do that:

Using Streamlabs

Source: Eklipse.gg

  1. Visit the Streamlabs website.
  2. Log in with your Twitch account.
  3. Access the All Widgets section and click on Chat Box.
  4. Hit the “Copy” button on the “Widget URL” section
    • You can customize the looks of your Twitch chat overlay by tweaking all the settings below the “Widget URL” section
  5. Copy the Widget URL (remember to keep it private).
  6. Open OBS
  7. Add a Browser Source under Sources.
    • You can rename the source as Twitch Chat Box and click OK.
  8. Paste the copied Chat URL and click OK to save.
    • Adjust the width and height for the desired layout.
  9. Start streaming to showcase your show with an embedded chat window.

Using StreamElements

Source: Recorder.easeus.com

  1. Head to the StreamElements website and log in.
  2. Click on Streaming Tools >> Overlays in the menu.
  3. Create a new overlay with the right resolution for your stream, say 1080p.
  4. Give your overlay a catchy name like “Chat Window” and save it.
  5. Add a widget to your overlay.
  6. Choose “Your Stream’s Chat” from the Stream tools menu. 
  7. Copy the URL link from the top right corner.
  8. Open OBS and pick the scene where you want your chat box. 
  9. Add a Browser source under Sources.
  10. Name it something like “Twitch Chat Box” and hit OK.
  11. Paste the URL you copied earlier and save. You can tweak the size to fit your layout.
  12. When everything’s set, hit Start Streaming and enjoy your stream with an embedded chat window.

More on Eklipse Blog >> Streamlabs vs StreamElements – Which One is Best in 2024: Comparison Guide

How to Add YouTube Live Chat to OBS

Adding the live chat feature to your OBS (Open Broadcaster Software) setup is essential. With YouTube Live Chat, you can establish real-time interaction with your audience, fostering a dynamic and engaging streaming environment.

Here are the steps to do that, assuming that you are already logged in with your Google account:

Source: Eklipse.gg

  1. Open a browser and navigate to YouTube.
  2. Click on the camcorder icon with a “+” sign in the top right corner, then select “Go Live.”
  3. In the top right corner’s three dots menu, choose “Popout Chat.”
  4. Copy the URL of the pop-up chat window.
  5. Launch OBS and add a “Browser Source” under “Sources.”
    • Rename the source as “YouTube Chat Box” and click OK.
  6. Paste the copied Chat URL and save by clicking OK.
    • Adjust the dimensions of the chat box for the desired layout.
  7. Start streaming and enjoy your show with an embedded chat window.

How to Make YouTube Chat Transparent on OBS

If you want a transparent YouTube chat on OBS, you can use a custom CSS that a tool automatically generates.

Here’s how to make YouTube chat transparent on OBS:

Source: Eklipse.gg

  1. Go to chatv2.septapus.com.
  2. Customize the desired chat appearance.
  3. Scroll to the “CSS” section, select all (Ctrl + A or CMD + A), and copy the code.
  4. Open OBS, and double-click on the “YouTube Chat Box” browser source.
  5. Go to the “Custom CSS” section, paste the code, and click OK.

And voila! It’s done! You’ll have a transparent YouTube chat on OBS.

How to Add Facebook Gaming Chat to OBS

Source: Eklipse.gg

  1. Access your Facebook Like Page.
  2. Navigate to the Meta Business Suite on the page’s left-hand side.
  3. Choose “Go Live” from the More menu.
  4. Enable the test broadcast button, then click Select to start a live broadcast. This button allows you to check your configuration before going live.
  5. Select “Comments” from the Settings menu.
  6. Open the comments module separately.
  7. Copy the URL from the new Comments tab.
  8. Launch OBS.
  9. In your chosen scene, add a Browser source named “Facebook Chat” in the Sources.
  10. Replace the URL with the Chat URL.
  11. Log in to your Facebook account using the Browser window in OBS. Click the Interact button above Sources and enter your login details.
  12. The chat window is now ready to be used. Remember to refresh your URL comments Browser source whenever you start a live session. You’re all set!

Final Thoughts

To sum up, integrating chat into your OBS stream makes it more interactive for viewers on platforms like Twitch, YouTube, and Facebook Gaming. By following the steps on how to add chat to OBS, you can easily add chat windows to your streams. Whether you’re using Streamlabs, StreamElements, or embedding chat directly, the process is simple. 

Ready to take your viewer engagement to the next level? Look no further than Eklipse. With its innovative AI highlight generator and “convert to TikTok” tool, Eklipse effortlessly transforms your live stream content into captivating TikTok videos. Sign up for free at Eklipse.gg now.

Looking to Stream Professionally? Here’s How to Setup a Dual Streaming PC

0

Dual PC streaming is one of the setups that all the streamers keep debating and asking about. It is natural to ask something like that since a dual PC streaming setup will cost you some big amounts of money.

Some of you may be suggested that this setup is a must for all professional streamers. Some other also asked if this setup is really worth doing? So to answer that question let’s check out this article from Eklipse blog team.

What is dual PC Streaming?

As the name suggests, dual PC streaming is a setup that is using provides 2 PCs, 2 monitors, and a capture card. Some streamers do this setup to ensure the quality of their stream, since dual stream PC will enable you to share the usage of your CPU. In this setup, streamers are usually use one PC to stream the game, while the other used to play the game.

Most of the streamers using this are the pro. So if you are a newbie, you might want to start with the simple and easier setup.

Also if you are just started streaming and looking to grow more, you might want to consider clipping your stream on Twitch and creating highlights from it. But lucky you, because in 2022, you can cut all the processes and let the AI create the highlights AUTOMATICALLY? 

Yes, that’s right! You can use Eklipse.gg, an AI highlight generator that automatically creates highlights from a stream. Even better, it can convert Twitch streams to TikTok videos. Go check it out and give it a try!

Why do streamers need to consider dual PC streaming

As stated in the point before, a dual PC streaming setup is used for efficiency reasons. When you only use one PC setup, your CPU is prone to overheat problems since it will process two different apps simultaneously: the game you are playing and the streaming apps like OBS.

So with this setup, you will benefit from something like

  • better heat management
  • Reduced workload that will reduce the lag on your stream
  • the ability to stream with higher graphics & visual settings
  • the ability to add additional cameras and viewpoints

Also, dual PC streams will let you have a backup when something goes wrong in your setup. Let’s say your game crashes because of a hardware problem, your stream will still up in the air since you separate the game and the stream one PC.

But, of course, there is a caveat on this. One most important caveats are definitely the costs to build the setup and the electricity costs. Also, from a technical perspective, dual PC is hard to set up and troubleshoot. So, if you are not a techie, you might want to reconsider it.

The Power of a Dual PC Streaming Setup

Streaming has become a highly competitive and demanding field, requiring streamers to deliver top-notch content with impeccable quality. A dual PC streaming setup is a game-changer that can give you the edge you need to stand out from the crowd. Let’s explore the benefits and advantages of utilizing a dual PC setup for streaming and how it can elevate your streaming game to new heights.

Superior Performance

One of the most significant advantages of a dual PC setup is the superior performance it offers. By dedicating one PC solely to the streaming process, you alleviate the strain on your gaming rig. This means smoother gameplay, reduced lag, and higher-quality streams for your viewers to enjoy. With a dedicated streaming PC handling the encoding and broadcasting tasks, you can focus on delivering your best performance without worrying about performance issues that may arise from multitasking on a single PC.

Enhanced Customization

Customization is key when it comes to creating a unique and captivating streaming experience. A dual PC setup provides you with the flexibility to customize your streaming settings to achieve optimal audio and video quality. With a dedicated streaming PC, you can fine-tune encoding settings, bitrates, and resolutions without impacting your gaming PC’s performance. This level of customization allows you to create a streaming environment that is perfectly tailored to your preferences, ensuring your stream stands out with professional-grade quality.

Resource Management

Resource allocation is critical for maintaining a smooth and seamless streaming experience. With a dual PC setup, you can separate the demanding tasks of gaming and streaming between two PCs. This effectively prevents performance issues that may occur when running resource-intensive games and encoding software simultaneously on a single system. By distributing the workload, you ensure that both your gaming and streaming PCs have the necessary resources to operate at their full potential, guaranteeing a stable and uninterrupted stream even during demanding gameplay sessions.

Future Expansion

A dual PC setup also provides room for future expansion and growth. As your streaming journey progresses and your audience grows, you may want to incorporate additional hardware, such as multiple capture cards, audio interfaces, or cameras. A dual PC setup offers the flexibility to expand and upgrade your streaming system without overburdening your gaming rig. This scalability allows you to adapt to the ever-changing demands of streaming and continuously enhance your streaming setup as your channel flourishes.

The specifications for dual PC streaming

To set up the dual streaming PC you’ll need to think of your PC working separately, one as your gaming PC, and one as your streaming PC

For the gaming PC, you’ll need to have something like

  • Dedicated Graphics Card: GPU in your gaming PC needs to have at least two outputs, 2x HDM or HDMI = DVI
  • Capture Card: Capture card works as the bridge between your gaming and streaming PC. This device will send the video and audio from your gaming PC to your streaming PC so it will ease the burden off your CPU, GPU, and memory
  • Monitors: For ease of use, you need Two monitors, one for gaming, the other for your streaming setups like OBS and the live chat box
  • Microphone: For professional setup, you need a standalone high-quality microphone so it will produce excellent sound quality from your voice. To have a high-quality microphone, you need an audio interface
  • Audio interface: Most professional microphones use an XLR plug that can only be found on the Audio Interface. Other than that, this will offer much more control over your audio sources
  • Audio splitter: 6-way 3.5mm audio splitter will enable you to connect all the devices and sources. Two male-to-male 3.5mm audio cables are also required for this setup

For the dedicated streaming PC, you will need something more average PC like:

  • A Quad-core processor
  • On-board graphics
  • 8GB DDR4 RAM
  • USB 3.0 connectivity

How to set up a dual PC streaming

To set up a dual PC streaming, you can follow these instructions. First, you need to set up the connection between your PC

Image Source – chillblast.com
  1. Connect your capture card to your streaming PC via USB 3.0 and connect your gaming PC to the capture card via HDMI
  2. Plug your gaming PC into your main gaming monitor via DVI 
  3. Connect your mic to your gaming PC via USB and then connect the line out/headphone jack to the audio splitter
  4. Plug your headphones into the audio splitter
  5. Connect the audio splitter to the capture card via the line in the jack
  6. Connect the audio out/line out on the gaming PC to the line in/mic in on the streaming PC
  7. For game audio: On your gaming PC, right-click sound settings in the taskbar and click Open sound settings
    – Make sure the sound output is going to your headphone output on your mic
  8. For mic audio: On your gaming PC, right-click sound settings in the taskbar and click Open sound settings
    – Click the Sound control panel
    – Choose the Recording tab, find your mic in the list, right-click, and select Properties
    – Now click the Listen tab, and check the “Listen to this device” option. Select the playback device and choose the cable that is connected to the audio splitter, where your headphones and capture card are plugged in

Once done, you need to set up your streaming PC:

  1. Install and open OBS Studio on your streaming PC
  2. Create a Scene using a Video Capture device. Name this whatever your capture card is
  3. An audio source will then be created. Go to Settings, and select Audio
  4. Disable Desktop audio 1 and 2, and select Default for Mic/Auxilary Audio
    If you want to hear any alerts from your gaming PC, you can enable Desktop 1 audio
  5. Test everything!

That is all you need to know about how to set up dual PC streaming. Now that you know the importance of dual PC for streaming and how to set it up, you’ll need to prepare for another essential thing for streaming, which is streaming software. Read our article here: Best 10 Streaming Software for YouTube in 2023.

Wanna know more tips about streaming make sure you check blog.eklipse.gg at a time!

How to Unlink Facebook and Instagram on PC and Mobile Phone

0
how to unlink facebook and instagram
Source: MyTechHubGh

Have you ever wondered how to unlink facebook from instagram? Well, if you care to do it, you can stay on this article and keep reading for a comprehensive guide.

Since Meta (previously known as Facebook) acquired Instagram in 2012, users can now link their Facebook accounts to their Instagram pages. Due to this service, users can have simultaneous sharing on both platforms seamlessly.

However, connecting these platforms also means letting you get double notifications from Facebook and Instagram itself, which could be annoying sometimes. But fret not since you can actually disconnect them. Let’s see what you can do, then.

How to Unlink Facebook and Instagram On a PC or Mac

Facebook and Instagram can be unlinked through a web browser. Simply go to the Instagram website from your browser and do several clicks. To make it clear, follow the guide below.

Method 1. From Instagram Page

  • To begin with, go to the Instagram site on your browser.
  • Sign in to your account.
  • Then, navigate to the profile icon in the top-right corner and click on Settings.
How to Unlink Facebook and Instagram
Source: Alphr
  • Scroll down until you find the Accounts Center hyperlink in the lower left.
how to unlink instagram from facebook 2022
Source: Sridianti
  • Next up, hit the Accounts option.
  • There will be shown a list of apps you’ve been linking to your Instagram, including Facebook.
  • To unlink Facebook, hit the Remove button next to your Facebook account.
Source: Alphr
  • So, there you have it.

Method 2. From Facebook Account

  • Go to the Facebook site on your browser and sign in to your account.
  • Hit the profile icon in the upper-right corner.
  • Click on Settings & Privacy.
  • Then, click on Settings.
  • Afterward, click the Accounts Center option.
  • Select the Accounts option and hit the Remove button next to your Instagram account.

How to Disconnect Facebook From Instagram on iPhone or Android

Alternatively, you can also unlink your Facebook with Instagram through your mobile phone, whether it’s iPhone or Android. The steps are basically similar to the PC version. Here’s how to do it.

Method 1. From Instagram Page

  • Launch the Instagram app on your device and log in to your account.
  • Hop on the profile icon.
  • After that, navigate to the hamburger icon in the upper-right corner.
  • Select Settings.
how to disconnect facebook from instagram on iphone
Source: Lifewire
  • Next up, scroll down and hit the Accounts Center.
  • Tap on the Accounts option.
  • Hit the Remove button next to the account you’d like to remove.
how to unlink facebook and instagram messages
Source: Lifewire

Method 2. From Facebook Page

  • First, open the Facebook app and log in to your account.
  • Second, navigate to the profile icon.
  • Hit the Setting & Privacy > Settings.
How to Unlink Facebook and Instagram
  • Then scroll down and tap on the Accounts Center.
how to unlink facebook from instagram 2021
  • Hit Accounts.
  • Finally, select the account you’re going to remove and hit the Remove button.

Why Unlink Facebook from Instagram?

In the world of social media, maintaining privacy, controlling your content, and avoiding targeted advertising are paramount. Unlinking your Facebook and Instagram accounts can be a strategic move that empowers you to take control of your digital presence. Let’s explore the key reasons why individuals may choose to unlink their Facebook and Instagram accounts.

Privacy Concerns

unlinking Facebook from Instagram is a powerful step towards maintaining it. By separating your personal Facebook profile from your public Instagram account, you create a clear boundary between your personal life and your online persona. This separation helps safeguard sensitive information, ensuring that only the content you choose to share on Instagram is accessible to the public. Unlinking grants you the peace of mind of knowing that your personal Facebook activities remain separate from your Instagram presence.

Targeted Advertising

In today’s digital landscape, targeted advertising has become a pervasive force. Unlinking your Facebook and Instagram accounts can shield you from Facebook’s use of your Instagram data for targeted advertising purposes. When Facebook and Instagram are linked, the information collected from your Instagram activity is used to tailor ads based on your interests, preferences, and online behavior. By unlinking, you can regain control over the ads you encounter, minimizing the intrusion of personalized advertisements and allowing for a more organic browsing experience.

Personalization and Control

Every individual has a unique vision for their Instagram content, and unlinking Facebook can help bring that vision to life. By severing the ties, you reclaim full control over your Instagram content without the influence of Facebook’s algorithms or features. You can personalize your posts, explore your creative freedom, and curate your Instagram presence according to your own standards. Unlinking allows you to shape your Instagram profile in a way that truly reflects your identity, without being limited or influenced by the integration with Facebook.

Conclusion

So, that’s how to unlink Facebook and Instagram that you need to know. Now that you’ve successfully disconnected Facebook from Instagram, there will be no more double notifications that will annoy you. Hope you’ll find this article helpful and don’t forget to let anyone know about this article as well.