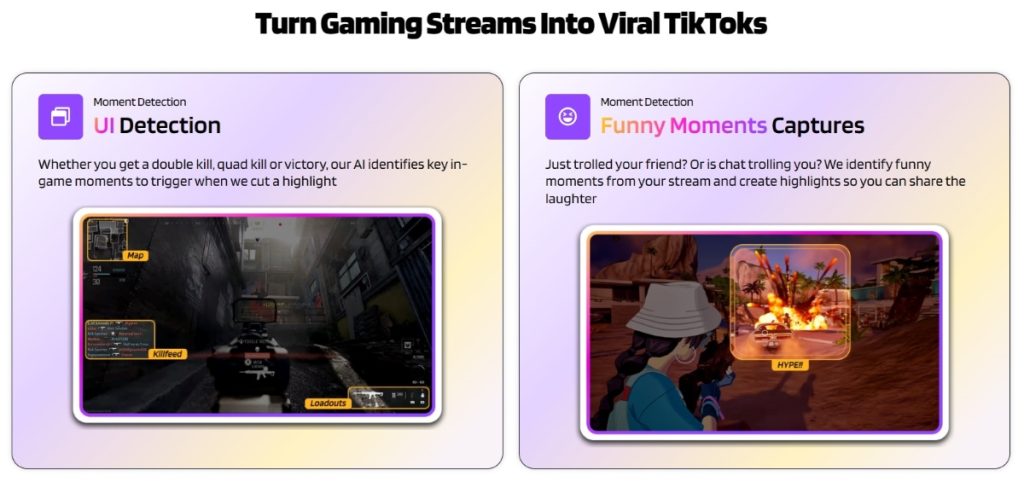
Players of Marvel Rivals are eagerly anticipating the arrival of The Thing and Human Torch, key members of the Fantastic Four. Here’s the latest information on their expected release.
As of now, NetEase has not officially confirmed a specific release date for The Thing and Human Torch in Marvel Rivals. However, based on available information, their release is anticipated soon.
Expected Release Window
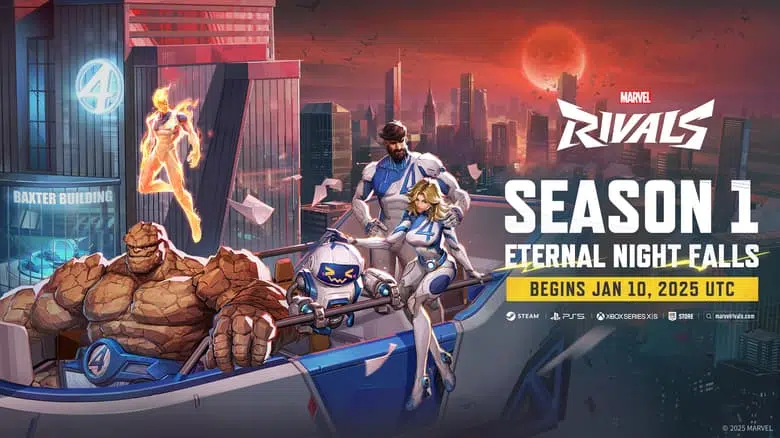
Season 1 of Marvel Rivals began on January 10, 2025. The developers have indicated that new heroes will be introduced approximately every six to seven weeks. This schedule suggests that The Thing and Human Torch are expected to be released between February 21 and 28, 2025.
Source: www.marvel.com
Context within Season 1
Season 1, titled “Eternal Night Falls,” focuses on the Fantastic Four’s battle against Dracula. Mr. Fantastic and Invisible Woman were introduced at the start of the season. The Thing and Human Torch are slated to join the roster in the second half of the season, aligning with the late February release window.
Additional Information
In the Dev Vision Volume Three update released on January 7, 2025, the developers hinted at a six to seven-week timeframe for new hero releases following the season’s commencement. This aligns with the anticipated late February release for The Thing and Human Torch.
While specific abilities for these characters have not been officially detailed, leaks suggest that Human Torch will possess abilities such as Fire Cluster, Blazing Blast, and Pyro Prison. The Thing is expected to serve as a Fighter/Tank role, consistent with his portrayal in the comics.
Conclusion
Although an exact release date has not been officially announced, current information points toward a late February 2025 release for The Thing and Human Torch in Marvel Rivals. This timing aligns with the game’s established schedule for new hero introductions during Season 1. Players should stay tuned for official announcements from NetEase as the release window approaches.
As Marvel Rivals continues to expand, capturing your best highlights effortlessly can set you apart. Whether you’re pulling off an insane Human Torch aerial combo or going on a rampage as The Thing, Eklipse makes it easy to save and share your greatest moments.
So, get ready for battle and start clipping your best Marvel Rivals plays today! 🚀🔥
Source: Eklipse Blog - Streamladder mobile alternatives for twitch clips
Short vertical videos dominate platforms like TikTok, Instagram Reels, and YouTube Shorts, making it essential for content creators to have the right editing tools. Whether you’re a beginner or an experienced editor, selecting software that is both powerful and easy to use can elevate your content and boost engagement. In this guide, we rank the best editing software for short vertical videos in 2025, combining detailed descriptions with value propositions so you understand exactly what each tool brings to your workflow.
CapCut is a standout free editor available for both mobile and desktop, celebrated for its simplicity and powerful editing tools tailored specifically for vertical videos. With support for the 9:16 aspect ratio essential for TikTok, Instagram Reels, and YouTube Shorts, CapCut enables creators to produce professional-quality content at zero cost.
Its intuitive interface makes it easy to trim, cut, add text overlays, and apply cinematic filters, allowing you to generate viral clips quickly. Additionally, its AI-powered features automatically optimize video effects and ensure smooth transitions—making it an ideal solution for creators aiming for high engagement without spending money.
Key Features:
Supports the 9:16 aspect ratio
AI-powered clipping and filter application
A variety of trendy effects, cinematic filters, and transition tools
2. Enlight Videoleap
Videoleap is a mobile-only editor that offers a rich set of creative tools for producing high-quality vertical videos. It includes keyframe animation, advanced color grading, and slow-motion effects, providing extensive control over your edits. Videoleap’s creative suite is designed for users who want to push the boundaries of mobile editing without sacrificing simplicity. With its premium subscription costing around $4.99/month, Videoleap offers a powerful editing experience on the go.
InShot is a favorite for many creators due to its ease of use and comprehensive suite of editing tools. It excels in sound editing and offers a wide range of features like trimming, text overlays, stickers, filters, and adjustable aspect ratios. Although the free version includes a watermark, an affordable one-time purchase or subscription (approximately $3.99) removes this limitation, making InShot perfect for creating quick, engaging vertical videos for social media.
Key Features:
Powerful sound editing and mixing capabilities
Customizable text, stickers, and filter options
Simple trimming and aspect ratio adjustments for vertical video
4. Picsart
Picsart combines both photo and video editing in one user-friendly package, making it ideal for creators looking to quickly produce visually appealing content. It provides customizable fonts, color schemes, and overlays to help maintain brand consistency, along with basic video editing tools. While the free version is sufficient for simple edits, upgrading to the premium version (around $4.99/month) unlocks additional features and a larger media library.
Key Features:
Customizable fonts and color overlays for branding
VEED.IO is an online video editor that works directly in your browser, offering robust tools for creating vertical videos without the need for software installation. It includes AI-driven auto-captioning, trimming, and other editing options that streamline the process. With a free tier available and premium plans starting at about $12/month, VEED.IO is a versatile option for both casual creators and professionals.
Key Features:
AI-powered auto-captioning and trimming tools
Flexible online editing interface with resizing and splitting options
Collaborative editing features for team projects
6. Adobe Premiere Rush
Adobe Premiere Rush offers a simplified editing experience that’s ideal for quick, professional-quality video production. Part of the Adobe ecosystem, it provides an intuitive timeline-based interface and cross-platform support, making it easy to edit on both mobile and desktop. The free version comes with basic features, while full access requires an Adobe Creative Cloud subscription (starting at approximately $9.99/month).
Key Features:
Simple timeline editing for fast video production
Cross-platform support and seamless integration with Adobe products
Easy export and sharing options optimized for social media
7. iMovie
For Apple users, iMovie is a free, reliable video editor with essential tools for creating polished vertical videos. It offers intuitive editing, transitions, and effects that integrate seamlessly with the Apple ecosystem. Although it lacks advanced features, iMovie is perfect for beginners who need a straightforward solution without additional cost.
Key Features:
Free for all Apple devices
Easy-to-use editing tools with smooth transitions and effects
Direct integration with iTunes and other Apple services
8. Spark Camera
Spark Camera is designed for fast and straightforward editing, ideal for on-the-go creators who need to produce content quickly. It focuses on simple, quick edits suitable for Instagram Stories and TikTok. While its feature set is basic, it’s perfect for capturing spontaneous moments and sharing them immediately.
Key Features:
Rapid editing for quick content creation
Simple interface designed for spontaneous, on-the-go use
Supports direct sharing to social media platforms
9. VivaCut
VivaCut stands out with its creative text animations and stylish title effects, making it a great choice for creators who want to add a dynamic visual element to their videos. Its mobile interface is designed for creative editing, with a focus on producing eye-catching titles and transitions. The free version includes ads, while the premium version is available for around $4.99/month.
Key Features:
Advanced animated text and title effects
Mobile-friendly interface for creative video production
Focused on adding unique, stylish visuals to your content
10. Animoto
Animoto is a web-based video editor that offers a wide variety of pre-built templates ideal for creating vertical videos for different social media platforms. It simplifies the process of combining photos, video clips, and text into professional-looking videos. With plans starting at around $15/month after a free trial, Animoto is particularly appealing for marketers and businesses.
Key Features:
Extensive range of templates for various content types
Drag-and-drop interface for quick video assembly
Suitable for creating video ads, product demos, and testimonials
Key Features to Consider
When choosing an editing tool for short vertical videos, keep these points in mind:
Aspect Ratio Adjustment: Support for the 9:16 format is crucial for TikTok, Reels, and Shorts.
User Interface: Look for software with an intuitive, beginner-friendly design.
Editing Tools: Essential functions include trimming, cutting, merging, and adding effects.
Social Sharing: Direct sharing options help you post content quickly on multiple platforms.
AI Capabilities: Features like automatic clipping and background removal save time.
Templates: Ready-made templates can speed up the editing process and give your videos a professional look.
Pricing: Compare free versions with premium upgrades to determine which fits your budget and needs.
Conclusion
In 2025, there are plenty of excellent tools available for creating short vertical videos. CapCut leads the pack with its robust, free, AI-powered features that allow you to create high-quality content quickly. Videoleap and InShot offer great mobile editing experiences with advanced features for those willing to invest a little more, while Picsart and VEED.IO provide versatile options for customization and social sharing. For Apple users, iMovie remains a trusted, free option, and Spark Camera and VivaCut cater to creators who need quick, creative edits.
If you’re looking for a balanced upgrade without overspending, consider premium options where available—especially Eklipse Premium, which offers a smart middle ground by enhancing your workflow with advanced AI features and additional customization, ensuring your content stands out in a crowded market.
Choose the tool that best suits your workflow and creative style. With the right software, you can effortlessly produce stunning vertical videos that captivate your audience and boost your social media presence.
Changing your display name in Call of Duty: Black Ops 6 lets you update how you appear to friends and opponents online. However, the process varies by platform. On PC, your display name change happens through your Activision account (used on Battle.net or Steam), while on PlayStation and Xbox, it ties directly to your account’s online ID or gamertag. This guide provides clear, platform-specific instructions so you can update your name with ease.
Select “Customize Profile” and then choose “Gamertag”.
Enter your new Gamertag.
Confirm the Change:
Confirm your new Gamertag. Keep in mind that after your first free change, subsequent changes may incur a fee.
Additional Information on Rename Tokens and Limitations
Rename Tokens: You receive two free rename tokens on PC via your Activision account. After using these, you earn one token every six months.
Platform Limitations:
On PlayStation and Xbox, changing your Online ID or Gamertag might be subject to restrictions and fees.
Always double-check any character limits or prohibited words before finalizing your new name.
Conclusion
Changing your display name in Call of Duty: Black Ops 6 is straightforward when you follow the platform-specific steps. Whether you’re on PC, PlayStation, or Xbox, updating your name helps keep your online identity fresh and recognizable. Remember to take note of the rename token system on PC and any potential fees on PlayStation and Xbox.
By following these simple instructions, you can ensure that your new display name is set up quickly and correctly, so your friends and opponents always know who you are in the game.
While you’re updating your display name to refresh your gaming profile, why not make sure your best in-game moments are captured as well? Eklipse is a smart, AI-powered tool designed for gamers and streamers. It automatically generates highlight clips from your gameplay, making it easy to share your epic moments on social media.
Short-form video content has exploded in popularity, becoming one of the most engaging formats for creators and marketers alike. With platforms like TikTok, Instagram Reels, and YouTube Shorts dominating the landscape, choosing the best platform to share your content can significantly impact your audience reach and engagement.
In this article, we explore the best short-form video platforms in 2025, ranking them based on features, audience demographics, and overall effectiveness for content creators.
TikTok continues to dominate the short-form video space with its trend-driven content and highly engaged audience, primarily consisting of Gen Z. The platform allows creators to upload videos up to 10 minutes long, but shorter, snappier content typically performs better. TikTok’s algorithm excels at discovering new content, making it an ideal platform for viral videos and fast-growing channels.
Pros:
Largest user base for short-form videos, especially Gen Z.
Exceptional algorithm for discoverability and virality.
Focus on music and creative trends.
Excellent engagement rates and potential for viral growth.
Cons:
Algorithm can be unpredictable and may not always favor new creators.
Limited maximum video length compared to some competitors.
Best For:
Creators who want to go viral, engage with trends, and target a younger audience.
2. Instagram Reels
Source: Eklipse Blog – how to share full 30-second reels on instagram story
Instagram Reels benefits from Instagram’s massive user base, which spans various age groups, with a focus on lifestyle, aesthetics, and polished content. With a maximum video length of 90 seconds, Reels offers a slightly longer format than TikTok, but still supports quick, engaging content. Integration with Instagram’s main features and advertising tools makes it a powerful option for creators looking to monetize their content.
Pros:
Massive user base, great for lifestyle and aesthetic content.
Strong integration with Instagram’s existing features and ads.
Easier for creators already established on Instagram.
Cons:
Challenging algorithm for new creators to navigate.
Less emphasis on music compared to TikTok.
Best For:
Creators who already have an Instagram following and want to monetize their content via ads and product features.
3. YouTube Shorts
YouTube Shorts offers a great opportunity for creators who already have an audience on YouTube, as it’s integrated into the platform. Shorts are limited to 60 seconds, making it ideal for quick content that can drive traffic to longer YouTube videos. YouTube’s robust monetization system allows creators to earn ad revenue from Shorts, making it a viable platform for those looking to turn their content into a business.
Pros:
Integrated into the YouTube ecosystem, providing SEO and traffic benefits.
Monetization via ad revenue sharing.
High discoverability, especially for creators already established on YouTube.
Cons:
High competition, with many established channels already dominating.
Limited video length compared to other platforms.
Best For:
Creators who are already on YouTube and want to use Shorts to drive engagement and monetize their content.
4. Facebook Reels
Facebook Reels serves a similar purpose to Instagram Reels but is more geared toward Facebook’s older demographic. While Facebook’s user base is massive, Reels tends to attract a broader range of ages, making it a good option for those targeting older users or those engaged in lifestyle, news, and community-oriented content.
Pros:
Access to Facebook’s vast, multi-generational user base.
Integrated with Facebook’s advertising tools and features.
Strong potential for reaching older demographics.
Cons:
Less trendy and less creative than TikTok or Instagram.
Lack of advanced editing features compared to competitors.
Best For:
Content creators looking to reach an older audience or those already invested in Facebook’s ecosystem.
5. Snapchat Spotlight
Snapchat Spotlight focuses on short-form videos and is integrated with Snapchat’s augmented reality (AR) tools, making it perfect for creators who want to engage with a younger audience using interactive and creative content. Snapchat has seen strong engagement with its AR features, but its audience and reach are smaller compared to TikTok or Instagram.
Pros:
Strong engagement with younger audiences.
AR features offer a unique creative edge.
Ideal for spontaneous, creative content.
Cons:
Smaller reach compared to the other platforms.
Less emphasis on long-term content creation strategies.
Best For:
Creators who want to leverage AR tools and focus on fun, spontaneous content for a younger demographic.
Factors to Consider When Choosing a Platform:
Audience Demographics:
TikTok is favored by Gen Z, while Instagram Reels is popular across various age groups, especially Millennials.
YouTube Shorts attracts a broad demographic and is perfect for those looking to create diverse content.
Content Style and Length:
TikTok thrives on creative, trendy content.
Instagram Reels is great for polished, lifestyle-focused content.
YouTube Shorts works best for various content, including educational or long-form teasers.
Monetization Opportunities:
TikTok offers creator funds, brand partnerships, and e-commerce integrations.
YouTube Shorts allows ad revenue sharing.
Instagram Reels integrates with Instagram’s product tagging and paid partnerships.
Below is a comparison table that summarizes the key aspects of the best short-form video platforms in 2025, including the features, pros, and cons most relevant for content creators and marketers.
Platform
Description
Max Video Length
Pros
Cons
Unique Feature
TikTok
The leader in short-form video with a highly engaged, trend-driven Gen Z audience.
Up to 10 minutes (short clips thrive)
Massive user base; high engagement; powerful algorithm for discoverability
Algorithm can be unpredictable; potential regulatory issues
Dominates with around 40% market share
Instagram Reels
Integrated within Instagram, offering a polished and user-friendly experience for lifestyle and aesthetic content.
90 seconds
Access to over 2 billion users; strong integration with Instagram’s features and ads
Learning curve for its algorithm; less emphasis on music compared to TikTok
Seamless integration with Instagram ecosystem
YouTube Shorts
YouTube’s dedicated short video platform that leverages the massive YouTube audience and monetization opportunities.
60 seconds
Huge potential reach; monetization via ad revenue sharing; SEO benefits through YouTube
High competition; favors channels with established audiences
Leverages YouTube’s vast network and search power
Facebook Reels
A short-form video tool within Facebook, catering to a broader, often older demographic.
Generally short clips
Access to Facebook’s extensive user base; strong advertising tools
Less trendy; fewer creative editing features than competitors
Taps into Facebook’s vast, mature audience
Snapchat Spotlight
Snapchat’s platform for short, creative videos with a focus on spontaneity and AR-driven effects.
Varies (typically short clips)
Unique AR features; very popular with younger audiences; creative and fun
Smaller overall reach compared to TikTok and Reels; less emphasis on monetization
Emphasis on creative AR effects and spontaneous content
Conclusion
When it comes to short-form video, each platform offers distinct advantages for content creators:
TikTok remains the powerhouse for trend-driven, highly engaging content, ideal for reaching a young audience.
Instagram Reels offers a seamless experience for those who want to leverage Instagram’s massive user base, especially for visually appealing and lifestyle content.
YouTube Shorts provides excellent monetization opportunities and SEO benefits, making it great for creators looking to expand their reach.
Facebook Reels targets a more mature audience and benefits from Facebook’s strong advertising tools.
Snapchat Spotlight is perfect for creators focused on creative, AR-enhanced content and a spontaneous style.
Choose the platform that best aligns with your content style, audience, and marketing goals, and start experimenting to see which one helps you connect best with your viewers.
Conclusion
The best short-form video platform depends on your goals and audience. TikTok continues to be the leader in terms of engagement and trendsetting, making it ideal for viral content. Instagram Reels and YouTube Shorts provide broader reach and excellent monetization potential, while Facebook Reels and Snapchat Spotlight offer unique opportunities to engage with specific demographics.
Ultimately, the right platform for you will depend on your target audience, content style, and whether you’re looking to monetize your videos. Experimenting across multiple platforms can help you reach a larger audience and diversify your content strategy.
For a balanced solution that delivers advanced, automated editing features without the high costs of many professional tools, consider exploring AI-powered platforms like Eklipse.gg. While Eklipse.gg is not a short-video platform per se, it can streamline your content creation by automatically generating highlight clips for social sharing across platforms. This makes it an excellent complementary tool for creators looking to maximize their impact without overwhelming complexity or expense.
For content creators and streamers, the right game can be a game-changer—especially when it comes to high-engagement titles like Call of Duty. Whether it’s the thrill of competitive multiplayer, the storytelling of a gripping campaign, or the chaos of a battle royale, Call of Duty offers plenty of options for creators looking to captivate their audience.
In this article, we rank the best Call of Duty games for streamers, considering factors like popularity, replayability, and content variety.
Best Call of Duty Games for Streamers and Content Creators
1. Warzone 2.0 (2022)
Source: The Mirror
Why It’s Great for Streamers: Warzone 2.0 continues to dominate the battle royale scene, offering endless content possibilities. The game’s open-world format provides opportunities for high-stakes moments, intense firefights, and fun fails—perfect for creating engaging, unpredictable content. Its popularity on Twitch and YouTube means you’ll likely attract a large viewership with minimal effort. Plus, the game’s frequent updates ensure fresh content for streamers and keeps the audience coming back for more.
Key Features:
Open-world battle royale
Huge viewership potential
High engagement from both casual players and competitive communities
Frequent updates and seasonal content
2. Call of Duty: Black Ops 6 (2024)
Why It’s Great for Streamers: Released in October 2024, Black Ops 6 brings fresh content with a new campaign, multiplayer maps, and an updated Zombies mode. With an engaging narrative and classic Black Ops features, it’s a hit for streamers looking for fresh content while retaining the beloved elements from previous installments. This title will definitely attract viewers looking for the latest CoD content, keeping your channel relevant and up-to-date.
Key Features:
New campaign and multiplayer modes
Zombies mode for varied content
High relevance in the CoD community
Released just in time for fresh content creation
3. Call of Duty 4: Modern Warfare (2007) & Modern Warfare Remastered (2016)
Why It’s Great for Streamers: As the game that redefined the Call of Duty franchise, both the original and remastered versions of Modern Warfare provide a blend of nostalgic multiplayer action and a gripping campaign. Streamers can tap into the nostalgia factor while delivering high-quality content from a classic that still holds up today. The remastered edition with improved graphics makes it more accessible for modern-day creators, while the original’s authenticity appeals to long-time fans.
Key Features:
Classic campaign and multiplayer modes
Timeless appeal for a wide audience
Remastered version brings the game up to modern standards
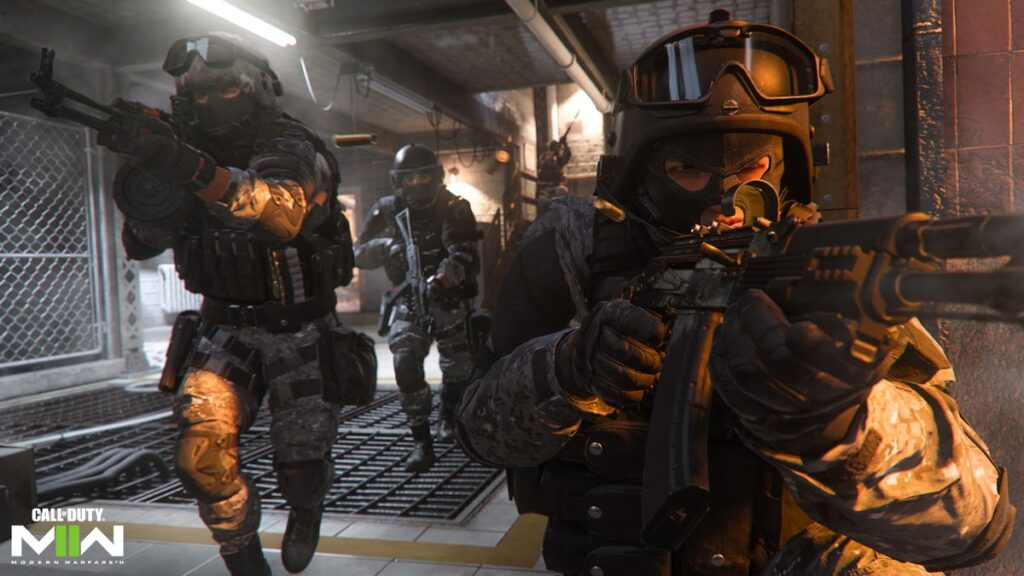
4. Call of Duty: Modern Warfare II (2022)
Why It’s Great for Streamers: Modern Warfare II offers an exciting mix of campaign thrills and multiplayer action. With an active community and ongoing updates, this installment continues to attract a lot of viewers. It’s a perfect game for creators who want a blend of modern warfare and tactical gameplay. Streamers can also tap into its robust multiplayer modes, which remain a fan favorite.
Key Features:
Intense campaign mode
Still-active multiplayer community
Frequent updates for fresh content
5. Call of Duty: Black Ops (2010) & Black Ops Cold War (2020)
Why It’s Great for Streamers: The Black Ops series is known for its compelling campaigns, Zombies mode, and multiplayer options. These games have massive replay value and can serve as great content for streamers who want to mix action with some nostalgia. Cold War’s unique multiplayer modes and integration with Warzone bring extra options for creators who want to diversify their content.
Key Features:
Popular Zombies mode
Strong campaign storytelling
Engaging multiplayer options
6. Call of Duty: Modern Warfare (2019)
Why It’s Great for Streamers: The reboot of Modern Warfare brought a fresh, gritty narrative to the CoD franchise. With a popular multiplayer mode and new features like Gunfight, this title remains relevant for streamers. It also continues to draw viewers thanks to its tactical gameplay and intense battles. Perfect for streamers who want to showcase a combination of high action and strategic play.
Key Features:
Gritty campaign with modern storytelling
Unique modes like Gunfight
Strategic gameplay for varied content
7. Call of Duty: WWII (2017)
Why It’s Great for Streamers: For a change of pace from modern or futuristic combat, WWII offers a historical setting with a gripping single-player campaign. The multiplayer modes provide fast-paced action, making it a solid choice for creators looking to deliver something different. This game also taps into the historical genre, appealing to viewers interested in WWII settings.
Key Features:
Historical World War II setting
Fast-paced multiplayer modes
A shift in pacing compared to other CoD games
Factors Considered in Ranking:
Popularity and Viewership: Games like Warzone 2.0 and recent releases tend to have high viewership on Twitch and YouTube, making them excellent choices for streamers looking to maximize their audience.
Replayability and Content Variety: Games with multiple modes (multiplayer, campaign, Zombies, battle royale) offer more opportunities for content creation and can keep your streams diverse and engaging.
Community Engagement: Active multiplayer communities ensure that your content is relevant and that viewers have a constant supply of fresh updates and challenges to enjoy.
Content Potential: Strong narratives, unique mechanics, and engaging gameplay all contribute to a game’s ability to fuel endless content ideas, from walkthroughs and guides to live streams.
Comparison Table
Game Title
Release Year
Key Features
Pros
Cons
Ideal For
Warzone 2.0
2024 (Latest update)
Open-world battle royale, high viewership, intense firefights
High viewership, endless content opportunities
Very competitive; high network demands
Streamers looking for high-energy gameplay
Call of Duty: Black Ops 6
2024
New campaign, updated multiplayer maps, zombies mode
Fresh content; high relevance with current trends
Early stage with potential bugs; may require updates
Creators focusing on new, trending content
Call of Duty 4: Modern Warfare & Remastered
2007/Remastered
Classic campaign, nostalgic multiplayer action
Timeless gameplay; appeals to loyal fans
Older graphics; less relevant for current trends
Streamers aiming for nostalgic content
Modern Warfare II
2022
Thrilling campaign, active multiplayer community
Good mix of modern gameplay and content opportunities
May lack some cutting-edge features compared to newer titles
Creators wanting a balance between old and new
Call of Duty: Black Ops & Black Ops Cold War
2010/2020
Engaging campaigns, popular zombies mode, varied multiplayer
Diverse modes; strong fan base
Mixed reviews on gameplay consistency
Streamers who want variety in content
Modern Warfare (2019)
2019
Gritty campaign, popular multiplayer modes like Gunfight
Well-received gameplay; still holds strong in viewership
Some features may feel dated compared to latest releases
Streamers targeting current audience trends
Call of Duty: WWII
2017
World War II setting, historical campaign, different multiplayer experience
Unique setting; offers change of pace
May not appeal to all fans; less popular than modern titles
Creators looking for a different theme in content
Conclusion
The best Call of Duty game for streaming and content creation largely depends on your personal style and your audience’s interests. Whether you prefer the high-stakes action of Warzone 2.0, the nostalgic appeal of Modern Warfare and Black Ops, or the fresh content found in Black Ops 6, there’s a CoD title that can match your streaming needs.
For streamers looking to maximize engagement, mixing newer releases with classic titles will allow you to appeal to a wide range of viewers. By choosing the right game, you can create diverse, engaging content that keeps your audience coming back for more.
For those who prefer a modern approach that also offers tools to streamline your content creation, consider integrating services like Eklipse.gg. Eklipse.gg’s AI-powered highlight generation can work with many Call of Duty titles, making it easier for you to share your best moments with minimal effort. It provides a smart middle ground that enhances your content without requiring a steep investment.
TL;DR Yes, Eklipse.gg is free. You can clip and edit up to 15 clips per 3‑hour stream at 720p. To unlock higher limits, HD quality, more platforms, and watermark removal, you’d need the $24.99/month Premium plan, or get annual plan for $3.47/week if you pay annually.
Eklipse is an AI-powered tool that helps gamers and streamers automatically generate highlights from their live streams. Eklipse works on platforms like Twitch, YouTube, Facebook, and Kick. Many users ask whether Eklipse is free and what extra benefits the premium version might offer.
In this guide, we break down the features of the free version and reveal why Eklipse Premium stands out as the balanced choice—delivering enhanced functionality without the steep price tag of many competitors.
For creators who want to save time and produce professional-looking clips, Eklipse provides a strong core of free features that get you started quickly. And when you’re ready to take your content to the next level, upgrading to Premium unlocks advanced tools designed to boost your workflow and maximize your content’s impact.
Here’s a closer look at what the free and premium versions of Eklipse:
The free version of Eklipse offers an impressive suite of features that are perfect for getting started with automated highlight generation:
AI-Powered Highlight Generation: Automatically clips your best gameplay moments—like impressive kills, clutch plays, and humorous reactions—without any manual effort.
Clip Conversion: Easily convert your highlights into vertical videos optimized for social media platforms such as TikTok, Instagram Reels, and YouTube Shorts.
Ready-to-Use Templates: Access a range of free, regularly updated templates that allow you to customize your clips quickly.
Basic Video Editing: Perform essential edits such as trimming and adjusting clip lengths.
Social Sharing: Share your edited clips directly from Eklipse to your favorite social media channels.
User-Friendly Interface: Enjoy a straightforward and intuitive design that lets you start creating content right away.
Cross-Platform Integration: Seamlessly pull in streams from major platforms, so you can focus on creating content instead of juggling multiple tools.
These free features provide everything you need to start producing high-quality gaming clips without spending a cent.
This free tier is ideal for casual streamers and new content creators who want to automate highlight generation without spending money.
Eklipse Premium: Strategic Upgrades for Serious Creators
Why choose between basic free tools and bloated “pro” platforms? Eklipse Premium fills the gap with purpose-built features designed for scalable growth:
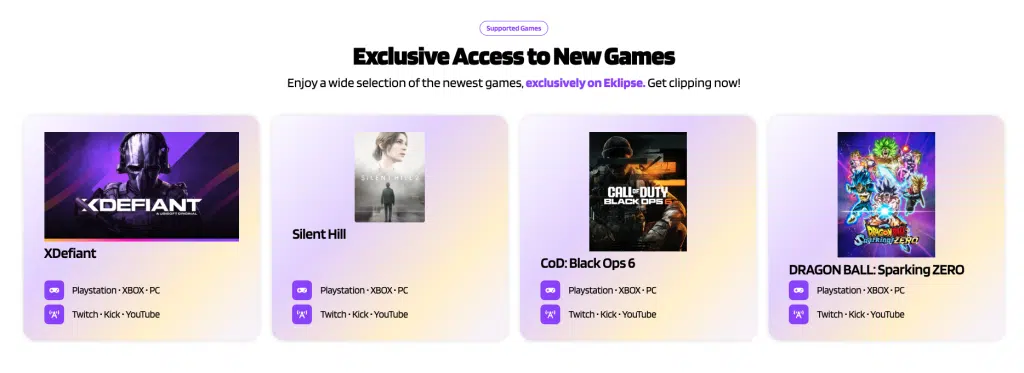
Premium user will get early access to new hype games
1. Enhanced Technical Capabilities
Premium removes critical bottlenecks:
1080p HD Exports: Crisp, monetization-ready quality for YouTube and sponsorships.
12-Hour Stream Support: Ideal for marathon gaming sessions or live events.
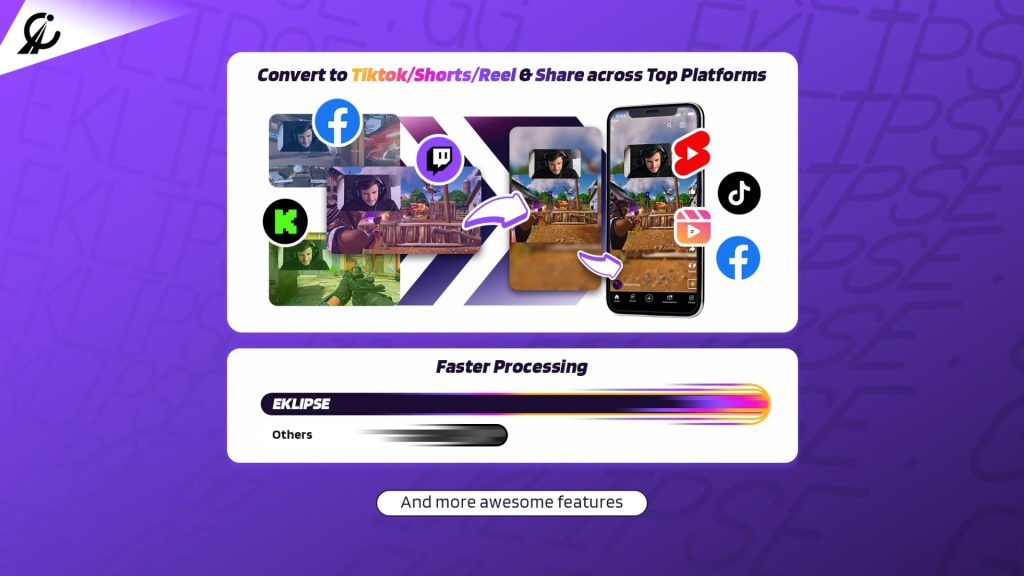
3x Faster Processing: Highlights ready in minutes, not hours.
90-Day Clip Storage: Archive content for seasonal compilations or repurposing.
2. Advanced Editing & AI Tools
Premium unlocks studio-grade customization:
Watermark-Free Clips: Present polished content without distracting branding.
100 Clips/Stream: Maximize content output from every session.
Automatic Meme Insertion: AI suggests/reacts to viral moments with trending templates.
3. Cross-Platform Flexibility
Kick & Rumble Integration: Expand reach with full support for Kick streaming and Rumble.
Multi-Platform Scheduling: Auto-publish to 6+ platforms at optimal times.
Eklipse Premium vs. Alternatives: Value Without Bloat
Feature
Eklipse Free
Eklipse Premium
High-Cost Competitors
Resolution
720p
1080p
4K (often unnecessary)
Clips/Stream
15
100
Unlimited (with rendering lag)
Storage Duration
14 days
90 days
180+ days (+$10/month)
Price
Free
$19.99/month
30−30−50/month
The Takeaway: Premium prioritizes practical upgrades—like HD exports and extended storage—over niche extras that inflate costs.
Who Benefits Most From Premium?
Eklipse Premium is ideal for mid-tier streamers (1K-50K followers) who want to leverage HD clips and watermark removal to attract sponsors. It’s also perfect for daily streamers who need to process 100 clips per stream quickly and cross-platform creators who benefit from Kick integration and multi-platform scheduling.
On the other hand, the free plan suffices for casual gamers sharing weekend Fortnite highlights with friends or new creators testing workflows before monetizing.
Pricing: Affordable Scaling for Growing Channels
Eklipse Premium’s pricing model rewards commitment:
Monthly Plan: $24.99/month (flexibility for seasonal creators).
Annual Plan: $179.99/year (37% savings for dedicated streamers).
For comparison, competitors charge 30−30−50/month for similar features, often locking advanced tools behind pricier tiers.
Conclusion
Yes, Eklipse is free to use, with a strong AI-powered highlight tool available at no cost. The free version is a great option for streamers looking to automate content creation. However, for those who want faster processing, premium templates, and more advanced editing, Eklipse Pro is the smart middle ground—offering high value without the excessive costs of high-end alternatives.
For the latest pricing details on Eklipse Pro, visit Eklipse.gg.
Outplayed is a tool designed to automatically generate highlights from your gaming streams. However, many users find it lacking in features like advanced editing and support for a wider variety of games, leading them to search for the best Outplayed alternatives.
To enhance your content creation, it’s worth exploring other options that offer more comprehensive functionality. This article will guide you through some of the top apps for capturing highlights, helping you choose the one that suits you best.
Eklipse is an AI highlights tool that creates fantastic video clips of your best gaming moments. It does this automatically and maintains high-quality results.
To get started, simply sign up on Eklipse.gg and connect your Eklipse account to streaming platforms like Twitch, YouTube, Facebook, or TikTok. The AI will instantly gather your stream videos. With just a few clicks, you’ll have an amazing highlight clip ready to share.
What’s even better, Eklipse allows you to repurpose your clip for vertical short videos on platforms such as TikTok, Reels, or YouTube Shorts, and it does this in less than a minute.
Additionally, the repurposing tool includes a handy feature that lets you add automatic captions, channel name stickers, custom text, and more!
AI-Powered Highlights Generation: Eklipse uses artificial intelligence to automatically identify and extract the most exciting and engaging moments from your gaming streams and videos. This feature helps you create high-quality highlights without having to manually edit and curate them.
Conversion to TikTok and Other Platforms: Eklipse allows you to convert your generated highlights into various formats suitable for different platforms. This includes TikTok, Reels, and YouTube Shorts, making it easy to share your content across multiple platforms.
Customization: The tool provides various customization options to enhance the visual appeal of your highlights. These include templates, AI captions, and custom text, which can be used to add a personal touch and make your content more engaging.
Cloud-Based Processing: Eklipse uses cloud-based servers to process your videos, which means you don’t need to worry about the technical aspects of video editing or storage. This also allows for faster processing times and more efficient use of resources.
Premium Features: The premium plan offers additional features that enhance the overall experience. These include advanced editing capabilities, higher video quality, and more storage space for your highlights.
Pros:
Easy to use
Supports multiple platforms
Advanced AI-powered highlights generation
Wide customization options
Cloud-based processing for efficient use of resources
Cons:
Limited features in the free version
No B-roll or GIF support
Limited control over AI-generated highlights
Price:
Free version with limited features
Premium version at US$19.99 per month
Maximize your Black Ops 6 rewards—Create highlights from your best gameplay with with Eklipse
Eklipse help streamer improve their social media presence with AI highlights that clip your Twitch / Kick streams automatically & converts them to TikTok / Reels / Shorts
2. Gazoom App: Seamless Multi-Game Support + Advanced Review Tools
Source: Overwolf – outplayed alternative
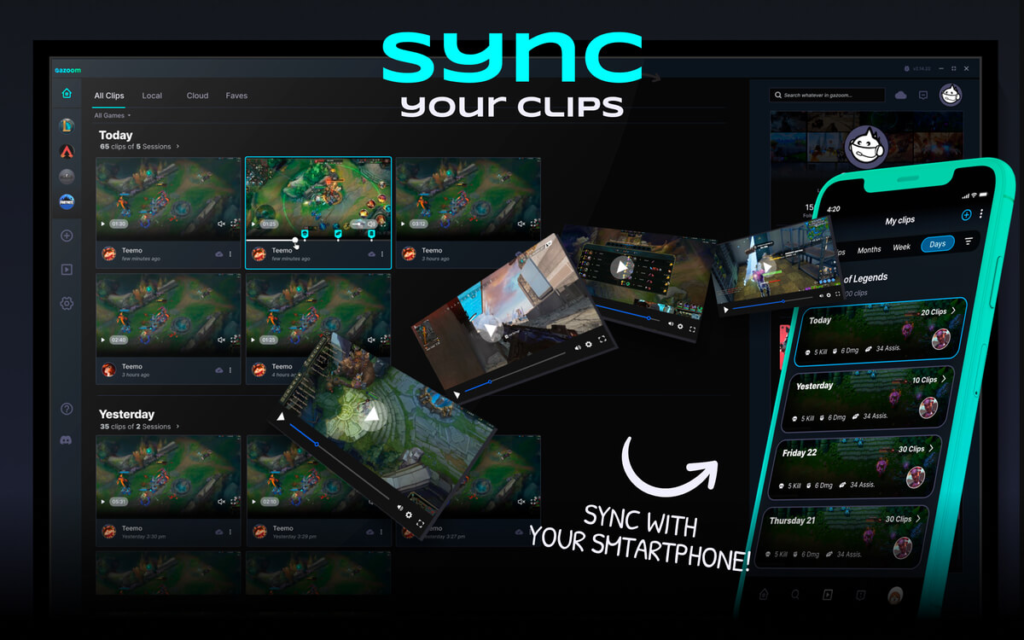
Another convenient app you can try to create a highlight clip is Gazoom App. Gazoom is available for Windows, IOS, and Android. Just like Outplayed, the Gazoom app automatically captures your best gaming moments and turns them into clips. Furthermore, this app has quite a simple interface that even a beginner can learn to use in no time.
The interesting thing about this app is that Gazoom also supports 500+ well-known games, like Apex Legends, Fortnite, Call of Duty, League of Legends, and more! Just the way Outplayed supported games. In case you don’t find your favorite game on their list, just knock them through a message. Aside from that, you can enhance your video appearance by adding GIFs, text, and even changed audio.
However, this software requires a download to use. But since the file size isn’t that big, it can fit on your device without taking up too much space.
Key features:
Capture: Gazoom allows users to capture their gaming highlights with ease, providing a seamless way to record and review their gameplay. The app offers a variety of capture modes, including manual, automatic, and scheduled captures.
Review: The app provides professional reviewing tools for users to analyze and improve their gaming skills. These tools include frame-by-frame playback, slow motion, and the ability to add annotations and tags to clips.
Store in the Cloud: Gazoom offers free cloud storage for users to store and manage their gaming clips. This allows users to access their clips from any device and share them with others.
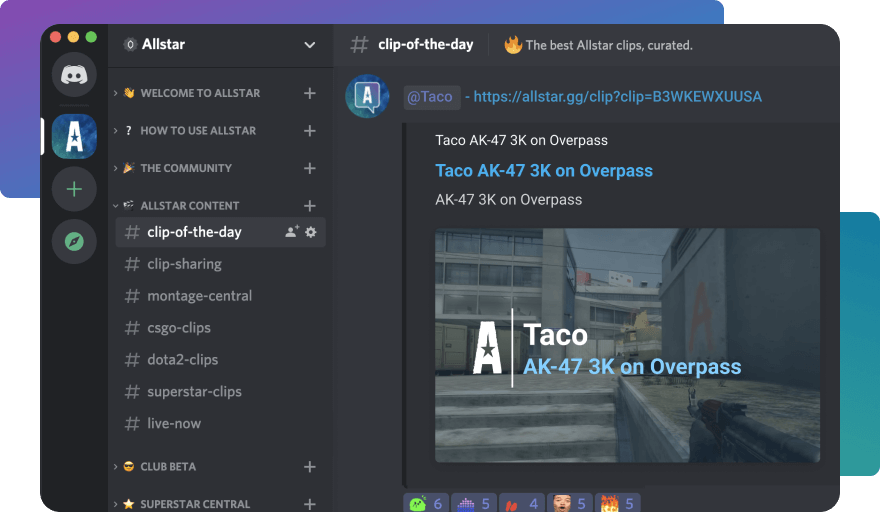
Share & Watch: Users can share their clips on various platforms like Discord, YouTube, Twitter, and Gfycat, and also watch clips from other users on their personalized news feed. This feature allows users to engage with the gaming community and share their gaming experiences with others.
Pros:
Low impact on performance
Free cloud storage
Easy sharing
Supports a wide range of games
Allows for frame-by-frame playback and slow-motion
Cons:
No automatic clipping process
No support for live-streaming
No option to customize the app’s appearance
Price: Free
3. AllStar: Best Outplayed Alternatives with High-Quality Output
Source: AllStar – best app to capture highlights
Do you play DOTA 2, CSGO, Fortnite, or League of Legends and trying to find the best clipping software to capture the best highlight from your video? AllStar might be the best option for you. This is another software that allows users to get their video clips in minutes. Once you download the app, you’re able to try all the features.
When it comes to features, AllStar provides everything to support your streaming. You can add catchy music, transitions, memes, special effects, and more! AllStar even lets you personalize your intro and outro, even overlays.
But the worth-noting fact is, that this software is currently available for Windows 10 and 11 only. With time, the developers will expand this clip-creator app. So if you are a Mac user, you can probably try another tool that fits your needs better. Additionally, fret not it will take up space on your storage, because it applies free-cloud storage that enables you to clip video as many as you want.
Key features:
Cloud-based processing: The app processes clips on higher-end machines in the cloud, ensuring that the quality of the clips is consistent regardless of the user’s local machine specifications.
1080p60 captured at 120 FPS and blended down: This feature ensures that the clips are captured at a high frame rate and then blended down to 60 FPS for a smooth and high-quality output.
Intro and watermark: The app includes an intro and a small watermark in the corner, similar to TikTok, to make the clips more engaging and to promote the app.
Support for various game types: The app currently supports CS: GO Competitive Matchmaking, Scrimmage, Wingman, and FACEIT, with plans to expand to other game types like casual and community matches.
Editing features: Although the app is primarily designed for clipping, it also includes basic editing features like adding music and making montages, which are being developed further.
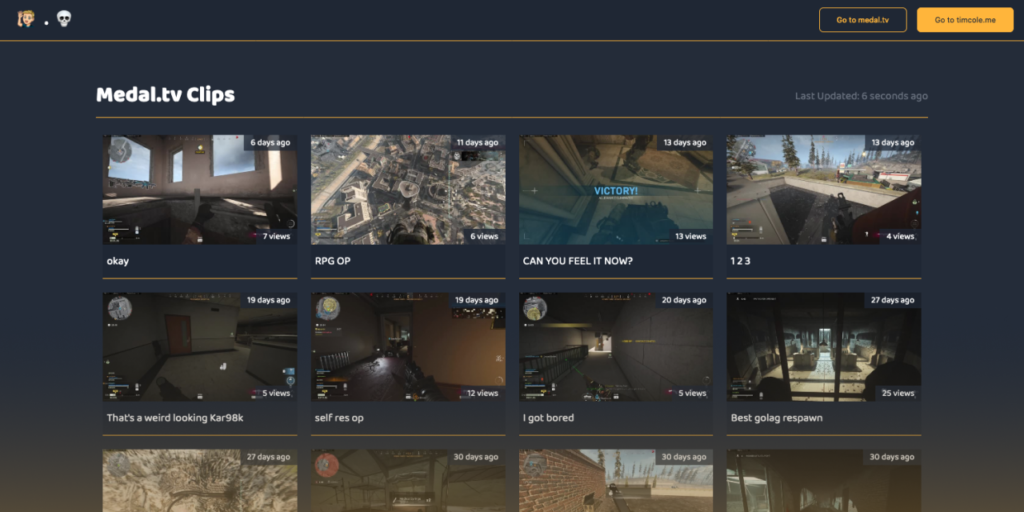
4. MedalTV: Best Outplayed Alternatives with Gameplay Record Feature
Source: GitHub – medal tv vs outplayed reddit
MedalTV is undoubtedly one of the best clip makers. The interesting part of this software is it’s not only capable of capturing highlights from a video, but it’s also able to conveniently record your gameplay. So basically it’s sort of a two-in-one software.
Once you’ve recorded your gameplay and clipped it right away, you can easily edit and share it on other platforms with a single click. MedalTV offers various editing tools like GIFs, stickers, greenscreen effects, and free-copyright soundtracks. It even allows you to speed up or slow down your video using one of its features.
If you don’t mind a watermark on your video, you might like using its free version. But if a watermark is not your thing, you can pay $9.99 for the premium version and say, sayonara watermark!
Key features:
Record and Clip Gameplay: Medal TV allows users to record and clip their gameplay, providing a convenient way to capture and share memorable moments.
AI-Powered Editing Tools: The software includes advanced editing tools powered by AI, which enable users to create professional-looking videos with ease.
Customization Options: Users can customize their clips with various effects, such as slow-motion, fast-forward, and text overlays, to enhance their visual appeal.
Social Sharing Integration: Medal TV integrates directly with social media platforms, making it easy for users to share their clips with friends and followers.
Hardware Acceleration: The software uses hardware acceleration, ensuring that it does not significantly impact gaming performance while clipping.
Hotkeys for Clipping: Users can set hotkeys to quickly capture specific moments in their gameplay, such as the last 30 seconds.
Pros:
User-friendly interface
Comprehensive editing tools
Hardware acceleration
Social sharing integration
Wide customization options
Cons:
Watermark on the free version
Limited recording time on the free version
Premium version required for advanced features
Price:
Free version with a watermark
Premium version at approximately $9.99 per month (exact price may vary based on sign-up)
5. Game Bar: Best Outplayed Alternatives for Xbox Gamers on PC
Source: WWWhats New – app like outplayed
The Game Bar is a built-in screen capture tool in Windows 10 that allows users to record game clips, take screenshots, and broadcast game battles. It is designed to be user-friendly and offers several key features that cater to the needs of gamers and content creators.
The Game Bar is particularly useful for gamers who want to capture and share their gaming experiences with others. With its simple and intuitive interface, users can easily record and share their gameplay, making it an essential tool for building a gaming community and engaging with fellow gamers. Additionally, the Game Bar’s integration with Mixer allows users to broadcast their gameplay to a wider audience, making it an excellent platform for content creators and streamers.
Key Features:
Screen Capture: The Game Bar allows users to record game clips and take screenshots while playing games on their Windows 10 PCs. This feature is particularly useful for capturing memorable moments in games, sharing them with friends, or creating tutorials and walkthroughs.
Broadcasting: Users can broadcast their gameplay directly to Mixer, a live-streaming platform. This feature is ideal for gamers who want to share their gaming experiences with a wider audience, engage with their fans, or participate in online gaming communities.
Audio Options: The Game Bar includes options to record system audio and microphone audio, making it suitable for gamers who want to record commentary or sound effects. This feature is particularly useful for content creators who want to add a personal touch to their recordings.
Customization: Users can customize the recording settings, such as video quality, frame rate, and audio bit rate, to suit their needs. This feature is useful for gamers who want to optimize their recordings for specific platforms or formats.
Integration with Xbox: The Game Bar is integrated with Xbox, allowing users to access Xbox features like Game DVR and social features directly from the Game Bar. This integration provides a seamless gaming experience across devices.
Pros:
Simple and intuitive interface
Supports high-quality video recording
Allows for customization of recording settings
Integrated with Mixer for live streaming
Supports recording of system audio and microphone audio
6. Vibby: Another Best Software of Outplayed Alternatives
Source: Vibby – Outplayed alternatives free
Vibby offers a more hands-on approach by allowing you to copy video URLs from platforms like YouTube, Google Drive, and Twitch, and use them to create highlights. Unlike other tools, Vibby gives users full control over what part of the video they want to capture, cutting out the rest.
Once your clip is ready, you can easily share it through an embedded link or on social media. For those looking for Outplayed alternatives free or Outplayed alternatives Android, Vibby is a great option. It provides similar features to Outplayed premium and is available for Outplayed download.
Key features:
Layered Toolset: Vibby’s toolset sits on top of existing video players to enable sharing, ensuring compatibility with major video providers and social networks.
Brand Consistency: The platform allows users to match video player experiences to their existing visual brand guidelines, ensuring a consistent visual identity.
Graphic Overlays: Vibby enables users to engage viewers with brand-specific graphic overlays, enhancing the overall video experience.
User-Generated Sharing: The platform allows users to set limitations and parameters for user-generated sharing, ensuring that content is shared according to their preferences.
CTAs: Vibby offers both in-video and post-video CTAs to increase conversions, making it an effective tool for marketers and businesses.
Pros:
Easy integration with existing video players
Customization options for brand consistency
Enhanced engagement through graphic overlays and CTAs
Ability to set parameters for user-generated sharing
Compatible with major video providers and social networks
Cons:
The steep learning curve for users without prior video editing experience
Potential for video quality degradation due to compression
Limited support for older browsers or devices
Price: No information available
7. Steelseries Moments: Best Lightweight Outplayed Alternatives
Source: Steel Series
Steelseries Moment is another alternative to Outplayed. Moments from Steelseries is the best lightweight clipping software at your disposal. You’ll never miss your best moment during the game while using this tool.
Once you’ve got the clip, you can immediately trim the length, add text captions, and even some cool GIFs. For Windows users, you better not miss out on this thing.
Key features:
Easy to use: Moments offers a simple interface with clear buttons for recording, editing, and sharing clips.
Manual and automatic capture: You can capture clips manually using a hotkey or set Moments to automatically detect and clip highlights based on in-game events (currently supported for a limited number of games).
Basic editing tools: Moments allows you to trim clips, add text overlays, and adjust audio levels.
Sharing options: You can easily share your clips directly to social media platforms like Discord, YouTube, and Twitter.
8. OBS Studio: Best Open-Source Outplayed Alternatives
Source: OBS
One solid choice as an Outplayed alternative is OBS Studio. This application is not only free but also open-source, making it a popular pick for live-streaming enthusiasts. What sets OBS Studio apart is its versatility – not only can it handle live streaming, but it’s also excellent for recording gaming clips. If you’re seeking a robust and flexible option, OBS Studio should be on your radar.
Key Features:
Real-time video and audio capturing and mixing: OBS Studio allows users to capture and mix video and audio sources in real-time, making it suitable for live streaming and recording123.
Customizable scenes: Users can create scenes composed of multiple sources, including window captures, images, text, browser windows, webcams, and capture cards, allowing for a high degree of customization123.
Filters and effects: OBS Studio includes various filters and effects, such as chroma key and masking tools, which can be used to enhance video quality and add visual interest13.
Audio mixer: The software includes an audio mixer that allows users to customize the levels and settings of multiple audio sources during recording or live streaming3.
Hotkeys and customizable controls: OBS Studio offers hotkeys and customizable controls, enabling users to access frequently used features quickly and efficiently.
Transitions and transitions management: The software includes various transition effects and allows users to manage these transitions during live streams or recordings2.
Scene buffering time: OBS Studio offers scene buffering time, which helps ensure smooth transitions during recordings or live streams by preventing abrupt changes
9. Opus Clip: Best Outplayed Alternatives with Virality Potential Score
Source: OpusClip
Opus Clip, an AI-powered video repurposing tool, can be a good Outplayed alternative. It analyzes your video content, identifies the most compelling hooks, and seamlessly extracts relevant highlights from different parts of your video.
Whether you’re a seasoned content creator or just starting, Opus Clip offers a solution to transform your content into cohesive viral short videos, making it a versatile tool for enhancing your online presence.
Key Features:
Smart Selection (ClipGenius™): The tool uses AI to identify the most engaging parts of a video, making it easy to create clips that could go viral.
Chance of Going Viral Score™: Each clip is given a score indicating which one might receive more likes and shares.
Smart Helper: Allows users to manually select the parts of the video they want to turn into a clip.
Speaker Focus: Ensures the speaker is always centered in the video.
Keyword and Emoji Spotlight: Highlights important words in the video and adds fun emojis to keep viewers engaged
Pros:
Efficient video editing process
Customization options
Fast video processing
Cost-effective
Time-saving
Cons:
Free plan limitations (60-minute upload time, watermark, no editing/auto post)
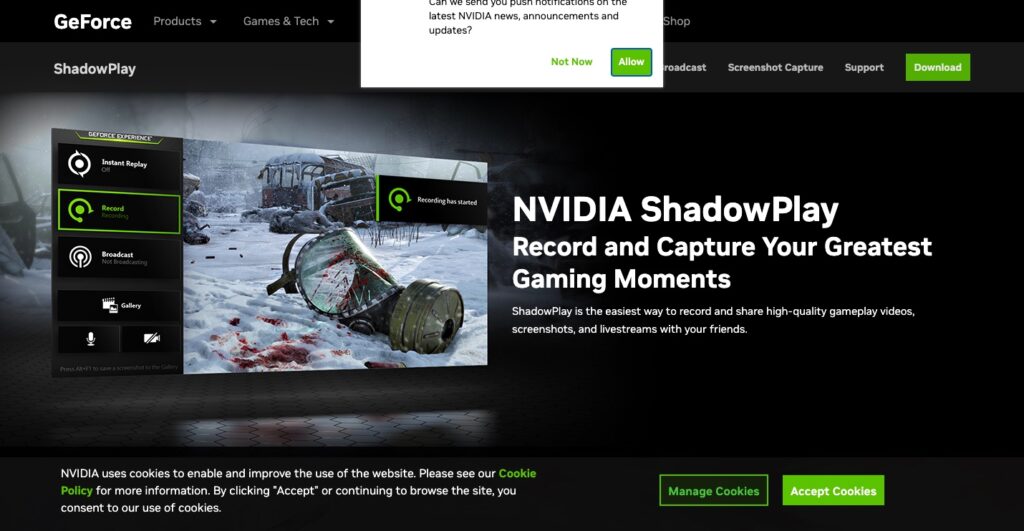
10. Nvidia Instant Replay: Best Outplayed Alternatives for NVIDIA Users
Source: SaaS Hub
nstant Replay is a unique feature offered by Nvidia Share. When enabled, it constantly runs in the background and records your gameplay during the entirety of your gaming session. Nvidia Instant Replay, formerly known as ShadowPlay, can save up to 20 minutes of gameplay without you ever needing to press the record button.
Nvidia Instant Replay supports over 2000 games, including popular titles like Fortnite, League of Legends, Apex Legends, and more. To use Nvidia Instant Replay, you need to have an Nvidia graphics card that is GeForce GTX 650 or newer.
Nvidia Instant Replay is a powerful and convenient tool for gamers who want to capture and share their gameplay. It offers high-quality recording, automatic highlights, easy sharing, and more.
Key Features:
Instant Replay: Continuously records the last five to twenty minutes of gameplay, allowing users to save highlights by pressing Alt + F10.
Automatic Highlights: For compatible games, ShadowPlay automatically saves the best moments to the user’s hard drive.
GIF Creation: Enables users to create and share GIFs on platforms like Google, Facebook, and Imgur without leaving the game.
11. EaseUS RecExperts: Most Complete Outplayed Alternatives
Source: SaaS Hub
Introducing EaseUS RecExperts, the new Outplayed alternative in 2025. This app is one of the comprehensive solutions for screen recording and capturing game highlights.
This all-in-one tool goes beyond the basics, allowing you to record gameplay in stunning 4K UHD quality at up to 144fps, take high-quality screenshots, and manage both audio and video seamlessly. The user-friendly interface makes it easy to add webcam overlays, edit recordings, and navigate the software effortlessly.
However, it’s worth mentioning that EaseUS RecExperts is still lacking an automatic clipping feature. The recording quality is also subject to your computer’s specifications.
Key Features:
Flexible Recording Options: Users can capture the entire screen, specific regions, or even locked windows. This flexibility allows for tailored recordings based on user requirements.
High-Quality Output: EaseUS RecExperts supports recording in up to 4K resolution at 60 frames per second, which is particularly beneficial for gamers and content creators who require high-quality visuals.
Multiple File Formats: EaseUS RecExperts supports various output formats including MP4, AVI, MOV, and more, providing flexibility in how recordings are saved and shared.
Pros:
User-Friendly Interface
Resource Efficiency
Unlimited Recording Time
Cons:
Limited Advanced Editing Features
Pricing Concerns
Free Trial Limitations
Price:
Monthly Subscription: $19.95 per month
Annual Subscription: $39.95 per year
Lifetime License: $69.95 (one-time payment for lifetime upgrades)
MedalTV is highly regarded for its comprehensive recording and editing features.
Can I use Outplayed without Overwolf?
No, Outplayed requires integration with Overwolf to function effectively.
Is Outplayed Overwolf legit?
Yes, it is a legitimate tool. However, user experiences may vary
Final Thoughts
When looking for the best Outplayed alternatives, several options stand out depending on your needs. Eklipse is a top choice for those seeking an AI-powered tool with advanced features, making highlight creation seamless.
If you prefer a budget-friendly option with simple functionality, consider Gazoom App or SteelSeries Moments. Both provide automatic clip capture and basic editing tools, making them great alternatives for effortless video highlights.
Many users have noticed that TikTok videos often lose quality after uploading, becoming blurry and less clear. If you’re wondering how to upload high-quality video on TikTok, there’s a solution to prevent this issue.
To ensure your video maintains its clarity, aim for a resolution of at least 720p x 980p or 1080p x 1920. TikTok allows users to adjust the output quality before publishing, giving you control over the video’s final appearance.
TikTok can make your wish come true in terms of making a great quality video. But before going to the tutorial, make sure you get your video ready, either by recording a new video or attaching the existing video from your gallery. Then, here’s how to upload a high-quality video on TikTok Android or iPhone.
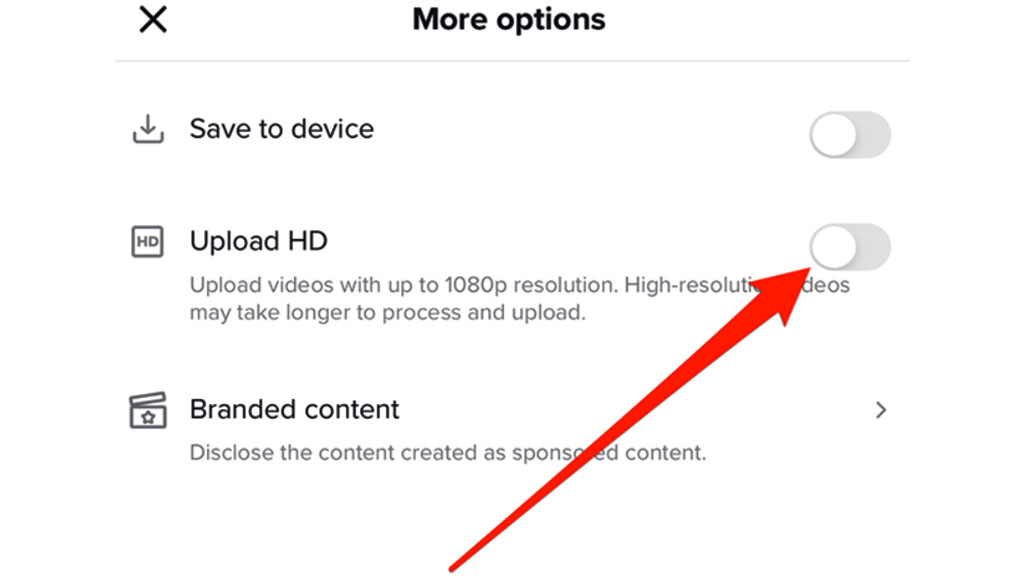
Source: Adweek/How To Upload High-quality Video On TikTok
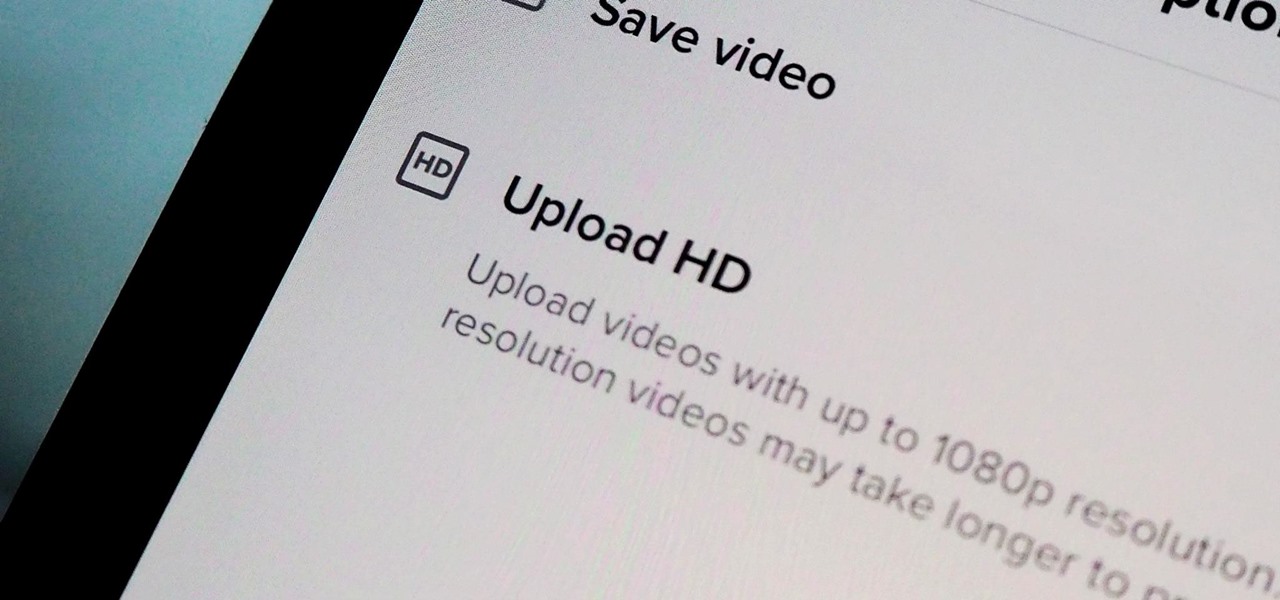
Before you tap on the Post button, hit More Options.
Then, toggle on the Allow high-quality uploads option.
After that, back to the previous page, and tap Post.
Voila! Your video is now airing without reducing its quality. No more issues about pixelation or blurriness. All you will see is a clear video, as clear as the original. Are you happy with that?
Tips About Uploading a High-quality Video on TikTok
Source: TechnoGlitz – tiktok video quality bad after upload 2023
Now that you have toggled on the high-quality option on your TikTok account, you can upload the video in 1080p resolution with ease. But how to upload a 4k video on TikTok, then? Can you do it as well? Of course, you definitely can do it.
However, since the maximum video resolution for TikTok is 1080p, it will automatically scale down your 4k video to 1080p. It’s not bad, though. But it’s advisable to resize your video before uploading it to TikTok for better quality than processing it in the native app.
Saving TikTok Videos without Losing Quality
TikTok is a great platform for sharing your creativity, but one common issue is the loss of video quality when saving TikTok videos. Here’s how to preserve the quality of your TikTok videos:
– Save to Device: Download videos directly from the app to your device. Tap the share icon and select Save Video to save it to your camera roll in its original quality.
– Use Compression Software: If you need to compress your video, use tools like Handbrake, Adobe Premiere Pro, or Final Cut Pro. These tools allow you to adjust settings and reduce file size without sacrificing quality.
– Adjust Export Settings: When exporting your video, select the highest quality settings to maintain its quality after compression.
– Avoid Screen Recording: Screen recording reduces video quality and can introduce unwanted artifacts like notifications and time stamps.
By following these steps, you can save your TikTok videos without quality loss, ready to share on other platforms.
How To Fix Low and Poor Quality Videos on TikTok
If the TikTok videos you’re watching appear blurry, it’s likely due to low quality. Don’t worry, though—if your TikTok high quality upload not showing, you can easily resolve it by following the steps below.
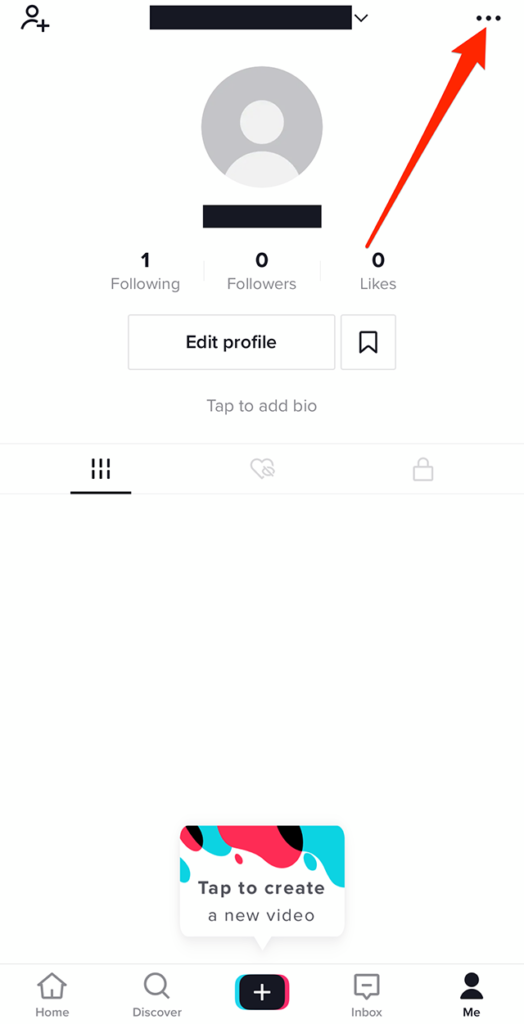
First, launch the TikTok app and log in to your account.
Head to your account and hit the three-dots icon.
Source: Adweek – how to upload high quality video on tiktok android
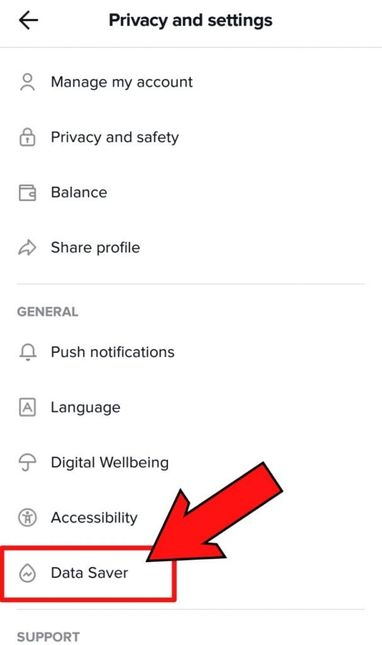
Then, go to Privacy and Settings.
Scroll down to spot the Data Saver option. Tap on it.
Source: Techidence – how to upload high quality video on tiktok pc
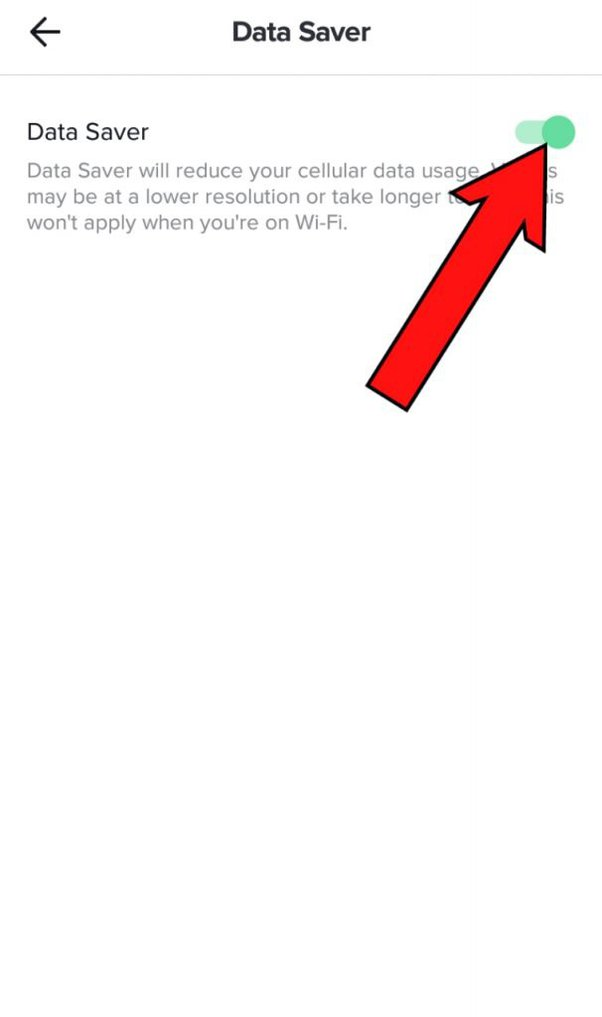
Toggle off the Data Saver button to disable it.
Source: Quora – tiktok video quality settings iphone
Finally, close the app completely from the background and re-open it.
Bingo! You’re now able to watch the TikTok video in higher quality.
One quick note, disabling the Data Saver option on TikTok may affect the upload speed, loading time, and data conservation, even the video quality.
How to Edit TikTok Video Without Decreasing the Quality
how to post high quality videos on TikTok using Eklipse
Feeling unsatisfied with the results of your TikTok video? No worries. You can still edit and enhance it as you wish. Thankfully, we have Eklipse Studio as our savior. Eklipse offers you a super convenient way to edit your TikTok video. Only by dropping the URL link of the video, or drag from the local device, the AI then will do its magic to finish it off.
In addition to the automatic service, Eklipse also provides a list of catchy TikTok templates and background music to make your video even more attractive. Don’t worry about quality reduction, since Eklipse gives you the option to set up your output. You can actually produce between 720p and 1080p resolution. If you prefer to have HD resolution, make sure to try our Premium version. Keep an eye on our blog to see other articles about Eklipse.
TikTok Video Formats & Max. Video Length Limit
To ensure the best TikTok experience for your viewer, make sure you are following this guideline for TikTok video formats and duration
Keep the file size within the limits (287.6 MB for iOS or 72 MB for Android, up to 500 MB for ads).
15 seconds to 10 minutes in length
Vertical orientation.
For HD video, the dimensions are 1080×1920.
Use a 9:16 aspect ratio.
Use .mp4 or .mov file types (or .avi or .gif for ads).
Tips for Shooting High-Quality TikTok Videos
Creating high-quality videos on TikTok involves both the shooting and editing processes. To help ensure your videos are top-notch, here are some tips on how to upload high quality video on TikTok iPhone or Android.
Camera Quality: To achieve high-quality videos on TikTok, you should use a camera with good resolution and high pixel density. A phone with a good camera will do the trick.
Lighting: Good lighting is critical to producing high-quality videos. Use natural light sources such as windows or outdoor areas. Avoid using harsh artificial lighting, which can make your video look unappealing.
Audio: Audio quality is essential for a successful TikTok video. Always use external microphones or lapel mics to ensure clear sound. Record audio in a quiet area to avoid background noise.
Stable Equipment: Shaky videos are unappealing to the eyes, which is why using a tripod or a stable platform for your camera is essential. A stable shot will make your video look professional and polished.
Editing and Enhancing: After shooting your video, editing and enhancing are crucial steps to improve your video’s quality. You can use video editing apps to add filters, adjust brightness and contrast, and add effects to make your video more visually appealing.
By following these tips, you can create high-quality videos on TikTok that will stand out from the crowd. Remember, shooting and editing techniques are just as important as the content itself, so invest some time in perfecting your craft.
Understanding TikTok Video Requirements
TikTok has specific requirements for uploading content:
– Aspect Ratio: 9:16 (vertical format)
– Resolution: 1080 x 1920 pixels
– File Size: 287.6 MB on iOS and 72 MB on Android.
TikTok’s compression algorithms can reduce video quality, so it’s important to identify the cause of low quality. Preview your videos in the app before uploading, and if needed, re-export with different settings or use compression software to reduce file size without sacrificing quality.
Frequently Asked Questions
1. Why is my video not high quality on TikTok?
TikTok often compresses videos, which can lower their quality. Make sure you’re uploading a high-resolution video and check your settings.
2. How to upload a 4K video on TikTok?
Ensure your video resolution is 4K before uploading. TikTok supports 4K videos, but they may be compressed for mobile viewing.
3. Is TikTok better in 1080p or 4K?
1080p is the ideal resolution for TikTok, balancing quality and file size. While 4K looks great, TikTok compresses it, reducing some of the quality benefits.
Final Thoughts
Uploading sharp, clear videos on TikTok is simple once you learn how to adjust your settings. Knowing how to upload high-quality video on TikTok can significantly enhance your content’s appearance.
Maximize your Black Ops 6 rewards—Create highlights from your best gameplay with with Eklipse
Eklipse help streamer improve their social media presence with AI highlights that clip your Twitch / Kick streams automatically & converts them to TikTok / Reels / Shorts
TikTok Live has become a popular platform for gamers to stream their gameplay, connect with fans, and build a thriving community. However, enabling and using this feature can be confusing, especially if you’re new to the process. That’s why many people in this niche wonder how to get mobile gaming on TikTok Live for Android and iOS.
Don’t worry! Enabling mobile gaming live on TikTok is actually simple with TikTok Live Studio app. However, you also need to make sure your account meet TikTok’s requirements. What are they? Let’s dive into the entire process right here.
How To Enable Your Mobile Gaming Using Tiktok Live Studio
Source: Cherish PR – how to enable the mobile gaming option on TikTok Live
You can start playing the TikTok live game and give commentary once you’ve fulfilled the TikTok gaming live application. Here’s how to enable the mobile gaming option on TikTok Live Android / iOS and share your screen:
Launch the TikTok app on your device.
Log in to your account.
Hit the ‘+’ button at the bottom of the screen.
Tap on the LIVE option under the Recording button.
Notice the Mobile Gaming section.
Write an engaging title for your live stream.
Tap on the Select Game option to select the game you want to stream.
Set your layout by tapping on the Portrait/landscape Mode icon.
Go to Settings to set up your Live (mute, activate moderator mode, live intro, filter comment, etc).
Tap on Video Quality to set up your output resolution.
Hit the Go Live button once you’ve set all the things.
Tap on the TikTok option in the pop-up message.
There you have it. Your TikTok is now screen-sharing everything that appears on your phone screen. So, it’s better to launch your game and start playing.
Last but not least, how to mute the mic on TikTok live mobile? While some users enjoy chatting during their live sessions, others prefer the opposite. To mute your mic, navigate to settings and choose the option to mute the microphone.
TikTok Mobile Gaming Live Requirements
Source: Convertedin – How to Get Mobile Gaming on TikTok Live without 1000 Followers
Why don’t I have mobile gaming on TikTok live? Well, TikTok applied several requirements to enable users to put on the share-screen feature (including game streaming).
So, how many followers do you need for mobile gaming on TikTok? Let’s see what you’ll need to fulfill:
Have at least 1,000 followers.
Be at least 18 years old.
However, it’s worth noting that although you have met all the requirements above, it does not mean you’ll be magically granted access to TikTok mobile gaming live. You have to be selected by TikTok to get Live access.
Given that, the Tiktok Live Studio will not give you the estimated time of when they are going to allow you to share the screen. Until then, keep producing nice content and attract viewers through FYP.
Source: Youtube Freedom108 – How to enable the mobile gaming option on tiktok live iphone
If TikTok Live mobile gaming isn’t working, try these steps to resolve the issue:
1. Check App Permissions
Ensure TikTok has permissions for Microphone, Screen Recording, and Storage in your device settings.
2. Update TikTok App
Ensure you have the latest version of TikTok by updating it via the App Store or Google Play Store.
3. Meet Live Requirements
Your account needs at least 1,000 followers, and you must be at least 16 years old to use TikTok Live.
4. Check Internet Connection
Use a stable Wi-Fi connection or ensure strong mobile data coverage for streaming.
5. Clear Cache
In TikTok, go to Settings > Cache & Cellular Data > Clear Cache, then restart the app.
6. Enable Screen Recording
Make sure your device’s Screen Recording feature is enabled in settings.
7. Reinstall TikTok
Uninstall and reinstall TikTok to fix potential app file corruption.
8. Contact TikTok Support
If issues persist, report the problem through Profile > Settings > Report a Problem.
These steps should help resolve most TikTok Live mobile gaming issues without the need for a TikTok mobile gaming enabled APK.
How to Clip The TikTok Gaming Live Using Eklipse
Aside from streaming your gameplay, you should also record your screen while playing the game. This will give you a chance to replay it anytime, even create engaging clips from it.
In case you are interested in highlighting the epic moments from your recorded live, try the Eklipse app. The Eklipse app offers the ease of creating stream clips during your busy time. Here is the step-by-step on how to go live on TikTok while playing games:
Sign up or log in with your Twitch account or email address.
Tap on the Upload option under the URL bar. Import the recorded stream from your camera roll.
Pick your favorite templates and hit Continue Editing.
Select the face cam and the gameplay area, and adjust the clip length. Tap Next.
Set up your output, add the channel name, and add music. Hit Confirm.
Go to the homepage and navigate to the Edited Clips option to find your edited clip.
Bingo! The clip is now ready to share or publish on every platform!
How to Optimize Audience Engagement
Capturing your audience’s attention is crucial for building a successful gaming stream on TikTok Live. Here are some suggestions to help you enthrall your viewers and ensure their continued interest:
Interactwith your audience: Actively engage with your audience by responding to their comments, posing questions, and making them feel included in the gameplay. Cultivating a sense of community makes viewers feel appreciated.
Use a webcam: Incorporating a webcam into your gaming stream allows viewers to witness your reactions and expressions while playing. This personal touch fosters a stronger connection between you and your audience. Ensure the webcam placement doesn’t obstruct the gameplay.
Be energetic andenthusiastic: Transmit your energy and enthusiasm, as these qualities are contagious. Showcase your excitement during gameplay and express your emotions to create a more enjoyable experience for your viewers, keeping them engaged.
Provide informativecommentary: Extend beyond the gameplay by offering insightful commentary, sharing tips, and tricks, and explaining your strategies. This not only adds value to your stream but also helps viewers learn and enhance their gaming skills.
Incorporate giveaways andchallenges: Boost the excitement of your gaming stream by including giveaways and challenges. From in-game item giveaways to setting achievement milestones within a specified timeframe, these elements encourage audience participation and introduce a competitive aspect.
Collaborate with other creators: Expand your reach and offer a fresh experience by collaborating with other creators. Invite fellow TikTok gamers to join you in multiplayer games or host joint streams. This introduces variety and maintains audience engagement.
Use sound effects and music: Elevate the overall viewer experience by integrating sound effects and background music. Use suitable sound effects to emphasize exciting moments in the game, and select background music that complements the gameplay’s mood and style. This creates a more immersive and engaging atmosphere.
Encourage audience interaction: Prompt your viewers to interact with you and each other during the stream. Seek their opinions, initiate discussions, and conduct polls to gather input. This not only sustains engagement but also fosters a sense of active community participation.
You need at least 1,000 subscribers, active live-streaming on your account, be 18 years old or older, and applying for Live access before gaining the mobile gaming feature.
Q2: Why is my TikTok not showing mobile gaming?
Originally, TikTok required 18k subscribers and active live streaming to qualify. Some accounts were given early access based on app evaluations.
Q3: Can I live gaming on TikTok?
Absolutely yes. Going LIVE gaming on TikTok is an excellent way to grow your gaming community and connect with viewers worldwide.
Q4: Why don’t I have mobile gaming on TikTok?
TikTok live streaming has eligibility criteria: users must be at least 18 years old, and the requirements vary based on location and content type. U.S. gaming creators need 1,000 followers, while non-gaming creators must have 10,000.
Final Thoughts
That’s how to enable the mobile gaming option on TikTok Live for iOS/Android in 2025! The process is actually quite simple, but you must meet TikTok’s requirements, such as having at least 1,000 followers and being 18 years or older. While access depends on TikTok’s approval, consistently creating quality content and actively engaging with your audience are essential steps to unlocking this feature.
You can also you can further enhance your streaming experience by creating shareable highlights of your best moments with Eklipse! Sign up for Eklipse to elevate your streaming experience and create compelling clips effortlessly for free.
Capturing your epic moments in Call of Duty or any other PS5 game is awesome, but managing and sharing those clips should be effortless. The PlayStation App makes it easy to view, download, and share your game captures directly from your mobile device.
Whether you’re a seasoned gamer or just getting started, this guide will walk you through every step to ensure you never miss a highlight.
Before diving into the how-to, let’s quickly cover why the PlayStation App is a fantastic tool for managing your game captures:
Convenience: Access your screenshots and video clips on the go.
Easy Sharing: Share your best moments with friends or on social media without needing a PC.
Auto-Upload: Automatically save your captures to the cloud, ensuring you have backups and easy access.
Step 1: Linking Your PS5 to the PlayStation App
To get started, you need to ensure your PS5 is linked to your PlayStation App. Here’s how:
Download the PlayStation App:
Available on both iOS and Android devices. Head to the App Store or Google Play Store and install the PlayStation App.
Sign In to Your PSN Account:
Open the app and sign in using your PlayStation Network (PSN) credentials. Make sure it’s the same account linked to your PS5.
Link Your PS5:
On your PS5, go to Settings > System > Remote Play and ensure Enable Remote Play is turned on.
In the PlayStation App, follow the prompts to link your console. Your PS5 must be powered on or in Rest Mode with the “Stay Connected to the Internet” setting enabled.
Step 2: Enabling Auto-Upload of Captures
Once your PS5 is linked to the app, the next step is to enable auto-upload so your captures are automatically saved to the cloud.
Access PS5 Settings:
On your PS5, navigate to Settings > Captures and Broadcasts > Captures.
Turn On Auto-Upload:
Toggle the Auto-Upload option to ON. This ensures that every time you take a screenshot or record a video, it’s automatically uploaded to your PlayStation App.
Step 3: Viewing Captures on the PlayStation App
With auto-upload enabled, your captures will start appearing on the app. Here’s how to view them:
Open the PlayStation App:
Launch the app on your mobile device and sign in if you haven’t already.
Navigate to the Game Library:
Tap the Game Library icon, which looks like six squares and a controller, usually located at the bottom of the screen.
Select Captures:
At the top of the Game Library, you’ll see a Captures section. Tap on it to view all your uploaded screenshots and video clips.
Step 4: Downloading and Sharing Captures
Now that you can view your captures, here’s how to download or share them:
Downloading Captures
Select the Capture:
Browse through your captures and tap on the one you want to download.
Download to Your Device:
Tap the Download button. The capture will be saved to your mobile device’s gallery for offline access or further editing.
Sharing Captures
Choose the Capture to Share:
Select the screenshot or video clip you want to share.
Share via Game Base:
Tap the Share button and choose Game Base to share the capture directly with your PlayStation friends.
Share via Other Apps:
Alternatively, tap Share > Share via to send your capture through other supported apps like Instagram, Twitter, Facebook, or messaging apps.
Additional Tips and Information
Supported File Types and Time Limits
File Types: The PlayStation App supports standard image formats like JPEG for screenshots and MP4 for video clips.
14-Day Availability: Remember, captures are available on the app for 14 days after being created on your PS5. After this period, they’ll be deleted from the app’s cloud storage but will remain on your console’s storage. To keep them longer, make sure to download and back them up manually.
Manual Uploads
If you prefer not to use auto-upload or need to upload older captures, you can do so manually:
Go to Media Gallery:
On your PS5, navigate to Game Library > Media Gallery.
Select and Upload:
Highlight the captures you want to upload, press the Options button, and select Upload to PlayStation App.
Troubleshooting Common Issues
Auto-Upload Not Working?
Check Internet Connection: Ensure your PS5 is connected to the internet.
Stay Connected to the Internet: Verify that the “Stay Connected to the Internet” setting is enabled in Rest Mode.
App Permissions: Make sure the PlayStation App has the necessary permissions on your mobile device to access storage and run in the background.
Supported Platforms
Mobile Devices: Ensure your PlayStation App is updated to the latest version on your iOS or Android device.
Console Compatibility: Make sure your PS5 firmware is up to date to avoid any compatibility issues.
Conclusion
The PlayStation App is a powerful tool for managing your PS5 game captures, making it easier than ever to view, download, and share your best gaming moments. By enabling auto-upload, you ensure that every epic kill or clutch play is safely stored and ready to share with friends or your online community. Just remember the 14-day availability limit and back up your favorite captures to keep them forever.
Whether you’re showcasing your skills on social media or simply keeping a personal archive of your gaming highlights, the PlayStation App streamlines the process, letting you focus more on what you love—playing games.
For those looking to elevate their content further, Eklipse offers an excellent solution to transform your captures into professional-quality highlights and montages effortlessly. With its user-friendly interface and advanced AI features, Eklipse is a must-have tool for any dedicated gamer aiming to showcase their best moments.
Whether you’re showcasing your skills on social media or simply keeping a personal archive of your gaming highlights, the PlayStation App and Eklipse work together to streamline the process, letting you focus more on what you love—playing games.