The gaming world holds its breath as the release of Monster Hunter Wilds draws near. Slated to arrive on February 28, 2025, Capcom’s latest installment in the revered action RPG series promises an expansive and immersive experience, setting a new benchmark for the franchise.
Monster Hunter Wilds aims to build upon the success of its predecessor. It offers players a dynamic and seamless open world. As the release date approaches, understanding the key features, story elements, and gameplay enhancements becomes essential for both returning hunters and newcomers eager to embark on this grand adventure.
Release Information: A Simultaneous Multi-Platform Launch
Monster Hunter Wilds
Monster Hunter Wilds is set to launch on February 28, 2025, marking a significant milestone as the first title in the series to debut simultaneously across multiple platforms. Players can anticipate the release on:
Windows PC
PlayStation 5
Xbox Series X and Series S
This coordinated release ensures that players across various gaming ecosystems can immediately dive into the world of Monster Hunter Wilds together, eliminating platform-based waiting periods and fostering a unified community experience from day one.
Delving into the Narrative: Story and Setting Details
Set within the enigmatic Forbidden Lands, the game presents a compelling narrative woven around several key plot points:
The Mystery of the White Wraith: The central storyline revolves around the investigation of a newly discovered monster known as the White Wraith. Players will unravel the secrets surrounding its origins and its influence on the environment.
The Plight of the Keepers: Players will engage in missions to rescue a group of individuals referred to as the Keepers. They share a unique connection with a young boy named Nata.
Exploring Environmental and Social Interconnections: The game delves into the dynamic relationships among humans, monsters, and the environment. Players will make strategic decisions that will have a ripple effect in the Monster Hunter World.
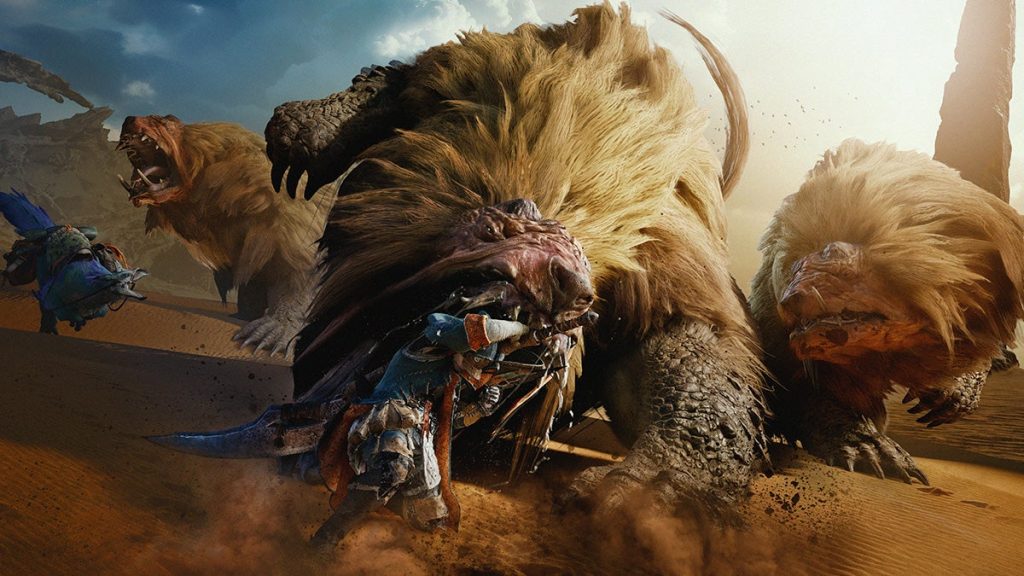
Enhanced Gameplay Mechanics: Features and Innovations
Monster Hunter Wilds gameplay – Source: IGN
Monster Hunter Wilds introduces a range of enhancements designed to elevate the gameplay experience, including:
Efficient Traversal with Seikret Mounts: The introduction of Seikret Mounts allows players to traverse vast landscapes more efficiently, enabling faster exploration and quicker access to hunting grounds.
Strategic Combat via Focus Mode: Focus Mode offers players a more refined combat experience, enabling precise control and strategic decision-making during engagements with monsters.
Dynamic Weather Systems: Weather conditions will change, directly influencing the environment and monster behavior.
Return of Slinger Ammo: Slinger Ammo makes a return from Monster Hunter World. It allows players to utilize environmental elements.
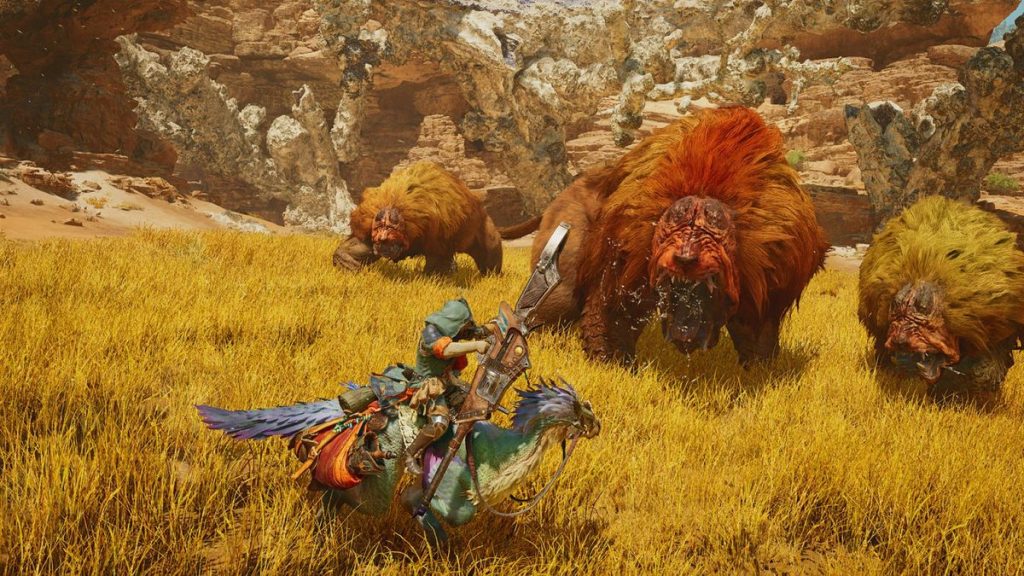
Encountering New and Returning Monsters
The game will feature a diverse roster of monsters.
The Arkveld: This new monster will serve as an ultimate test of skill and strategy.
Legacy Monsters: Confirmed returning monsters include the Rathalos, Yian Kut-Ku, Rathian, and Congalala.
Open Beta Testing: An Early Look at the Wilds
Anticipation is high. Capcom is providing players with an opportunity to experience the game early through open beta testing periods scheduled for:
February 6th-9th, 2025
February 13th-16th, 2025
This beta testing phase enables players to explore some of the new features and gameplay mechanics. It also provides valuable feedback to the developers.
Conclusion: Prepare for the Hunt
Monster Hunter Wilds is poised to deliver a transformative experience. It has enhanced mechanics, new features, compelling narrative, and expansive open world. As the release date rapidly approaches, preparation is essential. For seasoned hunters and new adventurers, the Forbidden Lands await. The world stands on the brink of a new era in the Monster Hunter saga.
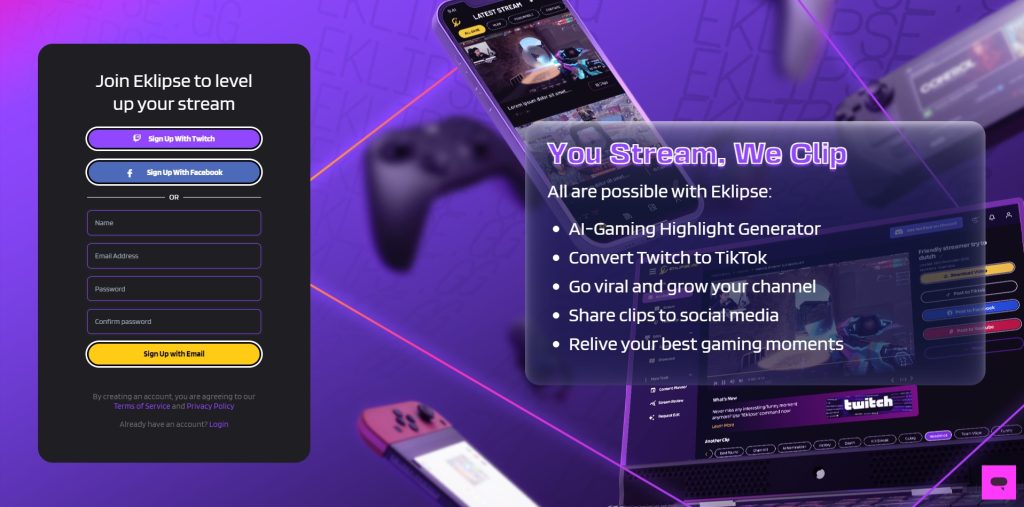
YouTube Shorts, introduced in 2020, have quickly become a powerful tool for gamers and content creators alike. With its maximum length of 60 seconds (and experimental support for longer formats), Shorts offer a unique way to capture your best gaming moments and rapidly grow your channel. In this guide, we’ll show you how to use Eklipse—an AI-powered highlight tool—to transform your gaming replays into engaging, viral Shorts that boost your reach and revenue.
Step-by-Step Process to Create and Optimize Shorts Using Eklipse
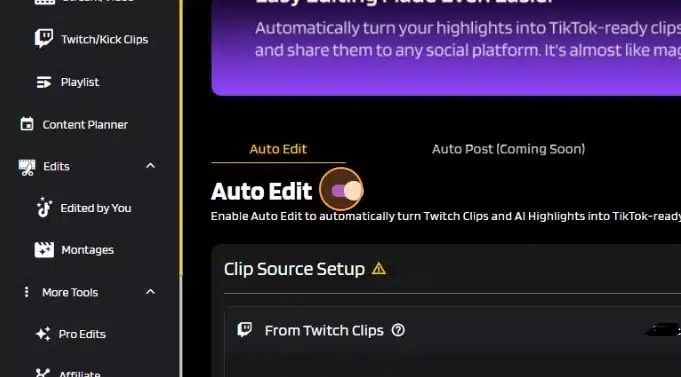
1. Connect Your Accounts
Sign Up: Create an account on Eklipse and link it to your streaming platforms (Twitch, YouTube, Facebook Gaming, Kick). This connection allows Eklipse to access your live stream recordings and replays automatically.
2. Import Your Gaming Replays
Upload or Record: Import your gaming replays into Eklipse, or use its built-in stream recording feature.
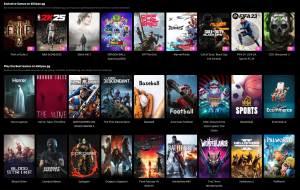
Supported Games: Eklipse works with a wide range of games, making it easy to capture your best moments.
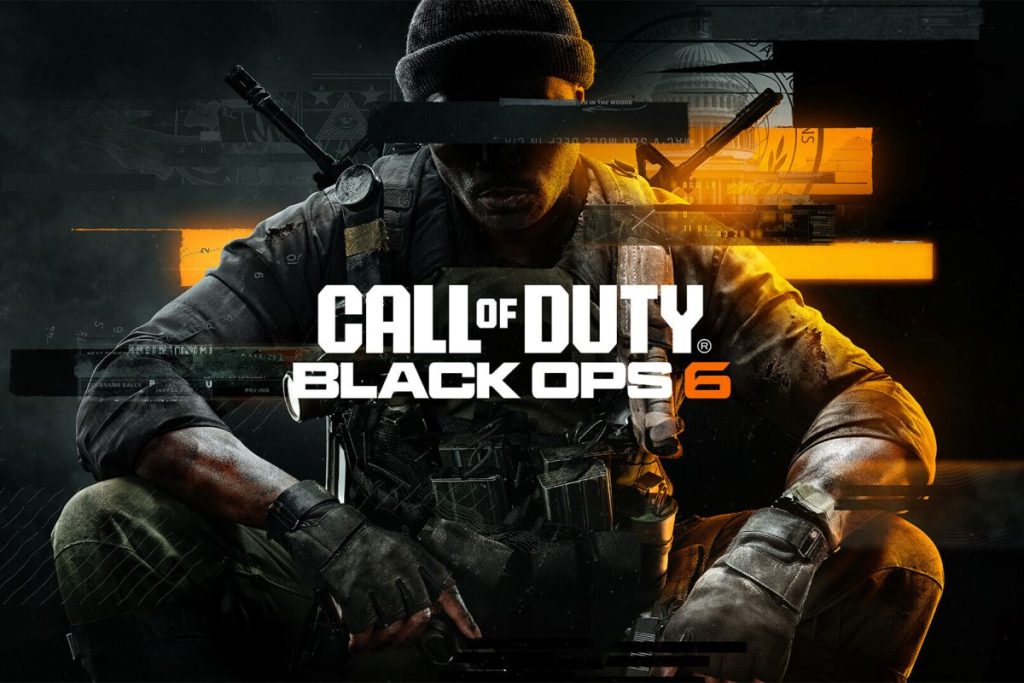
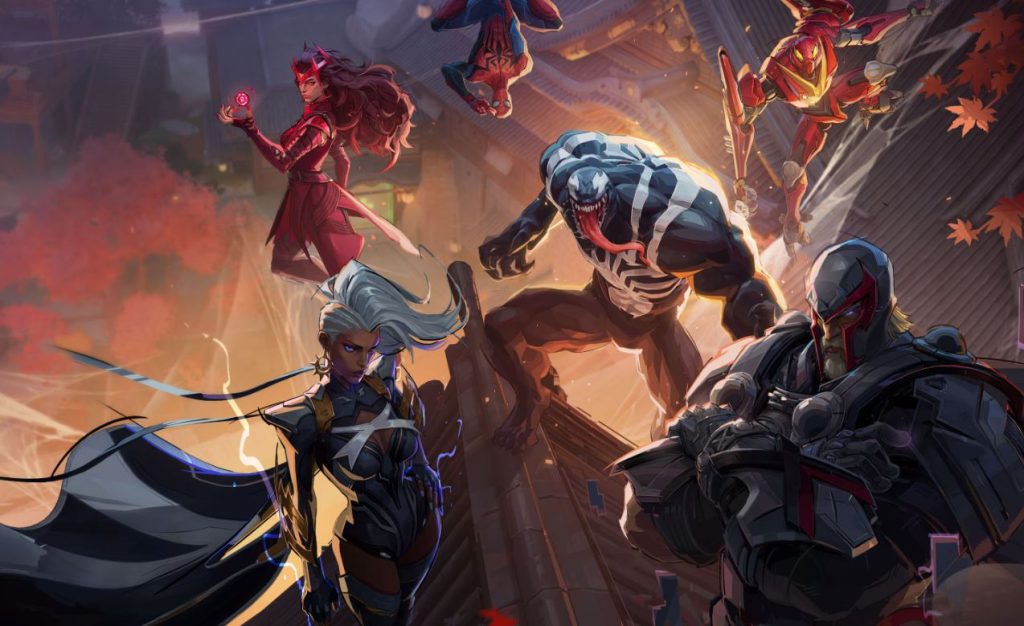
Eklipse supports hype games like Marvel Rivals and BO6
3. AI-Powered Highlight Generation
Automatic Detection: Let Eklipse’s AI analyze your replays to automatically identify key moments—epic wins, clutch plays, or funny glitches.
Time-Saving: This feature saves you significant editing time by quickly generating short clips that are primed for virality.
4. Edit Your Clips in Eklipse Studio
Trim and Customize: Use the intuitive editing tools to trim clips, add text overlays, transitions, and adjust the feed area.
Enhance with Music: Incorporate trending or royalty-free music and sound effects from Eklipse’s built-in libraries.
Add Subtitles: Use AI-generated captions to make your content accessible, especially for viewers watching without sound.
5. Convert to Vertical Format
Optimize for Shorts: Ensure your video is in a 9:16 aspect ratio. Eklipse offers automatic conversion for various platforms, optimizing your content for YouTube Shorts.
6. Add a Compelling Hook
Grab Attention Early: Start your Short with an eye-catching moment—a surprising play, humorous glitch, or a question that piques curiosity.
First Few Seconds Matter: A strong hook in the first 3–5 seconds is crucial for retaining viewers.
7. Select Engaging Start Frames
Visual Impact: Even though YouTube Shorts may not always display a custom thumbnail, a dynamic start frame can significantly boost initial engagement.
Stop Frame Options: Eklipse allows you to select a compelling stop frame to leave a lasting impression.
8. Use Relevant Hashtags and Descriptions
Improve Discoverability: Incorporate hashtags like #GamingShorts, #Gameplay, #Shorts, and game-specific tags in your title and description.
Keyword Optimization: Use relevant keywords to help your Short appear in search results and recommended feeds.
9. Upload and Optimize Your Short on YouTube
Title and Description: Craft an attention-grabbing title and detailed description that include target keywords such as “YouTube Shorts,” “gaming content,” and “Eklipse.”
SEO Best Practices: Optimize metadata to improve search visibility and reach a wider audience.
10. Monitor and Refine
Analytics: Use YouTube Analytics to track key performance metrics like Average Percentage Viewed (APV), watch time, and swipe behavior.
Iterate: Based on your insights, tweak your content strategy, editing style, or posting schedule to further enhance engagement.
Tips for Creating Viral Gaming Shorts
Focus on High-Energy Moments: Prioritize clips that feature intense gameplay, humorous fails, or unexpected game mechanics to keep your audience engaged.
Keep It Concise: Aim for Shorts under 30 seconds to maximize view duration and completion rate, while still conveying your story.
Leverage Trends and Challenges: Participate in trending gaming challenges or memes to increase your visibility.
Tell a Story: Even within a brief clip, a clear narrative or progression can captivate viewers emotionally.
Engage with Your Community: Respond to comments and encourage viewer interaction to build a loyal fan base that actively shares your content.
Monetization Strategies for Your YouTube Shorts
YouTube Partner Program (YPP)
Ad Revenue Sharing: Once you meet the eligibility requirements (10,000 followers and 100,000 views in 30 days), you can start earning money directly from YouTube ads displayed on your Shorts.
Brand Deals and Sponsorships
Collaborations: As your channel grows, brands may approach you for sponsored content, product placements, or branded challenges.
Lucrative Campaigns: Successful campaigns can earn you significant revenue, sometimes reaching five-figure deals per video.
Affiliate Marketing
Promote Products: Include affiliate links for gaming gear, merchandise, or services in your video descriptions.
Commission Earnings: Earn commissions on sales generated through your links, providing an additional income stream.
Diversify Revenue Streams
Merchandise Sales: Consider launching your own line of merchandise, such as t-shirts or accessories, to further monetize your brand.
Cross-Platform Promotion: Repurpose your Shorts on other platforms like Instagram Reels or TikTok to maximize your exposure and revenue potential.
Conclusion
Creating viral YouTube Shorts from gaming replays is a game-changer for content creators. By leveraging Eklipse’s AI-powered tools and following the outlined steps, you can efficiently transform raw gaming replays into engaging, shareable content that resonates with your audience. Focus on high-energy moments, optimize every element—from format to hashtags—and consistently refine your strategy using YouTube Analytics.
With these actionable strategies and monetization methods, you’re well-equipped to boost your channel’s growth, increase viewer engagement, and potentially generate a lucrative revenue stream. Consistency, creativity, and community engagement are the keys to long-term success on YouTube.
Embrace the power of Eklipse and start turning your gaming replays into viral Shorts that not only entertain but also open new doors for monetization and audience growth in 2025!
Creating viral gaming content requires a mix of creativity, passion, and a deep understanding of what resonates with your target audience. In today’s competitive digital landscape, gamers must think outside the box to capture viewers’ attention. This guide is designed to help you brainstorm and execute viral content ideas that can boost your online presence in 2025.
With platforms like YouTube Shorts, TikTok, and Instagram at the forefront, delivering dynamic and engaging videos is more important than ever. From gameplay highlights to behind-the-scenes peeks, there are countless ways to entertain and engage your audience. Read on to discover a comprehensive list of viral content ideas for gamers that can elevate your content strategy.
By exploring diverse formats and use current trends, you can connect with your community on a deeper level. Whether you’re a casual streamer or a seasoned pro, these ideas are tailored to drive engagement and audience growth. Let’s dive into these actionable concepts and level up your content game!
Showcase your best in-game moments, epic kills, and unexpected glitches in short, high-energy clips. These highlights can be easily edited into snappy videos perfect for YouTube Shorts and TikTok. Capturing these moments not only entertains but also encourages viewer interaction and sharing.
2. Reaction Videos
Record your authentic reactions to game trailers, major updates, or viral gaming events. Genuine emotions resonate well with audiences, making your content both relatable and engaging. Reaction videos can also spark conversations and debates within the gaming community.
3. Game Reviews
Offer in-depth, honest reviews of new releases or classic titles. Share your perspective on gameplay mechanics, storylines, and graphics, and include both pros and cons. This type of content helps establish you as a trusted voice in the gaming niche.
4. Gaming Challenges
Participate in trending challenges or create your own unique ones, such as “Three Truths and a Lie” or “Speedrun Challenges.” Encourage your viewers to join in and share their own attempts. Gaming challenges foster community engagement and often lead to viral trends.
5. Tutorials and How-Tos
Provide detailed guides and tips on mastering game mechanics, troubleshoot, completing hard levels, or optimizing strategies. Tutorials cater to both newcomers and experienced players, offering valuable insights that can boost your credibility. Clear and concise how-to videos can quickly become go-to resources within your community.
6. Cosplay Content
Show off your cosplay skills or collaborate with other cosplayers to recreate iconic game characters. Cosplay content is visually striking and highly shareable, appealing to both gamers and cosplay enthusiasts. It’s an excellent way to blend creative expression with gaming culture.
7. Game Theories
Dive into the lore of your favorite games by exploring hidden meanings, Easter eggs, and speculative theories. Spark discussions and encourage your audience to share their interpretations. This content type not only entertains but also builds a community of engaged, thoughtful fans.
8. Top 10 Lists
Compile ranked lists such as “Top 10 Hardest Boss Fights” or “Top 10 Most Memorable Game Glitches.” These videos are perfect for sparking debate and inviting viewer comments. Top 10 lists are an effective way to organize content that is both informative and entertaining.
9. Live Streams
Interact with your audience in real time while playing your favorite games. Live streaming offers immediate feedback and helps build a loyal community. Use live sessions to discuss strategies, answer questions, or simply entertain with spontaneous gameplay.
10. Modding and Customization Showcases
Highlight creative mods, custom skins, or unique character builds that add a personal touch to gameplay. Demonstrating how modifications can transform a game can attract viewers who love personalization and innovation. These showcases provide inspiration and encourage viewers to experiment with their own setups.
11. VR and Immersive Gaming Content
Share your experiences with VR gaming by capturing immersive gameplay footage. Unique perspectives and innovative visuals make VR content highly engaging. This niche is growing rapidly, and early adopters can position themselves as pioneers in the VR gaming community.
12. Esports Highlights and Commentary
Cover major esports tournaments, analyze standout performances, and offer your commentary on key moments. Esports content appeals to both casual fans and serious analysts. Providing expert insights can help you build authority and attract a dedicated viewer base.
13. Behind-the-Scenes Content
Give your audience a glimpse into your gaming setup, streaming process, or content creation workflow. Behind-the-scenes videos humanize your brand and foster a stronger connection with your community. This content can demystify the production process and inspire aspiring creators.
14. Funny Gaming Moments
Compile humorous glitches, unexpected fails, or quirky in-game interactions. Lighthearted content often has broad appeal and can easily go viral. Humor is a powerful tool to increase shareability and attract viewers from outside your usual niche.
15. Emotional and Relatable Gaming Experiences
Share personal stories about how gaming has impacted your life, memorable victories, or tough losses. Authentic, heartfelt content builds deeper connections and encourages community discussion. Relatable experiences can drive long-term loyalty among your viewers.
16. Silliest Gameplays and In-Game Conversations
Capture the most absurd, funny, or bizarre moments during gameplay, including entertaining interactions with other players. These videos can provide a welcome break from intense competitive content and are perfect for quick laughs. They often attract a wide range of viewers, from hardcore gamers to casual fans.
Tips for Creating Viral Content
High-Quality Production: Invest in good audio and video equipment to enhance the viewer experience.
Engaging Editing: Use dynamic cuts, effects, and transitions to keep your audience hooked from start to finish.
Consistent Posting Schedule: Regular uploads build anticipation and maintain engagement over time.
Promote Your Content: Share your videos across multiple platforms and collaborate with fellow creators.
Interact with Your Audience: Respond to comments and messages to build a loyal community.
Stay Updated on Trends: Monitor current challenges and viral trends to ensure your content remains relevant.
Magical AI-edit from eklipse allows you edit without even touching any video editor
Platform-Specific Considerations
YouTube Shorts: Focus on concise, visually impactful videos with clear, engaging commentary.
TikTok: Leverage popular sounds, effects, and hashtags to increase shareability and reach.
Instagram: Utilize a mix of Reels, Stories, and IGTV to showcase both polished highlights and behind-the-scenes content.
Conclusion
Creating viral content is not just about following trends—it’s about connecting with your audience on an emotional and creative level. By experimenting with these viral content ideas for gamers, you can explore new formats and refine your unique style. Whether you’re sharing gameplay highlights, reaction videos, or behind-the-scenes moments, staying authentic and innovative is key to growing your audience in 2025.
Remember, the most successful gaming content is one that resonates deeply with viewers, sparks conversation, and encourages sharing. Now, take these ideas and start creating content that will captivate the gaming community and elevate your online presence.
Looking to capture those epic moments with viral potential? Consider incorporating Eklipse into your content creation process. This AI-powered highlight tool is designed to automatically detect the key moments in your gameplay that are primed for virality. By seamlessly integrating Eklipse into your workflow, you can quickly compile and edit highlight reels that showcase the best of your gaming action—allowing you to focus more on creativity and engagement. Explore Eklipse today to level up your content game and share your most electrifying moments with the world!
The “Failed to connect to Steam” error is a common issue that prevents Marvel Rivals from launching or connecting to online services on PC. This error can be frustrating, but with the right troubleshooting steps, you can resolve the issue and start playing.
In this guide, we’ll explore the common causes and provide actionable solutions to fix the Steam connection error.
Several factors can contribute to the failed Steam connection issue in Marvel Rivals. Identifying the root cause will help you apply the right fix.
Source: www.partitionwizard.com
Steam Client Issues: The Steam client itself may be out-of-date or have corrupted files.
Internet Connectivity Problems: A weak or unstable internet connection can prevent the game from connecting to Steam servers.
Firewall/Antivirus Interference: Security software like firewalls or antivirus programs might block Marvel Rivals or Steam from connecting.
Game File Issues: Corrupted or missing game files can trigger connection errors.
Administrative Privileges: Running Steam or Marvel Rivals without administrative rights can cause connectivity problems.
Background Processes: Other apps or processes running in the background may interfere with the connection.
Solutions and Troubleshooting Steps
Follow these troubleshooting steps to resolve the Steam connection error and get Marvel Rivals working properly:
1. Check Steam Client Status
Ensure that Steam is online and functioning correctly. You can check the Steam status on their website or visit community forums to see if others are experiencing similar issues.
2. Restart Steam
Close the Steam client completely, and then relaunch it. This can help resolve any temporary glitches or connection issues with the Steam servers.
3. Check Internet Connection
Verify that your internet connection is stable and working. Use online tools to test your internet speed. Slow speeds or high latency can often result in connection errors.
4. Allow Marvel Rivals Through Firewall
Your firewall might be blocking Steam or Marvel Rivals. Configure your firewall settings (Windows Firewall or third-party firewalls) to allow both Steam and Marvel Rivals through. Ensure that both incoming and outgoing connections are permitted.
5. Temporarily Disable Antivirus
If your antivirus software is blocking the connection, disable it temporarily and try launching the game. If this resolves the issue, you can add exceptions for Steam and Marvel Rivals in your antivirus settings to prevent future interference.
6. Verify Integrity of Game Files
Corrupted or missing game files can cause connection issues. To fix this:
Right-click Marvel Rivals in your Steam library.
Select Properties and go to the Local Files tab.
Click Verify integrity of game files to detect and repair any issues.
7. Run Steam and Game as Administrator
Right-click both the Steam client and the Marvel Rivals shortcut and select “Run as administrator” to launch both with elevated privileges. This can help fix issues related to permissions.
8. Close Background Applications
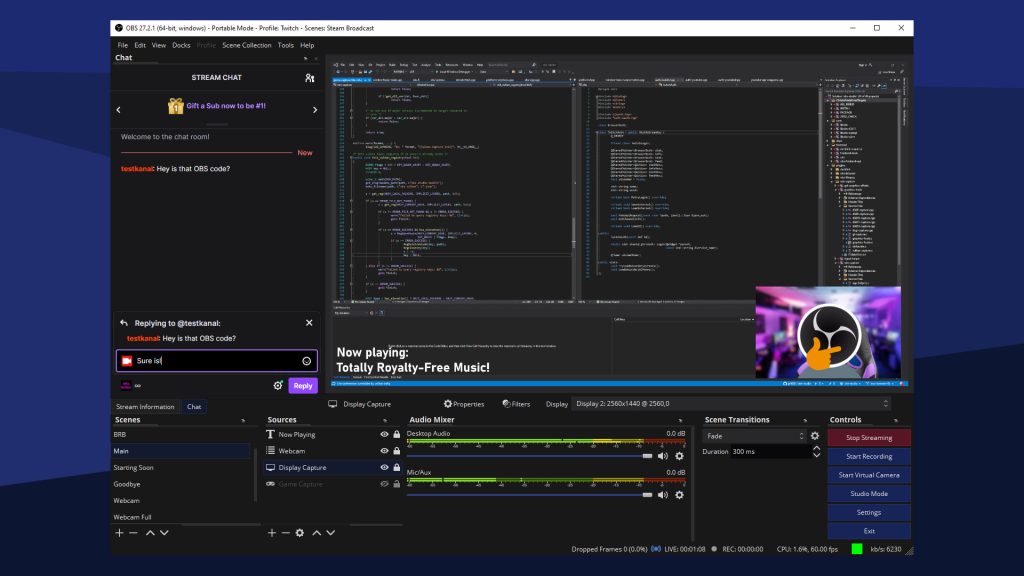
Close unnecessary applications running in the background, especially those that are resource-intensive or that include overlays, like Discord or OBS. These can interfere with the game’s connection to Steam.
9. Reinstall Steam (Last Resort)
If all else fails, you may need to reinstall the Steam client. Before doing so, back up your game files to avoid losing any progress. After reinstalling, check if the issue persists.
10. Check for Windows Updates
Make sure your Windows operating system is up-to-date. Sometimes, network and software compatibility issues can be resolved through the latest updates (source).
11. Reset Router
Try restarting your router to eliminate any network issues that may be affecting your connection. This is a common fix for problems involving internet connectivity (source).
12. Disable Overlays
Game overlays (like Discord or Steam’s overlay) can sometimes interfere with the game’s online connection. Disabling overlays can help resolve the issue (source).
Conclusion
The ‘Failed to connect to Steam’ error in Marvel Rivals can be caused by a variety of issues, including Steam client problems, internet connectivity, firewall interference, and game file corruption. By following the troubleshooting steps outlined in this guide, you should be able to identify and resolve the issue.
Start with simple fixes, like restarting Steam and checking your internet connection, and then proceed to more advanced steps like adjusting your firewall settings or verifying game files. If the issue persists, consider reaching out to official support or checking community forums for additional solutions.
“Packet burst” in Black Ops 6 refers to a sudden surge of data packets sent or received over a short period, often leading to lag spikes, rubberbanding, or temporary freezes during online gameplay.
This issue can be highly frustrating, especially in fast-paced matches. In this guide, we’ll provide clear, actionable steps to troubleshoot and resolve packet burst problems to improve your gaming experience.
Packet burst in Black Ops 6 can stem from various factors, including:
Unstable Internet Connection, a weak or fluctuating internet connection can cause inconsistent data transfer, leading to packet burst.
Network Congestion, a high traffic on your local network or game servers can create delays and packet bursts.
Certain graphics settings that demand high bandwidth or on-demand texture streaming can contribute to packet burst.
Overloaded CPU or insufficient VRAM may trigger packet bursts, as seen with some users (source). Usually happen on lower end PCs.
Problems with Activision’s servers can cause widespread connectivity issues, including packet bursts.
Solutions and Troubleshooting Steps
Here’s a comprehensive list of troubleshooting steps to help reduce or fix packet burst:
1. Check Your Internet Connection
Test your internet speed and stability using online tools like Speedtest.net. Low speeds or high latency can contribute to packet burst, so it’s important to ensure your internet connection is reliable.
2. Restart Your Router
If you experience packet burst, restarting your router can help clear network congestion and improve your connection stability.
3. Use a Wired Connection (Ethernet)
Switch from Wi-Fi to a wired Ethernet connection, which generally offers a more stable and faster connection, reducing the likelihood of packet bursts.
4. Minimize On-Demand Texture Streaming
In the game’s graphics settings, try lowering or turning off On-Demand Texture Streaming. This reduces the amount of data the game needs to download during gameplay, helping to prevent packet burst caused by network overload.
5. Check Activision’s Server Status
Visit the Activision website or their social media channels to check if there are any server issues or maintenance. Server problems can contribute to widespread connectivity issues and packet bursts.
6. Close Background Applications
Close any resource-intensive applications running in the background that may overload your CPU or network, causing packet burst. Examples include streaming services or large downloads.
7. Turn Off Cross-Play
If cross-play is enabled, try disabling it. Playing only with users on your platform can reduce potential connectivity issues across different networks.
Platform-Specific Fixes (PC)
8. Restart Shaders Pre-Loading
On PC, pre-loading shaders can sometimes cause packet bursts. Resetting the shaders clears the cache and reduces VRAM usage, potentially resolving the issue.
Go to Graphics settings > Display and click “Restart Shaders Pre-Loading” to reset them.
9. Adjust VRAM Usage
If you’re using high VRAM settings, lowering the VRAM slider may help. Setting VRAM usage to around 60 (instead of higher values) may prevent packet bursts due to VRAM overload. (source)
Additional Tips from Various Sources
10. Firewall Bypass (Consider Carefully)
One user reported attempting to bypass their firewall, but it’s unclear if this solved the issue. Be cautious when modifying firewall settings, as it can compromise your network security.
11. Port Forwarding (Advanced Users)
For advanced users, port forwarding specific ports for Black Ops 6 on your router may help. However, this requires technical knowledge and may not always be effective. Be sure to consult Activision’s official documentation if you decide to proceed with this.
12. Lower Graphics Settings and Frame Limit Cap
Another solution for CPU overload and packet burst is to lower graphics settings and set a frame limit cap. One user with a Ryzen 7 5800x CPU found that this combination helped reduce packet bursts during gameplay (source).
Conclusion
Packet burst inBlack Ops 6 can stem from several factors, including internet connection issues, game settings, and hardware limitations. By following the troubleshooting steps in this guide, you can improve your connection stability and reduce lag during online gameplay. If these solutions don’t resolve the issue, consider seeking further assistance from Activision support or exploring community forums for additional tips.
For those who require faster processing, advanced editing tools, and premium templates for BO6, Eklipse Pro is the balanced choice. It offers enhanced customization, unlimited usage, high-resolution exports, and priority customer support, ensuring you get maximum value without breaking the bank.
For the latest pricing details and further information, visit Eklipse Premium
Steam Replay is a feature that provides you with a yearly summary of your gaming activity on Steam. Launched at the end of 2022, it allows you to see statistics, favorite games, and your overall gaming journey for the year. Whether you’re looking to analyze your play style or simply relive your top moments, Steam Replay makes it easy to access your match history and view detailed replays.
In this guide, we’ll show you how to view your Steam Replay using three different methods: via the Steam desktop client, the Steam website, and the Steam mobile app. We’ll also offer a few additional tips to help you make the most of this feature.
Special Offers Window: When you open the Steam client on your computer, look for the “Specials & Offers” pop-up window. If you see a Steam Replay tile, click it to view your replay.
News Feed Method: If the tile isn’t visible, click the megaphone icon in the top right corner to open the news feed. Scroll down until you find the Steam Replay header, and click the link to access your replay.
Year in Review for Past Replays: For replays from previous years, hover over your profile name in the top right corner and select “Year in Review”.
Tip: Make sure you’re logged into your Steam account and that you have updated to the latest version of the client to see the replay feature.
Log In: Sign in with your Steam account credentials.
View Your Replay: Once logged in, your personalized Steam Replay will be displayed on the website, showing your gaming activity and stats for the year.
Accessing Steam Replay on Mobile
Steps:
Open the Steam Mobile App: Launch the Steam app on your phone or tablet.
Check Notifications: Tap the bell icon at the bottom of the screen to view notifications. Look for a notification that says something like “Replay Your Year Now!”
View Your Replay: Tap the notification to open your Steam Replay directly in the mobile app.
Additional Tips
Release Timing: Steam usually announces the availability of Steam Replay via the Specials & Offers window or news feed in the desktop client. Keep an eye on these announcements to know when the replay is available each year.
Customizing Replay Location: You can change where your replay files are stored by checking the Replays tab in the Settings menu. This is useful if you want to organize your files differently.
Troubleshooting: If you can’t find your replay, verify that you have enabled replay recording in your settings. You can also use File Explorer (Windows) or Finder (Mac) to search for “*.rofl” files, which are the replay files saved by Steam.
Stay Updated: Always update your Steam client to ensure you have access to the latest features and fixes.
Conclusion
Steam Replay is a fantastic way to look back on your gaming year and see your progress, favorite games, and top moments. Whether you access it via the Steam desktop client, the website, or the mobile app, the process is simple and straightforward. By following the steps in this guide, you can easily view and manage your Steam Replay, making it a valuable tool for reviewing your gameplay and planning for the next gaming season.
Steam Replay is a fantastic way to revisit your year in gaming, but don’t just leave your highlights as stats—turn them into shareable clips! With Eklipse AI, you can automatically generate, edit, and publish your top Steam gaming moments without needing advanced editing skills.
So, the next time Steam Replay reminds you of your best matches, take it one step further—clip, customize, and share your gameplay like a pro.
✅ Check out Eklipse and start creating viral gaming clips today! 🎥 Eklipse.gg
The world of streaming is constantly evolving, and Twitch remains one of the top platforms where millions of viewers tune in to watch live gameplay. In January 2025, certain games have captured the attention of the U.S. audience more than others. Whether you’re a streamer looking to understand current trends or a gamer curious about which titles are drawing massive viewership, knowing which games dominate Twitch can provide valuable insights into audience preferences and streaming potential.
This guide breaks down the highest viewed games on Twitch in the USA based on live concurrent viewership data. We’ll look at the top titles, their average viewership, and some context about why they perform so well. The data not only reflects current trends but also hints at the long-term potential for engagement and content creation in the competitive streaming arena.
Let’s dive into the rankings and see which games are winning the viewership battle on Twitch in the USA.
Ranked List of Highest Viewed Games (January 2025)
Below is a ranked list of the most-watched games on Twitch in the USA, along with key details for each title:
Battle royale mode of the Call of Duty franchise; known for high-intensity action and competitive play.
15
Variety
24.4K
A catch-all category for assorted content; reflects diverse viewer interests beyond traditional gaming.
High average viewership numbers for shows like Just Chatting and Grand Theft Auto V demonstrate a strong appetite for both non-gaming and gaming content on Twitch. Meanwhile, titles such as Marvel Rivals and Escape from Tarkov are gaining traction in niche markets, hinting at potential for increased engagement. Classics like League of Legends and Counter-Strike continue to draw loyal audiences, underscoring their enduring popularity in esports and streaming culture (Source: Twitch quarterly analytics, 2024).
Conclusion
In January 2025, Just Chatting leads the way on Twitch in the USA, with other major titles like Grand Theft Auto V and League of Legends following closely. Whether you’re a streamer looking to target the most popular games or a gamer curious about the current trends, understanding these viewership numbers can help guide your content strategy. As Twitch continues to evolve, keeping an eye on these trends will be key to maximizing your streaming potential and staying ahead in the competitive landscape.
For content creators looking to capture these moments, Eklipse’s AI-powered tools offer an easy way to highlight and share key moments, maximizing engagement across platforms. You can try it here: Eklipse Sign Up Page.
CapCut has become a go-to video editor for many creators, especially for TikTok and Instagram Reels, thanks to its intuitive interface and powerful editing tools. However, there are several excellent free alternatives that provide similar functionality, each with unique features and strengths.
Whether you need a tool for quick mobile edits or a more advanced desktop solution, this guide presents a ranked list of the best free CapCut alternatives for 2025. You’ll learn about their standout features, pricing details, and why they might be the right choice for your content creation needs.
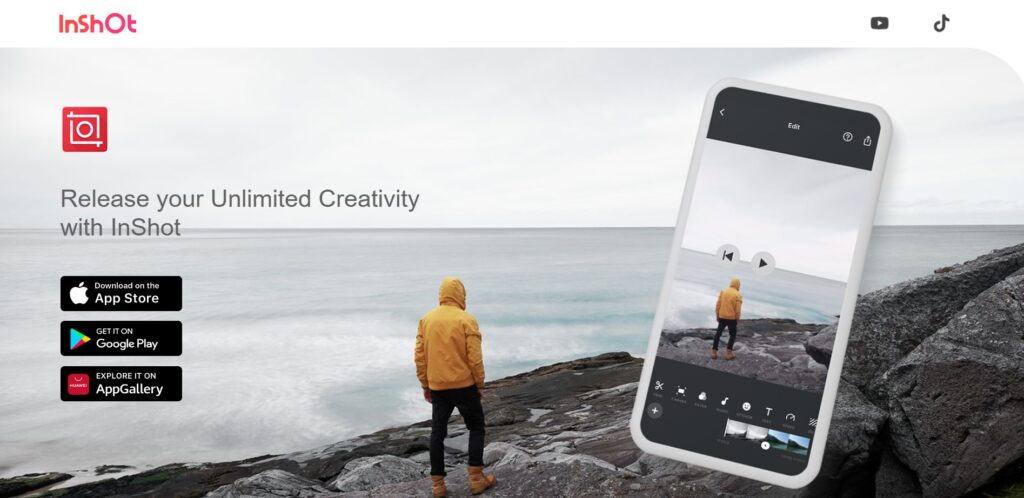
InShot is a widely popular mobile video editor known for its simplicity and robust feature set. It lets you trim, cut, and merge clips effortlessly, with options to add text overlays, stickers, and background music.
InShot offers an easy-to-use interface that is perfect for beginners, allowing you to produce high-quality vertical videos for social media quickly. While the free version includes a watermark, an affordable one-time purchase (around $3.99) or subscription model can remove it. Key Features:
Intuitive trimming and cutting tools
Customizable text, stickers, and filters
Strong sound editing capabilities
2. VN Video Editor
VN Video Editor provides advanced editing features on mobile without overwhelming the user. It includes keyframe animation, multi-track editing, and precise control over visual effects.
VN Video Editor is ideal for creators who need more control over their edits while maintaining a straightforward, user-friendly interface. It delivers powerful editing tools without the complexity of desktop software. Key Features:
Keyframe animation for detailed adjustments
Multi-track editing and precise control
Rich visual effects and transitions
3. VLLO
VLLO is a versatile mobile editor that stands out with its creative text options and smooth editing interface. It’s perfect for adding stylish overlays and captions to your videos.
VLLO offers an intuitive editing experience with a wide range of text and design options, making it a great choice for creators focused on building a consistent brand image on platforms like TikTok and Instagram. Key Features:
Customizable text overlays and fonts
Easy-to-use timeline and editing tools
Support for various video effects and transitions
4. FilmoraGo
FilmoraGo is a mobile version of the popular Filmora software, designed for quick and easy editing on the go. It provides a range of basic editing tools and creative effects, although the free version includes a watermark. FilmoraGo is perfect for beginners who want to create engaging vertical videos without a steep learning curve. Its extensive library of effects and transitions helps you add a professional touch to your content. Key Features:
User-friendly interface with drag-and-drop editing
Extensive effects, transitions, and filters
Built-in music and text options
5. KineMaster
KineMaster is a powerful mobile editor that offers advanced features like multi-layer video editing and chroma key, although many of its premium features are locked behind a subscription.
KineMaster is designed for creators who want a professional-grade mobile editing experience. Its feature-rich environment makes it suitable for more complex projects, though be aware that the free version may include watermarks and limited exports. Key Features:
Multi-layer editing and chroma key for green screen effects
Advanced audio and video control
High-quality export options with a detailed timeline
Desktop Editors
6. OpenShot
OpenShot is a free, open-source video editor that is known for its simplicity and ease of use. It provides basic editing tools along with a range of effects and transitions suitable for creating vertical videos.
OpenShot is an excellent starting point for desktop video editing, offering a clean interface and essential features for creating social media-ready content without any cost. Key Features:
User-friendly and lightweight
Basic trimming, cutting, and merging functions
Variety of transitions and effects
7. Kdenlive
Kdenlive is a more advanced open-source editor that caters to users who want additional control and features. It supports multi-track editing, keyframe animations, and a variety of video effects.
Kdenlive is perfect for those who need more robust editing capabilities on desktop. It provides powerful features without a price tag, making it ideal for creators who want to go beyond basic edits. Key Features:
Multi-track editing with keyframe support
Extensive effects, transitions, and filters
Customizable interface for professional editing workflows
8. DaVinci Resolve
DaVinci Resolve is a professional-grade video editor with a comprehensive free version. It offers advanced tools such as color correction, visual effects, and audio editing.
DaVinci Resolve is best suited for creators looking for a high-end desktop solution. Despite its steep learning curve, its powerful features make it a top choice for producing high-quality vertical videos. Key Features:
Advanced color grading and visual effects
Professional audio editing and multi-camera editing
High-quality export options with 4K support
9. Shotcut
Shotcut is a cross-platform, open-source video editor that supports 4K resolution and a wide range of video and audio formats. It offers advanced features in a modular interface that can be customized for your editing needs.
Shotcut is a powerful alternative for experienced users who require more sophisticated editing capabilities on desktop. Its flexibility and wide format support make it a reliable choice for crafting professional content. Key Features:
4K resolution support
Advanced audio filters and video effects
Customizable interface for detailed editing
10. Lightworks
Lightworks is a professional video editor with a free version that includes essential editing tools, though with export limitations. It’s widely used in the film industry and offers robust performance for complex projects.
Lightworks provides a professional-level editing environment for free, making it suitable for creators who are serious about producing high-quality videos but don’t want to invest heavily upfront. Key Features:
Professional editing tools and real-time effects
Support for multiple file formats
Limited free export options; premium plans remove these restrictions
Key Features to Consider
When choosing an editing tool as a free CapCut alternative, keep these factors in mind:
Aspect Ratio Support: Ensure the software supports the 9:16 vertical format essential for TikTok, Reels, and YouTube Shorts.
User Interface: Look for an intuitive, user-friendly design, especially if you’re new to video editing.
Editing Tools: Consider basic functions like trimming, cutting, merging, and advanced features such as keyframe animation or chroma key.
Effects and Filters: Evaluate the availability of creative effects, transitions, and customizable text overlays.
Social Sharing: Direct export options to major social platforms can streamline your workflow.
AI Capabilities: Features like automatic clipping and background removal can save time and enhance your videos.
Pricing and Value: Compare the free version’s capabilities with premium options to ensure you get the best value for your needs.
Conclusion
There is a wealth of excellent free alternatives to CapCut available in 2025, each offering unique features that cater to different editing needs. For mobile editing, InShot and CapCut itself lead the pack with robust, user-friendly tools. If you need more advanced control on your phone, VN Video Editor and VLLO provide extra creative options. On the desktop, OpenShot and Kdenlive offer powerful editing capabilities, while DaVinci Resolve and Shotcut are great for those seeking professional-grade features.
Experiment with these alternatives to find the one that best fits your workflow and creative style. With the right tool, you can produce high-quality content that engages your audience and boosts your social media presence.
Each of these tools delivers value by allowing you to create stunning vertical videos for social media without a hefty price tag. For creators who want to maximize efficiency and quality, exploring premium upgrades—such as Eklipse Premium for automated clipping and enhanced social sharing—might be the smart middle ground between basic free tools and expensive professional software.
When you’re deep in battle in Marvel Rivals, crashes or freezes can disrupt your flow and ruin an intense gaming session. These technical issues not only spoil your gameplay but also prevent you from capturing your best moments.
In this guide, we’ll walk you through seven effective solutions to troubleshoot and fix crashing and freezing issues on your Windows PC. Plus, we’ll show you how you can enhance your overall gaming experience with tools that capture and analyze your highlights, such as Eklipse.
Why It Helps: Outdated or corrupted graphics drivers are one of the most common causes of game crashes and freezes. Updating to the latest drivers ensures that your system is fully compatible with Marvel Rivals and its performance is optimized.
How to Do It:
NVIDIA users: Use GeForce Experience to update drivers.
AMD users: Use Radeon Software.
Intel users: Use the Intel Driver & Support Assistant.
If your drivers are already up-to-date, try reinstalling them, as sometimes installation issues can cause problems even with the latest version.
2. Lower In-Game Graphics Settings
Why It Helps: Running the game at high graphics settings can place too much strain on your system, especially if you have lower-end hardware. Reducing the settings can help the game run more smoothly and prevent crashes and freezes.
How to Do It:
Go to the Display section in the game settings.
Lower settings such as Super Resolution Mode, FPS cap, and Graphics Quality.
This reduces the load on your CPU, GPU, and RAM, making the game more stable.
3. Close Resource-Intensive Applications
Why It Helps: Background applications such as Discord, performance optimization software (like Riva Tuner), or system overlays can interfere with the game’s performance.
How to Do It:
Close unnecessary applications running in the background.
Turn off overlays in software like Discord or NVIDIA GeForce Experience to avoid potential conflicts.
4. Update Windows
Why It Helps: Updating Windows ensures you have the latest patches and bug fixes that could improve game compatibility and performance, especially on lower-end systems.
How to Do It:
Open Settings and navigate to Update & Security.
Check for updates, particularly if you’re on Windows 10 or Windows 11, and install any available updates.
5. Verify Game File Integrity
Why It Helps: Corrupted game files can cause unexpected crashes or freezing. Verifying the integrity of the game files can detect and repair any damaged files.
How to Do It:
Steam: Go to your Library > Right-click Marvel Rivals > Properties > Local Files > Verify Integrity of Game Files.
Epic Games Store: Use a similar option in the launcher to verify the files.
6. Increase Virtual Memory
Why It Helps: If your PC doesn’t have enough physical RAM to run Marvel Rivals, increasing the virtual memory allocation allows Windows to use additional disk space to handle memory needs.
How to Do It:
Search for View Advanced System Settings in the Start Menu.
Under System Properties, click Settings > Advanced > Virtual Memory and adjust it to a higher value (e.g., 1.5x your total RAM).
7. Check Hardware Compatibility and XMP Profile (RAM)
Why It Helps: If your hardware is incompatible or improperly configured, it can lead to crashes and instability. Additionally, enabling the XMP profile in your BIOS could cause issues with RAM compatibility.
How to Do It:
Check that your hardware meets the minimum system requirements for Marvel Rivals.
Disable XMP in BIOS if you’re experiencing crashes related to RAM configuration.
Additional Tips
Clean Reinstall of Drivers: Uninstall and reinstall graphics drivers completely using Display Driver Uninstaller (DDU) for a fresh start.
Unplug External Peripherals: Disconnect any unnecessary external peripherals, especially when playing on a laptop.
Reinstall Marvel Rivals: If none of the above solutions work, consider reinstalling the game to fix any deeply rooted issues.
Delete Crash Logs: Sometimes clearing the crash logs can help reset the game’s state and resolve freezing or crashing.
Conclusion
By following these troubleshooting steps, you can significantly reduce crashes and freezes in Marvel Rivals on your PC. Start with the simple fixes such as updating drivers and lowering in-game settings before moving on to more advanced solutions like adjusting virtual memory and checking hardware compatibility. If the issues persist, consider reaching out to the official Marvel Rivals support team for further assistance.
Additionally, consider using Eklipse to automatically capture and share your highlights, giving you more time to focus on your gameplay and less on manual editing. If issues persist, don’t hesitate to reach out to official support for further assistance. Enjoy a smoother gaming experience and let your best moments shine!
The Terminator event in Call of Duty: Black Ops 6 is set to be one of the most exciting updates in Season 2. Running from February 6th to 20th, 2025, this event brings fresh challenges and rewards across Multiplayer, Zombies, and Warzone modes. Whether you are a fan of intense firefights or love the extra twists in Zombies, this event promises to add a new layer of fun and competition to your gameplay.
The Terminator event runs from February 6th to 20th, 2025 during Season 2.
Game Modes:
The event spans Multiplayer, Zombies, and Warzone modes, ensuring a wide variety of challenges and rewards.
Key Features
Skull Collection
How It Works: In Multiplayer and Zombies, you earn skulls by eliminating enemies. In Warzone, you gain skulls by eliminating players and opening caches. Bonus skulls are awarded for kills using explosives or fire.
Purpose: Skull collection is the main activity during the event. The skulls you collect can be exchanged for exclusive rewards.
Event Rewards
Collected skulls can be exchanged for 13 event-exclusive rewards. Some of the key rewards include:
Judgment PP919: A special SMG weapon blueprint that is the main reward for completing the event.
Full Auto Mod for the AEK-973 Marksman Rifle: An upgrade that enhances the rifle’s performance.
Cosmetic Items: Expect additional rewards such as weapon blueprints, operator skins, emotes, and other cosmetics.
War Machine Scorestreak: A new burst-fire grenade launcher available as an event reward and accessible in Zombies through the Crafting Table.
Terminator Operator Bundle (Tracer Pack)
This bundle, available for purchase after Season 2’s launch on January 28th, includes:
The Terminator operator
“T-800” and “Titanium Core” Ultra Skins
Four new weapon blueprints
“T-800 Style” Finishing Move
“Tracking… Tracking…” Emote
“What Pain?” Emblem
“Lookin’ Fly” Calling Card
Shadow Hunt Event
Overview: A separate event called Shadow Hunt will run from February 13th to 20th, overlapping with the Terminator event.
Note: Details about Shadow Hunt are limited, so keep an eye out for more updates.
Conclusions
While the exact details and complete rewards list may change as we get closer to the event, all current evidence points to a dynamic and engaging Terminator event in Black Ops 6 from February 6th to 20th, 2025.
This event will not only offer fresh gameplay challenges across Multiplayer, Zombies, and Warzone but also provide a range of exciting rewards, including exclusive weapon blueprints and cosmetic items. Stay tuned for official updates from NetEase and get ready to earn those skulls for some epic rewards.