Call of Duty has several in-game definitions that beginners might not know about. If you have just tuned in for the Call of Duty experience, you are probably struggling with all these terms. Today, I am going to explain Hip fire in Call of Duty. Knowing that will help you understand the gameplay better and eventually improve your game style. So without further ado, let’s begin.
What is Hip fire in Call of Duty?
Hip firing simply refers to shooting without aiming. As you might have guessed, this makes your shots less accurate. However, there is a benefit to using this technique. If the enemy is close to you, you don’t have to waste your time aiming for it. Just start firing.
Source: GFycat
Call of Duty mobile provides you with aiming down sights (ADS) to allow you to be more accurate with your shots. If you are facing a target that’s far away from you, then using ADS will be the right choice. But in close quarters, hip firing is the way to go. Using ADS means there’s a slight animation delay. This can get you killed if you try to do that in close-quarter situations.
Source: Giphy
Hip firing is poor for long-range combat. It’s hard to be precise when you are using hip fire in Call of Duty. In addition to that, you also need to switch to a weapon that has a high firing rate. Using a sniper in close-quarter situations makes no sense for your game. Instead, you will want to switch to a shotgun or a machine gun when you are hip firing.
Switching between the two modes will be the best strategy for your Call of Duty gameplay.
Conclusion
Hip fire in Call of Duty basically means shooting without aiming first. The technique has its pros and cons but you can use it in situations where it’s truly required.
So, what is a melee master medal in cod mobile? COD Mobile has plenty of incredible medals that are given to the players as a reward for their in-game achievements. Players can avail a lot of rewards by unlocking these medals & completing the tasks in the ‘Events’ section of the game. One of these is the melee master medal.
In Season 4, one of the most well-known medals is undoubtedly the Melee master medal. The main reason why it became famous was due to the quite new melee weapon or equipment in the game, that is Sickle. To unlock the melee weapon, the players of COD Mobile have to unlock the Melee Master medal first.
Want to know more about the Melee master medal cod mobile? Well, in this article, we will summarize all the things you should know about the Melee master medal in cod mobile, including how to achieve it. So, let us begin,
COD Mobile: Tips to Get Melee Master Medal
Source: TouchTapPlay
Since the Melee Master Medal is linked to acrobatics and melee hits, you should complete 4 skills using the melee weapon in the game. The basic trick for doing so is to finish your task in the Battle Royale mode. Even though finishing the task in the mode of Battle Royale seems fairly difficult, we suggest that you should try in this mode alone.
For playing solo in the Battle Royale mode, you need to choose Solo or Classic mode. Though solo mode contains different bots from BR which can enhance the possibility of getting killed with the weapons of melee. It’s possible to use the ax & kill the adversaries without taking any serious damage.
You can also use Katana for slashing your adversaries in short battles. Follow these tips and you’ll be rewarded the medal on COD mobile when you finish the task. Along with this trophy and medal, you’ll also be rewarded with a Punk Skull efficient spray. Sounds cool, right?
Benefits of having a Medal
The medal you attain will give you great benefits for a short time. Try killing a minimum of 4 enemies by using an ax or other melee weapons at least once in a match. If you do this, the Melee Master medal will definitely be yours. A great kick for the bucks! In addition, having the Melee Master medal will assist you in speeding up the progress via different challenges within COD mobile.
All in all, this is the only way to get this medal. However, if the players are facing any kind of issues while doing it, just make sure to look for a solution by research. Plus, you can also talk to any of your friends about this.
Conclusion
So that’s how you can unlock the melee master medal in COD mobile. Definitely try this the next time you play COD mobile with your friends or alone.
Booyah Live is a live streaming game platform for free and easy. The live streaming platform made by Garena is the most widely used by Free Fire players.
You can live stream the game you want with much easier streaming settings on it. All you have to do is set up a streaming app like OBS Studio and connect to the platform.
If you have recently started a YouTube channel, you probably don’t get enough traffic on the YouTube channel. Well, there are two ways of earning money through YouTube. One is through ad revenue and the other is through sponsorships. The best part about YouTube sponsorship for small channels is that you can revenue despite not getting much traffic.
Sponsorships are a godsend for small YouTube channels. Even if you are too small to generate an impressive ad income, chances are you are still big enough to get a sponsor for your YouTube videos. Want to find out how to get your first sponsor? Keep reading to learn more.
How to attract sponsors to your channel when you’ve just started
Here’s what you need to do to make your YouTube channel attractive to your sponsors. Your sponsors are interested in a channel that has just enough traffic (which doesn’t need to be a lot), produces family-friendly content, and gives off professional vibes. If you do these basic things, you will be approached by sponsors in no time.
1. Making your channel look professional
What does it mean to be professional on YouTube? It means you need to tick all the necessary boxes to make your channel look approachable. Make sure you have an about section, a proper banner, and a profile picture. Put relevant titles and thumbnails in your videos and keep everything tidy. This will help you make an impression.
2. Growing your channel
Growing your channel means getting views and subscribers. If you don’t know by now, YouTube requires at least 1000 subs and 4000 hours of watch time before you can monetize your channel. So if you want to chase a certain milestone, aim for these numbers. Once you clear this mark, your channel will be attractive to brands and they will approach you.
Growing your channel requires you to consistently put out unique content. Don’t be afraid of experimenting at first. Make sure you never stop learning and improving your content. As your channel grows, so will your audience. That’s why diversifying is necessary for your YouTube channel.
3. Joining sponsorship platforms
Once you grow your channel, you can join YouTube sponsorship platforms to connect with brands that are interested in sponsoring your YouTube content. YouTube BrandConnect is a great platform for you to meet brands and arrange deals with them. The best part about using this platform is that it is situated within YouTube’s ecosystem.
How to approach brands for sponsorships?
Once you have built a channel with a good enough following and subscribers, you can start reaching out to brands. Brands like NordVpn have dedicated pages for those who want to join their sponsorship programs. Though, having a robust audience and channel means many brands will email you themself.
Though when you are just starting, it’ll be helpful if you build an attractive portfolio and reach out to brands yourself. Doing so will give you a lot of experience and will teach you a lot of things for your YouTube business in the long term.
Conclusion
So that was my guide on how you can receive YouTube sponsorship for small channels.
The main takeaway is that you need to be patient and persistent in your efforts. You need to see your YouTube channel as a resume as brands will judge you based on professionalism, audience, and content.
If you are creating a video game montage then you must pay attention to the transitions and effects you add between each clip. Gaming montage effects are a great way to showcase your skills and highlight the best moments from your gameplay.
Leaving abrupt cuts between clips is bad for your YouTube channel or any other platform in the long run. But with so many different editing tools and effects available, it can be tough to know where to start.
In this article, we’ll take a look at some of the most popular and effective gaming montage effects that you can use. We’ll also provide tips on how to use these effects to create the most engaging and visually appealing montages possible.
Whenever you make a compilation of different clips, it’s necessary to add smooth transitions between those clips to make the editing look smooth. Adding smooth transitions and a bunch of effects will help you level up your gaming montage editing.
What gaming montage effects should you use?
Here is a list of montage effects you should incorporate into your overall editing strategy:
1. Dissolve
This is probably the most used gaming montage effect out there. A dissolve is when you simply layer two clips together to create a smooth transition between the two clips. A dissolve effect is so subtle that your audience will barely notice the translation between two clips. If you want your montage to look smooth, consider adding dissolve effects here and there.
Fade transitions are great for dramatizing your videos. You might have noticed fade effects in movies all the time. You can use Fade to or Fade from black effect to mark a shift in tone in your gaming montage.
Source: CodeMyUI – montage presets for premiere pro free
Light flashes are one of the coolest effects out there. In a light flash, the screen stimulates a camera flash by dissolving the screen to white for merely a fraction of a second. Depending on the content you put out, this can be a great tool for your montage videos. Light flashes can get pretty overwhelming so it’s important to be a bit meager when using this flash.
Source: Second life marketplace – gaming montage maker
4. Particle wipes
Even though wipes in general tend to be quite cheesy and don’t make your video look professional, they can still be useful. The particle wipe for instance can be a good resource if your montage is humorous in nature. A particle wipe is basically something like a bunch of particles such as stars, sparkles, or bubbles covering up the screen to transition the clip to another.
You might remember seeing this effect in Spongebob Squarepants.
Source: Noise – gaming montage effects download
Conclusion
So these were some of the basic gaming montage effects you can add to your videos. Remember to use these sparingly as you don’t want to overwhelm your audience with a bunch of flashing images or hard-to-follow content.
An addition, we suggest you try making video montage using Eklipse as it provides you the most convenient method. Give a read to this article to know more: How To Make Video Montage: An Eklipse Guide.
Want to implement seamless transitions in your videos? Join Eklipse and level up your editing.
Maximize your Black Ops 6 rewards—Create highlights from your best gameplay with with Eklipse
Eklipse help streamer improve their social media presence with AI highlights that clip your Twitch / Kick streams automatically & converts them to TikTok / Reels / Shorts
Streaming on YouTube is amazing and can be a great revenue stream along with your Facebook gaming and Twitch streaming. Just like Twitch VODS, you don’t want to lose any potential great moments in your YouTube live streams. So, how to record a live streaming video on YouTube? To know the answer, keep reading the blog.
How to record live streaming video on YouTube: Xbox
Follow these steps to record your YouTube live stream if you are streaming from Xbox:
Press Win + G on your keyboard. This will launch your Xbox Game Bar.
You can now press record to start recording or use the following shortcut: Win + Alt + R.
You can press the stop recording button once you are done. Note that this method only records the stream in window mode.
How to record live streaming video on YouTube: PC
You can record your YouTube live stream on PC using online screen recorders such as Screen Capture. Follow these steps to use this online recorder:
Go to the official Screen Capture website and select the parameters.
Once you are done, click start recording.
You can choose the recording area and press “share the screen” to begin recording.
Click “stop recording” when you wish to finish the recording.
How to record live streaming video on YouTube: Android
For Android users, you can download any screen recording app on your Android to record your Live stream videos:
Open YouTube and select the live stream you wish to record.
Launch your screen recorder and press record.
You can pause or stop the recording whenever you wish.
You can check your recorded live streams in your camera roll.
Conclusion
So that’s how you can record your YouTube live streams on three different kinds of devices. Looking for fresh recording software for your streams? Eklipse got you covered! Read more about Eklipse here!
Looking for a way to edit video clips professionally without needing to master the skill? Eklipse is the answer!
Anyone can now create cool video content without much effort with Eklipse. This tool uses advanced AI to help every game streamer and content creator make the best content without wasting much time and energy.
Curious about what Eklipse is and how to use it to edit videos online for free? Keep reading to learn more about this cool app!
Eklipse is smart clipping software designed for streamers and content creators. It uses a powerful AI-based algorithm that automatically highlights the best moments from your live streams. This tool has been chosen by various users worldwide and gained 4.8 stars on Product Hunt.
You just need to connect your streaming platforms (such as YouTube, Twitch, Kick, and Facebook) to Eklipse. Afterward, the AI system will start making highlights from your stream automatically.
In addition, Eklipse lets you edit your clips and videos via a beginner-friendly and convenient interface. You can trim your videos, compile them, and add filters, themes, sound effects, smooth transitions, and even channel sticker names to make them more appealing!
How to Edit a Video Clip for Free with Eklipse?
Source: Eklipse.gg
Eklipse works on many platforms, including PCs, tablets, and smartphones (Android and iOS). The steps to edit a video clip with Eklipse are straightforward:
That’s how to edit a video clip online for free with Eklipse! With Eklipse’s powerful editing features, you can edit your video clips like a pro in no time. Sign up on Eklipse here to enjoy more exclusive benefits and watch your content thrive!
You might come across a clip on Twitch that’s too good to miss. What do you do now? You download it! Though this is not the only reason why you should download your clips from Twitch. If you are a creator, you might want to download your best clips for safety reasons. Here, I will tell you how to download a clip from Twitch.
Due to recent DMCA takedown notices, the safety of your clips on Twitch is deeply compromised. Just because your clip is safe on Twitch right now, it doesn’t mean it will always be there. Therefore, you should download your valuable clips from Twitch as soon as possible. As a viewer, you might want to download clips you like because the streamer can decide to delete them.
Downloading the clip on your PC or any other device will ensure that the clip is safe.
If you are a creator on Twitch and you have created the clip you want to download, you can simply go to the creator Dashboard and click the content drop-down menu. After that, select the “clips” option and choose the clips you wish to download to your device. To download the clips, click on the share icon. Now you can click on the downward pointing arrow labeled “download” to save the clip to your device.
How to download a clip from Twitch as a viewer
If the clip you wish to download does not belong to you, you’ll have to use external tools to save them to your device. Some good tools that you can use to download clips to your device are Internet download manager, Clipr.xyz, and the Twitch Clip Downloader extension that is available on Google Chrome.
Conclusion
So that’s how you can download a clip from Twitch.
Online video editor no watermark can be the best alternative if you need editing software with convenient use. Sometimes, launching any editing applications on your device need much effort. Besides, it will also use your memory storage. Therefore, many people have moved on to better options.
Video editor no watermark online is an online tool you can use freely. If it says free, then it’s free. Most of those tools require just your account information to sign up, and then you’re ready to go. You can use all the advanced features to make your video looks more interesting. However, some online video editors also offer you plans along with their pricing.
It’s actually a preference and optional. Those who need more complete services can pay for a subscription to certain versions. Other than that, we have made a list of the best free online video editor with a comprehensive explanation. Let’s check the list below and see what you can find here.
If you want a robust and easy to use online video editor online free that lets you edit a video without a watermark, you can try WeVideo. It has a lot of features you’d want in video editing software. The best part about it is that since it’s an online service, you don’t have to install anything else again because you can just boot up your browser and start editing right away.
Although, if you want to use it with all the features it has, you have to pay a subscription. They have a lot of subscription plans that you can choose from, from $4 a month up to $36 a month plan targeted for teams of professionals. That said, you can still try it for free with a lot of limitations, including a watermark on your finished video.
Movie Maker Online: Free Video Editor No Watermark
Source: Filmora
Movie Maker Online is the service you’d want to know if you need a quick and simple online video editor without watermark for PC. The best thing about it is you don’t have to register or subscribe to it because it offers you the service for free. Even more amazing it lets you do all that without having an annoying watermark on your final product.
Since it’s an online service, you can access it wherever you want on whatever device as long as it has a browser and internet access. It also has an extensive library of free stock photos and music.
Clipchamp
Source: Clipchamp
Clipchamp is another good online video editor no watermark free you should have on your list. Despite you can use it for free, to download your video without a watermark you have to subscribe. The feature that stands out from others is that Clipchamp has a lot of video templates for a lot of purposes, this lets you edit your video faster and more efficiently.
Along with various templates, it also has an extensive collection of stock pictures, videos, and audio for you to enhance your videos. Clipchamp also has its own cloud storage so you don’t have to upload it to another place that might cost you another subscription.
FlexClip
Source: FlexClip
Flexclip is another contender for an online video editing service. It offers you no subscription plan at all since it offers it for free. The good thing is, that the final product you’ll download will not have any watermarks. It is also geared towards entrepreneurs since it has a lot of templates to promote a product.
However, it still has the features you’d want in a video editor, along with cut, trim, and other crucial features, it also lets you record your screen, so you can capture meetings, games, and anything you want.
Eklipse: The Best Online Video Editor No Watermark
Source: Eklipse
If you are looking for a free online video editor that is easy to use and has no watermark on the final output, Eklipse is the best answer. This tool generates with an advanced AI. With this, you don’t have to do anything but sit and wait for your video result. This is what you call the Premium Edit feature in Eklipse.
On top of that, you can also have the best highlights from your video automatically only by doing a few clicks. Eklipse can provide you with several cool clips you can choose, from or many automatic AI compilation videos. This tool has made your life a lot easier.
Additionally, all the features in Eklipse are free to use. No need for any payments, even when you are going to take the Premium Edit service. Despite its free, do not worry about the result, because you won’t find any watermarks on your video.
Magisto
Source: ProductNation
Magisto would probably be called a premium online video editor service since it doesn’t have any free plans at all. That said, if you do subscribe to them you’d get one of the best online video editors on the net. Magisto is loaded with a lot of features and templates, ranging from fitness, and cooking, to specialized templates for ads that can be used on youtube and Facebook.
Although it is a paid service, Magisto is one with a good value. Magisto offers you plans that include cloud storage so you don’t have to subscribe to another service dedicated to it. On top of that, it also gives you access to probably the best stock library in the world, iStock.
Renderforest: Another Online Video Editor No Watermark
Source: BloggerIO
Renderforest is a specialized online video editor that lets you edit your video in a very easy way. While you need to have a subscription to export it without watermarks, you can see from the features that it offers, that it is very much worth it.
Renderforest allows you to select from a lot of video resources you can use to enhance your video with stuff like logo animation, motion titles, presentation pack, and even mockups template and your own website. If you don’t want to subscribe, it also lets you use the service for free albeit limited in some way, or you can choose the pay-per-product scheme instead.
Conclusion
So that’s all the best recommendations for online video editor no watermark you can try. Though some of the tools still require you to pay for a subscription to take out the watermark, all of them are really worth trying. Besides the friendly interface, they have their best feature to support you in terms of video editing. Wich one of the software you wanna try?
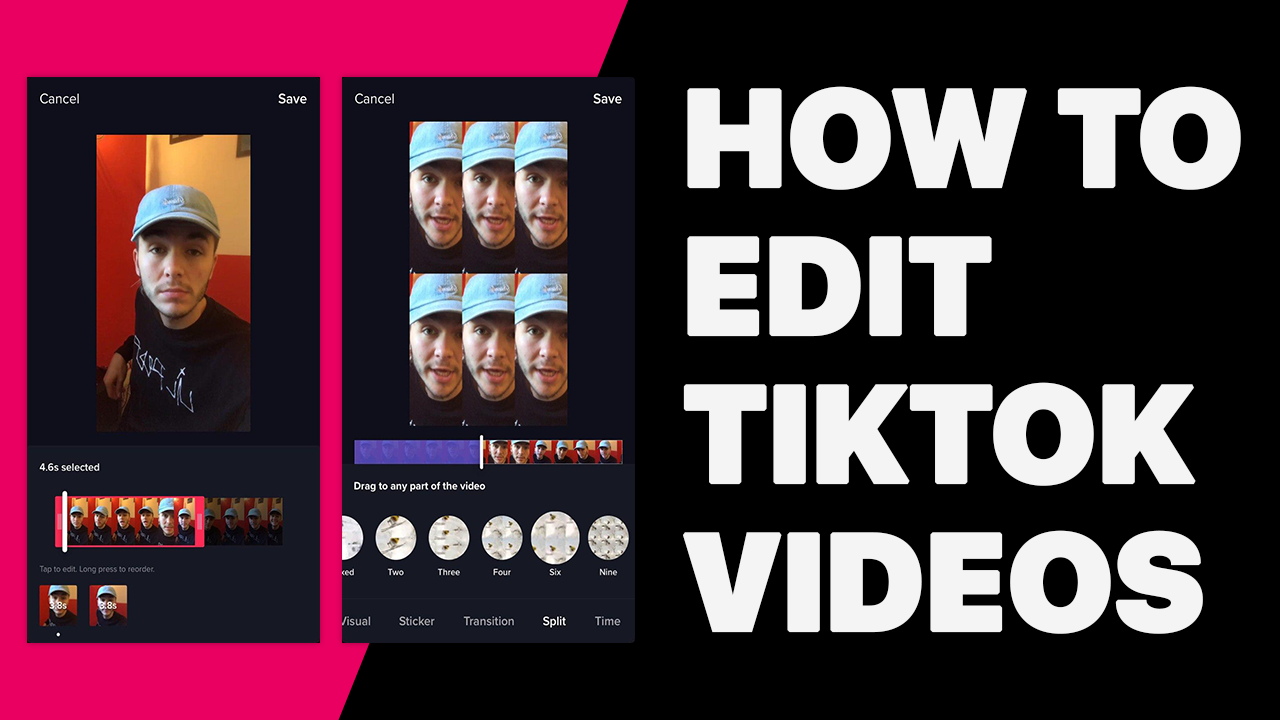
Want to create aesthetic, eye-catchy, and smooth videos for TikTok? You can always rely on a third-party platform to do so. In today’s article, I will tell you how to create a TikTok video using Eklipse’s editing software. So without further ado, let’s begin!
Eklipse is a powerful AI-based software that automatically generates clips from your gaming streams. Besides being a clip generator, it also works as a very convenient video editing software. You can easily edit your clips and videos using Eklipse and post them on your social media platforms such as Twitch, Facebook, Instagram, and TikTok.
How to create a TikTok video using Eklipse?
Follow these steps to edit your videos for TikTok using Eklipse:
Record your video for TikTok. You can either record it using the TikTok app or use your phone camera.
Now you can do lots of stuff to your video like adding transitions to it, cropping it, adding sound effects, etc. If you want to stand out from the rest, you should focus on smooth editing.
If you want to trim the length of your video for TikTok, you can do so by using the trim tool. You need to abide by the time limit provided by TikTok.
You can add transitions to your video by selecting the transitions section.
Eklipse also allows you to add music of your own choice as well as sound effects.
To add text to your video for TikTok, click on the plus icon.
If you want to scale your video to fit a square, horizontal, or vertical format, you can do so by selecting the resize menu. For your TikTok video, you want the vertical format.
Once you are satisfied with the editing of your TikTok video, you can go ahead and save your project.
Conclusion
So that’s how you can create aesthetic TikTok videos using Eklipse’s editing features.