With so many characters to play in League of Legends, some people may wonder how many champions are in League of Legends in 2022? Here’s everything you need to know.
League of Legends is one of the most popular MOBA games that offers a wide range of characters. You can play as a sneaky assassin, a mage, or even a tree. There’s always a character for everyone to play according to their playstyle.
If it’s your first time playing League of Legends:, you’re reading the right article. In this article there is information about all heroes or champions that can be played in 2022. Here is the most updated list of heroes or champions in League of Legends.
Creating a YouTube video production workflow is really important if you want to keep on track while producing videos regularly. In addition to the number of videos you have to produce every day, you will also race with the deadlines and any other challenges. So, a workflow will help you to be more systematic.
A great YouTube video consists of well-design content ideas, sorted clips and footage, predictable budget and time, and more important things. You can imagine without clear guardrails, everything will not run smoothly, or worse it could be a tangle.
Therefore, this article will give you an example of a good YouTube channel workflow to speed up your content creation process. Let’s begin the discussion.
Preferred YouTube Video Production Workflow You Can Try
Workflow can really help you face the deadline, provide a great content idea, and manage resources for creating video faster. Aside from that, it can also help you to avoid great mess whenever you try to edit your resource to be a video.
In addition to that, a good workflow should’ve separated the content-producing process into four stages: pre-production, production, post-production, and promotion.
1. Pre-production Stage
Source: vidIQ
To make YouTube content less complicated and on time, you need to do some stuff regarding the pre-production stage. It’s including initiating the creative and clear ideas along with the goal of the content, creating the narrative script, budgeting, and setting the timeline. Let’s discuss each of them.
Coming Up With a Clear Idea
The idea is the root of everything. You can’t make a single YouTube video without an idea. Once you’ve found an awesome idea, you can then start researching the related keyword, topic, or even script writing. Additionally, you can make a full script or some bullet points are also fine.
Set The Content Goal
Content without a clear goal will be nonsense, and everyone will get bored if there’s no point in your YouTube video. That’s why after you have a content idea, set the goal of the video as well. Apart from that, you can set the goal to be educating, amusing, persuading, or informing. Then, you can improve them later.
Provide Project Budget and Timeline
In addition to the content idea and goal, you also need to arrange the project budget and the timeline. The project budget should cover every project spending. Meanwhile, the timeline is all about when the production begins and the target date for the project to be completed.
2. Production Stage (The Next YouTube Video Production Workflow)
Source: Volution
Now since you’re ready with all of the pre-production stuff, you can continue to the next stage, which is the production stage. In this stage, you will start to record clips and footage, and then arrange them into an incredible video.
Setting Up Recording Gears
Before starting a recording process, setting up the gear is required. It’s including your camera, lighting, additional mic, and more important things. Other than that, you need to decide what kind of scene you need to capture.
Start Filming Process
This step is where it all comes together. You will start to shoot the scene using the gears. One thing for sure, try to stick around the budget and timeline to avoid delays in producing process.
Preparing to Edit
Once you’ve finished shooting, the next step is to gather any additional content such as B-roll footage, graphic or animation, and voiceover recording. Also, make sure you organize all those important files into a specific folder on your device. Trust me, it will make everything easier and you will be able to avoid multiple revisions.
3. Post-production Stage (The Final Step of YouTube Video Production Workflow)
Source: PCmag
The post-production stage is the last in terms of making a video. At this stage, you’ll start to edit your organized resources, collect some feedback from the reviewer (if it’s possible), and make a final production.
Start Editing and Create Rough Draft
Finally a video post-production workflow, and it’s time for video editing! At this step, you can identify all the clips and footage, arrange and trim them into a raw cut, and maybe adding effects or transitions is also fine. Other than polishing the raw cut into the final product, you can also add a cool soundtrack to make your video more interesting.
Collect Feedback and Make the Final Product
Feedback is actually necessary to review your raw video before you save it as the final product. However, collecting feedback from any reviewers might take a long time. If you think it’s kinda impossible to waste any of your time, you can skip this step though.
To make sure that everything is alright, you can compare your raw video, observe, and decide what part you will need and what you don’t.
4. Distribution and Promotion
Source: Vidilot
Apart from producing videos, you also need to work on a distribution and promotion plan. If you want to increase the growth of your YouTube channel and gain more viewers from your videos, it’s required to involve other platforms such as TikTok, Instagram, Facebook, or other platforms.
Therefore, you should prepare a video in any format and develop a distribution plan to properly promote your video on social media.
Conclusion
That’s all about our preferred YouTube Video Production Workflow. If you have another plan or strategy for your workflow, that’s cool. You can share other ideas through the comment section below. Happy YouTubing and good luck!
If you want to make gaming video for YouTube, you can try Eklipse as the best clipping tool. Additionally, Eklipse powered by A.I. So, it can help you to automatically create incredible montages to be shared on YouTube. Learn more about Eklipse here!
Greetings, content creator! How’s your progress in the world of live streaming? Have you been able to attract a viewership? Do you want to know How to Grow on Facebook Gaming?
If you haven’t achieved the desired results yet, there may be certain elements missing from your approach. It could be an ineffective strategy or an inadequate live-streaming method. To become a creator who resonates with viewers, it’s crucial to stream diligently and engage actively with your audience.
If you’re still facing challenges, fret not! We’ve put together this comprehensive guide on how to thrive on Facebook Gaming to lend you a helping hand. Let’s explore the complete array of tips below!
Are you interested in playing Apex Legends Mobile on PC? Here’s a complete tutorial on how to play Apex Legends Mobile on PC using an emulator.
Apex Legends Mobile is now available on Android and iOS but cannot be officially played on PC. However, players can use the emulator to play on PC if they wish.
Respawn Entertainment has not officially implemented emulation support but players can run the game on multiple emulators without any problems.
Bluestacks is one of the most popular emulators out there, but you can use any emulator of your choice. Simply follow the steps below to play Apex Legends Mobile on PC!
Let’s face it, not everyone is equipped with the same capacity to play difficult games, such as Dark Souls, Elden Ring, or even FPS games. If you’re a beginner when it comes to games, you might want to start by playing the best video games for beginner gamers.
Of all the many genres and types of digital games that exist, perhaps the easy and down-to-earth type of game is still a favorite for some gamers. In this type of game, you don’t need to be always fully aware of your surroundings, be able to aim, do a 180 flick, or some advanced gaming tricks to win.
If you’re the type to prefer play chill games that aren’t hard, then these are for you. Check out the top stress-free and easy games recommendation from us below!
If you are a fan of FPS games and are wondering how to play Fortnite on PC, this guide is for you. Undoubtedly, Fortnite is one of the most popularbattle royale games in the market. You can play it on almost any device but we will talk about how to play it on PC for now.
Yeah, yeah … we know that the game is available to play on half a dozen platforms such as macOS, Android, iOS, Switch, PlayStation 4, Microsoft Windows, and Xbox One. But we think, playing Fortnite on PC itself has some benefits.
To play Fortnite on PC, the minimum system requirements for the game are:
CPU: Core i3-3225 3.3 GHz
GPU: Intel HD 4000 or Intel Iris Pro 5200
RAM: 4GB RAM
Operating System: Windows 7/8/10 64-bit or Mac OS Mojave 10.14.6
How to Install Fortnite on PC?
Considering you meet the minimum system requirements, let’s dig deeper into how to install Fortnite on PC.
Source: YouTube
Create an Epic Games Account
If you don’t have an Epic Games account, the first step is to create one. You can do so by going to Epic Games website and clicking on the “Sign Up” button located at the top right corner of the webpage.
Enter your email address, date of birth, password, and username. Once you’ve done that, click the “Create Account” button, and you’re ready to go.
Download the Epic Games Launcher
The next step is to download the Epic Games Launcher. You can do so by going to their website and clicking on the “Download” button in the top right corner of the screen.
Once the download finishes, open the Epic Games Launcher and log in with your account credentials.
Install Fortnite on PC
The next step is to install Fortnite on PC. To do this, click on the “Install” button for Fortnite in the Epic Games Launcher.
Once the installation completes, launch the game by clicking on the “Play” button.
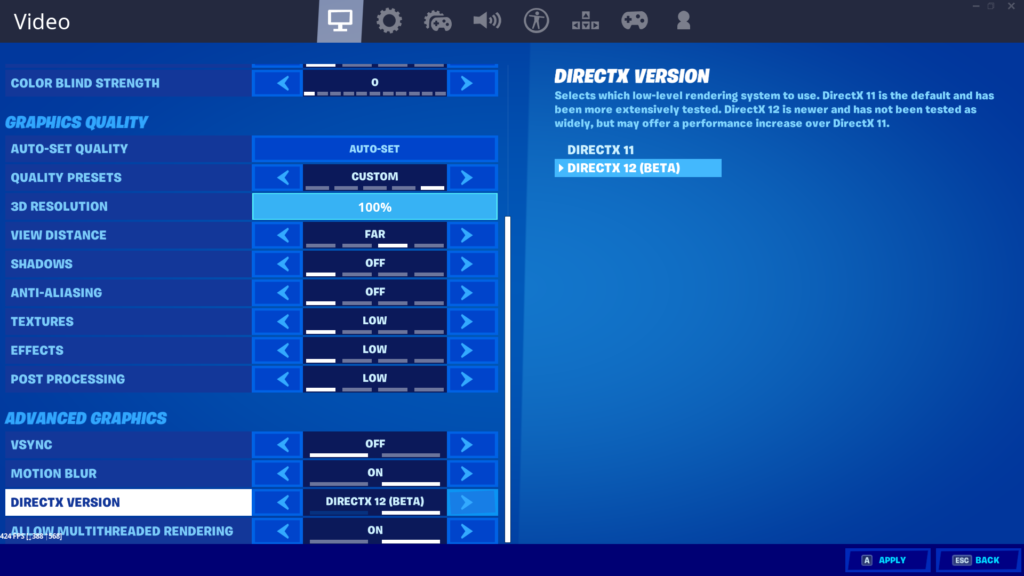
Adjust the Settings
Source: YouTube
While the default graphics are pre-adjusted according to the specs of your PC, you might want to change them for a better gaming experience. To do this, click on the “Settings” button in the top right corner of the main menu screen.
In the Graphics tab, you can tweak the game’s resolution as well as its frame rate. It’s important to note that if you’re unsure what your PC can handle, it’s best to start with the lowest graphics and work your way up.
You’ll also find options to change the control settings in the settings menu. Before playing the game, ensure that you’re comfortable with the controls, such as the mouse sensitivity and key-binds.
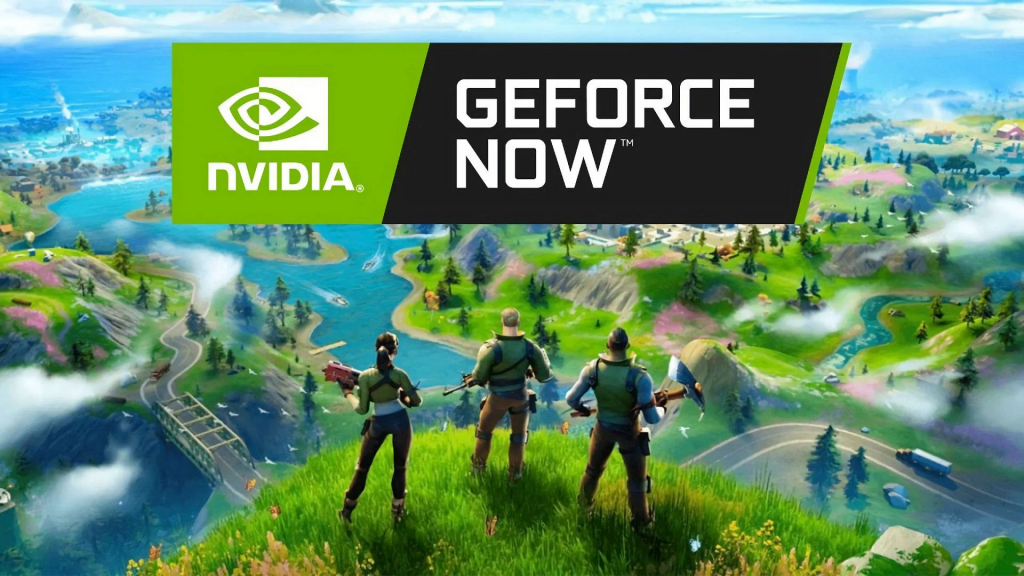
How to play Fortnite on PC with Nvidia GeForce Now
Source: Sportskeeda
Are you ready to explore a way that will allow you to play Fortnite on your PC without downloading the game? You can do it with Nvidia GeForce Now. Here are the steps to follow to play Fortnite with GeForce NOW,
Choose your monthly subscription plan
We recommend the establishment plan for €5.49 per month play for unlimited time
Check system requirements for GeForce Now
Download the client and register an account
Install the .exe file you will get for Mac it will be a .dmg file
Launch the app once installation completes
Search for Fortnite
All that’s left is start playing!
Conclusion
That’s it! You’re now ready to play Fortnite on PC. By the way, just a fun fact, did you know that you can even play Fortnite on school Chromebook!? Read more to learn how to do it. Happy Gaming!
League of Legends: Wild Rift is a highly popular mobile game available exclusively for iOS and Android devices. However, many players desire a larger screen and more precise controls.
Can you play Wild Rift on PC? Fortunately, there are solutions to fulfill your desire of playing Wild Rift on a PC. One option is to utilize a Wild Rift PC emulator. Read on to discover our guide on playing Wild Rift on PC and start your adventure right away.
Many people ask this question: can you play Wild Rift on emulator? Of course, you can. An emulator is an application to empower the user to play games on their PC without relying on their device. In addition to that, there are various game emulators you can try.
We are going to mention some of the best emulators along with the steps to use them. Check it out!
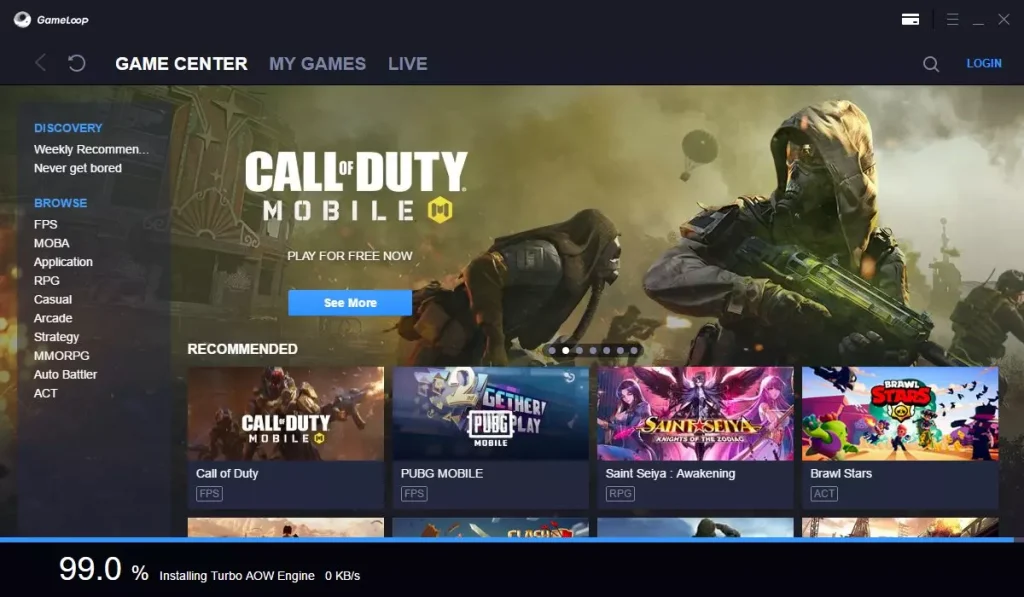
Play Wild Rift Using GameLoop
Source: Usitility
GameLoop is one of the most advanced emulators that will assist you to play any game on a PC. If you are an Android user and want to play a game on a PC, GameLoop will be the best choice. Here’s how to use it.
Start off by downloading GameLoop app on your PC through its official website here.
Once you’ve downloaded the app, run the installer and follow all the installation processes.
Then, launch the GameLoop app, create an account and sign in with your account.
Next, head to the search bar and type Wild Rift to find the game.
Hit on the Install button and wait until the downloading process finishes.
To open the game, click on the Open button, then log in with your LoL account.
Adjust the keybinds and controls by heading to the Settings menu in the game.
Now, you can enjoy Wild Rift on your PC using GameLoop
BlueStacks Wild Rift Emulator and How to Use It
The second alternative game emulator is BlueStacks. Besides GameLoop, BlueStack also has many users due to its incredible features which can enhance users’ gaming experience. Here are the steps to use this app.
To begin with, download and install the BlueStacks app on your PC.
Once it has already launched, open it and open Google Playstore through the app.
Then, log in with your Google account.
After that, head to the search bar and search for League of Legends: Wild Rift.
Next, click the install button to download and install the game.
Now, hit the Open button to launch the game, and log in with your account to start playing the game.
If you want to adjust the controls and keybinds, you can head to the Settings menu within the game.
Finally, you can play Wild Rift on your PC using this app.
How to Play Wild Rift on PC via LDPlayer
Looking for another emulator that is more lightweight yet featured high FPS, great keyboard mapping control, and graphical support? LDPlayer is the answer. You can do the following steps to be able to play a game using this app.
First, download and install the LDPlayer app from its official site.
After that, launch the app and click on the LD Store icon.
Find Wild Rift on the search bar.
Once you’ve found Wild Rift, click install to download it.
Finally, enjoy your game on your PC.
How to Play Wild Rift on PC Without Emulator
Can you play Wild Rift with the keyboard and mouse but without an emulator? Yes, you can definitely do it. If you don’t want to use an emulator, you can use live projection software or screen mirroring apps. We will discuss some apps that will help project the gameplay from your screen mobile to your PC. Find whichever suits you most.
Play Wild Rift With TC Games
Source: ExceedEasy
TC Games is one of the live projection software you can try to transfer the gameplay from mobile to PC. Here’s how you can use this app.
First, download and install TC Games both on your PC and mobile.
Second, connect them with a data cable and open it on both devices.
There will be a pop-up message asking you to allow the MediaTekCloud connection.
Then, allow the MediaTekCloud connection and turn on the USB debugging in your mobile device.
After that, hit connect PC and the mobile screen should appear on your PC display. You can control using mouse and keyword later on.
Open LoL Wild Rift and set the controls accordingly.
Finally, you can start playing it on your PC.
Play Wild Rift on PC with iMyFone MirrorTo
Another mirror app that will allow you to enjoy your favourite mobile games on PC is iMyFone MirrorTo. iMyFone will let you project your full screen or specific window from Android. So, playing the game will be so much fun using this app. Follow the tutorial below to start using this app.
Download and install iMyFone MirrorTo on your PC.
Then, connect your mobile and your PC with a USB cable and make sure that the connection mode is selected for file transfer.
Click Turn on to give permission MirrorTo to allow it to show things on top.
Next, you can enjoy playing and controlling the characters of Wild Rift on your PC.
Can You Get Banned for Playing Wild Rift on PC?
Rumour has it that Riot Games will ban players who are using prohibited third-party programs, including emulators. This rumour has spread after a popular Wild Rift streamer has been banned due to the use of an emulator to play the game on PC.
However, there is no confirmation from Riot Games regarding the primary reason behind the ban itself. Many speculate that it might be caused by the use of an emulator or even a VPN. None can guarantee it. Aside from that, many Wild Rift players are starting to reconsider using an emulator to avoid being banned. What do you think about this? Leave a comment below!
Join Wild Rift Community in Eklipse!
Have fun with Wild Rift on PC and wish to show the best of your gaming moments to the world? We got you. You can simply record your gameplay using any streaming recorder, and use Eklipse to create incredible highlights with our amazing tools, such as automatic clipping by AI, converting to TikTok, and adding a soundtrack.
On top of that, Eklipse also lets you join the Wild Rift community to show your best moment while playing this game. Our AI will automatically pick your epic moment and show it to the community. If you want to join Eklipse community, hit the following button and let people see your skill!
Conclusion
So, that’s all about how to play Wild Rift on PC with or without an emulator. Now, you can play your mobile game on a wider screen with more convenient control to help you achieve the glory. Aside from the issue above, will you still be interested to play a mobile game on PC?
Maximize your Black Ops 6 rewards—Create highlights from your best gameplay with with Eklipse
Eklipse help streamer improve their social media presence with AI highlights that clip your Twitch / Kick streams automatically & converts them to TikTok / Reels / Shorts
Funny errors in Fortnite during Season 3 are just as useful as errors in previous seasons. Players may be having difficulty advancing and reaching milestones this season, but these errors can help them do it quickly.
However, when problems are found, the game’s creators usually act fast to fix them. This means gamers only have a short time to try out these errors before they are repaired. So, before they get fixed, here are a few amusing errors in Fortnite that you should definitely try. We will showcase errors from Chapter 2 and 3 of Season 3.
This chapter came with many major changes in the map and much more. The left-side of the island now have Reality Falls and Rave Cave instead of Camp Cuddle, The Fortress and Command Cavern. There are exciting new characters and more landmarks. The renewed Battle Pass has Indiana Jones and Darth Vader as its highlight.
Now let’s get started on the glitches, the first funny glitch we have is:
Funny glitches in Fortnite
Darth Vader’s Glitch
Unlock and wear the Darth Vader gear to accomplish the latest Fortnite bug. Volatile should be your back bling. When you choose Darth Vader’s back bling from the locker, it won’t appear. It functions like a gigantic Minesweeper ball on any skin. However, Lord Vader is an exception.
The surprise is in the lobby. In a match, the back bling floats above and follows the character. It responds to player actions like pickaxe swinging, jogging, and sprinting. It looks fantastic, and players consider it to be one of the fun glitches in Fortnite, but Epic Games will probably fix the bug shortly.
Merged Skin Glitch
Players who have completed the final of the Week 3 tasks using a disguise can obtain a free skin. In addition, this bugged quest allows players to combine two different clothing types into a single look. After donning the unlocked look of a skin, players should compete in a match with that look. Then the players must put on the disguise and carry out the remaining steps of the mission. Once the player completes the mission, the unlocked style of their basic clothing will be combined with the style of the outfit they initially started with.
AR Combat in the Tent
Before voting, players tested the Combat AR and MK-Seven. Some gamers hid their Combat ARs in tents. Despite MK-Seven AR’s victory, Combat AR is still accessible in Tents. Thanks to reoccurring Tent bugs in Fortnite, users may keep limited-time weapons and equipment and retrieve them long after they are gone from the game.
Unlimited Sprint
Tactical Sprint was introduced in Fortnite Chapter 3 Season 2. This feature lets players sprint faster, although it’s limited by stamina. After depleting stamina, players return to an average pace. Tweaking parameters can give the Tactical Sprint limitless stamina. Turn off ‘Toggle Sprint’ and bind sprint to the mouse wheel. Players may then overuse the mouse wheel to run forever.
Siege Canon’s Glitch
The recently added Siege Cannon and a dumpster are responsible for one of the game’s funniest bugs. Players that use a Siege Cannon to fire themselves directly into a dumpster and then hide within it will not instantly remove the launch flight effect. Once again, players will be catapulted into the air when exiting the trash, allowing them to cover more ground. This is one of the funny glitches in Fortnite.
Tank Rift’s Glitch
A problem has been discovered in one of the map’s rifts; players who enter it while riding tanks will fall through the ground and perish. You’ll find the fissure at the westernmost part of the map, inside the Seven Territories above Camp Cuddle. Try out this game-changing bug in Fortnite, but if your numbers mean anything to you, don’t do it again. However, this is considered another one of the funny glitches in Fortnite.
Throwing in this latest XP Glitch as a bonus to give you a kick start so do check this out.
Conclusion
We hope you enjoy these glitches. We try to give you the latest content on Fortnite so check out this article about how to play fornite on chromebook if you are interested. Sign up with Eklipse to get highlights from all your latest Fortnite streams.
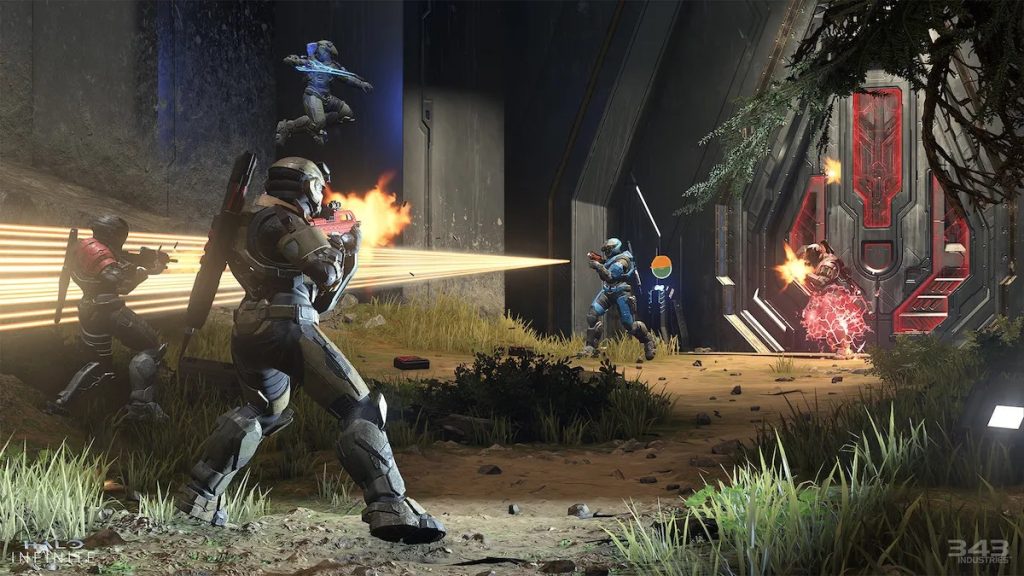
Many gamers are stumped about how to add Xbox friends on PC Halo Infinite. It’s because Halo Infinite doesn’t give any clear way for the PC players to get their Xbox friends onto their friend list. But do not worry about that, cause we have noticed this issue and go above to address it.
Additionally, Halo Infinite has come with a cross-play concept that will allow every player on PC or consoles to play together. So, no wonder many players want to add some friends from consoles, especially Xbox, to get into the game together.
Therefore, we are going to help you out with the following guide to know about how to add friends in Halo Infinite Xbox. Let’s get started.
How to Add Xbox Friends on PC Halo Infinite Using Xbox Game Bar
halo infinite crossplay steam
If you have started to play Halo Infinite and are looking for a way how to add Xbox friends on PC, you will need to launch Xbox Game Bar on your PC. Xbox Game Bar is really important to track anything regarding the game stuff from Xbox, including your Xbox friend list. So, without this, you won’t be able to invite your Xbox friends from PC.
Once you have launched Xbox Game Bar on your PC, you can follow this guide below.
First, go to Windows Settings and click on Gaming. Find the Xbox Game Bar and move the slider to enable it.
Second, make sure that you have connected your Steam account with the Xbox Game Bar as well.
After enabling the Xbox Game Bar and syncing it to your Steam account, now you can open the overlay by pressing the Windows Key + G button simultaneously.
Then, you can start typing your friends’ gamer tag in the search bar and hit the plus button next to their name to add them. Other than that, you can also click the Find Friends button to search for your friends from Facebook, Steam, or Xbox itself.
Something is worth noting that it’d be better if you use a PC for being a party leader. It’s because the crossplay of Steam seems to be a bit glitchy now. Aside from that, you can know how to add Steam friends on Xbox easily.
If for some reason you can’t use Xbox Game Bar on your PC, you can use Xbox App as an alternative. Get the Xbox App from Microsoft Store. Once you’ve downloaded it, you can start to find your friends through XboxSocial tab.
How to Join Friends in Halo Infinite Using Xbox
halo infinite crossplay steam
How to join and invite a friend if you play the game on Xbox? It’s actually so much easier than using a PC. The plus point is you don’t need to launch any app to connect your console. Here’s how to add PC players on Xbox.
To begin with, press the Xbox button on your Xbox. Then, navigate to the People tab.
Finally, you’ll be able to invite your friends to play together in Halo Infinite.
Conclusion
So, that’s all about how to add Xbox friends on PC Halo Infinite. What do you think about this guide? Was it helpful enough? Let us know by leaving a comment below.
Above all, if you are going to create some cool highlight clips in a super convenient way, you can use Eklipse as one of the best clipping software you can try. All you need to do is just click the following button to start using our tool. Don’t miss out!
Those who view themselves as YouTubers know that editing is one of the main selling points of a YouTube video. Therefore, it’s important to professionally edit your YouTube videos before you upload them to your channel. Today, I will tell you how to edit YouTube videos using Eklipse.
Eklipse is a powerful AI-based software that automatically generates clips from your gaming streams. Besides being a clip generator, it also works as a very convenient video editing software. You can easily edit your clips and videos using Eklipse and post them on your social media platforms such as Twitch, Facebook, Instagram, YouTube, and TikTok.
In addition to that, Eklipse features various interesting tools, such as an automatic highlight clipper, TikTok converter, TikTok templates for more awesome videos, and a trim-clip tool to let you manually edit, and also music background. These tools are more than enough to create amazing YouTube videos.
How to Edit YouTube Videos using Eklipse: Step-by-step Guide
As previously mentioned, you can basically do several editing processes using Eklipse, including automatically clipping the best moment, converting video into TikTok, doing manual editing, and adding a cool soundtrack. Follow these steps to start editing your videos for YouTube using Eklipse:
First of all, make sure that you have uploaded videos to your YouTube channel.
Second, do a free sign-up on eklipse.gg if you haven’t got an Eklipse account. If you own an account, just sign in with your existing account.
Link Eklipse into your YouTube channel by hitting the cable icon at the top-right corner of the page and toggling on the YouTube option.
Then, let the A.I load your videos from YouTube automatically.
Navigate to the Streams under the Video Library menu. Then, hit the All Streams tab to see all your YouTube video list.
After that, select one video you would like to edit. Again, our A.I will assist you in instantly clipping the best moments from your video, even arranging it to be a great compilation.
Eklipse will give you several options regarding the clip and the compilation video. Choose whichever you like.
Next, if you want manually trim your video, you can click on the Trim-clip button underneath the video preview. Then, you can adjust the starting and the end bar to set the length of your video.
Other than that, you can also convert your video into TikTok or reel version by hitting the Convert to TikTok/reel button under the video preview, next to the Trim-clip button.
Then, you’ll see five template options for your TikTok video. Select whichever you like.
After that, you can do another trim-cut process. Besides, you’ll get a chance to add awesome music background to your video by heading to Add Music tab.
Eklipse provides you with various free-copyright gaming soundtracks. You can just pick one, set the part of the music you want to use, and then hit the Select Music button.
Next, you can set the music to any scene you think suits most with the sound. Additionally, you can adjust the volume of the sound as well.
Now that you have done adding the music background and making some changes, you can save and find them on the Edited Clips tab.
Finally, you can directly share your edited video to your YouTube channel by clicking the Share icon or downloading the video to upload the video manually on YouTube (which is a lot more complicated!).
Voila! Your YouTube video has been much better and looks amazing with just a few clicks!
Conclusion
So, that’s how to edit YouTube videos using Eklipse. Doesn’t it seem simple, yet it produces a great result? Try Eklipse now, and stay tuned to our blog for Eklipse updates and other tutorials!