The gaming community is buzzing with excitement as Godzilla is set to make his grand entrance into Fortnite on January 17, 2025, as part of Chapter 6 Season 1, themed “Hunters.” This collaboration promises an epic boss battle and the chance to unlock a unique Godzilla skin through special quests tied to the Battle Pass. Players should stay alert for environmental changes on the island that could hint at the King of Monsters’ arrival.
With Epic Games’ history of thrilling boss encounters, fans are eager to discover the challenges and rewards that come with Godzilla’s introduction. Whether you’re aiming to defeat him in an adrenaline-fueled showdown or sporting his skin in your next match, this guide will equip you with everything you need to prepare for one of Fortnite’s most exciting events yet. Get ready to unleash your inner monster hunter!

Where is Godzilla in Fortnite?
Godzilla’s presence in Fortnite is tied directly to Chapter 6 Season 1’s Battle Pass. Set to be released on January 17, 2025, players will find him amongst other themed skins designed around popular culture icons. His character will not only grace the main Battle Royale map but also appear across various game modes such as Festival and Rocket Racing.
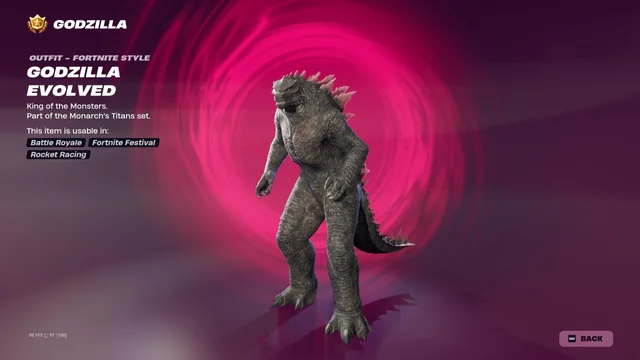
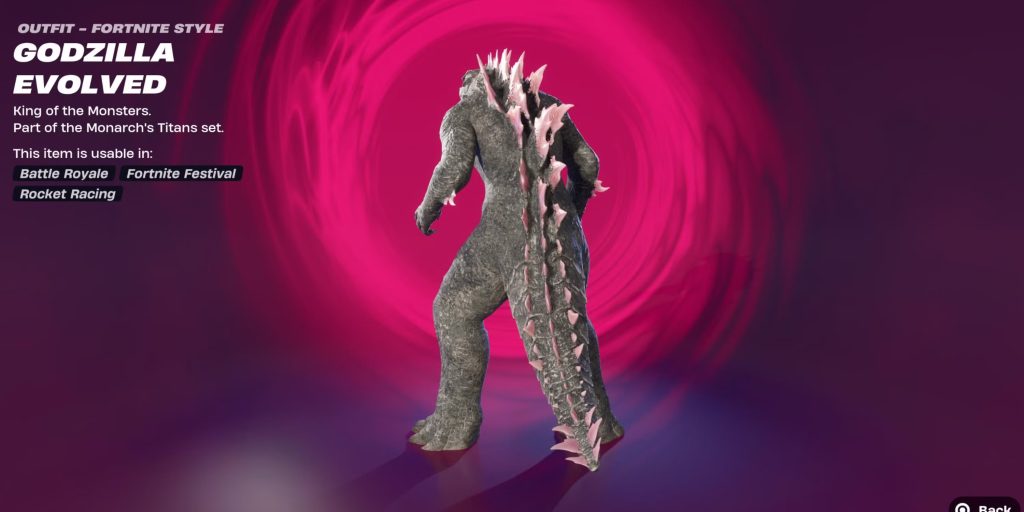
Expect a mini-sized version of Godzilla that captures his essence from Godzilla x Kong: The New Empire (2024). While players await his arrival, there may be hints or teasers scattered throughout the game leading up to his launch date.
How to Get the Godzilla Skin
Unlocking the Godzilla Evolved skin requires some preparation and strategy. Here’s how you can secure this sought-after cosmetic:
- Purchase the Battle Pass: Ensure you have obtained the Chapter 6 Season 1 Battle Pass for 1,000 V-Bucks.
- Wait for Launch Date: Mark your calendar for January 17, 2025, as this is when you can begin pursuing quests related to unlocking Godzilla.
- Complete Quests: Once available, engage with specific quests outlined in-game that revolve around themes linked to Godzilla.
- Claim Your Rewards: Successfully completing these tasks will grant access not only to the Godzilla Evolved skin but also additional items themed around him—potentially including a second outfit!
What’s so special about getting Godzila?
- Exclusivity: Only available through Chapter 6 Season 1 Battle Pass.
- Cost: Priced at just 1,000 V-Bucks, making it accessible for most players.
- Game Modes: Usable across several Fortnite modes—including Battle Royale and Festival.
Additional Information About Godzilla Skin
The hype surrounding this iconic creature isn’t just about gameplay; it’s about building community engagement too! Epic Games has crafted a cinematic experience by integrating powerful pop culture elements like those seen in Legendary’s MonsterVerse films.
Upsides:
- Unique character design reflecting popular media.
- Engaging quests enhance player interaction.
- Versatile use across multiple gaming modes.
Downsides:
- Limited availability confined strictly within Season duration.
- May require considerable time investment depending on quest complexity.
Conclusion
Becoming part of Fortnite as one of its most formidable figures—the mighty Godzilla—is just around the corner! By following these steps and preparing adequately ahead of time, you’ll be well on your way to adding this thrilling skin to your collection come January 17th.
Embrace your inner beast with Fortnite’s latest offerings—you won’t want to miss out on becoming part of gaming history!
")