Creating viral YouTube Shorts has never been easier, thanks to innovative tools like Clipgoat. This video editing tool helps creators produce engaging short-form content that captures viewers’ attention. While Clipgoat is a popular choice, it’s not the only option available. For creators looking for variety or specialized features, exploring these Clipgoat alternatives is a great way to elevate your content strategy.
These Clipgoat’s competitors and alternates bring unique advantages to the table, from advanced AI functionalities to streamlined workflows. Curious to find out which platforms are worth trying? Let’s dive into the top AI-powered Clipgoat alternatives for generating captivating YouTube Shorts here!
1. Vizard AI: Perfect for Streamlining Professional Videos
Vizard AI specializes in creating professional-looking videos tailored for professional purposes, from presentations to social media campaigns. This tool offers an easy-to-use interface and advanced editing features, making it a powerful solution for content creators and marketers.
Key Features:
AI-assisted video editing
Customizable templates for various business needs
Real-time collaboration for team projects
Pros:
Saves time with automated processes
Great for team-based video projects
Suitable for beginners and professionals
Cons:
Limited advanced effects for high-end productions
2. Eklipse: Best for Stream Highlights
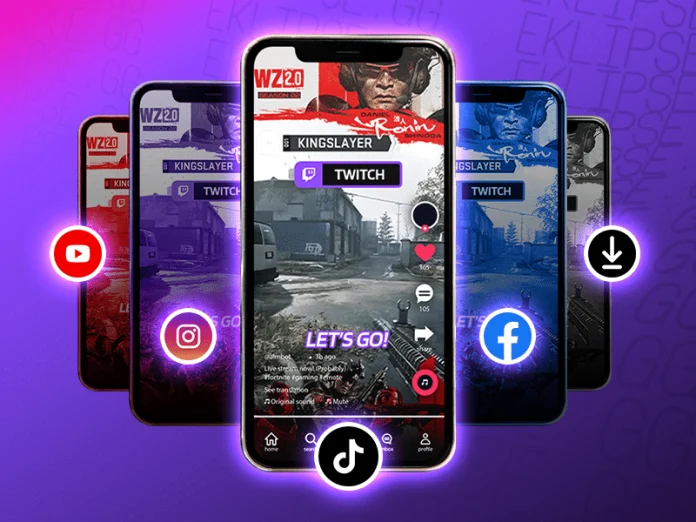
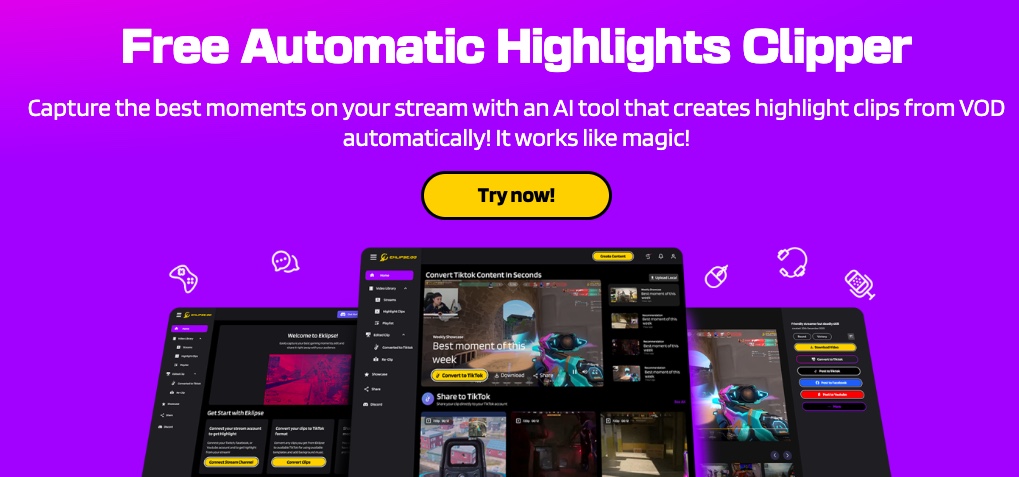
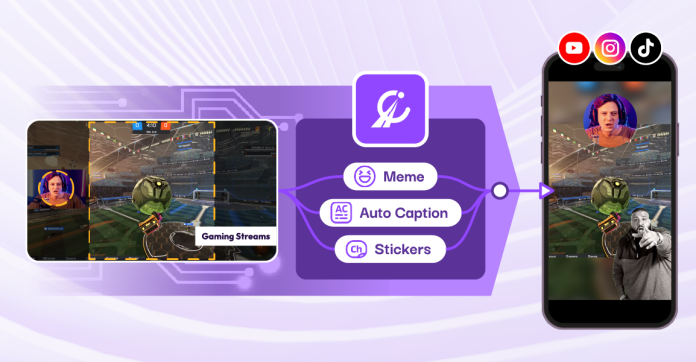
Eklipse.gg is a powerful AI-driven platform designed to help creators easily generate highlights from their gaming streams. Perfect for streamers looking to create viral content, this tool automatically captures the best moments from your streams, making it simple to share engaging clips on social media.
Key Features:
AI-powered clip generation
Social media-ready exports
Multi-platform support
Pros:
Saves time with automated clip editing
Compatible with popular streaming platforms like Twitch and YouTube
Easy to share clips on social media
Cons:
Limited manual editing options
Advanced features require a subscription
3. ClipCutAi: Best for Text-to-Video Conversion
ClipCutAi automates the video creation process, making it easy to convert scripts into engaging visuals. This is one of the top AI-powered Clipgoatalternatives for those who want to streamline their workflow.
Key Features:
Text-to-video automation
Library of templates
Multilingual support
Pros:
Beginner-friendly interface
Excellent for fast content production
Cons:
Limited customization options
4. Zapclip: Ideal for Social Media Content
As one of ClipGoat competitors, Zapclip focuses on creating short-form content optimized for platforms like TikTok and Instagram, streamlining the video-making process. As one of the effective free AI-powered Clipgoat alternatives, it helps you create scroll-stopping content quickly.
Key Features:
Auto-clipping for highlights
Direct social media sharing
AI-based recommendations
Pros:
Time-efficient
Streamlined social media integrations
Cons:
Geared primarily towards short videos
5. BravoClip: Best for Advanced Editing
BravoClip offers advanced features for experienced editors seeking maximum control over their projects. This tool stands out among AI-powered alternatives to Clipgoat for those who require detailed editing capabilities, such as editing YouTube video.
Klap is designed for creating impactful short videos, keeping up with social media trends through AI-powered analysis. It’s another fantastic option in the realm of AI-powered Clipgoat alternative.
Key Features:
Auto-captioning
Focus on vertical videos
AI trend analysis
Pros:
Optimized for short-form content
Keeps up with trends
Cons:
Limited to short video formats
7. DreamCut: Best for Collaborative Projects
DreamCut enhances team collaboration with real-time editing and cloud integration, making teamwork more efficient. This tool is a great choice for those working in teams.
Key Features:
Real-time team editing
Cloud storage integration
Multi-user access
Pros:
Great for team projects
Seamless file sharing
Cons:
Requires stable internet connection
8. ReelFarm: Best for Automation
ReelFarm uses AI automation to handle repetitive editing tasks, allowing creators to focus on their creative vision. It’s a valuable addition to the list of AI-powered Clipgoat alternative, especially for those overwhelmed by manual editing.
Key Features:
Auto-scene detection
One-click editing presets
Cross-platform compatibility
Pros:
High-speed processing
Minimal manual intervention
Cons:
Limited manual controls
9. Crayo.ai: Best for AI Creativity
Crayo.ai provides creative AI tools that inspire unique effects and storyboarding suggestions, enhancing artistic vision. As one of the innovative Clipgoat alternative, it offers features that can help spark creativity.
Key Features:
AI-generated effects
Creative storyboard suggestions
Easy-to-use interface
Pros:
Inspires creativity
Intuitive tools
Cons:
May lack professional-grade features
Conclusion
These are the best Clipgoat alternatives worth exploring in 2025. While Clipgoat excels at simplifying the creation of viral YouTube Shorts, its AI-powered competitors open up even more possibilities for content creators. These tools cater to diverse needs, offering advanced editing features, automated workflows, and platforms specifically designed for content types such as gaming highlights or social media reels.
If you’re looking for a versatile tool that combines ease of use with smart automation, try Eklipse.gg! It’s designed to simplify video editing while delivering professional-quality results, making it perfect for gamers, streamers, or anyone aiming to create standout content. Try Eklipse.gg today and start elevating your creative workflow seamlessly!
In the fast-paced world of gaming, capturing and sharing your best moments is essential for both personal enjoyment and community engagement. Whether you’re a casual gamer, a dedicated streamer, or a professional content creator, having the right clipping software can make all the difference in showcasing your skills and memorable plays.
In 2025, the market offers a diverse range of game clipping software, each catering to different needs and skill levels. From user-friendly free tools to powerful, AI-driven platforms, this guide ranks the 15 best clipping software for gaming, helping you choose the perfect tool to capture, edit, and share your gaming highlights effortlessly.
Drag-and-drop interface, AI tools, effects library, direct export options
User-friendly, affordable, AI features
Limited in free version, watermarks
Beginners, Intermediate users
iMovie
Free (Apple)
Mac, iOS
Simple editing tools, transitions, effects, seamless Apple integration
Free for Apple users, clean interface
Limited to Apple platforms, less advanced
Apple users, Basic editing
1. OBS Studio
OBS Studio remains a staple in the gaming community as a free, open-source solution for both recording and live streaming. Its versatility and extensive customization options make it a favorite among gamers of all levels.
Key Features:
Multi-Platform Support: Available on Windows, macOS, and Linux.
Scene Composition: Create multiple scenes with different sources, including game captures, webcams, and overlays.
Audio Mixing: Advanced audio controls with filters and noise suppression.
Plugins and Extensions: Enhance functionality with a vast library of community-driven plugins.
Pros:
Completely free with no hidden costs.
Highly customizable with a supportive community.
No restrictions on recording duration or quality.
Cons:
Steeper learning curve for beginners.
Requires manual setup for optimal performance.
2. Nvidia ShadowPlay
Designed exclusively for Nvidia graphics card users, ShadowPlay offers seamless, high-quality recording without significantly impacting game performance. It’s perfect for gamers seeking a hassle-free recording solution.
Key Features:
High-Resolution Recording: Supports up to 4K at 60FPS.
Instant Replay Mode: Automatically records the last few minutes of gameplay.
GIF Creation: Easily convert clips into GIFs for quick sharing.
Low Performance Overhead: Minimal impact on game performance due to hardware acceleration.
Pros:
Free with Nvidia graphics cards.
Easy to use with minimal setup.
High-quality recordings suitable for professional use.
Cons:
Limited to Nvidia GPU users.
Fewer advanced editing features compared to standalone software.
Eklipse leverages artificial intelligence to automate the clipping process, making it an ideal choice for streamers and gamers who want to focus on gameplay without the hassle of manual editing.
Key Features:
AI-Driven Highlight Detection: Automatically identifies and clips top moments from your gameplay.
Seamless Integration: Connects with platforms like Twitch, YouTube, Facebook Gaming, and Kick.
Online Editing Tools: Trim, combine, and enhance clips directly within the platform.
Free and Premium Options: Basic features available for free, with advanced tools in premium tiers.
Pros:
Saves time by automating highlight creation.
User-friendly interface suitable for all skill levels.
Facilitates easy sharing across multiple platforms.
Cons:
Dependent on AI accuracy for highlight detection.
Limited manual editing capabilities for advanced customization.
4. Gecata by Movavi
Gecata by Movavi is celebrated for its user-friendly interface and reliable performance. It offers HD recording capabilities, making it a great choice for gamers who need straightforward clipping without extensive features.
Key Features:
High-FPS Recording: Supports up to 120 FPS for smooth gameplay captures.
Multiple Audio Sources: Capture game audio and microphone input simultaneously.
Webcam Overlay: Easily add a personal touch with webcam overlays.
Scheduled Recording: Automate recording sessions based on your gaming schedule.
Pros:
Intuitive interface ideal for beginners.
Reliable performance with minimal setup.
Affordable pricing with a free trial available.
Cons:
Limited advanced features compared to other software.
Free version may include watermarks or limited functionality.
5. Xbox Game Bar
Integrated into Windows 10 and 11, Xbox Game Bar provides a quick and easy way to record gameplay without needing additional software. It’s perfect for gamers who want basic clipping capabilities without the complexity.
Key Features:
Built-In Tool: No need to download or install additional software.
Simple Recording: Easily capture screen, audio, and webcam footage.
Performance Monitoring: Track system performance in real-time while recording.
Quick Access: Easily accessible through a keyboard shortcut (Win + G).
Pros:
Free and pre-installed on Windows systems.
Minimal setup required for quick recordings.
Lightweight with no significant impact on performance.
Cons:
Limited editing and customization options.
Not ideal for long-form or high-quality recordings.
6. Medal.tv
Medal.tv specializes in short-form highlights, making it an excellent choice for gamers who want to share quick clips with friends or the broader gaming community. Its social features enhance the sharing experience.
Key Features:
Instant Clipping: Quickly capture and share highlights during or after gameplay.
Social Integration: Discover and share clips within the Medal.tv community.
Cloud Storage: Save your highlights securely in the cloud.
Customizable Clips: Add annotations, captions, and effects to your clips.
Pros:
Focused on quick and easy highlight sharing.
Active community for discovering new clips.
Free with optional premium features.
Cons:
May impact game performance on lower-end PCs.
Limited in-depth editing capabilities.
7. Bandicam
Bandicam is renowned for its ability to capture high-FPS gameplay, supporting up to 480 FPS. It offers a range of features tailored for both casual gamers and professionals seeking detailed recordings.
Key Features:
High-FPS Capture: Record gameplay at up to 480 FPS for ultra-smooth footage.
Webcam Overlay: Add a personal touch by overlaying webcam footage.
Scheduled Recording: Set specific times to start and stop recordings automatically.
Compression Technology: Maintain high quality with reduced file sizes.
Pros:
Exceptional high-FPS recording capabilities.
Reliable performance with minimal lag.
Versatile recording options for different needs.
Cons:
Free version includes watermarks and limited features.
No built-in streaming functionality.
8. Action!
Action! by Mirillis is designed for advanced gamers who require high-quality recordings and live streaming capabilities. It offers a range of customization options to suit various recording needs.
Key Features:
High-Quality Recording: Capture up to 4K resolution at 240 FPS.
Live Streaming: Stream directly to platforms like Twitch, YouTube, and Facebook.
Time-Shift Mode: Instantly save the last few minutes of gameplay.
Real-Time Editing: Apply filters, transitions, and overlays during recording.
Pros:
Powerful recording and streaming features.
High customization for professional-grade recordings.
Supports multiple output formats.
Cons:
Paid license required for full functionality.
Can be resource-intensive on lower-end systems.
9. EaseUS RecExperts
EaseUS RecExperts offers a versatile screen recording experience with support for UHD footage and multiple audio sources. It’s suitable for gamers who need flexible recording options without sacrificing quality.
Key Features:
UHD Recording: Capture 4K/60FPS gameplay for stunning visuals.
Flexible Recording Options: Region-based recording, full-screen capture, and window-specific recording.
Multiple Audio Sources: Record system audio, microphone input, and game sounds simultaneously.
Scheduled Recording: Plan recordings in advance to capture key gaming sessions.
Pros:
Comprehensive feature set catering to various recording needs.
User-friendly interface with easy navigation.
Affordable pricing with a free trial available.
Cons:
Can be overwhelming for users seeking simple clipping solutions.
Some advanced features require the premium version.
10. Fraps
Fraps is a lightweight game capture tool known for its simplicity and effectiveness, particularly suited for older or lower-end PCs. It’s ideal for gamers who need basic recording without extensive features.
Key Features:
Real-Time FPS Display: Monitor game performance while recording.
Basic Screen Capture: Easily record gameplay with minimal setup.
Benchmarking Tools: Test and measure your system’s performance.
Simple Interface: Start and stop recordings with ease.
Pros:
Extremely lightweight with minimal system impact.
Easy to use with straightforward functionality.
Ideal for basic recording needs.
Cons:
Limited features compared to modern recording software.
No built-in editing tools or social sharing options.
11. XSplit Broadcaster
XSplit Broadcaster is a versatile tool for both live streaming and recording gameplay. It offers advanced features like scene switching and multi-source capture, making it a favorite among streamers.
Key Features:
Multi-Scene Setup: Create and switch between multiple scenes during streaming.
Plugin Support: Enhance functionality with a wide range of plugins.
Built-In Chat Integration: Manage stream interactions directly within the software.
Live Streaming: Stream to multiple platforms simultaneously.
Pros:
Comprehensive features for both streaming and recording.
User-friendly interface with robust support.
Integrates seamlessly with various streaming platforms.
Cons:
Some advanced features require a paid subscription.
Heavier on system resources compared to simpler alternatives.
12. DaVinci Resolve
While primarily a professional video editing suite, DaVinci Resolve offers powerful tools for capturing and editing game replays. It’s perfect for gamers looking to create polished, high-quality content.
Key Features:
Advanced Editing Tools: Includes color grading, visual effects, and motion tracking.
Fusion VFX: Create stunning visual effects with the integrated Fusion module.
Fairlight Audio: Professional-grade audio editing and mixing.
Collaboration Features: Work with teams in real-time for collaborative editing projects.
Pros:
Industry-standard editing capabilities.
Free version offers most core features.
Extensive support for high-resolution footage.
Cons:
Steep learning curve for beginners.
Overkill for simple game clipping needs.
13. Adobe Premiere Pro
Adobe Premiere Pro is the gold standard for professional video editing, offering an unparalleled suite of tools for creating high-quality gaming videos. While not a dedicated clipping tool, its advanced features make it ideal for serious content creators.
Key Features:
Comprehensive Editing Tools: Multi-track editing, advanced transitions, and effects.
Seamless Integration: Works seamlessly with other Adobe Creative Cloud apps like After Effects and Photoshop.
Motion Graphics Templates: Easily add professional-grade animations and titles.
Lumetri Color: Advanced color correction and grading tools.
Pros:
Unmatched editing capabilities for professional content.
Regular updates and extensive community support.
Integration with a wide range of Adobe tools.
Cons:
Expensive subscription model.
Requires significant time to learn and master.
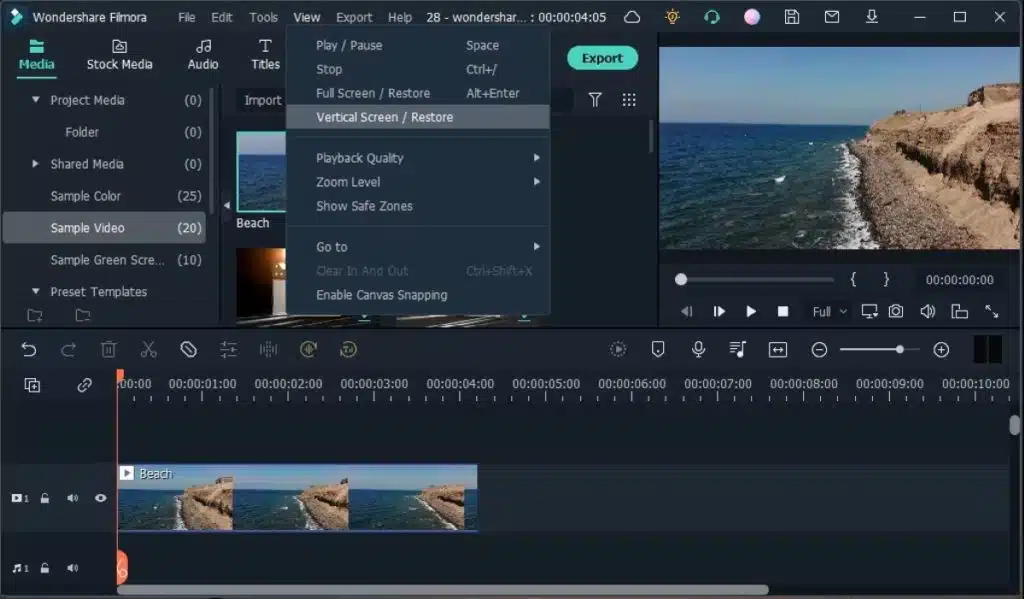
14. Wondershare Filmora
Wondershare Filmora strikes a balance between ease of use and advanced features, making it suitable for both beginners and intermediate users. Its intuitive interface and AI-driven tools simplify the editing process.
Key Features:
Drag-and-Drop Interface: Easy to use with a minimal learning curve.
AI-Powered Tools: Includes features like auto scene detection and smart background removal.
Extensive Effects Library: Access a wide range of transitions, filters, and overlays.
Direct Export Options: Easily upload videos to platforms like YouTube and Twitch.
Pros:
User-friendly interface with powerful editing tools.
Affordable pricing with flexible licensing options.
AI features save time and enhance video quality.
Cons:
Some advanced features are locked behind the paid version.
Watermarks may appear in the free version.
15. iMovie (Apple Devices)
iMovie is Apple’s default video editing application, offering a straightforward solution for Mac and iOS users. It’s perfect for gamers who need basic editing tools without the complexity of professional software.
Key Features:
Simple Editing Tools: Intuitive timeline-based editing with drag-and-drop functionality.
Built-In Effects and Transitions: Easily add visual enhancements to your clips.
Seamless Integration: Syncs across Apple devices through iCloud.
Direct Sharing: Export videos directly to YouTube, Apple devices, or social media.
Pros:
Free for Apple device owners.
Clean, user-friendly interface ideal for beginners.
Reliable performance on Apple hardware.
Cons:
Limited to macOS and iOS platforms.
Not as feature-rich as professional editing software.
Considerations for Different User Needs
Beginners:
For those new to game clipping and video editing, simplicity and ease of use are paramount. Medal.tv, Xbox Game Bar, Gecata by Movavi, Wondershare Filmora, and iMovie offer intuitive interfaces and straightforward functionalities that make capturing and sharing gameplay highlights effortless.
Streamers:
Streamers require robust tools that support live streaming alongside recording. OBS Studio, XSplit Broadcaster, Streamlabs, and Action! provide comprehensive features like multi-scene setups, real-time overlays, and seamless integration with streaming platforms, making them ideal for professional streaming setups.
Advanced Users and Professionals:
For those seeking advanced editing capabilities and professional-grade features, DaVinci Resolve, Adobe Premiere Pro, and Wondershare Filmora offer extensive tools for detailed video editing, color grading, and motion graphics. These tools are perfect for content creators who aim to produce high-quality, polished videos for platforms like YouTube and Twitch.
AI-Powered Highlights:
If automation is your priority, Eklipse stands out with its AI-driven highlight generation. It automatically detects and clips your best moments, saving you time and effort, and is particularly beneficial for streamers who prefer focusing on gameplay rather than manual editing.
Conclusion
Selecting the right clipping software depends on your specific needs, budget, and technical expertise. Whether you’re a casual gamer wanting to share quick clips, a dedicated streamer needing advanced recording and streaming features, or a professional content creator seeking powerful editing tools, this list of the 15 best clipping software for gaming in 2025 has something for everyone.
From the highly customizable and free OBS Studio to the AI-driven convenience of Eklipse, each software offers unique features designed to enhance your gaming and content creation experience. Explore a few options to find the perfect fit for your gaming setup and start capturing your epic moments today.
In Marvel Rivals, securing assists is not just about dealing damage—it’s about meaningfully supporting your teammates to secure eliminations. Assists can play a crucial role in team dynamics, contributing to the overall success of your squad. Whether you’re a beginner looking to improve or a seasoned player aiming to optimize your gameplay, understanding how to earn assists can significantly enhance your performance and teamwork.
This guide delves into the key actions that grant assists, highlights the characters best suited for supporting roles, and provides strategic tips to help you maximize your assist opportunities in Marvel Rivals. By leveraging these insights, you can become a more effective team player, ensuring that your contributions lead to more victories and stronger team cohesion.
Assists in Marvel Rivals are earned through specific supportive actions rather than merely dealing damage. Here are the primary actions that can help you secure assists:
1. Healing
Healing a teammate who subsequently secures a kill grants you an assist. This is especially effective when playing as Strategist heroes like Rocket Raccoon and Jeff the Land Shark, who possess strong healing abilities. By keeping your teammates alive and in the fight, you set the stage for their success.
2. Shielding
Providing a shield to an ally who then eliminates an enemy counts as an assist. Characters such as Magneto and Hulk have shielding abilities that can protect teammates during critical moments, enabling them to focus on securing eliminations without taking unnecessary damage.
3. Crowd Control
Using abilities that stun, slow, or otherwise disable enemies facilitates your teammates’ ability to finish off opponents, earning you assists. Examples include Mantis’ Spore Slumber and Cloak & Dagger’s Lightforce Dagger, which can incapacitate enemies and create opportunities for your team to secure kills.
4. Buffs
Enhancing a teammate’s combat abilities through buffs leads to eliminations, granting you an assist. Mantis’ damage boost ability is a prime example, where increasing a teammate’s damage output directly contributes to their ability to eliminate enemies more effectively.
5. Utility Abilities
Using abilities that provide utility, such as Spider-Man’s ultimate, can also result in assists. These abilities often create advantageous situations for your team, making it easier for them to secure eliminations.
Characters Best Suited for Assists
Certain characters excel in support roles, making them ideal for racking up assists through their supportive abilities:
Strategists (Healers & Support):
Mantis
Jeff
Rocket Raccoon
Luna Snow
These heroes excel at providing heals, buffs, and crowd control, enabling them to contribute significantly to their team’s success without necessarily being the primary damage dealers.
Other Classes with Supportive Abilities:
Magneto (Vanguard)
Hulk (Vanguard)
Cloak & Dagger (Skirmisher)
Storm (Duelist)
Even though their primary roles might not be support, these characters have abilities that can assist their teammates, making them versatile choices for earning assists.
Important Note
It’s crucial to understand that dealing damage alone does not count as an assist. To earn assists, you must utilize abilities that directly support your teammates in securing eliminations. Focus on actions that contribute to your team’s success rather than solely aiming for personal damage metrics.
Strategies for Getting Assists
To effectively earn assists in Marvel Rivals, consider the following strategies:
1. Focus on Support
Prioritize using your abilities to help your teammates rather than focusing solely on dealing damage. Use healing, shielding, and crowd control abilities to create opportunities for your team to secure kills.
2. Coordinate with Your Team
Effective communication and coordination are key. Work with your teammates to time your supportive actions, ensuring that your heals, shields, and crowd control are used when they can have the most significant impact.
3. Choose the Right Character
Select characters with strong support abilities, particularly Strategists. These characters are designed to enhance team performance through their supportive skills, making it easier to earn assists.
4. Target Vulnerable Enemies
Focus your support on teammates who are engaging vulnerable enemies. By supporting players who are in a position to eliminate opponents, you increase the likelihood of securing assists.
5. Manage Cooldowns
Be mindful of your abilities’ cooldowns to ensure you can consistently provide support throughout the match. Proper management of your cooldowns allows you to be a reliable support for your team.
Conclusion
Earning assists in Marvel Rivals is a fundamental aspect of contributing to your team’s success. By utilizing supportive abilities such as healing, shielding, and crowd control, you can significantly enhance your team’s performance and secure more victories. Choosing the right character, coordinating with your team, and focusing on support over personal damage are essential strategies for racking up assists effectively.
Remember, assists are not just about individual performance but about how you can elevate your entire team’s gameplay. Implement these strategies to become a more effective and supportive player, ensuring that your contributions lead to memorable and successful matches.
For advanced tools and further optimization of your gameplay, consider using Eklipse.gg. Eklipse offers features tailored for Marvel Rivals players, helping you analyze your performance, organize your gameplay highlights, and share your best moments seamlessly. Elevate your Marvel Rivals experience with Eklipse and take your support game to the next level.
League of Legends is a highly competitive game where every match counts, and capturing your best moments can be incredibly rewarding. Whether you want to showcase your strategic prowess, analyze your gameplay to improve, or share epic victories with friends and the gaming community, uploading your replays to YouTube is an excellent way to do so. YouTube serves as a vast platform where millions of gamers can watch, learn, and engage with your content, providing valuable feedback and increasing your visibility as a player.
Uploading replays from League of Legends involves converting the game’s replay files into a video format compatible with YouTube. While the process might seem daunting at first, there are several methods available to make it straightforward, whether you prefer automated solutions or manual recording techniques. Understanding these methods will allow you to choose the one that best fits your needs and technical comfort level.
In this guide, we’ll explore three primary methods to upload your League of Legends replays to YouTube: using ReplayCast, manual recording with OBS Studio, and direct .rofl file conversion. Additionally, we’ll provide general tips to optimize your uploads for better visibility and engagement on YouTube. By the end of this guide, you’ll have all the knowledge you need to share your best League of Legends moments with the world.
ReplayCast offers the easiest and most streamlined method for uploading League of Legends replays to YouTube. It automates the recording and uploading process, eliminating the need for manual file conversions or additional software.
Follow the on-screen instructions to complete your registration.
Link Your Accounts:
Once logged in, link your League of Legends and YouTube accounts within ReplayCast.
This integration allows ReplayCast to access your gameplay data and upload videos directly to your YouTube channel.
Configure Recording Settings:
Customize your recording preferences, such as recording all games, specific champions, or particular game modes.
Adjust settings like video quality and frame rate to suit your needs.
Automatic Recording and Upload:
ReplayCast will automatically record your ranked games and upload them to YouTube without any manual intervention.
You can also manually select specific matches to upload if desired.
Editing (Optional):
Use ReplayCast’s online editing tools to trim, combine, or enhance your video segments before uploading.
This feature helps you create polished and engaging content for your audience.
Benefits:
Simplifies the Process: No need for manual recording or file conversion.
Time-Efficient: Automatically handles recording and uploading.
Editing Tools: Built-in tools for enhancing your videos before upload.
Drawbacks:
Limited Control: Less flexibility compared to manual recording methods.
Dependency on Third-Party Service: Relies on ReplayCast’s platform and features.
2. Manual Recording and Upload (Using OBS Studio)
For those who prefer more control over their recordings or want to use specific replay tools, manually recording your gameplay with OBS Studio is a viable option. This method involves capturing your screen while playing or watching a replay and then uploading the recorded video to YouTube.
Follow the installation instructions to set it up on your PC.
Open Your Replay:
Launch your preferred replay tool, such as LoL Replay, OP.GG, or Baron Replays.
Open the replay file (.rofl) you wish to record.
Configure OBS Studio:
Add a Display Capture Source:
In OBS, click the “+” button in the “Sources” panel.
Select “Display Capture” and choose the screen where the replay is playing.
Add Audio Capture Sources:
Add “Audio Output Capture” to record in-game sounds.
Optionally, add “Audio Input Capture” to include your microphone commentary.
Start Recording:
Click “Start Recording” in OBS before playing the replay.
Play the replay in your replay tool while OBS captures the footage.
Stop Recording:
Once the replay is complete, click “Stop Recording” in OBS.
The recorded video will be saved to your designated folder.
Upload to YouTube:
Log in to your YouTube account.
Click the “Create” button and select “Upload Video.”
Choose the recorded video file and follow the prompts to upload, add a title, description, tags, and thumbnail.
Benefits:
Full Control: Customize what and how you record.
High-Quality Recordings: Adjust settings for optimal video quality.
Flexibility: Use with various replay tools and add personal commentary.
Drawbacks:
Time-Consuming: Requires manual setup and recording.
Additional Software: Necessitates downloading and configuring OBS Studio.
3. Direct .ROFL Upload and Conversion (For Normal Games)
For normal, non-ranked games, you can directly upload the .rofl replay files to ReplayCast for conversion and uploading to YouTube. This method is useful if you prefer not to record manually but still want to use ReplayCast’s features.
How to Use Direct .ROFL Upload:
Download the .ROFL File:
Open your League of Legends client.
Navigate to the “Replays” section and download the desired .rofl replay file.
Upload to ReplayCast:
Log in to your ReplayCast account.
Use the upload feature to select and upload the .rofl file.
Conversion and Upload:
ReplayCast will convert the .rofl file to an .mp4 video format.
Once converted, you can upload the video directly to your YouTube channel.
Benefits:
Ease of Use: Simple upload and conversion process.
No Need for Manual Recording: Eliminates the need for OBS or other recording software.
Drawbacks:
Limited to Normal Games: Not applicable for ranked matches.
Dependent on ReplayCast: Relies on ReplayCast’s platform for conversion and uploading.
General Tips for Uploading to YouTube
1. Optimize Your Title and Description:
Use Relevant Keywords: Include terms like “League of Legends replay,” “Epic Victory,” or specific champion names to improve searchability.
Provide Context: Briefly describe the match or highlight to give viewers an idea of what to expect.
2. Add Appropriate Tags:
Categorize Your Video: Use tags related to League of Legends, specific champions, game modes, and replay types to reach your target audience.
3. Create a Compelling Thumbnail:
Visual Appeal: Design a thumbnail that captures the essence of the replay, using in-game screenshots or graphic elements.
Consistency: Maintain a consistent style across your thumbnails to build brand recognition.
4. Manage Video Length:
Adhere to YouTube’s Limits: Ensure your video meets YouTube’s length requirements. Verify your account to upload longer videos if necessary.
Engage Your Audience: Keep your videos concise and focused to maintain viewer interest.
Conclusion
Uploading your League of Legends replays to YouTube is a straightforward process that allows you to share your best gameplay moments with a wider audience. Whether you choose the automated convenience of ReplayCast, the full control offered by OBS Studio, or the direct conversion method for normal games, each approach has its unique advantages tailored to different needs and preferences. By following the steps outlined in this guide, you can efficiently convert and upload your replays, ensuring your epic victories and strategic plays are always preserved and celebrated.
For an enhanced experience in managing and sharing your League of Legends replays, consider using Eklipse.gg. Eklipse offers advanced tools that streamline the process of organizing, editing, and uploading your gameplay footage, making it easier to showcase your skills and engage with your audience. With features designed specifically for gamers, Eklipse ensures your replays are not only saved securely but also presented in the most compelling way possible.
Hope this guide helps you effectively upload and share your League of Legends replays on YouTube! Happy gaming and creating!
ortnite offers an exhilarating gaming experience where every match is filled with strategic plays, intense battles, and memorable moments. Whether you’re aiming to improve your skills, analyze your strategies, or simply relive your most epic victories, saving and managing your replays is essential. By capturing your gameplay footage, you can create a library of your best performances, share impressive plays with friends, and gain valuable insights to enhance your gaming prowess.
Fortnite provides two primary methods for saving gameplay footage: automatically generated highlights and manually saved replays. Understanding how to utilize these features effectively can significantly enhance your overall gaming experience. This guide will walk you through the process of enabling replay recording, saving your highlights and replays, and managing your recordings on your PC.
Additionally, we’ll cover important considerations such as storage management and the differences between highlights and full match replays. By following these steps, you’ll ensure that your Fortnite adventures are always preserved and easily accessible for future viewing or sharing.
Before saving replays, ensure the replay recording feature is enabled in Fortnite. Here’s how:
Step 1: Open Settings
From the lobby, access the main menu (three horizontal lines or equivalent button prompt) and select “Settings” (gear icon).
Step 2: Navigate to Game Settings
Switch to the “Game” or “Game Options” tab.
Step 3: Enable Replay Recording
Find the “Replays” section and toggle on the “Record Replays” option. You can also enable replays for specific game modes like large team games or creative mode.
Step 4: High-Quality Replays (Optional)
For better footage quality, enable “High-Quality Replays”. Be aware that this setting will consume more storage space, so ensure you have enough disk space available.
Step 5: Apply Changes
Save the settings by clicking “Apply” and close the menu.
2. Saving and Managing Replays
Once replays are enabled, follow these steps to save and manage them effectively:
Step 1: Access the Career Tab
From the main lobby, go to the “Career” tab.
Step 2: Open the Replays Section
Click the “Replays” button near the bottom of the screen to view a list of your recent matches.
Step 3: Select and Save a Replay
Choose a Replay: Highlight the replay you want to save from the list.
Rename and Save: Click “Rename and Save” (or the equivalent button prompt). This lets you give the replay a descriptive name, ensuring it won’t be overwritten.
Step 4: Play or Delete Replays
Play a Replay: Select a replay and click “Play” to watch your match.
Delete a Replay: To free up storage, highlight an old or corrupted replay and click “Delete.”
Step 5: Open Replay Folder
For PC users, use the “Open Replay Folder” option to directly access the directory where your replay files are stored.
3. Replay File Location
Understanding where Fortnite stores replay files can help you organize and back up your footage.
Unsaved Replays
Initially, unsaved replays are stored temporarily within Fortnite’s system files. These replays may be overwritten by new matches unless saved manually.
Saved Replays
When you rename and save a replay, it’s stored permanently in a designated folder on your computer. The typical directory is:
Note: Replace [YourUsername] with your actual Windows username. If you’re unsure of the exact location, use the “Open Replay Folder” option in Fortnite to find the directory.
Tips for Replay Management
Avoid Storage Issues: Regularly delete old or unneeded replays to free up space on your hard drive.
Back Up Important Files: Transfer your favorite replays to an external drive or cloud storage to prevent accidental loss.
Use Replay Controls: Fortnite’s replay system includes advanced controls, allowing you to change camera angles, slow down footage, and focus on specific players during playback.
Conclusion
Saving Fortnite replays is a simple yet powerful way to capture and preserve your gameplay highlights. By enabling the replay feature, renaming and saving important matches, and managing your stored files, you can ensure that your best moments are always accessible. Whether you’re analyzing strategies, sharing clips with friends, or creating content, Fortnite’s replay system has you covered.
For enhanced editing and sharing capabilities, consider using tools like Eklipse.gg. Eklipse streamlines the process of turning your replays into polished highlights, perfect for social media or content creation.
Start recording your Fortnite adventures today, and never miss a moment worth saving!
StreamLadder is a free online tool designed to help users transform Twitch clips into engaging short videos for social media platforms like TikTok, YouTube Shorts, and Instagram Reels. It’s user-friendly and includes essential features such as captions, overlays, and scheduling. However, some users may still seek for best StreamLadder alternatives that provide more advanced editing options, broader platform support, or better free plans.
If you’re looking for similar tools with added flexibility and features, you’re in the right place. Below, we’ve compiled a list of the best StreamLadder alternatives free to explore. Let’s dive into their features, pros, and cons to find the perfect match for your needs!
Eklipse is the best AI highlight generator in the market right now, and it’s free! It can automatically repurpose your stream clip to TikTok, Instagram reels, and YouTube shorts so that you can share the AI-generated clip across any social media.
You have the option to connect your Twitch, YouTube, TikTok, or Facebook account with Eklipse to get your AI-made highlights. Eklipse will easily detect if you get a double kill, quad kill, victory, or even funny moments, and include them in the highlights.
You then can edit those clips using pre-made templates, stickers, and auto-captions using the advanced in-app video editor to make it more you. If you’re looking for the best StreamLadder alternatives for Twitch, Eklipse is a must-try.
Pros:
Converts your streams to Twitch/Tiktok/Reels/Shorts
Voice Command support
Weekly Showcase
Special Editing Features
Free to Use
No Watermark
720p and 1080p Resolution
Support & Feedback
Blog for Updates and more
Eklipse community (Discord)
Supports all popular games like CoD, Valorant, and 200+ more
Available for Mobile & Desktop
Cons:
AI is not fully equipped for all games
Limited features on the free plan.
Pricing: $19.99 per month for Premium Plan
2. Crossclip – Best Alternative for Mobile Gamers
Cross Clip can also help convert your Twitch & YouTube clips into TikTok, Instagram reels, YouTube shorts, or Facebook videos automatically. According to popular reviews, Cross Clip is said to be one of the best Streamladder alternatives for TikTok.
Then, what is the difference between StreamLadder and Cross Clip? Cross Clip is limited to editing only three clips, while you can edit an unlimited amount of videos with StreamLadder. Cross Clip also has a mobile app, while StreamLadder doesn’t.
Pros:
Converts Twitch/YouTube clips to TikTok/Reels/Shorts
Wondering where gamers edit their videos? HypeTrigger is quite the choice for many.
HypeTrigger is an OBS companion that captures moments using built-in AI with certain triggers. When you use HyperTrigger with OBS while streaming you will get a notification after performing certain actions that the AI captures.
Pros:
Converts videos to highlights
Makes audio highlights
Records overlays
Quick export
Cons:
Only compatible with OBS
Requires download to use
Supports very few games
Only available for Windows and Linux
Pricing: Free
4. Powder.gg – Best for Game Streamers
Powder.gg is an AI-powered software tool designed specifically for gamers and streamers. It helps them automatically clip the most exciting and engaging moments from their long streams, and convert them into bite-sized content perfect for social media.
It can recognize things like funny moments, clutch wins, epic fails, and audience reactions. Once Powder.gg identifies highlights, you can easily edit them and share them directly on your favorite social media platforms.
Pros:
Works with over 50,000 games and “Just Chatting” streams.
Analyze footage from PC, Xbox, Switch, and mobile devices.
Type in a keyword you said on-stream to search, find your clips, and export short-form content in record time.
Cons:
You may need to do some manual curation for optimal results.
Your control over highlight selection might be limited compared to manual editing.
While there might be a free tier, some features or advanced functionality might require a paid subscription.
Pricing: Free for gamers; $19.99 for Powder Premium (monthly).
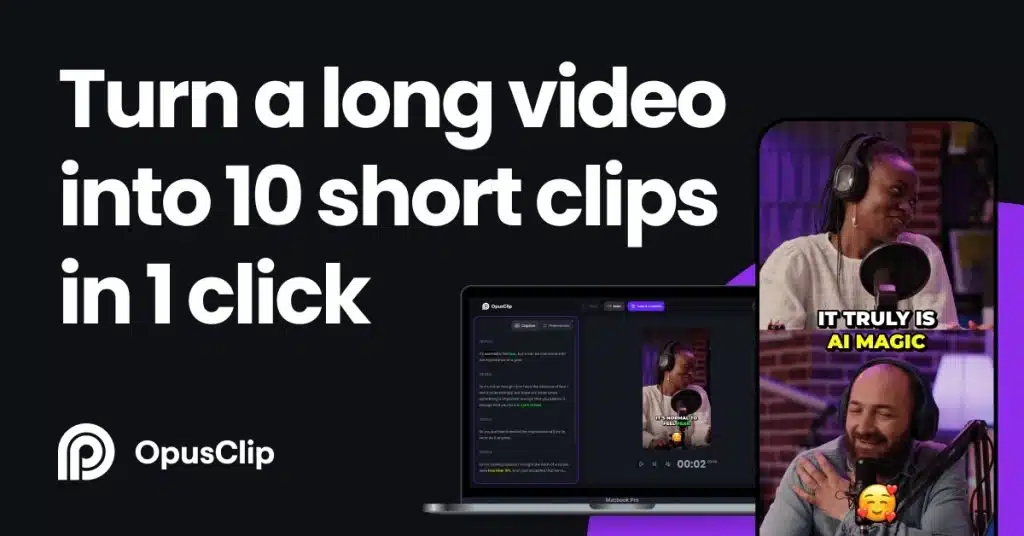
Next, we have Opus Clip, an excellent alternative to StreamLadder, particularly if you’re a YouTube content creator.
Opus automatically trims and resizes your videos, adds engaging captions, and edits them in a style optimized for capturing the attention of social media audiences.
Although Opus is still developing, it has already garnered substantial popularity among video creators. Its user-friendly interface and wide array of features make it a valuable resource for effortlessly producing top-notch short videos.
Pros:
Opus Clip uses AI for quick video conversion and automatic editing, saving time and effort.
It adds captions and optimizes content for social media, enhancing viewer engagement.
Cons:
Opus is still under development, so it may lack advanced features and have occasional bugs.
Depending on pricing, Opus Clip’s subscription fees might be a concern, especially for budget-conscious users.
Vidyo.ai stands as a comprehensive content repurposing solution, enabling the transformation of lengthy videos into engaging TikToks and Reels effortlessly through AI-driven processing with just a simple click.
It’s not limited to just streamers, but almost all content creators can leverage Vidyo.ai. From podcasters, agencies, marketers, and video creators, to small businesses. You can make videos that look professional and sleek in just 5 minutes.
Pros:
The AI algorithm identifies key moments within videos, making it easier to create engaging clips, and saving time and effort.
They have auto-video captioning, video clipping tools, instant video resizing, templates for every social media platform, virality predictor, and more.
Cons:
If you crave meticulous control over every aspect of your video, Vidyo.ai’s focus on automation might feel restrictive.
Screencast content might require additional editing for optimal results.
While lavish with 75 minutes of footage, the free version allows only 30 days of data retention.
Pricing: Free trial available; Premium subs starting from $29.99 per month.
Framedrop is a free tool that uses AI to automatically detect and clip your stream highlights. You can also use smart editing tools to enhance your clips and export them to various social media platforms.
It does not require any software download or installation.
It enables you to easily share your clips on TikTok, Reels, YouTube Shorts, and more.
Browser extension available.
Cons:
If you require more advanced editing features, you might find it limiting.
Framedrop.gg provides clips in 720p resolution.
Framedrop.gg has a maximum stream duration of 5 hours.
Pricing: Free trial available for 2 months; Premium starting from $15 monthly
8. Clipbot – Best for Twitch Streamers
Clipbot offers efficient workflow improvements and indeed champions automation for frequent clippers. Set your preferred crop, link your social accounts, and watch your clips seamlessly transform into vertical masterpieces overnight.
Pros:
Clipbot saves editing time by automating the clip-sharing process.
You can pick your favorite clips and only upload those.
Cons:
There are only a couple of default crops available, one with a camera view and one without.
Clipbot primarily caters to Twitch streamers and has not yet supported other streaming platforms.
Pricing: Free trial; Premium starts from $6.99 per month.
9. Adobe Premiere Pro – Best for Industry-Standard Editing
When it comes to professional video editing, Adobe Premiere Pro is still one of the best. It offers unparalleled precision and control, allowing you to meticulously craft every frame of your video.
Pros:
Premiere Pro is widely used in the industry for its professional-grade editing capabilities.
It offers a wide range of features, from basic editing to advanced effects.
Despite its complexity, Premiere Pro delivers powerful performance for complex projects.
Cons:
Beginners may find it challenging to grasp all the features quickly.
Some features require additional Adobe software licenses.
You need to download the Adobe Premiere Pro app to use it, and it can be a problem for you who have limited space on your PC.
Pricing: $22.99 per month for individuals.
10. Wondershare Filmora – Best Easy-to-Use Professional Editor
Wondershare Filmora strikes a perfect balance between user-friendliness and robust editing capabilities. It’s an excellent choice for creators who are new to the editing game but want to elevate their content beyond basic cuts and edits.
Pros:
Beginner-friendly.
Easily customize templates and apply effects.
Supports subtitles and captions.
Cons:
Professional editors may find Filmora lacking in advanced editing capabilities.
Pricing: Free trial (7 days); Auto renew subs at $19.99 per month
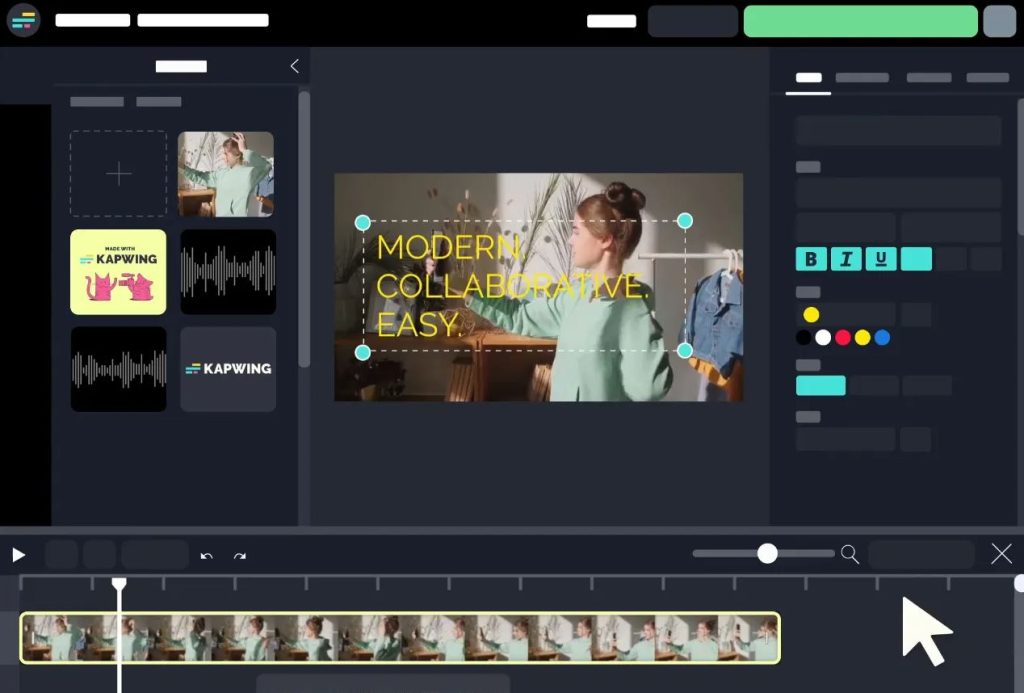
11. Kapwing – Best for Collaborations
This online editor is a haven for creating all things social media magic: from quick and catchy edits to hilarious GIFs and trendy memes. Kapwing offers pre-made templates and effects that can take your social media presence to the next level in a snap.
Pros:
Kapwing’s interface is straightforward and accessible.
It covers a wide range of editing needs.
Collaboration for teams.
Cons:
Some users may need time to understand and utilize the AI features.
Not suitable for complex professional projects.
Kapwing’s functionality depends on a stable internet connection.
Pricing: $50 per month (billed annually) or $600 per year.
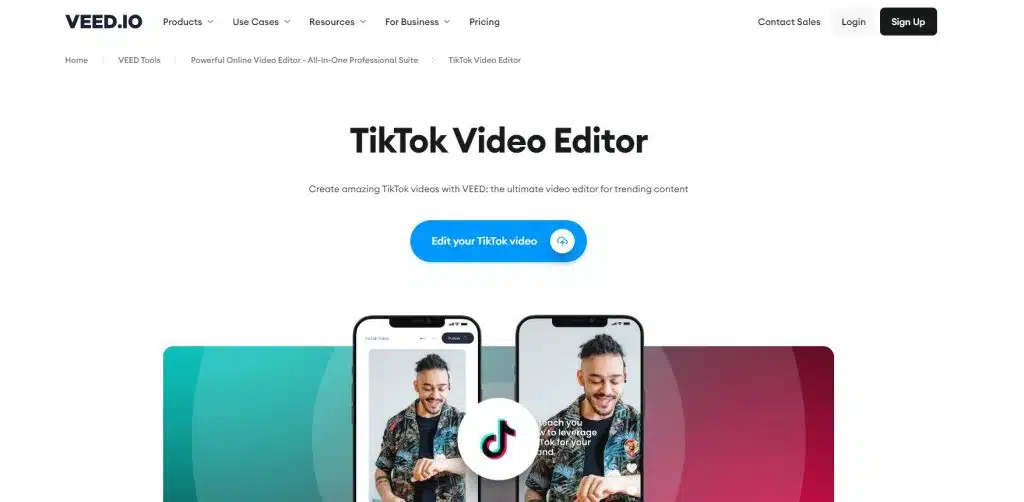
If collaboration is key for your workflow, VEED.io is a strong contender. This online editor shines in its ability to seamlessly facilitate teamwork on video projects.
With VEED, you and your team can edit videos together in real time, no matter where you are located. Features like cloud storage and shared workspaces make VEED a dream come true for remote teams.
Pros:
VEED shines in its ability to streamline teamwork. Multiple editors can work on the same project simultaneously, regardless of location.
VEED offers a free plan that includes basic editing tools, cloud storage, and the ability to export videos in 720p resolution.
Access to a vast library of stock video clips, images, and music can be a huge time-saver, allowing you to add visual elements and background music to your projects without having to source them elsewhere.
Cons:
The free plan has limitations on features like cloud storage and video export resolution.
Excessive for individual creators who don’t necessarily need real-time teamwork functionalities.
Some advanced editing techniques might require more exploration and practice to master.
Pricing: Free version available; Premium subs starting from $12.
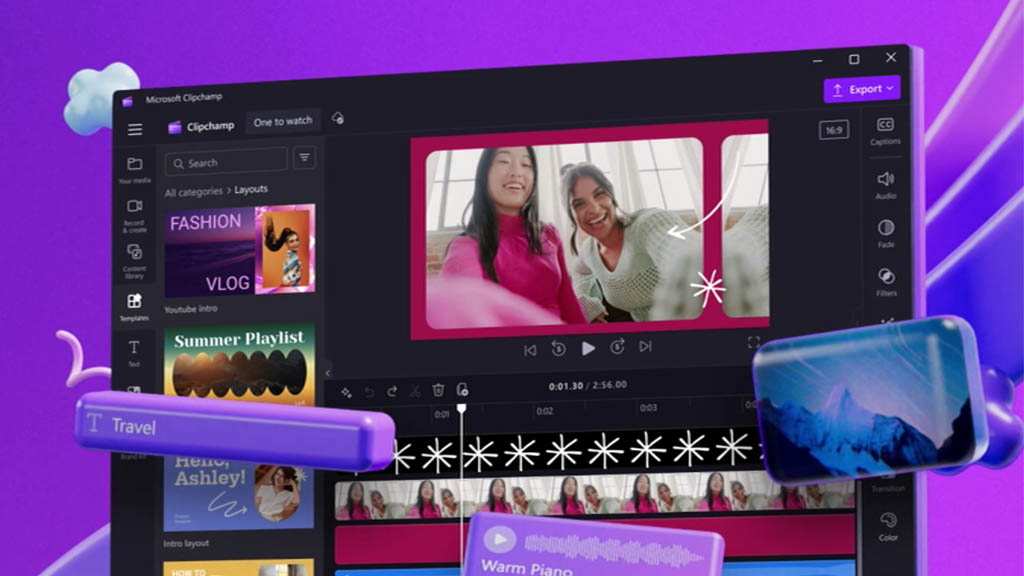
For those who value convenience above all else, Clipchamp is a game-changer. This web-based clip editor eliminates the need for hefty software downloads.
All you need is a web browser and an internet connection, and you’re ready to edit from anywhere, anytime. Clipchamp is the free Streamladder alternative perfect for creators who work on the go or collaborate with remote teams.
Pros:
Its user-friendly interface makes it easy for beginners to jump in and start editing videos.
No need to download.
Easily export your edited videos directly to your chosen platform for sharing.
Cons:
Clipchamp caters more to basic and social media-focused editing.
The free plan might have limitations on processing power, which could lead to slower editing times for larger video projects.
Pricing: Free
Conclusion
While StreamLadder is great for creating attractive Twitch clips, it’s perfectly fine to explore the best StreamLadder alternatives, especially if you’re looking for more advanced features or a premium clip editor that fits your budget.
If you’re searching for a versatile alternative, we recommend trying Eklipse. Not only is Eklipse fast and easy to use, but it’s also built with the latest AI technology to detect the best moments from your Twitch live streams and transform them into TikTok, Reels, or YouTube Shorts clips. This is a unique feature that sets Eklipse apart from other apps.
Try Eklipse.gg today and join our Discord community to start creating captivating content and connecting with fellow streamers!
Maximize your Black Ops 6 rewards—Create highlights from your best gameplay with with Eklipse
Eklipse help streamer improve their social media presence with AI highlights that clip your Twitch / Kick streams automatically & converts them to TikTok / Reels / Shorts
The Marvel Rivals Showdown, a prominent Twitch Rivals event, took place on January 18th and 19th, 2025. This exciting two-day competition brought together 72 top players forming 12 formidable teams, each vying for a share of the $200,000 prize pool. Whether you missed the live broadcast or want to relive the thrilling moments, this guide will help you find recordings, highlights, and results from the event.
Streaming platforms have become the heartbeat of eSports, allowing fans to engage with their favorite games and players in real-time. Marvel Rivals, known for its strategic gameplay and dynamic teams, showcased some of the best talents in the gaming community during the Twitch Rivals Showdown. Understanding where and how to watch these events can enhance your viewing experience and keep you connected with the latest in Marvel Rivals competitions.
In this article, we’ll walk you through the best ways to watch Marvel Rivals Twitch Rivals events, provide details about the teams and schedules, highlight the event results, and explain how you can earn exclusive Twitch Drops by tuning in. Whether you’re a long-time fan or new to the scene, this guide has everything you need to stay informed and entertained.
The primary source for watching Marvel Rivals Twitch Rivals events is the official Twitch Rivals channel. Twitch Rivals hosts a variety of competitive gaming events, and the Marvel Rivals Showdown was no exception.
Use the search bar to find “Marvel Rivals Showdown.”
Browse through the Video on Demand (VOD) section to watch past broadcasts and highlights.
2. Participating Streamers’ Channels
Many well-known streamers participated in the Marvel Rivals Showdown, including xQc, Shroud, Willneff, Necros, Nadeshot, Dafran, Emongg, Symfuhny, and Sinatraa. These streamers often upload recordings or share highlights of their gameplay.
How to Find:
Search for the specific streamer’s channel on Twitch.
Look for recent broadcasts around the event dates (January 18th-19th, 2025).
Check their video library for replays or highlight compilations.
3. YouTube
If you prefer watching on YouTube, many streamers and viewers upload recordings of the Marvel Rivals Showdown to the platform.
The event spanned two days, featuring a Group Stage followed by a Bracket Stage. During the final rounds, a map veto process was used to ensure fair and strategic gameplay.
Results
The Marvel Rivals Showdown concluded with Team Shroud emerging victorious, claiming the top spot in the competition. Detailed results, including group stage standings and bracket progression, can be found on Liquipedia.
Winner: Team Shroud
Runners-Up: Detailed rankings available on Liquipedia and the official Twitch Rivals page.
Twitch Drops
Dancing Fortune Nameplate
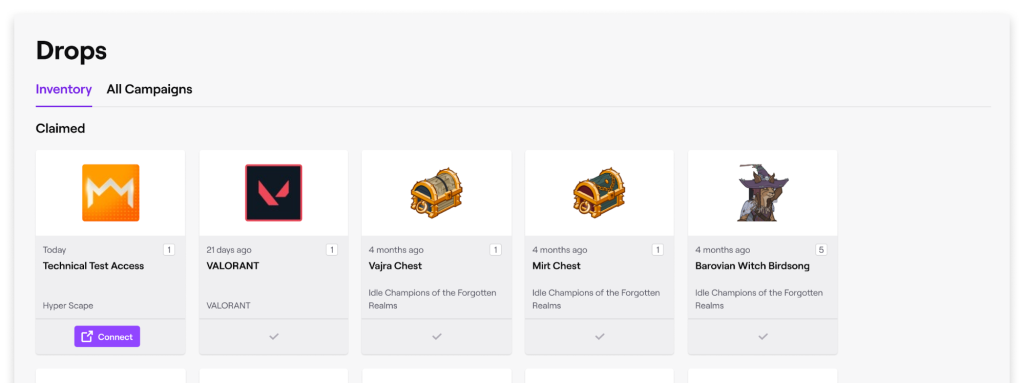
During the Marvel Rivals Showdown, viewers had the opportunity to earn the Dancing Fortune Nameplate by watching participating streams for at least 30 minutes between January 18th (2 PM PST) and January 19th (11:59 PM PST).
How to Earn:
Link Accounts: Ensure your Twitch and Marvel Rivals accounts are linked.
Watch Streams: Tune into participating streams and accumulate 30 minutes of watch time.
Claim Drops: After meeting the watch time requirement, claim your Dancing Fortune Nameplate through your Twitch account.
These drops were part of the Lunar New Year event, adding an extra layer of excitement to the showdown.
Always refer to official platforms like the Twitch Rivals website and Liquipedia for the most accurate and up-to-date information regarding schedules, team lineups, and results.
2. Follow Your Favorite Streamers
By following the streamers who participated in the event, you can stay informed about any future replays or exclusive content they may upload.
3. Participate in Future Events
Engaging with Twitch Rivals and other eSports events can enhance your viewing experience and increase your chances of earning exclusive rewards like Twitch Drops.
Conclusion
The Marvel Rivals Showdown was a thrilling event that brought together some of the best players in the community, offering intense competition and impressive gameplay. Whether you watched live or are catching up with recordings and highlights, understanding where to find these streams and replays ensures you stay connected with all the action.
Additionally, taking advantage of Twitch Drops like the Dancing Fortune Nameplate adds an extra incentive to engage with the streams, rewarding dedicated viewers with unique in-game items. As the eSports landscape continues to evolve, platforms like Twitch Rivals provide valuable opportunities for both viewers and creators to connect, compete, and celebrate their favorite games.
For an enhanced experience in managing and sharing your Marvel Rivals highlights and replays, consider using Eklipse.gg. Eklipse offers advanced tools that streamline the process of organizing, editing, and sharing your best gameplay moments, making it easier to showcase your skills and engage with your audience. With features tailored specifically for Marvel Rivals, Eklipse ensures your highlights are not only saved securely but also presented in the most compelling way possible.
Streaming your gameplay is a fantastic way to share your Marvel Rivals adventures with a broader audience. Whether you’re aiming to build a community, showcase your skills, or engage with fellow players, OBS Studio is a powerful tool to help you achieve your streaming goals. However, streaming Marvel Rivals on OBS can be challenging due to the game’s anti-cheat system, which may cause issues like black screens if not set up correctly.
This guide provides a detailed, step-by-step approach to streaming Marvel Rivals on OBS Studio. From initial setup to troubleshooting common problems, you’ll find everything you need to create a seamless streaming experience. Additionally, we’ll share some valuable tips to optimize your stream quality and ensure your gameplay is captured flawlessly.
By following these instructions, you’ll be able to stream Marvel Rivals smoothly, allowing you to focus on delivering engaging content to your viewers without technical interruptions.
Crucial Step: Running OBS Studio with administrative privileges is essential to bypass Marvel Rivals’ anti-cheat system and prevent black screen issues.
How to Do It:
Right-click the OBS Studio icon on your desktop or in the Start menu.
Select “Run as administrator” from the context menu.
Running OBS as an administrator ensures that the application has the necessary permissions to capture the game properly.
2. Launch Marvel Rivals
After OBS: Once OBS is running as an administrator, launch Marvel Rivals on your PC. Starting the game after OBS helps ensure that OBS can recognize and capture the game window without issues.
Tips:
Make sure Marvel Rivals is running in Windowed or Borderless Windowed mode for better compatibility with OBS.
3. Set Up OBS Studio
Configuring OBS Studio correctly is vital for a smooth streaming experience.
Add Game Capture Source
Steps:
Open OBS Studio.
In the “Sources” panel at the bottom, click the “+” button.
Select “Game Capture” from the list.
Name the source (e.g., “Marvel Rivals Capture”) and click “OK”.
In the “Mode” dropdown, choose “Capture specific window”.
From the “Window” dropdown menu, select “Marvel Rivals”.
Ensure “Capture Cursor” is enabled if you want your cursor to appear in the stream.
Click “OK” to save the settings.
Add Audio Capture Source
Steps:
Click the “+” button in the “Sources” panel.
Select “Audio Output Capture” to capture in-game audio.
Name the source (e.g., “Game Audio”) and click “OK”.
Choose your audio device (usually “Default”) and click “OK”.
To capture microphone audio, add an “Audio Input Capture” source and select your microphone device.
Configure Output Settings
Steps:
Go to “Settings” in OBS Studio.
Navigate to the “Output” tab.
Set your desired Resolution, Bitrate, and Frame Rate based on your streaming platform’s recommendations.
Click “Apply” and then “OK” to save the settings.
Troubleshooting Black Screen Issues
Black screens are a common issue when streaming games with anti-cheat systems. Here’s how to resolve them:
1. Ensure OBS is Running as Administrator
Double-check that OBS Studio is running with administrative privileges. This is the most common solution to black screen problems.
2. Use Compatibility Mode
If running as administrator doesn’t resolve the issue, try running OBS in compatibility mode for an older version of Windows.
How to Do It:
Right-click the OBS Studio icon.
Select “Properties”.
Go to the “Compatibility” tab.
Check “Run this program in compatibility mode for” and select an older version of Windows.
Click “Apply” and then “OK”.
3. Verify Game Capture Settings
Ensure that the “Game Capture” source is set to capture the correct window.
Steps:
Right-click the “Marvel Rivals Capture” source in OBS.
Select “Properties”.
Confirm that “Marvel Rivals” is selected in the “Window” dropdown.
Click “OK” to save any changes.
4. Adjust In-Game Graphics Settings
Sometimes, high graphics settings can interfere with OBS capturing the game.
Steps:
Open Marvel Rivals.
Go to “Settings” > “Graphics”.
Lower the resolution or reduce graphic quality to ease the load on your system.
If you prefer a more user-friendly interface, consider using Streamlabs OBS (SLOBS). It’s based on OBS Studio but offers additional features tailored for streamers.
2. Test Your Stream
Before going live, perform a test stream to ensure everything is working correctly. Check audio levels, video quality, and stream stability.
3. Optimize OBS Settings
Fine-tune your OBS settings for the best performance and stream quality. Adjust bitrate, encoder settings, and resolution based on your internet speed and PC capabilities.
Common Mistakes to Avoid
Launching OBS before the game: Always start Marvel Rivals after running OBS as administrator to prevent capture issues.
Not running OBS as administrator: This is the most common cause of black screen problems.
Incorrect Game Capture settings: Ensure you’re capturing the correct window in OBS.
Conclusion
Streaming Marvel Rivals on OBS Studio can enhance your gaming experience by allowing you to share your strategic plays and intense battles with a wider audience. By following this guide, you can set up OBS correctly, overcome common challenges like black screens, and optimize your stream for the best quality. Remember to run OBS as administrator, configure your capture sources accurately, and troubleshoot any issues promptly to ensure a smooth streaming experience.
For an enhanced streaming setup, consider using Eklipse.gg. Eklipse offers advanced tools tailored for Marvel Rivals, helping you manage, edit, and share your streams effortlessly. With Eklipse, you can elevate your streaming quality and engage more effectively with your audience.
Marvel Rivals offers an engaging platform where players can showcase their strategic skills and intense gameplay moments. Whether you’re aiming to relive your most epic victories, analyze your strategies, or share impressive plays with friends, saving your highlights and match replays is essential. This guide provides clear, step-by-step instructions on how to save these memorable moments directly to your PC, ensuring you never miss a beat.
By capturing your top plays, you can create a library of your best performances, which is not only satisfying but also valuable for improving your gameplay. Additionally, having a collection of highlights and replays allows you to share your accomplishments on social media or with the Marvel Rivals community, gaining recognition and feedback from fellow players.
In this guide, we’ll walk you through the process of saving both highlights and full match replays in Marvel Rivals on PC. We’ll also cover important additional information, such as highlight expiration and the differences between highlights and replays, to help you make the most out of your gameplay recordings.
Want to hold onto those amazing moments you’ve achieved in Marvel Rivals? Here’s how you can easily save highlights directly to your PC, ensuring those top plays are always accessible.
1. Access the Career Tab
Start by launching Marvel Rivals on your PC. Once you’re on the home menu, locate and click the grey Marvel Rivals symbol in the upper right corner to access the “Career” tab. This section is your gateway to managing your gameplay history and highlights.
2. Go to Favorites
Within the Career tab, navigate to the “Favorites” section. This area is designed to store your preferred matches and highlights, making it easier to access them later. Click on the Favorites tab to proceed.
3. Find Highlights
In the Favorites section, look for the “Highlights” subsection. Marvel Rivals automatically saves your top gameplay moments here. Typically, the game retains the last five highlights, allowing you to keep track of your most recent impressive plays. Browse through this section to view your saved highlights.
4. Select a Highlight
Browse the list of saved highlights and choose the one you wish to preserve. Click on the specific highlight to view more options and details about that particular moment.
5. Click Save
Once you’ve selected a highlight, click the “Save” button located below it. This action will prompt you to customize your saving preferences, ensuring that your highlight is stored exactly how you want it.
6. Customize Settings (Optional)
Before finalizing the save, you have the option to adjust the highlight’s name, resolution, frame rate, and graphics quality. Higher quality settings will provide a better viewing experience but may increase the saving time. Customize these settings based on your preferences and system capabilities.
7. Choose Save Location (PC)
To specify where the highlight will be stored on your PC, click the “Change” button. You can select your preferred folder for saving the highlight. By default, highlights are saved in your computer’s Videos folder, but you can choose any location that suits your organizational preferences.
8. Confirm
After customizing your settings and selecting the save location, confirm the action. The highlight will then be saved to your designated folder, ready for viewing or sharing whenever you want.
Steps to Save Full Match Replays
Want to keep a record of your entire match? Here’s how you can save full match replays in Marvel Rivals, allowing you to relive every moment:
1. Go to History
Within the “Career” tab, navigate to the “History” section. This area logs all your past matches, providing a comprehensive record of your gameplay history.
2. Locate the Match
Browse through your match history to find the specific game you want to save. Each match entry typically includes details like the date, time, and outcome, helping you identify the match you wish to replay.
3. View Details
Click on the “Details” button for the selected match. This will open a detailed view of the game, including statistics and performance metrics, giving you a deeper insight into that particular match.
4. Favorite the Match
In the match details view, click the star icon located in the bottom right corner. Favoriting the match ensures it is saved as a replay, making it easily accessible for future viewing. This step is crucial for preserving the entire match for later analysis or sharing.
5. Access Replay
Once you’ve favorited the match, it will appear under the “Match Replays” section within your “Favorites” tab. You can access and watch these replays anytime, allowing you to analyze your gameplay, identify areas for improvement, or simply enjoy your memorable matches.
Where Does Marvel Rivals Save Recordings?
Understanding where your recordings are saved is essential for easy access and organization. Marvel Rivals saves match recordings in a specific folder on your computer. While the game automatically generates highlights, separate recordings made using the in-game recorder are stored in a different location.
File Path for Recordings
The recordings are saved in the following directory:
Note: Replace [YourUsername] with your actual Windows username.
How to Unhide the AppData Folder
The “AppData” folder is typically hidden by default. To access your recordings, you’ll need to enable the viewing of hidden files and folders in your operating system’s file explorer settings.
For Windows 10:
Open File Explorer.
Go to the “View” tab.
Click on “Options” > “Change folder and search options”.
Navigate to the “View” tab again.
Under “Advanced settings”, check the box next to “Show hidden files, folders, and drives”.
Click “OK”.
For Windows 11:
Open File Explorer.
Go to the “View” tab.
Check the box next to “Hidden items” within the “Show/hide” group.
Highlights vs. Recordings
Highlights: Automatically generated by the game and stored in the “Favorites” tab. These are the top five gameplay moments the game saves for you.
Recordings: Created using the in-game recorder and saved in the “VideoRecords” folder. These are separate from the automatically generated highlights and offer a more comprehensive capture of your gameplay.
Additional Information
Highlight Expiration
Be aware that saved highlights in Marvel Rivals are subject to expiration upon game updates. When you update to a new version of Marvel Rivals, previously saved highlights may be deleted. To prevent losing your highlights, make sure to back them up before performing any game updates. Regularly exporting your highlights to a secure location can help ensure your best moments are always preserved.
Highlight Requirements
Marvel Rivals automatically generates highlights based on your in-game performance. While the exact criteria for a moment to be considered a highlight are not specified, focusing on achieving significant victories, impressive plays, or strategic maneuvers increases the likelihood of your moments being saved as highlights. Consistent high performance and engaging gameplay are key factors in having your moments captured.
Highlights vs. Replays
It’s important to understand the difference between highlights and full match replays:
Highlights are automatically generated and showcase your top gameplay moments. They are concise and focus on the most impressive parts of your game.
Replays are saved recordings of entire matches that you have manually favorited. Unlike highlights, replays capture the full scope of your gameplay, providing a comprehensive view of each match.
Conclusion
Saving highlights and full match replays in Marvel Rivals is a straightforward process that allows you to preserve and share your best gameplay moments. By following the steps outlined above, you can effortlessly save your top plays and full matches to your PC, ensuring that your impressive performances are always accessible.
Remember to back up your highlights before updating the game to avoid losing any treasured moments. Whether you’re looking to analyze your strategies, share your victories with friends, or simply relive your favorite battles, Marvel Rivals provides the tools you need to keep your gameplay memories intact.
For an enhanced experience in managing and sharing your Marvel Rivals highlights, consider using Eklipse.gg. Eklipse offers advanced tools that streamline the process of organizing, editing, and sharing your best gameplay moments, making it easier to showcase your skills and engage with your audience. So, for a truly seamless experience, you may want to check it out. With features tailored specifically for Marvel Rivals, Eklipse ensures your highlights are not only saved securely but also presented in the most compelling way possible.
Amazon Prime Gaming Roblox continues its collaboration, offering a rotating selection of exclusive virtual items. These items can be acquired by redeeming promotional codes provided through the program.
To access these exclusive items and enhance your avatar’s appearance, an active Amazon Prime membership is required. Collecting these unique items adds a fun element to the Roblox experience.
Prime Gaming typically introduces new Roblox items each month. Be sure to check regularly to claim the latest offerings. A simple guide on how to claim and redeem these promotional codes is provided below.
Prime Gaming is a service included with Amazon Prime memberships, offering a variety of benefits for gamers. These benefits include free games, in-game content, and exclusive discounts. Popular games like Roblox are frequently featured, providing members with exclusive items and other perks.
Each month, Prime Gaming members have access to a selection of free games, ranging from indie titles to AAA releases. Recent examples include games such as Prey, Star Wars Jedi: Fallen Order, Dishonored 2, and Baldur’s Gate 1 and 2.
Beyond free games, Prime Gaming members unlock exclusive in-game content, such as skins, characters, and other digital items, for popular games like League of Legends, Valorant, Grand Theft Auto Online, and Madden 25. Members also enjoy exclusive discounts on game purchases and gaming merchandise on Amazon.
How to sign up for Prime Gaming
If you’re already an Amazon Prime member, Prime Gaming is automatically included with your subscription – no separate signup is required. Simply navigate to the Prime Gaming website and link your Amazon account to begin accessing the benefits. If you’re not currently a Prime member, a free trial is available to experience both Prime Gaming and other Amazon Prime perks.
Roblox is a massively multiplayer online game where players can create and share their own virtual worlds and games. Its expansive player base includes users of all ages. Through Prime Gaming, Roblox players can unlock a range of benefits, such as free in-game items, exclusive content, and occasionally, early access to new releases. Recent Prime Gaming Roblox rewards have included accessories like the Delinquent Demon.
How To Claim Amazon Prime Gaming Roblox Rewards
Claiming your exclusive Roblox rewards through Prime Gaming each month involves a straightforward process accessible to both new and experienced players.
Follow these steps to claim your rewards:
Have an active Amazon Prime Gaming subscription.
Sign in to Prime Gaming using your Amazon account.
Locate and click on Roblox on the Prime Gaming homepage.
Paste your copied promo code into the designated field and click “Redeem.”
Launch or refresh Roblox.
Your new items will be available in the Avatar Editor.
Enjoy your new virtual items!
Regularly check Prime Gaming to avoid missing out on these exclusive items and consider setting a reminder to stay informed about new releases.
Decoding Prime Gaming’s Accessibility
Prime Gaming, with its connection to Roblox, raises the question of its accessibility. Is it free, or are there specific requirements to gain access?
1. Prime Gaming and Cost
Prime Gaming is a benefit included with Amazon Prime membership and is not available as a standalone free service. Therefore, an active Amazon Prime subscription is required to access Prime Gaming.
Existing Amazon Prime members automatically have access to Prime Gaming at no additional cost.
2. Requirements for Prime Gaming
To access Prime Gaming, the primary requirement is an Amazon Prime membership. Additionally, Prime Gaming’s availability depends on your geographical location, although it is accessible in over 200 countries and territories.
Amazon Prime Membership: An active Amazon Prime membership is necessary for Prime Gaming access. This membership comes with various benefits like expedited shipping, Prime Video, Prime Music, and more.
Location: Prime Gaming is subject to regional availability. Check the Prime Gaming website to confirm availability in your region.
3. How to Sign Up for Prime Gaming
Follow these steps to sign up for Prime Gaming:
Step 1: Visit the Amazon Prime webpage and select “Start your free trial.”
Step 2: Create or log in to your Amazon account.
Step 3: Provide payment information. After the free trial, your membership will automatically convert to a paid subscription unless cancelled.
Step 4: Go to the Prime Gaming website and link it to your Amazon account.
Step 5: You now have access to Prime Gaming!
By subscribing to Amazon Prime and linking your account, you can unlock Prime Gaming’s benefits, including free games, in-game content, and exclusive offers for an enhanced gaming experience.
Eklipse.gg’s software can enhance Roblox gameplay
Eklipse.gg offers software to enhance your Roblox gameplay experience:
About Eklipse.gg
Eklipse.gg’s AI-powered software transforms your Twitch clips into shareable content, automatically identifying and highlighting exciting gameplay moments.
Showcase Your Gameplay
Roblox players can use Eklipse.gg to highlight their skills, attracting more viewers to their Twitch streams and growing their audience by sharing short, engaging videos.
Share and Connect
Share favorite Roblox moments, from funny glitches to impressive builds, with other players and fans using Eklipse.gg, fostering connections and interactions.
Create Unique Content
Create engaging content showcasing your favorite Roblox aspects – games, characters, and features. Generate excitement by sharing videos about new releases or upcoming events with your followers.
Discover Eklipse.gg in Action
Explore examples of Roblox gameplay clips transformed into dynamic videos using Eklipse.gg. Witness how these videos capture the essence of gameplay and are ideal for sharing across social media platforms.
Frequently Asked Questions
Q: Does Prime Gaming offer benefits for Roblox?
A: Yes, Prime Gaming and Roblox have a partnership that provides Prime Gaming members with exclusive in-game items, accessories, and other perks. Link your Roblox and Prime Gaming accounts to claim these rewards.
Q: What’s the cost of Prime Gaming for Roblox?
A: Prime Gaming is not priced separately for Roblox; it’s included with an Amazon Prime membership. The current cost of Amazon Prime is $14.99/month or $139/year in the US (as of January 20, 2025). This grants access to Prime Gaming benefits, including in-game loot, free games, a free monthly Twitch channel subscription, and more.
Q: Is Prime Gaming free?
A: Prime Gaming is included with an Amazon Prime membership, which is a paid service. It’s not available for free independently. However, Amazon Prime offers a free trial (often 30 days), during which new users can access and enjoy Prime Gaming perks.
Conclusion
Amazon Prime Gaming provides Roblox players with exclusive promo codes for special virtual items and also offers digital gift cards for Robux, the Roblox premium currency, bundled with special virtual items. These options typically include 800 Robux with a Pizza Slice Sling Backpack or 4,500 Robux with a Hot Dog Pack. Claim your rewards and enhance your Roblox experience!