
Level Up Your Marvel Rivals Gameplay
Capture your epic wins, clutch moments, and even hilarious fails with Eklipse. Easily create and share highlight reels with your friends—even if you're not streaming!
Learn MoreAs Kick.com rises in popularity as a new streaming platform that enables creators to monetize their content, many streamers are asking how to set up Kick channel branding. A key aspect of this process involves not only configuring your profile, banner, and Kick panel to create a unique appearance but also understanding how to set up alerts on Kick to enhance viewer engagement.
Establishing a distinctive channel identity is crucial for creators make money and being easily recognizable to your audience. Additionally, incorporating alerts can significantly improve interaction during your streams, which is essential for creators looking to maximize their earnings on the platform. For instance, knowing how to set up alerts can help you connect better with your viewers while you focus on strategies that allow creators to make money effectively.
Step-by-Step Guide Setting Up Your Kick Channel Branding
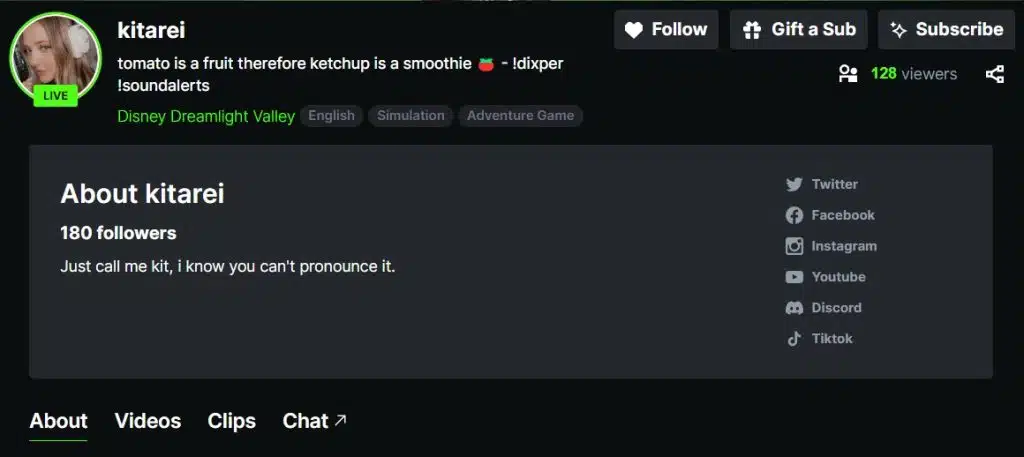
Setting up your Kick Channel Profile is an essential step on how to setup Kick channel branding as a content creator Kick.com.
To do this, you need to access your profile settings and in there, you can edit your avatar, banner image, username, bio, social media links, and more.
To set up your channel profile on Kick.com, follow these simple steps:
- Go to your settings
- Click on “profile”
- You’ll see an option to edit your avatar, banner image, channel offline banner, username, bio, and social media.
Make sure to choose an avatar, Kick banner template and image that represents your channel and what you’re all about. Your username should also be memorable and relevant to your content.
Lastly, fill out your bio with interesting captions and social media links, so your viewers can connect with you outside of Kick.com.
More on Eklipse Blog >> 5 AI Tools for Kick Streamers: Boost Your Channel Growth
Step 1: Kick Channel Avatar
The first part of how to set up Kick Channel branding is by setting up your Kick Channel Avatar.
When selecting your avatar, remember that it should be a JPEG or PNG file with a minimum size of 128×128 pixels and cannot exceed 4MB.
To upload your avatar, go to your channel settings and select the option to edit your profile. From there, you can upload your image and adjust it as needed.
It’s recommended to use a clear and high-quality image that represents your content or personality.
Remember, your avatar will be the first thing viewers see when they visit your channel, so choose an image that is memorable and helps establish your brand.
With a great avatar, you can capture the attention of potential viewers and stand out from the crowd on Kick.com.
More on Eklipse Blog>>> How to Network on Kick: Tips for Streamers
Step 2: Kick Banner Image
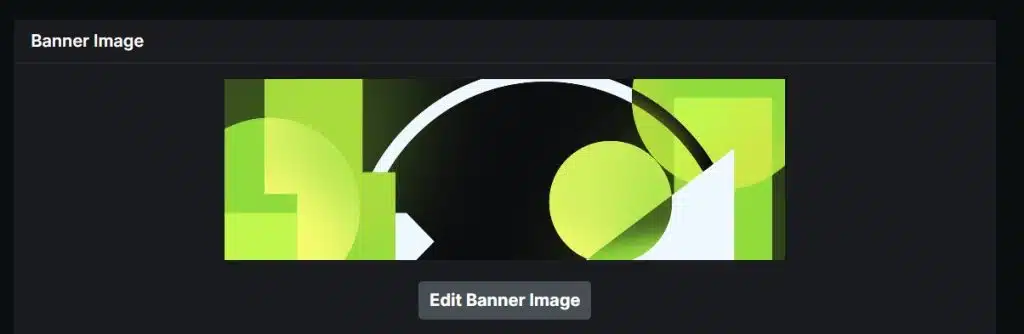
The next setup kick channel branding free is your banner image. The channel banner is another important visual element of your channel, so it’s crucial to make a good impression.
To set up your banner, go to your channel settings and select the “Profile” option, scroll a bit, and click “Edit Banner Image”. From there, you can upload your banner image. Keep in mind that the banner should be a minimum size of 1280×700 pixels and less than 4MB.
When designing your banner, consider using eye-catching visuals that reflect your content or personality.
You can also include text or a call-to-action to encourage viewers to follow your social media accounts or to inform them about your streaming schedule.
More on Eklipse Blog>>> How to Make Money on Kick Streaming – Essential Guide 2024
Step 3: Channel Offline Banner
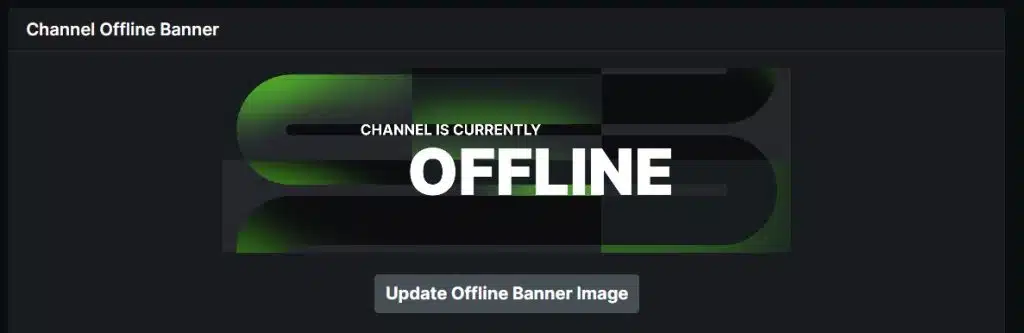
The offline banner is a crucial element of your Kick channel branding, displayed for two minutes after your stream ends. To create a visually appealing banner that reflects your brand, navigate to your channel settings and select “Profile.” Scroll down to find the “Update Channel Offline Banner” button, where you can upload your offline banner image.
Size Requirements:
- The banner must be 1920 pixels wide by 1080 pixels tall (16:9 aspect ratio) and less than 10MB in size. This ensures that your banner looks sharp on various devices, particularly larger screens, avoiding distortion or pixelation.
Design Tips:
- High-Quality Visuals: Use high-resolution images that align with your channel’s branding. This helps maintain a professional appearance and engages viewers effectively.
- Brand Consistency: Ensure that your offline banner reflects the overall aesthetic of your channel. Use colors, fonts, and styles that are consistent with your brand identity to create a cohesive look across all platforms.
- Minimal Text: Keep text to a minimum to avoid clutter. Focus on essential information such as social media handles, stream schedules, or a thank-you message for viewers. This approach allows the visuals to shine while still conveying important details.
- Call to Action: Encourage viewers to return by including a call-to-action in your banner, such as “Follow for updates!” or “Join me next time!” This can help maintain viewer interest between streams.
By following these guidelines and tips, you can create an engaging offline banner that not only enhances your channel’s branding but also encourages viewer interaction and retention.
More on Eklipse Blog>>> How to Setup Kick Alerts for Increased Viewer Engagement (2024 Tutorial)
Step 4: Bio and Username
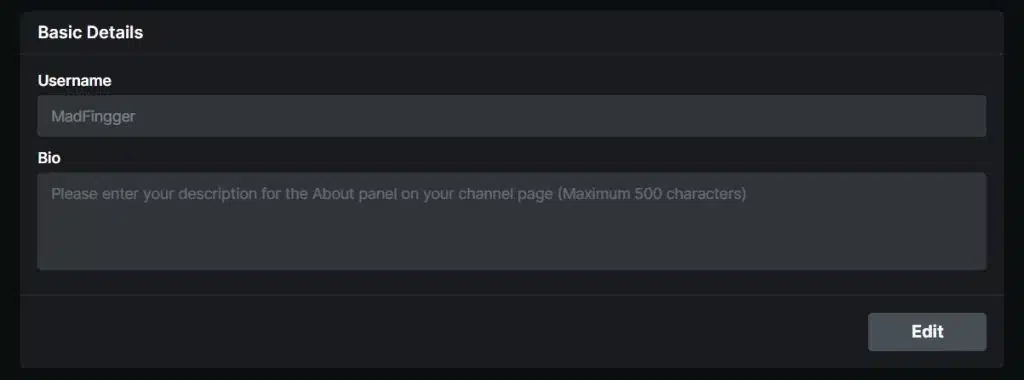
Your username and bio give viewers a quick snapshot of your channel and can help attract new followers.
To set up your username and bio, go to your channel settings and select “Profile”. Scroll down to find the “Edit” button under the Username and Bio section. From there, you can choose your username and write an interesting bio that captures your best persona. Keep in mind that your bio is limited to 500 characters.
When crafting your bio, consider including information that helps viewers understand what your channel is all about.
This could include a summary of your content, your streaming schedule, or any other relevant information that you want viewers to know.
Your username should be memorable, unique, and easy to spell. Keep in mind that your username will be displayed as part of your channel’s URL, so choose carefully.

Step 5: Social Media
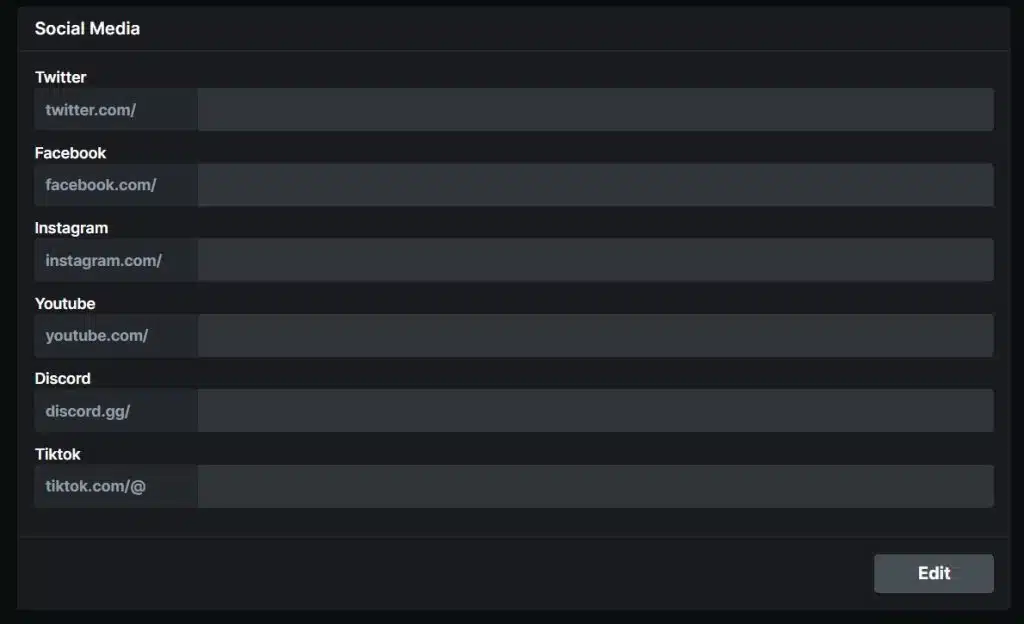
Including links to your other social media profiles is an excellent way to connect with viewers and build a stronger online presence.
To set up social media links on your Kick Channel, go to your channel settings and select “Profile”. Scroll down until you see the “Social Media” section, and click the “Edit” button to add links to your social media profiles, such as Twitter, Facebook, Instagram, YouTube, Discord, and TikTok.
When adding your social media links, make sure to double-check that you have entered the correct usernames for each platform.
This will ensure that viewers can easily find and connect with you on your other social media channels.
More on Eklipse Blog>>> Benefits of Branding Your TikTok: Use Eklipse to Grow!
Step 6: Use Channel Name Sticker from Eklipse
The final step in branding your Kick channel involves promoting it outside of Kick.
Repurpose your stream clips into short videos for platforms like TikTok, Reels, and Shorts. Use tools like Eklipse for automatic clipping and content repurposing.
Make sure to include your Kick channel name in the content, then share it on social media to attract more viewers and followers to your Kick channel.
This step is crucial for expanding your online presence and growing your audience.
Go check out eklipse.gg, sign up, start repurposing Kick clips for social media, and promote it using Kick channel name sticker.
OR, you can check out the guide below to learn how to use the channel name sticker to promote your Kick channel.
More on Eklipse Blog >> How to Promote Your Kick Stream With Channel Name Sticker
Step 7: Personalize Your Panel
Transform your Kick channel’s panel into more than just an information space—it’s a canvas to convey your identity, streaming schedule, channel rules, and more. Infuse creativity and utilize Kick panels to share intriguing details about yourself and your brand with visitors.
Step 8: Define Your Profile Voice
Your profile voice serves as your channel’s personality. It should mirror your authentic self consistently across all platforms—whether you’re streaming, interacting in chat, or posting on social media. Whether it’s a friendly and casual tone or a more formal and informational approach, choose a profile voice that resonates with you and your content.
More on Eklipse Blog>>> How to Stream on Kick Using OBS Studio: Ultimate Guide in 2024
Step 9: Deliver Top-notch Content

In streaming, just like anywhere else, content reigns supreme. Be deliberate about what you stream. Ensure your content aligns seamlessly with your profile, captivates your target audience, and maintains high quality.
Consistently providing content that resonates with your viewers will contribute significantly to building your reputation—a crucial aspect of your overall branding.
Step 10: Establish a Branded Merchandise Shop
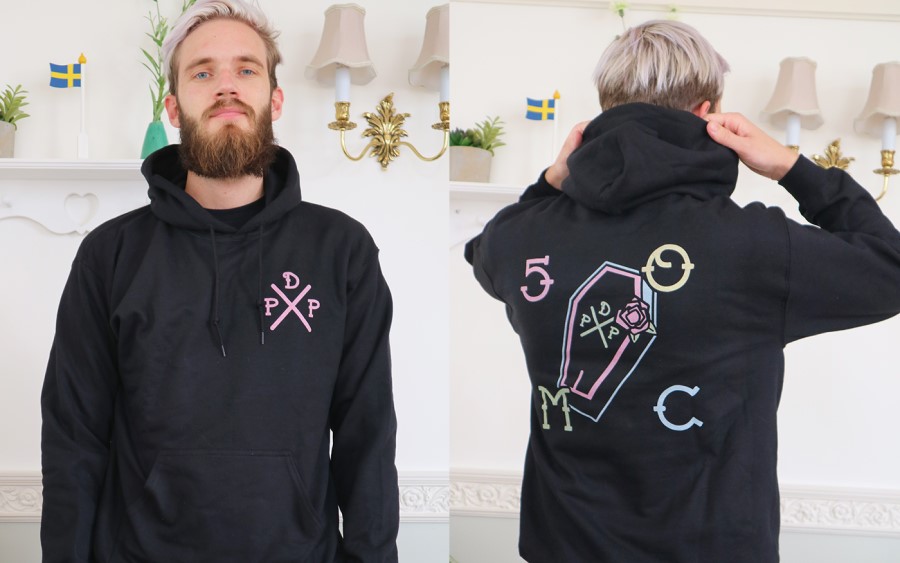
Setting up a merch store presents an additional avenue to expand your influence. This allows you to broaden your revenue streams while providing your audience with tangible representations of your brand/profile.
Step 11: Customize Your Stream Alerts
Stream alerts are notifications that appear on your stream during interactions such as follows or donations. Personalized alerts not only captivate viewers but also stimulate more engagement.
More on Eklipse Blog>>> How to Setup Kick Alerts for Increased Viewer Engagement (2024 Tutorial)
Step 12: Craft Unique Kick Emotes
Kick emotes contribute to a more interactive and enjoyable streaming experience. Designing personalized emotes that align with your profile can elevate viewer engagement and add a distinctive touch to your streamer persona.
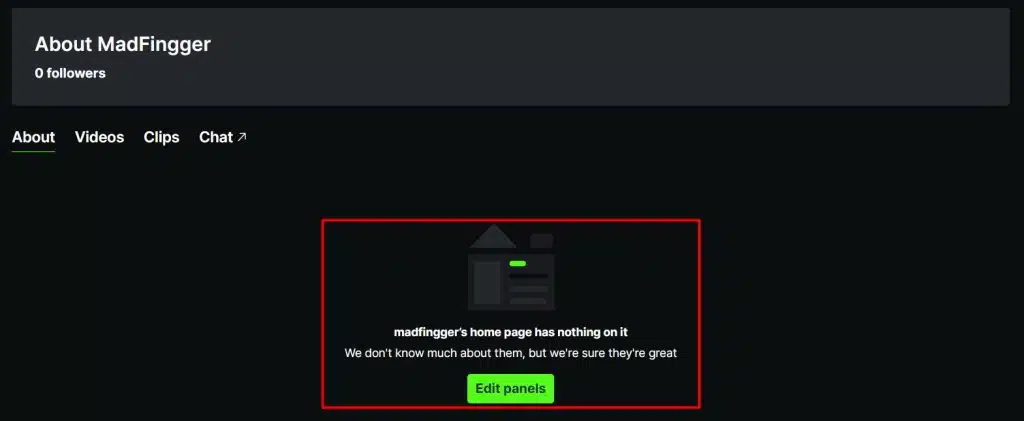
Step 13: Desain Your Kick Panel
The Kick Panel is another crucial part of your channel branding. However, the current Kick Panel only provides tools to add an image with links, title, and description.
To access the Kick Panel customization, follow these instructions:
- Click on your profile icon and select “Channel.”
- Click on the “About” tab.
- Hit the “Edit Panels” button.
- Click the “+” icon to add new panels.
- Give your panel a title, image, URL, and description.
Choose a unique and catchy title that accurately represents the content of your panel. Use an image that is relevant and eye-catching, and write a description that encourages viewers to click on your panel.
More on Eklipse Blog>>> Top 5 Kick Stream Extension: Tools to Grow Your Channel
Step 14: Add Overlays
Overlays refer to visual elements incorporated into your live stream, such as donation tickers and alert boxes, enhancing viewer engagement.
It’s essential to select overlays that match your brand’s color scheme, font, and overall aesthetic to create a visually appealing experience for your audience.
If you’re seeking assistance, explore Streamlabs’ diverse collection of overlays and themes. There are numerous free options available, including the Kick overlay collection. However, for premium themes and additional tools tailored for live streamers, consider subscribing to Streamlabs Ultra.
More on Eklipse Blog >> 5 Content Repurposing Tips: Long Videos to Vertical Content
FAQ
Q1. Is Kick a favorable platform for new streamers?
Certainly! Kick offers new streamers the potential to earn more money compared to most other platforms, thanks to its attractive 95% creator / 5% Kick revenue split.
Q2. What is the recommended Kick streaming banner size?
Your “Channel Offline Banner” should be in 1080p (16:9 aspect ratio) and not exceed 4MB. You can use any Kick banner resizer to ensure your image fit perfectly.
Q3. What resolution does Kick support for streaming?
Kick currently supports a maximum streaming resolution of 1920×1080. Ensure that your “Rescale Output” is checked at this value for optimal streaming quality.
Q4. What is the ratio of the Kick banner?
Kick offline banner size should be 1080p (16:9 aspect ratio) and no more than 4MB.
Q5. How do I change my Kick banner?
To change your banner image please click the Edit Banner Image button to either upload your own banner or select from a pre-designed image.
More on Eklipse Blog >> How to Improve Kick Stream Quality: 10 Things to Check
Conclusion
That’s how to set up Kick channel branding effectively! This process involves configuring your profile, banner, and Kick panels to create a unique identity that resonates with your audience. Establishing a distinctive brand is essential for attracting viewers and maximizing your earnings, while incorporating alerts can enhance viewer engagement during your streams.
To further boost your channel’s visibility, consider using Eklipse. This tool allows you to effortlessly create engaging clips from your live streams. By showcasing your best moments, you can attract new viewers and promote your Kick channel seamlessly. Embracing Eklipse in your growth strategy will help expand your reach and strengthen your online presence as a streamer.
Maximize your Black Ops 6 rewards—Create highlights from your best gameplay with with Eklipse
Eklipse help streamer improve their social media presence with AI highlights that clip your Twitch / Kick streams automatically & converts them to TikTok / Reels / Shorts
🎮 Play. Clip. Share.
You don’t need to be a streamer to create amazing gaming clips.
Let Eklipse AI auto-detect your best moments and turn them into epic highlights!
Limited free clips available. Don't miss out!
