TikTok’s popularity is on the rise, but many users are still figuring out how to create engaging videos. One common concern they have is how to remove filters from their TikTok videos.
It can be frustrating to realize that a different filter would have been more suitable after already uploading a video. However, the unfortunate truth is that once a video is uploaded to TikTok, you cannot edit it to remove a previously applied filter.
Nevertheless, there is a solution available during the editing process before uploading the video. If you want to know how to remove TikTok filters from your videos easily, here is a simple rundown of the procedure.
It’s too late to remove filters from a user’s or public video once it’s been uploaded, but you can always go back and make changes to a video you’ve produced and saved as a draft.
Note: This process only applies to filters and effects you add after the video has already been recorded.
Here’s how to remove TikTok filter step-by-step:
Start the app
Open your profile.
You will see the profile sign in the right hand corner
Choose the video from the drafts whose filter you want to remove.
Press the “Back” button
You will see three options on the screen
“Save as draft”
“Quite editing”
“Continue recording”
Under continue recording you will also see a subtext that says: Any changes made will be removed.
Press continue recording and remove any filters or effects that you have added.
Tap the “🛇” button to remove the filters that you have added. If there are more than one, tap multiple times.
Once you are done click next to save the change.
How to remove a tiktok filter from your list
Just like videos in drafts can have filters removed, you can learn how to remove TikTok filters from your list. This way you can better tailor your videos according to your specific needs.
Here’s how to remove TikTok filter so you can quickly access the ones you want:
Open the camera by clicking the plus icon on the app home screen.
Select the filter button located on the right.
To preview available filters, open the management tool by sliding through the top menu.
Browse the filters and decide which ones do you want to keep.
Simply uncheck the filters you don’t want to see.
All of the filters that aren’t currently selected will disappear from your list.
This is how to remove TikTok filter from your list. A fantastic time-saver if you frequently use the same filters and want rapid access to them.
Conclusion
These were a few ways that you can use for making your videos. We hope this helped you understand how to remove TikTok filter and made the editing process a little easier. For more TikTok tutorials, guides and updates stay tuned to our blog. Happy editing!
Are you trying to merge videos online without using extra apps? No worries! This article will show you how to combine two or more videos into one using free online tools.
Usually, people think they need special software like Movie Maker or Adobe Premiere to merge videos. But guess what? There’s an easier way! You can do it online without any additional software. All you need is an internet connection. This method is super simple, making it perfect for those who aren’t familiar with video editing.
The best part is that you don’t need a fancy computer or laptop. Even your Android phone or iPhone can do the job. Whether you’re using a cellphone or a laptop, we’ll walk you through the process of merging videos step by step.
So, if you want to know how to combine videos hassle-free, keep reading!
Clideo is a fairly popular website capable of merging videos online. And one of the excellent features of this site is that it can combine two or many videos into one online.
Here’s how to join videos online:
Run the browser on your cellphone or laptop.
Then visit the site clideo.com/merge-video
Click Choose file and then upload a video.
After that click Upload more files then upload another video.
When you have added the required videos, click Merge.
Wait for the process to finish.
Click Download to save the merged video.
Done.
In addition to being able to combine online videos, this site also provides editing features such as cutting videos and adding audio. You can also save the results to google drive and dropbox.
2. Online Converter How to Merge Videos Online for Free
Online Converter is a service in web format that can help you combine videos up to 4 videos. This service is free and can be used as many times as you want.
How to combine online and free videos:
Open your flagship web browser application.
Go to the site onlineconverter.com/merge-video
Once the site opens, upload all your videos.
Then click the Merge button.
So the site started merging videos.
You have to wait for the process to finish.
When finished, click Download Now.
Now you have successfully merged videos into one online and for free. The length of time in the process of merging videos depends on the size and number of videos.
3. Aconvert
Aconvert is an online video editing service that has quite complete features. Among its superior features is being able to merge several videos into one online.
How to merge online videos:
Go to aconvert.com/video/merge/ site
Then upload videos one by one.
After that click the Save option at the bottom of the Output File.
Click the link in the File URL to download the resulting video.
You can also save it on google drive and dropbox.
Done.
This service from Aconvert provides a simple interface that is easier to understand. Besides being able to combine videos, there are also several online video editing features.
4. WoFox
Want to combine multiple videos into one long video online? Then the wofox site can help you. This service is free and can be used without any restrictions.
How to combine multiple videos online:
Go to wofox.com/video-editing-tools/video-joiner
Then upload the videos you want to merge.
Click the Add more button and upload another video.
Repeat step 3 to add the videos you want to merge.
If so, click the Download button.
Wait a few moments until the video merging process is complete.
The appearance and features of joining videos provided by WoFox are quite easy. So, you don’t have to worry about having trouble using it.
5. Pixiko (Free Video Merger Online Website)
Pixiko is a site that is no less good than the previous one. Besides being able to combine online videos, pixiko is also able to cut, add effects, adjust speed, add text, and many other features.
Here’s how to merge videos into one online:
Visit pixiko.com/tools/video-merger
After that click the Get started button!
Then upload all the videos you want to merge.
If so, click the Merge menu at the top.
Adjust the video position to change the order.
Then click the Merge button and then Render.
Wait for the video merging process to finish.
Finally, save the video file.
[BONUS] Eklipse (The Best Free Video Merger Online and Highlight Clipping Tool)
Eklipse is an advanced AI tool that automatically creates highlight clips of your best gaming moments from the streams. It’s extremely easy to use and can save you a lot of time. Other than that, Eklipse also has a diverse set of editing tools that you can use to create aesthetic videos. Eklipse is constantly being updated by the developers so you can always expect new features.
First of all, log in to Eklipse or sign up if you haven’t.
To upload your stream, click the switch-shaped option. This will take you to your connection status where you can connect your Twitch, Youtube, and Facebook gaming account with Eklipse.
Go to your Stream Library. You will have options to select All Streams or Processed, In Progress, and Unclipped streams. To create a highlight video, pick an unclipped stream and allow it to process.
The AI will automatically verify the game you have been streaming on your channel. Next, it will find the best moments from your stream and make edited clips.
Once the AI has finished editing and clipping all the best moments, it will send you a notification.
Next, you can select the highlights you would like to merge into one video. You can also trim your clip, add music, and edit it however you like.
Once you are satisfied with your merged video, you can either choose to download it or share it to your social media!
Interested in trying Eklipse? Don’t miss out on all the features to create the best highlight video!
Conclusion
Well, that’s some information related to combining videos online without using the help of additional applications. The most important thing in trying this method is a stable internet connection so that the process of uploading, merging, downloading video results can run smoothly.
Just in case you want to merge TikTok videos, you can also do it without using any application. Easy peasy lemon squeezy, find how to do it here: How To Merge Videos in TikTok: A Simple Guide.
The launch of the new platform Kick in October 2022, has introduced a creator-friendly alternative to established giants like Twitch, YouTube, and Facebook.
Kick has swiftly gained popularity among streamers, positioning itself as a platform with favorable policies that cater to even the smallest content creators. While still in its beta phase, Kick aims to compete head-to-head with Twitch.
Let’s delve into the comparisons between these two renowned streaming platforms and compare Kick vs. Twitch.
Kick vs. Twitch: Streamer Revenue and Affiliate Status
One of the major selling points of Kick is its commitment to provide creators with a larger share of the earnings when compared to its competitors. Twitch recently introduced a new Partner Plus program that features a 70-30 revenue split.
While this may seem promising, the program comes with numerous terms and conditions. Firstly, streamers are required to maintain 350 active subscribers consistently for three months. Secondly, the revenue split only applies to the initial $100,000 earned through the program.
Additionally, Kick offers a 100% revenue split on Kicks, the platform’s donation service, allowing streamers to maximize their earnings. Furthermore, Kick facilitates same-day payouts, eliminating the need for streamers to wait until the end of the month to collect their revenue.
In terms of becoming an affiliate, Kick offers a more accessible pathway compared to Twitch. To attain affiliate status on Twitch, streamers must meet specific requirements, including:
Broadcasting at least 500 total minutes within the last 30 days.
Having at least 7 unique broadcast days in the last 30 days.
Maintaining an average of 3 or more concurrent viewers over the last 30 days.
Accumulating at least 50 followers.
In contrast, Kick sets the following criteria for streamers to achieve affiliate status:
Have 75 followers.
Streaming for a total of 5 hours.
Kick vs. Twitch: Gambling Regulations
Twitch imposes strict regulations on gambling-related content. Users are prohibited from sharing links or affiliate codes to gambling sites, such as slots, roulette, and dice games.
Additionally, Twitch forbids streamers from broadcasting sites that lack proper licensing in their respective jurisdictions. On the other hand, Kick maintains a more lenient stance toward gambling in streaming. While interuser gambling is not permitted, streamers can engage in online poker and blackjack streams, depending on the regulations of their country.
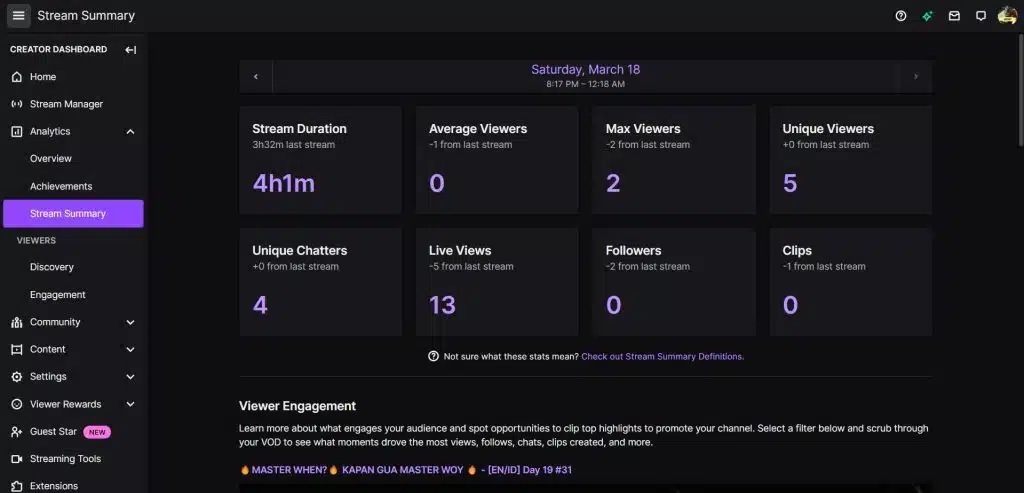
Kick vs. Twitch: Features and Tools
Deep analytic tools is one of feature that Kick must catch up from Twitch.
Having been active since 2011, Twitch has had ample time to refine its platform, integrating numerous features and resolving technical issues. In contrast, Kick is currently in its beta phase, lacking many of the comprehensive features and tools that Twitch offers to streamers. However, Kick already has some useful extensions that allow you to automatically clip streams or convert clips into a vertical format for social media platforms like TikTok.
However, Kick shows promise by attracting renowned streamers such as Destiny and Adin Ross. It remains to be seen whether Kick can successfully divert a significant streamer and viewer base from Twitch, considering the challenges faced by previous platforms like Mixer, which struggled to sustain their initial momentum.
Conclusion
In conclusion, Kick presents itself as a promising contender in the realm of live streaming, with its creator-friendly approach and advantageous revenue-sharing model.
While Twitch holds the advantage of having a robust feature set and established reputation, Kick’s appeal lies in its potential to provide a competitive alternative to both aspiring and established content creators. As the streaming landscape continues to evolve, streamers and viewers alike have more options than ever before, and the choice between Kick and Twitch ultimately rests on their individual needs and preferences.
Maximize your Black Ops 6 rewards—Create highlights from your best gameplay with with Eklipse
Eklipse help streamer improve their social media presence with AI highlights that clip your Twitch / Kick streams automatically & converts them to TikTok / Reels / Shorts
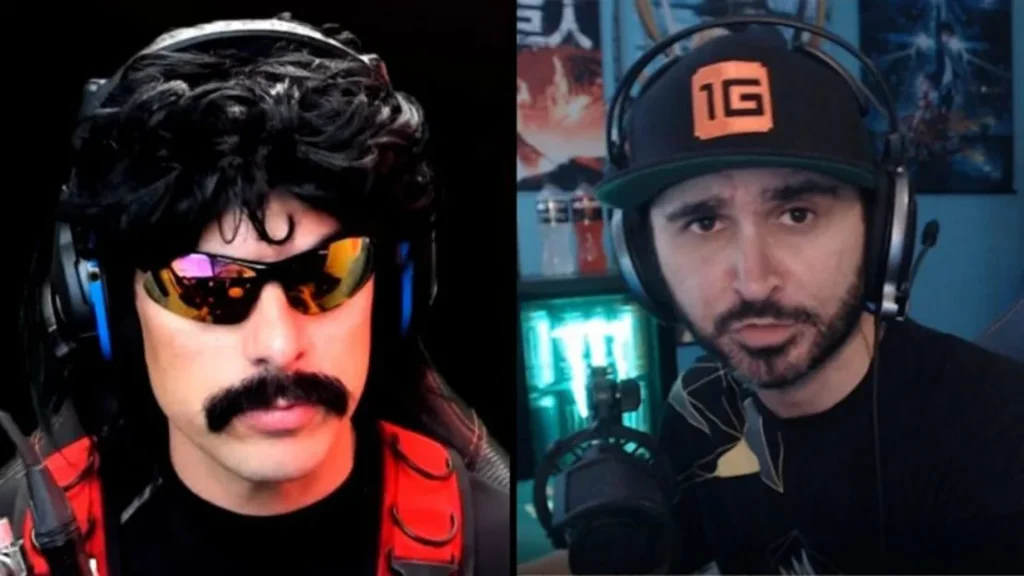
Cloakzy has announced the end of his exclusive contract with Twitch, celebrating by reuniting with Dr Disrespect and returning to YouTube, while also venturing over to Kick.
Content creator and professional gamer Dennis ‘Cloakzy’ Lepore is best known for streaming himself playing Fortnite and Warzone. He previously made headlines after publicizing his messy split from the FaZe Clan, referring to the contract he signed as “really bad.”
Source: Essentially Sports
The streamer was signed by Twitch in an exclusive contract with the platform but has since announced its end as of June 16, 2023.
Now, Cloakzy is celebrating his newfound freedom by reuniting with ‘Dr Disrespect’ and posting new content on Kick and YouTube. On June 22, Cloakzy hosted his first YouTube stream, playing xDefiant with Dr Disrespect and ‘Tim The Tatman’.
bomb stream today, my twitch contract is up so it’s time to do a once a week stream on YT with doc
Fans expressed their excitement in the comments, supporting the streamer’s move to new platforms and his first stream back with his long-time friends.
“About time…! The heck with the Purple Snakes [sic],” one commenter said, referring to Twitch. Another posted, “I personally can’t stand Twitch, so whenever I get a YouTube notification for a live stream, I’ll be here.”
“A fan commented on the stream, remaining hopeful that Cloakzy might frequent the platform more often, ‘Cloak is going to [YouTube] whether he has exclusivity or not once he realizes the benefits [laughing out loud].'”
However, it seems Cloakzy intends to stick predominantly with Twitch in the immediate future.
“We are mostly going to stream on Twitch. But two or three times a week, we’ll be duo-streaming on KICK and YouTube… Just to play with Doc and create some content. First time ever streaming on YouTube, it was f***in’ lit,” he said in the final moments of his stream.
Maximize your Black Ops 6 rewards—Create highlights from your best gameplay with with Eklipse
Eklipse help streamer improve their social media presence with AI highlights that clip your Twitch / Kick streams automatically & converts them to TikTok / Reels / Shorts
The highly anticipated Fortnite Chapter 4 Season 3 update has introduced an array of exciting new content for players to unlock. One of the highlights of this update is the introduction of Super Level Styles, which offer alternative looks for Mariposa, Rian, Lorenzo, Relik, and Trace.
However, unlocking these Super Styles requires some effort and progression through the Battle Pass tiers. Here’s a guide on how to unlock all of Fortnite Chapter 4 Season 3’s Super Level Styles.
To access the Bonus Rewards section of the Battle Pass, players must reach Level 100. However, to unlock the Super Level Styles in Fortnite, you need to complete the Battle Pass and progress beyond Level 200 during Chapter 4 Season 3. This can be achieved by completing Weekly Quests and other in-game challenges. If you’re looking to level up quickly in Fortnite, be sure to consult our leveling guide.
Super Level Styles can be found in the “Bonus Rewards” section of the Battle Pass tab. Each Super Level style in Fortnite costs 25 Battle Pass Stars to unlock, but some of the skins have prerequisites that must be fulfilled before they become accessible.
Base Skin: Found on Page 8 and requires reaching level 46 of the Battle Pass.
Midnight Mariposa: Unlocked by reaching level 54 of the Battle Pass.
Dynamo Mariposa: Bonus reward obtained after completing the Battle Pass.
Wildscorch, Confetti Claw & Regal Hunter (Super Style): Reach level 200 after completing the Battle Pass.
How to Get Rian Super Level Styles
Base Skin: Found on Page 4 and requires reaching level 20 of the Battle Pass.
Rockslide Rian: Unlocked by reaching level 26 of the Battle Pass.
Stonewash Rian: Reward for completing Week 5-6 quests.
Wildscorch, Confetti Claw & Regal Hunter (Super Style): Reach level 200 after completing the Battle Pass.
How to Get Lorenzo Super Level Styles
Base Skin: Found on Page 10 and requires reaching level 62 of the Battle Pass.
Lorenzo the Dashing: Unlocked by reaching level 70 of the Battle Pass.
Lorenzo the Reckless: Bonus reward obtained after completing the Battle Pass.
Wildscorch, Confetti Claw & Regal Hunter (Super Style): Reach level 200 after completing the Battle Pass.
How to Get Relik Super Level Styles
Base Skin: Found on Page 6 and requires reaching level 32 of the Battle Pass.
Deepwalker Relik: Unlocked by reaching level 38 of the Battle Pass.
Wildguard Relik: Reward for completing Week 3-4 quests.
Wildscorch, Confetti Claw & Regal Hunter (Super Style): Reach level 200 after completing the Battle Pass.
How to Get Trace Super Level Styles
Base Skin: Found on Page 2 and requires reaching level 8 of the Battle Pass.
Rebel Trace: Unlocked by reaching level 14 of the Battle Pass.
Luminary Trace: Reward for completing Week 1-2 quests.
Wildscorch, Confetti Claw & Regal Hunter (Super Style): Reach level 200 after completing the Battle Pass.
Conclusion
Unlocking the Super Level Styles for Mariposa, Rian, Lorenzo, Relik, and Trace in Fortnite Chapter 4 Season 3 requires a significant amount of effort and progression through the Battle Pass tiers. By following the guidelines outlined in this article and completing Weekly Quests and other in-game challenges, players can unlock these exciting new skins and enjoy a fresh look for their favorite characters!
Maximize your Black Ops 6 rewards—Create highlights from your best gameplay with with Eklipse
Eklipse help streamer improve their social media presence with AI highlights that clip your Twitch / Kick streams automatically & converts them to TikTok / Reels / Shorts
Discord has gained tremendous popularity as an application in recent times. It is not only a favorite tool among gamers for enhancing their gaming experiences, but it is also commonly used as a platform for recording podcasts. As a result, many users are actively seeking methods to record audio on Discord.
Recording conversations on Discord is a straightforward process that can be accomplished in just a few steps. These recorded files can serve various purposes, whether for creating gaming content or producing podcasts.
In this article, we will present you with simple and easy-to-follow steps for recording Discord audio. By following these steps, you’ll be able to effortlessly capture audio from this platform. Let’s dive in!
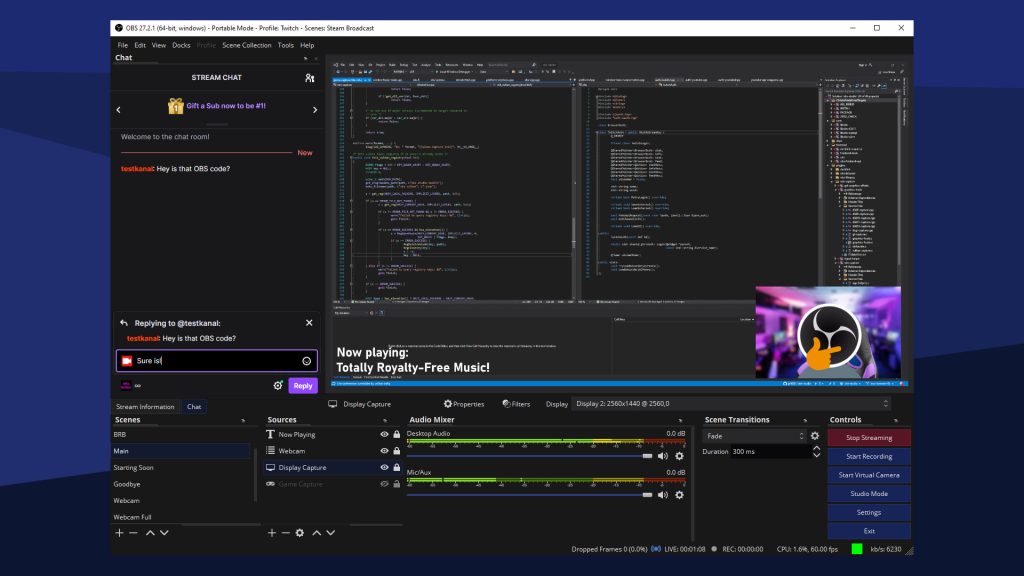
OBS is one of the best software applications for live streaming, widely used by game streamers. It is a free software available for both Mac and Windows, and you can also use it to record Discord. The process is straightforward. Follow the step-by-step instructions below.
Open OBS on your device.
Go to the “Action” menu, click the plus (+) icon in the Sources panel, and select “Desktop Capture“.
Once done, go to the “Settings” menu, click “Output” to select the file format (audio or video).
Click “Start Recording“.
Repeat step 2 and select “Output Audio Capture“.
Open Discord.
If you are in a chat room, OBS will automatically record the conversation.
You’re done.
As additional information, you can also record your own voice on Discord using OBS. Simply click the plus (+) icon again, select “Audio Input Capture,” click “Properties,” and choose the audio input device you are using.
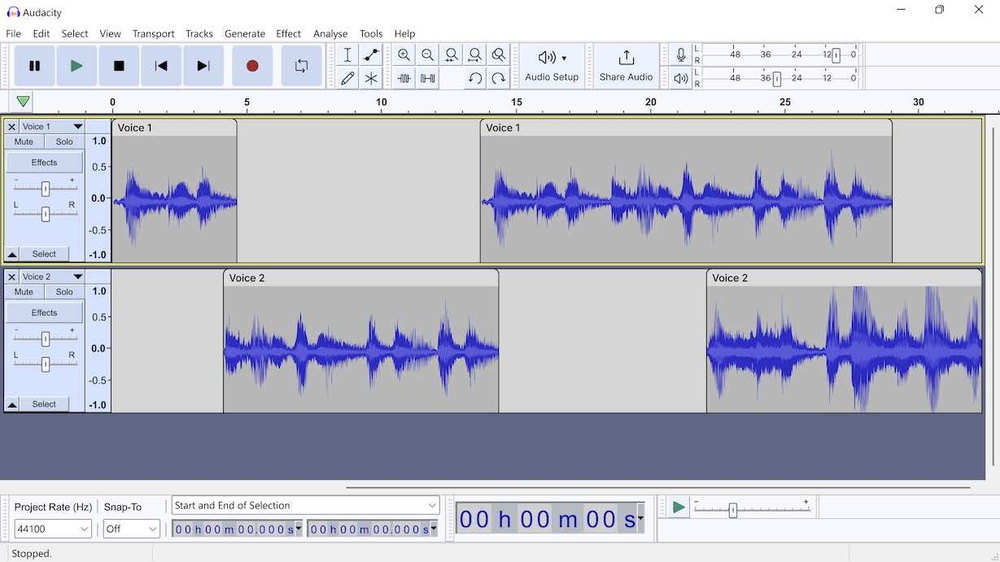
2. Record Conversations on Discord Using Audacity
Source: Sound on Sound
In addition to using OBS, you can also record Discord conversations on your computer using the software Audacity.
Open the “Settings” on your computer (or click the speaker icon directly).
Click the “Record” menu, and available audio devices on your computer will appear.
Check the audio quality to ensure compatibility with Audacity by clicking the menu next to the Microphone device.
Once done, open Audacity and change the audio host/system from MME to Windows WASAPI.
You’re done.
3. How to Record Audio on Discord Using Craig
Source: Harrison Baron
You can also record audio on Discord using Craig. Craig is the built-in recording bot in Discord, enables users to easily record calls within the app itself, eliminating the need for external software. Follow these steps to record conversations on Discord using Craig:
Click the “Invite Craig to your Discord server” button.
Choose the Discord server where you want to record audio.
Click “Authorize” to complete the Recaptcha process.
Open the Discord voice channel and type ‘/join’ in the chatbox.
Press “Send” to start recording audio in the voice channel where the Craig bot is activated.
When you’re done recording, type ‘/stop’ in the chatbox and press “Send“.
Access your recorded content in the Craig bot chat.
Conclusion
Recording audio on Discord is an essential feature for content creators and podcasters. In this article, we’ve presented three easy-to-follow methods for recording audio on Discord, using OBS, Audacity, and Craig. Whether you’re a gamer or a podcaster, these methods will help you easily capture audio from Discord. We hope this article was helpful, and happy recording!
Maximize your Black Ops 6 rewards—Create highlights from your best gameplay with with Eklipse
Eklipse help streamer improve their social media presence with AI highlights that clip your Twitch / Kick streams automatically & converts them to TikTok / Reels / Shorts
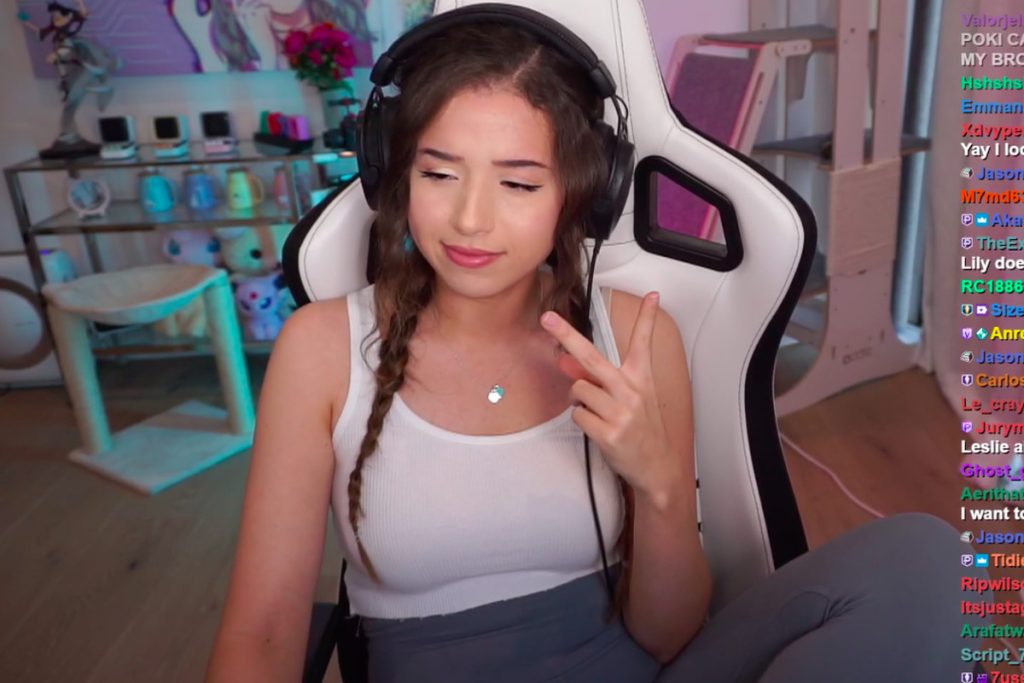
Pokimane has been causing a lot of talk lately because of her opinion on Kick vs Twitch “drama”. Kick is actively recruiting big streamers like xQc and Amouranth. that were previously streaming on Twitch.
Before all the attention around this news, Pokimane was already known for being really good at playing League of Legends. But now, let’s take a closer look at her personal life and career.
Pokimane is a famous person who plays video games and shares them online. Many people like to watch her play on Twitch and YouTube, and she has more than 17 million people who follow her on those platforms. Forbes, a magazine, featured her as a successful young person in 2021 when she was under the age of 30.
Before becoming famous, Pokimane was known as Imane Anys. She was born on May 14, 1996, in Morocco, but she grew up in Quebec, a place in Canada. When she was in college at McMaster University, she studied Chemical Engineering. However, in 2013, she decided to stop going to school and focus on playing video games and streaming them on Twitch as her full-time job.
Pokimane Streaming Career
Pokimane started streaming on Twitch, a platform where people can watch others play video games. She mainly played a game called League of Legends. During her college days, she streamed her games from her dorm room using a simple setup. Eventually, she decided to do streaming as a full-time job.
As Pokimane gained more followers and subscribers, the number of people watching her Twitch streams also increased a lot. In 2018, she became one of the most successful female streamers on Twitch, with 8.9 million followers. She even made it to the Top 100 highest-paid gamers list.
Pokimane is a co-owner and content creator of a group called Offline TV. The group is an online social entertainment group that includes other streamers like William “Scarra” Li, Jeremy “DisguisedToast” Wang, Lily “LilyPichu” Ki, and Michael Reeves. Among them, Pokimane has the highest net worth, which means she has earned the most money from streaming compared to her colleagues.
Apart from Twitch, Pokimane also has three YouTube channels with a total of more than 8 million subscribers. She occasionally uploads content on these channels.
When Pokimane started her Twitch channel in 2013, she was known for playing League of Legends. However, as she became a full-time streamer, she started streaming other games as well. Some of the games she plays and streams include Just Chatting, VALORANT, Fortnite Battle Royale, Among Us, Minecraft, Grand Theft Auto V, Rust, and Teamfight Tactics.
Playing and streaming Fortnite Battle Royale helped Pokimane gain many more subscribers and followers. In fact, in 2020, she announced on her Twitter post that she had her own Fortnite Game Emote in partnership with Epic Games.
Pokimane has received recognition for her online streaming career. In 2018, she won the Shorty Award for Best Twitch Streamer. She was also nominated for other awards, such as Content Creator of the Year at The Game Awards and Live Streamer of the Year at The Streamy Awards, both in the same year.
Pokimane Net Worth
Source: Polygon
Pokimane, like other gamers, earns money through various means such as online gaming, sponsored streams, paid ads, subscriptions, user donations, and sponsored deals. Roughly estimated, Pokimane makes around $66.3K in monthly revenue from platforms like YouTube and Twitch. In total, Pokimane’s net worth is estimated around US$1-2 million.
1. Twitch
Pokimane earns money by doing live streams and creating gaming content on Twitch. With 9 million followers on Twitch, she has approximately 9,500 subscribers. Using a profit ratio of $10,000 per 3,000 subscribers, Pokimane makes about $35,000 per month from Twitch subscriptions alone. Additionally, she receives direct income through Twitch payouts due to an exclusive contract.
2. YouTube
Pokimane also streams on YouTube. Currently, she has three YouTube channels with different types of content, which have collectively garnered a total of 795,121,480 views.
Pokimane Official YouTube Channel
Poki ASMR YouTube Channel: This channel focuses on ASMR content, with one of the most viewed videos titled “Mouth Sounds & Ear Play,” reaching 12 million views.
Pokimane Too: This vlog-type channel allows Pokimane to create personalized content and upload whenever she wants.
Overall, Pokimane makes approximately $5,000-$12,000 per month from YouTube.
3. Merchandise
Apart from her earnings from streaming and exclusive contracts, Pokimane generates income from her own merchandise, available on Pokimerch.com. Her own business platform contributes to her growing revenue, along with Twitch and YouTube.
4. Sponsorships
Pokimane also enjoys sponsorships and special promotions. Some of the famous sponsors she affiliates with include CashApp, NZXT, and Postmates. These sponsorships, along with her exclusive contracts, allow her to earn a significant amount of money. Recently, Pokimane decided to cap her donations and fundraising platform at a $5 limit per transaction, stating that she is already content with her current earnings and doesn’t need more.
5. Investments
Pokimane has also started investing in Theragun by Therabody, a muscle remedy system that was relaunched in 2016. Notable celebrities such as NBA player Kevin Durant, singer Rihanna, and Justin Timberlake are also investors/ambassadors for Theragun.
Conclusion
Pokimane is a successful gamer and content creator who has amassed a large following on Twitch and YouTube. She earns money through various means such as sponsored deals, subscriptions, user donations, and exclusive contracts. Her net worth is estimated around US$1-2 million. Despite her success, she remains humble and is dedicated to her fans.
Maximize your Black Ops 6 rewards—Create highlights from your best gameplay with with Eklipse
Eklipse help streamer improve their social media presence with AI highlights that clip your Twitch / Kick streams automatically & converts them to TikTok / Reels / Shorts
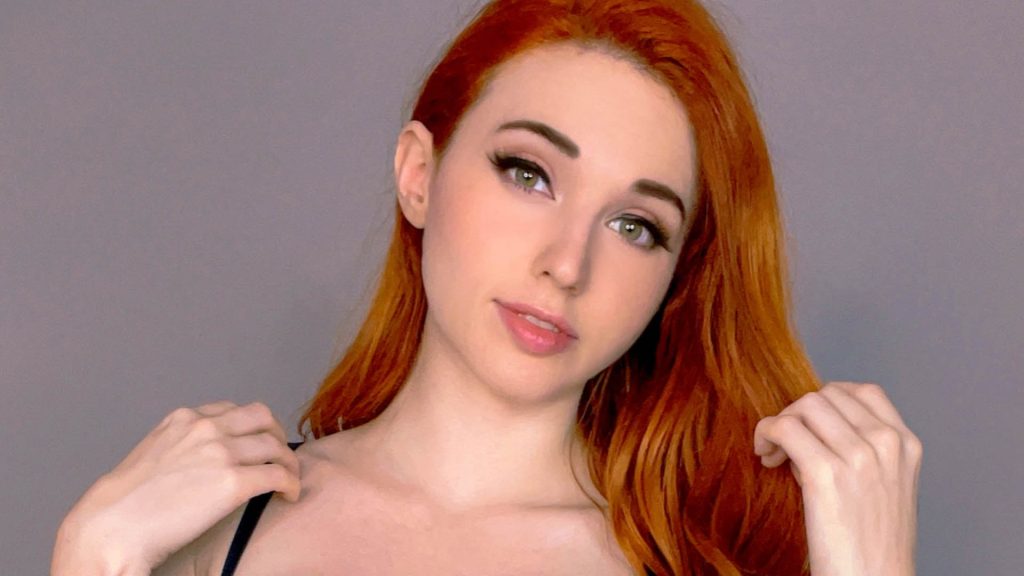
Amouranth, the most successful female streamer on Twitch, created a stir by moving from that platform to Kick, following popular streamer xQc. This move has sparked curiosity among internet users, as they wonder who Amouranth really is and why she decided to join Kick.
Amouranth, also known as Kaitlyn Michelle Siragusa, was born on December 2, 1993 (age 29), in Houston, Texas. She grew up in a conservative family with an older brother who is 5 years older than her.
In a January 2022 interview with Anthony Padilla, Kaitlyn mentioned that she didn’t have many friends during her childhood because there weren’t many kids her age in their neighborhood. As a result, she spent a lot of time playing alone or occasionally playing video games with her brother. She developed a fondness for animals since there were many dogs in the area, and she would often play with them.
From a young age, Kaitlyn enjoyed sewing clothes and had a strong interest in creating costumes based on fictional characters like Disney princesses and comic book figures. In college, she studied Fashion Design and Theatrical Costume Design and was recommended to work at the Houston Grand Opera and Houston Ballet as a Costume Designer.
In October 2022, Amouranth revealed that she was married but that her husband had compelled her to stream while pretending to be single. He coerced her into creating NSFW content and was abusive towards her. Following this revelation, she took a short break from Twitch and returned with a fresh start.
Amouranth Net Worth
Amouranth makes a lot of money from her Twitch and YouTube subscriptions. However, she earns even more from her OnlyFans account, followed by her Patreon and Twitch channel. Apart from these platforms, she is involved in various business ventures, investments, and merch sales. Based on our estimation, her net worth is around $30 million.
1. Twitch
Amouranth’s Twitch channel contributes significantly to her income. Recently, she revealed that she earns approximately $100,000 solely from this platform.
2. YouTube
On her main YouTube channel, Amouranth’s earnings range from $549 to $8.8K per month, or $6.6K to $105.4K per year, based on Social Blade’s statistics. It’s worth noting that she may earn additional income from her three other channels.
3. OnlyFans
Amouranth’s highest revenue comes from her OnlyFans account, where she reportedly earns over 1 million dollars per month.
4. Patreon
Patreon is another substantial source of income for Amouranth. She earns more than $100,000 per month from her patrons on this platform.
5. Business Ventures and Investments
Amouranth is transparent about her business endeavors and investments. Here are some notable ones:
Stocks: Amouranth has investments in companies like Visa and Activision Blizzard.
Business Investments: She has leased a gasoline station to Circle K and owns a 7/11 store.
Inflatable Pool Toy Company: Amouranth has involvement in an inflatable pool toy company.
Products: She sells scent jars and hot tub water, priced at $99.99 and $999.99. These items attract buyers, whether they are dedicated fans or simply curious observers.
6. Sponsorship Deals
Amouranth has secured sponsorship deals with prominent brands and companies, including Dolls Kill and GFuel. Additionally, she has become an official Playboy model.
Amouranth Career and Latest News
Source: Dexerto
Kaitlyn has a passion for design. It led her to start her own company called A Charmed Affair. This company specializes in children’s parties with fairy tale princess themes and is based in Houston, Texas. Her business has gained recognition, even appearing on television shows like TLC’s The Littlest Couple.
Then in 2016, Twitch reached out to Kaitlyn and invited her to become a streamer on their platform, where she initially showcased her costume creation process. However, she soon expanded into other categories such as ASMR, dancing, and Just Chatting streams.
Her content sometimes blurs the line between what is considered safe-for-work and not safe-for-work, which led to her being banned from Twitch five times. In 2021, during the “hot tub meta,” she gained significant recognition and became one of the most well-known streamers in that category.
Realizing her popularity in this area, Kaitlyn subsequently created accounts on adult platforms like OnlyFans and Fansly, which further boosted her income. Additionally, she maintains accounts on various other streaming platforms and social media channels such as TikTok, Instagram, Twitter, and Snapchat.
Amouranth’s YouTube channel covers a wider range of content, including video game streams (which she initially uploaded when she started her main YouTube channel), cosplays, ASMR content, podcasts, and try-on videos.
Now, Amouranth left Twitch and joined Kick because she was frustrated with the platform’s inconsistent enforcement of its Terms of Service. She felt that she was being targeted for her content, which often pushed the boundaries of what was allowed on Twitch.
The exact terms of Amouranth’s deal with Kick are not publicly known. However, there have been reports that she signed a two-year contract worth $30 million. This would make her one of the highest-paid streamers on any platform. But, this still needs official confirmation.
Conclusion
Amouranth is a successful streamer and entrepreneur who has made a name for herself in the gaming and adult entertainment industries. Her net worth is estimated to be around $30 million, with the bulk of her income coming from her OnlyFans account and Twitch channel. Despite being banned from Twitch multiple times, she has continued to grow her following and expand her brand through various social media platforms. Recently, she made headlines by leaving Twitch for Kick, a move that has yet to be fully explained. Nevertheless, it is clear that Amouranth is a force to be reckoned with in the world of streaming and entertainment, and her influence and success are likely to continue for many years to come.
Maximize your Black Ops 6 rewards—Create highlights from your best gameplay with with Eklipse
Eklipse help streamer improve their social media presence with AI highlights that clip your Twitch / Kick streams automatically & converts them to TikTok / Reels / Shorts
Many people are now competing to become professional game streamers. However, many are still confused when it comes to choosing a platform to share their gaming content.
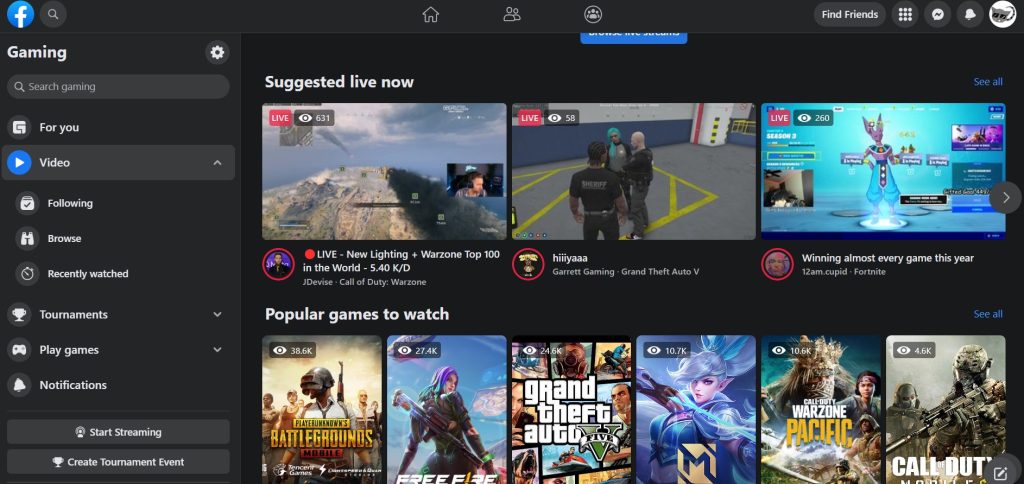
Despite Twitch and Kick being the most popular streaming platforms in the industry, Facebook Gaming can also be your top choice. There are various advantages to being a Facebook Gaming streamer that you will gain.
As a major and influential platform, Facebook’s presence cannot be underestimated. Its Daily Active Users (DAU) are quite high, so it’s always populated with users.
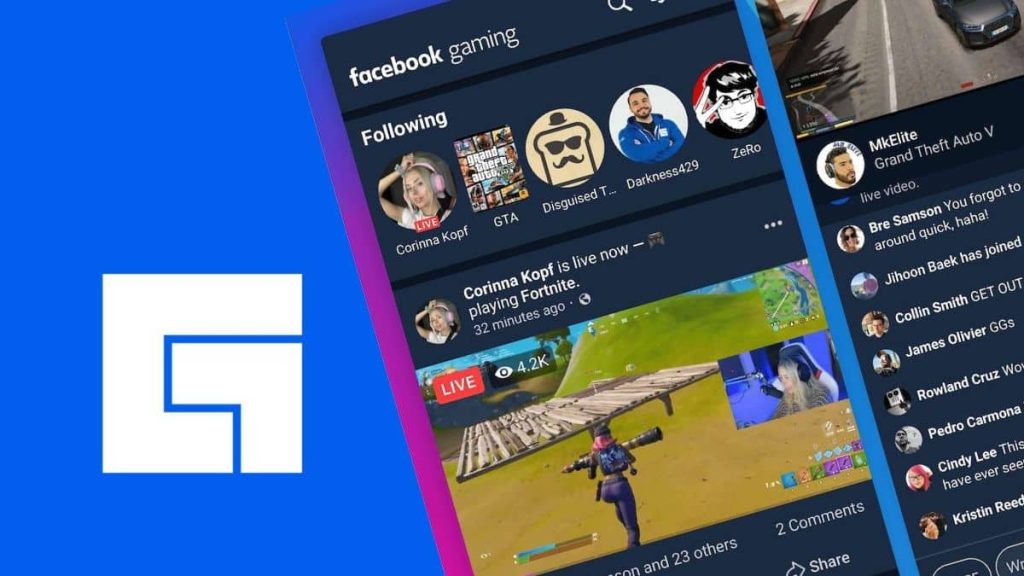
Moreover, Facebook Gaming is already well-known. The live streaming platform, launched around 2018, has become a gathering place for gaming communities and creators worldwide.
With that in mind, it’s highly likely that the content you broadcast will receive significant engagement. Although it may not instantly go “viral,” at least the content you create can capture the attention of other users.
2. Greater Promotional Opportunities
Another advantage that makes Facebook Gaming superior to YouTube and other platforms is the greater promotional opportunities it offers.
When you first create an FB Gaming account and share content there, the posts you send will be delivered by Facebook to the community timeline or other users. You are also given the freedom to share that content with groups you follow.
Since this is Facebook, it’s effortless for users to reshare your posts on their Facebook timelines. They can also share those posts on other social media platforms.
As a result, your channel will reach a wider audience. Moreover, it becomes easier for you to target a niche and specific viewers once you know who enjoys your game content.
3. Virtual Reality Opportunities (VR)
Since Facebook owns Oculus, a product of its own family, Meta, you can directly set up streaming using Virtual Reality (VR) mode.
VR mode is currently trending among technology enthusiasts and gamers, so many are willing to spend money to buy VR devices for a more immersive gaming experience. So, if you enjoy playing VR games, Facebook Gaming is the place to be.
Your popularity as a Facebook game streamer is skyrocketing, and you already have a strong audience base. If that’s the case, it’s time to join the Facebook Gaming Level Up Program. The FB Gaming Level Up Program is a prestigious program dedicated to Facebook creators. Here, you can live stream games in Full HD mode at 60 FPS.
What’s more, creators accepted into this program will have access to Fans Subscription (paid fan subscriptions) and Facebook Stars to earn money. However, if you’re just starting out on FB Gaming, don’t be discouraged.
This program is not exclusive to senior creators only. Beginner creators can also participate.
5. Mobile Streaming
Lastly, one of the advantages of being a Facebook Gaming streamer is the flexibility to live stream using various devices. You’re not required to go live using a PC; instead, you can live stream the best games through a more practical Android phone. Just download Facebook, log in via your phone, and start live streaming.
Conclusion
Becoming a Facebook Gaming streamer offers advantages like attracting a large audience, greater promotional opportunities, VR streaming capabilities, partnership benefits, and the flexibility to stream games using mobile devices. So, are you interested to join this platform?
Maximize your Black Ops 6 rewards—Create highlights from your best gameplay with with Eklipse
Eklipse help streamer improve their social media presence with AI highlights that clip your Twitch / Kick streams automatically & converts them to TikTok / Reels / Shorts
Kick is an emerging streaming platform recognized for its enticing creator program, granting an impressive 90% revenue share for each subscriber.
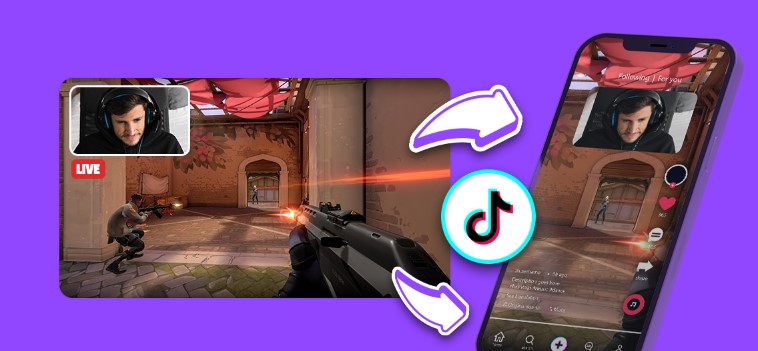
Within the platform, you can craft brief Kick clips lasting around 30 seconds, perfectly encapsulating the highlights of your live streams. These clips serve as excellent material for repurposing into TikTok content to boost your Kick Channel.
Wondering how to adapt your Kick clips into TikTok’s vertical-style format? Explore this guide for a quick, five-minute tutorial on effortlessly editing Kick clips into TikTok content.
In this guide, we will provide detailed step-by-step instructions on how to use the AI tool Eklipse to edit Kick clips and transform them into TikTok videos.
Eklipse is an AI highlight generator specifically designed to clip your Kick streams automatically. Moreover, it offers online video editing features that make the process of editing Kick clips and adapting them for TikTok seamless and effortless.
Follow along to discover how to leverage Eklipse and create captivating TikTok content from your Kick clips.
Choose a template and edit your layer for facecam and gameplay.
You can also trim your clip duration during this process.
Add a final touch to your clip, hit “Confirm” when you’re done
You can add a channel name sticker, auto-caption, or even a custom text to your Kick clips
Tips on Turning your Kick Clip into a Perfect TikTok
Beside using Eklipse, the best Twitch clip into TikTok free, you should also notice some tips to make your highlights TikTok-worthy. Here’s some:
Make it fit
Show your name
Enhance with text overlays and captions
Add music or sound effects
Experiment with filters and effects
Keep it short
Why You Need to Repurpose Kick Clip for TikTok
If you’re a streamer creating gaming Kick clips like Call of Duty, Fortnite, and Valorant, you’re already creating great content that showcases your gaming skills. However, if you want to reach a wider audience and expand your social media presence, you need to repurpose your Kick clips for different platforms, including TikTok.
TikTok is a popular social media platform with over 1 billion active users, and it’s especially popular with younger audiences.
By repurposing your Kick clips for TikTok, you can tap into this large and engaged audience and attract new followers who may not have discovered your content on Kick.
Conclusion
In summary, if you’re a gaming streamer creating Kick clips for games like Call of Duty, Fortnite, or Valorant, editing your content into TikTok format can help you reach a wider audience.
By using a simple video editing tool such as Eklipse, you can edit your Kick clip into TikTok format using a drag-and-drop video editor, complete with templates, stickers with your Kick channel name, auto-captioning, music, and more with no charge. Sign up for a free Eklipse account now!
So, let your creativity shine and make your video stand out from the rest. Share it with your followers on TikTok, and watch your audience grow.
Maximize your Black Ops 6 rewards—Create highlights from your best gameplay with with Eklipse
Eklipse help streamer improve their social media presence with AI highlights that clip your Twitch / Kick streams automatically & converts them to TikTok / Reels / Shorts