We are excited for you to try our newest editing feature, Trim-Clip. This innovative feature gives gamers full control over editing gaming highlights. Trimming involves taking an already generated highlight and allows you to shorten it, or only pick the part you want to share to get that perfect moment!
Eklipse has revolutionized making highlights for streamers, with our state-of-the-art AI tool! Our team is hard at work developing additional features to help streamers save time while getting the perfect highlights. These new features will give you simple, yet powerful ways to control how your final highlights will look when you share them across your social media! Let’s learn more,
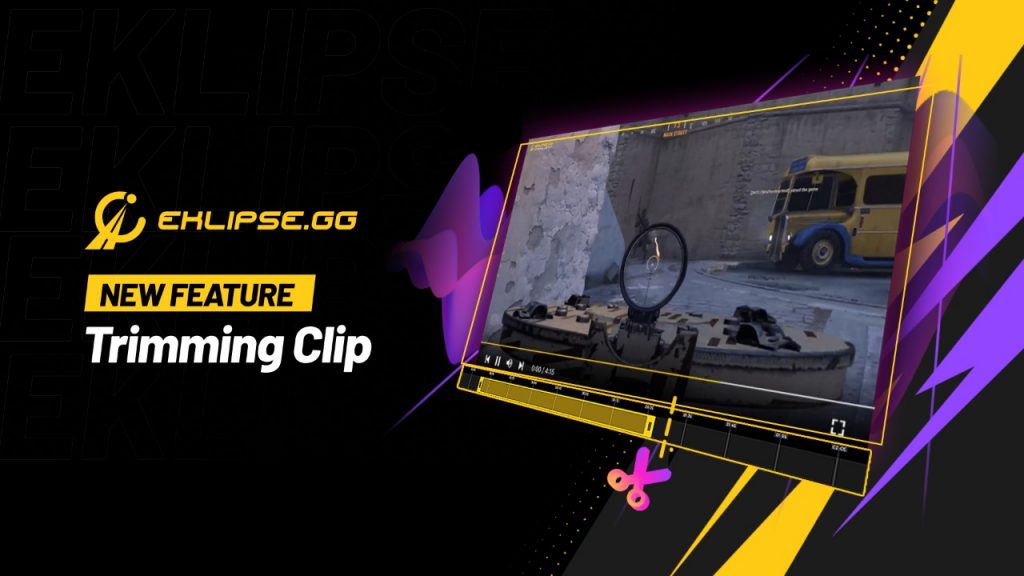
Use of Trim-Clip
For those who are new to streaming here are a few examples that explain the use and importance of this new feature:
- Your victory moment show you nailing an amazing sniper shot for the win, but you want to edit out the 3 shots you missed before it? Now you can!
- Our AI capture an amazing 5x kill, but you only wanted to show off the last kill of your epic “wipe” at the end? Do it now with Trim-Clip!
- Did you take out two teams in your “best 3 minutes” clip, but you need to shorten it to 60 seconds for YouTube shorts? Trim-Clip will let you do it in seconds.
What is Trim-Clip?
Here is a detailed overview of the feature:
Trim Any Highlight Clip
If you’re an Eklipse user, you will now be able to select any AI-generated clip and trim it. Complete the editing with a timeline and trimming scale to assist you in the process. Select a time duration and make further edits to the clip. If you are not yet a user, then sign up now to get free highlights from your streams and try out our latest features!
Clip Duration
As we outlined, the trim-clip feature allows you to select your own clip duration. Users can now manually edit their highlights to make their new clip last between a minimum of 30 seconds to a maximum of 10 minutes. Now that’s flexibility!
Play, Pause and Mute
The Trim-Clip feature includes the ability to Play, Pause or entirely Mute clips during the editing process. Once you’re done, you can rename your highlight with something more fitting as well.
Manual Editing with Trim-Clip
Manual editing means that users will now be able to trim their clips from any direction on the timeline, thus giving greater flexibility in choosing the best moments whether they’re located in the beginning, middle, or end of the highlight. Additionally, a progress indicator bar will show the Time Elapsed or Time Remaining once choosing to compile the clip.

How to use Trim-Clip feature
Here is a step by step tutorial on how to use the trim-clip feature. First of all, sign in to your Eklipse account, choose a stream and let Eklipse make highlights for you. If you already have highlights generated from a certain gameplay then:
- Go to “Highlights” from left menu panel under “Video Library”

- Pick your game and select the highlight you want to edit
(Highlights will appear in the right side of the panel after you select the game)

- Take the highlight that you selected and edit it using trim-clip
- Move the selection bar anywhere on the timeline to set the start and end point
- Set your clip duration to anything between 30seconds – 10 minutes
- Mute or Unmute the sound by clicking the small icon in the lower left corner
- Pause or Play your clip during the edit as many times as you need
- Save your edited clip as new or let it replace the old one
- Add the name for your new clip under the “Video Title” and you are good to go
- Press “Complete” to let your clip process

- Find your clip in “Trim-Clip” under “Edited Clip” section on the left menu panel

Conclusion
Our AI tool is very powerful because it can generate the best highlights and gaming moments from your stream!
Sign up today and gain access to all our powerful tools! Keep an eye on the blog as we regularly post information regarding updates, gaming news and more. Join our discord to share your feedback and be a part of our rapidly growing Eklipse Community. Happy Streaming!