Twitch has revolutionized the way streamers and their communities interact, introducing features that foster connection and support. One standout feature is Twitch Gifted Subs, which allows viewers to purchase subscriptions for others in the community.
This unique offering not only boosts a streamer’s revenue but also enhances the overall experience for viewers, making it a win-win for everyone involved.
What Are Twitch Gifted Subs?
Twitch Gifted Subs enable viewers to gift a subscription to another user in a streamer’s chat. This subscription provides the recipient with all the benefits of being a subscriber, including access to ad-free viewing, exclusive emotes, and enhanced chat privileges. This feature has become a cornerstone for community building on Twitch, as it encourages generosity and camaraderie among viewers.
By gifting a sub, users can contribute to the streamer’s success while helping others become more engaged in the channel. Twitch Gifted Subs are often used during special events, charity streams, or simply as a way to show support for the streamer and the community.
How Do Twitch Gifted Subs Work?
Eligibility
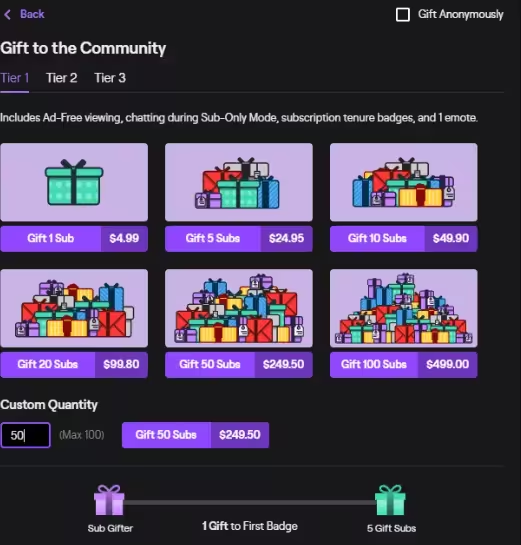
Any user can gift subs, whether they are a current subscriber or simply looking to support the streamer. Subscriptions can be gifted individually or in bundles.
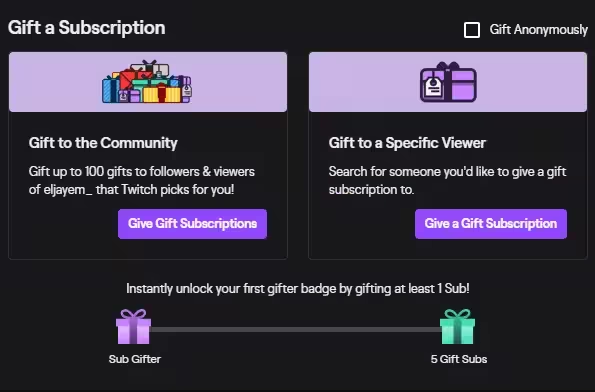
Gifting Process
- The gifter selects how many subscriptions they wish to give.
- They can choose specific recipients or allow Twitch’s algorithm to randomly distribute the subscriptions among eligible viewers in the chat.
Recipient Notification
- Once a gifted sub is distributed, the recipient is notified via a message in the chat and often receives a thank-you prompt to acknowledge the gifter.
- The subscription benefits activate immediately, enhancing the recipient’s experience on the channel.
Benefits of Twitch Gifted Subs
For Streamers:
Twitch Gifted Subs provide a significant boost to a streamer’s revenue while fostering viewer loyalty. The feature encourages more active participation in streams and helps streamers grow their subscriber base organically.
For Viewers:
Recipients of gifted subs enjoy premium benefits like ad-free viewing, access to exclusive emotes, and chat privileges. This allows them to engage more deeply with the streamer and the community without needing to pay for the subscription themselves.
For the Community:
Twitch Gifted Subs cultivate a positive, inclusive atmosphere. The generosity of gifters often sparks gratitude and interaction within the chat, leading to stronger bonds among viewers and an overall more engaging environment.
Why Are Twitch Gifted Subs Important?
The importance of Twitch Gifted Subs lies in their ability to build and sustain vibrant communities. For streamers, they represent an additional revenue stream that supports their content creation. For viewers, they offer a chance to experience the perks of being a subscriber without the financial commitment.
Gifted subs often inspire a cycle of giving, as recipients are more likely to gift subscriptions to others in the future, perpetuating a sense of community and mutual support. Streamers who actively recognize and appreciate gifted subs can foster even greater loyalty among their audiences.
Final Thoughts
Twitch Gifted Subs exemplify the power of generosity and community on digital platforms. By enabling viewers to gift subscriptions, Twitch has created a feature that supports streamers financially while enhancing the viewer experience. Whether you’re a streamer looking to grow your community or a viewer wanting to spread positivity, gifted subs are a powerful tool to foster connection and engagement.
Embrace the power of Twitch Gifted Subs and watch how they transform your streaming experience into something truly extraordinary.