Recording gaming highlights on a low-end PC can be tough, especially when performance is at stake. Selecting the best clipping software for low-end PCs is crucial to ensure smooth gameplay and high-quality footage. OBS is the best customizable free clipping software, but it can be demanding on low-end PCs. If your PC can’t handle OBS, try GeForce Experience, Medal, or Outplayed as alternatives.
This guide showcases the best clipping software for low end PCs free of lag, helping you capture memorable moments. Discover the best clipping software for PC to enhance your gaming experience while recording.
1. Bandicam – Best for High-Performance Screen Recording
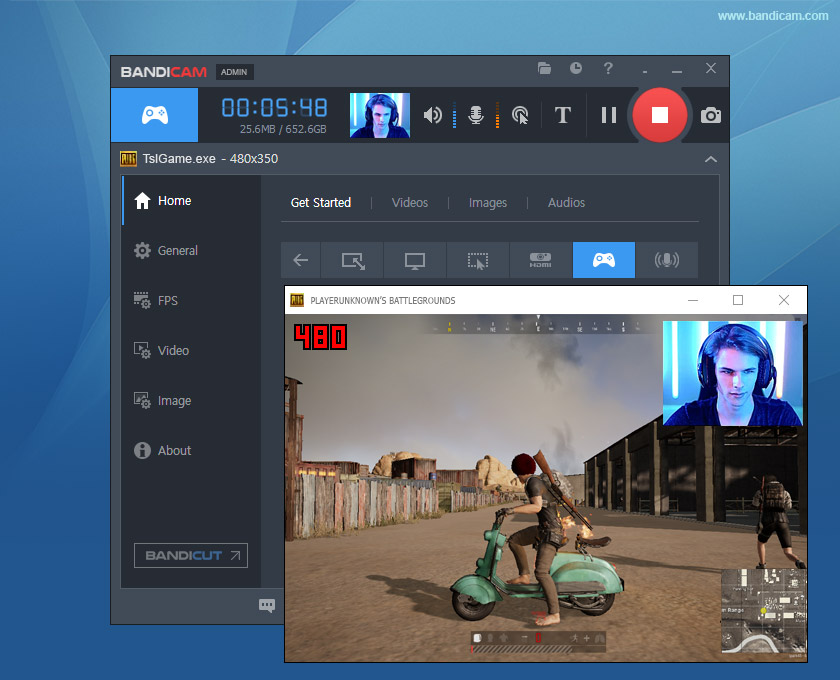
Bandicam is one of the best clipping software that is compatible with low-end PCs but comes with complete features. With Bandicam, you can record your screen or gameplay in multiple modes. Other than that, it also supports game recording with a 480 frame rate.
What’s more interesting, you can use this fantastic tool to record your gameplay not only on PC but from external game consoles, including Xbox, PlayStation, and Nintendo Switch due to its HDMI recording mode.
You can adjust the settings to suit your PC spec. Other than that, Bandicam is also able to clip iconic moments from your stream without affecting performance due to its hardware acceleration.
Key Features:
- Hardware Acceleration: smooth recording for demanding games
- Multiple Recording Modes: screen, specific window, webcam, etc.
- High Frame Rate Recording: up to 480 FPS for gameplay
- HDMI Recording: capture gameplay from consoles like Xbox, PlayStation, and Switch
- Customizable Recording Settings: adjust for PC performance
Pros:
- Free to use
- Can record and clip game console gameplay
- Allows capturing the best moment without affecting the quality
Cons:
- The free version comes with a watermark
- Only available for Windows
- It is priced at $39.95 for the lifetime full version
Pricing:
- Free: Records up to 10 minutes with a watermark.
- One-Time License: Starts at $39.95 for a single PC.
Rating: 4.4 (G2)
2. Eklipse – Best for Stream Highlights and Social Sharing
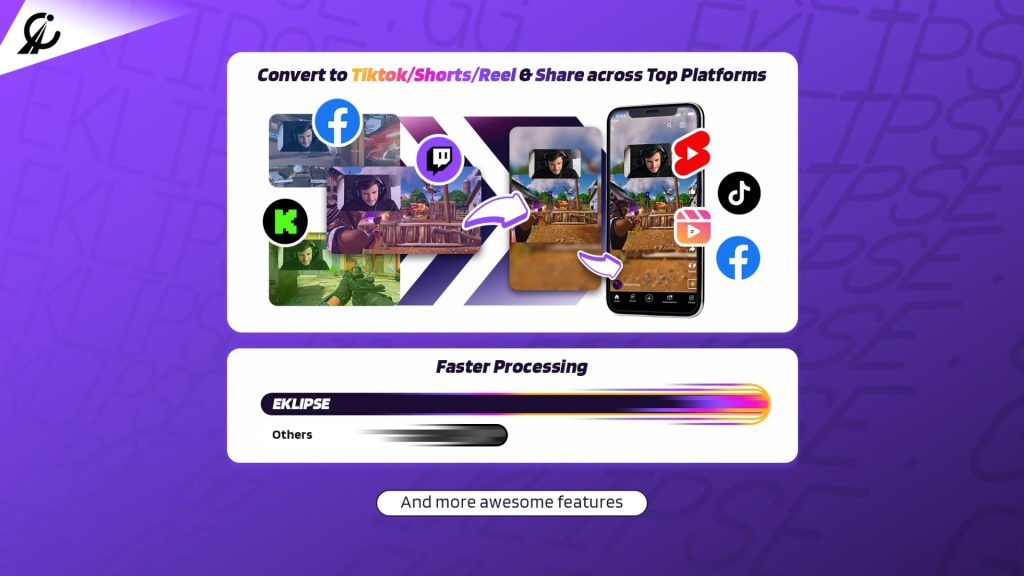
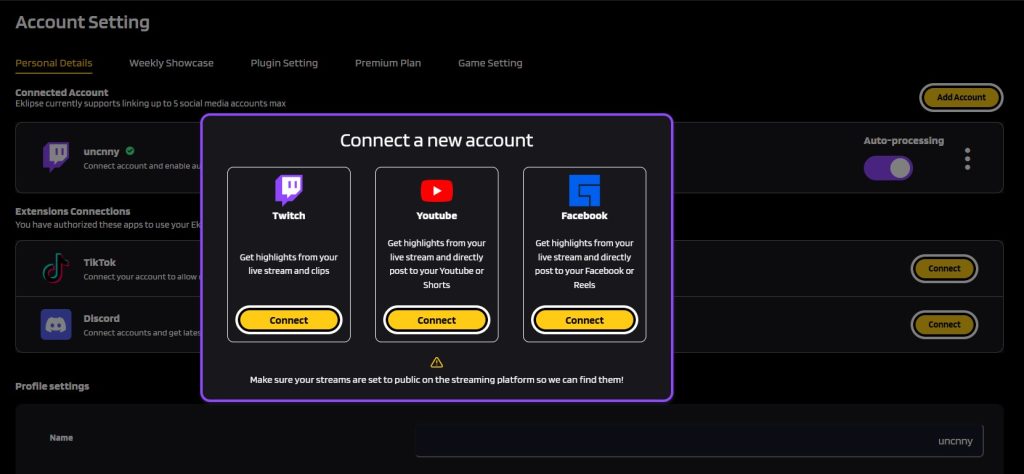
Eklipse stands out as a lightweight clipping tool with social media integration, making it a great choice for low-end PCs. It goes beyond simple clipping by offering automatic highlight generation using AI.
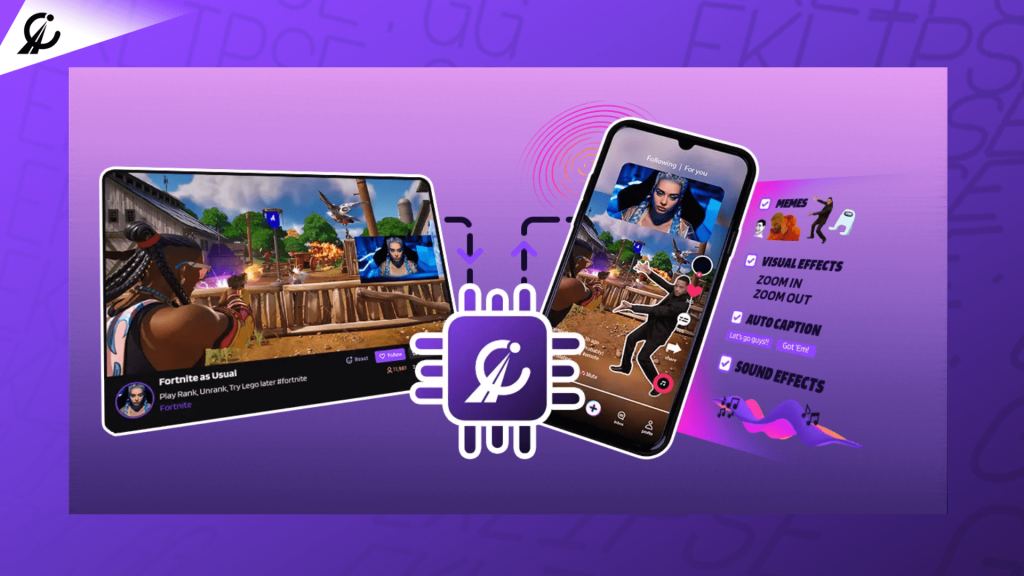
This means Eklipse can analyze your Twitch, YouTube, or Facebook Gaming streams and identify the most exciting moments, saving you the time of manually sorting through footage.
While Eklipse offers some editing features, it might not be as powerful as some dedicated editing software. However, its focus on social media and automatic highlights makes it a compelling option for low-end PC users who want to share their best streaming moments quickly and easily.
Key Features:
- Automatic Highlight Generation: Eklipse utilizes AI technology to analyze your livestreams (Twitch, YouTube, Facebook Gaming) and automatically identify the most engaging or exciting moments.
- Clip Management: Easily manage the clips generated from your streams within the Eklipse mobile app.
- Social Media Sharing: Effortlessly download and share your generated clips directly to popular social media platforms like TikTok, YouTube Shorts, and Instagram Reels.
- Short-form Video Creation: Convert lengthy Twitch streams or videos into bite-sized, engaging content specifically tailored for social media consumption.
Pros:
- A friendly and intuitive interface
- Many different templates to spice up your video
- Convert Twitch or any other stream video to TikTok/Reels/Short in a snap
- Provides automatic service
- Supports many popular games
- Allows importing videos from the local device
- Enables instant sharing
Cons:
- May require some learning to fully utilize its features for creative editing.
- Limited editing options compared to more advanced software.
Pricing: Free plan with basic features; Premium plans start at $19.99/month.
Rating: 4.7 (Trustpilot.com)
3. FBX Game Recorder – Best for HD Gameplay

FBX is not originally clip-maker software. It’s more of a game-streaming recorder. Nonetheless, it offers great features such as hardware acceleration that helps to keep the game’s performance.
What’s more interesting is, despite this being probably the lightest recording tool, it’s able to record HD gameplay videos with no lag at all. In addition, FBX can record the gameplay in 1440p resolution.
Despite being a video recorder, FBX allows its users to customize the recording mode, including the video area which makes it enables to create highlight clips from your gameplay record. To make your clip even more stunning, you can add stickers, sound, or text captions, freeze the game, and any other cool features. Eventually, you can save your recording to your device or share it directly on your social media platforms.
Key Features:
- High-Performance Recording: FBX Game Recorder utilizes hardware acceleration to capture gameplay smoothly, minimizing the impact on your frame rates. This ensures you can record high-quality footage without sacrificing your in-game performance.
- Instant Replay: This innovative feature acts like a DVR for your gameplay. FBX continuously buffers your gameplay in the background, allowing you to save the previous moments (customizable duration) after an impressive feat or hilarious blunder. No more scrambling to hit the record before the magic happens!
- Manual Recording: For planned recordings or longer sessions, FBX offers traditional recording functionality. You can initiate and stop recordings with hotkeys at any time.
- Highlight Clip Capture: Similar to Instant Replay, you can capture specific moments even while recording. Hit a hotkey, and FBX will save a configurable time window (typically 10 seconds) of your gameplay, ensuring you capture those epic moments you don’t want to miss.
- Multiple Capture Modes: Choose between capturing your entire screen, a specific window (ideal for focusing solely on the game), or a custom area.
- Simple Editing Tools: FBX offers basic editing functionalities like trimming unwanted footage from the beginning or end of your recordings.
- Webcam Overlay: Add a personal touch to your recordings by incorporating your webcam feed alongside your gameplay footage. This can be useful for creating video commentaries or reactions.
Pros:
- Light-weight software
- Produce HD resolution
- It has many great features like hardware acceleration, record HD gameplay with no lag, etc
- Allows users to add text captions, stickers, and sounds, and even freeze the game.
- Offers instant sharing to social media
Cons:
- Manual edit
- Unable to record and clip other activities besides gaming
Pricing: Free to use with watermark; $9.50 per year (Pro plan); $25 for a plan that includes all future updates.
Rating: 3.5 (Softpedia)
4. Xbox Game Bar – Best Easy-to-Use Clipping Software
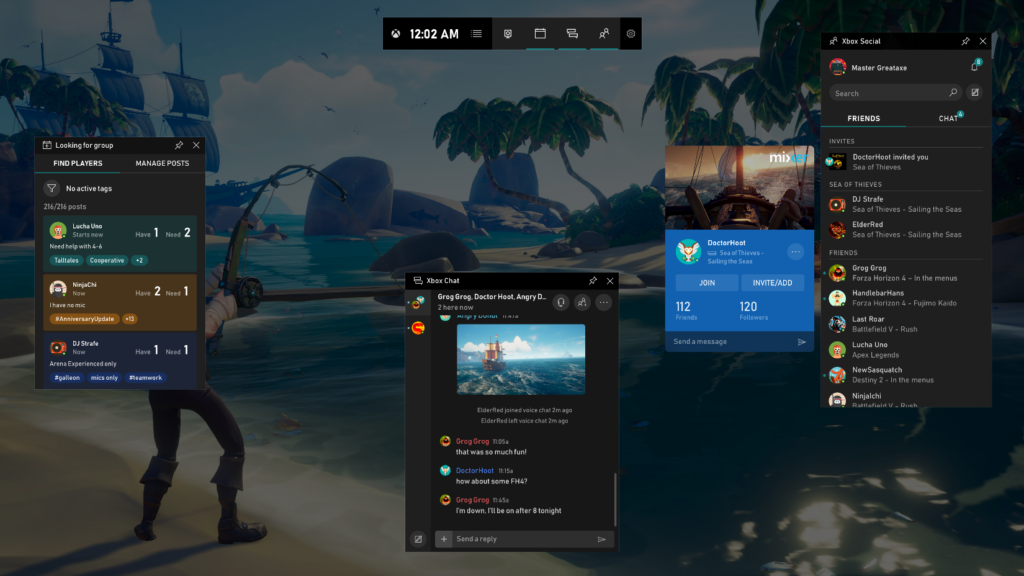
For all Windows users, you might be familiar with this software. Xbox Game Bar is a pre-installed app available on Windows 10 or later.
If you are looking for super simple and quick clipping software, Xbox Game Bar could be your perfect choice. It even provides in-app chatting with Xbox users while playing games.
However, unlike other software that provides complete features to enhance your clips, Xbox Game Bar lacks editing tools. So, you might need other tools to edit your video.
Key Features:
- Effortless Access: Simply press the Windows logo key + G to open or close the Xbox Game Bar overlay while in-game or using any desktop application.
- Screen Recording: Capture your gameplay or desktop activity with a simple hotkey combination (default: Windows logo key + Alt + R). You can choose to record from the moment you press the hotkey or retroactively capture the previous moments (customizable duration).
- Screenshots: Take high-resolution screenshots of your gameplay or desktop with the dedicated camera icon in the Xbox Game Bar.
- Basic Editing Tools: Trim unwanted footage from the beginning or end of your recordings using the built-in editing tools within the Xbox Game Bar.
- Sharing: Share your screenshots and clips directly to social media platforms like Twitter or YouTube, or save them to your local storage for further editing.
- Performance Overlay: Monitor your system performance while gaming, including frame rates (FPS), CPU usage, and GPU temperature (requires enabling in settings).
- Audio Recording: Choose to record game audio, microphone audio, or both for your gameplay clips, allowing you to narrate your recordings.
Pros:
- Requires no download to use
- Offers simple and quick service
- Provides in-app messaging to Xbox users
Cons:
- Only available for Windows users
- Lack of editing tools
Pricing: Free
Rating: 3.0 (Softpedia)
5. NVIDIA ShadowPlay – Best for Effortless Gameplay Recording

NVIDIA ShadowPlay can be a good choice if you need a tool that allows you to record the screen, do live streaming, or even clip the last 30 seconds of gameplay. Something that makes people love to use this software is the capability to give minimal effect to the game performance during recording.
You don’t need to have a high-spec PC or laptop to have a 4K resolution at 60 FPS. It is still achievable if you use NVIDIA despite you only having a low-end PC.
Aside from all of its unique features, you can share the video recording to YouTube Live, Twitch, or Facebook Live instantly using this tool.
Key Features:
- Hardware Acceleration: Leveraging the power of your Nvidia GPU, ShadowPlay captures gameplay footage with minimal impact on frame rates. This ensures smooth gameplay recording, even for demanding titles.
- Instant Replay: Functioning like a DVR for your gameplay, ShadowPlay continuously buffers your gameplay in the background. Hit a hotkey, and you can save the previous moments (customizable buffer time) to capture that unexpected play or hilarious blunder you just witnessed. No need to constantly record everything!
- Manual Recording: For planned recordings or longer sessions, ShadowPlay offers traditional recording functionality. You can initiate and stop recordings with hotkeys at any time.
- Highlight Capture: Similar to Instant Replay, you can capture specific moments even while recording. A hotkey saves a configurable time window (default: 30 seconds) of your gameplay, ensuring you snag those epic moments you don’t want to miss.
- Multiple Resolutions & Frame Rates: Choose recording resolutions and frame rates to optimize file size and video quality based on your needs. ShadowPlay supports high-definition recording and even 4K capture for Nvidia RTX 30 series and above graphics cards.
- Microphone & Webcam Overlay: Incorporate your voice commentary and webcam footage alongside your gameplay recordings, allowing you to create personalized content.
Pros:
- It’s the painless option if you have a GeForce graphic card
- Allows instant sharing to social networks
- Produce high-quality results
Cons:
- You need to use an NVIDIA GeForce graphic card
- Limited editing features within ShadowPlay (requires separate software for advanced editing)
Pricing: Free for users who own Nvidia’s graphics cards.
Rating: 3.5 (PCWorld)
6. D3DGear – Best Lightweight Game Recording and Streaming
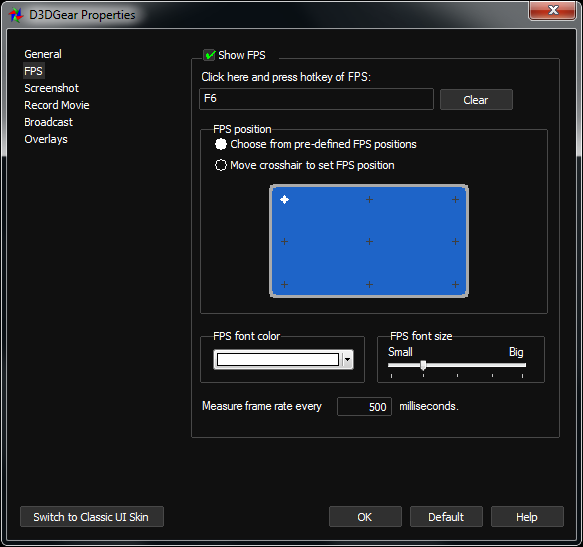
Are you looking for lightweight yet functional clipping software that works for a game or any streaming moment? D3DGear is the answer. Despite the small size of its file, D3DGear offers you excellent features such as the capability to record screen and gameplay in 1440p resolution, while still being able to preserve the video quality.
In addition to that, D3DGear also provides you with a super simple function where you can directly click on the start and stop buttons to capture the screen or the video. No need to take a lot of time just to find out how it works.
Have a slow uploading speed issue? No worries, because D3DGear is still able to work in that situation. So, if you need a simple yet complete package, this tool is worth trying.
Key Features:
- High-Performance Recording: D3DGear prioritizes minimal performance impact, ensuring smooth gameplay while recording.
- Live Streaming: Stream directly to popular platforms like Twitch.tv, YouTube, and Facebook Live.
- Simple Interface: A User-friendly interface makes it easy to start recording or streaming with minimal setup.
- Customization Options: Fine-tune recording and streaming settings to optimize for your specific needs and internet connection.
- Microphone and Webcam Support: Add voice commentary and your face to your recordings for a more engaging experience.
Pro:
- Lightweight and performance-focused, ideal for users with less powerful machines.
- Simple and easy to use, perfect for beginners.
- Supports various streaming platforms.
Cons:
- Lacks some advanced features found in more comprehensive recording software.
- The free version has limited recording time (up to 3 minutes).
Pricing:
- Free version with a 3-minute recording limit.
- Paid license: USD 20 (one-time purchase) unlocks unlimited recording and additional features.
Rating: 4.0 (HumbleBundle.com)
7. Medal.tv – Best Free App to Capture and Share Gaming Highlights
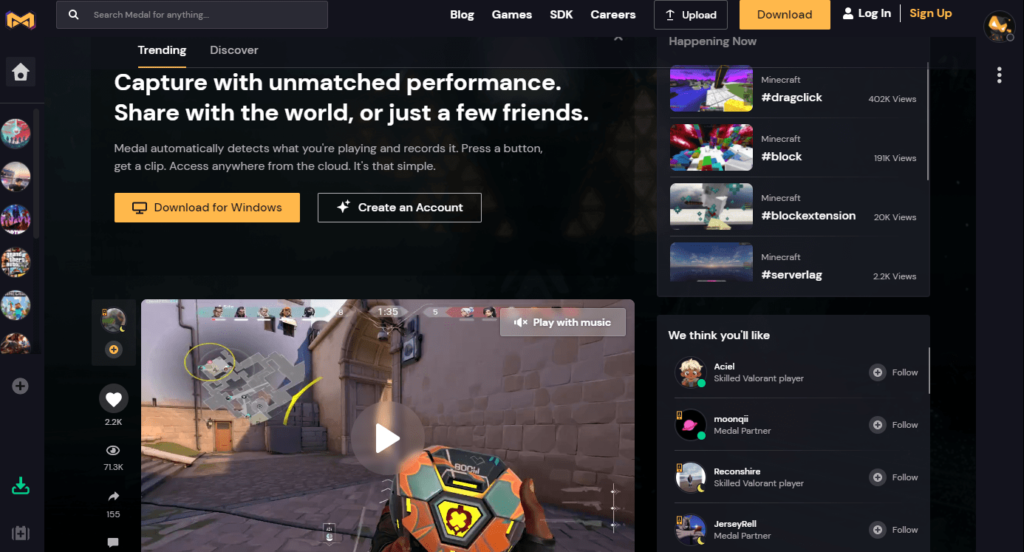
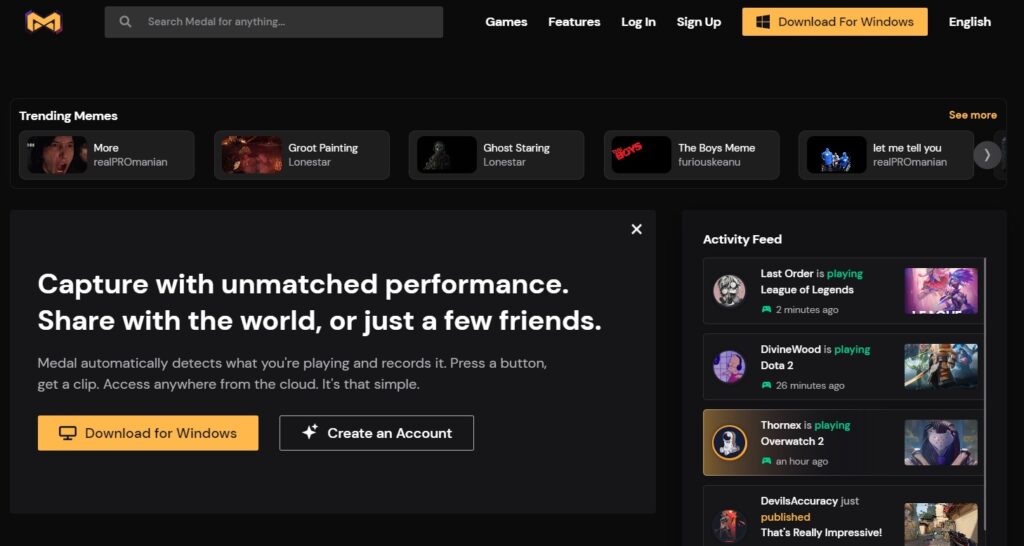
When it comes to the best clip-maker tool, Medal.tv is certainly not to be missed. It’s a worthy opponent of Eklipse. Just like Eklipse, Medal.tv is powered with an AI, making it able to create clips and montages effortlessly.
Medal.tv is a free, all-in-one platform tailored for gamers to capture, edit, and share their best moments. Since its launch in 2018, Medal has provided an easy-to-use experience for PC, PlayStation, Xbox, and mobile gamers.
Medal automatically records your gameplay in the background, so you don’t need to adjust any settings. A simple hotkey allows you to clip those exciting plays or funny fails, and the clips are stored in the cloud, saving device space. So, is Medal the best clipping software? Many gamers think it’s a top contender for its convenience and features.
Key Features:
- Capture & Clip Anything: Medal runs in the background, always recording. Save those awesome moments with a single hotkey.
- Edit & Share Quickly: Trim clips, add text, and share them with friends or the Medal community in seconds.
- Play Together, Share: Connect with other gamers, browse their clips, and build a network around your shared passion.
- Game On, Anywhere: Capture and share gameplay from PC, PlayStation, Xbox, and even mobile devices – all in one place.
- Store Your Victories: Free cloud storage keeps your clips safe and accessible.
Pros:
- Friendly interface
- Clips specific scenes and record full gameplay
- Provides complete and incredible editing tools
- Unlimited free storage for videos
- Supports many games
- Available for Windows, Mac, or mobile
Cons:
- Longer video clips are only available for the Premium version
- The free version contains a watermark
- Requires download to use
- Requires editing skills to create cool clips
Pricing:
- Free: 5GB storage, 1080p 60FPS capture, basic editing tools.
- Pro ($4.99/month): 100GB storage, 4K HDR capture, advanced editing tools, priority queue for support.
- Club ($9.99/month): 2TB storage, exclusive in-app features, and community benefits.
Rating: 2.9 (Trustpilot)
8. Gecata by Movavi – Best for Simple and Affordable Gameplay Recording
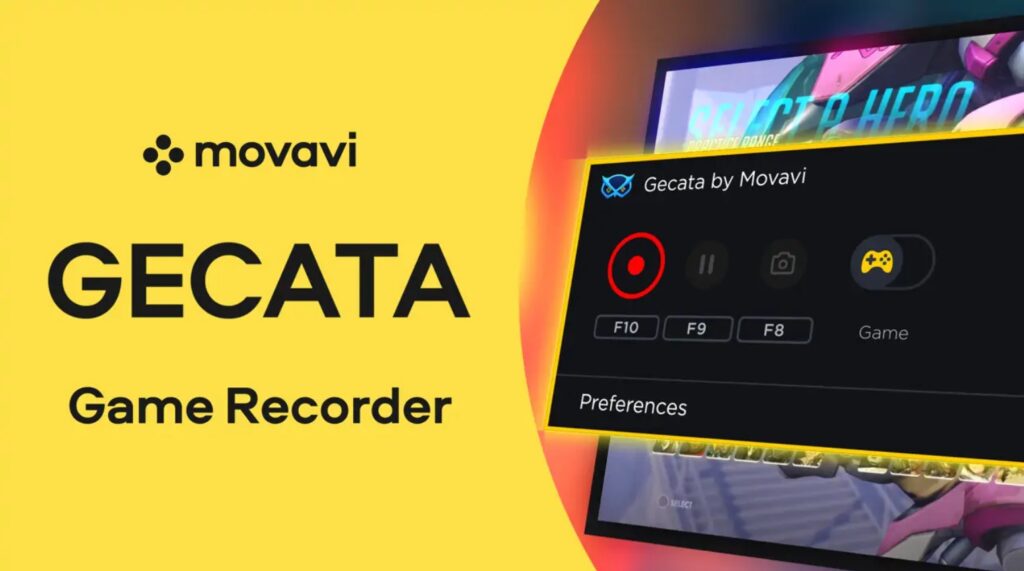
Gecata by Movavi is a free and user-friendly screen and game recording software designed specifically for PC gamers. Launched in 2018, Gecata boasts a lightweight design that prioritizes smooth performance, allowing you to capture your gameplay without experiencing lag or compromising in-game frame rates.
Gecata offers a streamlined recording experience. With just a single click, you can start capturing your gameplay footage or your entire Windows desktop. The software also seamlessly integrates webcam recording, allowing you to add your reactions and commentary alongside your gameplay.
Key Features:
- Simple Interface: Gecata boasts a clean and intuitive interface, making it easy to navigate and configure recording settings, even for those new to screen recording software.
- Recording Modes: Choose between capturing your entire screen, a specific window, or focusing on gameplay with the dedicated game capture mode.
- Webcam Overlay: Incorporate your webcam footage alongside your screen recording for a more personalized touch.
- Basic Editing Tools: Perform essential edits like trimming unwanted footage or adding intros and outros to your recordings.
- Hotkeys: Customize hotkeys for starting, stopping, and pausing recordings to streamline your capture workflow.
Pros:
- Completely free to use with no hidden fees or limitations
- Lightweight design minimizes impact on system resources
- Simple and intuitive interface for easy capture and streaming
- Supports recording webcam alongside gameplay for enhanced commentary
- Streams directly to popular platforms for easy content sharing
Cons:
- It comes with a watermark for the free version
- Can only record for 10 minutes on the free version
Pricing:
- Free: Limited to 5 minutes recording length per session and adds a watermark to videos.
- Paid (Gecata Pro): One-time purchase starting at $29.95 (price may vary depending on region and promotions). Unlocks unlimited recording length, removes the watermark, and offers additional features like scheduling recordings and noise reduction.
Rating: 3.0 (6/10 Steam)
9. Wondershare DemoCreator – Best Flexible Clipping Software
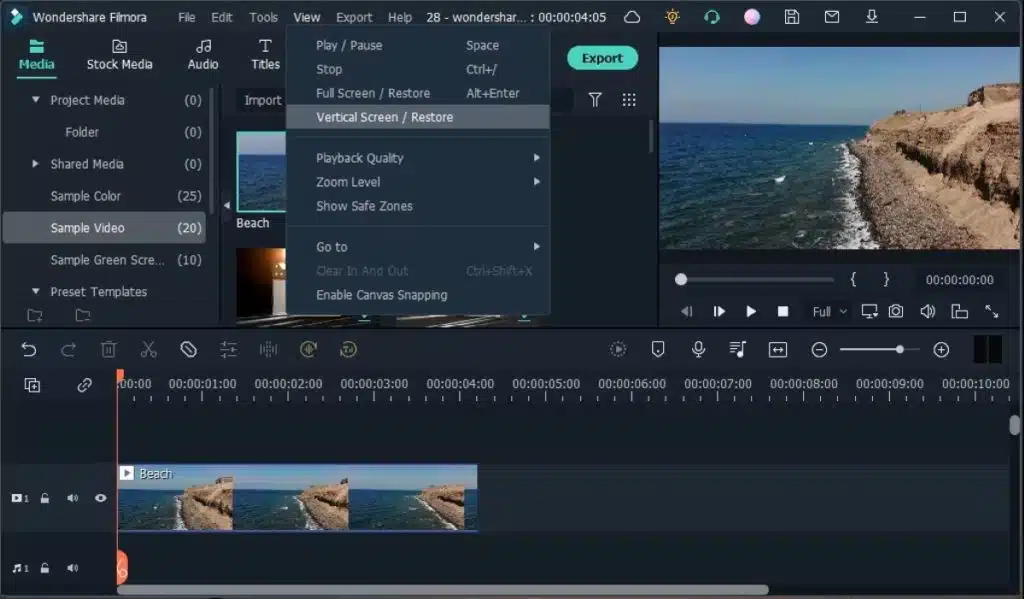
Wondershare DemoCreator is a powerful screen recording and video editing software designed for educators, presenters, business owners, and gamers. Launched in 2011, DemoCreator offers a comprehensive suite of tools to capture your screen, edit your recordings, and create professional-looking explainer videos or presentations.
Wondershare DemoCreator goes beyond simple screen recording. It allows you to capture your screen, webcam, system audio, microphone audio, and even record gameplay footage, all simultaneously. This flexibility makes it ideal for creating tutorials, software demos, webinars, and even capturing those epic gaming moments.
And best of all, its cloud-based storage will save a lot of your computer space.
Key Features:
- Screen Recording: Capture your entire screen, a specific window, or a custom area with ease. DemoCreator also boasts a dedicated game recording mode optimized for capturing smooth gameplay footage.
- Webcam Recording: Overlay your webcam feed on top of your screen recording to add a personal touch, perfect for creating video tutorials or presentations.
- Video Editing Suite: Go beyond basic trimming with DemoCreator’s built-in video editing suite. Edit clips, add transitions, captions, and annotations, and incorporate royalty-free music and sound effects to enhance your recordings.
- Advanced Features: For more polished productions, DemoCreator offers features like green screen recording, video effects library, and teleprompter support.
- Intuitive Interface: Despite its comprehensive features, DemoCreator maintains a user-friendly interface, making it accessible to users of all experience levels.
Pros:
- Versatile recording capabilities capture all your video and audio needs
- The User-friendly editing interface makes creating polished videos a breeze
- A rich library of resources like music, effects, and avatars enhances your productions
- Green screen functionality opens doors for creative video editing techniques
- The free version offers basic recording and editing functionalities
Cons:
- The free version has limitations on recording length and watermarks exported videos
- Advanced editing features and extended recording lengths require paid subscriptions
Pricing:
- Free: Watermarked videos, limited export time (5 minutes), and basic recording features.
- Monthly Plan ($5.99/month): Removes watermark, extends export time, and unlocks additional editing features.
- Yearly Plan ($39.95/year): Most cost-effective option, includes all features and benefits.
Rating: 4.8 (Capterra)
10. EaseUS RecExperts – Best for Budget-Friendly Screen Recording with Editing Options
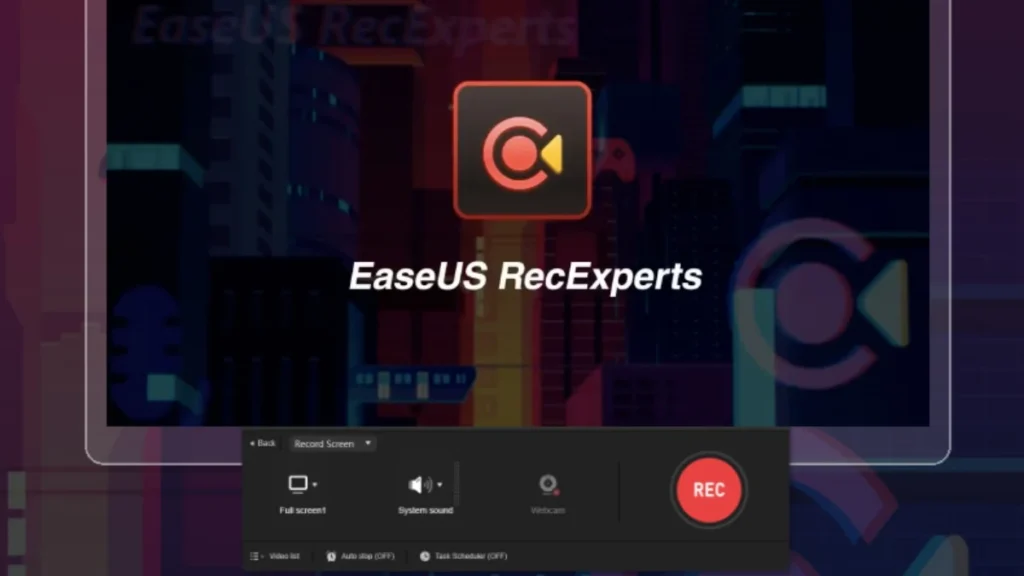
EaseUS RecExperts features a trimming tool that allows you to split unnecessary parts of your video. Aside from that, this software also enables you to capture high-quality gameplay without even lagging.
No need for additional editing software to make your clip look appealing since EaseUS features shapes, text, arrows, or more tools.
Key Features:
- Screen Recording: Choose to record your entire screen, a specific window, or a custom area. EaseUS RecExperts allows you to capture system audio, microphone audio, or both simultaneously for a comprehensive recording.
- Schedule Recording: Schedule recordings in advance to capture online events, webinars, or lectures that you might otherwise miss.
- Webcam Overlay: Add a personal touch to your recordings by incorporating your webcam feed alongside your screen capture.
- Basic Editing Tools: Trim unwanted footage, cut out unnecessary sections, and split your recording into separate clips. You can also add text captions and simple annotations to your videos.
- Real-time Drawing: Draw and annotate on your screen in real time to highlight key areas or add visual emphasis during your recordings.
Pros:
- Enables users to flexibly adjust the FPS from 1 to 144
- Features complete editing tools
- Captures high-quality video without lagging
- Available for Windows and macOS
Cons:
- The free version can only record the screen for a 1-minute duration without any other features mentioned above
- The Pro version is a bit pricey compared to others on this list
Pricing:
- Free: Limited recording time (2 minutes), watermarked videos, and basic features.
- Paid (Starting at $19.95/month): Offers various subscription plans (monthly, yearly, lifetime) with increasing discounts for longer commitments. Paid plans remove watermarks, unlock unlimited recording time, and provide additional features like video conversion and noise reduction.
Rating: 4.0 (TechRadar)
11. Opus – Best for Effortless Social Media Clip Creation from Long-Form Videos
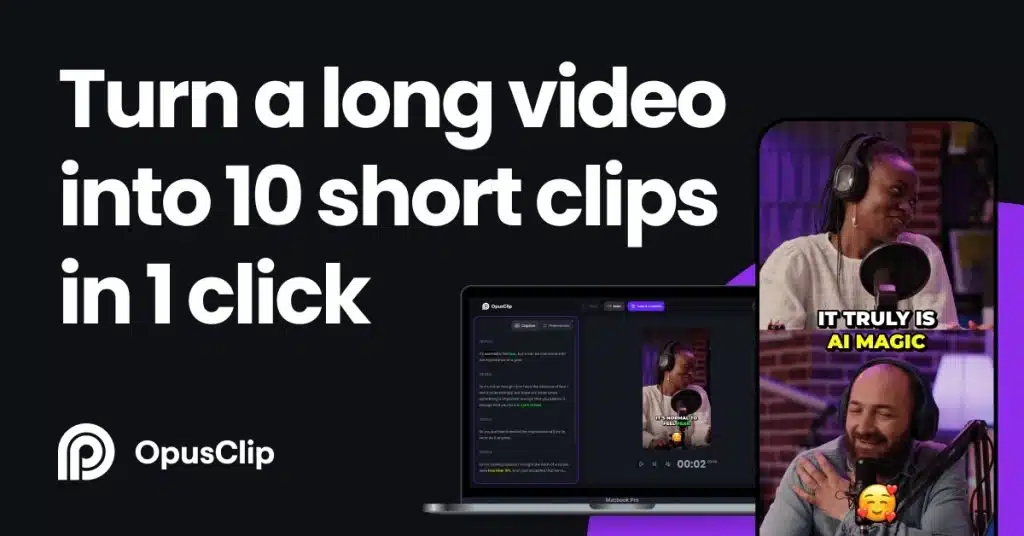
Opus Clip is another best game recording software that fits a low-end PC. You just have to share a YouTube link, and it works best for videos where people talk a lot, like podcasts, educational stuff, reviews, and motivational speeches.
However, it’s not great for vlogs, gaming, or music videos. It supports English, German, Spanish, French, and Portuguese languages right now.
Key Features:
Pros:
- AI-Powered Video Editing: Opus Clip leverages artificial intelligence to analyze your long-form videos, identifying the most compelling moments and transitions. Based on this analysis, it automatically generates shorter clips optimized for social media platforms.
- Multiple Clip Formats: Choose from various clip formats tailored to specific social media platforms, eliminating the need for manual resizing and editing.
- Automatic Captions & Emojis: Captivate viewers with automatically generated captions and emojis, adding dynamism and personality to your short clips.
- Branding Customization: Maintain brand consistency by applying your logo, color scheme, and fonts to your generated clips.
- Viral Score Prediction: Gain valuable insights with Opus Clip’s viral score prediction feature, which estimates the potential reach and engagement of your generated clips.
- Efficient: Quickly creates multiple short clips from one long video.
- AI-Powered: Uses AI for smart video clip generation.
- Customizable: Allows control over the clipping process.
- High Quality: Offers free 1080p resolution for videos.
Cons:
- Limited Video Types: Best suited for talk-heavy videos.
- Language Limitation: May not support all languages.
- AI Dependency: Effectiveness depends on content and video quality.
- Subscription Cost: Some features may require a paid subscription.
Pricing:
- Free: Watermarked videos, limited export quality (720p), and limited clip generation per month.
- Basic (Starting at $19/month): Removes watermarks, allows HD exports, and offers increased clip generation quota.
- Pro (Starting at $49/month): Unlocks advanced features like custom branding templates and priority customer support.
Rating: 4.9 (ProductHunt)
12. Spikes Studio – Best for Effortless Clip Creation from Long Videos
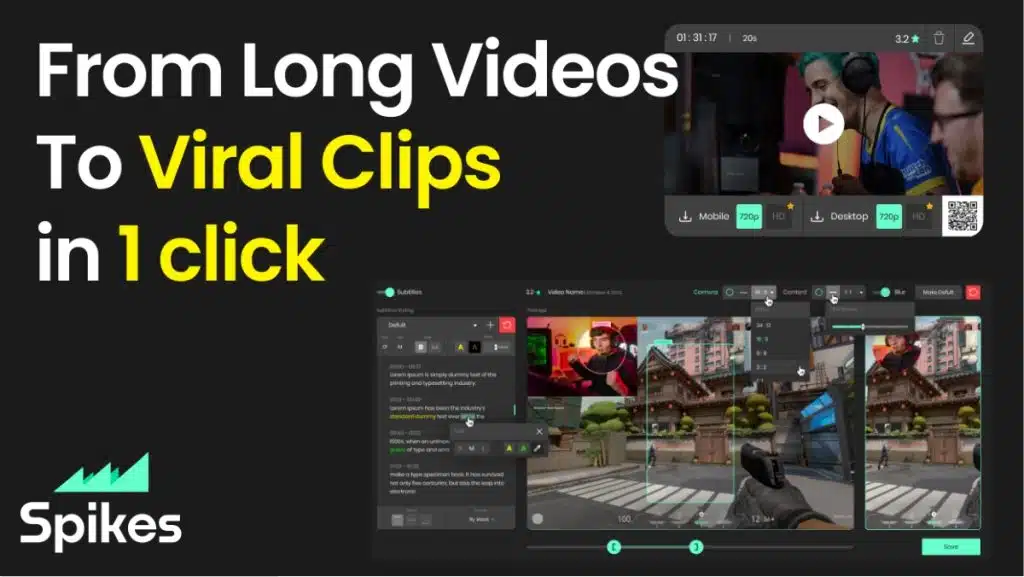
Looking for the best clipping software for Valorant? You can try Spikes Studio.
Spikes Studio is a game-changing tool for content creators looking to transform long-form content into viral clips for platforms like YouTube, TikTok, and Reels. Equipped with a powerful AI editor featuring auto-captions and more, Spikes Studio is your gateway to growing your social media influence.
Key Features:
- AI-Powered Video Editing: Spikes Studio utilizes AI technology to analyze your video content, identifying key moments, audience trends, and high-engagement potential. Based on this analysis, it automatically generates sharp, captivating short clips optimized for various social media platforms.
- Social Media Integration: Seamlessly schedule and publish your generated clips directly to your favorite social media platforms, saving you time and effort.
- Auto Captions & Titles: Spike Studio automatically generates captions and titles for your short clips, further enhancing viewer engagement and accessibility.
- AI-powered Styling: The platform offers AI-powered styling options, allowing you to add visual effects and flourishes to your clips for a more polished and dynamic look.
- Call to Action Integration: Spikes Studio empowers you to include clear calls to action within your generated clips, prompting viewers to subscribe, like, or follow your content.
Pros:
- Effortlessly convert lengthy content into attention-grabbing viral clips.
- Powerful AI editor enhances the editing process, saving time and effort.
- Auto-captions feature for improved accessibility and engagement.
- Ideal for repurposing content on popular platforms like YouTube, TikTok, and Reels.
- Enhances social media influence by providing a streamlined content creation process.
Cons:
- May require a learning curve to master all of its advanced features.
- Compatibility with specific content formats or platforms may vary.
- Users should ensure that auto-generated captions are accurate for their content.
- Advanced features might necessitate a subscription or additional costs.
- The availability of customer support or tutorials may vary, affecting ease of use for some users.
Pricing:
- Free: Limited processing time (30-minute videos), basic features, and watermarked videos.
- Starter (Starting at $5/month): Increased processing time, HD exports, and watermark removal.
- Pro (Starting at $29/month): Unlocks advanced features like scheduling, AI-powered styling options, and priority customer support.
Rating: 4.9 (ProductHunt)
13. Fraps – Best for Simple and Lightweight Gameplay Recording

Fraps is a lightweight screen recording software that can be used to capture gameplay videos on low-end PCs. This clipping software for gaming low-end PCs is relatively easy to use and doesn’t require a lot of system resources, making it a good option for users with older or less powerful computers.
Key Features:
- Gameplay Recording: Fraps excels at capturing fast-paced gameplay. It utilizes DirectX or OpenGL technology to record your games, ensuring smooth video without compromising frame rates.
- FPS Overlay: Monitor your in-game performance in real time with the customizable FPS overlay. Display frame rates in a corner of your screen to gauge the impact of recording on your gameplay performance.
- Screenshots: Capture high-resolution screenshots (BMP format only in the free version) of your most epic gaming moments or scenic in-game landscapes.
- Benchmarking: Fraps offers basic benchmarking functionalities, allowing you to measure frame rates over specific in-game sections.
Features:
- Captures gameplay videos at up to 120 frames per second (FPS)
- Records audio from both the microphone and the game
- Saves videos in a variety of formats, including uncompressed AVI, BMP, and JPEG
- Can be used to take screenshots
- Provides an on-screen frame rate counter
Pros:
- Lightweight and easy to use
- Doesn’t require a lot of system resources
- Can capture high-quality videos
- Saves videos in a variety of formats
- Can be used to take screenshots
Cons:
- The user interface is a bit dated
- Can be resource-intensive when recording at high resolutions and FPS
- Does not have as many features as some other screen-recording software
Pricing:
- Free: 30-second recording limit, watermarked videos, BMP screenshots only.
- Paid (License starts at $39): Removes all limitations, allows unlimited recording time, watermark removal, and supports various screenshot formats (JPG, PNG, TGA).
Rating: 4.2 (G2)
14. Dxtory – Best for High-Performance Recording with Advanced Features
Dxtory is a premium screen and game recording software designed for users who demand the utmost performance and control over their captures. Unlike lightweight screen recorders, it prioritizes capturing high-quality footage with minimal impact on system resources.
Launched in 1999, Dxtory has established itself as a veteran in the recording software industry, trusted by professional gamers, YouTubers, and content creators.
Key Features:
- Record up to 120 FPS for silky-smooth clips, perfect for fast-paced games.
- Capture game audio, microphone input, and system sounds separately for maximum control.
- Bind clipping and other actions to convenient hotkeys for a seamless experience.
- Preserve the original pixel data of your recordings for stunning clarity.
- Immortalize those in-game moments with high-quality screenshots.
Pros:
- Ideal for low-end PCs.
- Up to 120 FPS and lossless codec for sharp clips.
- Customizable hotkeys, multiple audio sources, and more.
- One-time purchase with no subscriptions.
Cons:
- The interface can be less intuitive than some beginner-friendly options.
- Focuses purely on recording, not post-production.
- No Mac or Linux support.
Pricing:
- Dxtory is paid software with a one-time license fee:
- License (Starts at $39.95): Provides full access to all features and functionalities.
Rating: 3.5 (CNET)
FAQ
1. Which is best video editing software for low end PC?
For slow PCs, VSDC and Kdenlive are excellent choices due to their low RAM and disk space requirements. VSDC, exclusive to Windows, uses about 250 MB of disk space and runs on just 1 GB of RAM.
2. How to clip on PC without losing FPS?
The only way to record gaming without major FPS loss is by using a secondary recording machine. However, some performance impact is unavoidable due to the overhead of transferring data between devices.
3. Which recorder is best for a low-end PC?
Movavi Screen Recorder excels at video and audio capture, while Bandicam is ideal for recording gameplay on PCs or Xbox. OBS Studio supports live broadcasting across platforms, and Fraps is perfect for screen recording on older low-end PCs.
Final Thoughts
The best clipping software for low-end PCs ensures you can capture gaming highlights without disrupting performance. With the right software, you can create shareable clips of memorable moments while keeping gameplay smooth on less powerful systems.
For a lightweight option, Eklipse.gg is designed to work seamlessly on low-end PCs. It offers easy recording and automatic clip creation, helping you transform your gaming moments into impressive highlights with minimal effort.
